Spring Cloud OpenFeign
Finchley.RELEASE
这个项目通过自动配置和绑定到Spring环境和其他Spring编程模型的习惯,为Springboot应用提供了openign集成。
声明REST 客户端: Feign
Feign是一个声明性的web服务客户端。它使编写web服务客户机变得更容易。使用Feign创建一个接口并注释它。它有可插入的注释支持,包括佯装注解和JAX-RS注释。Feign还支持可插拔的编码器和解码器。Spring Cloud增加了对Spring MVC注释的支持,也增加了Spring Web默认使用的httpmessageconverter。Spring Cloud集成了Ribbon和“发现”,在使用Feign时,它提供了一个负载均衡的http客户端。
如何使用Feign
要在项目中使用Feign,请使用包含组org.springframework.cloud 和工件ID 的启动器spring-cloud-starter-openfeign。有关 使用当前Spring Cloud Release Train设置构建系统的详细信息,请参阅Spring Cloud Project页面。
Spring boot 应用启用实例:
@SpringBootApplication
@EnableFeignClients
public class Application {

    public static void main(String[] args) {
        SpringApplication.run(Application.class, args);
    }

}
StoreClient.java.
@FeignClient("stores")
public interface StoreClient {
    @RequestMapping(method = RequestMethod.GET, value = "/stores")
    List<Store> getStores();

    @RequestMapping(method = RequestMethod.POST, value = "/stores/{storeId}", consumes = "application/json")
    Store update(@PathVariable("storeId") Long storeId, Store store);
}
在@FeignClient注解中,String值(上面的“stores”)是一个任意客户端名称(application.yml中的spring.application.name:stores),用于创建Ribbon负载均衡器(有关功能区支持的详细信息,请参见下文)。您还可以使用url属性(绝对值或仅主机名)指定URL 。应用程序上下文中bean的名称是接口的完全限定名称。要指定自己的别名值,可以使用注释的qualifier值@FeignClient。
一、创建一个新工程(openfeign):
(一)服务消费
1、pom文件:
<?xml version="1.0" encoding="UTF-8"?>
<project xmlns="http://maven.apache.org/POM/4.0.0"
         xmlns:xsi="http://www.w3.org/2001/XMLSchema-instance"
         xsi:schemaLocation="http://maven.apache.org/POM/4.0.0 http://maven.apache.org/xsd/maven-4.0.0.xsd">
    <parent>
        <artifactId>springcloud-example01</artifactId>
        <groupId>com.xslde</groupId>
        <version>1.0-SNAPSHOT</version>
    </parent>
    <modelVersion>4.0.0</modelVersion>

    <artifactId>openfeign</artifactId>

    <dependencies>
        <dependency>
            <groupId>org.springframework.boot</groupId>
            <artifactId>spring-boot-starter-web</artifactId>
        </dependency>
        <!--客户端依赖-->
        <dependency>
            <groupId>org.springframework.cloud</groupId>
            <artifactId>spring-cloud-starter-netflix-eureka-client</artifactId>
        </dependency>
        <!--配置中心客户端依赖-->
        <dependency>
            <groupId>org.springframework.cloud</groupId>
            <artifactId>spring-cloud-starter-config</artifactId>
        </dependency>
        <!--openfeign依赖-->
        <dependency>
            <groupId>org.springframework.cloud</groupId>
            <artifactId>spring-cloud-starter-openfeign</artifactId>
        </dependency>
    </dependencies>

</project>
2、创建启动类;
package com.xslde;

import org.springframework.boot.SpringApplication;
import org.springframework.boot.autoconfigure.SpringBootApplication;
import org.springframework.cloud.netflix.eureka.EnableEurekaClient;
import org.springframework.cloud.openfeign.EnableFeignClients;

/**
 * Created by xslde on 2018/7/22
 */
@EnableEurekaClient//启用eureka客户端,将服务注册到注册中心
@EnableFeignClients//启用openfeign
@SpringBootApplication
public class OpenFeignApplication {

    public static void main(String[] args) {
        SpringApplication.run(OpenFeignApplication.class,args);
    }

}
3、创建一个openfeign接口(这里是消费eureka-client工程中的服务):
package com.xslde.openfeign;

import com.xslde.openfeign.impl.OpenFeignConfig;
import org.springframework.cloud.openfeign.FeignClient;
import org.springframework.web.bind.annotation.GetMapping;

/**
 * Created by xslde on 2018/7/22
 */
@FeignClient(name = "eureka-client")//eureka-client工程的服务名称
public interface OpenFeign {

    @GetMapping("/name")//这里的请求路径需要和eureka-client中的请求路径一致
    public String test();//这里的方法名需要和eureka-client中的方法名一致

}
4、创建一个Controller类:
package com.xslde.controller;

import com.xslde.openfeign.OpenFeign;
import org.springframework.beans.factory.annotation.Autowired;
import org.springframework.web.bind.annotation.GetMapping;
import org.springframework.web.bind.annotation.RestController;

/**
 * Created by xslde on 2018/7/22
 */
@RestController
public class OpenFeignRest {

    @Autowired
    OpenFeign openFeign;

    @GetMapping("/name")
    public String name(){
       return openFeign.test();
    }


}
5、创建一个openfeign-dev.yml文件上传到git仓库:
server:
  port: 7103 #启动端口号
spring:
  application:
    #配置应用名称,后期可根据应用名称调用应用的应服务
    name: openfeign
6、在当前工程resources文件夹下创建bootstrap.yml文件,配置类容如下:
spring:
  cloud:
    config:
      discovery:
        enabled: true
        service-id: config-server #根据eureka注册中心里的服务名称找到配置中心服务器
        #openfeign-dev.yml
      name: openfeign
      profile: dev
eureka:
  instance:
      hostname: localhost
  client:
    service-url:
      #向服务中心注册服务,xslde:123456是用户名称和密码
      defaultZone: http://xslde:123456@${eureka.instance.hostname}:7100/eureka/
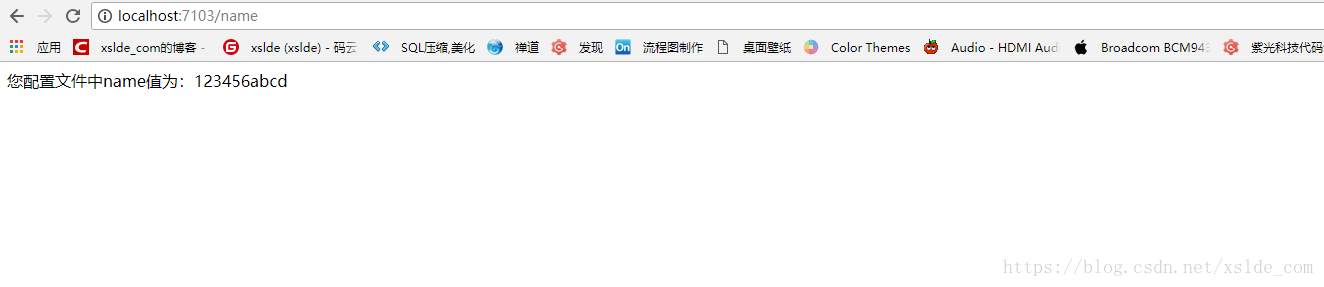
7、依次启动eureka-server、config-server、eureka-client、openfeign项目,然后访问http://localhost:7103/name,如下图则消费成功 :
(二)openfeign负载均衡:
8、openfeign修改eureka-client工程中启动类(添加了当前应用端口参数)测试负载均衡:
package com.xslde;

import org.springframework.beans.factory.annotation.Value;
import org.springframework.boot.SpringApplication;
import org.springframework.boot.autoconfigure.SpringBootApplication;
import org.springframework.cloud.netflix.eureka.EnableEurekaClient;
import org.springframework.web.bind.annotation.GetMapping;
import org.springframework.web.bind.annotation.PathVariable;
import org.springframework.web.bind.annotation.RestController;

/**
 * Created by xslde on 2018/7/21
 */
@RestController
@EnableEurekaClient //启用服务
@SpringBootApplication
public class EurekaClientApplication {

    public static void main(String[] args) {
        SpringApplication.run(EurekaClientApplication.class,args);
    }

    @Value("${xslde.name}")
    private String name;

    @Value("${server.port}")
    private Integer port;

    @GetMapping("/name")
    public String test(){
        return "您配置文件中name值为:"+name+",服务端口号为:"+port;
    }


}
重新启动openfeign、eureka-client工程,改变eureka-client端口号再启动一个eureka-client服务,访问http://localhost:7103/name,刷新页面,会发现端口号交替显示:


(三) Feign Hystrix Support(Feign对熔断的支持)
官方文档原文:

如果Hystrix在类路径上,默认情况下,Feign会用一个断路器来包装所有的方法。返回一个com.hystrix.hystrixcommand也可用。这让您可以使用响应式模式(对.to可视()或。观察()或异步使用(对.queue()的调用)。
默认是禁用Hystrix支持Feign,需在bootstrap.yml中加入以下配置启用Hystrix对Feign的支持:
feign:
  hystrix:
    enabled: true
创建一个OpenFeignFallbackServiceImpl.class
package com.xslde.openfeign;

import org.springframework.stereotype.Service;

/**
 * Created by xslde on 2018/7/22
 */
@Service
public class OpenFeignFallbackServiceImpl implements OpenFeignService{
    @Override
    public String test() {
        return "调用服务失败!";
    }
}
对OpenFeignService 接口修改:
package com.xslde.openfeign;

import org.springframework.cloud.openfeign.FeignClient;
import org.springframework.web.bind.annotation.GetMapping;

/**
 * Created by xslde on 2018/7/22
 */
@FeignClient(name = "eureka-client",fallback = OpenFeignFallbackServiceImpl.class)//eureka-client工程的服务名称
public interface OpenFeignService {

    @GetMapping("/name")//这里的请求路径需要和eureka-client中的请求路径一致
    public String test();//这里的方法名需要和eureka-client中的方法名一致

}
关闭eureka-client所有服务,重启openfeign服务,访问:http://localhost:7103/name,显示如下:

启动一个eureka-client服务,访问:http://localhost:7103/name,显示如下:
