本人在虚拟机上又安装了一台linux机器,作为MySQL数据库服务器用,在安装时选择了系统自带的MySQL服务器端,以下是启用步骤。
首先开启mysqld服务
#service mysqld start
进入/usr/bin目录
#cd /usr/bin
设定mysql数据库root用户的密码
#mysqladmin -u root password '123456'
进入mysql数据库管理控制台
#./mysql -u root -p
Enter password:
Welcome to the MySQL monitor. Commands end with ; or g.
Your MySQL connection id is 4
Server version: 5.0.67 Source distribution
Type 'help;' or 'h' for help. Type 'c' to clear the buffer.
mysql> grant all privileges on *.* to root@'%' identified by "root";
Query OK, 0 rows affected (0.00 sec)
mysql> flush privileges;
Query OK, 0 rows affected (0.00 sec)
mysql> grant select,update,insert,delete on *.* to root@192.168.0.100 identified by "root";
Query OK, 0 rows affected (0.00 sec)
mysql> flush privileges;
Query OK, 0 rows affected (0.00 sec)
mysql> quit
Bye
上面的步骤是进行授权
然后重启mysqld服务
# service mysqld restart
Stopping MySQL: [ OK ]
Starting MySQL: [ OK ]
再次进入mysql管理控制台
# mysql -u root -p
Enter password:
Welcome to the MySQL monitor. Commands end with ; or g.
Your MySQL connection id is 2
Server version: 5.0.67 Source distribution
Type 'help;' or 'h' for help. Type 'c' to clear the buffer.
mysql> use mysql
Reading table information for completion of table and column names
You can turn off this feature to get a quicker startup with -A
Database changed
mysql> update user set password=password('12345678') where user='root';
Query OK, 5 rows affected (0.00 sec)
Rows matched: 5 Changed: 5 Warnings: 0
mysql> flush privileges;
Query OK, 0 rows affected (0.00 sec)
mysql> quit
Bye
以上步骤是修改root用户的密码
之后开启防火墙的3306端口
# vi /etc/sysconfig/iptables
以下是/etc/sysconfig/iptables的内容,其中蓝色一行是新加的。这一行可以由上一行复制得到,方法是在22哪行按下yy,然后按p,然后点insert键进入编辑模式,修改22为3306,然后点esc,输入wq保存退出。
# Firewall configuration written by system-config-firewall
# Manual customization of this file is not recommended.
*filter
:INPUT ACCEPT [0:0]
:FORWARD ACCEPT [0:0]
:OUTPUT ACCEPT [0:0]
-A INPUT -m state --state ESTABLISHED,RELATED -j ACCEPT
-A INPUT -p icmp -j ACCEPT
-A INPUT -i lo -j ACCEPT
-A INPUT -m state --state NEW -m tcp -p tcp --dport 22 -j ACCEPT
-A INPUT -m state --state NEW -m tcp -p tcp --dport 3306 -j ACCEPT
-A INPUT -j REJECT --reject-with icmp-host-prohibited
-A FORWARD -j REJECT --reject-with icmp-host-prohibited
COMMIT
防火墙重启
# service iptables restart
iptables: Flushing firewall rules: [ OK ]
iptables: Setting chains to policy ACCEPT: filter [ OK ]
iptables: Unloading modules: [ OK ]
iptables: Applying firewall rules: [ OK ]
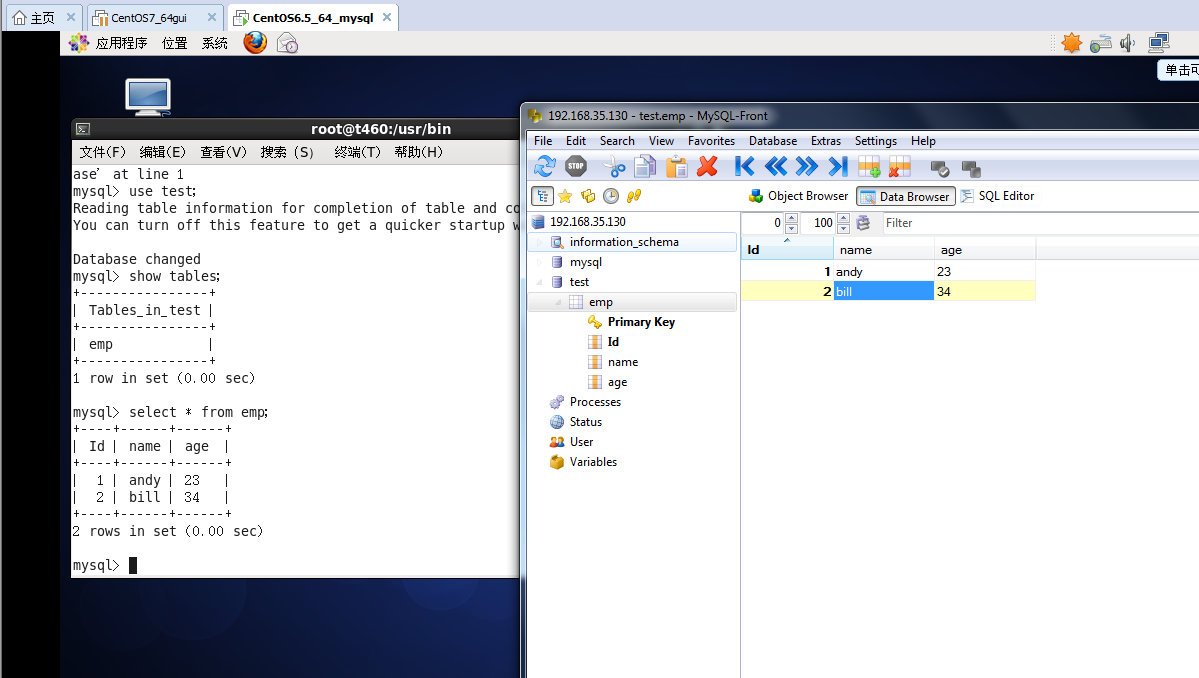
之后就可以在192.168.0.100上用mysqlfront连接数据库了。
本文转自张昺华-sky博客园博客,原文链接:http://www.cnblogs.com/xiandedanteng/p/5799417.html,如需转载请自行联系原作者