平时都用OpenCV的imwrite存图,保存为bmp格式的图片,速度快但占用空间大;存为jpg格式,占用空间小但存图时间长。
了解到libjpeg这个开源库存图,实验了一下,老版的libjpeg与OpenCV相比,没有优势。新版的libjpeg-turbo就不一样了,存图效率很高。
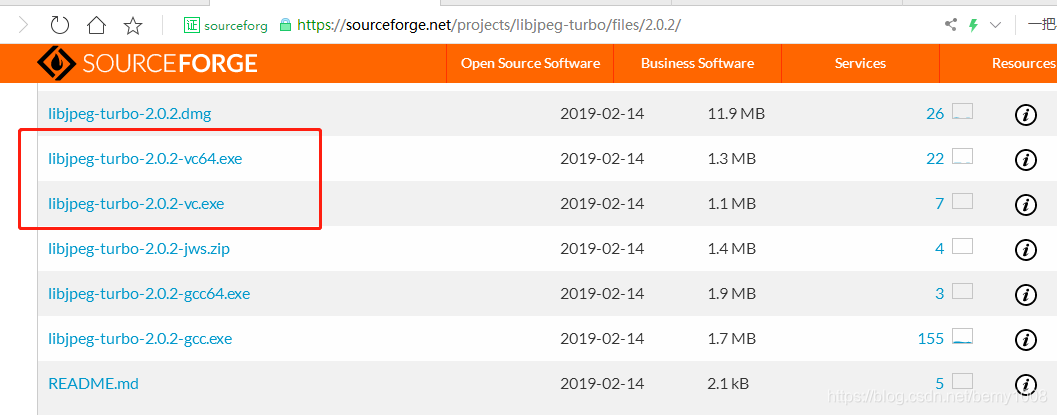
(1)从官网下载最新版本的libjpeg-turbo
https://libjpeg-turbo.org/
(2)安装.exe文件,解压压缩包
(3)应用
参考doc文件夹中的example.txt,了解使用步骤
注意:
要求的图片指针数据为 RGB!
要求的图片指针数据为 RGB!
要求的图片指针数据为 RGB!
参数解析:
char filename 要保存的图像文件名
int quality jpg图像的压缩率(0-100)
unsigned char image_buffer 图像指针(RGB排序)
int image_width 图像宽
int image_height 图像高
  1 void write_JPEG_file(char *filename, int quality, unsigned char* image_buffer, int image_width, int image_height)
  2 {
  3     /* This struct contains the JPEG compression parameters and pointers to
  4     * working space (which is allocated as needed by the JPEG library).
  5     * It is possible to have several such structures, representing multiple
  6     * compression/decompression processes, in existence at once.  We refer
  7     * to any one struct (and its associated working data) as a "JPEG object".
  8     */
  9     struct jpeg_compress_struct cinfo;
 10     /* This struct represents a JPEG error handler.  It is declared separately
 11     * because applications often want to supply a specialized error handler
 12     * (see the second half of this file for an example).  But here we just
 13     * take the easy way out and use the standard error handler, which will
 14     * print a message on stderr and call exit() if compression fails.
 15     * Note that this struct must live as long as the main JPEG parameter
 16     * struct, to avoid dangling-pointer problems.
 17     */
 18     struct jpeg_error_mgr jerr;
 19     /* More stuff */
 20     FILE *outfile;                /* target file */
 21     JSAMPROW row_pointer[1];      /* pointer to JSAMPLE row[s] */
 22     int row_stride;               /* physical row width in image buffer */
 23
 24     /* Step 1: allocate and initialize JPEG compression object */
 25
 26     /* We have to set up the error handler first, in case the initialization
 27     * step fails.  (Unlikely, but it could happen if you are out of memory.)
 28     * This routine fills in the contents of struct jerr, and returns jerr's
 29     * address which we place into the link field in cinfo.
 30     */
 31     cinfo.err = jpeg_std_error(&jerr);
 32     /* Now we can initialize the JPEG compression object. */
 33     jpeg_create_compress(&cinfo);
 34
 35     /* Step 2: specify data destination (eg, a file) */
 36     /* Note: steps 2 and 3 can be done in either order. */
 37
 38     /* Here we use the library-supplied code to send compressed data to a
 39     * stdio stream.  You can also write your own code to do something else.
 40     * VERY IMPORTANT: use "b" option to fopen() if you are on a machine that
 41     * requires it in order to write binary files.
 42     */
 43     if ((outfile = fopen(filename, "wb")) == NULL) {
 44         fprintf(stderr, "can't open %s
", filename);
 45         exit(1);
 46     }
 47     jpeg_stdio_dest(&cinfo, outfile);
 48
 49     /* Step 3: set parameters for compression */
 50
 51     /* First we supply a description of the input image.
 52     * Four fields of the cinfo struct must be filled in:
 53     */
 54     cinfo.image_width = image_width;      /* image width and height, in pixels */
 55     cinfo.image_height = image_height;
 56     cinfo.input_components = 3;           /* # of color components per pixel */
 57     cinfo.in_color_space = JCS_RGB;       /* colorspace of input image */
 58     /* Now use the library's routine to set default compression parameters.
 59     * (You must set at least cinfo.in_color_space before calling this,
 60     * since the defaults depend on the source color space.)
 61     */
 62     jpeg_set_defaults(&cinfo);
 63     /* Now you can set any non-default parameters you wish to.
 64     * Here we just illustrate the use of quality (quantization table) scaling:
 65     */
 66     jpeg_set_quality(&cinfo, quality, TRUE /* limit to baseline-JPEG values */);
 67
 68     /* Step 4: Start compressor */
 69
 70     /* TRUE ensures that we will write a complete interchange-JPEG file.
 71     * Pass TRUE unless you are very sure of what you're doing.
 72     */
 73     jpeg_start_compress(&cinfo, TRUE);
 74
 75     /* Step 5: while (scan lines remain to be written) */
 76     /*           jpeg_write_scanlines(...); */
 77
 78     /* Here we use the library's state variable cinfo.next_scanline as the
 79     * loop counter, so that we don't have to keep track ourselves.
 80     * To keep things simple, we pass one scanline per call; you can pass
 81     * more if you wish, though.
 82     */
 83     row_stride = image_width * 3; /* JSAMPLEs per row in image_buffer */
 84
 85     while (cinfo.next_scanline < cinfo.image_height) {
 86         /* jpeg_write_scanlines expects an array of pointers to scanlines.
 87         * Here the array is only one element long, but you could pass
 88         * more than one scanline at a time if that's more convenient.
 89         */
 90         row_pointer[0] = &image_buffer[cinfo.next_scanline * row_stride];
 91         (void)jpeg_write_scanlines(&cinfo, row_pointer, 1);
 92     }
 93
 94     /* Step 6: Finish compression */
 95
 96     jpeg_finish_compress(&cinfo);
 97     /* After finish_compress, we can close the output file. */
 98     fclose(outfile);
 99
100     /* Step 7: release JPEG compression object */
101
102     /* This is an important step since it will release a good deal of memory. */
103     jpeg_destroy_compress(&cinfo);
104
105     /* And we're done! */
106 }