Data Migration from Various Storage Types Using EMC VPLEX and EMC RecoverPoint Technologies

Migrating data centers (hereinafter referred to as data centers) is a non-trivial and time-consuming task, although with built-in and tested processes it is quite easy to do. Last summer, I had the opportunity to work on the migration of two data centers, and since I mainly deal with SAN, then we will talk about how to migrate them.
In the source data center, the customer had storage systems from IBM and NetApp, and in destination - EMC VNX. The task was to quickly and with minimal downtime migrate all hosts, both physical and virtual, to a new location. Migration of data and hosts was to be performed with minimization of downtime - the customer was a very large company, and every minute was critical. The optimal solution was to use EMC technologies - VPLEX and RecoverPoint.
After much thought, the following migration scheme was developed:
Encapsulation
1. The host is turned off;
2. Zoning on switches changes from XIVakh to VPLEX;
3. On VPLEX the necessary Storage group are created;
4. The same is done on the destinaion side;
5. A pair is created in RecoverPoint;
6. Asynchronous replication starts;
7. The host turns on.
Migration
1. The host is shutting down;
2. Replication stops, direct access on the destination side is enabled;
3. The host is physically transported to the new data center;
4. The host turns on.
If everything is done correctly, the host should not even notice that it was transported to another place, it remains only to connect the necessary moons using the OS tools.
As we can see, the plan is not particularly complicated, but during its implementation I had to deal with many pitfalls, such as inconsistent data in the destination data center. In the framework of this article I will try to give detailed instructions on the migration itself, as well as a working procedure that will help to avoid our mistakes. So let's go!
I want to note that I am writing this procedure using examples XIV and VNX, but it can be applied to any systems.
Encapsulation
Presenting volumes from XIV to VPLX. We need to connect to XIV, find all volumes that our migrated host uses, and map them to VPLEX. I think there will be no difficulties with this. Of course, you must have zoning configured so that XIV sees VPLEX.
Define volumes on VPLEX. It is best to use the CLI for this.
cd /clusters/cluster-1/storage-elements/storage-arrays/
cd /clusters/cluster-1/storage-elements/storage-arrays/
cd /clusters/cluster-1/storage-elements/storage-volumes/
claim --storage-volumes VPD83T2:<wwn_volume> --name <name_volume>
Create virtual volumes on VPLEX source.
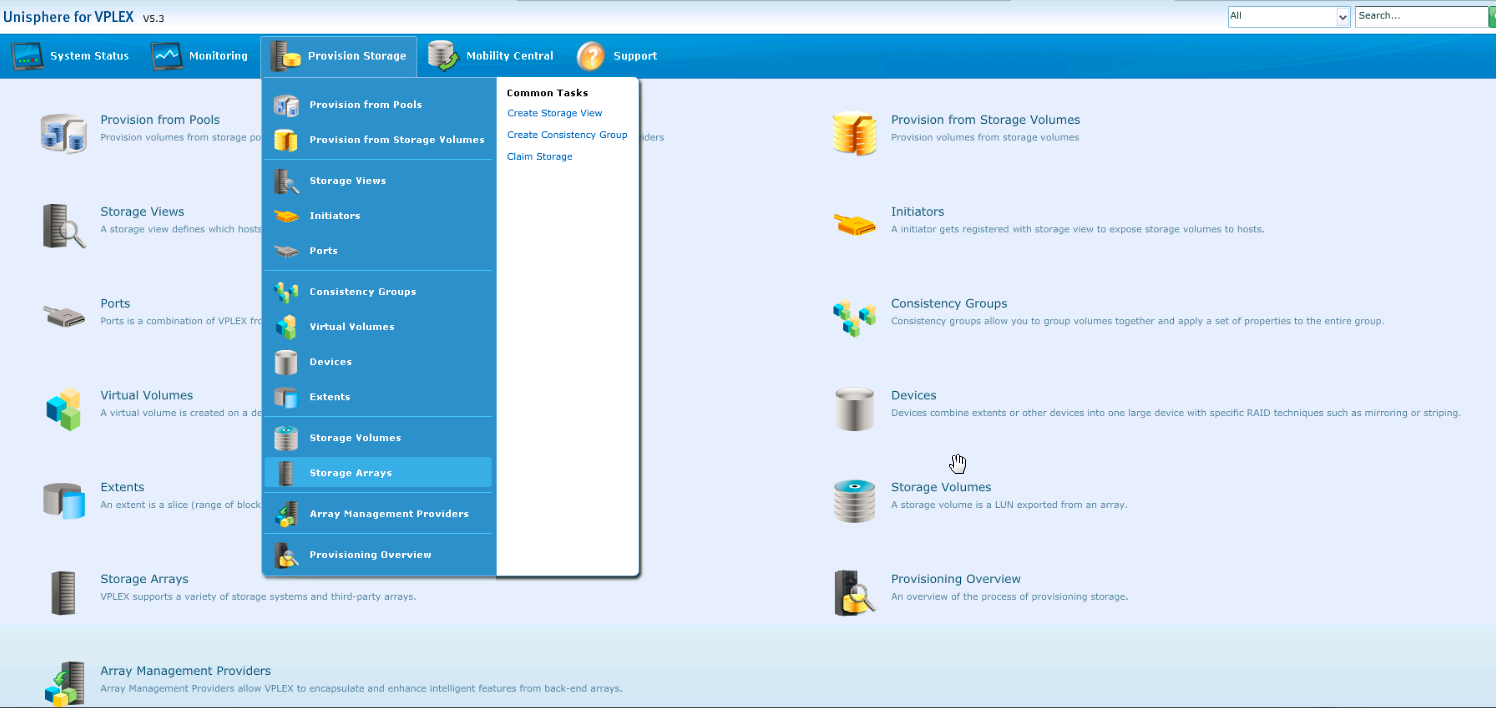
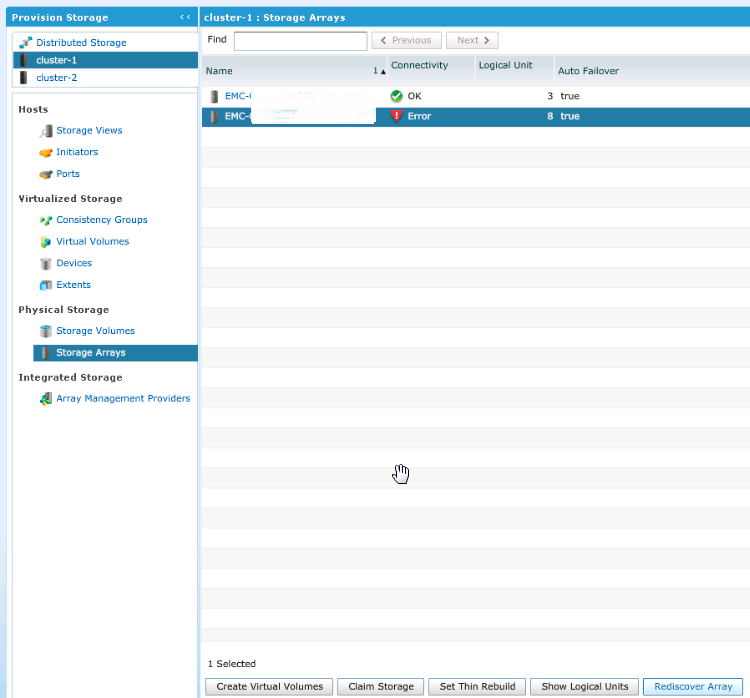
Go to Provision Storage -> Storage array:
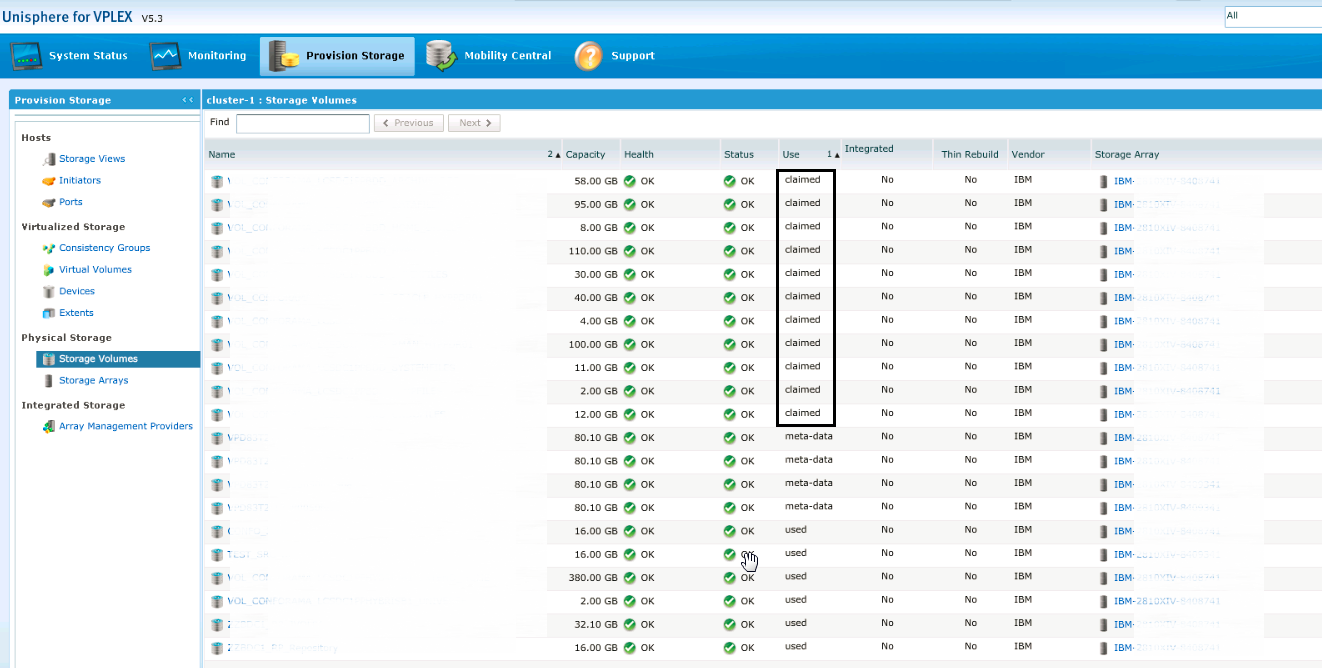
Then on the “Storage Volumes” tab, check that all our moons are presented (are in the Claimed status)

Go to “Extents” and click “Create”, select all the LUNs from our host and add them.

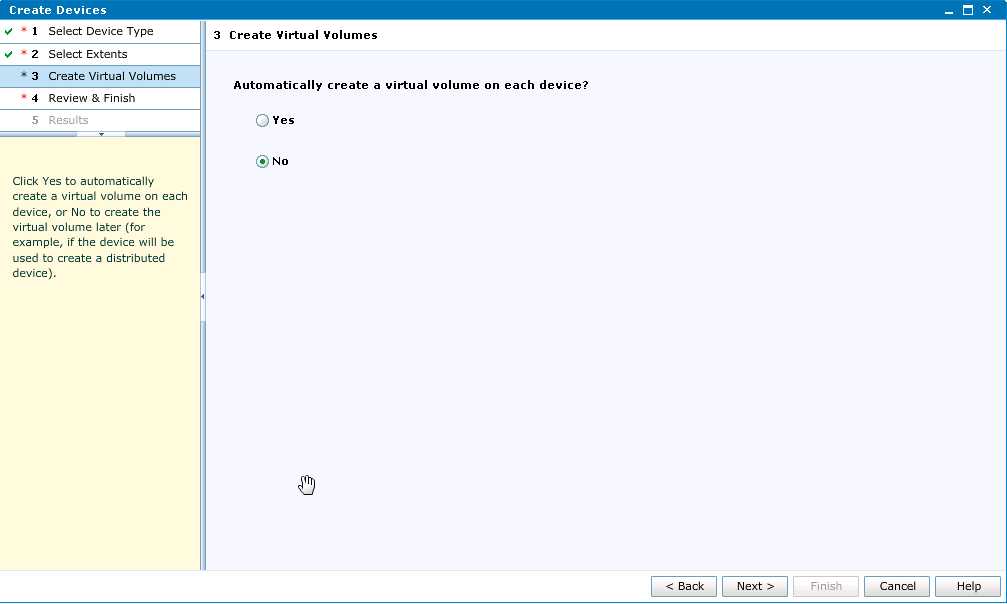
Go to the "Devices". We will need to create a device associated with our Extents. Click "Create", after which we need to specify the type of device, in our case we need 1: 1 Mapping:

Add all Extents created in the previous step, turn off the automatic creation of virtual volumes:
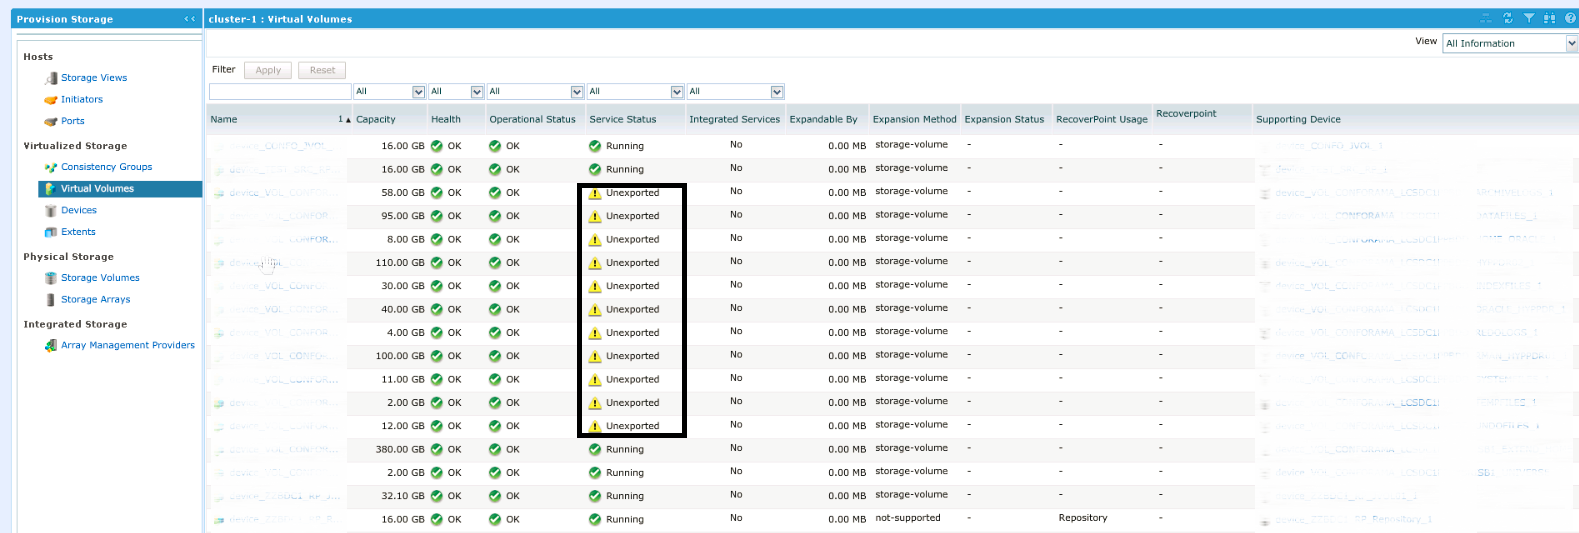
Now we need to create virtual volumes, for which we go to the corresponding menu item and click Create from Devices, select all the devices that we created in the previous step.

After adding, please note that our new virtual volumes are still in Unexported status:
Well, now let's do the zoning, as you know, at the moment all our moons are presented not to the host, but to VPLEX, and we need to reconfigure the zoning so that the host sees the data the moon., We must do this in both factories. So:
SAN01
alishow | grep
zonecreate "_VPLEX",";VPLEX_1E1_A0_FC00"
cfgadd "CFG_20160128_07h05FR_SCH","_VPLEX_1E1_A0_FC00"
zonecreate "_VPLEX_1E1_B0_FC00",";VPLEX_1E1_B0_FC00"
cfgadd "CFG_20160128_07h05FR_SCH ","_VPLEX_1E1_B0_FC00"
cfgsave
cfgenable CFG_20160128_07h05FR_SCH
cfgactvshow | grep
We do the same for the second factory SAN02.
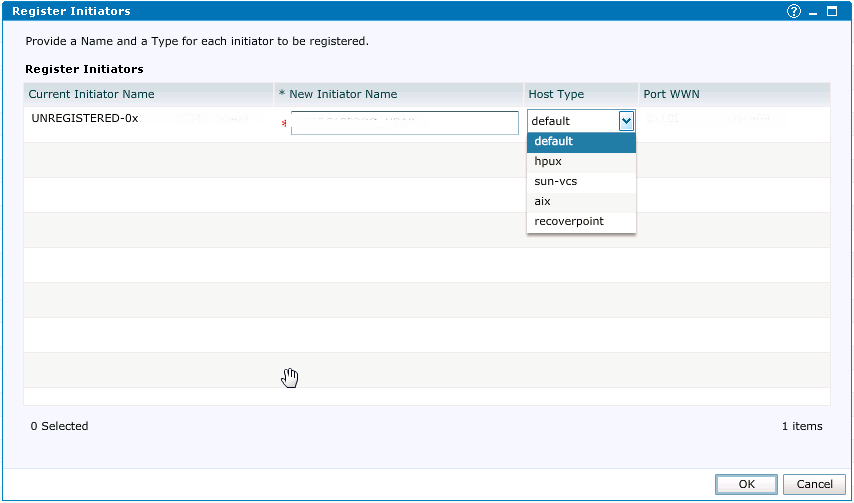
Now we need to create a new host on VPLEX and present the moons to it. We return to the VPLEX admin panel and go to the Initiators . If the zoning is configured correctly, we should see two unregistered initiators:

Once again, check WWN and boldly click Register. In the next step, we set the name of our new initiator (I usually set * the name of the host_number HBA *), the host type in our case is default.
We perform the same step for the second initiator. That's all, our host now sees VPLEX, it remains only to present LUNs to it.
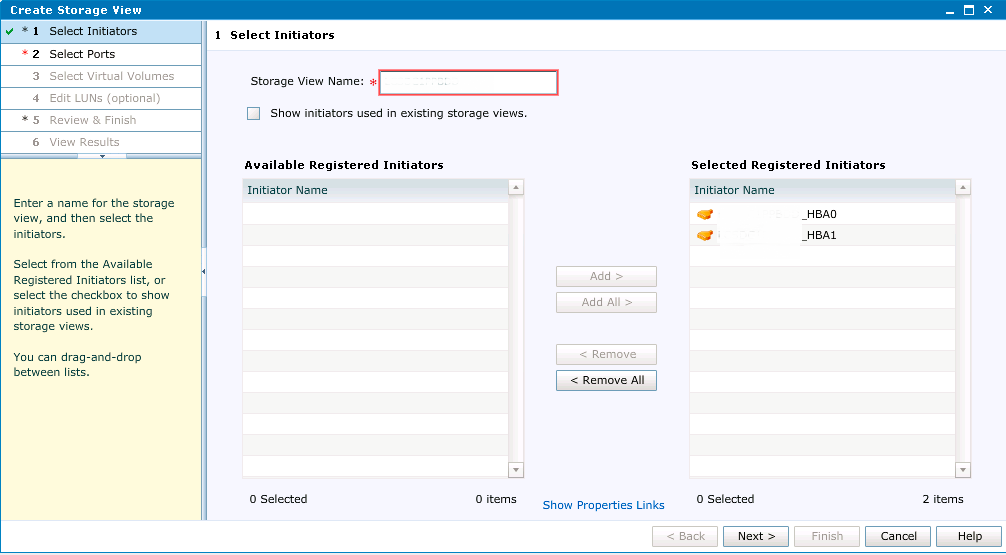
We go to the Storage View item and click Create, set the name of the Storage View (usually this is the host name), add the initiators:
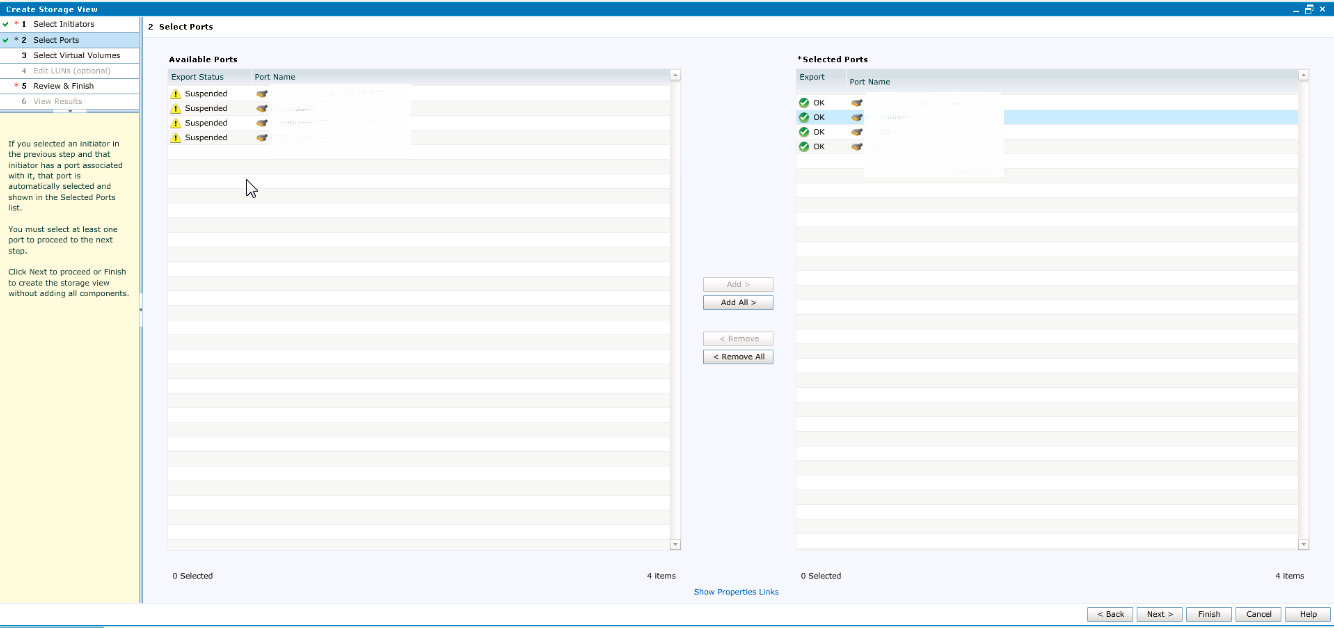
In the next step, we must associate the initiators with the free ports on the VPLEX side. First you need to make sure that all ports are selected: A0-FC00, A0-FC01, B0-FC00, and B0-FC01. If they are not there, check once again the correctness of the zoning settings and perform rescan FC on the host.
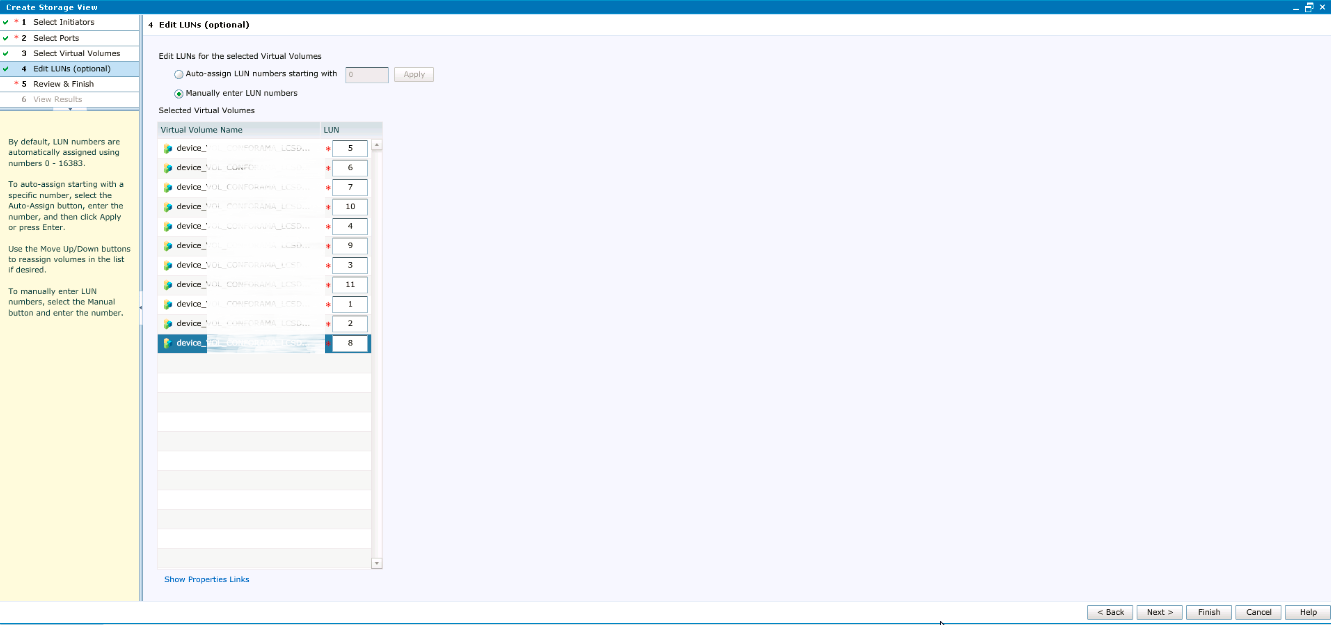
In the next step, select all volumes that we created for our server, then specify the LUN numbers. With this step, be especially careful: LUN numbers must match the numbers that we had on XIV. Choose Manually enter LUN numbers and assign numbers accordingly.
Once again, check everything and click Close. After this stage, you can reconnect all previously used disks on the host; ideally, the host should not notice that it is now working with Storage via VPLEX. It should be noted that, although we have added a new link to the chain, there should not be any performance problems, latency, of course, can slightly subside, but only slightly. But, I think, this is the topic of a separate article, I conducted research in this area and, if the results are interesting, I will gladly share them.
We have almost completed the configuration on the source side, now we will deal with destination. To begin with, we will again go to XIV and rewrite the exact size of our moons, I recommend taking the size in blocks.
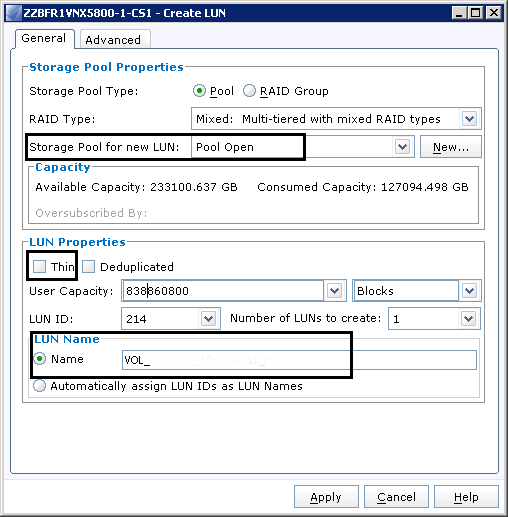
We go to VNX, then Storage -> LUNs -> Create LUN.
We check the settings of the LUN, in our case Storage Pool should be Pool Open, the LUN should be Thin, copy and paste the size and set the name. There are no requirements for the name, therefore we are guided by the rules adopted by the organization.
I assume that your VPLEX is already connected, the zoning is configured, and the Storage Group on VNX is created. Therefore, after creating the LUNs, we simply add them to the corresponding VPLEX Storage Group.
The next step is to present LUNs from VNX to VPLEX. You can, of course, do this manually, but for this purpose I use a small script from EMC. Download the useful utility from EMC - NavisphereCLI and create a simple BAT file:
REM remplacer FR1 par le nom du premier VNX.

REM remplacer FR2 par le nom du deuxieme VNX.

REM remplacer 0.0.0.0 IP VNX.

REM remplacer 0.0.0.0 IP VNX.

REM user/user: service/password

rem naviseccli -AddUserSecurity -user sysadmin -password sysadmin -scope 0

del c:R1.txt

del c:R2.txt

"C:EMCNavisphereCLINaviSECCLI.exe" -h 0.0.0.0 getlun -uid -name > c:R1.txt

"C:EMCNavisphereCLINaviSECCLI.exe" -h 0.0.0.0 getlun -uid -name > c:R2.txt
Of course, in the script we need to fix the way. The result of the script will be two files R1 and R2 (since in our case there are two locations).
We return to VPLEX and map our LUNs. Go to Provision Storage -> Array Management, select our VNX and click Rediscover Array:
After this procedure, again select our VNX and click Claim Storage. Next, select Use a Name Mapping File:

As probably already clear, then we will need to specify the file that we generated using the script. Next, we should see all the LUNs that were created on VNX. We give them a new name (I recommend giving a name by analogy with source), and after all these procedures we see that the moons are presented:
Now we need to create Extents, Devices, Virtual Volumes and Storage Group. All this is done by analogy with the source side and does not present any difficulties. By analogy, zoning and initiators are created. After all these actions, the distination side is ready to accept our host, we just have to configure replication.
For RecoverPoint to work, you need a volume for logs, the so-called JVOL, create it on both sides and add it to the Storage Group that we created in the previous steps.
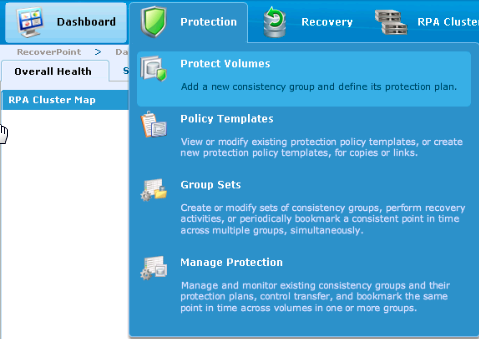
So replication. Open RecoverPoint and boldly go to Protection -> Protect Volumes:
We look for the Consistency group of our source VPLEX, in the RPA cluster field select the source site and select all the LUNs that will be replicated:
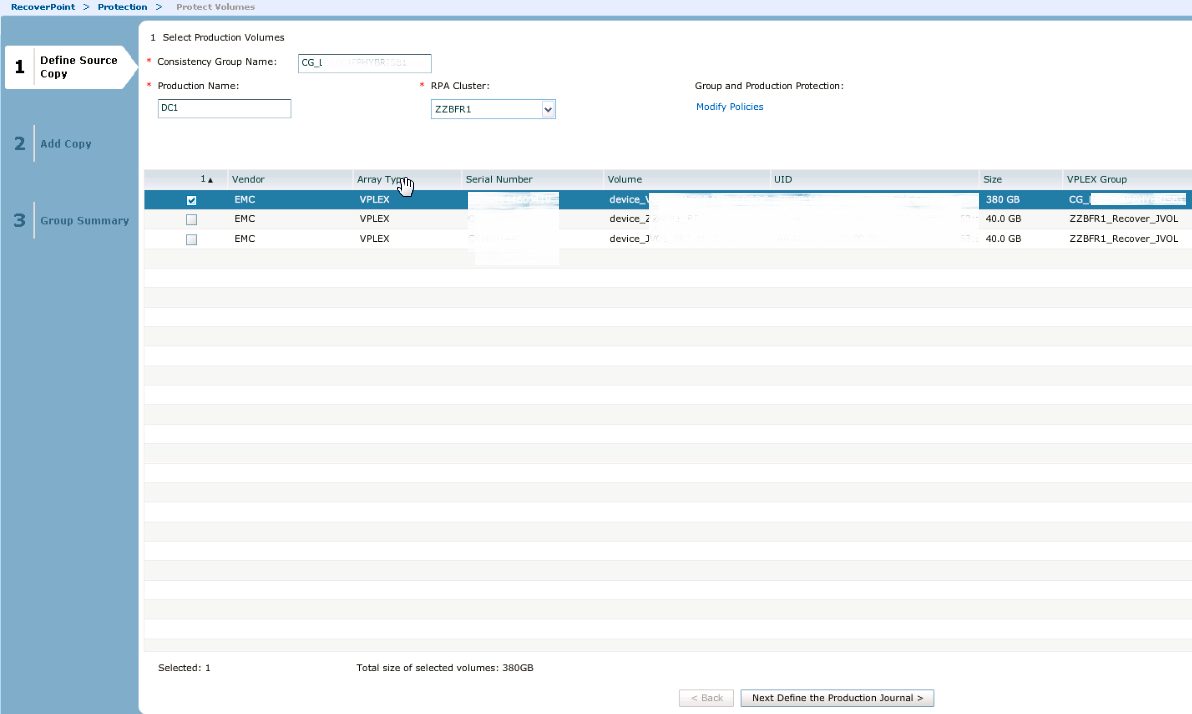
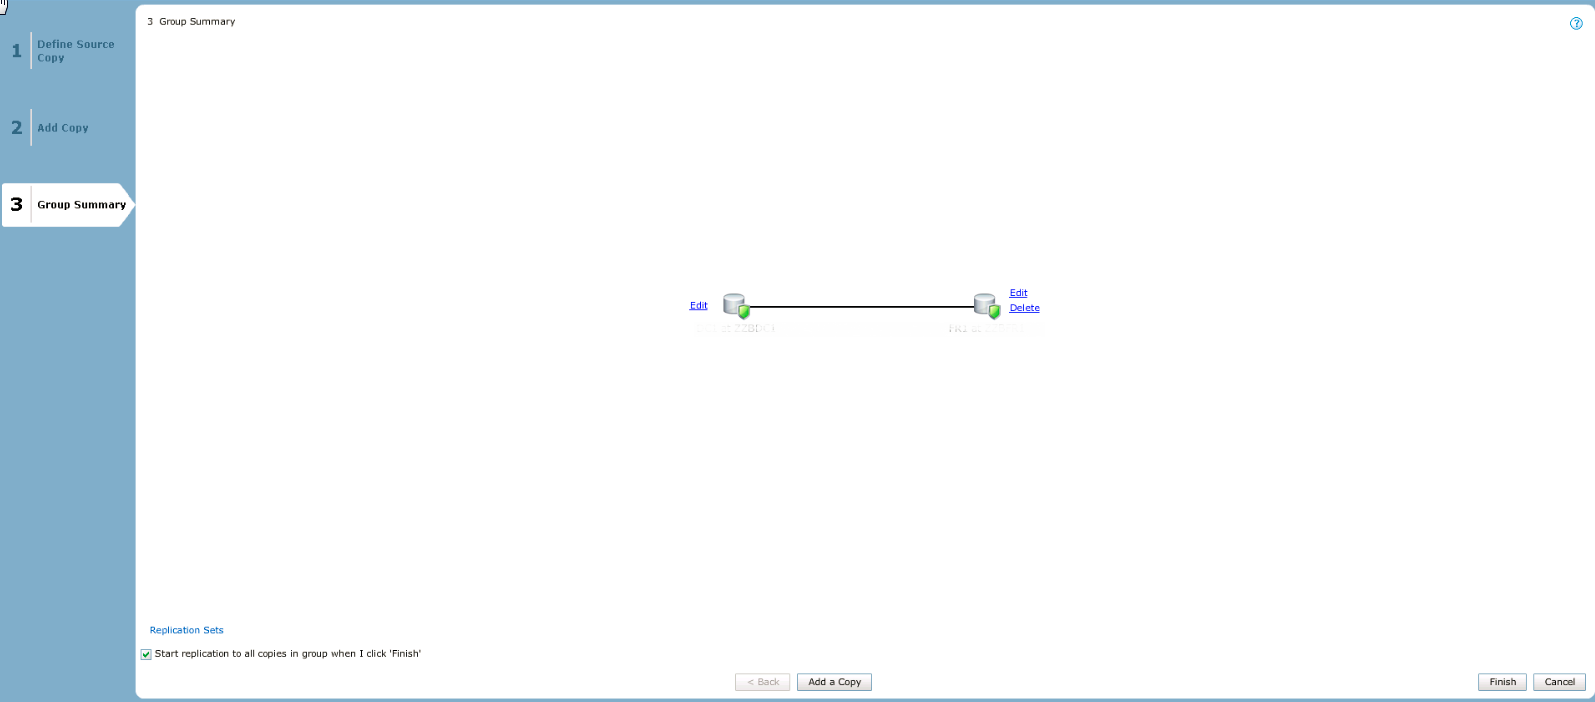
In the next step, select our JVOL. Next, we will need to specify the name of the pair (any in accordance with the accepted rules), RPA cluster already select Destination and select Detination volumes:
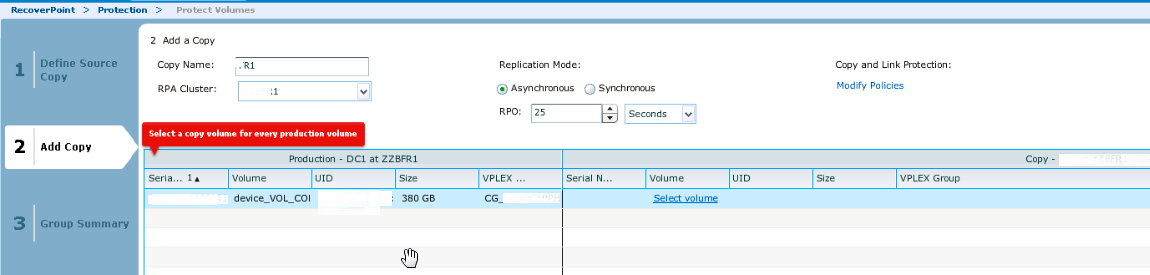
Next we need to specify destination JVOL. We will be shown a simple picture with our replication, after which we click Add a copy.
Click on the name of our CG group and see a beautiful interactive synchronization status:
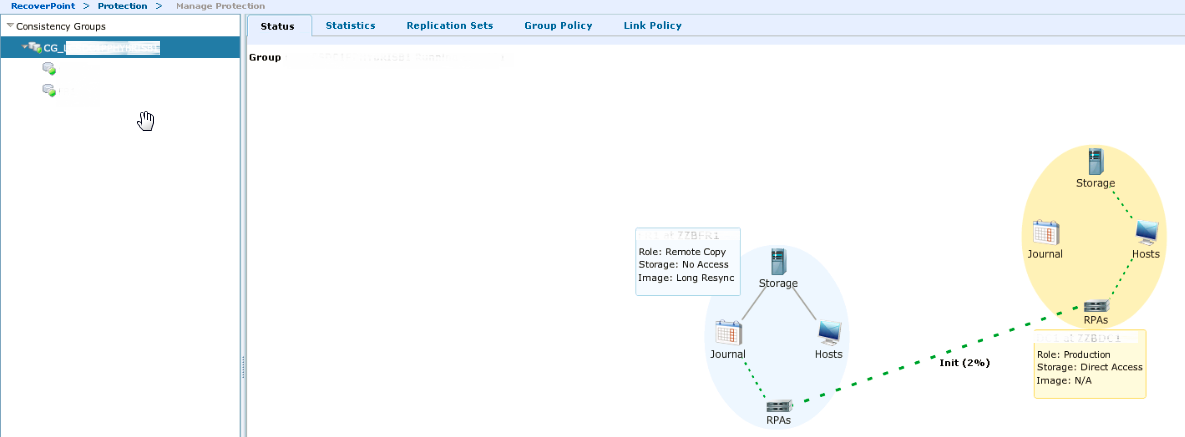
We are waiting for the data to be replicated. After that, we will observe the following status:
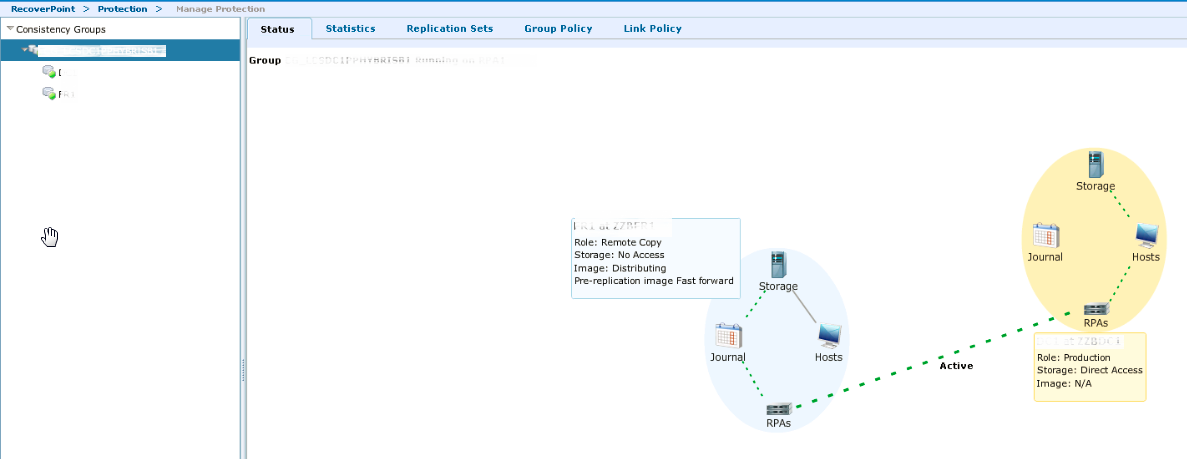
At this stage, we are ready to physically move the host to a new data center. But there is a caveat: be sure to turn off the host first, then stop replication.
Let's say the host is already on the way, we need to break the pair and enable direct access for the host. If we did not confuse anything with the zoning, then after switching on the host will not even guess about its new location.
We return to RecoverPoint, go through Protection -> Manage Protection, find our CG group and press the Pause Transfer button:

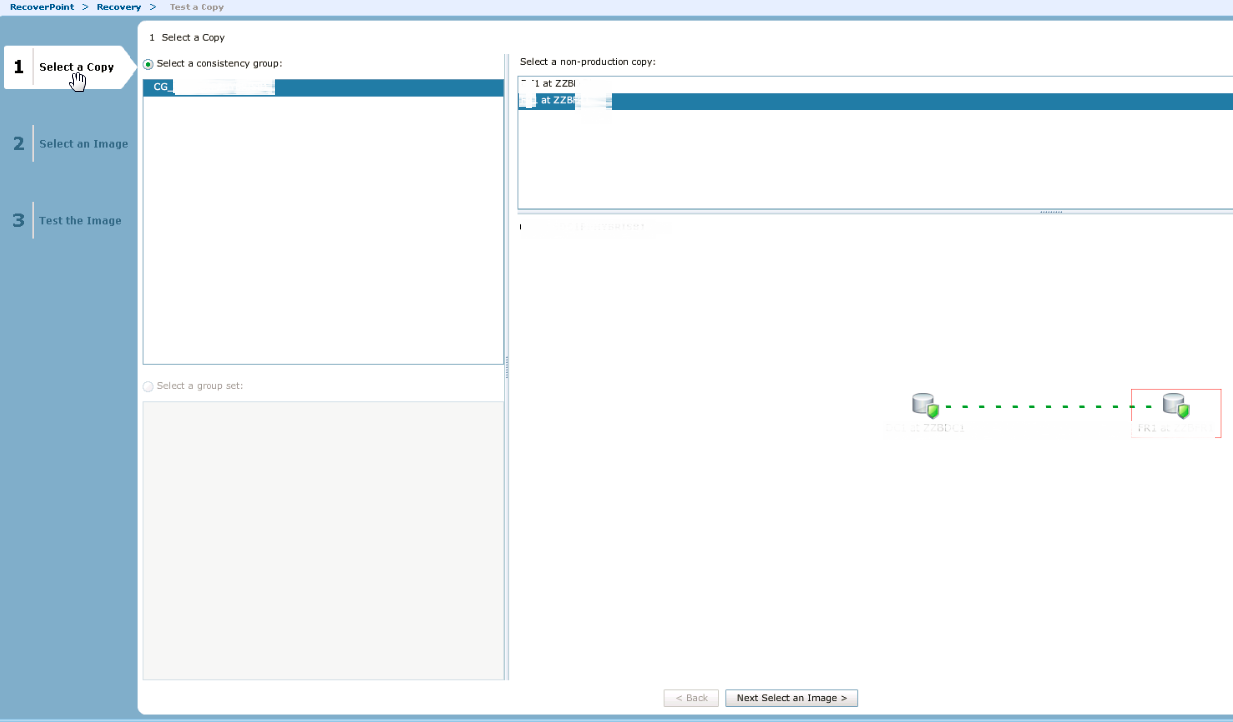
Then we start testing with the Test Copy button, select our destination side and click Next select an image
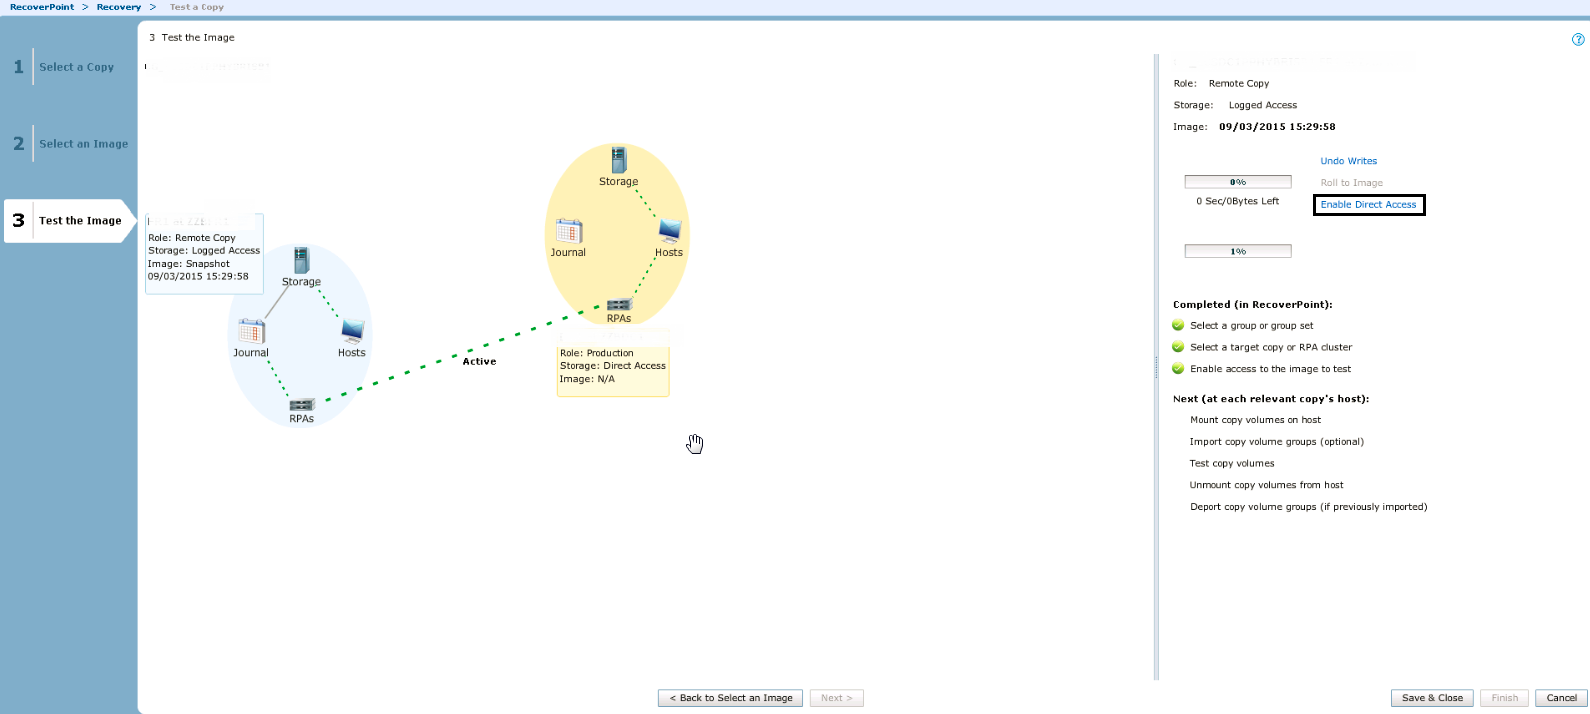
In the next window, leave everything by default, it is safe to click Warning We answer YES. We are waiting for the copy to be tested, and click Enable Direct Access.
In essence, that’s all. Again, if you are not confused with the settings of the zoning and initiators, the host should see all of its LUNs with consistent data. If you have any questions and additions to the article, I will be happy to answer them. All easy migrations!