实现基于用户的访问控制,使用basic机制进行用户认证
Syntax:    auth_basic string | off;
Default:    auth_basic off;
Context:    http, server, location, limit_except
#启用使用“HTTP基本身份验证”协议验证用户名和密码
Syntax:    auth_basic_user_file file;
Default:    —
Context:    http, server, location, limit_except
#启用“HTTP基本身份验证”验证用户名和密码,指定一个保存用户名和密码的文件,格式如下:
# comment
name1:password1
name2:password2:comment
name3:password3

#可以使用Apache自带的“htpasswd”或者“openssl passwd”命令设置用户和密码到认证文件里,注意,密码是加密的。
测试实例
实验环境
[root@node1 ~]# uname -r
3.10.0-957.el7.x86_64
[root@node1 ~]# cat /etc/redhat-release
CentOS Linux release 7.6.1810 (Core)
[root@node1 ~]# nginx -V
nginx version: nginx/1.16.0
built by gcc 4.8.5 20150623 (Red Hat 4.8.5-39) (GCC)
built with OpenSSL 1.0.2k-fips  26 Jan 2017
TLS SNI support enabled
configure arguments: --prefix=/usr/local/nginx --user=www --group=www --with-http_ssl_module --with-http_v2_module --with-http_realip_module --with-http_stub_status_module --with-http_gzip_static_module --with-pcre --with-stream --with-stream_ssl_module --with-stream_realip_module

ip: 10.0.0.101
实验要求
通过浏览器访问10.0.0.101需要输入账号密码:
user:admin
passwd:123456
页面内容:ni hao nginx!!!
nginx安装部署位nginx-1.16.0的源码安装,详细见《nginx的安装部署》
虚拟主机配置
server {
        listen       80;
        server_name  localhost;

        #charset koi8-r;

        access_log  logs/host.access.log  main;

        location / {
            auth_basic "auth test";
            auth_basic_user_file /usr/local/nginx/conf/hwpassd; #用户密码文件所在位子
            root   html;
            index  index.html index.htm;
        }

        #error_page  404              /404.html;

        # redirect server error pages to the static page /50x.html
        #
        error_page   500 502 503 504  /50x.html;
        location = /50x.html {
            root   html;
        }
重新加载nginx配置文件
[root@node1 ~]# nginx -t
nginx: the configuration file /usr/local/nginx/conf/nginx.conf syntax is ok
nginx: configuration file /usr/local/nginx/conf/nginx.conf test is successful
[root@node1 ~]# nginx -s reload
创建用户密码文件
#1、安装http-tools,需要使用htpasswd
yum install -y httpd-tools
#2、创建密码文件,用户admin,密码123456
htpasswd -bc /usr/local/nginx/conf/hwpasswd admin 123456
[root@node1 ~]# cat /usr/local/nginx/conf/hwpasswd
admin:$apr1$cratEB7V$BWNivkztrx0tRksdyHBq71
#注意: htpasswd创建新的密码文件需要加"-c"选项;只添加用户密码,只需要"-b"选项
#添加一个ywx:123456
#htpasswd -b /usr/local/nginx/conf/hwpasswd ywx 123456
#[root@node1 ~]# cat /usr/local/nginx/conf/hwpasswd
#admin:$apr1$cratEB7V$BWNivkztrx0tRksdyHBq71
#ywx:$apr1$ZXHwmrsC$JlPcsrx7NpcfzkweIawyB0

#3、更改hwpasswd权限为400,属主和属组为www
chmod 400 /usr/local/nginx/conf/hwpasswd
chown www.www /usr/local/nginx/conf/hwpasswd
访问测试

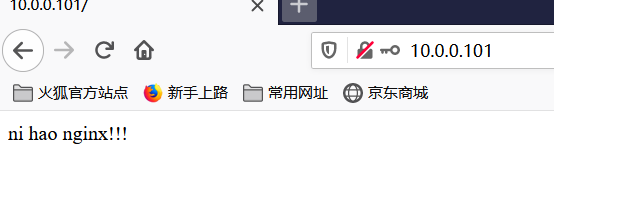
访问成功!!!