源码地址:https://gitee.com/yaohuiqin/SpringBootDemo
概念:
构建RESTful API的目的通常是由于多终端的原因,这些终端会共用很多底层业务逻辑,因此会抽象出来一层同时服务于多个移动端或Web前端。
SpringBoot 整合Swagger2,并配合Spring MVC组织处强大的Restful Api 文档。
步骤:
1、pom.xml新增依赖包:
<dependency>
   <groupId>io.springfox</groupId>
   <artifactId>springfox-swagger2</artifactId>
   <version>2.2.2</version>
</dependency>
<dependency>
   <groupId>io.springfox</groupId>
   <artifactId>springfox-swagger-ui</artifactId>
   <version>2.2.2</version>
</dependency>
2、创建配置类swagger2:
@Configuration
@EnableSwagger2
public class Swagger2 {
    @Bean
    public Docket createRestApi() {
        return new Docket(DocumentationType.SWAGGER_2)
                .apiInfo(apiInfo())
                .select()
                .apis(RequestHandlerSelectors.basePackage("per.yhq.controller.Swagger2"))
                .paths(PathSelectors.any())
                .build();
    }
    private ApiInfo apiInfo() {
        return new ApiInfoBuilder()
                .title("Swagger首页的标题")
                .description("Swagger首页的标题下的描述")
                .termsOfServiceUrl("https://www.cnblogs.com/yaohuiqin/p/9367822.html")
                .contact("yaohuiqin")
                .version("1.0")
                .build();
    }
分析: @Configuration (Spring将这个类解析成配置类)
@EnableSwagger2(启用Swagger)
5、添加controller类,以及entity实体类:
@RestController
@RequestMapping(value = "/users")
public class SwaggerUserController {

    static Map<Long,User> users = Collections.synchronizedMap(new HashMap<Long, User>());

    public SwaggerUserController(){
        users.put(123L,new User(1307L,"yhq",25));
    }

    @ApiOperation(value="获取用户列表", notes="获取全部的用户信息")
    @RequestMapping(value = {""} ,method = RequestMethod.GET)
    public List<User> getUserList(){
        List<User> userlist = new ArrayList<User>(users.values());
        return userlist;
    }

    @ApiOperation(value="创建用户", notes="根据User对象创建用户")
    @ApiImplicitParam(name = "user", value = "用户详细实体user", required = true, dataType = "User")
    @RequestMapping(value="", method=RequestMethod.POST)
    public String postUser(@RequestBody User user) {
        users.put(user.getUserId(), user);
        return "success";
    }

    @ApiOperation(value="获取用户详细信息", notes="根据url的id来获取用户详细信息")
    @ApiImplicitParam(name = "id", value = "用户ID", required = true, dataType = "Long", paramType = "path")
    @RequestMapping(value="/{id}", method=RequestMethod.GET)
    public User getUser(@PathVariable Long id) {
        return users.get(id);
    }

    @ApiOperation(value="更新用户详细信息", notes="根据url的id来指定更新对象,并根据传过来的user信息来更新用户详细信息")
    @ApiImplicitParams({
            @ApiImplicitParam(name = "id", value = "用户ID", required = true, dataType = "Long", paramType = "path"),
            @ApiImplicitParam(name = "user", value = "用户详细实体user", required = true, dataType = "User")
    })
    @RequestMapping(value="/{id}", method=RequestMethod.PUT)
    public String putUser(@PathVariable Long id, @RequestBody User user) {
        User u = users.get(id);
        u.setName(user.getName());
        u.setAge(user.getAge());
        users.put(id, u);
        return "success";
    }

    @ApiOperation(value="删除用户", notes="根据url的id来指定删除对象")
    @ApiImplicitParam(name = "id", value = "用户ID", required = true, dataType = "Long", paramType = "path")
    @RequestMapping(value="/{id}", method=RequestMethod.DELETE)
    public String deleteUser(@PathVariable Long id) {
        users.remove(id);
        return "success";
    }
}
public class User {
    private Long userId;
    private String name;
    private int age;
    //.....get  set 方法,构造器等
}
4、运行项目,在浏览器上访问:http://localhost:8080/swagger-ui.html

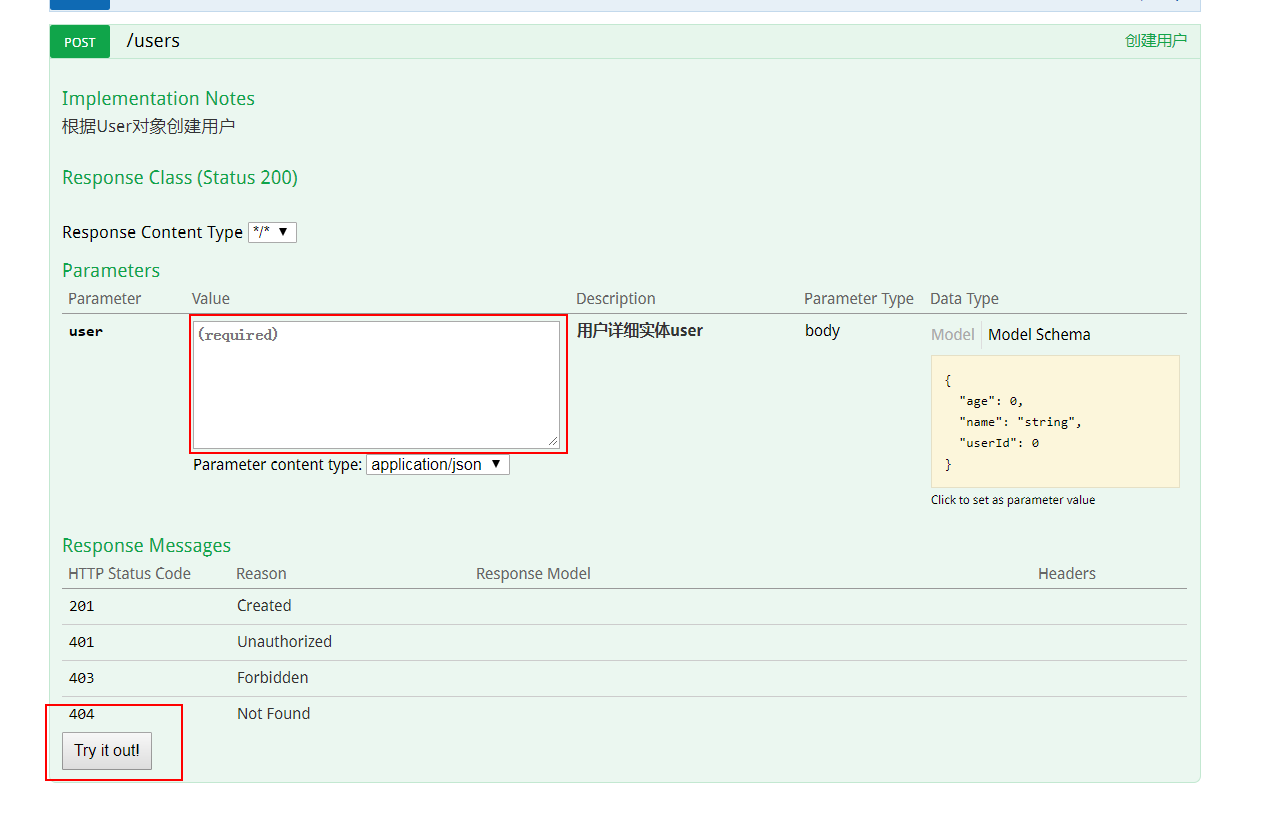
输入参数,点击Try it out,可以进行测试。