我们使用金融软件经常会发现手机锁屏或者长时间未操作就会退出程序或者需要重新输入密码等情况。下面让我们看一下如何实现这种功能。我们知道iOS有一个事件循环机制,也就是大家所说的runloop。我们在对程序进行手势操作时、如点击、滑动、长按、双击等都会响应对应的事件。那么我们就可以利用这个原理监听所有的屏幕事件来实现我们的功能。在程序里负责对用户事件进行处理的是UIApplication。那么如果我们想要做点什么的话,就要继承这个类。然后在里面做一些操作。好了,废话说完。下面上代码。
首先创建一个继承UIApplication的类。
SWFUIApplication.h文件
 1 #import <UIKit/UIKit.h>
 2
 3 // 定义未操作的时间,也可以从服务器上获取。
 4 #define kApplicationTimeoutInMinutes 5
 5
 6 // 超时通知名字
 7 #define kApplicationDidTimeoutNotification @"ApplicationDidTimeout"
 8
 9 /**
10  * This is a subclass of UIApplication with the sendEvent: method
11  * overridden in order to catch all touch events.
12  */
13
14
15 @interface SWFUIApplication : UIApplication
16 {
17     NSTimer *_myidleTimer;
18 }
19 /**
20  * Resets the idle timer to its initial state. This method gets called
21  * every time there is a touch on the screen.  It should also be called
22  * when the user correctly enters their pin to access the application.
23  */
24 - (void)resetIdleTimer;
25 @end
SWFUIApplication.m文件
 1 #import "SWFUIApplication.h"
 2
 3 @implementation SWFUIApplication
 4 -(void)sendEvent:(UIEvent *)event {
 5
 6     [super sendEvent:event];
 7
 8     if (!_myidleTimer) {
 9
10         [self resetIdleTimer];
11
12     }
13     NSSet *allTouches = [event allTouches];
14
15     if ([allTouches count] > 0) {
16
17         UITouchPhase phase= ((UITouch *)
18
19                              [allTouches anyObject]).phase;
20
21         if (phase ==UITouchPhaseBegan) {
22             [self resetIdleTimer];
23         }
24
25     }
26
27 }
28
29 //重置时钟
30
31 -(void)resetIdleTimer {
32
33     if (_myidleTimer) {
34
35         [_myidleTimer invalidate];
36
37     }
38
39     //将超时时间由分钟转换成秒数
40
41     int timeout = kApplicationTimeoutInMinutes* 60;
42
43     _myidleTimer = [NSTimer scheduledTimerWithTimeInterval:timeout target:self selector:@selector(idleTimerExceeded) userInfo:nil repeats:NO];
44
45
46
47 }
48
49 //当达到超时时间,发送 kApplicationTimeoutInMinutes通知
50
51 -(void)idleTimerExceeded {
52
53     [[NSNotificationCenter defaultCenter] postNotificationName:kApplicationDidTimeoutNotification object:nil];
54 }
55 @end
主要代码写完,下面来看一下如何使用
AppDelegate.m
 1 #import "AppDelegate.h"
 2 #import "SWFUIApplication.h"
 3 #import "SecondViewController.h"
 4 @interface AppDelegate ()
 5
 6 @end
 7
 8 @implementation AppDelegate
 9
10
11 - (BOOL)application:(UIApplication *)application didFinishLaunchingWithOptions:(NSDictionary *)launchOptions {
12     // Override point for customization after application launch.
13     [[NSNotificationCenter defaultCenter] addObserver:self selector:@selector(applicationDidTimeout:) name:kApplicationDidTimeoutNotification object:nil];
14     return YES;
15 }
16
17 -(void)applicationDidTimeout:(NSNotification *)notif {
18     NSLog (@"超时要进行的操作");
19     self.window.rootViewController = [SecondViewController new];
20     [[NSNotificationCenter defaultCenter] removeObserver:self name:kApplicationDidTimeoutNotification object:nil];
21 }
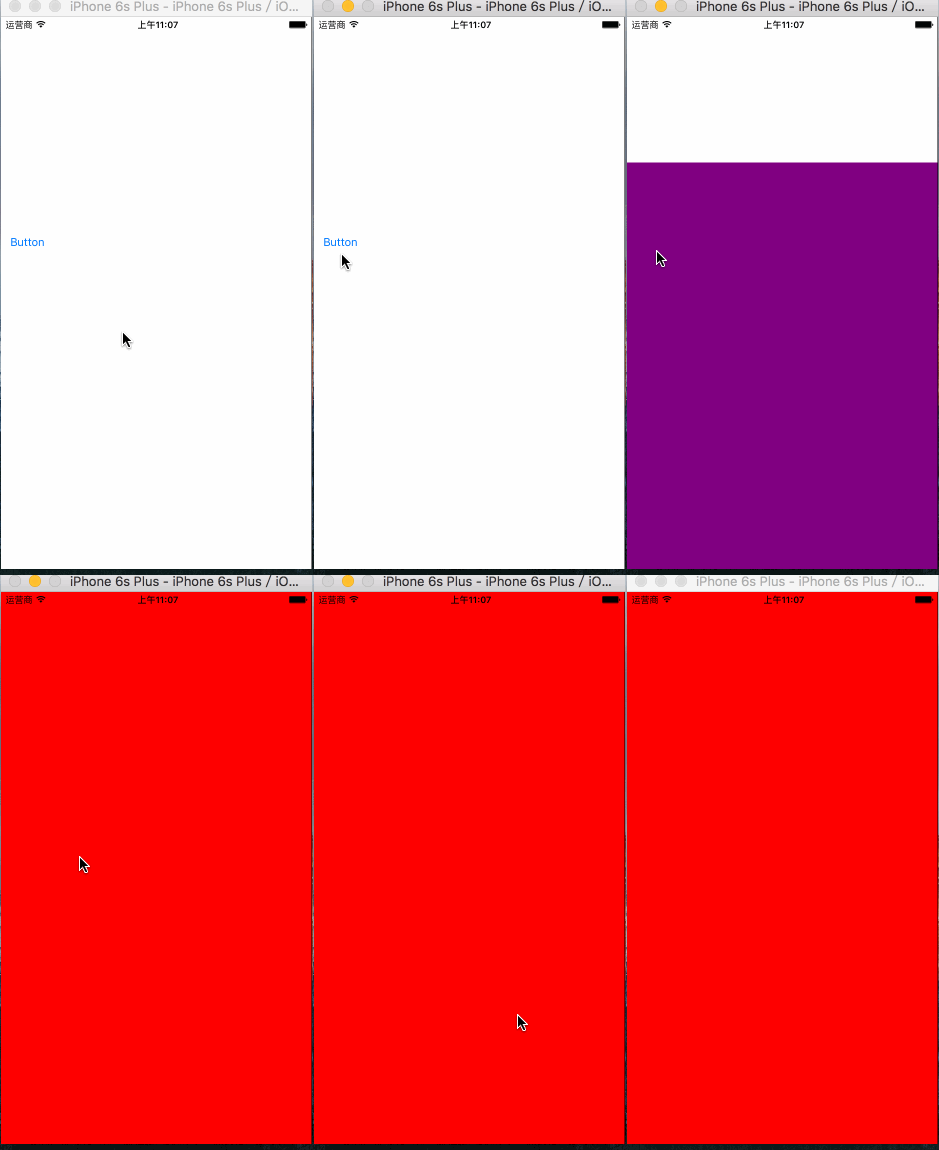
demo的功能是 模拟登陆页面 然后5秒未操作 会切换另一个页面
控制器代码
 1 #import "ViewController.h"
 2 #import "ThirdViewController.h"
 3
 4 @interface ViewController ()
 5
 6 @end
 7
 8 @implementation ViewController
 9
10 - (void)viewDidLoad {
11     [super viewDidLoad];
12     // Do any additional setup after loading the view, typically from a nib.
13 }
14 - (IBAction)btnAction {
15     [self presentViewController:[ThirdViewController new] animated:YES completion:nil];
16 }
 1 #import "SecondViewController.h"
 2
 3 @interface SecondViewController ()
 4
 5 @end
 6
 7 @implementation SecondViewController
 8
 9 - (void)viewDidLoad {
10     [super viewDidLoad];
11     // Do any additional setup after loading the view.
12     self.view.backgroundColor = [UIColor redColor];
13 }
 1 #import "ThirdViewController.h"
 2
 3 @interface ThirdViewController ()
 4
 5 @end
 6
 7 @implementation ThirdViewController
 8
 9 - (void)viewDidLoad {
10     [super viewDidLoad];
11     // Do any additional setup after loading the view.
12     self.view.backgroundColor = [UIColor purpleColor];
13 }
实现效果

DemoGithub地址:https://github.com/yanhuaxuanlan/untreatedExitDemo