需求:
搭建一个多模块项目,包含下面三个模块
sync-common
sync-mimall
sync-youpin
1、先搭建父工程
方式一、SpringBoot
1)File-New-Project-Spring Initializr
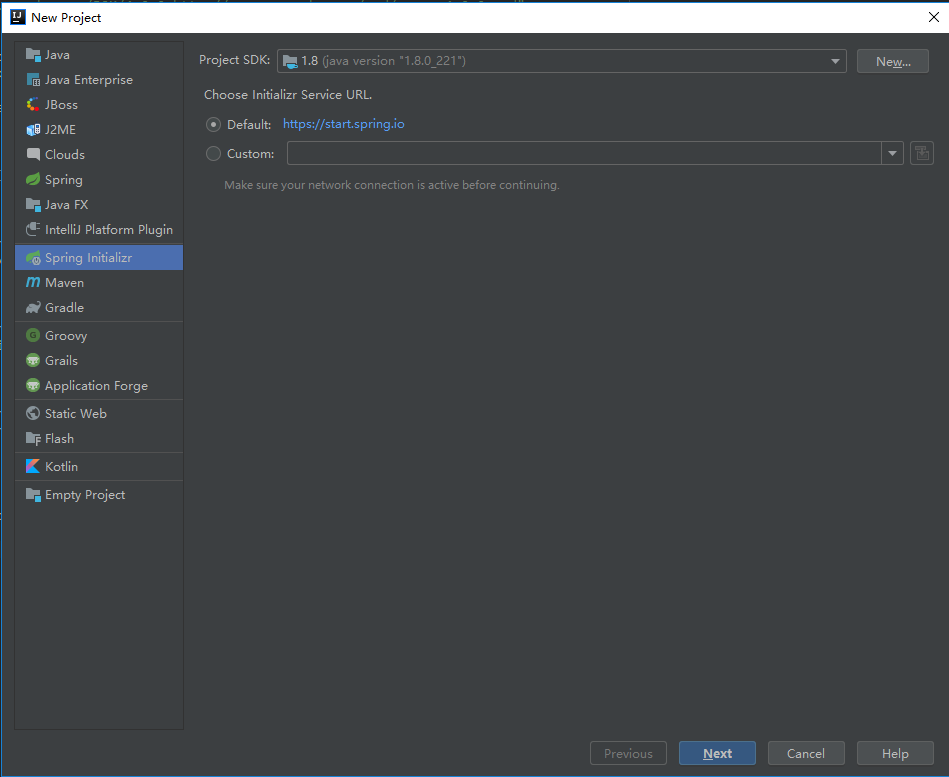
2)Next
选择打包方式(jar/war),Artifact/Name 工程名称,包路径等信息
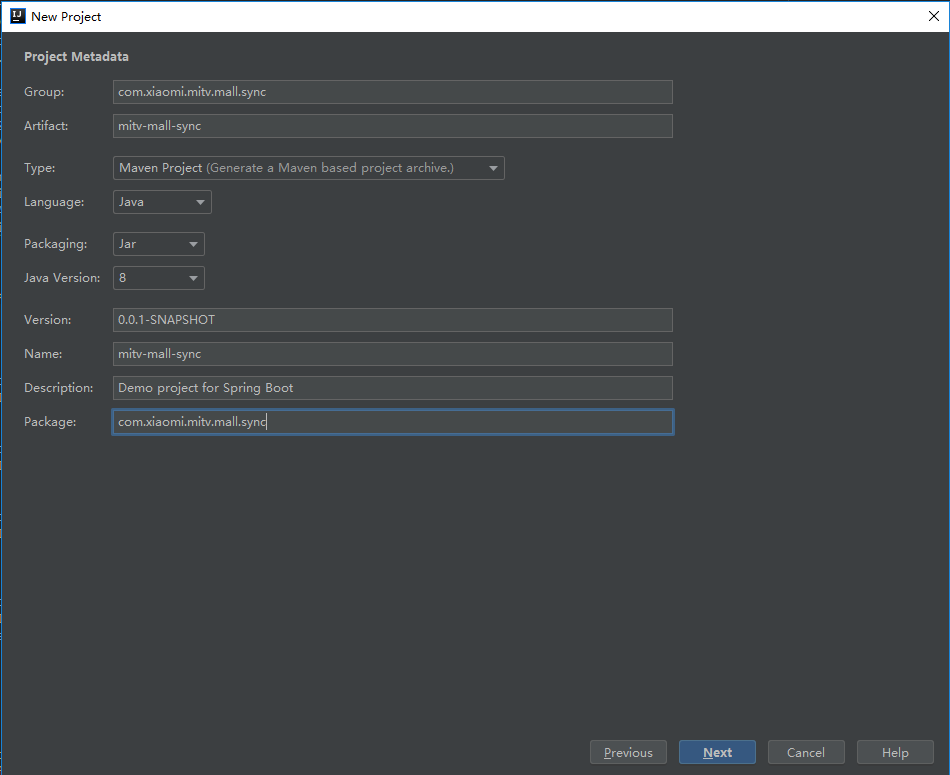
3)Next
选择SpringBoot版本
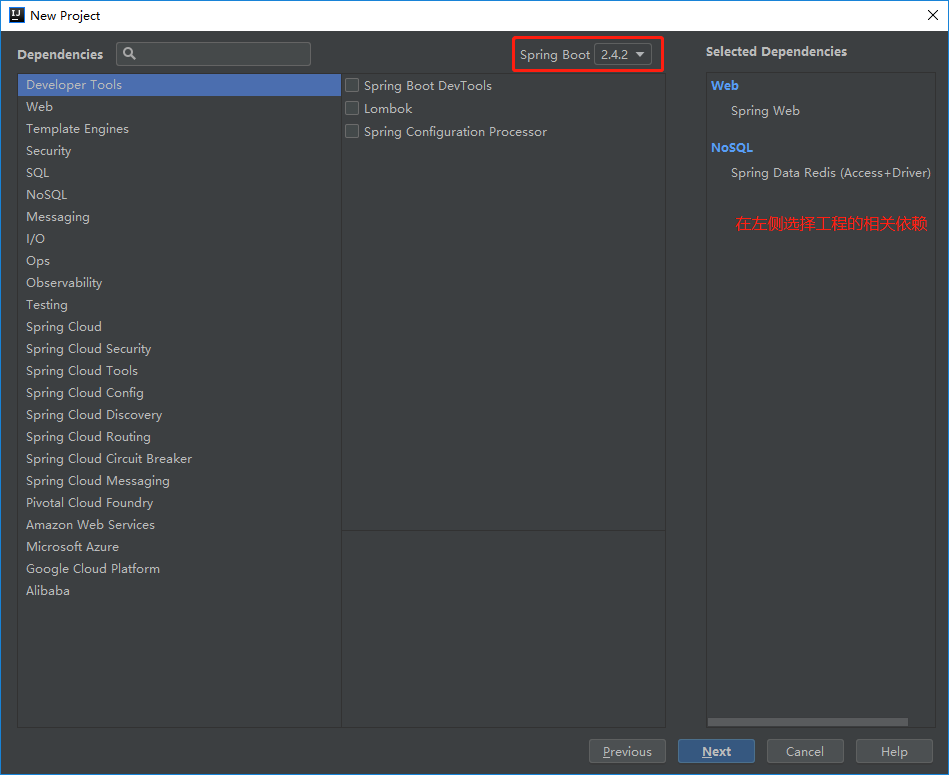
4)Next
确认工程名称和工程本地存储路径,然后点击Finish父工程即创建完成

5)删掉src目录
因为我们创建的是父工程,只作为管理工程,里面还有子模块,因此不需要src目录,删掉即可
6)修改pom.xml
    <groupId>com.xiaomi.mitv.mall.sync</groupId>
    <artifactId>mitv-mall-sync</artifactId>
    <version>0.0.1-SNAPSHOT</version>
    <name>mitv-mall-sync</name>
    <packaging>pom</packaging>  <!--修改jar为pom-->
    <description>Demo project for Spring Boot</description>
方式二、maven
1)File-New-Project-Maven
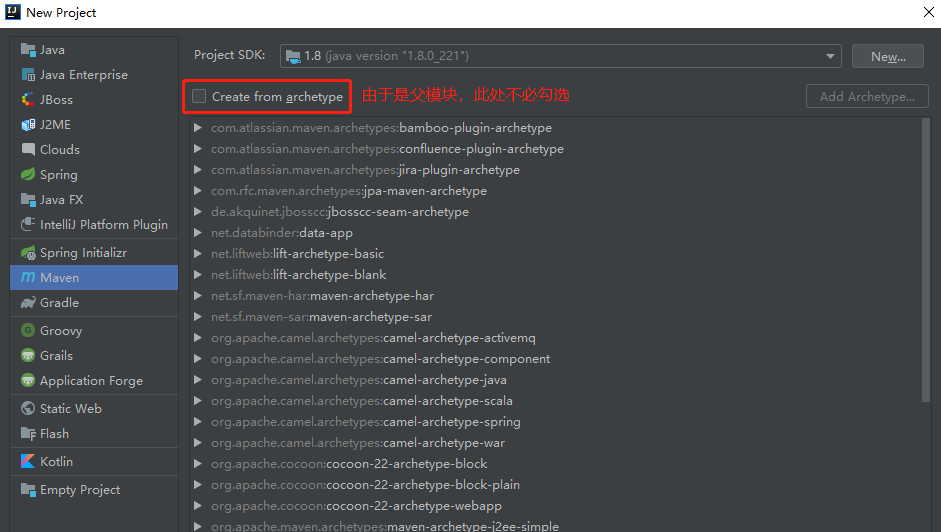
2)Next

3)Next
确认工程名,然后点击finish即完成
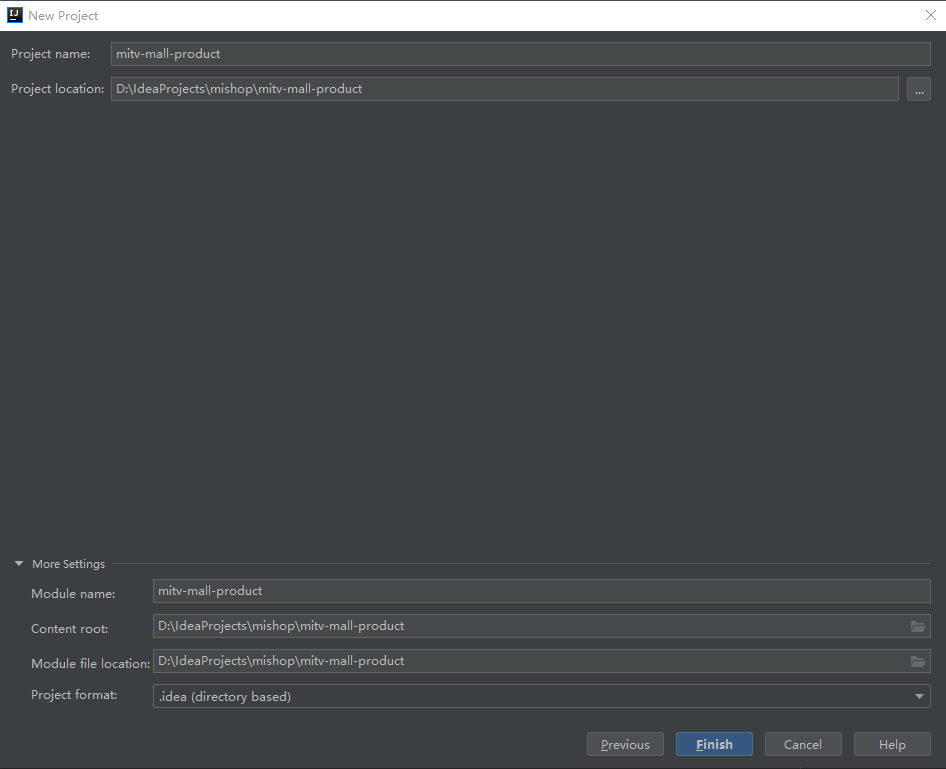
4)删除src目录
2、创建启动子模块(可部署)
1)在创建的工程名上右键 New-Module-Spring Initializr
2)Next
输入模块名,包名等相关信息
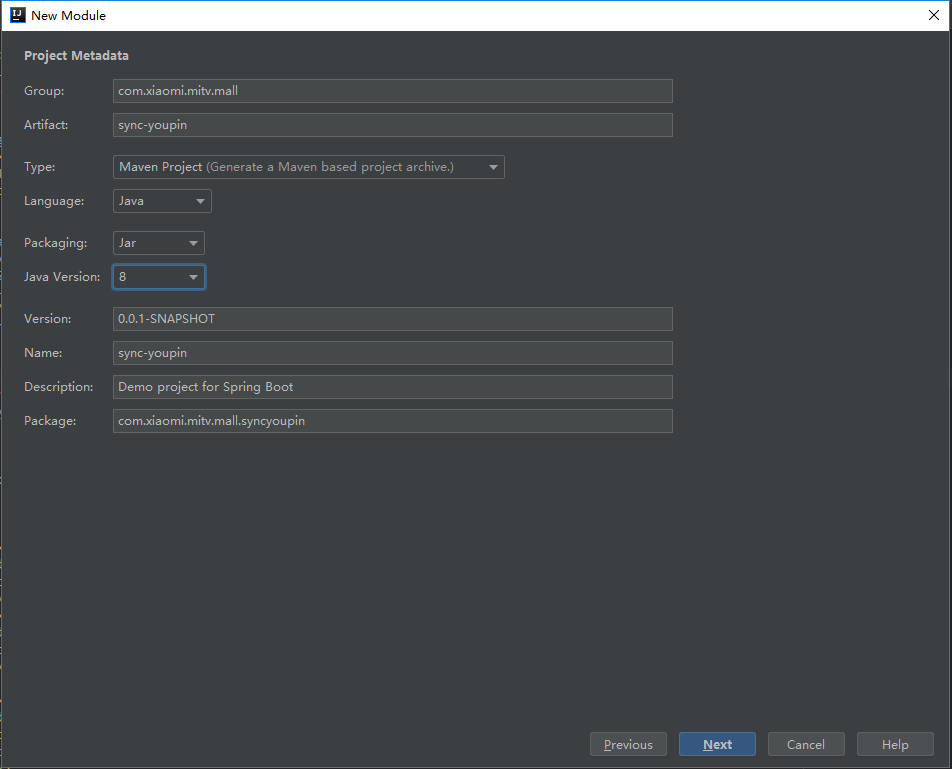
3)Next
选择SpringBoot版本和相关依赖,如果是Web项目,选择Web依赖
4)Next
确认模块名和模块路径,点击Finish完成
5)在父pom.xml中添加刚创建的子模块
  <modules>
        <module>sync-common</module>
        <module>sync-mimall</module>
        <module>sync-youpin</module>
    </modules>
6)修改子模块pom.xml parent
    <parent>
        <artifactId>mitv-mall-sync</artifactId>
        <groupId>com.xiaomi.mitv.mall.sync</groupId>
        <version>0.0.1-SNAPSHOT</version>
        <relativePath>../pom.xml</relativePath>
    </parent>
3、创建普通子模块(仅作为启动模块的依赖,如common模块)
1)在创建的工程名上右键 New-Module-Maven

2)Next

3)Next
确认模块名,点击Finish即完成。父pom.xml中会自动在modules标签内添加新增的子模块

4)修改子模块pom.xml parent
    <parent>
        <artifactId>mitv-mall-sync</artifactId>
        <groupId>com.xiaomi.mitv.mall.sync</groupId>
        <version>0.0.1-SNAPSHOT</version>
        <relativePath>../pom.xml</relativePath>
    </parent>
5)若不需要,如common模块,删除resources和test 目录
4、区分环境配置
1)项目结构

新建sync-deploy目录,里面包含三个环境的配置
2)其中一个部署模块的pom配置
<build>
        <!--指定配置文件的地址,里面的配置会作为参数替换其他配置文件的占位符-->
        <filters>
            <filter>../sync-deploy/config/${active.env}/config.properties</filter> <!-- 多个文件可配置多个filter -->
        </filters>
        <resources>
            <resource>
                <directory>${basedir}/src/main/resources</directory>
                <filtering>true</filtering>
            </resource>
        </resources>
        <plugins>
            <plugin>
                <groupId>org.springframework.boot</groupId>
                <artifactId>spring-boot-maven-plugin</artifactId>
            </plugin>
        </plugins>
    </build>

    <profiles>
        <profile>
            <id>dev</id>
            <properties>
                <active.env>dev</active.env>
            </properties>
            <activation>
                <activeByDefault>true</activeByDefault>
            </activation>
            <build>
                <plugins>
                    <plugin>
                        <groupId>org.apache.maven.plugins</groupId>
                        <artifactId>maven-resources-plugin</artifactId>
                        <executions>
                            <execution>
                                <id>copy-resources</id>
                                <phase>validate</phase>
                                <goals>
                                    <goal>copy-resources</goal>
                                </goals>
                                <configuration>
                                    <outputDirectory>${basedir}/target/classes</outputDirectory>
                                    <!--资源过滤-->
                                    <resources>
                                        <resource>
                                            <directory>../sync-deploy/config/dev</directory>
                                            <filtering>true</filtering>
                                            <includes>
                                                <include>logback.xml</include>
                                                <include>redis.properties</include> <!-- 把需要的copy过来 -->
                                            </includes>
                                        </resource>
                                    </resources>
                                </configuration>
                            </execution>
                        </executions>
                    </plugin>
                </plugins>
            </build>
        </profile>
        <profile>
            <id>pre</id>
            <properties>
                <active.env>pre</active.env>
            </properties>
            <build>
                <plugins>
                    <plugin>
                        <groupId>org.apache.maven.plugins</groupId>
                        <artifactId>maven-resources-plugin</artifactId>
                        <executions>
                            <execution>
                                <id>copy-resources</id>
                                <phase>validate</phase>
                                <goals>
                                    <goal>copy-resources</goal>
                                </goals>
                                <configuration>
                                    <!--复制到哪去-->
                                    <outputDirectory>${basedir}/target/classes</outputDirectory>
                                    <!--资源过滤-->
                                    <resources>
                                        <resource>
                                            <directory>../sync-deploy/config/pre</directory>
                                            <filtering>true</filtering>
                                            <!--复制哪些文件过来-->
                                            <includes>
                                                <include>logback.xml</include>
                                                <include>redis.properties</include>
                                            </includes>
                                        </resource>
                                    </resources>
                                </configuration>
                            </execution>
                        </executions>
                    </plugin>
                </plugins>
            </build>
        </profile>
        <profile>
            <id>prd</id>
            <properties>
                <active.env>prd</active.env>
            </properties>
            <build>
                <plugins>
                    <plugin>
                        <groupId>org.apache.maven.plugins</groupId>
                        <artifactId>maven-resources-plugin</artifactId>
                        <executions>
                            <execution>
                                <id>copy-resources</id>
                                <phase>validate</phase>
                                <goals>
                                    <goal>copy-resources</goal>
                                </goals>
                                <configuration>
                                    <!--复制到哪去-->
                                    <outputDirectory>${basedir}/target/classes</outputDirectory>
                                    <!--资源过滤-->
                                    <resources>
                                        <resource>
                                            <directory>../sync-deploy/config/prd</directory>
                                            <filtering>true</filtering>
                                            <!--复制哪些文件过来-->
                                            <includes>
                                                <include>logback.xml</include>
                                                <include>redis.properties</include>
                                            </includes>
                                        </resource>
                                    </resources>
                                </configuration>
                            </execution>
                        </executions>
                    </plugin>
                </plugins>
            </build>
        </profile>
    </profiles>
3)打包后,将对应环境下的文件复制进了target/classes目录中,并解析了其中的占位符

END.