可以画画啊!可以画画啊!可以画画啊!
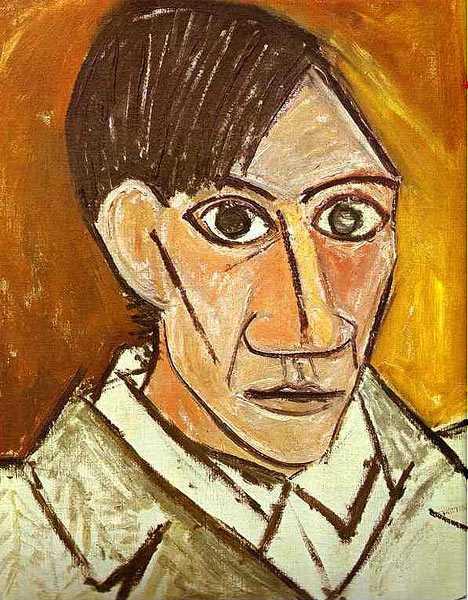
<img src="https://pic3.zhimg.com/50/98cab4f35d2084f969a8189e90b47dee_hd.jpg" data-rawwidth="468" data-rawheight="600" class="origin_image zh-lightbox-thumb" width="468" data-original="https://pic3.zhimg.com/98cab4f35d2084f969a8189e90b47dee_r.jpg"> 这个是世界名画”毕加索的自画像 “(我也不懂什么是世界名画,但是我会google呀哈哈),以这张图片为模板,让计算机去学习这张图片的风格(至于怎么学习请参照这篇国外大牛的论文http://arxiv.org/abs/1508.06576
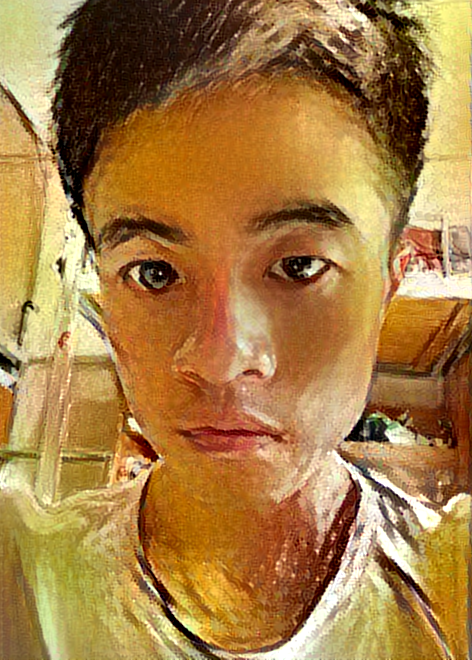
<img src="https://pic2.zhimg.com/50/7ca4eb6c6088ad9880a4bc1a9993ed35_hd.jpg" data-rawwidth="249" data-rawheight="365" class="content_image" width="249"> 结果就变成下面这个样子了
<img src="https://pic1.zhimg.com/50/b869feb93320634a2c05752efd02bc74_hd.png" data-rawwidth="472" data-rawheight="660" class="origin_image zh-lightbox-thumb" width="472" data-original="https://pic1.zhimg.com/b869feb93320634a2c05752efd02bc74_r.png"> 咦,吓死宝宝了,不过好玩的东西当然要身先士卒啦!
接着由于距离开学也越来越近了,为了给广大新生营造一个良好的校园,噗!为了美化校园在新生心目中的形象学长真的不是有意要欺骗你们的。特意制作了下面的《梵高笔下的东华理工大学》,是不是没有听说过这个大学,的确她就是一个普通的二本学校不过这都不是重点。
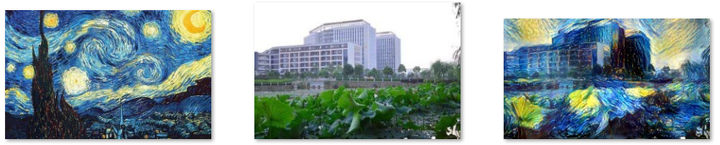
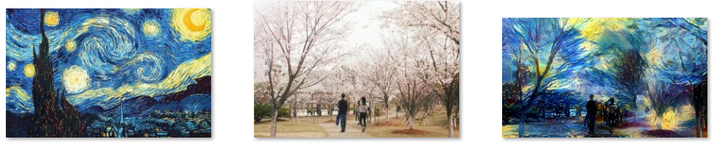
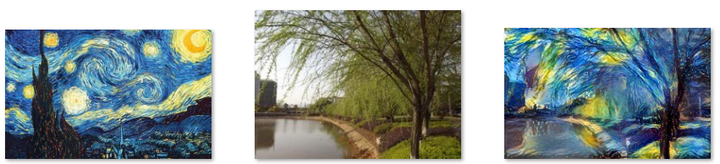
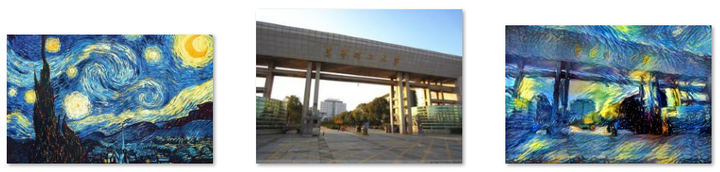
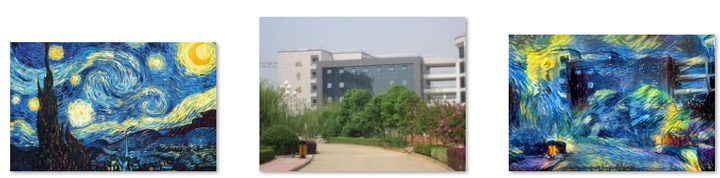
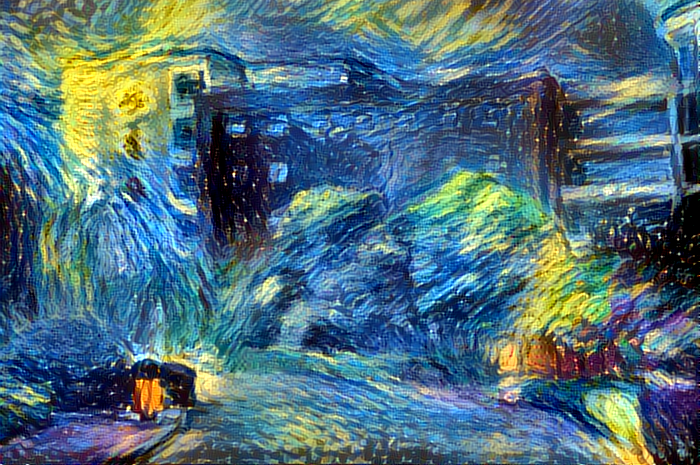
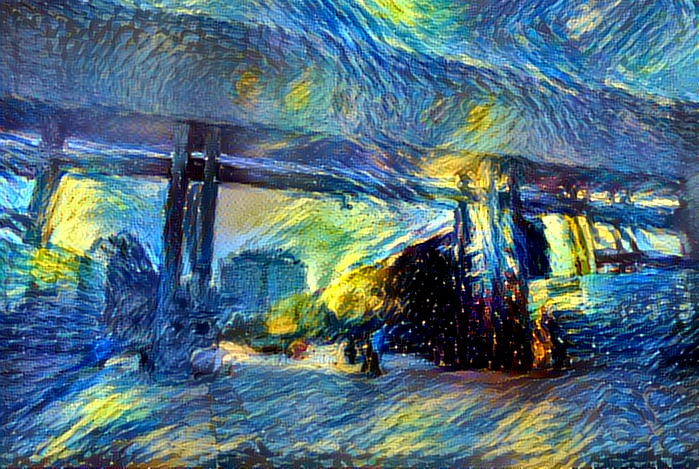
左边的图片是梵高的《星空》作为模板,中间的图片是待转化的图片,右边的图片是结果
<img src="https://pic2.zhimg.com/50/16b2c1522cea0ae43c4d2c1cc6871b29_hd.png" data-rawwidth="852" data-rawheight="172" class="origin_image zh-lightbox-thumb" width="852" data-original="https://pic2.zhimg.com/16b2c1522cea0ae43c4d2c1cc6871b29_r.png"> 这是我们学校的内“湖”(池塘)
<img src="https://pic1.zhimg.com/50/193695070e8614fb75b4735ad2d68734_hd.png" data-rawwidth="856" data-rawheight="173" class="origin_image zh-lightbox-thumb" width="856" data-original="https://pic1.zhimg.com/193695070e8614fb75b4735ad2d68734_r.png"> 校园里的樱花广场(个人觉得这是我校最浪漫的地方了)
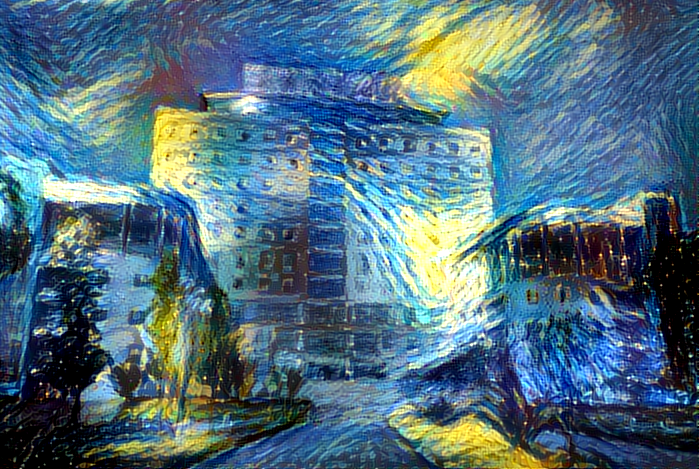
<img src="https://pic3.zhimg.com/50/dd333413cb332f5d0681ba479249f802_hd.png" data-rawwidth="848" data-rawheight="206" class="origin_image zh-lightbox-thumb" width="848" data-original="https://pic3.zhimg.com/dd333413cb332f5d0681ba479249f802_r.png"> 不多说,学校图书馆
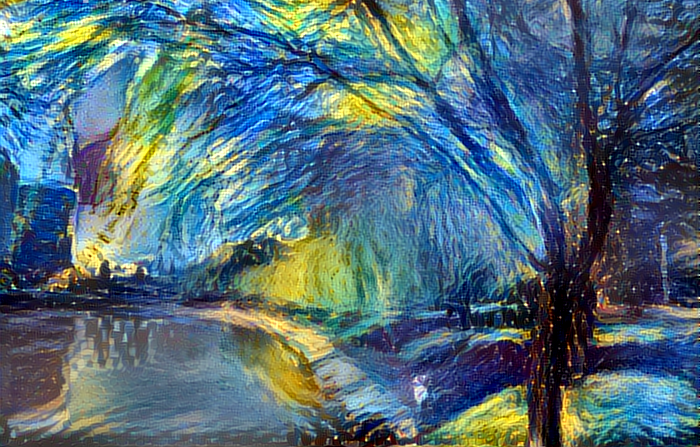
<img src="https://pic4.zhimg.com/50/9029082a8fdb697873f7250d0137a617_hd.png" data-rawwidth="851" data-rawheight="194" class="origin_image zh-lightbox-thumb" width="851" data-original="https://pic4.zhimg.com/9029082a8fdb697873f7250d0137a617_r.png"> “池塘”边的柳树
<img src="https://pic1.zhimg.com/50/8d8dcbca85b62f276129d6d237d4d6fc_hd.png" data-rawwidth="852" data-rawheight="204" class="origin_image zh-lightbox-thumb" width="852" data-original="https://pic1.zhimg.com/8d8dcbca85b62f276129d6d237d4d6fc_r.png"> 学校东大门
<img src="https://pic1.zhimg.com/50/ad22383f37f56d92517b18bb830ee7c8_hd.png" data-rawwidth="862" data-rawheight="164" class="origin_image zh-lightbox-thumb" width="862" data-original="https://pic1.zhimg.com/ad22383f37f56d92517b18bb830ee7c8_r.png"> 学校测绘楼
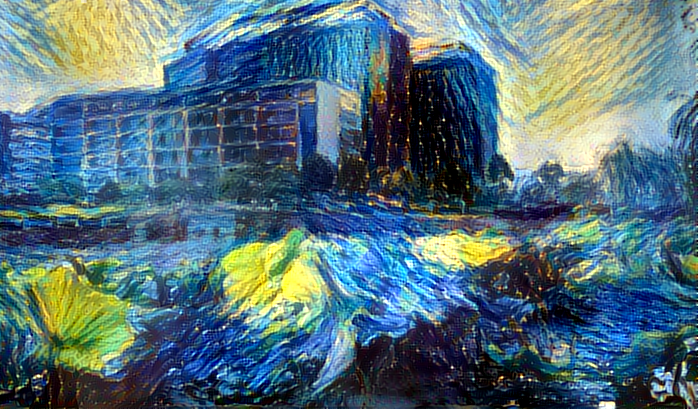
<img src="https://pic3.zhimg.com/50/cb6d76286324c857528892014d04bb3e_hd.png" data-rawwidth="852" data-rawheight="211" class="origin_image zh-lightbox-thumb" width="852" data-original="https://pic3.zhimg.com/cb6d76286324c857528892014d04bb3e_r.png"> 学校地学楼
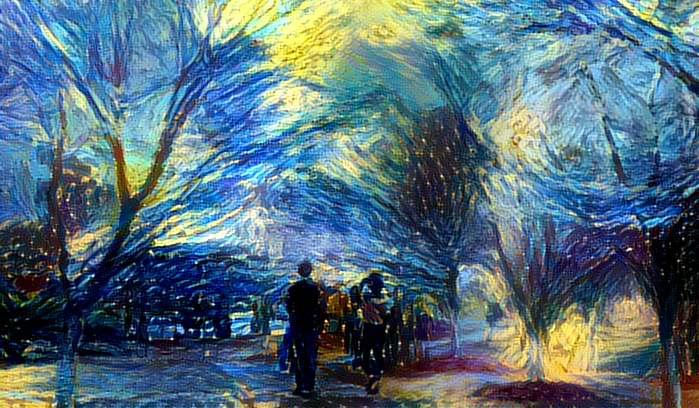
为了便于观看,附上生成后的大图:
<img src="https://pic3.zhimg.com/50/d7ee30ae90b3d81049abee478e8e75b6_hd.png" data-rawwidth="699" data-rawheight="408" class="origin_image zh-lightbox-thumb" width="699" data-original="https://pic3.zhimg.com/d7ee30ae90b3d81049abee478e8e75b6_r.png"> <img src="https://pic3.zhimg.com/50/c04d56309b493bd2a0d3db26d0916206_hd.png" data-rawwidth="700" data-rawheight="465" class="origin_image zh-lightbox-thumb" width="700" data-original="https://pic3.zhimg.com/c04d56309b493bd2a0d3db26d0916206_r.png"> <img src="https://pic1.zhimg.com/50/f41d8d145b8a8fe30abba37ede85c778_hd.png" data-rawwidth="695" data-rawheight="370" class="origin_image zh-lightbox-thumb" width="695" data-original="https://pic1.zhimg.com/f41d8d145b8a8fe30abba37ede85c778_r.png"> <img src="https://pic1.zhimg.com/50/797a561056109585428a10c9a6278874_hd.png" data-rawwidth="700" data-rawheight="447" class="origin_image zh-lightbox-thumb" width="700" data-original="https://pic1.zhimg.com/797a561056109585428a10c9a6278874_r.png"> <img src="https://pic1.zhimg.com/50/d4e2ac5460d08d0cd9af15bc154574e4_hd.png" data-rawwidth="699" data-rawheight="469" class="origin_image zh-lightbox-thumb" width="699" data-original="https://pic1.zhimg.com/d4e2ac5460d08d0cd9af15bc154574e4_r.png"> <img src="https://pic4.zhimg.com/50/7ea97eab41a2c2eb32d356b1afd9ca2f_hd.png" data-rawwidth="698" data-rawheight="409" class="origin_image zh-lightbox-thumb" width="698" data-original="https://pic4.zhimg.com/7ea97eab41a2c2eb32d356b1afd9ca2f_r.png"> <img src="https://pic1.zhimg.com/50/5f1f741537b28b9ec9e0d6e66b76a2cc_hd.png" data-rawwidth="699" data-rawheight="469" class="origin_image zh-lightbox-thumb" width="699" data-original="https://pic1.zhimg.com/5f1f741537b28b9ec9e0d6e66b76a2cc_r.png"> 别看才区区七张图片,可是这让计算机运行了好长的时间,期间电脑死机两次!
好了广告打完了,下面是福利时间
在本地用keras搭建风格转移平台 1.相关依赖库的安装
# 命令行安装keras、h5py、tensorflow
pip3 install keras
pip3 install h5py
pip3 install tensorflow
如果tensorflowan命令行安装失败,可以在这里下载whl包Python Extension Packages for Windows (进入网址后ctrl+F输入tensorflow可以快速搜索)
2.配置运行环境 下载VGG16模型 https://pan.baidu.com/s/1i5wYN1z
<img src="https://pic1.zhimg.com/50/v2-b06fa971e3b6ebc905097f89be3ce39c_hd.png" data-rawwidth="654" data-rawheight="129" class="origin_image zh-lightbox-thumb" width="654" data-original="https://pic1.zhimg.com/v2-b06fa971e3b6ebc905097f89be3ce39c_r.png"> 3.代码编写
from __future__ import print_function
from keras.preprocessing.image import load_img, img_to_array
from scipy.misc import imsave
import numpy as np
from scipy.optimize import fmin_l_bfgs_b
import time
import argparse

from keras.applications import vgg16
from keras import backend as K

parser = argparse.ArgumentParser(description='Neural style transfer with Keras.')
parser.add_argument('base_image_path', metavar='base', type=str,
                    help='Path to the image to transform.')
parser.add_argument('style_reference_image_path', metavar='ref', type=str,
                    help='Path to the style reference image.')
parser.add_argument('result_prefix', metavar='res_prefix', type=str,
                    help='Prefix for the saved results.')
parser.add_argument('--iter', type=int, default=10, required=False,
                    help='Number of iterations to run.')
parser.add_argument('--content_weight', type=float, default=0.025, required=False,
                    help='Content weight.')
parser.add_argument('--style_weight', type=float, default=1.0, required=False,
                    help='Style weight.')
parser.add_argument('--tv_weight', type=float, default=1.0, required=False,
                    help='Total Variation weight.')

args = parser.parse_args()
base_image_path = args.base_image_path
style_reference_image_path = args.style_reference_image_path
result_prefix = args.result_prefix
iterations = args.iter

# these are the weights of the different loss components
total_variation_weight = args.tv_weight
style_weight = args.style_weight
content_weight = args.content_weight

# dimensions of the generated picture.
width, height = load_img(base_image_path).size
img_nrows =