gitlab的安装
首先在网上下载好任意版本gitlab的rpm包
推荐下面的地址:
https://mirrors.tuna.tsinghua.edu.cn/gitlab-ce/yum/el7/gitlab-ce-8.8.5-ce.1.el7.x86_64.rpm
 1 [root@linux-node1 ~]# rz -E
 2
 3 rz waiting to receive.
 4
 5 [root@linux-node1 ~]# ls
 6
 7 anaconda-ks.cfg  gitlab-ce-8.8.5-ce.1.el7.x86_64.rpm
 8
 9 [root@linux-node1 ~]# rpm -ivh gitlab-ce-8.8.5-ce.1.el7.x86_64.rpm #安装
10
11 Preparing...################################# [100%]
12
13 Updating / installing...
14
15    1:gitlab-ce-8.8.5-ce.1.el7         ################################# [100%]
16
17 gitlab: Thank you for installing GitLab!
18
19 gitlab: To configure and start GitLab, RUN THE FOLLOWING COMMAND:
20
21
22
23 sudogitlab-ctl reconfigure  #配置并启动gitlab
24
25
26
27 gitlab: GitLab should be reachable at http://linux-node1  默认的访问地址
28
29 gitlab: Otherwise configure GitLab for your system by editing /etc/gitlab/gitlab.rb file  #gitlab的配置文件,修改之后需要重新gitlab-ctl reconfigure
30
31 gitlab: And running reconfigure again.
32
33 gitlab:
34
35 gitlab: For a comprehensive list of configuration options please see the Omnibus GitLab readme
36
37 gitlab: https://gitlab.com/gitlab-org/omnibus-gitlab/blob/master/README.md
38
39 gitlab:
40
41 It looks like GitLab has not been configured yet; skipping the upgrade script.
42
43 [root@linux-node1 ~]#
这里我先修改下配置文件
vim /etc/gitlab/gitlab.rb #修改配置文件
修改结果如下:
[root@linux-node1 ~]# grep -n "^[a-Z]" /etc/gitlab/gitlab.rb

11:external_url 'http://192.168.56.11'


[root@linux-node1 ~]# gitlab-ctl reconfigure  #配置并启动gitlab
打开浏览器输入http://192.168.56.11 #192.168.56.11我的本机ip
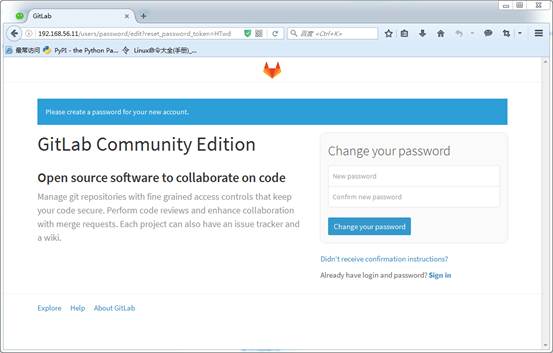
第一次登录要求设置root密码
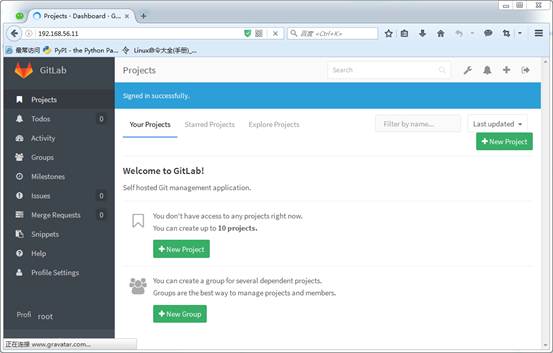
登录成功之后,是这样的
汉化:
[root@linux-node1 ~]# rz

[root@linux-node1 ~]# ls

anaconda-ks.cfggitlab-ce-8.8.5-ce.1.el7.x86_64.rpmgitlabhq.tar.gz

[root@linux-node1 ~]# tar xf gitlabhq.tar.gz

[root@linux-node1 ~]# ls

anaconda-ks.cfggitlab-ce-8.8.5-ce.1.el7.x86_64.rpmgitlabhq  gitlabhq.tar.gz
###关于这个也可以直接git clone git clone https://github.com/larryli/gitlabhq.git
[root@linux-node1 ~]# cp -r /opt/gitlab/embedded/service/gitlab-rails{,.ori}

[root@linux-node1 ~]# gitlab-ctl stop

ok: down: gitlab-workhorse: 1s, normally up

ok: down: logrotate: 0s, normally up

ok: down: nginx: 0s, normally up

ok: down: postgresql: 1s, normally up

ok: down: redis: 0s, normally up

ok: down: sidekiq: 0s, normally up

ok: down: unicorn: 0s, normally up

[root@linux-node1 ~]# cp -rf /root/gitlabhq/* /opt/gitlab/embedded/service/gitlab-rails/

cp: cannot overwrite non-directory ‘/opt/gitlab/embedded/service/gitlab-rails/log’ with directory ‘/root/gitlabhq/log’

cp: cannot overwrite non-directory ‘/opt/gitlab/embedded/service/gitlab-rails/tmp’ with directory ‘/root/gitlabhq/tmp’
#这里的错误,忽略,因为之前已经设置gitlab的root密码了
[root@linux-node1 ~]# gitlab-ctl start

ok: run: gitlab-workhorse: (pid 25910) 0s

ok: run: logrotate: (pid 25914) 0s

ok: run: nginx: (pid 25920) 1s

ok: run: postgresql: (pid 25925) 0s

ok: run: redis: (pid 25933) 1s

ok: run: sidekiq: (pid 25937) 0s

ok: run: unicorn: (pid 25941) 0s
汉化完成之后的效果