参考:
Building Autoencoders in Keras[https://blog.keras.io/building-autoencoders-in-keras.html]
Keras上实现AutoEncoder自编码器[https://blog.csdn.net/marsjhao/article/details/68928486]
全连接
import tensorflow as tf
from tensorflow import keras
from tensorflow.keras import layers
from tensorflow.keras.layers import Dense, Input
from tensorflow.keras.models import Model
from tensorflow.keras.datasets import fashion_mnist


import numpy as np
np.random.seed(1337)  # for reproducibility

# from keras.datasets import mnist
# from keras.models import Model #泛型模型
# from keras.layers import Dense, Input
import matplotlib.pyplot as plt

# X shape (60,000 28x28), y shape (10,000, )
(x_train, _), (x_test, y_test) = fashion_mnist.load_data()

# 数据预处理
x_train = x_train.astype('float32') / 255.        # minmax_normalized
x_test = x_test.astype('float32') / 255.        # minmax_normalized
x_train = x_train.reshape((x_train.shape[0], -1))
x_test = x_test.reshape((x_test.shape[0], -1))
print(x_train.shape)
print(x_test.shape)


#####model-1#################################################################################
# this is our input placeholder
input_img = Input(shape=(784,))

# 编码层
encoded = Dense(128, activation='relu')(input_img)
encoded = Dense(64, activation='relu')(encoded)
encoder_output = Dense(32, activation='relu')(encoded)

# 解码层
decoded = Dense(64, activation='relu')(encoder_output)
decoded = Dense(128, activation='relu')(decoded)
decoded = Dense(784, activation='tanh')(decoded)

# 构建自编码模型
autoencoder = Model(inputs=input_img, outputs=decoded)

# 构建编码模型
encoder = Model(inputs=input_img, outputs=encoder_output)

# compile autoencoder
autoencoder.compile(optimizer='adam', loss='mse')

autoencoder.summary()
encoder.summary()
#####model#######################################################################################


#####model-2#####increase the depth and width of the autoencoder############################################################################
# #this is our input placeholder
# input_img = Input(shape=(784,))
#
# # 编码层
# encoded = Dense(512, activation='relu')(input_img)
# encoded = Dense(256, activation='relu')(encoded)
# encoded = Dense(128, activation='relu')(encoded)
# encoded = Dense(64, activation='relu')(encoded)
# encoder_output = Dense(32, activation='relu')(encoded)
#
# # 解码层
# decoded = Dense(64, activation='relu')(encoder_output)
# decoded = Dense(128, activation='relu')(decoded)
# decoded = Dense(256, activation='relu')(decoded)
# decoded = Dense(512, activation='relu')(decoded)
# decoded = Dense(784, activation='tanh')(decoded)
#
# # 构建自编码模型
# autoencoder = Model(inputs=input_img, outputs=decoded)
#
# # 构建编码模型
# encoder = Model(inputs=input_img, outputs=encoder_output)
#
# # compile autoencoder
# autoencoder.compile(optimizer='adam', loss='mse')
#
# autoencoder.summary()
# encoder.summary()
#####model#######################################################################################


# training
autoencoder.fit(x_train, x_train, epochs=30, batch_size=256, shuffle=True,validation_data=(x_test,x_test))

# # plotting
# encoded_imgs = encoder.predict(x_test)
#
# plt.scatter(encoded_imgs[:, 0], encoded_imgs[:, 1], c=y_test,s=3)
# plt.colorbar()
# plt.show()

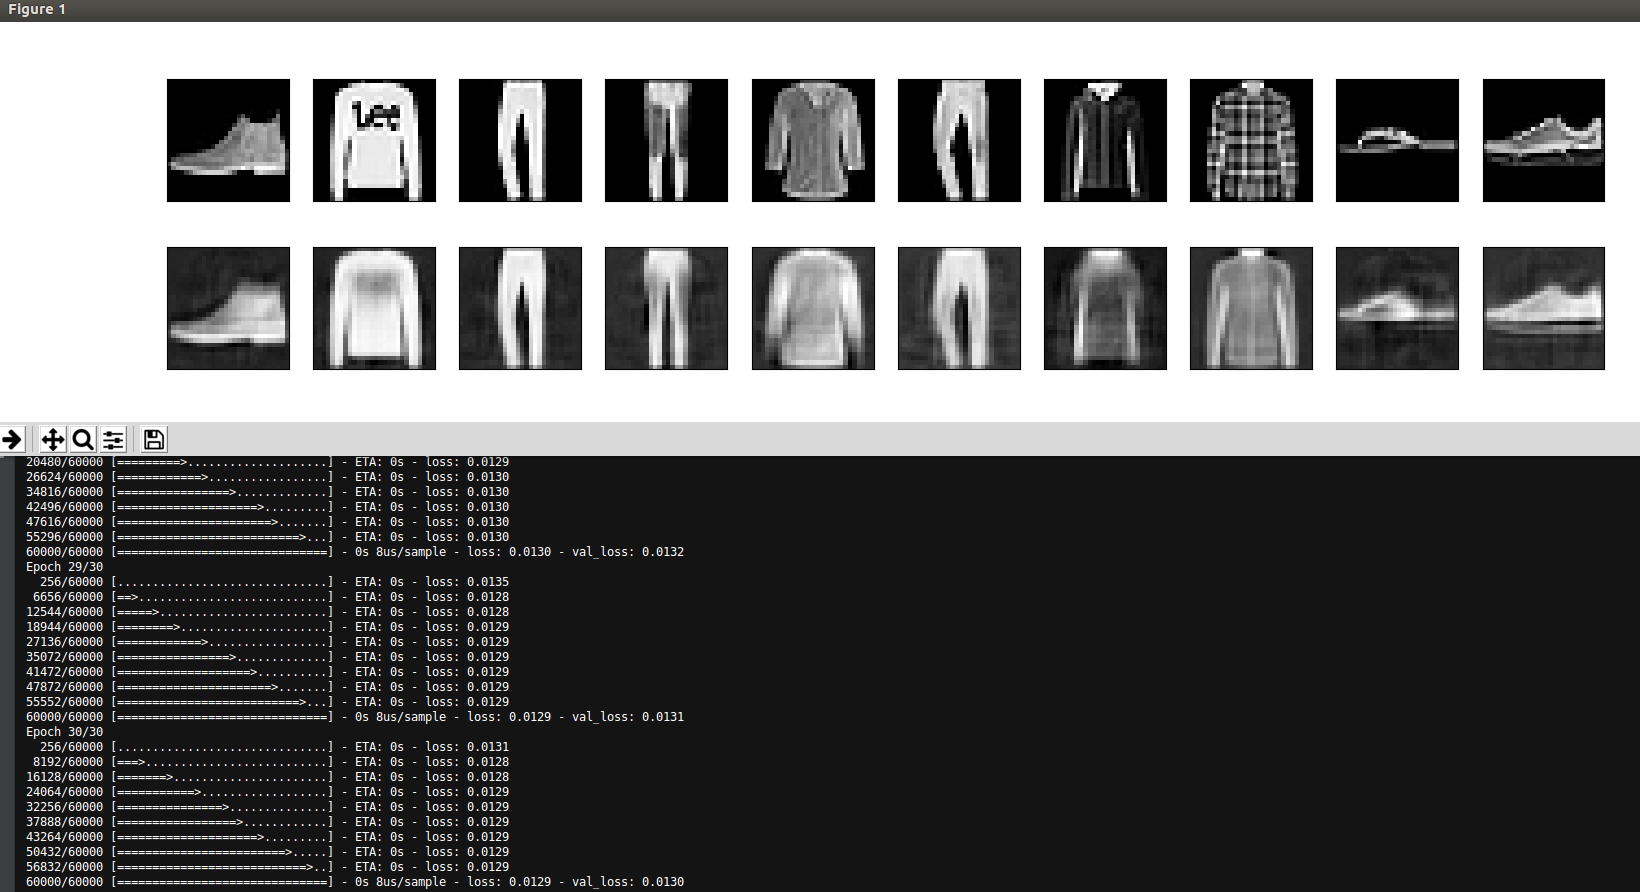
decoded_imgs = autoencoder.predict(x_test)
# use Matplotlib (don't ask)
import matplotlib.pyplot as plt

n = 10  # how many digits we will display
plt.figure(figsize=(20, 4))
for i in range(n):
    # display original
    ax = plt.subplot(2, n, i + 1)
    plt.imshow(x_test[i].reshape(28, 28))
    plt.gray()
    ax.get_xaxis().set_visible(False)
    ax.get_yaxis().set_visible(False)

    # display reconstruction
    ax = plt.subplot(2, n, i + 1 + n)
    plt.imshow(decoded_imgs[i].reshape(28, 28))
    plt.gray()
    ax.get_xaxis().set_visible(False)
    ax.get_yaxis().set_visible(False)
plt.show()

卷积
import tensorflow as tf
from tensorflow import keras
from tensorflow.keras import layers
from tensorflow.keras.layers import Dense, Input, Conv2D, MaxPooling2D, UpSampling2D
from tensorflow.keras.models import Model
from tensorflow.keras.datasets import fashion_mnist
# from keras.layers.convolutional import


import numpy as np
np.random.seed(1337)  # for reproducibility

# from keras.datasets import mnist
# from keras.models import Model #泛型模型
# from keras.layers import Dense, Input
import matplotlib.pyplot as plt

# X shape (60,000 28x28), y shape (10,000, )
(x_train, y_train), (x_test, y_test) = fashion_mnist.load_data()


width = 28
height = 28
depth = 1
x_train = x_train.reshape(x_train.shape[0], width, height, depth).astype('float32')
x_test = x_test.reshape(x_test.shape[0], width, height, depth).astype('float32')

# 归一化处理,将像素值控制在 0 - 1
x_train /= 255.0
x_test /= 255.0

print(x_train.shape)
print(x_test.shape)


# this is our input placeholder
input_img = Input(shape=(28,28,1))

# 编码层
# encoded = Conv2D(filters=256, kernel_size=(3,3), strides=(1,1), padding='same', input_shape=(width, height, 1), activation='relu')(input_img)
encoded = Conv2D(filters=256, kernel_size=(3,3), strides=(1,1), padding='same', activation='relu')(input_img)
encoded = Conv2D(filters=128, kernel_size=(3,3), strides=(1,1), padding='same', activation='relu')(encoded)
encoded = MaxPooling2D(pool_size=(2, 2))(encoded)
encoder_output = Conv2D(filters=64, kernel_size=(3,3), strides=(1,1), padding='same', activation='relu')(encoded)

decoded =  Conv2D(filters=128, kernel_size=(3,3), strides=(1,1), padding='same', activation='relu')(encoder_output)
decoded =  Conv2D(filters=64, kernel_size=(3,3), strides=(1,1), padding='same', activation='relu')(decoded)
decoded = UpSampling2D(size=(2,2))(decoded)
decoded =  Conv2D(filters=1, kernel_size=(3,3), strides=(1,1), padding='same', activation='relu')(decoded)

# 构建自编码模型
autoencoder = Model(inputs=input_img, outputs=decoded)


# compile autoencoder
autoencoder.compile(optimizer='adam', loss='mse')

autoencoder.summary()

# training
autoencoder.fit(x_train, x_train, epochs=15, batch_size=256, shuffle=True,validation_data=(x_test,x_test))


decoded_imgs = autoencoder.predict(x_test)
# use Matplotlib (don't ask)
import matplotlib.pyplot as plt

n = 10  # how many digits we will display
plt.figure(figsize=(20, 4))
for i in range(n):
    # display original
    ax = plt.subplot(2, n, i + 1)
    plt.imshow(x_test[i+20].reshape(28, 28))
    plt.gray()
    ax.get_xaxis().set_visible(False)
    ax.get_yaxis().set_visible(False)

    # display reconstruction
    ax = plt.subplot(2, n, i + 1 + n)
    plt.imshow(decoded_imgs[i+20].reshape(28, 28))
    plt.gray()
    ax.get_xaxis().set_visible(False)
    ax.get_yaxis().set_visible(False)
plt.show()
