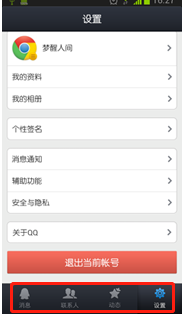
 在web 里面叫tabs 选项卡。
这里从基本的开始:
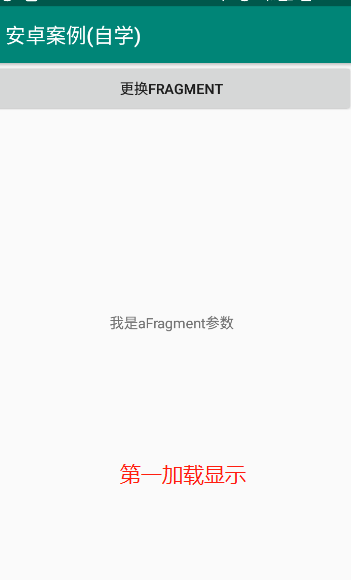
场景:ContainerActivity 自动添加一个afragment ,ContainerActivity 页面有个按钮 ,点击按钮替换成bfragment。
ContainerActivity 代码: 这里有个按钮,和 FrameLayout
<?xml version="1.0" encoding="utf-8"?>
<RelativeLayout xmlns:android="http://schemas.android.com/apk/res/android"
    xmlns:app="http://schemas.android.com/apk/res-auto"
    xmlns:tools="http://schemas.android.com/tools"
    android:layout_width="match_parent"
    android:layout_height="match_parent"
    tools:context=".fragment.ContainerActivity">

    <Button
        android:id="@+id/btn_chang"
        android:layout_width="match_parent"
        android:layout_height="50dp"
        android:text="更换fragment"/>

    <FrameLayout
        android:id="@+id/fl_container"
        android:layout_width="match_parent"
        android:layout_height="match_parent" />
</RelativeLayout>
后台代码: 在create里面 通过 getSupportFragmentManager实例化得到 fragment 开启了beginTransaction后面add了一个 aFragment (本质是个类 对象 有对应的xml布局文件),
这里我也不理解为啥要开启事务,学习的是时候看别人都是这样写的,很奇怪
public class ContainerActivity extends AppCompatActivity {

    Fragment aFragment;
    Fragment bFragment;
    Button btn_chang;

    @Override
    protected void onCreate(Bundle savedInstanceState) {
        super.onCreate(savedInstanceState);
        setContentView(R.layout.activity_container);

        /*实例化 aFragment*/
        /*如何向fragment 传递参数*/
        aFragment=AFragment.newInstance("我是aFragment参数");


        /*点击事件*/
        btn_chang=findViewById(R.id.btn_chang);
        btn_chang.setOnClickListener(new View.OnClickListener() {
            @Override
            public void onClick(View v) {
                if (bFragment==null){
                    bFragment=new BFragment();
                }
                getSupportFragmentManager().beginTransaction().replace(R.id.fl_container,bFragment).commitAllowingStateLoss();;
            }
        });

        /*aFragment 添加到 activity 重点记得调用 commit这里使用commitAllowingStateLoss 横屏竖屏宽容性错误 */
        getSupportFragmentManager().beginTransaction().add(R.id.fl_container,aFragment,"A").commitAllowingStateLoss();
    }
}
aFragment里面就一个行文字显示 没什么解释的
<?xml version="1.0" encoding="utf-8"?>
<LinearLayout xmlns:android="http://schemas.android.com/apk/res/android"
    android:orientation="vertical" android:layout_width="match_parent"
    android:layout_height="match_parent"
    android:gravity="center">

    <TextView
        android:id="@+id/tv_title"
        android:layout_width="match_parent"
        android:layout_height="wrap_content"
        android:text="我是a fragment"
        android:gravity="center_horizontal"/>
</LinearLayout>


生命周期:(在前端框架也有各种生命周期 个人粗暴理解 在什么时候干什么事,这帮家伙定义的好的)没什么好的说的 实现所有方法 ,打印 看日志
package com.example.androidlsw.fragment;

import android.app.Activity;
import android.content.Context;
import android.os.Bundle;
import android.util.Log;
import android.view.LayoutInflater;
import android.view.View;
import android.view.ViewGroup;

import androidx.fragment.app.Fragment;

import com.example.androidlsw.R;

public class Fragment1 extends Fragment {
    public static final String TAG = "Fragment1";

    @Override
    public View onCreateView(LayoutInflater inflater, ViewGroup container, Bundle savedInstanceState) {
        Log.d(TAG, "onCreateView");
        return inflater.inflate(R.layout.fragment1, container, false);
    }

    @Override
    public void onAttach(Context context) {
        super.onAttach(context);
        Log.d(TAG, "onAttach");
    }

    @Override
    public void onCreate(Bundle savedInstanceState) {
        super.onCreate(savedInstanceState);
        Log.d(TAG, "onCreate");
    }

    @Override
    public void onActivityCreated(Bundle savedInstanceState) {
        super.onActivityCreated(savedInstanceState);
        Log.d(TAG, "onActivityCreated");
    }

    @Override
    public void onStart() {
        super.onStart();
        Log.d(TAG, "onStart");
    }

    @Override
    public void onResume() {
        super.onResume();
        Log.d(TAG, "onResume");
    }

    @Override
    public void onPause() {
        super.onPause();
        Log.d(TAG, "onPause");
    }

    @Override
    public void onStop() {
        super.onStop();
        Log.d(TAG, "onStop");
    }

    @Override
    public void onDestroyView() {
        super.onDestroyView();
        Log.d(TAG, "onDestroyView");
    }

    @Override
    public void onDestroy() {
        super.onDestroy();
        Log.d(TAG, "onDestroy");
    }

    @Override
    public void onDetach() {
        super.onDetach();
        Log.d(TAG, "onDetach");
    }

}
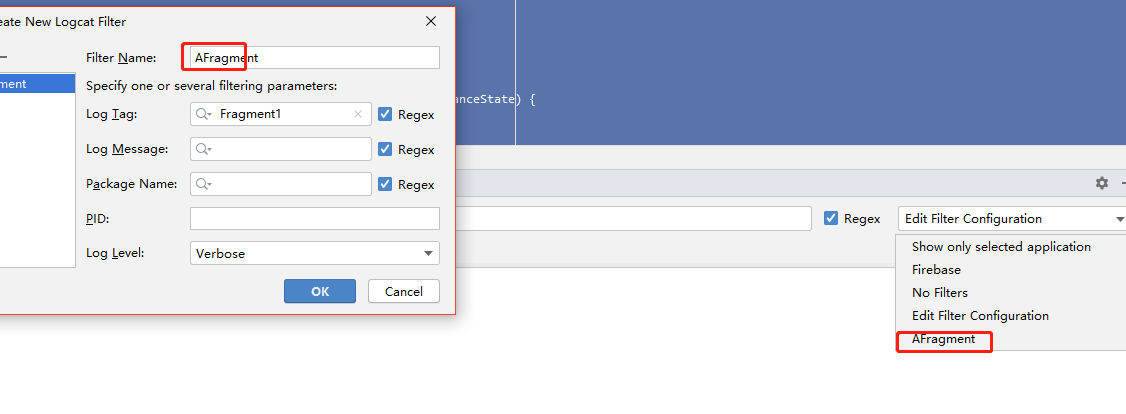
这里使用一个小技巧在 android studio logcat页面新建一个过滤;名字上面的TAG
如图:

启动打印:

安home键:

在打开:

返回back

看到这里,我相信大多数朋友已经非常明白了,因为这和Activity的生命周期太相似了。只是有几个Activity中没有的新方法,这里需要重点介绍一下:
onAttach方法:Fragment和Activity建立关联的时候调用。
onCreateView方法:为Fragment加载布局时调用。
onActivityCreated方法:当Activity中的onCreate方法执行完后调用。
onDestroyView方法:Fragment中的布局被移除时调用。
onDetach方法:Fragment和Activity解除关联的时候调用。
activity生命周期https://www.cnblogs.com/nylcy/p/6500832.html
使用场景:
第一次学习我也很苦恼为什么安卓设计出来这么一套, 引出(比如你在某a app 正在打游戏 或者做一些事),来了电话, 或者在一个输入框 ,突然按下home 在打开 之前的输入的内容不见了。
这些都是和生命周期有关系。 个人猜测是因为手机是单窗口, 当打开某一个运用后,其他的app运用,假死,系统设计 从资源,硬件使用角度回收资源, 提高性能,但是增加复杂度,开发成本。
也不知道理解对不对。