Gitlab/GitHub是两兄弟,但GitHub本着共享技术的精神,私有库是要钱滴,而且代码放别人家里,晚上总是有点睡不踏实,
来个代码泄露或者突然被区别对待,比如GitHub断供来自伊朗、叙利亚的人民,就问你怕不怕,所以企业一般会自建Gitlab
私服,供内部使用,反正我没听过谁家上GitHub管理代码的,今天就来建一个自家的Gitlab,自己在家放心玩。
作者原创文章,谢绝一切转载,违者必究!
本文只发表在"公众号"和"博客园",其他均属复制粘贴!如果觉得排版不清晰,请查看公众号文章。
准备:
VMwareWorkstation 15 Pro/RHEL8.0/Gitlab-ee-13.0.0
难度: 新手--战士--老兵--大师
目标:
- 搭建Gitlab私服
1 步骤
首先请设置Linux内存至少为4G,因为2G会非常卡顿!
1.安装HTTP, HTTPS 和SSH,还有防火墙设置,这里使用的是 DNF ,DNF(Dandified Yum)是新一代的 RPM 软件包管理器,未来会取代yum:
sudo dnf install -y curl policycoreutils openssh-server
sudo systemctl enable sshd
sudo systemctl start sshd
# Check if opening the firewall is needed with: sudo systemctl status firewalld
sudo firewall-cmd --permanent --add-service=http
sudo firewall-cmd --permanent --add-service=https
sudo systemctl reload firewalld
2.安装邮件服务,用于发送邮件:
sudo dnf install postfix
sudo systemctl enable postfix
sudo systemctl start postfix
3.下载安装脚本,并使用 bash 命令运行,这里使用到了Linux的|管道命令,即将前面的结果作为后面命令的输入:
curl https://packages.gitlab.com/install/repositories/gitlab/gitlab-ee/script.rpm.sh | sudo bash
4.安装 gitlab-ee 版本,ee版为enterprise edition,ce版为community edition,这个EXTERNAL_URL参数也可以在安装后修改:
Change https://gitlab.example.com to the URL at which you want to access your GitLab instance. Installation will automatically configure and start GitLab at that URL.
EXTERNAL_URL="https://gitlab.example.com" dnf install -y gitlab-ee
以下为下载过程,文件有点大,1G左右:

安装完成:

如果想先下载不安装,可以使用:
[root@server226 ~]# dnf download gitlab-ee-12.10.6-ee.0.el8.x86_64
或者使用 rpm 方式,先wget 安装包,再rpm安装也可以,举个例子:
wget --content-disposition https://packages.gitlab.com/gitlab/gitlab-ce/packages/el/7/gitlab-ce-10.8.4-ce.0.el7.x86_64.rpm/download.rpm

rpm -ivh gitlab-ce-10.8.4-ce.0.el7.x86_64.rpm
5.配置文件修改,配置文件在 /etc/gitlab/gitlab.rb :
修改外部访问地址为Linux的IP:

如果想修改端口号(默认为80):
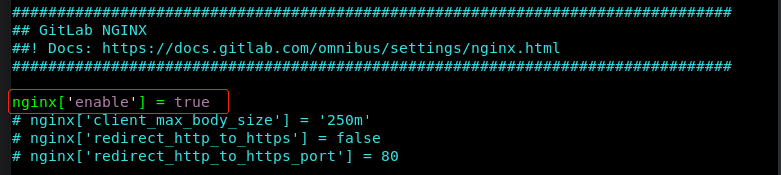
注意:gitlab自带Nginx,开启或关闭:
[root@server226 ~]# vim /etc/gitlab/gitlab.rb
下图二中看注释说明:Override only if you use a reverse proxy.
[root@server226 ~]# vim /etc/gitlab/gitlab.rb


[root@server226 ~]# vim /var/opt/gitlab/nginx/conf/gitlab-http.conf
修改如下:


重新加载: gitlab-ctl reconfigure
重启服务: gitlab-ctl restart
如果启动后访问,提示502,则需要耐心等待一下再刷新即可。
如果照上图修改了端口,访问地址则为:http://192.168.1.226:9099,
特别注意:这里因为nginx做了反向代理,故使用nginx监听端口。
6.使用命令 gitlab-ctl status 检查,如下则说明GitLab运行正常:

7.GitlabUI:访问 http://IP:80
首次登录会要求修改密码,然后 root + 密码 登录:

8.如果想强制初始化密码(或重置密码):命令目录在/opt/gitlab/bin,使用 gitlab-rails console production,如果报错,则使用 gitlab-rails console,如下:

9.优雅关闭服务: gitlab-ctl stop

全文完!
我近期其他文章:
- 1 聊聊算法——回溯算法
- 2 Redis高级应用
- 3 聊聊算法——BFS和DFS
- 4 微服务通信方式——gRPC
- 5 分布式任务调度系统
只写原创,敬请关注