活动(Activity)主要用于和用户进行交互,是一种可以包含用户界面的组件。
1、手动创建活动
右击com.example.administrator.exp5→New→Activity→Empty Activity,会弹出一个创建活动的对话框,将活动命名为FirstActivity。然后不要勾选Generate Layout File和Laucher Activity这两个选项。勾选Generate Layout File的话会自动为活动生成一个对应的布局文件,勾选Laucher Activity会将该活动设为项目的主活动,勾选BackwardsCompatibility表示会为项目启用向下兼容的模式,然后点击Finish完成。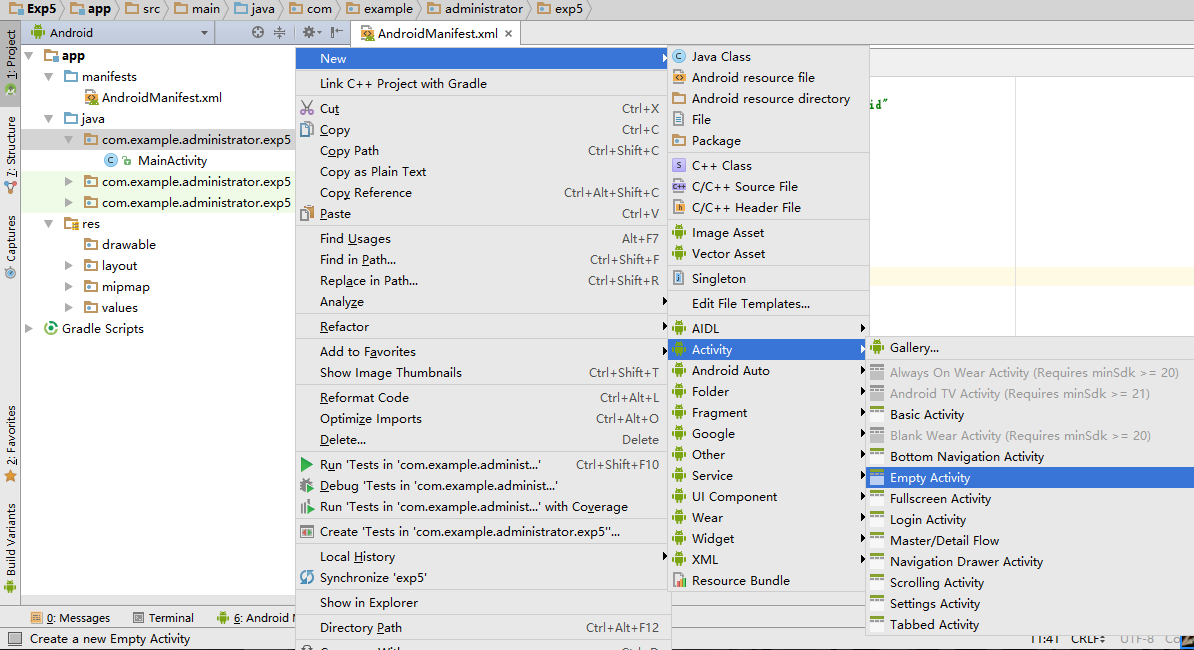
打开AndroidManifest可以看到在18行FirstActivity已经被自动注册了。
 1 <?xml version="1.0" encoding="utf-8"?>
 2 <manifest xmlns:android="http://schemas.android.com/apk/res/android"
 3     package="com.example.administrator.exp5">
 4
 5     <application
 6         android:allowBackup="true"
 7         android:icon="@mipmap/ic_launcher"
 8         android:label="@string/app_name"
 9         android:roundIcon="@mipmap/ic_launcher_round"
10         android:supportsRtl="true"
11         android:theme="@style/AppTheme">
12         <activity android:name=".MainActivity">
13             <intent-filter>
14                 <action android:name="android.intent.action.MAIN" />
15                 <category android:name="android.intent.category.LAUNCHER" />
16             </intent-filter>
17         </activity>
18         <activity android:name=".FirstActivity"></activity>
19     </application>
20 </manifest>
如果我们把代码简单的变成:
 1 <?xml version="1.0" encoding="utf-8"?>
 2 <manifest xmlns:android="http://schemas.android.com/apk/res/android"
 3     package="com.example.administrator.exp5">
 4
 5     <application
 6         android:allowBackup="true"
 7         android:icon="@mipmap/ic_launcher"
 8         android:label="@string/app_name"
 9         android:roundIcon="@mipmap/ic_launcher_round"
10         android:supportsRtl="true"
11         android:theme="@style/AppTheme">
12         <activity android:name=".MainActivity"></activity>
13         <activity android:name=".FirstActivity">
14             <intent-filter>
15                 <action android:name="android.intent.action.MAIN" />
16                 <category android:name="android.intent.category.LAUNCHER" />
17             </intent-filter>
18         </activity>
19     </application>
20 </manifest>
这样就将FirstActivity活动变成了项目的主活动。
之前没有勾选Generate Layout File,也就是没有为FirstActivity创建布局文件,Android程序讲究逻辑和视图分离,最好每个活动都对应着自己的一个布局,现在手动创建一个布局文件:
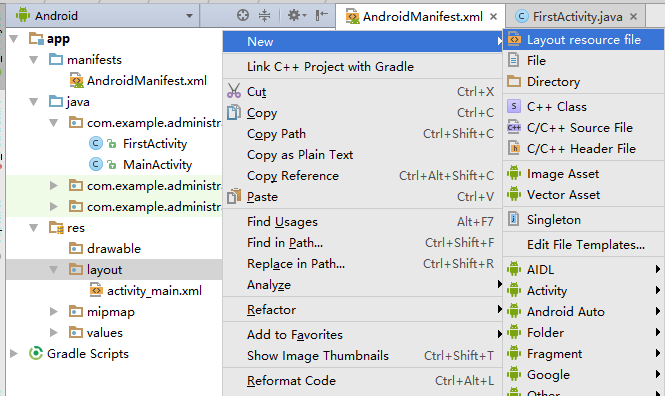
右击res下的layout→New→Layout resource file,将文件命名为first_layout,根元素就选择LinerLayout。
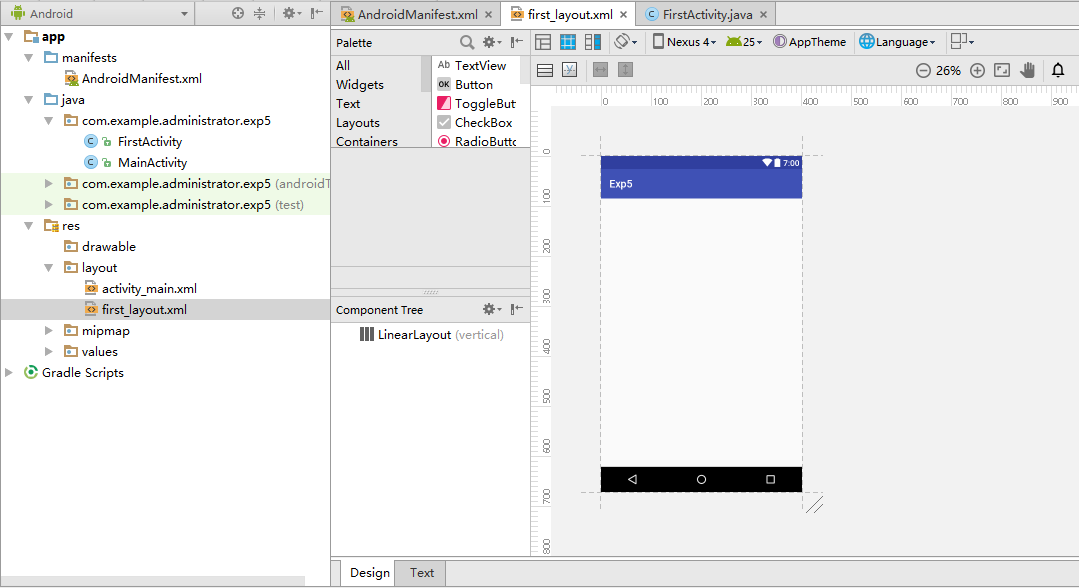
在窗口的最下方有两个切换卡,选择Text可以看到代码:
1 <?xml version="1.0" encoding="utf-8"?>
2 <LinearLayout xmlns:android="http://schemas.android.com/apk/res/android"
3     android:orientation="vertical"
4     android:layout_width="match_parent"
5     android:layout_height="match_parent">
6
7 </LinearLayout>
然后打开java下的FirstActivity,并在onCreate()方法中修改代码
 1 package com.example.administrator.exp5;
 2
 3 import android.support.v7.app.AppCompatActivity;
 4 import android.os.Bundle;
 5
 6 public class FirstActivity extends AppCompatActivity {
 7
 8     @Override
 9     protected void onCreate(Bundle savedInstanceState) {
10         super.onCreate(savedInstanceState);
11         setContentView(R.layout.first_layout);
12     }
13 }
setContentView()方法用来给当前活动动态加载一个布局,在该方法中我们通常需要传入一个布局文件的id R.layout.first_layout。
2.在活动中使用Toast
Toast是Android系统提供的提醒方式,我们可以使用它将一下短小的信息通知给用户,这些信息过一段时间后会自动消失,而且不会占用任何的屏幕空间。
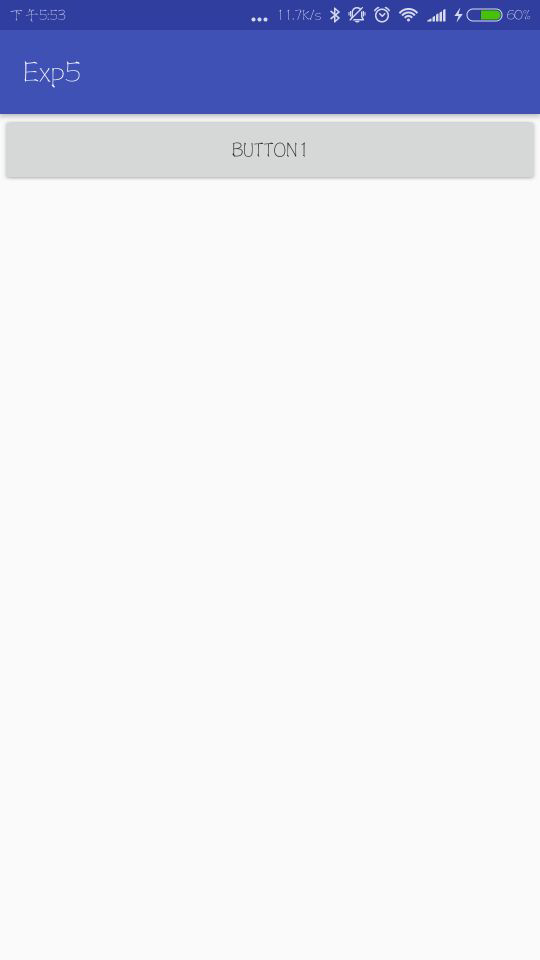
首先需要在活动的布局文件中添加一个按钮
 1 <?xml version="1.0" encoding="utf-8"?>
 2 <LinearLayout xmlns:android="http://schemas.android.com/apk/res/android"
 3     android:orientation="vertical"
 4     android:layout_width="match_parent"
 5     android:layout_height="match_parent">
 6     <Button
 7         android:id="@+id/button1"
 8         android:layout_width="match_parent"
 9         android:layout_height="wrap_content"
10         android:text="button1"/>
11 </LinearLayout>
<Button/>是一个按钮控件,
android:id用于添加控件的id,
android:layout_width是控件的宽,
android:layout_height是控件的高,
wrap_content是根据内容的大小而变化尺寸,
match_parent是和父控件一样大,
android:text是按钮上的文本默认为全部大写。
然后需要修改FirstActivity的java代码:
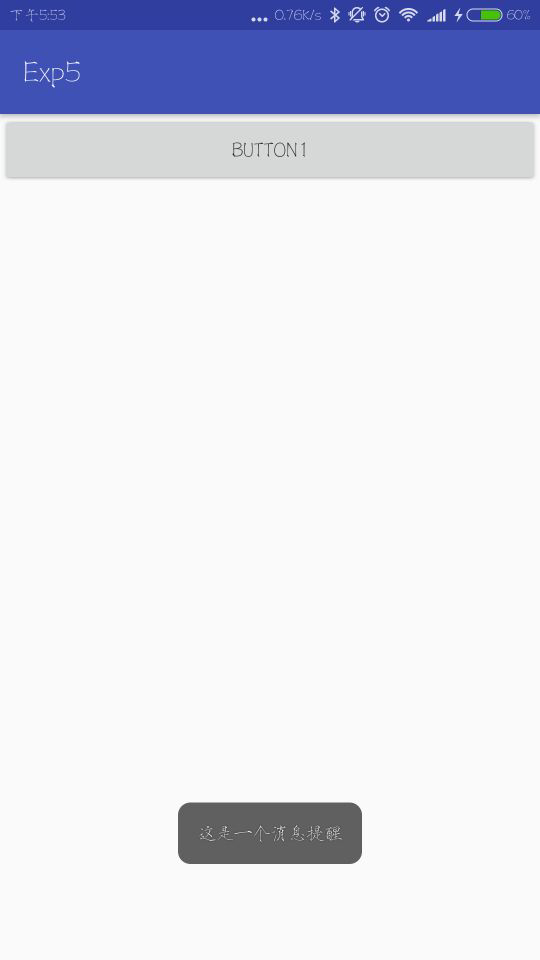
 1 public class FirstActivity extends AppCompatActivity {
 2
 3     @Override
 4     protected void onCreate(Bundle savedInstanceState) {
 5         super.onCreate(savedInstanceState);
 6         setContentView(R.layout.first_layout);
 7         Button button1 = (Button) findViewById(R.id.button1);
 8         button1.setOnClickListener(new View.OnClickListener() {
 9             @Override
10             public void onClick(View v) {
11                 Toast.makeText(FirstActivity.this,"这是一个消息提醒",Toast.LENGTH_SHORT).show();
12             }
13         });
14     }
15 }
先通过findViewId()方法并传入相应id创建得到按钮的实例,由于findViewId()方法 的返回的是一个View对象,所以需要向下转型为Button对象,然后调用setOnClickListener()方法为按钮注册一个监听器,这样在点击按钮的时候就会执行onClick()方法,然后在onClick()中写弹出Toast的功能。
Toast通过静态方法maketext()方法创建一个Toast对象,然后调用show()方法将Toast显示出来,maketext()方法第一个参数是Context,由于活动本身就是一个Context对象,所以这里传入当前活动,作为Toast要求的上下文,第二个参数是显示的内容,第三个参数是显示的时长,两个变量可以选择Toast.LENGTH_SHORT和Toast.LENGTH_LONG。效果如下: