参考文献:
CAS集成ldap:https://wiki.jasig.org/display/CASUM/LDAP
CAS集成restful api:https://wiki.jasig.org/display/CASUM/RESTful+API
下载jar包
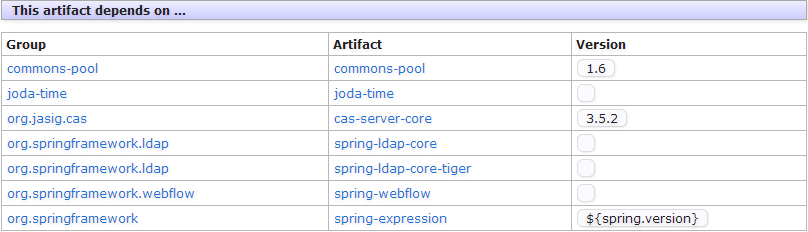
在参考文献当中,我们看到不论是集成ldap还是集成restful api都需要另外单独下载jar包。如果有maven的话,直接通过配置文件即可下载,但是当前我们没有配置,所以需要手动下载。Google搜索cas-server-support-ldap可以找到相关jar包的下载地址,当前我们的cas.version=3.5.2,根据这个版本好下载相应的jar文件。在cas-server-support-ldap的jar包页面,我们可以看到这个jar包还要依赖于其他jar,也要一并下载了。
在下载jar包之前,可以先比对/usr/local/tomcat7/webapps/cas/WEB-INF/lib当中是否已经有这个jar包了,如果没有再去下载。下载完毕以后将jar包放在/usr/local/tomcat7/webapps/cas/WEB-INF/lib目录下。
CAS与LDAP集成
Cas与ldap集成有FastBindLdapAuthenticationHandler和BindLdapAuthenticationHandler这两种接口,前者适用于CAS的验证登录名就直接是ldap当中uid的情况,这种情况比较单一,当前我是按照BindLdapAuthenticationHandler进行配置的。
配置deployerConfigContext.xml
所有关于cas集成ldap的修改都在 cas-server-webapp/src/main/webapp/WEB-INF/deployerConfigContext.xml这个配置文件当中。
首先在这个配置文件当中添加以下这个bean
<bean id="contextSource" class="org.springframework.ldap.core.support.LdapContextSource">
  <!-- DO NOT enable JNDI pooling for context sources that perform LDAP bind operations. -->
  <property name="pooled" value="false"/>

  <!--
    Although multiple URLs may defined, it's strongly recommended to avoid this configuration
    since the implementation attempts hosts in sequence and requires a connection timeout
    prior to attempting the next host, which incurs unacceptable latency on node failure.
    A proper HA setup for LDAP directories should use a single virtual host that maps to multiple
    real hosts using a hardware load balancer.
  -->
  <property name="url" value="ldap://localhost" />

  <!--
    Manager credentials are only required if your directory does not support anonymous searches.
    Never provide these credentials for FastBindLdapAuthenticationHandler since the user's
    credentials are used for the bind operation.
  -->
  <property name="userDn" value="cn=admin,dc=envisioncn,dc=com"/>
  <property name="password" value="12345678"/>

  <!-- Place JNDI environment properties here. -->
  <property name="baseEnvironmentProperties">
    <map>
      <!-- Three seconds is an eternity to users. -->
      <entry key="com.sun.jndi.ldap.connect.timeout" value="3000" />
      <entry key="com.sun.jndi.ldap.read.timeout" value="3000" />

      <!-- Explained at http://docs.oracle.com/javase/jndi/tutorial/ldap/security/auth.html -->
      <entry key="java.naming.security.authentication" value="simple" />
    </map>
  </property>
</bean>
在配置文档当中有一栏关于“SSL Considerations”的介绍,里面说的就是,如果我们没有为LDAP Server配置SSL的话,我们就不能ldaps,只能用ldap协议,也就是像我上面那样使用<property name="url" value="ldap://localhost" />,而不是<property name="url" value="ldaps://localhost" />。验证自己是否配置了SSL,可以查看636端口是否开启。通过netstat查看发现ldap只开启了389端口,那么就按照我上面的进行配置。LDAP开启SSL的方法可以参考https://help.ubuntu.com/12.04/serverguide/openldap-server.html里面的“TLS”这一章节。
enadmin@cgnmon:~$ netstat -ln
Active Internet connections (only servers)
Proto Recv-Q Send-Q Local Address           Foreign Address         State
tcp        0      0 127.0.0.1:587           0.0.0.0:*               LISTEN
tcp        0      0 0.0.0.0:80              0.0.0.0:*               LISTEN
tcp        0      0 0.0.0.0:21              0.0.0.0:*               LISTEN
tcp        0      0 0.0.0.0:22              0.0.0.0:*               LISTEN
tcp        0      0 127.0.0.1:25            0.0.0.0:*               LISTEN
tcp        0      0 0.0.0.0:389             0.0.0.0:*               LISTEN
tcp6       0      0 :::8080                 :::*                    LISTEN
tcp6       0      0 :::22                   :::*                    LISTEN
tcp6       0      0 :::8443                 :::*                    LISTEN
tcp6       0      0 :::389                  :::*                    LISTEN
tcp6       0      0 :::8009                 :::*                    LISTEN
udp        0      0 0.0.0.0:68              0.0.0.0:*
udp        0      0 10.0.2.15:123           0.0.0.0:*
udp        0      0 127.0.0.1:123           0.0.0.0:*
udp        0      0 0.0.0.0:123             0.0.0.0:*
udp6       0      0 ::1:123                 :::*
udp6       0      0 fe80::a00:27ff:fe22:123 :::*
udp6       0      0 :::123                  :::*
Active UNIX domain sockets (only servers)
Proto RefCnt Flags       Type       State         I-Node   Path
unix  2      [ ACC ]     STREAM     LISTENING     6704     @/com/ubuntu/upstart
unix  2      [ ACC ]     STREAM     LISTENING     8508     /var/run/acpid.socket
unix  2      [ ACC ]     STREAM     LISTENING     8259     /var/run/dbus/system_bus_socket
unix  2      [ ACC ]     STREAM     LISTENING     9035     /var/run/slapd/ldapi
unix  2      [ ACC ]     STREAM     LISTENING     8553     /var/run/apache2/cgisock.978
unix  2      [ ACC ]     STREAM     LISTENING     8669     /var/run/sendmail/mta/smcontrol
unix  2      [ ACC ]     SEQPACKET  LISTENING     6889     /run/udev/control
添加完上面那个bean以后,我们还需要修改authenticationManager这个bean,需要将原先的SimpleTestUsernamePasswordAuthenticationHandler修改为我们的BindLdapAuthenticationHandler。具体配置如下:
 <bean id="authenticationManager" class="org.jasig.cas.authentication.AuthenticationManagerImpl">
       <property name="credentialsToPrincipalResolvers">
         <list>
             <bean class="org.jasig.cas.authentication.principal.UsernamePasswordCredentialsToPrincipalResolver" >
                <property name="attributeRepository" ref="attributeRepository" />
               </bean>
               <bean class="org.jasig.cas.authentication.principal.HttpBasedServiceCredentialsToPrincipalResolver" />
           </list>
       </property>
       <property name="authenticationHandlers">
         <list>
            <bean class="org.jasig.cas.authentication.handler.support.HttpBasedServiceCredentialsAuthenticationHandler"
                    p:httpClient-ref="httpClient" />
              <bean class="org.jasig.cas.adaptors.ldap.BindLdapAuthenticationHandler"
                   p:filter="uid=%u"
                    p:searchBase="ou=People,dc=envisioncn,dc=com"
                    p:contextSource-ref="contextSource" />
           </list>
         </property>
         <property name="authenticationMetaDataPopulators">
           <list>
              <bean class="org.jasig.cas.authentication.SamlAuthenticationMetaDataPopulator" />
             </list>
          </property>
  </bean>
配置到这里,CAS与LDAP的集成就已经基本完成了。还可以优化的地方有以下几方面,这个在后面有时间了再进行配置。
- 为LDAP配置连接池
- 为LDAP配置SSL验证
CAS与Restful api集成
下载相关的jar包
跟ldap一样,也是需要下载jar包的,google搜索cas-server-integration-restlet找到相应的下载地址。
配置
所有针对restful的配置都在/usr/local/tomcat7/webapps/cas/WEB-INF/web.xml这个配置文件当中。
修改web.xml,添加servlet和servlet-mapping,具体如下所示:
  <servlet>
    <servlet-name>cas</servlet-name>
    <servlet-class>
      org.jasig.cas.web.init.SafeDispatcherServlet
    </servlet-class>
    <init-param>
      <param-name>publishContext</param-name>
      <param-value>false</param-value>
    </init-param>
    <load-on-startup>1</load-on-startup>
  </servlet>
<servlet>
    <servlet-name>restlet</servlet-name>
    <servlet-class>com.noelios.restlet.ext.spring.RestletFrameworkServlet</servlet-class>
    <load-on-startup>1</load-on-startup>
</servlet>
<servlet-mapping>
    <servlet-name>restlet</servlet-name>
    <url-pattern>/v1/*</url-pattern>
</servlet-mapping>
  <servlet-mapping>
    <servlet-name>cas</servlet-name>
    <url-pattern>/login</url-pattern>
  </servlet-mapping>
测试:
在ubuntu任意目录下下创建一个testcas.sh文件,并赋予这个文件可执行权限,执行命令如下
#sudo touch testcas.sh
#sudo chmod 777 testcas.sh
该文本内容如下所示。
# This file is used to store the Ticket Getting Ticket
rm tgt.txt

# This file is used to store the Service Ticket
rm serviceTicket.txt

#This file is used to store the service call response
rm response.txt

export CAS_LOGIN_URL=https://localhost:8443/cas/v1/tickets
export GET_URL=https://localhost:8443/cas
export USERNAME=username
export PASSWORD=password

# Request a new Ticket Getting Ticket (TGT).  This returns HTML which is put into tgt.txt.
wget --no-check-certificate -O tgt.txt --post-data="username=$USERNAME&password=$PASSWORD" $CAS_LOGIN_URL

# Extract from the HTML the TGT and put back into tgt.txt
echo TGT`grep -oEi 'action=".*"' tgt.txt | grep -oEi '-.*-cas'` > tgt.txt

# display the TGT
cat tgt.txt

# Request a new Service Ticket and store in serviceTicket.txt
wget --no-check-certificate --post-data="service=$GET_URL" -O serviceTicket.txt $CAS_LOGIN_URL/`cat tgt.txt`

# Get the data at from the service at GET_URL and store in response.txt
wget --no-check-certificate -O response.txt $GET_URL?ticket=`cat serviceTicket.txt`

# Display the data from the service call
cat response.txt
运行此testcas.sh文件,看一下能否正常生成tgt,
运行结果如下:
enadmin@cgnmon:~/test$ ./testcas.sh
--2013-12-11 22:51:38--  https://localhost:8443/cas/v1/tickets
Resolving localhost (localhost)... 127.0.0.1
Connecting to localhost (localhost)|127.0.0.1|:8443... connected.
WARNING: cannot verify localhost's certificate, issued by `/C=cn/ST=shanghai/L=shanghai/O=envision/OU=en/CN=test':
  Self-signed certificate encountered.
    WARNING: certificate common name `test' doesn't match requested host name `localhost'.
HTTP request sent, awaiting response... 201 Created //这表示生成tgt成功。
Length: 443 [text/html]
Saving to: `tgt.txt'

100%[=============================================================================================================================>] 443         --.-K/s   in 0s

2013-12-11 22:51:38 (218 MB/s) - `tgt.txt' saved [443/443]

TGT-1-4CeCylfHfbis9kttoqPsYIpMA17ajV5TJ4fWifA6pHjncKfR9E-cas//tgt
--2013-12-11 22:51:38--  https://localhost:8443/cas/v1/tickets/TGT-1-4CeCylfHfbis9kttoqPsYIpMA17ajV5TJ4fWifA6pHjncKfR9E-cas
Resolving localhost (localhost)... 127.0.0.1
Connecting to localhost (localhost)|127.0.0.1|:8443... connected.
WARNING: cannot verify localhost's certificate, issued by `/C=cn/ST=shanghai/L=shanghai/O=envision/OU=en/CN=test':
  Self-signed certificate encountered.
    WARNING: certificate common name `test' doesn't match requested host name `localhost'.
HTTP request sent, awaiting response... 404 Not Found
2013-12-11 22:51:38 ERROR 404: Not Found.

--2013-12-11 22:51:38--  https://localhost:8443/cas?ticket=
Resolving localhost (localhost)... 127.0.0.1
Connecting to localhost (localhost)|127.0.0.1|:8443... connected.
WARNING: cannot verify localhost's certificate, issued by `/C=cn/ST=shanghai/L=shanghai/O=envision/OU=en/CN=test':
  Self-signed certificate encountered.
    WARNING: certificate common name `test' doesn't match requested host name `localhost'.
HTTP request sent, awaiting response... 302 Found
Location: https://localhost:8443/cas/?ticket= [following]
--2013-12-11 22:51:38--  https://localhost:8443/cas/?ticket=
Reusing existing connection to localhost:8443.
HTTP request sent, awaiting response... 302 Found
Location: https://localhost:8443/cas/login?ticket= [following]
--2013-12-11 22:51:39--  https://localhost:8443/cas/login?ticket=
Reusing existing connection to localhost:8443.
HTTP request sent, awaiting response... 200 OK
Length: 6161 (6.0K) [text/html]
Saving to: `response.txt'

100%[=============================================================================================================================>] 6,161       --.-K/s   in 0s

2013-12-11 22:51:41 (320 MB/s) - `response.txt' saved [6161/6161]