ASPNET MVC URL、路由及区域
一、URL、路由及区域
一、 配置路由器
1、 URL模式
2、 定义路由默认值
3、 使用静态URL
4、 Route顺序
5、 自定义段变量
6、 使用action方法参数
7、 通过浏览器传参数
1、 在路由表中定义路由,需要对参数命名
2、 获取参数值:
1)、通过控制器中的action方法,如List(string cate),需要方法中的参数名和路由表中的参数相同,RouteData.Values[Key]获取,key为参数名,如果获取的是对象,可以通过模型绑定机制实现
二、 生成输出的URLS
1) 视图中静态链接
1、ActionLink:对应控制器/动作,使用默认路由
参数:new{参数=值,…}
样式:new{@class=样式名}
2、RouteLink:使用指定路由
格式:<a/>:控制器/动作/参数
2) 动态转向
1、 Redirect(url):参数是url地址
2、RedirecrToAction(action,Name,controllerName),参数为动作名和各种控制名
3、 RedirectToRoute(routeName,routeValues),转向到指定路由
routeName:路由名
routeValues=new{controller=value,action=value,id=value}
二、结合第一章MVC内容,设置产品分类显示
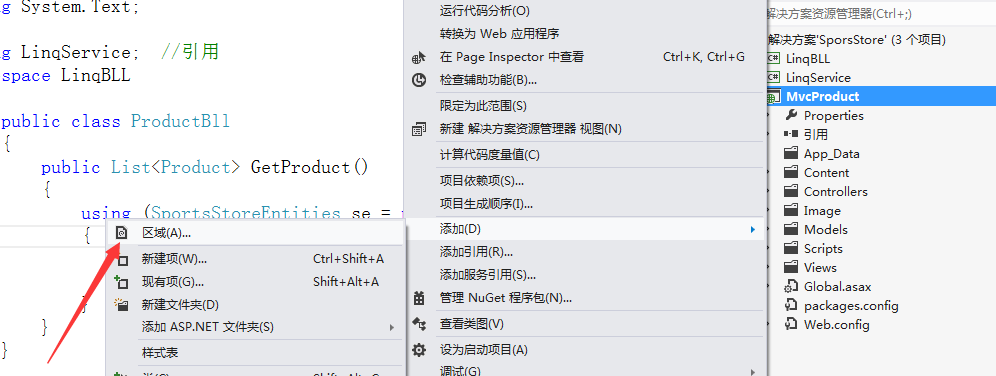
1、在"MVCProduct"项目单击右键添加“区域”,名字设为“Areas”
如图所示:
2、在“Areas”文件里面的“Controller”文件添加“控制器”名为“HomeController”
如图所示:

3、继续在“Areas”文件里面的“Controller”文件添加“控制器”名为“HomeController.cs”页面方法里"Index()"添加一个视图
如图所示:

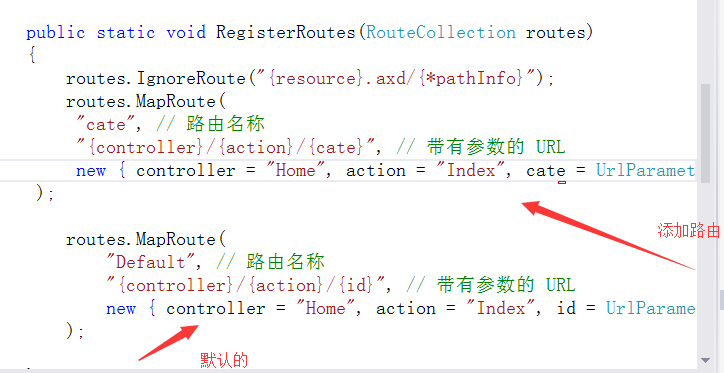
三、设置”路由“添加路由参数“
如图所示:
四、给"路由"添加对应"控制器名字",名字可以在"Controller"文件里面"HomeController.cs"页面
如图所示:

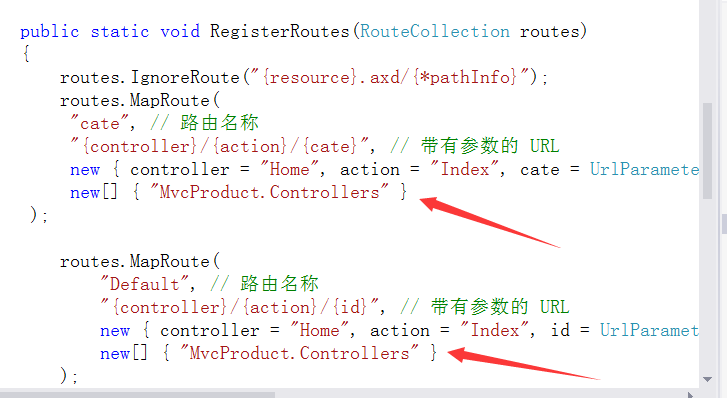
五、复制名字后,把它放在"路由参数里面"
代码示例:

using System;
using System.Collections.Generic;
using System.Data.Entity;
using System.Data.Entity.Infrastructure;
using System.Linq;
using System.Web;
using System.Web.Mvc;
using System.Web.Routing;

namespace MvcProduct
{
    // 注意: 有关启用 IIS6 或 IIS7 经典模式的说明,
    // 请访问 http://go.microsoft.com/?LinkId=9394801

    public class MvcApplication : System.Web.HttpApplication
    {
        public static void RegisterGlobalFilters(GlobalFilterCollection filters)
        {
            filters.Add(new HandleErrorAttribute());
        }

        public static void RegisterRoutes(RouteCollection routes)
        {
            routes.IgnoreRoute("{resource}.axd/{*pathInfo}");
            routes.MapRoute(
             "cate", // 路由名称
             "{controller}/{action}/{cate}", // 带有参数的 URL
             new { controller = "Home", action = "Index", cate = UrlParameter.Optional }, // 参数默认值
             new[] { "MvcProduct.Controllers" }
         );

            routes.MapRoute(
                "Default", // 路由名称
                "{controller}/{action}/{id}", // 带有参数的 URL
                new { controller = "Home", action = "Index", id = UrlParameter.Optional }, // 参数默认值
                new[] { "MvcProduct.Controllers" }
            );

        }

        protected void Application_Start()
        {
            AreaRegistration.RegisterAllAreas();

            // 默认情况下对 Entity Framework 使用 LocalDB
            Database.DefaultConnectionFactory = new SqlConnectionFactory(@"Data Source=(localdb)\v11.0; Integrated Security=True; MultipleActiveResultSets=True");

            RegisterGlobalFilters(GlobalFilters.Filters);
            RegisterRoutes(RouteTable.Routes);
        }
    }
}
如图所示:
六、在"表示层"添加一个根据名字分类方法
代码示例:

using System;
using System.Collections.Generic;
using System.Linq;
using System.Text;

using LinqService;  //引用
namespace LinqBLL
{
    public class ProductBll
    {
        public List<Product> GetProduct()
        {
            using (SportsStoreEntities se = new SportsStoreEntities())
            {
                var products = se.Product;  //数据库里面表名称
                return products.ToList();
            }
        }
        //通过分类名获取体育产品列表
        public List<Product> GetProductByCateName(string cate)
        {
            using(SportsStoreEntities se=new SportsStoreEntities())
            {
                if (string.IsNullOrEmpty(cate))
                {
                    var products=se.Product;
                    return products.ToList();
                }
                  else  //查找对应分类数据
                {
                    var books = from a in se.Product
                                where a.Name.Contains(cate)
                                select a;
                    return books.ToList();
                }
            }
        }
    }
}
如图所示:

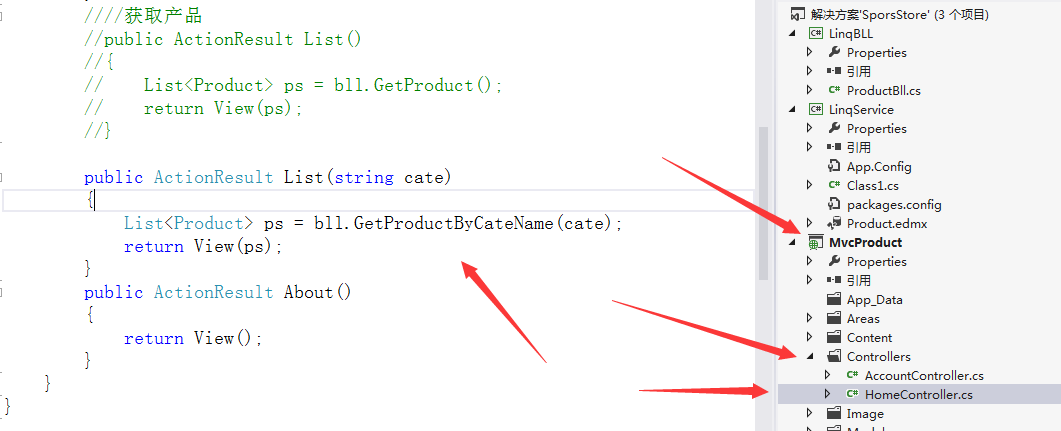
七、最后在"MvcProduct"项目调用方法可以了,把之前方法注释掉
代码示例:

using System;
using System.Collections.Generic;
using System.Linq;
using System.Web;
using System.Web.Mvc;

using LinqBLL;
using LinqService;
namespace MvcProduct.Controllers
{
    public class HomeController : Controller
    {
        ProductBll bll = new ProductBll();
        public ActionResult Index()
        {
            ViewBag.Message = "欢迎使用 ASP.NET MVC!";
            return View();
        }
        ////获取产品
        //public ActionResult List()
        //{
        //    List<Product> ps = bll.GetProduct();
        //    return View(ps);
        //}

        public ActionResult List(string cate)
        {
            List<Product> ps = bll.GetProductByCateName(cate);
            return View(ps);
        }
        public ActionResult About()
        {
            return View();
        }
    }
}
如图所示:
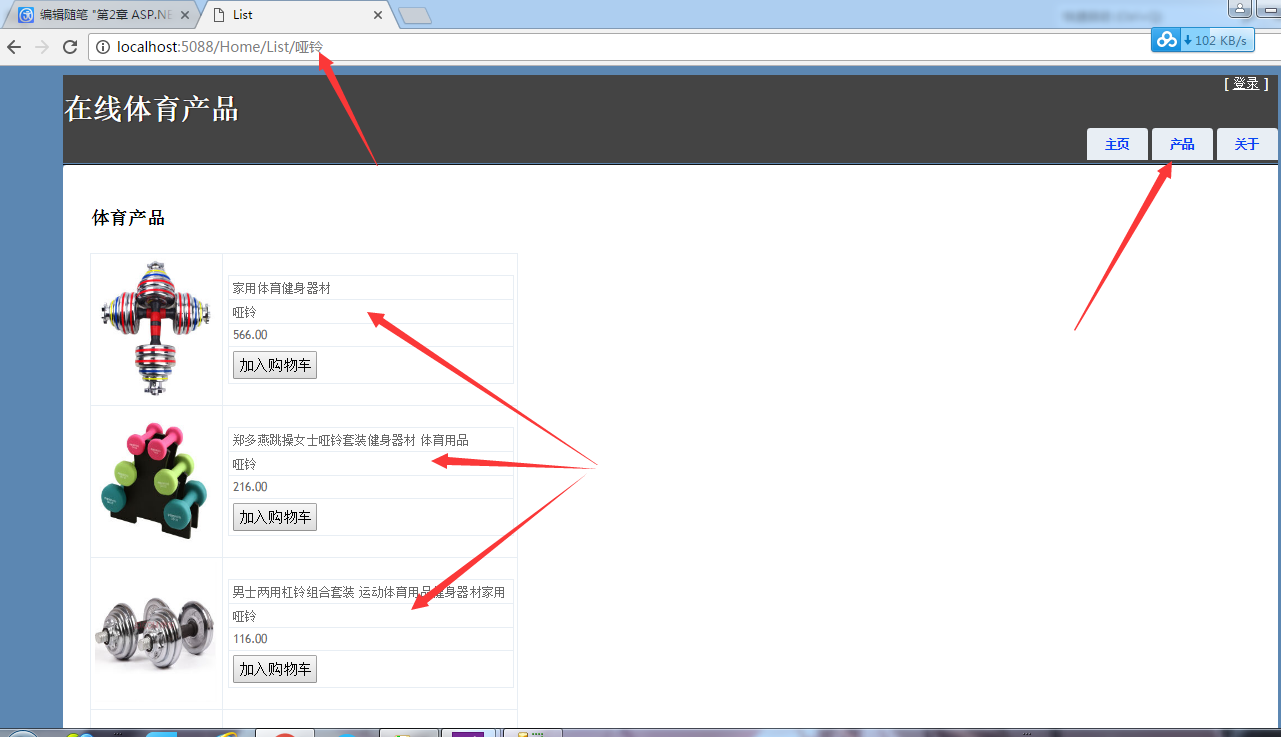
八、运行结果:输入要分类名称就可以了
