首先本人版本PowerDesigner16.5
批量转换,EXCEL数据字典转换为PDM
三步搞定~
第一步
按excel模板填入表的内容(字段名,数据类型…)
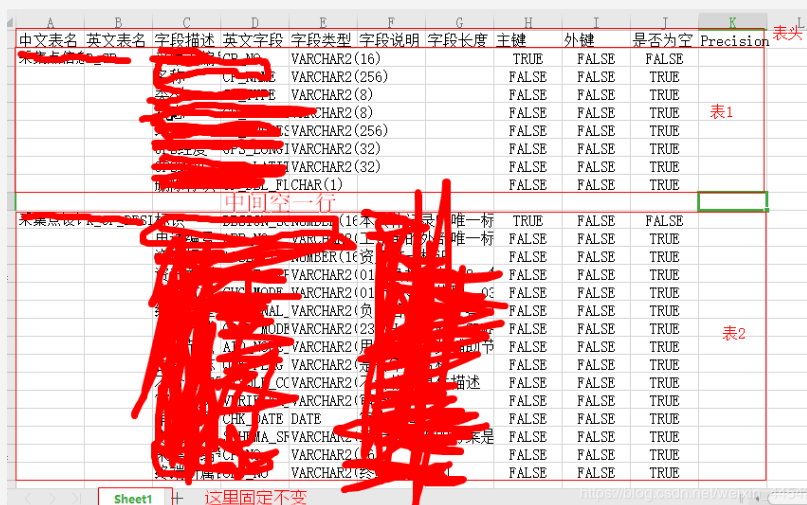
新建一个excel,表头如下(共11列)就是excel模板了,表头的顺序不要错哦~
中文表名 英文表名 字段描述 英文字段 字段类型 字段说明 字段长度 主键 外键 是否为空 Precision
所有的表设计都放在excel的sheet1中,每个表中间空一行,然后表无限往下放
第二步
复制脚本,粘贴到txt文档, 内容搜索一下x1.Workbooks.Open,把excel的路径改成你上面建的excel表的路径即可,其他啥也不用动
'******************************************************************************
'* 所有的表设计都放在一个excel的一个sheet中,每个表中间空一行,表体都有表头说明如下,
'* 再前面一行是表名和表的说明,分别在A和C列。下面格式直接拷贝到excel中就可以看到,空格是制表符。
'******************************************************************************
'                             Excel 格式如下
'中文表名    英文表名    字段描述    英文字段    字段类型    字段说明    字段长度    主键    外键    是否为空    Precision
'******************************************************************************
Option Explicit

Dim mdl ' the current model
Set mdl = ActiveModel
If (mdl Is Nothing) Then
    MsgBox "There is no Active Model"
End If

Dim HaveExcel
Dim RQ
RQ = vbYes 'MsgBox("Is Excel Installed on your machine ?", vbYesNo + vbInformation, "Confirmation")
If RQ = vbYes Then
    HaveExcel = True
    ' Open & Create Excel Document
    Dim x1  '
    Set x1 = CreateObject("Excel.Application")
    x1.Workbooks.Open "C:\Users\pc\Desktop\pdm导入导出\002.xlsx"  '指定excel文档路径
    x1.Workbooks(1).Worksheets("Sheet1").Activate   '指定要打开的sheet名称
Else
    HaveExcel = False
End If

a x1, mdl
sub a(x1, mdl)
dim rwIndex
dim tableName
dim colname
dim table
dim col
dim count
dim abc

on error Resume Next
'--------------------------------
'下面是读取excel,添加表实体属性
'--------------------------------
For rwIndex = 2 To 3031  '指定要遍历的Excel行标  由于第2行是表头,从第1行开始,看你这个表设计多少行
    With x1.Workbooks(1).Worksheets("Sheet1")'需要循环的sheet名称
        If .Cells(rwIndex,1).Value <> "" And  .Cells(rwIndex,2).Value <> ""  Then
            set table = mdl.Tables.CreateNew '创建一个表实体
            table.Code = .Cells(rwIndex,2).Value'从excel中取得表名称和编码
            table.Name = .Cells(rwIndex,1).Value'
            table.Comment = .Cells(rwIndex,1).Value
            count = count + 1
        End If
        If .Cells(rwIndex,4).Value <>"" Then
            set col =table.Columns.CreateNew '创建一列/字段
            col.Name = .Cells(rwIndex, 3).Value '指定列name
            col.Code = .Cells(rwIndex, 4).Value '指定列code
            col.DataType = .Cells(rwIndex, 5).Value '指定列数据类型
            col.Comment =  .Cells(rwIndex, 6).Value '指定列说明
            If .Cells(rwIndex, 8).Value = "True" or .Cells(rwIndex, 8).Value = "true" Then'指定主键
              col.Primary = true
              End If
            If .Cells(rwIndex, 10).Value = "True" or .Cells(rwIndex, 10).Value = "true" Then'指定列是否可空 true 为不可空
             col.Mandatory = true
             End If
         End If
    End With
Next
    MsgBox "生成数据表结构共计 " + CStr(count), vbOK + vbInformation, "表"
Exit Sub
End sub
第三步
打开pdm,快捷键ctrl+shift+x 打开脚本窗口,老版本的pdm用ctrl+shift+h打开,复制你txt文档里的全部内容粘贴上来,点击run
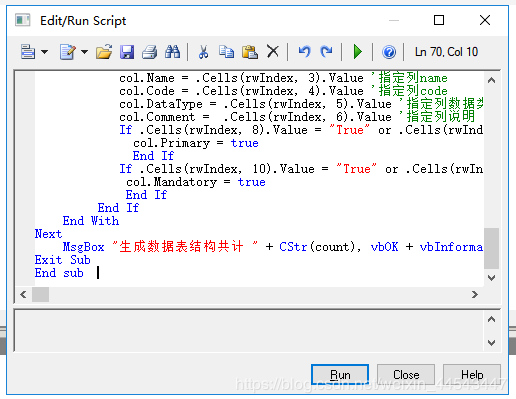
静等即可,结束后会弹出"生成数据表结构共计多少"
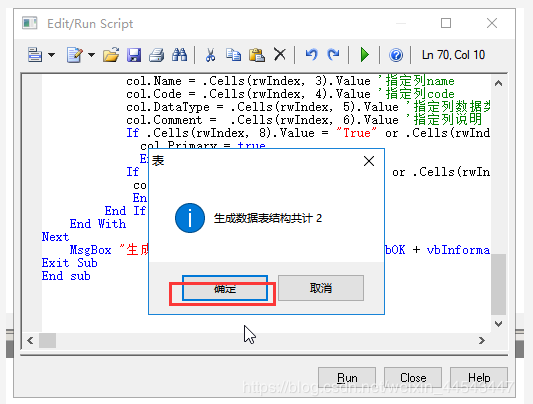
确定后点击close就可以了,不用保存
POWERDESIGNER 导出SQL
四步搞定~
第一步
database->change current DBMS 选择数据库
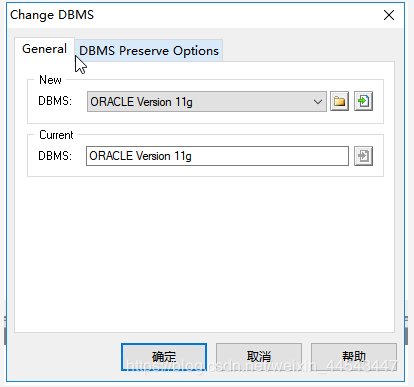
选择oracle或者mysql
第二步
把字段描述和字段说明拼在一起,不然他默认是导出字段说明,字段名就不见了
database -> edit current dbms->general选项卡->script -> objects -> column -> columncommnet-修改value值
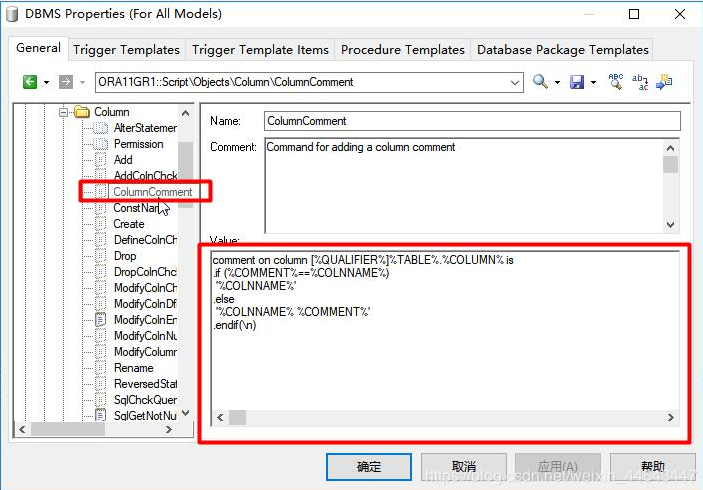
value值直接复制就可以了,代码意思也很简单,字段说明和字段描述相等的时候显示字段描述,否则两个都显示
comment on column [%QUALIFIER%]%TABLE%.%COLUMN% is
.if (%COMMENT%==%COLNNAME%)
 '%COLNNAME%'
.else
 '%COLNNAME% %COMMENT%'
.endif(\n)
第三步
修改生成规则
database -> generate database->format选项卡->选中”generate name is empty comment”选项 即可
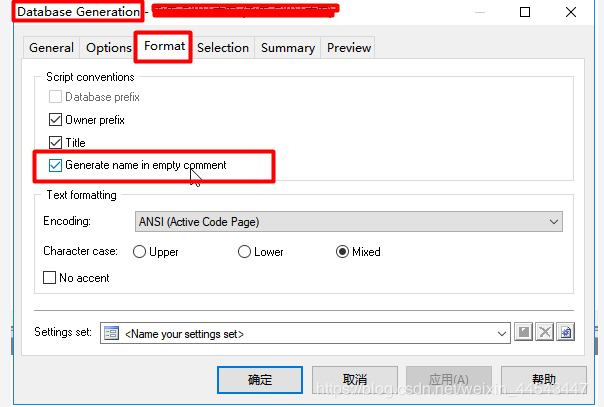
意思是如果字段说明为空,就显示字段描述为注释~
第四步
database->generate database(CTRL+G) 选择路径,其他不用动,点确定即可
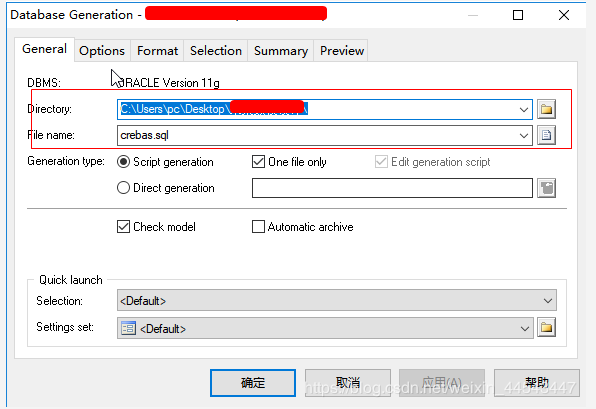
确定后,看pdm底部
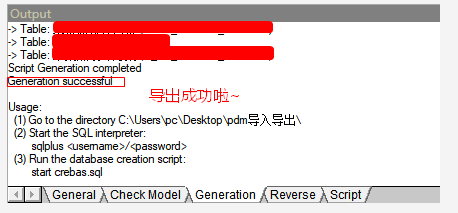
好啦,给你们看一下效果图~

备注
当从oracle反序列化pd的时候,表很多时候效率很低。我们可以使用oracle导入到excel中,然后使用上面的方法从excel再反序列化为pd。
oralce查询用户所有表:
select
-- a.owner ,
nvl(c.comments,a.table_name) as 中文表名
,a.table_name as 英文表名
,d.COMMENTS as 字段描述
,b.column_name as 英文字段
--,b.data_type as 字段类型
,'VARCHAR2(50)' as 字段类型
,'' as 字段说明
,'' as 字段长度
,nvl2((
  select cu.COLUMN_NAME
  from all_cons_columns cu, all_constraints au
  where cu.constraint_name = au.constraint_name and au.constraint_type = 'P' and au.table_name = 'S_COMPANY'
  and cu.owner='H2' and au.OWNER='H2'
  and cu.TABLE_NAME=a.TABLE_NAME and cu.COLUMN_NAME=b.COLUMN_NAME
),'TRUE','FALSE') as 主键
,'FALSE' as 外键
,'FALSE' as 是否为空
,'' as Precision
--,b.data_length as 字段长度22

from all_tables a
join all_tab_columns b on a.table_name= b.table_name
left join all_tab_comments c on c.table_name=a.table_name
left join all_col_comments d on d.table_name=a.table_name and d.column_name=b.column_name

where a.owner='H2' and b.owner='H2'  and c.OWNER='H2' and d.OWNER='H2'
-- and a.table_name  in ('S_COMPANY','T_FACTORY','S_DEPT')
order by b.table_name,b.column_id
使用自己开发的winfrom程序,导出excel
       public static bool wwww(DataTable dataTable, string file) {
            try {
                //1、创建excel
                FileInfo newFile = new FileInfo(file);
                if (newFile.Exists) {
                    return false;
                }
                //2、创建一个excel包,就是一个excel文件

                //许可证,必须添加许可证,否则会报错
                ExcelPackage.LicenseContext = OfficeOpenXml.LicenseContext.NonCommercial;

                using (ExcelPackage package = new ExcelPackage(newFile)) {
                    //3、创建一个excel,工作表 sheet
                    ExcelWorksheet worksheet = package.Workbook.Worksheets.Add("Sheet1");
                    for (int i = 0; i < dataTable.Columns.Count; i++) {
                        worksheet.Cells[1, (i + 1)].Value = dataTable.Columns[i].ColumnName;
                    }

                    try {
                        string vTableName = string.Empty;

                        int m = 0;

                        for (int i = 0; i < dataTable.Rows.Count; i++) {
                            if (string.IsNullOrEmpty(vTableName)) {
                                vTableName = dataTable.Rows[i][1].ToString();
                            }

                            if (vTableName != dataTable.Rows[i][1].ToString()) {
                                //写一行 空格
                                for (int j = 0; j < dataTable.Columns.Count; j++) {
                                    worksheet.Cells[(i + 2 + m), (j + 1)].Value = "";
                                }
                                vTableName = dataTable.Rows[i][1].ToString();
                                m = m + 1;


                                for (int j = 0; j < dataTable.Columns.Count; j++) {
                                    //写列
                                    worksheet.Cells[(i + 2 + m), (j + 1)].Value = dataTable.Rows[i][j].ToString();
                                }
                            }
                            else {
                                for (int j = 0; j < dataTable.Columns.Count; j++) {
                                    //写列
                                    if (j == 0 || j == 1) {
                                        worksheet.Cells[(i + 2 + m), (j + 1)].Value = "";
                                    }
                                    else {
                                        worksheet.Cells[(i + 2 + m), (j + 1)].Value = dataTable.Rows[i][j].ToString();
                                    }
                                }
                            }
                        }
                    }
                    catch (Exception vErr) {
                        string vInfo = vErr.Message;
                    }

                    package.Save();
                }
                return true;
            }
            catch (Exception vErr) {
                throw;
            }
        }
导出插件为“”“EPPlus” 版本6.0.3.0。