本篇不是介绍WCF的基础知识,而专门讨论基于UserName的身份验证方式。
关于WCF的基础知识,如果有不清楚的,请参考下面的链接
http://msdn.microsoft.com/zh-cn/library/ms735119.aspx
我现在用一个实录的方式,介绍一下UserName的身份验证
1. 准备一个证书。这个证书将用来做消息的加密。
我们可以通过SDK工具makecert创建一个测试证书,如下图
makecert -r -pe -n "CN=WCFCert" -ss My -sky exchange
创建成功之后,我们可以在证书管理器中看到我们的证书
2. 创建WCF服务库
修改名称,点击“确定”后创建的项目已经包含了一个简单的接口和服务
3. 测试该服务
通过VS2008提供的工具,我们可以很方便地进行服务的测试工作。方法是:直接按F5
双击“GetData”
在“值”中输入一个数值,点击“调用”
点击“确定”后,在测试客户端的右下部分,会看到有关的响应
测试结果表示该服务是工作正常的。
4.创建一个客户端来使用该服务
我们通过创建一个Windows Forms程序来作为客户端。
项目创建好之后,我们需要为该项目添加一个服务引用
点击“添加服务引用”
点击“发现”按钮
点击“确定”按钮
5. 编写代码访问该服务
private void btGetData_Click(object sender, EventArgs e)
{
TestService.Service1Client proxy = new Client.TestService.Service1Client();
MessageBox.Show(proxy.GetData(2000));
}
6. 将客户端程序设置为启动项目,按F5调试
7. 现在的服务能正常工作了,但没有做任何的身份验证。这不能满足我们的需求。我们首先从服务端下手,进行设置
选择中WCFServiceLib中的app.config文件,然后右键菜单中点击“编辑WCF配置”
我们可以看到Service1这个服务,会有两个EndPoint(终结点)。其中第一个是标准的请求的终结点,而第二个(mex)是基于元数据的发现。
我们点击第一个终结点(wsHttpBinding)下面的Binding configuration右边的 “单击可创建”
如果有兴趣,可以逐一了解每个属性。我们这里就不一一介绍了。因为此篇blog的目的是解决安全性问题
点击窗口顶部的“安全性”
我们修改两个选项如下。即:在消息级别使用基于UserName的身份验证,而在传输级别不使用验证
接下来,我们还要配置服务行为。通过依次展开“高级”=》“服务行为”=》WCFServiceLib.Service1Behavier。我们能看到如下的界面
点击“添加”按钮
选择“serviceCredentials”,点击“添加”
双击“serviceCredentials”
这个窗口中主要要设置的是UserNamePasswordValidationMode。这里有三个选择,如下图所示
- Windows :基于windows的用户名和密码
- MembershipProvider :基于成员管理提供程序
- Custom : 自定义的身份验证提供程序
我们先用Windows验证方式。
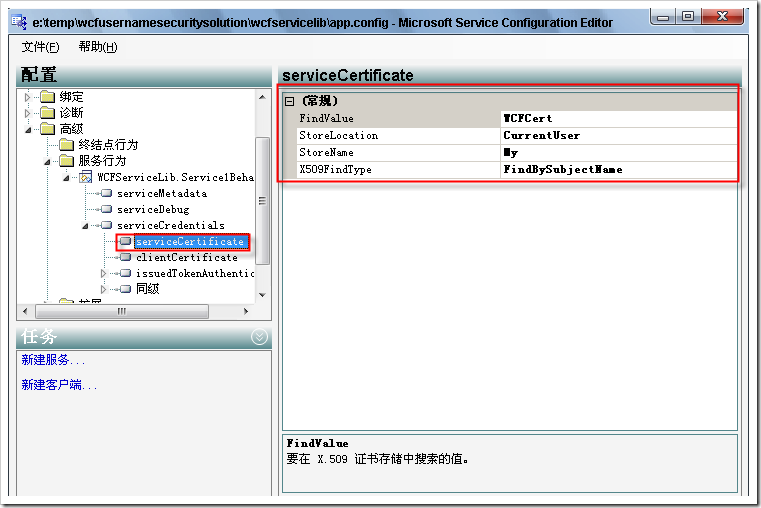
我们还需要设置服务端证书的信息,如下
设置完之后,我们选择“文件”=》“保存”后,回到Visual Studio中的服务项目中的app.config
<system.serviceModel>
<bindings>
<wsHttpBinding>
<binding name="NewBinding0">
<security>
<transport clientCredentialType="None" />
<message clientCredentialType="UserName" />
</security>
</binding>
</wsHttpBinding>
</bindings>
<services>
<service behaviorConfiguration="WCFServiceLib.Service1Behavior"
name="WCFServiceLib.Service1">
<endpoint address="" binding="wsHttpBinding" bindingConfiguration="NewBinding0"
contract="WCFServiceLib.IService1">
<identity>
<dns value="localhost" />
</identity>
</endpoint>
<endpoint address="mex" binding="mexHttpBinding" contract="IMetadataExchange" />
<host>
<baseAddresses>
<add baseAddress="http://localhost:8731/Design_Time_Addresses/WCFServiceLib/Service1/" />
</baseAddresses>
</host>
</service>
</services>
<behaviors>
<serviceBehaviors>
<behavior name="WCFServiceLib.Service1Behavior">
<serviceMetadata httpGetEnabled="true" />
<serviceDebug includeExceptionDetailInFaults="false" />
<serviceCredentials>
<serviceCertificate findValue="WCFCert" storeLocation="CurrentUser"
x509FindType="FindBySubjectName" />
<userNameAuthentication cacheLogonTokens="false" />
</serviceCredentials>
</behavior>
</serviceBehaviors>
</behaviors>
</system.serviceModel>
8. 完成服务端的配置后,我们先直接运行客户端程序。看看会发生什么情况
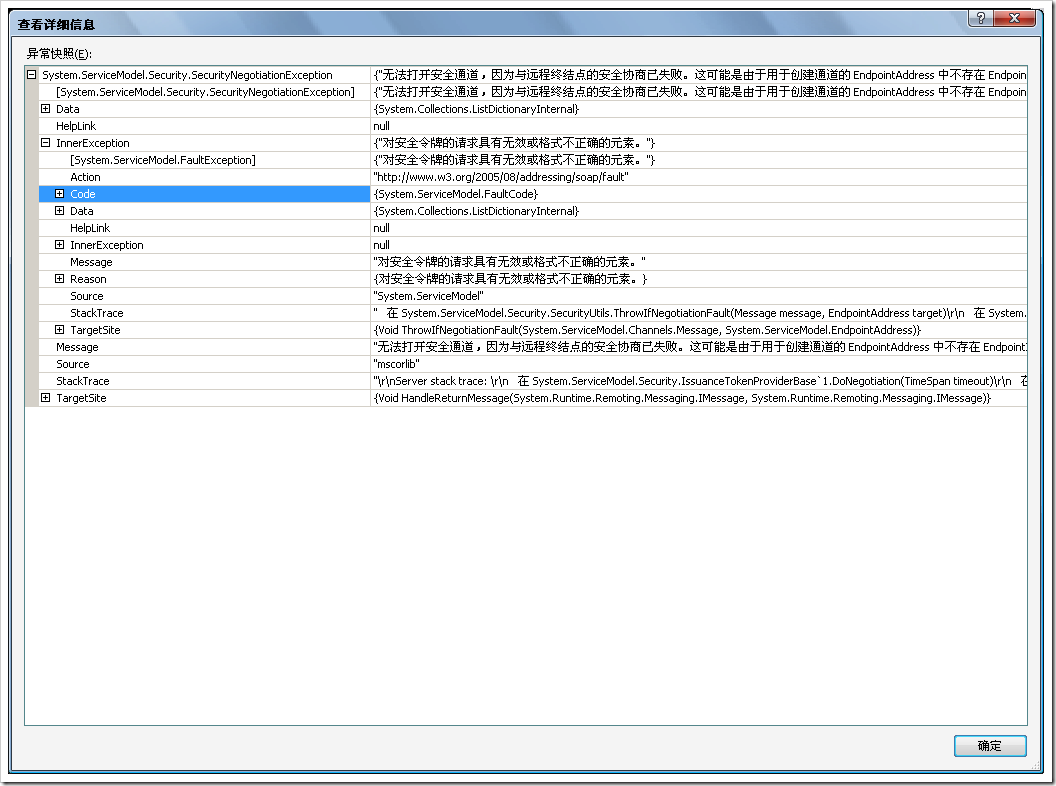
我们收到了一个异常消息。很显然,因为服务端已经启用了更加严格的安全性,客户端也需要有相应的设置才行
9. 对客户端进行配置
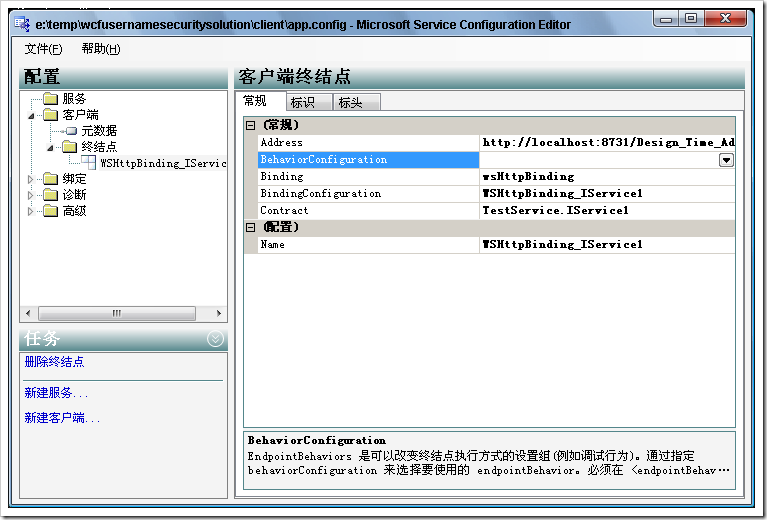
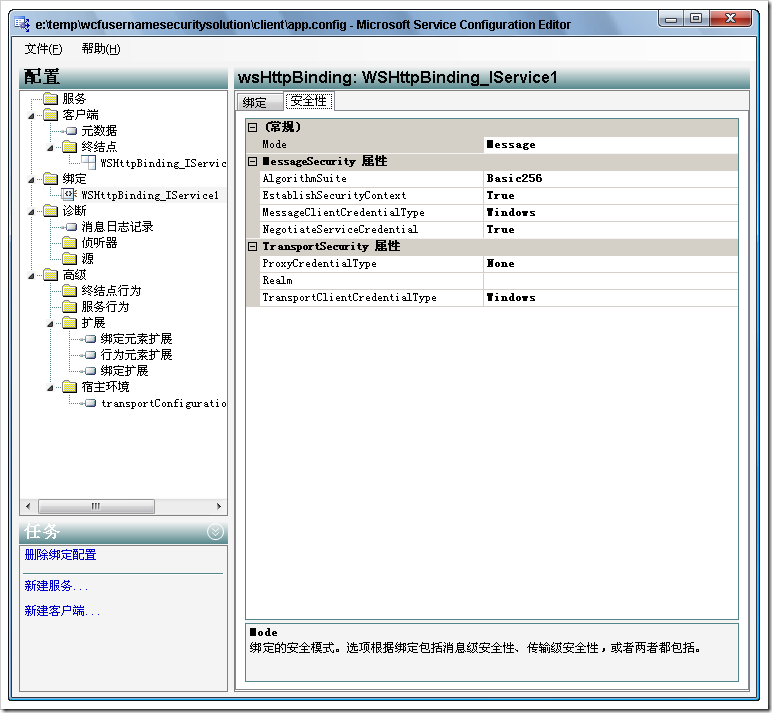
我们发现这个终结点有一个相应的配置。接下来对其进行查看,确定MessageClientCredentialType也是Windows
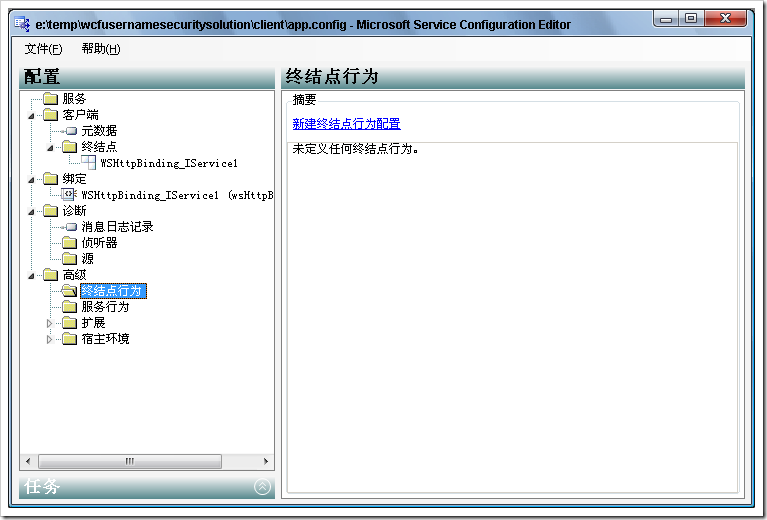
接下来,我们还需要定义终结点行为
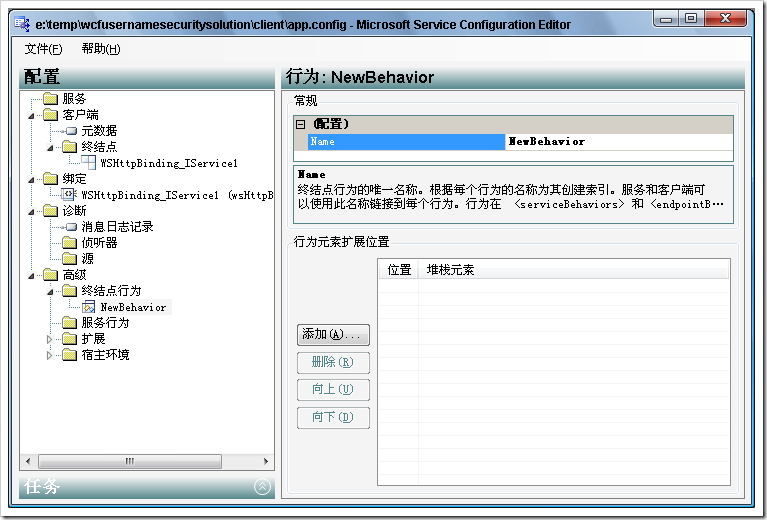
点击“新建终结点行为配置”
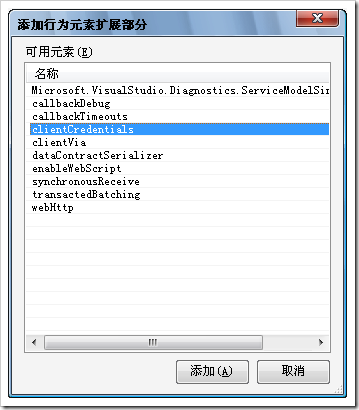
点击“添加”
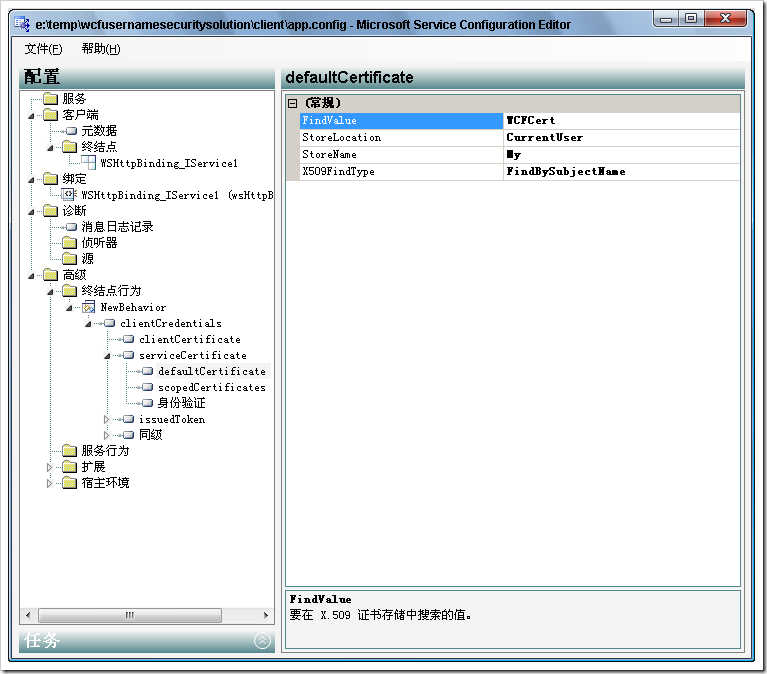
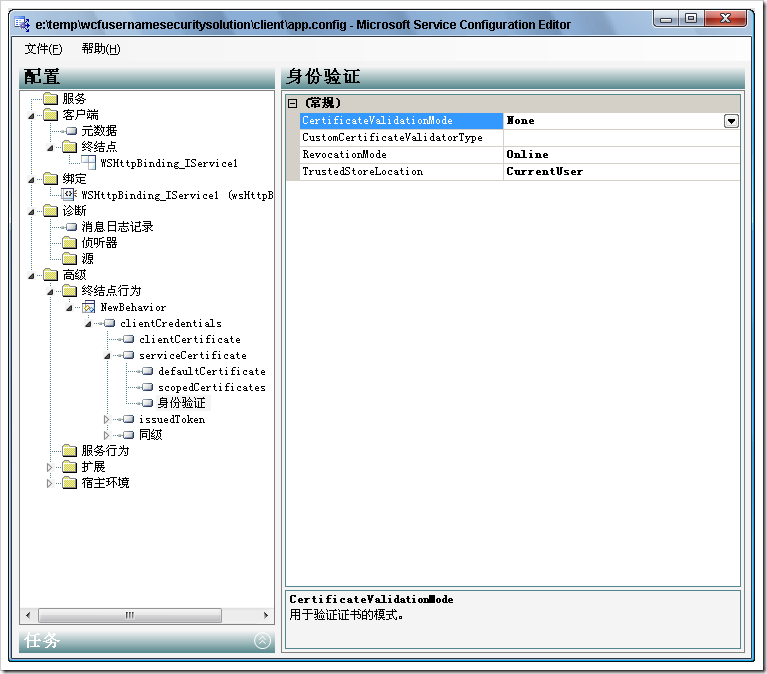
选择“clientCredentials”.依次展开clientCredentials=>serviceCertificate=>defaultcertificate,并进行如下的设置。这里的证书需要与服务器端匹配,因为它将对消息进行加密。
选择“身份验证”
【注意】一定要把CertificateValidationMode设置为None。因为我们现在使用的是测试证书
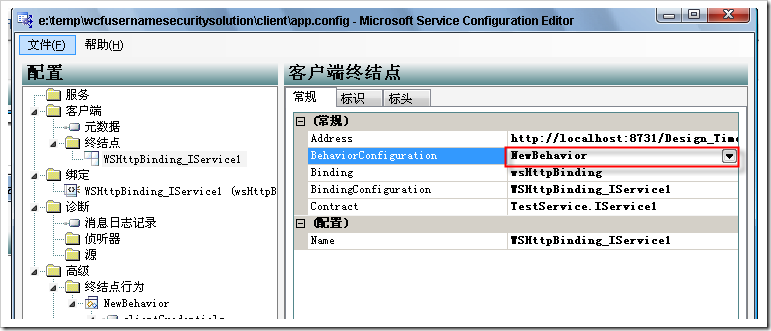
然后,回到终结点中,将终结点与行为进行关联。
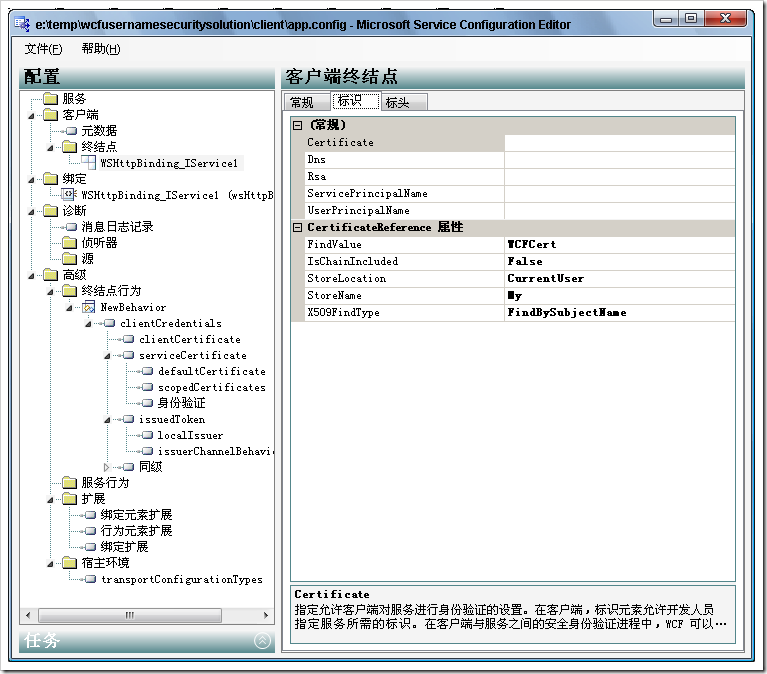
并且,在“标识”页面进行如下的设置
完成如上的配置后,保存,退出该工具。
<system.serviceModel>
<behaviors>
<endpointBehaviors>
<behavior name="NewBehavior">
<clientCredentials>
<serviceCertificate>
<defaultCertificate findValue="WCFCert" x509FindType="FindBySubjectName" />
<authentication certificateValidationMode="None" />
</serviceCertificate>
</clientCredentials>
</behavior>
</endpointBehaviors>
</behaviors>
<bindings>
<wsHttpBinding>
<binding name="WSHttpBinding_IService1" closeTimeout="00:01:00"
openTimeout="00:01:00" receiveTimeout="00:10:00" sendTimeout="00:01:00"
bypassProxyOnLocal="false" transactionFlow="false" hostNameComparisonMode="StrongWildcard"
maxBufferPoolSize="524288" maxReceivedMessageSize="65536"
messageEncoding="Text" textEncoding="utf-8" useDefaultWebProxy="true"
allowCookies="false">
<readerQuotas maxDepth="32" maxStringContentLength="8192" maxArrayLength="16384"
maxBytesPerRead="4096" maxNameTableCharCount="16384" />
<reliableSession ordered="true" inactivityTimeout="00:10:00"
enabled="false" />
<security mode="Message">
<transport clientCredentialType="Windows" proxyCredentialType="None"
realm="" />
<message clientCredentialType="UserName" negotiateServiceCredential="true"
algorithmSuite="Default" establishSecurityContext="true" />
</security>
</binding>
</wsHttpBinding>
</bindings>
<client>
<endpoint address="http://localhost:8731/Design_Time_Addresses/WCFServiceLib/Service1/"
behaviorConfiguration="NewBehavior" binding="wsHttpBinding"
bindingConfiguration="WSHttpBinding_IService1" contract="TestService.IService1"
name="WSHttpBinding_IService1">
<identity>
<certificateReference storeLocation="CurrentUser" x509FindType="FindBySubjectName"
findValue="WCFCert" />
</identity>
</endpoint>
</client>
</system.serviceModel>
9. 修改客户端代码,在调用服务之前设置客户端的凭据
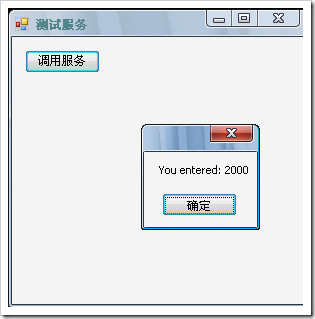
我们很高兴地看到,这样做了之后,就可以看到结果了
10. 进一步的扩展。
上面的过程我们实现了对于WCF服务,使用基于windows的username验证的方式。但如果我们想更加有灵活性.首先看我们能不能使用自定义的代码来进行验证呢?
11. 实现自定义的身份验证器
我们在服务项目中添加一个新的类
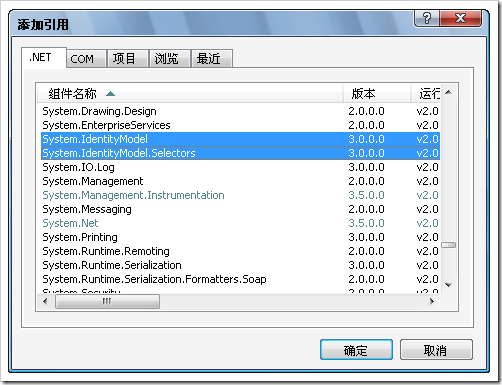
同时,我们还需要添加两个引用
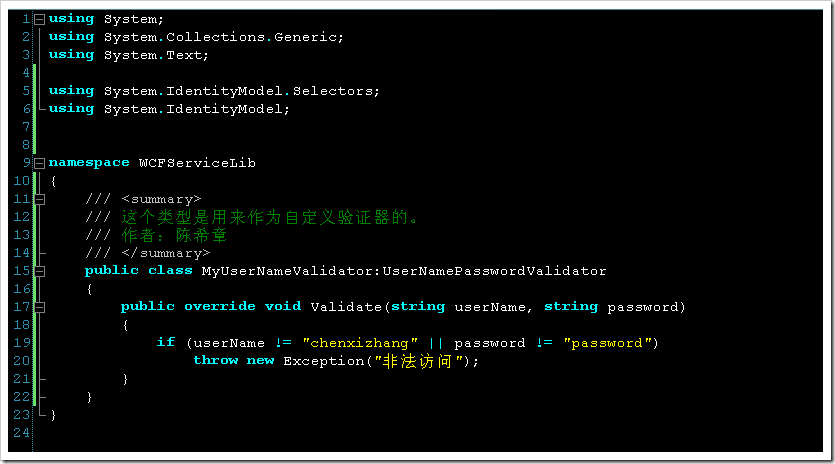
然后,编写该类型
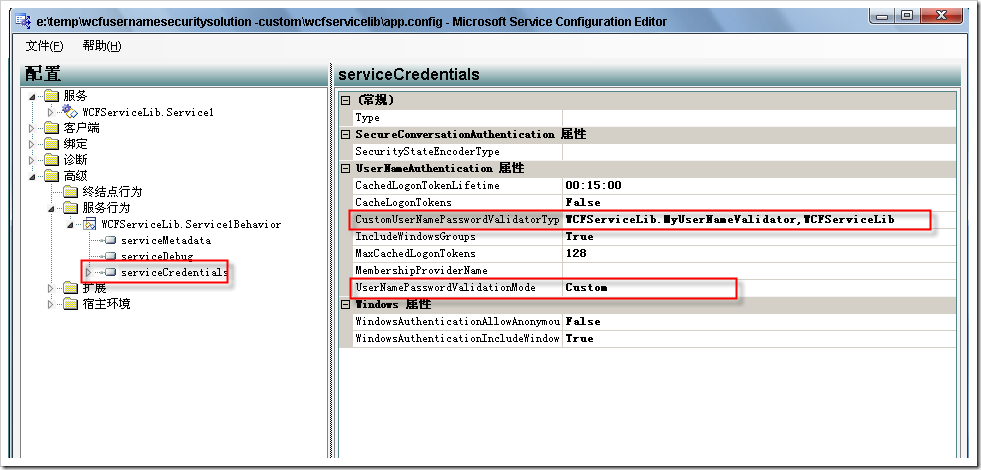
12. 在服务器端指定使用该验证器
13. 客户端掉用调试
【注意】客户端无需任何更改。我们还是像下面这样提供用户名和密码
因为这个用户名和密码是正确的,所以能正确返回。
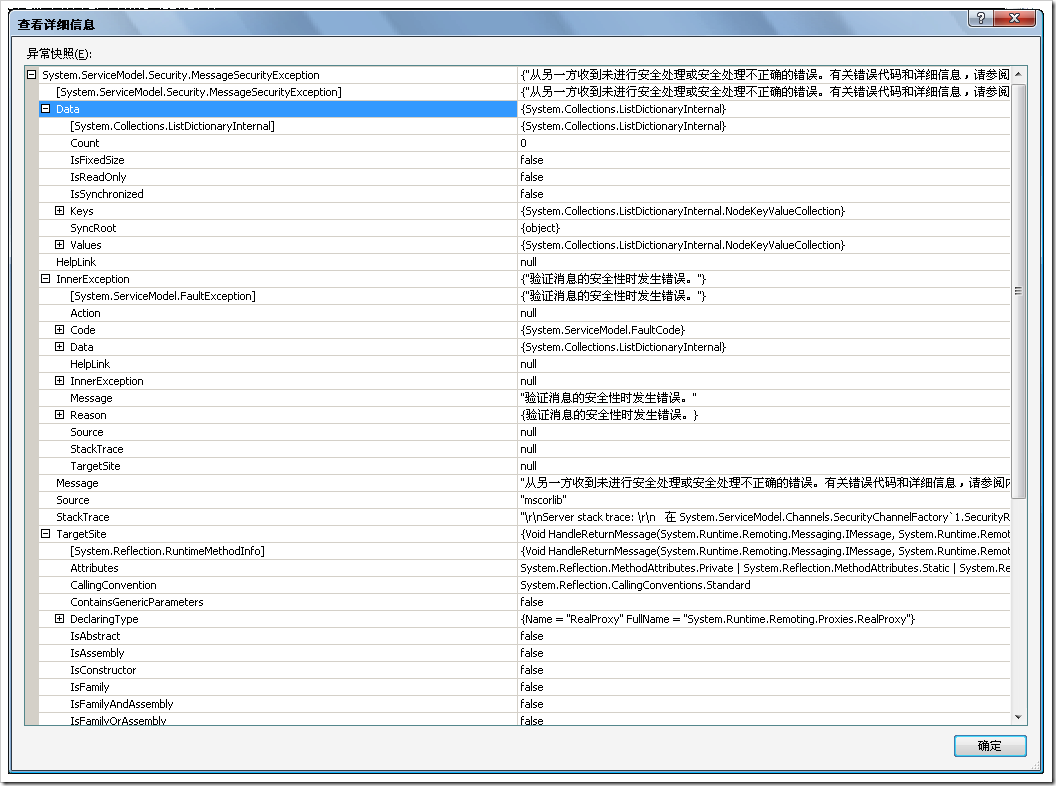
反之,如果我们修改一下密码,例如改成password1,则会发生一个异常
这样就实现了自定义的身份验证工作。
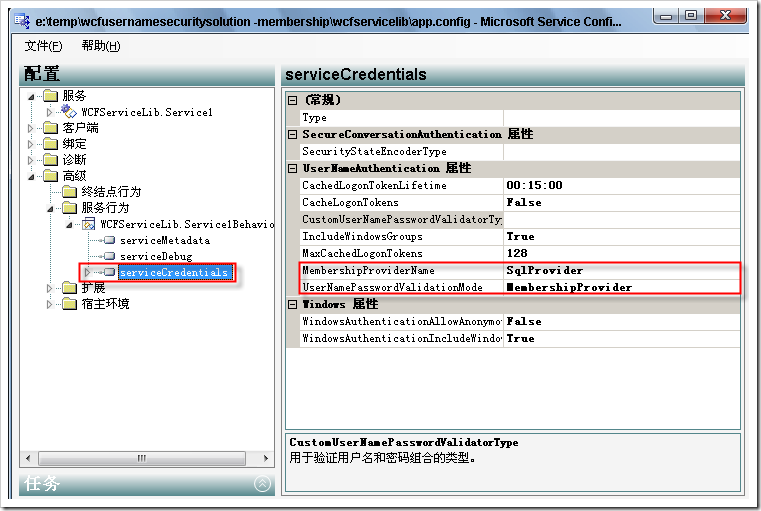
14. 最后,其实我们还可以做得更加简单一些。就是不编写专门的用户密码验证器,而是直接使用ASP.NET 2.0新增加的所谓MemberShip的功能。(关于该功能,以及其配套的数据库,你可能需要参考其他的资料,这里不做介绍)
我们首先在服务端配置文件中,添加如下的设置
<connectionStrings>
<add name="SqlServices" connectionString="server=(local);database=aspnetdb;integrated security=true"/>
</connectionStrings>
<system.web>
<compilation debug="true" />
<membership defaultProvider="SqlProvider">
<providers>
<clear />
<add name="SqlProvider" type="System.Web.Security.SqlMembershipProvider" connectionStringName="SqlServices" applicationName="demosite" enablePasswordRetrieval="false" enablePasswordReset="true" requiresQuestionAndAnswer="true" requiresUniqueEmail="true" passwordFormat="Hashed" />
</providers>
</membership>
</system.web>
然后,继续配置服务的配置文件
同样,保存好配置后,客户端亦无须任何修改。直接调试一下看看
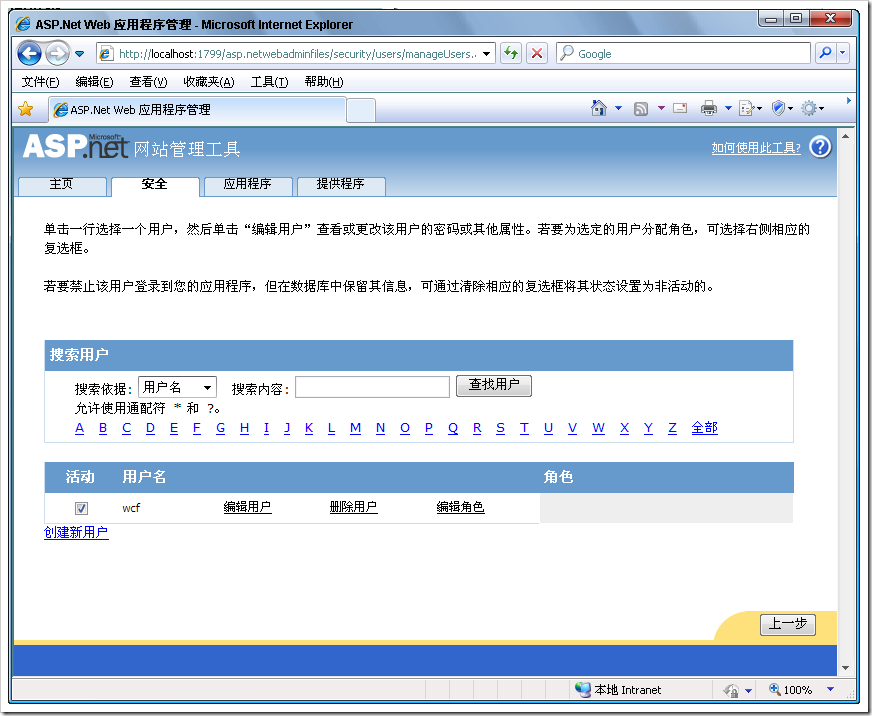
我们在数据库中有一个用户叫wcf,它的密码就是pass@word
所以,通过如下的客户端代码就可以成功实现验证


