docker新手。
目的:开发运行多个web api项目的时候,方便开发,兼顾部署。
方案大概这样:
1 隔离:系统运行在容器里,1容器只起1进程,代替在host起多个venv或虚拟机;
2调试和备份:代码和数据仍然保存在host,通过-v挂载到容器,用host的编辑器开发和git。
3部署:用dockerfile+docker-compose.yaml把配环境的工作固化下来,节省时间。dockerfile=安装虚拟机+pip install,docker-compose=启动虚拟机+命令行python3 xx.py
1创建镜像
具体到docker, 分成2个镜像来做
1 ubuntu+python3.6基础镜像
2 在1的基础上pip一些python库
1.1 ubuntu+python3.6
dockerhub上官方的python镜像是基于debian的,启动CMD默认起一个解释器。
镜像太精简,apt ip ifconfig等等工具好像都没有装,稍微想装点工具就不行,作为部署环境还可以,开发用的话,还是自己用ubuntu搞一个算了。
因为是开发用,所以重在隔离,不太在乎体积。
deb-src http://archive.ubuntu.com/ubuntu xenial main restricted #Added by software-properties
deb http://mirrors.aliyun.com/ubuntu/ xenial main restricted
deb-src http://mirrors.aliyun.com/ubuntu/ xenial main restricted multiverse universe #Added by software-properties
deb http://mirrors.aliyun.com/ubuntu/ xenial-updates main restricted
deb-src http://mirrors.aliyun.com/ubuntu/ xenial-updates main restricted multiverse universe #Added by software-properties
deb http://mirrors.aliyun.com/ubuntu/ xenial universe
deb http://mirrors.aliyun.com/ubuntu/ xenial-updates universe
deb http://mirrors.aliyun.com/ubuntu/ xenial multiverse
deb http://mirrors.aliyun.com/ubuntu/ xenial-updates multiverse
deb http://mirrors.aliyun.com/ubuntu/ xenial-backports main restricted universe multiverse
deb-src http://mirrors.aliyun.com/ubuntu/ xenial-backports main restricted universe multiverse #Added by software-properties
deb http://archive.canonical.com/ubuntu xenial partner
deb-src http://archive.canonical.com/ubuntu xenial partner
deb http://mirrors.aliyun.com/ubuntu/ xenial-security main restricted
deb-src http://mirrors.aliyun.com/ubuntu/ xenial-security main restricted multiverse universe #Added by software-properties
deb http://mirrors.aliyun.com/ubuntu/ xenial-security universe
deb http://mirrors.aliyun.com/ubuntu/ xenial-security multiverse
FROM ubuntu
LABEL author="lazyman"
#用ubuntu国内源替换默认源
RUN rm /etc/apt/sources.list
COPY sources.list /etc/apt/sources.list

#安装python3.6必要的包。源镜像太精简了,ip ifconfig之类的都没有。后续安装python pip也需要一些。但是build_essential似乎不必须,先去了。如果后面安装numpy之类需要gcc了,再加上
RUN apt-get update
#RUN apt-get install -y apt-transport-https vim iproute2 net-tools build-essential ca-certificates curl wget software-properties-common
RUN apt-get install -y apt-transport-https vim iproute2 net-tools ca-certificates curl wget software-properties-common

#安装python3.6 来自第三方
RUN add-apt-repository ppa:jonathonf/python-3.6
RUN apt-get update
RUN apt-get install -y python3.6
RUN apt install -y python3.6-dev
RUN apt install -y python3.6-venv
#为3.6安装pip
RUN wget https://bootstrap.pypa.io/get-pip.py
RUN python3.6 get-pip.py
#和自带的3.5共存
RUN update-alternatives --install /usr/bin/python3 python3 /usr/bin/python3.5 1
RUN update-alternatives --install /usr/bin/python3 python3 /usr/bin/python3.6 2
RUN update-alternatives --config python3
#print()时在控制台正常显示中文
ENV PYTHONIOENCODING=utf-8
在dockerfile所在路径下执行,建立image
docker build -t ubuntu-with-python .
因为开头几步用了国内源,所以非常快。
1.2 开发环境
FROM ubuntu-with-python
LABEL author="lazyman"

#代码复制过来后的路径
RUN mkdir /code
WORKDIR /code

#安装需要的python库
RUN pip3 install flask
RUN pip3 install flask-sqlalchemy
RUN pip3 install flask_restful
2启动容器
也分2种
1 手动敲docker命令2 docker-compose
2.1手动敲docker命令
先试试用docker命令行启动容器:
docker run --name quotation_api -itd -p 5000:5000 -v /home/quotation:/code quotation_dev:latest
用到的参数分别是
--name为容器命名;
-itd 输入输出终端,后台运行
-p host端口:容器端口 用5000是flask默认
-v host路径:容器内路径
最后是使用的镜像名(前面刚用dockerfile build出来的)
docker attach quotation_api
用python3 main.py启动flask,OK。
这样flask运行在docker里了。
在host改代码,可以看见docker的控制台在更新,和在host一样了。
2.2使用dock-compose
dock-compose用来管理多个container的运行,特别适合1个host上跑多个container的情况。
得天独厚,docker官网上dock-compose的gettingstarted文档就是flask的(说明flask+docker代表了先进生产力的前进方向O Yeah!),看完了基本就能用了。
dock-compose采用yaml作为配置文件。查了一下,yaml参考了xml和json,以及python的语法,采用了python之缩进,无XML之标记,无json之括号,无字符串之引号。特别适合作为配置文件用。
建立docker-compose.yaml文件:
version: "3"

services:
  quotation_api:
    image: quotation_dev:latest
    volumes:
      - /home/quotation:/code
    ports:
      - "5000:5000"
    command: python3 main.py
基本对应手动敲的docker命令,最后还省了敲python3 main.py。
当然如果是部署,这句可以用CMD 写进Dockfile。但是开发过程,文件名之类的会改变,比如最终部署运行用可能是gunicorn+wsgi.py,所以还是写在dockerfile外面比较方便
运行,在控制台执行:
docker-compose up
正常的话,已经能看见flask的控制台了
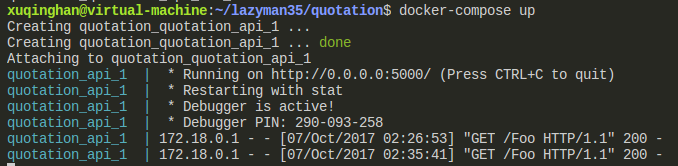
把手敲的命令基本都省了,包括(docker attach 容器名)之类。
但是每次有语法错误,容器会报错退出。修改完,还得在控制台按“↑”和“enter”重新执行一次docker-compose up。
这是flask的原因:flask自带的reload只能在语法没毛病的情况下,如果有错就会报错退出,因为容器执行的是python3 main.py,这个退了,容器就会stop。
为了解决这个问题,可以用flask-failsafe插件。然后就完美啦。语法错误也会reload了。