rmi需要建立两个项目,一个是服务端的项目,一个是客户端的项目.服务端项目启动后,再启动客户端项目去调用服务端的方法.
我们建立两个maven项目:
pom.xml配置:
<?xml version="1.0" encoding="UTF-8"?><project xmlns="http://maven.apache.org/POM/4.0.0"xmlns:xsi="http://www.w3.org/2001/XMLSchema-instance"xsi:schemaLocation="http://maven.apache.org/POM/4.0.0 http://maven.apache.org/xsd/maven-4.0.0.xsd"><modelVersion>4.0.0</modelVersion><groupId>com.xiejl</groupId><artifactId>test</artifactId><version>1.0-SNAPSHOT</version><properties><spring-version>4.3.7.RELEASE</spring-version></properties><dependencies><!-- https://mvnrepository.com/artifact/org.springframework/spring-beans --><dependency><groupId>org.springframework</groupId><artifactId>spring-beans</artifactId><version>${spring-version}</version></dependency><dependency><groupId>org.springframework</groupId><artifactId>spring-context</artifactId><version>${spring-version}</version></dependency><dependency><groupId>org.springframework</groupId><artifactId>spring-context-support</artifactId><version>${spring-version}</version></dependency><dependency><groupId>org.springframework</groupId><artifactId>spring-core</artifactId><version>${spring-version}</version></dependency><dependency><groupId>org.springframework</groupId><artifactId>spring-aop</artifactId><version>${spring-version}</version></dependency><dependency><groupId>org.springframework</groupId><artifactId>spring-aop</artifactId><version>${spring-version}</version></dependency><dependency><groupId>org.springframework</groupId><artifactId>spring-orm</artifactId><version>${spring-version}</version></dependency><dependency><groupId>org.springframework</groupId><artifactId>spring-orm</artifactId><version>${spring-version}</version></dependency><dependency><groupId>org.springframework</groupId><artifactId>spring-web</artifactId><version>${spring-version}</version></dependency><dependency><groupId>org.springframework</groupId><artifactId>spring-webmvc</artifactId><version>${spring-version}</version></dependency><!-- https://mvnrepository.com/artifact/org.aspectj/aspectjrt --><dependency><groupId>org.aspectj</groupId><artifactId>aspectjrt</artifactId><version>1.8.10</version></dependency><!-- https://mvnrepository.com/artifact/org.aspectj/aspectjweaver --><dependency><groupId>org.aspectj</groupId><artifactId>aspectjweaver</artifactId><version>1.8.10</version></dependency></dependencies></project>
第一个是服务端的maven项目:
服务接口,和以前不一样了,不用实现远程接口了。HelloService:
package com.xjl456852.rmi.spring;/*** 定义一个远程接口** @author leizhimin 2009-8-17 13:53:38*/public interface HelloService {/*** 简单的返回“Hello World!"字样** @return 返回“Hello World!"字样*/public String helloWorld();/*** 一个简单的业务方法,根据传入的人名返回相应的问候语** @param someBodyName 人名* @return 返回相应的问候语*/public String sayHelloToSomeBody(String someBodyName);}
服务实现类,加入了注解:
package com.xjl456852.rmi.spring;import org.springframework.stereotype.Service;/*** 远程的接口的实现** @author leizhimin 2009-8-17 13:54:38*/@Servicepublic class HelloServiceImpl implements HelloService {public HelloServiceImpl() {}/*** 简单的返回“Hello World!"字样** @return 返回“Hello World!"字样*/public String helloWorld() {return "Hello World!";}/*** 一个简单的业务方法,根据传入的人名返回相应的问候语** @param someBodyName 人名* @return 返回相应的问候语*/public String sayHelloToSomeBody(String someBodyName) {return "你好," + someBodyName + "!";}}
服务端启动程序:
package com.xjl456852.rmi.spring;import org.springframework.context.ApplicationContext;import org.springframework.context.support.ClassPathXmlApplicationContext;/*** 通过Spring发布RMI服务** @author leizhimin 2009-8-17 14:22:06*/public class HelloHost {public static void main(String[] args) {ApplicationContext ctx = new ClassPathXmlApplicationContext("applicationContext.xml");System.out.println("RMI服务伴随Spring的启动而启动了.....");}}
Spring 配置: applicationContext.xml:
<beans xmlns="http://www.springframework.org/schema/beans"xmlns:aop="http://www.springframework.org/schema/aop" xmlns:context="http://www.springframework.org/schema/context"xmlns:tx="http://www.springframework.org/schema/tx" xmlns:xsi="http://www.w3.org/2001/XMLSchema-instance"xmlns:task="http://www.springframework.org/schema/task"xsi:schemaLocation="http://www.springframework.org/schema/beans http://www.springframework.org/schema/beans/spring-beans-3.2.xsdhttp://www.springframework.org/schema/aop http://www.springframework.org/schema/aop/spring-aop-3.2.xsdhttp://www.springframework.org/schema/context http://www.springframework.org/schema/context/spring-context-3.2.xsdhttp://www.springframework.org/schema/tx http://www.springframework.org/schema/tx/spring-tx-3.2.xsdhttp://www.springframework.org/schema/task http://www.springframework.org/schema/task/spring-task-3.2.xsd"><!-- component-scan自动搜索@Component , @Controller , @Service , @Repository等标注的类 --><context:component-scan base-package="com.xjl456852" /><bean id="serviceExporter" class="org.springframework.remoting.rmi.RmiServiceExporter"><property name="serviceName" value="rmiSpring"/><property name="serviceInterface" value="com.xjl456852.rmi.spring.HelloService"/><property name="registryPort" value="8888"/><property name="service" ref="helloServiceImpl"/></bean></beans>
启动服务端程序,HelloHost:

第二个是客户端的maven项目:
客户端调用有两种方式,一种是使用Spring,一种不使用,这里仅介绍使用Spring的情况。
客户端需要依赖服务端的 HelloService接口,需要将这个接口放入到客户端中.
客户端的启动类:
package com.xjl456852.rmi.spring;import org.springframework.context.ApplicationContext;import org.springframework.context.support.ClassPathXmlApplicationContext;import javax.annotation.Resource;import java.rmi.RemoteException;/*** 通过Spring来调用RMI服务** @author leizhimin 2009-8-17 14:12:46*/public class HelloClient {@Resourceprivate HelloService helloService;public static void main(String[] args) throws RemoteException {ApplicationContext ctx = new ClassPathXmlApplicationContext("applicationContext.xml");HelloService hs = (HelloService) ctx.getBean("helloService");System.out.println(hs.helloWorld());System.out.println(hs.sayHelloToSomeBody("xjl456852"));}}
在Spring中配置客户端要调用服务, applicationContext.xml:
<beans xmlns="http://www.springframework.org/schema/beans"xmlns:aop="http://www.springframework.org/schema/aop" xmlns:context="http://www.springframework.org/schema/context"xmlns:tx="http://www.springframework.org/schema/tx" xmlns:xsi="http://www.w3.org/2001/XMLSchema-instance"xmlns:task="http://www.springframework.org/schema/task"xsi:schemaLocation="http://www.springframework.org/schema/beans http://www.springframework.org/schema/beans/spring-beans-3.2.xsdhttp://www.springframework.org/schema/aop http://www.springframework.org/schema/aop/spring-aop-3.2.xsdhttp://www.springframework.org/schema/context http://www.springframework.org/schema/context/spring-context-3.2.xsdhttp://www.springframework.org/schema/tx http://www.springframework.org/schema/tx/spring-tx-3.2.xsdhttp://www.springframework.org/schema/task http://www.springframework.org/schema/task/spring-task-3.2.xsd"><!-- component-scan自动搜索@Component , @Controller , @Service , @Repository等标注的类 --><context:component-scan base-package="com.xjl456852" /><bean id="helloService" class="org.springframework.remoting.rmi.RmiProxyFactoryBean"><property name="serviceUrl" value="rmi://192.168.176.131:8888/rmiSpring"/><property name="serviceInterface" value="com.xjl456852.rmi.spring.HelloService"/></bean></beans>
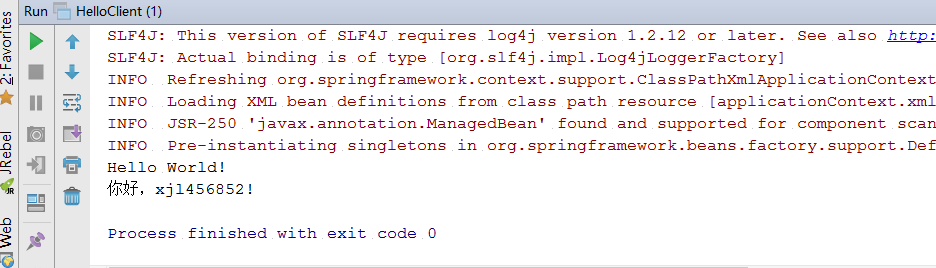
启动客户端,查看结果:
下面是服务端发布多个服务接口的配置:
假设服务端还有一个服务,叫OtherService:
package com.xjl456852.rmi.spring;/*** Created by xjl on 2017/3/19.*/public interface OtherService {public int random();}
服务端的实现类:
package com.xjl456852.rmi.spring;import org.springframework.stereotype.Service;import java.util.Random;/*** Created by xjl on 2017/3/19.*/@Servicepublic class OtherServiceImpl implements OtherService{Random random = new Random();public int random() {System.out.println("invoke random method");return random.nextInt(100);}}
服务端的Spring配置:
<beans xmlns="http://www.springframework.org/schema/beans"xmlns:aop="http://www.springframework.org/schema/aop" xmlns:context="http://www.springframework.org/schema/context"xmlns:tx="http://www.springframework.org/schema/tx" xmlns:xsi="http://www.w3.org/2001/XMLSchema-instance"xmlns:task="http://www.springframework.org/schema/task"xsi:schemaLocation="http://www.springframework.org/schema/beans http://www.springframework.org/schema/beans/spring-beans-3.2.xsdhttp://www.springframework.org/schema/aop http://www.springframework.org/schema/aop/spring-aop-3.2.xsdhttp://www.springframework.org/schema/context http://www.springframework.org/schema/context/spring-context-3.2.xsdhttp://www.springframework.org/schema/tx http://www.springframework.org/schema/tx/spring-tx-3.2.xsdhttp://www.springframework.org/schema/task http://www.springframework.org/schema/task/spring-task-3.2.xsd"><!-- component-scan自动搜索@Component , @Controller , @Service , @Repository等标注的类 --><context:component-scan base-package="com.xjl456852" /><bean id="serviceExporter" class="org.springframework.remoting.rmi.RmiServiceExporter"><property name="serviceName" value="rmiSpring"/><property name="serviceInterface" value="com.xjl456852.rmi.spring.HelloService"/><property name="registryPort" value="8888"/><property name="service" ref="helloServiceImpl"/></bean><bean id="serviceExporter_Other" class="org.springframework.remoting.rmi.RmiServiceExporter"><property name="serviceName" value="rmiSpringOther"/><property name="serviceInterface" value="com.xjl456852.rmi.spring.OtherService"/><property name="registryPort" value="8888"/><property name="service" ref="otherServiceImpl"/></bean></beans>
下面是客户端的配置:
客户端需要依赖服务端的OtherService接口
然后客户端的Spring配置如下:
<beans xmlns="http://www.springframework.org/schema/beans"xmlns:aop="http://www.springframework.org/schema/aop" xmlns:context="http://www.springframework.org/schema/context"xmlns:tx="http://www.springframework.org/schema/tx" xmlns:xsi="http://www.w3.org/2001/XMLSchema-instance"xmlns:task="http://www.springframework.org/schema/task"xsi:schemaLocation="http://www.springframework.org/schema/beans http://www.springframework.org/schema/beans/spring-beans-3.2.xsdhttp://www.springframework.org/schema/aop http://www.springframework.org/schema/aop/spring-aop-3.2.xsdhttp://www.springframework.org/schema/context http://www.springframework.org/schema/context/spring-context-3.2.xsdhttp://www.springframework.org/schema/tx http://www.springframework.org/schema/tx/spring-tx-3.2.xsdhttp://www.springframework.org/schema/task http://www.springframework.org/schema/task/spring-task-3.2.xsd"><!-- component-scan自动搜索@Component , @Controller , @Service , @Repository等标注的类 --><context:component-scan base-package="com.xjl456852" /><bean id="helloService" class="org.springframework.remoting.rmi.RmiProxyFactoryBean"><property name="serviceUrl" value="rmi://192.168.176.131:8888/rmiSpring"/><property name="serviceInterface" value="com.xjl456852.rmi.spring.HelloService"/></bean><bean id="otherService" class="org.springframework.remoting.rmi.RmiProxyFactoryBean"><property name="serviceUrl" value="rmi://192.168.176.131:8888/rmiSpringOther"/><property name="serviceInterface" value="com.xjl456852.rmi.spring.OtherService"/></bean></beans>
客户端的测试类:
package com.xjl456852.rmi.spring;import org.springframework.context.ApplicationContext;import org.springframework.context.support.ClassPathXmlApplicationContext;import javax.annotation.Resource;import java.rmi.RemoteException;/*** 通过Spring来调用RMI服务** @author leizhimin 2009-8-17 14:12:46*/public class HelloClient {@Resourceprivate HelloService helloService;@Resourceprivate OtherService otherService;public static void main(String[] args) throws RemoteException {ApplicationContext ctx = new ClassPathXmlApplicationContext("applicationContext.xml");HelloService hs = (HelloService) ctx.getBean("helloService");System.out.println(hs.helloWorld());System.out.println(hs.sayHelloToSomeBody("xjl456852"));OtherService os = (OtherService) ctx.getBean("otherService");System.out.println("otherService:" + os.random());}}
先启动服务端,然后再启动客户端进行调用.
服务端显示如下:

客户端显示如下:

感谢原作者: