1、Autolayout的2个核心概念
(1)参照:将某个UI控件作为参照标示,进行确定该控件的位置;
在添加时要注意目标view需要遵循以下规则:
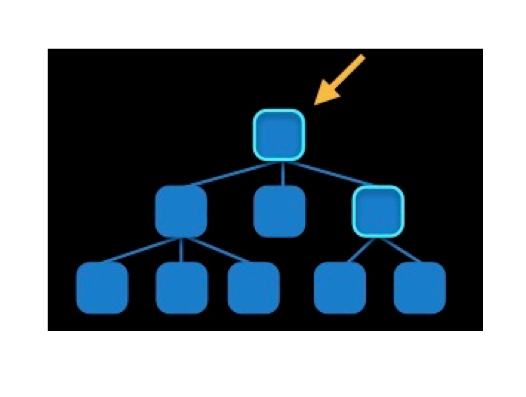
1)对于两个同层级view之间的约束关系,添加到它们的父view上
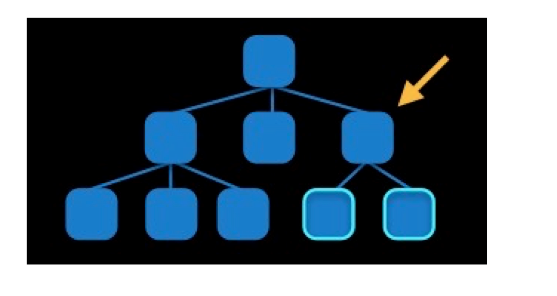
2)对于两个不同层级view之间的约束关系,添加到他们最近的共同父view上
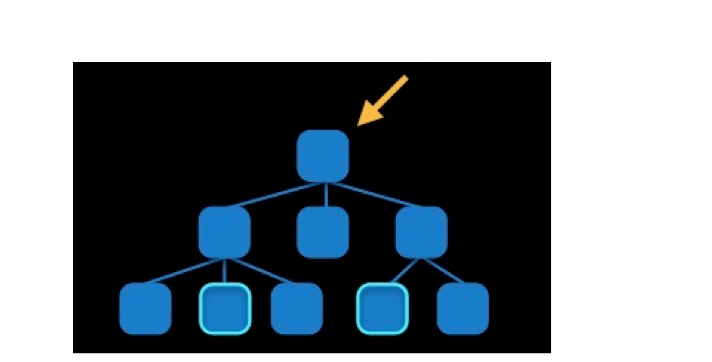
3)对于有层次关系的两个view之间的约束关系,添加到层次较高的父view上
二、创建autoLayout的方法
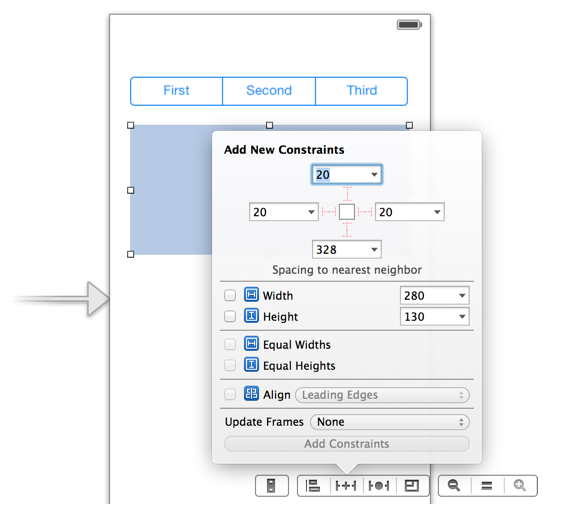
1、手动布局
2、纯代码方式
(1)利用NSLayoutConstraint类创建具体的约束对象
(2)添加约束对象到相应的view上
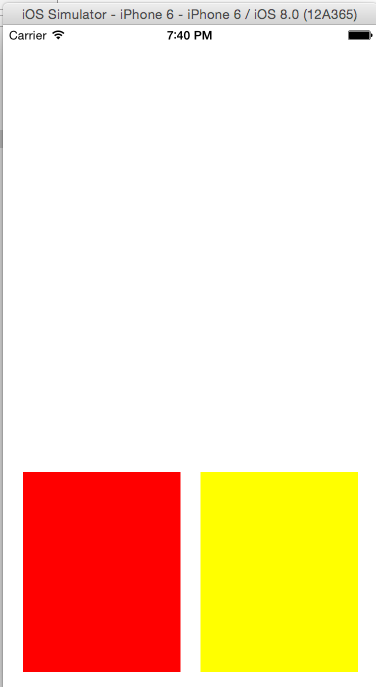
#import "ViewController.h"

@interface ViewController ()
@property(strong,nonatomic)UIView *view1;
@property(strong,nonatomic)UIView *view2;
@end

@implementation ViewController

- (void)viewDidLoad {
    [super viewDidLoad];
    //创建view1
    self.view1 = [[UIView alloc]init];
    self.view1.backgroundColor = [UIColor redColor];
    self.view1.translatesAutoresizingMaskIntoConstraints = NO;
    [self.view addSubview:self.view1];

    //创建view2
    self.view2 = [[UIView alloc]init];
    self.view2.backgroundColor = [UIColor yellowColor];
    self.view2.translatesAutoresizingMaskIntoConstraints = NO;
    [self.view addSubview:self.view2];

    //创建约束
    //设置view1的左边距
    NSLayoutConstraint *lcLeft = [NSLayoutConstraint constraintWithItem:self.view1 attribute:NSLayoutAttributeLeading relatedBy:NSLayoutRelationEqual toItem:self.view attribute:NSLayoutAttributeLeading multiplier:1.0 constant:20];
    //设置view1的下边距
    NSLayoutConstraint *lcBottom = [NSLayoutConstraint constraintWithItem:self.view1 attribute:NSLayoutAttributeBottom relatedBy:NSLayoutRelationEqual toItem:self.view attribute:NSLayoutAttributeBottom multiplier:1.0 constant:-20];
    //设置view1与view2等宽
    NSLayoutConstraint *lcEqualWidth = [NSLayoutConstraint constraintWithItem:self.view1 attribute:NSLayoutAttributeWidth relatedBy:NSLayoutRelationEqual toItem:self.view2 attribute:NSLayoutAttributeWidth multiplier:1.0 constant:0];
    //设置view1与view2等高
    NSLayoutConstraint *lcEqualHeight = [NSLayoutConstraint constraintWithItem:self.view2 attribute:NSLayoutAttributeHeight relatedBy:NSLayoutRelationEqual toItem:self.view1 attribute:NSLayoutAttributeHeight multiplier:1.0 constant:0];
    //设置view2的右边距
    NSLayoutConstraint *lcRight = [NSLayoutConstraint constraintWithItem:self.view2 attribute:NSLayoutAttributeTrailing relatedBy:NSLayoutRelationEqual toItem:self.view attribute:NSLayoutAttributeTrailing multiplier:1.0 constant:-20];
    //设置view2的下边距
    NSLayoutConstraint *lcBottom2 = [NSLayoutConstraint constraintWithItem:self.view2 attribute:NSLayoutAttributeBottom relatedBy:NSLayoutRelationEqual toItem:self.view attribute:NSLayoutAttributeBottom multiplier:1.0 constant:-20];
    //设置view1与view2的间隔
    NSLayoutConstraint *lcGap = [NSLayoutConstraint constraintWithItem:self.view2 attribute:NSLayoutAttributeLeading relatedBy:NSLayoutRelationEqual toItem:self.view1 attribute:NSLayoutAttributeTrailing multiplier:1.0 constant:20];
    //添加约束到组
    [self.view addConstraints:@[lcLeft,lcBottom,lcRight,lcBottom2,lcEqualHeight,lcEqualWidth,lcGap]];
    //设置view的高度
    NSLayoutConstraint *lcFixedHeight = [NSLayoutConstraint constraintWithItem:self.view1 attribute:NSLayoutAttributeHeight relatedBy:NSLayoutRelationEqual toItem:nil attribute:NSLayoutAttributeHeight multiplier:1.0 constant:200];
    [self.view1 addConstraint:lcFixedHeight];
}
@end
运行效果图,如下所示:
(1)要先禁止autoresizing功能,设置view的下面属性为NO
(2)添加约束之前,一定要保证相关控件都已经在各自的父控件上
(3)不用再给view设置frame
2.3创建约束对象的常用方法
+(id)constraintWithItem:(id)view1 attribute:(NSLayoutAttribute)attr1 relatedBy:(NSLayoutRelation)relation toItem:(id)view2 attribute:(NSLayoutAttribute)attr2 multiplier:(CGFloat)multiplier constant:(CGFloat)c;
参数解析:
(1)view1 :要约束的控件
(2)attr1 :约束的类型(做怎样的约束)
(3)relation :与参照控件之间的关系
(4)view2 :参照的控件
(5)attr2 :约束的类型(做怎样的约束)
(6)multiplier :乘数
(7)c :常量
三、VFL语言
VFL全称是Visual Format Language,翻译过来是“可视化格式语言”,VFL是苹果公司为了简化Autolayout的编码而推出的抽象语言。
1、简单VFL示例:
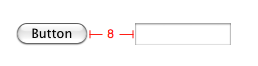
1.[button]-[textField]
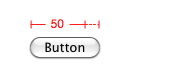
2.[button(>=50)]
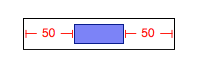
3.|-50-[purpleBox]-50-|
4.V:[topField]-10-[bottomField]

5.[maroonView][blueView]

6.[button(100@20)]

7.[button(==button2)]

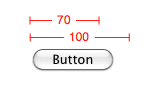
8.[flexibleButton(>=70,<=100)]
9.|-[find]-[findNext]-[findField(>=20)]-|
2.复杂示例(带说明):
H:[cancelButton(72)]-12-[acceptButton(50)]
说明:canelButton宽72,acceptButton宽50,它们之间间距12
H:[wideView(>=60@700)]
说明:wideView宽度大于等于60point,该约束条件优先级为700(优先级最大值为1000,优先级越高的约束越先被满足)
V:[redBox]-[yellowBox(==redBox)]
说明:竖直方向上,先有一个redBox,其下方紧接一个高度等于redBox高度的yellowBox
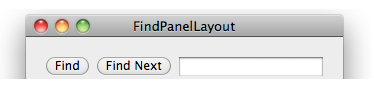
H:|-10-[Find]-[FindNext]-[FindField(>=20)]-|
说明:水平方向上,Find距离父view左边缘默认间隔宽度,之后是FindNext距离Find间隔默认宽度;再之后是宽度不小于20的FindField,它和FindNext以及父view右边缘的间距都是默认宽度。(竖线“|”表示superview的边缘)
3.使用VFL来创建约束数组
+ (NSArray *)constraintsWithVisualFormat:(NSString *)format options:(NSLayoutFormatOptions)opts metrics:(NSDictionary *)metrics views:(NSDictionary *)views;
参数说明:
(1)format :VFL语句
(2)opts :约束类型
(3)metrics :VFL语句中用到的具体数值
(4)views :VFL语句中用到的控件
案例分析:通过VFL语句实现上个案例
#import "ViewController.h"

@interface ViewController ()
@property(strong,nonatomic)UIView *view1;
@property(strong,nonatomic)UIView *view2;

@end

@implementation ViewController

- (void)viewDidLoad {
    [super viewDidLoad];
    //创建view1
    self.view1 = [[UIView alloc]init];
    self.view1.backgroundColor = [UIColor redColor];
    self.view1.translatesAutoresizingMaskIntoConstraints = NO;
    [self.view addSubview:self.view1];
    //创建view2
    self.view2 = [[UIView alloc]init];
    self.view2.backgroundColor = [UIColor blueColor];
    self.view2.translatesAutoresizingMaskIntoConstraints = NO;
    [self.view addSubview:self.view2];

    //使用VFL语言添加约束
    NSDictionary *metrics = @{@"gap":@20,@"height":@200};
    NSDictionary *viewsDic =@{@"view1":self.view1,@"view2":self.view2};
    NSArray *layoutConstraints1 = [NSLayoutConstraint constraintsWithVisualFormat:@"H:|-gap-[view1]-gap-[view2(==view1)]-gap-|" options:NSLayoutFormatDirectionLeftToRight metrics:metrics views:viewsDic];
    NSArray *layoutConstraints2 = [NSLayoutConstraint constraintsWithVisualFormat:@"V:[view1(height)]-gap-|" options:NSLayoutFormatDirectionLeadingToTrailing metrics:metrics views:viewsDic];
     NSArray *layoutConstraints3 = [NSLayoutConstraint constraintsWithVisualFormat:@"V:[view2(==view1)]-gap-|" options:NSLayoutFormatDirectionLeadingToTrailing metrics:metrics views:viewsDic];
    [self.view addConstraints:layoutConstraints1];
    [self.view addConstraints:layoutConstraints2];
    [self.view addConstraints:layoutConstraints3];

}

@end