• 消息队列之ActiveMQ学习笔记(二、C#实例实现)


    ActiveMQ提供多种语言支持,如Java, C, C++, C#, Ruby, Perl, Python, PHP等。此处列举C#实例

     下述C#实例代是基于QUEUE的P2P方式,如需要实现TOPIC的广播模式,请参见下方总结第四条。

    一 、发送端       

    public void ActiveSend()
            {
                IConnectionFactory factory = new ConnectionFactory("tcp://localhost:61616");
                //通过工厂建立连接
                using (IConnection connection = factory.CreateConnection())
                {
                    try
                    {
                        //通过连接创建Session会话
                        using (ISession session = connection.CreateSession())
                        {
                            //通过会话创建生产者,方法里面new出来的是MQ中的Queue
                            using (IMessageProducer prod = session.CreateProducer(new Apache.NMS.ActiveMQ.Commands.ActiveMQQueue("firstQueue")))
                            {
                                //创建一个发送的消息对象
                                ITextMessage message = prod.CreateTextMessage();
                                while (true)
                                {
                                    try
                                    {
                                        //给这个对象赋实际的消息
                                        message.Text = Console.ReadLine();
                                        //设置消息对象的属性,这个很重要哦,是Queue的过滤条件,也是P2P消息的唯一指定属性
                                        message.Properties.SetString("filter", "demo");
                                        //生产者把消息发送出去,几个枚举参数MsgDeliveryMode是否长链,MsgPriority消息优先级别,发送最小单位,当然还有其他重载
                                        prod.Send(message, MsgDeliveryMode.NonPersistent, MsgPriority.Normal, TimeSpan.MinValue);
                                        Console.WriteLine("消息发送成功");
                                    }
                                    catch (Exception ex)
                                    {
                                        Console.WriteLine("消息发送失败!" + ex);
                                    }
                                }
    
                            }
                        }
                    }
                    catch (Exception e)
                    {
                        Console.WriteLine("创建发送MQ失败失败" + e);
                    }
                }
            }
    View Code

    二 、接收端       

    public void ActiveReceived()
            {
                //创建连接工厂
                IConnectionFactory factory = new ConnectionFactory("tcp://localhost:61616");
    
                try
                {
                    //通过工厂构建连接
                    using (IConnection connection = factory.CreateConnection())
                    {
                        //这个是连接的客户端名称标识
                        connection.ClientId = "firstQueueListener";
                        //启动连接,监听的话要主动启动连接
                        connection.Start();
                        //通过连接创建一个会话
                        using (ISession session = connection.CreateSession())
                        {
                            //通过会话创建一个消费者,这里就是Queue这种会话类型的监听参数设置
                            using (IMessageConsumer consumer = session.CreateConsumer(new Apache.NMS.ActiveMQ.Commands.ActiveMQQueue("firstQueue"), "filter='demo'"))
                            {
                                ITextMessage message;
                                while (true)
                                {
                                    try
                                    {
                                        message = (ITextMessage)consumer.Receive();
                                        Console.WriteLine("Receive msg:" + message.Text);
                                    }
                                    catch (Exception ex)
                                    {
                                        Console.WriteLine("接收消息失败!" + ex);
                                    }
                                }
                            }
                        }
                    }
                }
                catch (Exception ex)
                {
                    Console.WriteLine("启动接收失败!" + ex);
                }
            }
    View Code

    三 、总结          

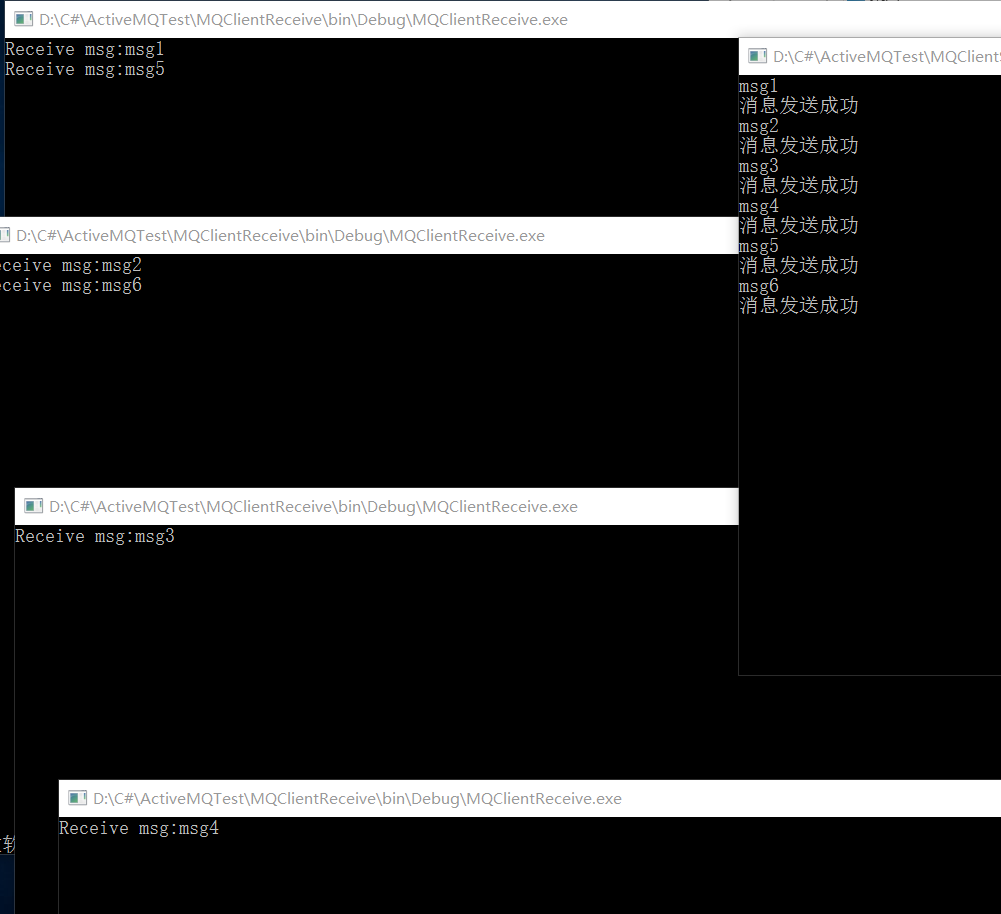
    1.ActiveMQ  的队列类似于线程安全的队列,可以多个客户端(生产者)往该队列发送消息,但读取的客户端(消费者)只能有一个,即使同时开启多个消费者客户端(这种情况下每个消费者轮询接收消息)。

     测试结果如下:

    2.可以启动多个发送客户端,但需要注意的是只有在标识id不同的情况下才能开启多个消费者客户端,所以建议将消费者标识ID设置成唯一:

    如:

    connection.ClientId = "firstQueueListener" + Guid.NewGuid();

    如果启动多个客户端但标识相同则会出现以下错误提示:

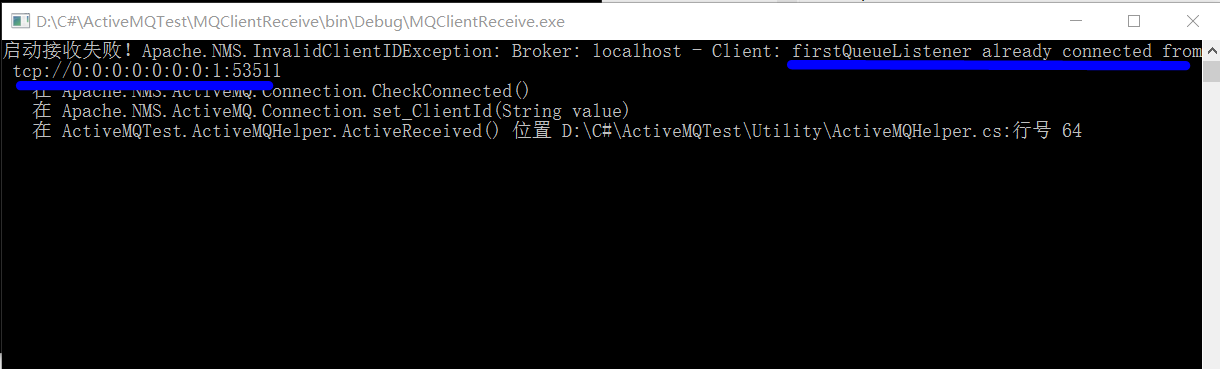
     3.ActiveMQ支持过滤机制,即生产者可以设置消息的属性(Properties),该属性与消费者端的Selector对应,只有消费者设置的selector与消息的Properties匹配,消息才会发给该消费者。Topic和Queue都支持Selector。

    4.上述C#实例是基于QUEUE的P2P方式,每条消息有且仅有一个消费者能接收。如需要广播,那么需要在创建生产者时将ActiveMQQueue对象修改为ActiveMQTopic对象,在此为了更直观再重新贴一边代码,不同处已标记

    public void QueueReceived()
            {
                //创建连接工厂
                IConnectionFactory factory = new ConnectionFactory("tcp://localhost:61616");
    
                try
                {
                    //通过工厂构建连接
                    using (IConnection connection = factory.CreateConnection())
                    {
                        //这个是连接的客户端名称标识
                        connection.ClientId = "firstQueueListener" + Guid.NewGuid();
                        //启动连接,监听的话要主动启动连接
                        connection.Start();
                        //通过连接创建一个会话
                        using (ISession session = connection.CreateSession())
                        {
                            //通过会话创建一个消费者,这里就是Topic这种会话类型的监听参数设置
                            using (IMessageConsumer consumer = session.CreateConsumer(new Apache.NMS.ActiveMQ.Commands.ActiveMQTopic("firstQueue"), "filter='demo'",false))
                            {
                                ITextMessage message;
                                while (true)
                                {
                                    try
                                    {
                                        message = (ITextMessage)consumer.Receive();
                                        Console.WriteLine("Receive msg:" + message.Text);
                                    }
                                    catch (Exception ex)
                                    {
                                        Console.WriteLine("接收消息失败!" + ex);
                                    }
                                }
                            }
                        }
                    }
                }
                catch (Exception ex)
                {
                    Console.WriteLine("启动接收失败!" + ex);
                }
            }

     如下为测试结果:

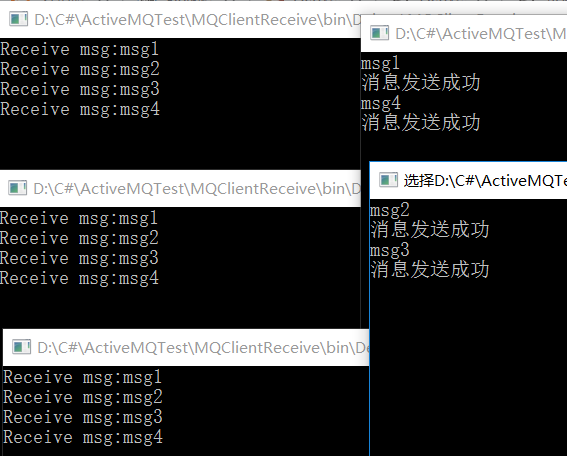
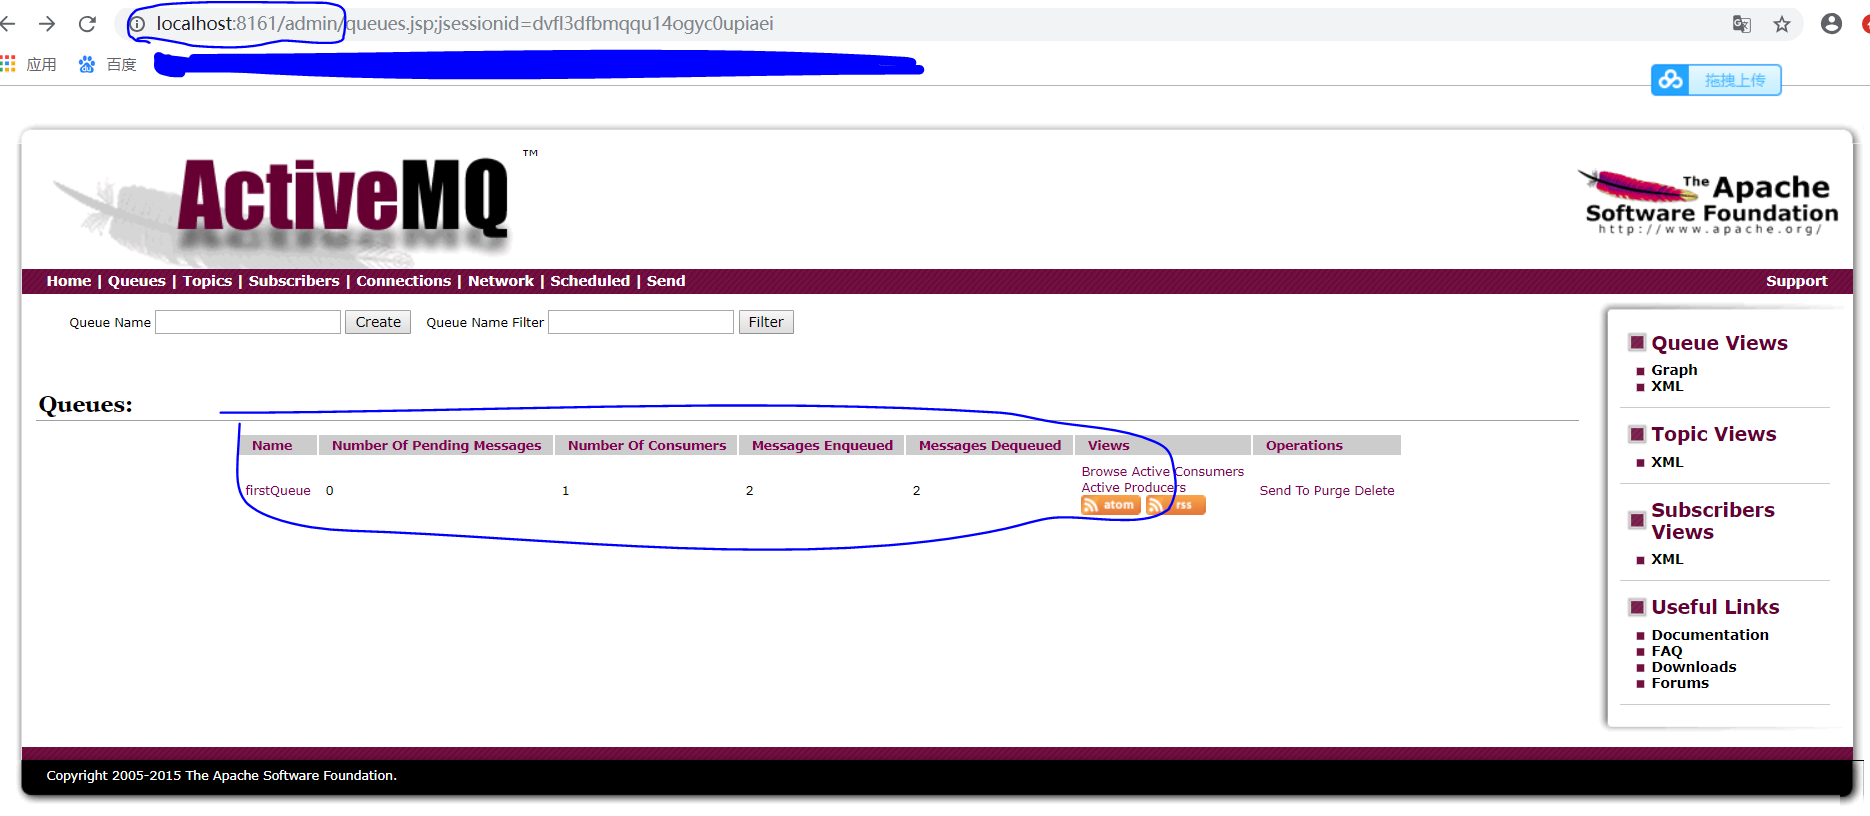
     5.测试结果可以去http://localhost:8161/admin查看,登陆用户密码默认均为admin

    完整测试代码

    https://pan.baidu.com/s/1NjKtg77cYTRbswxl5cO67A

  • 相关阅读:
    struts2 局部类型转换器
    Struts2 命名空间配置
    Struts2 国际化
    Struts2 跟踪用户状态
    Struts2
    Struts2支持的处理结果类型
    SGI STL内存配置器(一):内存泄漏?
    TP 3.2 笔记 (1)
    AOP TP框架有感
    eclipse+git
  • 原文地址:https://www.cnblogs.com/xieyang07/p/10404040.html
Copyright © 2020-2023  润新知