前言:
学习学到现在终于要学习框架了,心里有点小激动呢,也不知道自己能不能学好呢,只能按着一步一个脚印的走下去,好了废话不多说。让我们打开hibernate 的大门吧!!!
肯定好多人都会问什么是hibernate呢?
解答:Hibernate是一个开放源代码的对象关系映射框架,它对JDBC进行了非常轻量级的对象封装,使得Java程序员可以随心所欲的使用对象编程思维来操纵数据库。 Hibernate可以应用在任何使用JDBC的场合,既可以在Java的客户端程序使用,也可以在Servlet/JSP的Web应用中使用,最具革命意义的是,Hibernate可以在应用EJB的J2EE架构中取代CMP,完成数据持久化的重任。
我们接触了Intelij IDEA,听老师说这是一款特别强大的软件,下面的案例就是那这个软件操作的。有兴趣的同学可以去下载。
首先我要说一点,在IntelliJ IDEA里面“new Project”就相当于我们eclipse的“workspace”,而“new Module”才是创建一个工 程,这是要注意的一点。
Intelij IDEA 中的架构图:

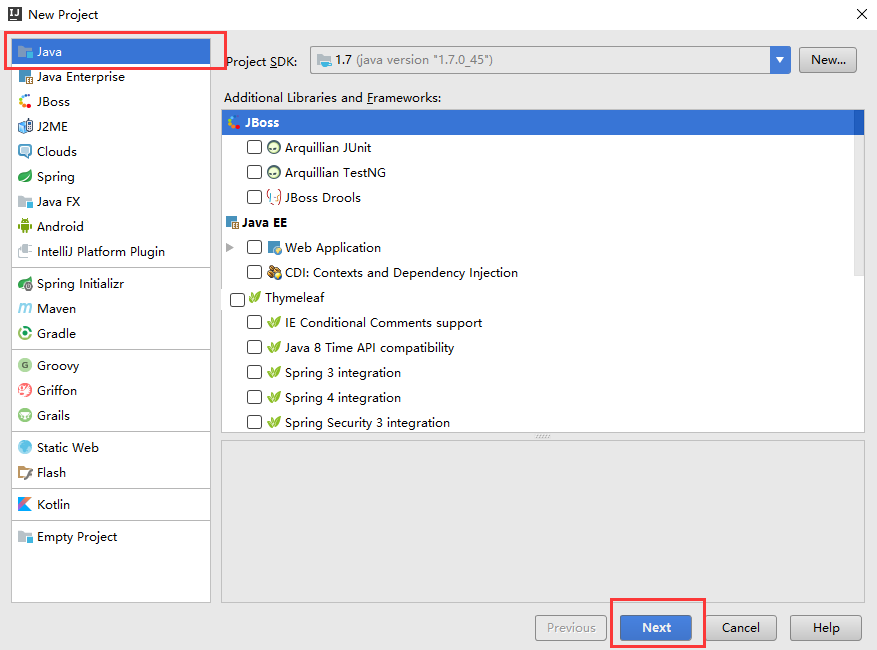
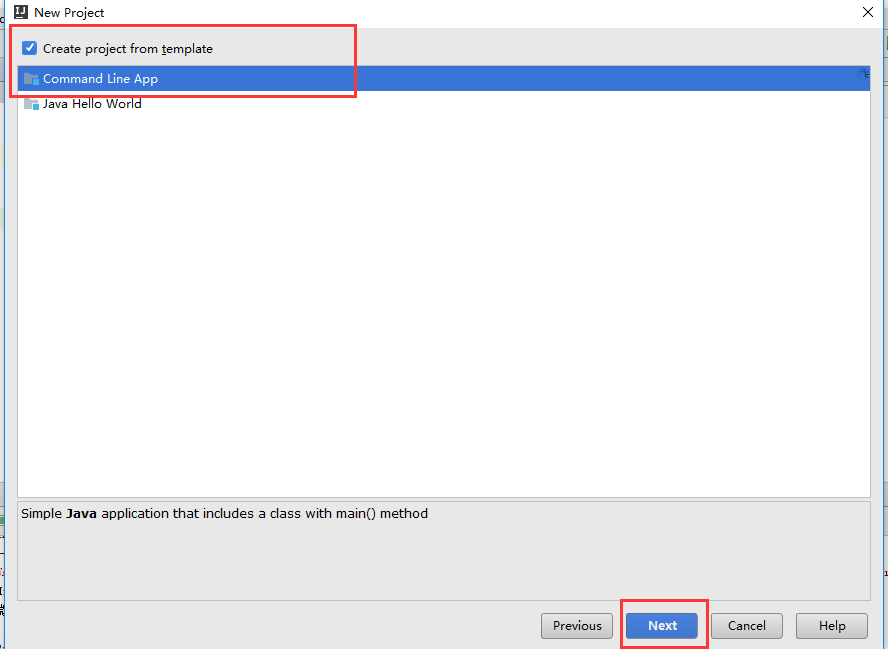
创建一个工程分为以下几步:
(1)new project


这样一个项目就有了,接下来我们要添加我们需要的资源
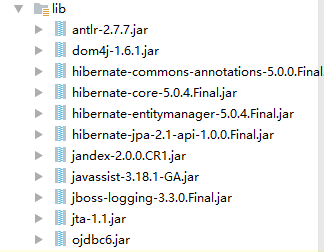
(2)创建lib文件夹

以上就是现阶段我们所需要的jar包
(3)创建resource文件夹,其中包含hibernate 的大配置信息,在这要注意命名问题:hibernate.ccfg.xml

<?xml version='1.0' encoding='utf-8'?>
<!DOCTYPE hibernate-configuration PUBLIC
        "-//Hibernate/Hibernate Configuration DTD 3.0//EN"
        "http://www.hibernate.org/dtd/hibernate-configuration-3.0.dtd">

<hibernate-configuration>

    <session-factory>

        < !--数据库连接设置-->
     < !--数据库JDBC驱动设置-->

        <property name="connection.driver_class"
>oracle.jdbc.driver.OracleDriver</property>

    < !--数据库url-->

        <property name="connection.url"
>jdbc:oracle:thin:@localhost:1521:orcl</property>
    < !--数据库用户名-->

        <property name="connection.username"
>lex</property>
    < !--数据库用户密码-->

        <property name="connection.password"
>lex</property>

        < !--JDBC连接池(使用内置的)-->
        <property name="connection.pool_size"
>1</property>

       < !--SQL方言-->
        <property name="dialect"
>org.hibernate.dialect.Oracle10gDialect</property>

        < !--使Hibernate自动会话上下文管理-->
        <property name="current_session_context_class"
>thread</property>

       <!--关闭二级缓存-->
        <property name="cache.provider_class"
>org.hibernate.cache.NoCacheProvider</property>

        <!-- 是否将运行期间生成的sql输出到日志以供调试-->
        <property name="show_sql"
>true</property>

       < !--在启动时,删除和重新创建数据表结构-->
        <property name="hbm2ddl.auto"
>update</property>
<!-- 关联小配置-->
<mapping-resource>
    cn/lex/entity/Student.hbm.xml</mapping-resource>
</hibernate-configuration >
(4)配置小配置,存在于实体层,命名:Student.hbm.xml
<?xml version="1.0"?>
<!DOCTYPE hibernate-mapping PUBLIC
        "-//Hibernate/Hibernate Mapping DTD 3.0//EN"
        "http://www.hibernate.org/dtd/hibernate-mapping-3.0.dtd">
<hibernate-mapping package="cn.lex.entity">

    <class name="Student" table="Student">
        <id name="id" column="id">
            <generator class="native"/>
        </id>
        <property name="name"></property>
    </class>

</hibernate-mapping
>
(5)书写测试
package cn.lex.test;

import cn.lex.entity.Student;
import org.hibernate.Query;
import org.hibernate.Session;
import org.hibernate.SessionFactory;
import org.hibernate.Transaction;
import org.hibernate.cfg.Configuration;
import org.junit.After;
import org.junit.Before;
import org.junit.Test;

import java.util.List;

/**
 * Created by accp on 2017/1/9.
 */
public class FirstTest {
    Configuration cfg;  //配置对象
    Session session;   //会话对象
    Transaction tx;    //事务对象
    @Before
    public void mybefore(){
        cfg=new Configuration().configure();  //获取配置对象
        SessionFactory factory = cfg.buildSessionFactory(); //获取sessionfactory对象
         session= factory.openSession();  //获取session对象
         tx= session.beginTransaction();  //开启事务
    }

    //添加学生
    @Test
    public void add(){
        Student stu=new Student();
        stu.setName("微冷的雨");
        session.save(stu);  //提交到数据库
        System.out.println("save ok!");
    }

    //根据条件查询学生姓名
    @Test
    public void select(){
        String hql="from Student where id=?";
        Query query = session.createQuery(hql);
        query.setParameter(0,26);
        Student stu =(Student) query.uniqueResult();
        System.out.println(stu.getName());
    }

    //修改学生姓名
    @Test
    public void update(){
      Student stu=session.load(Student.class,serializable:1);
      stu.setName("天空的星星");
      System.out.println("update ok!");

    }

    //删除学生
    @Test
    public void delete(){
        Student stu=session.load(Student.class,serializable:1);
        session.delete(stu);
        System.out.println("delete ok!");

    }

    //查询学生
    @Test
    public void select(){
      Student stu=session.load(Student.class,serializable:1);
      System.out.println("姓名:"+stu.getName());
    }
    @After
    public void after(){
        tx.commit();  //提交事务
        session.close();  //关闭session
    }
}
点击运行即可。。。
