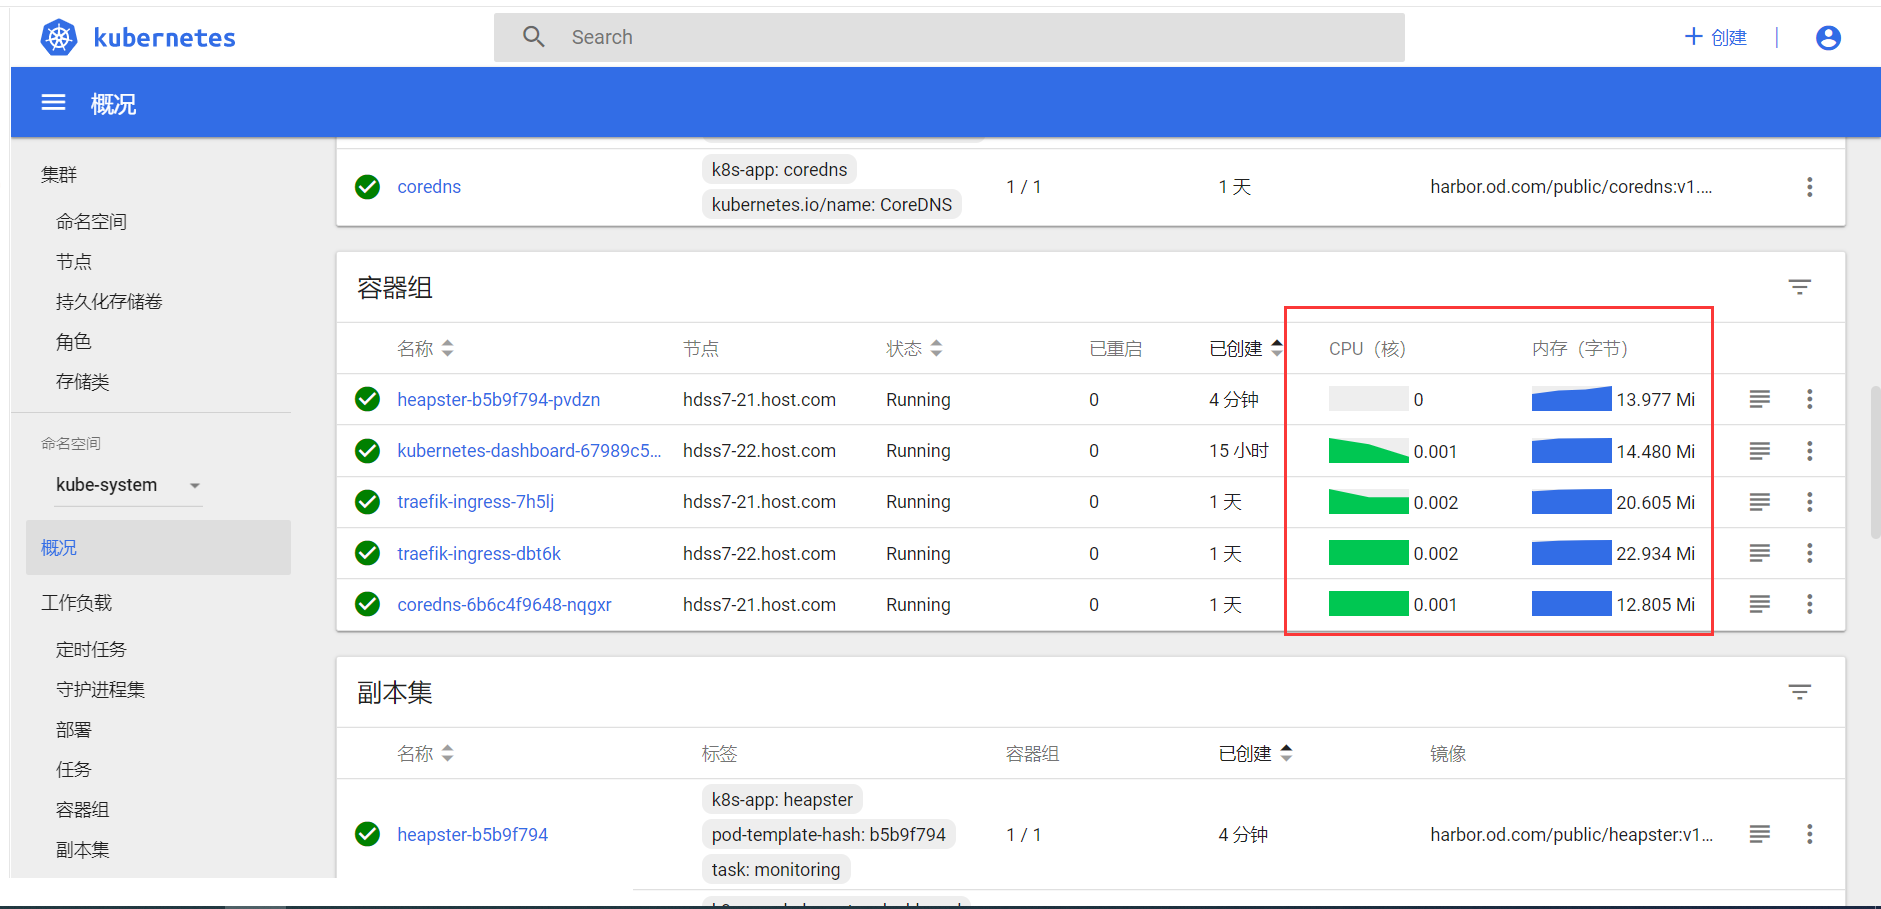
k8s安装前置准备工作
1. 所需资源
| 主机名 | 最低CPU | 最低内存 | IP地址 | 角色 |
|---|---|---|---|---|
| hdss7-11.host.com | 2核 | 2G | 10.4.7.11 | k8s代理节点1 |
| hdss7-12.host.com | 2核 | 2G | 10.4.7.12 | k8s代理节点2 |
| hdss7-21.host.com | 2核 | 2G | 10.4.7.21 | k8s运算节点1 |
| hdss7-22.host.com | 2核 | 2G | 10.4.7.22 | k8s运算节点2 |
| hdss7-200.host.com | 2核 | 2G | 10.4.7.200 | k8s运维节点(docker仓库) |
网络规划
- 节点网络:10.4.7.0/16
- Pod网络:172.7.0.0/16
- Service网络:192.168.0.0/16
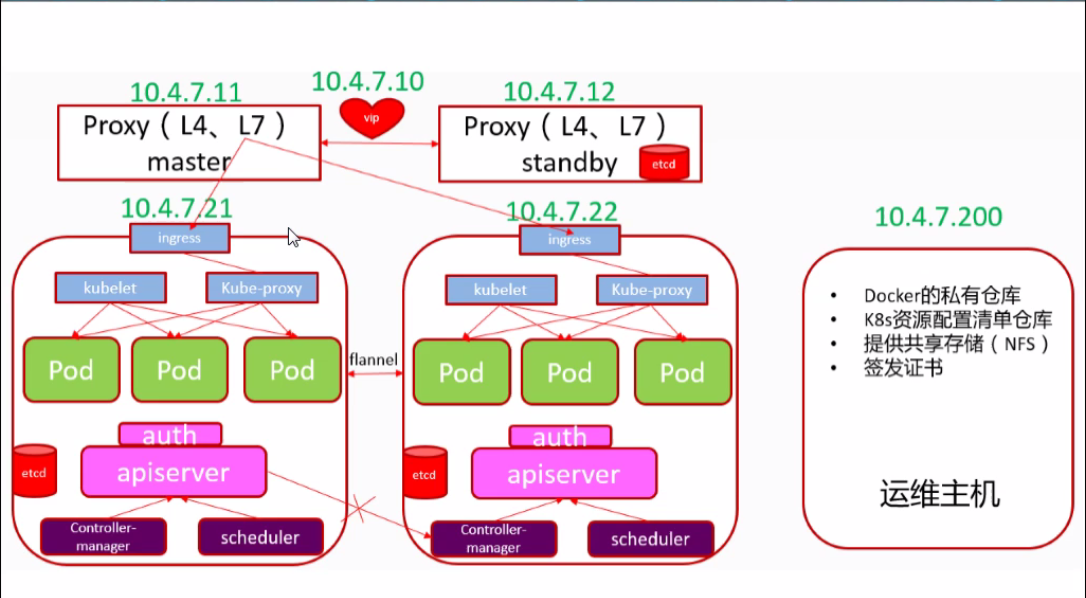
本次集群架构图
2. 环境配置
(1)操作系统为Centos 7,并做好基础优化
(2)关闭selinux和防火墙
(3)Linux内核版本3.8以上
(4)安装国内yum源和epel源
2.1 所有机器的基础配置
# 添加epel源
wget -O /etc/yum.repos.d/epel.repo http://mirrors.aliyun.com/repo/epel-7.repo

# 关闭防火墙
systemctl stop firewalld
systemctl disable firewalld

# 关闭SElinux
setenforce 0

# 安装必要的工具
yum install -y wget net-tools telnet tree nmap sysstat lrzsz dos2unix bind-utils
3. 安装bind9,部署自建DNS系统
hdss7-11.host.com上操作
3.1 为什么要安装bind9
因为要使用ingress做7层的流量调度,方便容器间的域名解析。
3.2 安装bind9
[root@hdss7-11.host.com ~]# yum install -y bind
[root@hdss7-11.host.com ~]# rpm -qa bind
bind-9.11.4-16.P2.el7_8.6.x86_64
3.3 配置bind9主配置文件
[root@hdss7-11.host.com ~]# vi /etc/named.conf
13         listen-on port 53 { 10.4.7.11; };	# 监听本机IP
14         listen-on-v6 port 53 { ::1; };		# 删除该行,不监听IPV6
20         allow-query     { any; };			# 允许所有主机查看
21         forwarders      { 10.4.7.254; };		# 添加该行,地址为办公网的DNS
32         recursion yes;				# dns采用递归的查询
34         dnssec-enable no;				# 关闭,节省资源(生产可能不需要关闭)
35         dnssec-validation no;			# 关闭,节省资源,不做互联网认证
检查配置是否正确
[root@hdss7-11.host.com ~]# named-checkconf
# 没有输出表示正常
3.4 配置bind9区域配置文件
[root@hdss7-11.host.com ~]# vim /etc/named.rfc1912.zones
# 文本最后添加
zone "host.com" IN {          # 主机域
        type  master;
        file  "host.com.zone";
        allow-update { 10.4.7.11; };
};

zone "od.com" IN {          # 业务域
        type  master;
        file  "od.com.zone";
        allow-update { 10.4.7.11; };
};
3.5 配置bind9区域数据文件
3.5.1 配置主机域数据文件
[root@hdss7-11.host.com ~]# vim /var/named/host.com.zone
$ORIGIN host.com.
$TTL 600	; 10 minutes						# 过期时间10分钟
@       IN SOA	dns.host.com. dnsadmin.host.com. (			# 区域授权文件的开始,OSA记录,dnsadmin.host.com为邮箱
				2020102801 ; serial			# 2020102801为安装的当天日期+01,共10位
				10800      ; refresh (3 hours)
				900        ; retry (15 minutes)
				604800     ; expire (1 week)
				86400      ; minimum (1 day)
				)
			NS   dns.host.com.				# NS记录
$TTL 60	; 1 minute
dns                A    10.4.7.11					# A记录
hdss7-11           A    10.4.7.11
hdss7-12           A    10.4.7.12
hdss7-21           A    10.4.7.21
hdss7-22           A    10.4.7.22
hdss7-200          A    10.4.7.200
3.5.2 配置业务域数据文件
[root@hdss7-11.host.com ~]# vim /var/named/od.com.zone
$ORIGIN od.com.
$TTL 600	; 10 minutes
@   		IN SOA	dns.od.com. dnsadmin.od.com. (
				2020102801 ; serial
				10800      ; refresh (3 hours)
				900        ; retry (15 minutes)
				604800     ; expire (1 week)
				86400      ; minimum (1 day)
				)
				NS   dns.od.com.
$TTL 60	; 1 minute
dns                A    10.4.7.11
3.5.3 检查配置并启动
[root@hdss7-11.host.com ~]# named-checkconf
[root@hdss7-11.host.com ~]# # 没有输出表示正常
[root@hdss7-11.host.com ~]# systemctl start named
[root@hdss7-11.host.com ~]# systemctl enable named
Created symlink from /etc/systemd/system/multi-user.target.wants/named.service to /usr/lib/systemd/system/named.service.
[root@hdss7-11.host.com ~]# netstat -lntup |grep 53    # 53端口监听到了,表示服务就启动成功了
tcp        0      0 10.4.7.11:53            0.0.0.0:*               LISTEN      22171/named
tcp        0      0 0.0.0.0:22              0.0.0.0:*               LISTEN      6536/sshd
tcp        0      0 127.0.0.1:953           0.0.0.0:*               LISTEN      22171/named
tcp6       0      0 :::22                   :::*                    LISTEN      6536/sshd
tcp6       0      0 ::1:953                 :::*                    LISTEN      22171/named
udp        0      0 10.4.7.11:53            0.0.0.0:*                           22171/named
3.5.3 检查域名解析配置是否成功
[root@hdss7-11.host.com ~]# dig -t A hdss7-21.host.com @10.4.7.11 +short
10.4.7.21
[root@hdss7-11.host.com ~]# dig -t A hdss7-22.host.com @10.4.7.11 +short
10.4.7.22
[root@hdss7-11.host.com ~]# dig -t A hdss7-200.host.com @10.4.7.11 +short
10.4.7.200
[root@hdss7-11.host.com ~]# dig -t A hdss7-12.host.com @10.4.7.11 +short
10.4.7.12
[root@hdss7-11.host.com ~]#
3.5.4 更换所有主机的DNS为10.4.7.11
vim /etc/sysconfig/network-scripts/ifcfg-eth0
DNS1=10.4.7.11
systemctl restart network

[root@hdss7-11.host.com ~]# ping www.baidu.com
PING www.a.shifen.com (14.215.177.39) 56(84) bytes of data.
64 bytes from 14.215.177.39 (14.215.177.39): icmp_seq=1 ttl=128 time=17.2 ms
^C
[root@hdss7-11.host.com ~]# ping `hostname`
PING hdss7-11.host.com (10.4.7.11) 56(84) bytes of data.
64 bytes from hdss7-11.host.com (10.4.7.11): icmp_seq=1 ttl=64 time=0.009 ms
^C
[root@hdss7-11.host.com ~]# ping hdss7-11 #因为resolv.conf中有search host.com,支持短域名,所以这不要.host.com也能ping通,一般情况下,只有主机域使用短域名。
PING hdss7-11.host.com (10.4.7.11) 56(84) bytes of data.
64 bytes from hdss7-11.host.com (10.4.7.11): icmp_seq=1 ttl=64 time=0.007 ms
^C
3.5.5 配置windows宿主机的VMnet8网卡的dns,后期要浏览网页
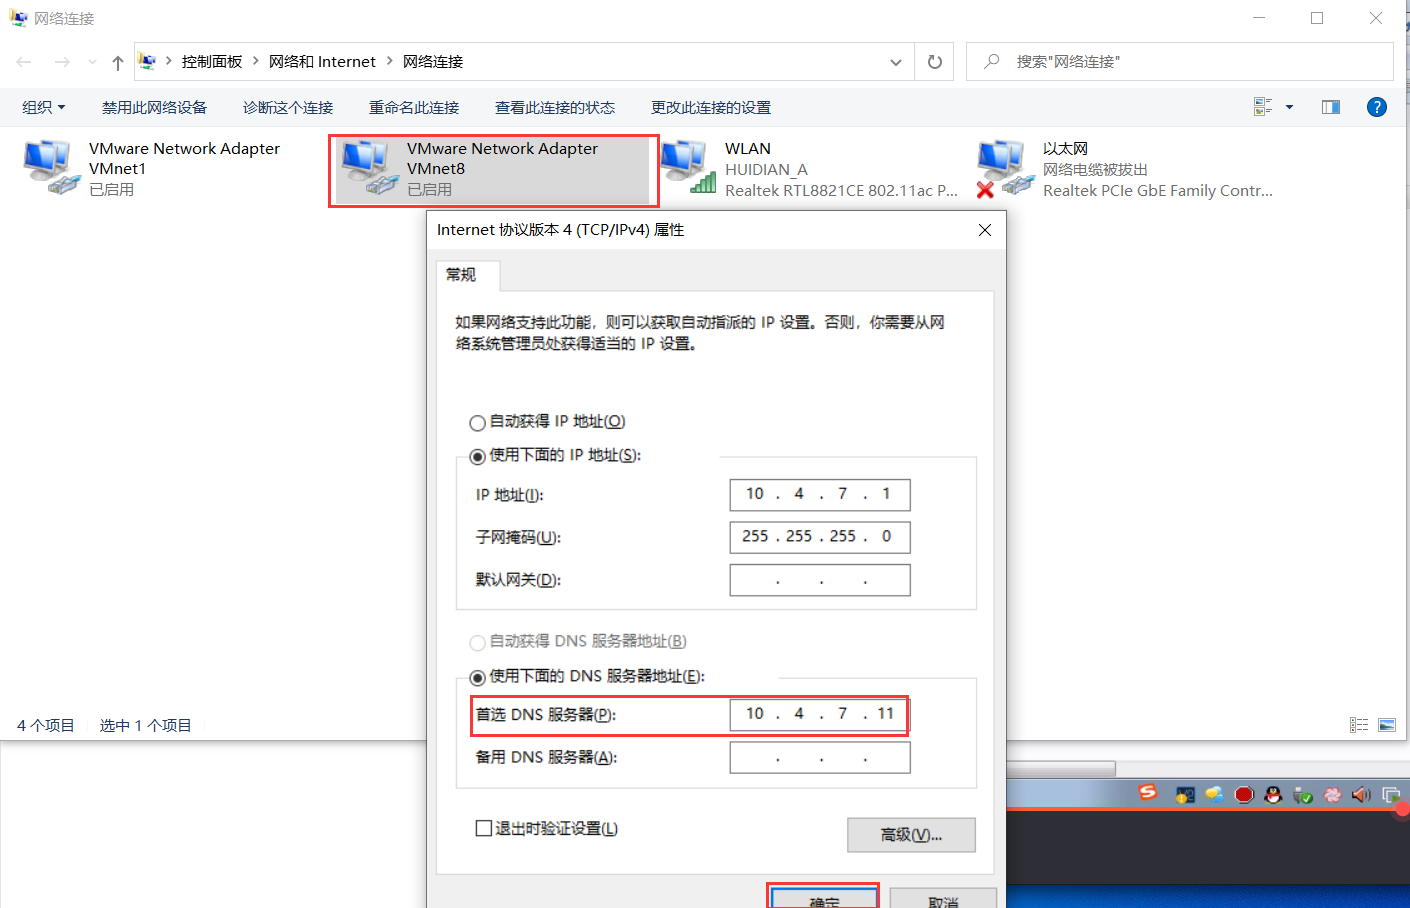
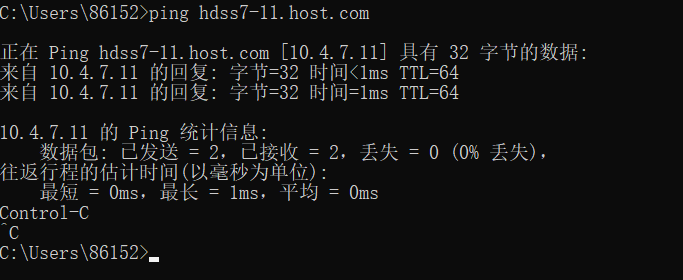
如果这里在cmd无法ping通虚拟机的主机名,则检查宿主机的防火墙是否关闭,如果关闭了宿主机防火墙还是不行,就把宿主机本身的网卡DNS改成10.4.7.11,但是实验过后记得还原宿主机网卡的设置,以免出现无法上网的情况
4. 准备证书签发环境
操作hdss7-200.host.com
4.1 安装CFSSL
cfssl工具:
- cfssl:证书签发的主要工具
- cfssl-json:将cfssl生成的证书(json格式)变为承载式证书(文件文件)
- cfssl-cerinfo:验证证书信息。
  - 使用方法:cfssl-certinfo -cert $name.pem
[root@hdss7-200.host.com ~]# wget https://pkg.cfssl.org/R1.2/cfssl_linux-amd64 -O /usr/bin/cfssl
[root@hdss7-200.host.com ~]# wget https://pkg.cfssl.org/R1.2/cfssljson_linux-amd64 -O /usr/bin/cfssl-json
[root@hdss7-200.host.com ~]# wget https://pkg.cfssl.org/R1.2/cfssl-certinfo_linux-amd64 -O /usr/bin/cfssl-certinfo
[root@hdss7-200.host.com ~]# chmod +x /usr/bin/cfssl*
[root@hdss7-200.host.com ~]# which cfssl
/usr/bin/cfssl
[root@hdss7-200.host.com ~]# which cfssl-json
/usr/bin/cfssl-json
[root@hdss7-200.host.com ~]# which cfssl-certinfo
/usr/bin/cfssl-certinfo
4.2 创建CA根证书签名请求(csr)的JSON配置文件
[root@hdss7-200.host.com ~]# cd /opt/
[root@hdss7-200.host.com /opt]# mkdir certs
[root@hdss7-200.host.com /opt]# cd certs
[root@hdss7-200.host.com /opt/certs]# pwd
/opt/certs
[root@hdss7-200.host.com /opt/certs]# vim ca-csr.json
{
    "CN": "OldboyEdu",   # CA机构的名称
    "hosts": [
    ],
    "key": {
        "algo": "rsa",    # 加密算法的类型
        "size": 2048      # 长度
    },
    "names": [
        {
            "C": "CN",
            "ST": "beijing",
            "L": "beijing",
            "O": "od",
            "OU": "ops"
        }
    ],
    "ca": {
        "expiry": "175200h"    # ca证书的过期时间,使用kubeadm安装K8S默认颁发的证书有效期是一年,此处二进制安装K8S,为20年
    }
}

# 上述配置官网解释
## CN: Common Name,浏览器使用该字段验证网站是否合法,一般写的是域名。非常重要。浏览器使用该字段验证网站是否合法
## C: Country, 国家
## ST: State,州,省
## L: Locality,地区,城市
## O: Organization Name,组织名称,公司名称
## OU: Organization Unit Name,组织单位名称,公司部门
4.3 签发承载式证书
[root@hdss7-200.host.com /opt/certs]# ll
total 4
-rw-r--r-- 1 root root 329 Oct 28 16:24 ca-csr.json
[root@hdss7-200.host.com /opt/certs]# cfssl gencert -initca ca-csr.json | cfssl-json -bare ca
2020/10/28 16:25:17 [INFO] generating a new CA key and certificate from CSR
2020/10/28 16:25:17 [INFO] generate received request
2020/10/28 16:25:17 [INFO] received CSR
2020/10/28 16:25:17 [INFO] generating key: rsa-2048
2020/10/28 16:25:18 [INFO] encoded CSR
2020/10/28 16:25:18 [INFO] signed certificate with serial number 210900104910205411292096453403515818629104651035
[root@hdss7-200.host.com /opt/certs]# ll
total 16
-rw-r--r-- 1 root root  993 Oct 28 16:25 ca.csr      # 生成的证书
-rw-r--r-- 1 root root  329 Oct 28 16:24 ca-csr.json
-rw------- 1 root root 1675 Oct 28 16:25 ca-key.pem  # 生成的证书(根证书的私钥)
-rw-r--r-- 1 root root 1346 Oct 28 16:25 ca.pem      # 生成的证书(根证书)
5. 准备Docker环境
K8s环境依赖于容器引擎,此处选择的容器引擎为docker
操作:hdss7-200.host.com、hdss7-21.host.com、hdss7-22.host.com
# curl -fsSL https://get.docker.com | bash -s docker --mirror Aliyun  # 安装完了后会显示WARNING:,忽略即可
# mkdir -p /etc/docker

# vi /etc/docker/daemon.json
{
  "graph": "/data/docker",  # 该目录 需要手动创建
  "storage-driver": "overlay2",
  "insecure-registries": ["registry.access.redhat.com","quay.io","harbor.od.com"],
  "registry-mirrors": ["https://q2gr04ke.mirror.aliyuncs.com"],
  "bip": "172.7.200.1/24",			# 定义k8s主机上k8s pod的ip地址网段,此处在200机器上配置的,当在21和22上配置时,把172.7.200.1分别改成172.7.21.1和172.7.22.1即可。
  "exec-opts": ["native.cgroupdriver=systemd"],
  "live-restore": true
}

# mkdir -p /data/docker
# systemctl start docker
# systemctl enable docker
6. 部署docker私有仓库harbor
6.1 下载harbor
操作:hdss7-200.host.com
harbor官网:https://github.com/goharbor/harbor(不FQ上不了github)
强烈建议安装1.7.6以上版本(1.7.5以下的有漏洞),并选择harbor-offline-installer类型的包
[root@hdss7-200.host.com ~]# mkdir /opt/src
[root@hdss7-200.host.com ~]# cd /opt/src
[root@hdss7-200.host.com /opt/src]# ll -h
total 554M
-rw-r--r-- 1 root root 554M Oct 28 17:06 harbor-offline-installer-v1.8.3.tgz

[root@hdss7-200.host.com /opt/src]# tar zxf harbor-offline-installer-v1.8.3.tgz -C /opt/
[root@hdss7-200.host.com /opt/src]# cd /opt/
[root@hdss7-200.host.com /opt]# ll
total 0
drwxr-xr-x 2 root root  71 Oct 28 16:25 certs
drwx--x--x 4 root root  28 Oct 28 16:53 containerd
drwxr-xr-x 2 root root 100 Oct 28 17:08 harbor
drwxr-xr-x 2 root root  49 Oct 28 17:06 src
[root@hdss7-200.host.com /opt]# mv harbor harbor-v1.8.3   # 方便识别版本
[root@hdss7-200.host.com /opt]# ln -s harbor-v1.8.3 harbor
[root@hdss7-200.host.com /opt]# ll
total 0
drwxr-xr-x 2 root root  71 Oct 28 16:25 certs
drwx--x--x 4 root root  28 Oct 28 16:53 containerd
lrwxrwxrwx 1 root root  13 Oct 28 17:09 harbor -> harbor-v1.8.3  # 方便未来升级
drwxr-xr-x 2 root root 100 Oct 28 17:08 harbor-v1.8.3
drwxr-xr-x 2 root root  49 Oct 28 17:06 src
[root@hdss7-200.host.com /opt]#
[root@hdss7-200.host.com /opt/harbor]# ll
total 569632
-rw-r--r-- 1 root root 583269670 Sep 16  2019 harbor.v1.8.3.tar.gz  # harbor镜像文件
-rw-r--r-- 1 root root      4519 Sep 16  2019 harbor.yml   # harbor的配置文件
-rwxr-xr-x 1 root root      5088 Sep 16  2019 install.sh
-rw-r--r-- 1 root root     11347 Sep 16  2019 LICENSE
-rwxr-xr-x 1 root root      1654 Sep 16  2019 prepar
6.2 编辑harbor主配置文件harbor.yml
[root@hdss7-200.host.com /opt/harbor]# vim harbor.yml
# 把第5行的 hostname: reg.mydomain.com  改成  hostname: harbor.od.com
# 把第10行的 port: 80 改成 port: 180,后期需要安装nginx,防止端口冲突
# 第27行 harbor_admin_password: Harbor12345,为登陆harbor的密码,生产环境中应设置为复杂度足够高的字符串。
# 把第35行的  data_volume: /data  改成  data_volume: /data/harbor
# 把第82行的 location: /var/log/harbor  改成 location: /data/harbor/logs,自定义日志存放的位置

[root@hdss7-200.host.com /opt/harbor]# mkdir -p /data/harbor/logs
6.3 安装docker-compose
# harbor本身也是若干个容器启动起来的,依赖于docker-compose做单机编排。
[root@hdss7-200.host.com /opt/harbor]# yum install -y docker-compose
[root@hdss7-200.host.com /opt/harbor]# rpm -qa docker-compose
docker-compose-1.18.0-4.el7.noarch
6.4 安装harbor
root@hdss7-200.host.com /opt/harbor]# ./install.sh

[Step 0]: checking installation environment ...

Note: docker version: 19.03.13        # 用到的docker

Note: docker-compose version: 1.18.0  # 用到的docker-compose

[Step 1]: loading Harbor images ...
………………省略若干行输出
✔ ----Harbor has been installed and started successfully.----  # 安装和启动完毕
6.5 检查harbor启动情况
[root@hdss7-200.host.com /opt/harbor]# docker-compose ps
      Name                     Command               State             Ports
--------------------------------------------------------------------------------------
harbor-core         /harbor/start.sh                 Up
harbor-db           /entrypoint.sh postgres          Up      5432/tcp
harbor-jobservice   /harbor/start.sh                 Up
harbor-log          /bin/sh -c /usr/local/bin/ ...   Up      127.0.0.1:1514->10514/tcp
harbor-portal       nginx -g daemon off;             Up      80/tcp
nginx               nginx -g daemon off;             Up      0.0.0.0:180->80/tcp
redis               docker-entrypoint.sh redis ...   Up      6379/tcp
registry            /entrypoint.sh /etc/regist ...   Up      5000/tcp
registryctl         /harbor/start.sh                 Up

[root@hdss7-200.host.com /opt/harbor]# docker ps
CONTAINER ID        IMAGE                                               COMMAND                  CREATED             STATUS                   PORTS                       NAMES
ea041807100f        goharbor/nginx-photon:v1.8.3                        "nginx -g 'daemon of…"   3 minutes ago       Up 3 minutes (healthy)   0.0.0.0:180->80/tcp         nginx
c383803a057d        goharbor/harbor-jobservice:v1.8.3                   "/harbor/start.sh"       3 minutes ago       Up 3 minutes                                         harbor-jobservice
2585d6dbd86b        goharbor/harbor-portal:v1.8.3                       "nginx -g 'daemon of…"   3 minutes ago       Up 3 minutes (healthy)   80/tcp                      harbor-portal
6a595b66ea58        goharbor/harbor-core:v1.8.3                         "/harbor/start.sh"       3 minutes ago       Up 3 minutes (healthy)                               harbor-core
7f621c7241b0        goharbor/harbor-registryctl:v1.8.3                  "/harbor/start.sh"       3 minutes ago       Up 3 minutes (healthy)                               registryctl
1c6aed28ed83        goharbor/redis-photon:v1.8.3                        "docker-entrypoint.s…"   3 minutes ago       Up 3 minutes             6379/tcp                    redis
880f4554a304        goharbor/harbor-db:v1.8.3                           "/entrypoint.sh post…"   3 minutes ago       Up 3 minutes (healthy)   5432/tcp                    harbor-db
728895602e02        goharbor/registry-photon:v2.7.1-patch-2819-v1.8.3   "/entrypoint.sh /etc…"   3 minutes ago       Up 3 minutes (healthy)   5000/tcp                    registry
03f05904cd6d        goharbor/harbor-log:v1.8.3                          "/bin/sh -c /usr/loc…"   3 minutes ago       Up 3 minutes (healthy)   127.0.0.1:1514->10514/tcp   harbor-log
6.6 安装nginx,反向代理harbor
[root@hdss7-200.host.com /opt/harbor]# yum install -y nginx
[root@hdss7-200.host.com /opt/harbor]# vim /etc/nginx/conf.d/harbor.od.com.conf
server {
    listen       80;
    server_name  harbor.od.com;

    client_max_body_size 1000m;

    location / {
        proxy_pass http://127.0.0.1:180;
    }
}

[root@hdss7-200.host.com /opt/harbor]# nginx -t
nginx: the configuration file /etc/nginx/nginx.conf syntax is ok
nginx: configuration file /etc/nginx/nginx.conf test is successful
[root@hdss7-200.host.com /opt/harbor]#  systemctl start nginx
[root@hdss7-200.host.com /opt/harbor]#  systemctl enable nginx

# 这个是否harbor的域名,是不能访问的,需要去更改dns服务器11的配置。
6.7 更改dns服务器配置,使harbor能够正常对外提供服务
[root@hdss7-11.host.com ~]# vim  /var/named/od.com.zone
# 把第4行的 2020102801 改成 2020102802,就是最后一位数+1,前滚一个序列号,(每次添加一个新的解析都需要最后一位数字+1)
# 然后在文件末尾添加一行:harbor             A    10.4.7.200
$ORIGIN od.com.
$TTL 600        ; 10 minutes
@               IN SOA  dns.od.com. dnsadmin.od.com. (
                                2020102802 ; serial        # 最后一位数+1
                                10800      ; refresh (3 hours)
                                900        ; retry (15 minutes)
                                604800     ; expire (1 week)
                                86400      ; minimum (1 day)
                                )
                                NS   dns.od.com.
$TTL 60 ; 1 minute
dns                A    10.4.7.11
harbor             A    10.4.7.200               # 添加的行

[root@hdss7-11.host.com ~]# systemctl restart named  # 重启服务
[root@hdss7-11.host.com ~]# dig -t A harbor.od.com +short  #验证域名能否正常解析
10.4.7.200
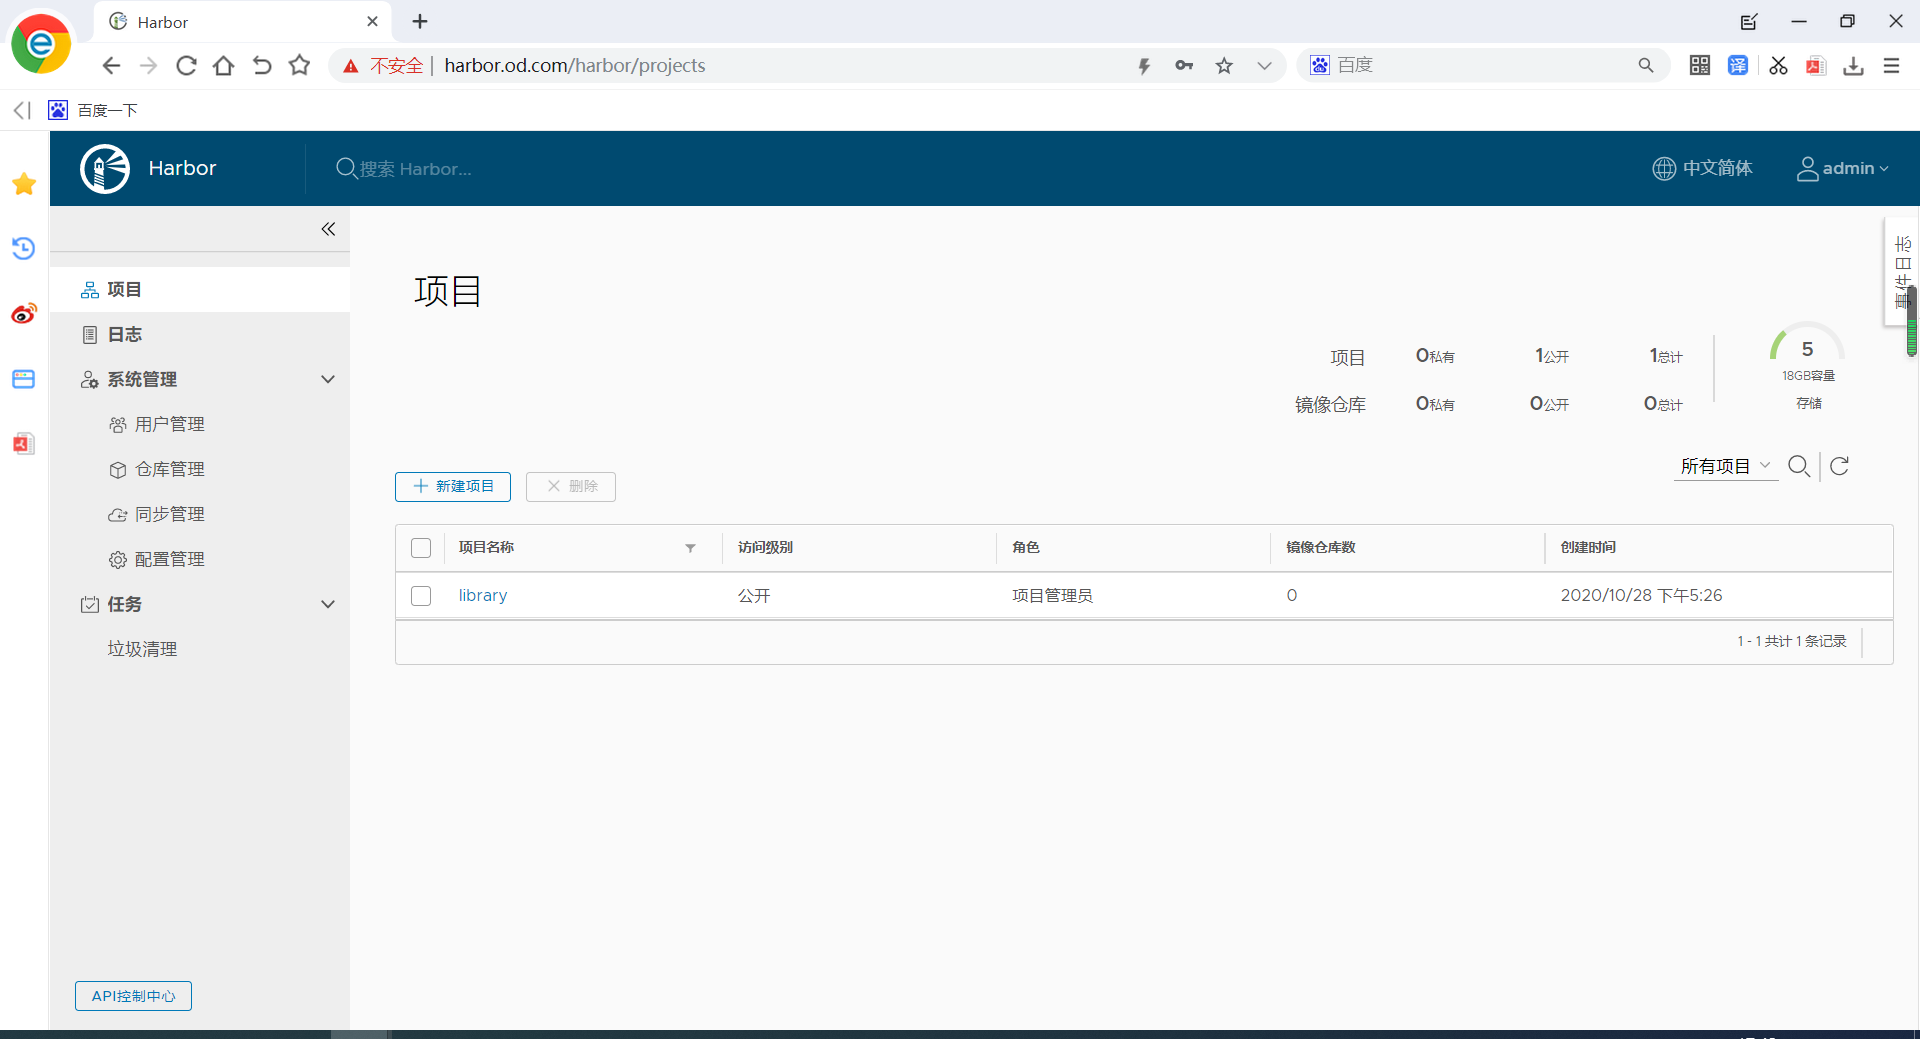
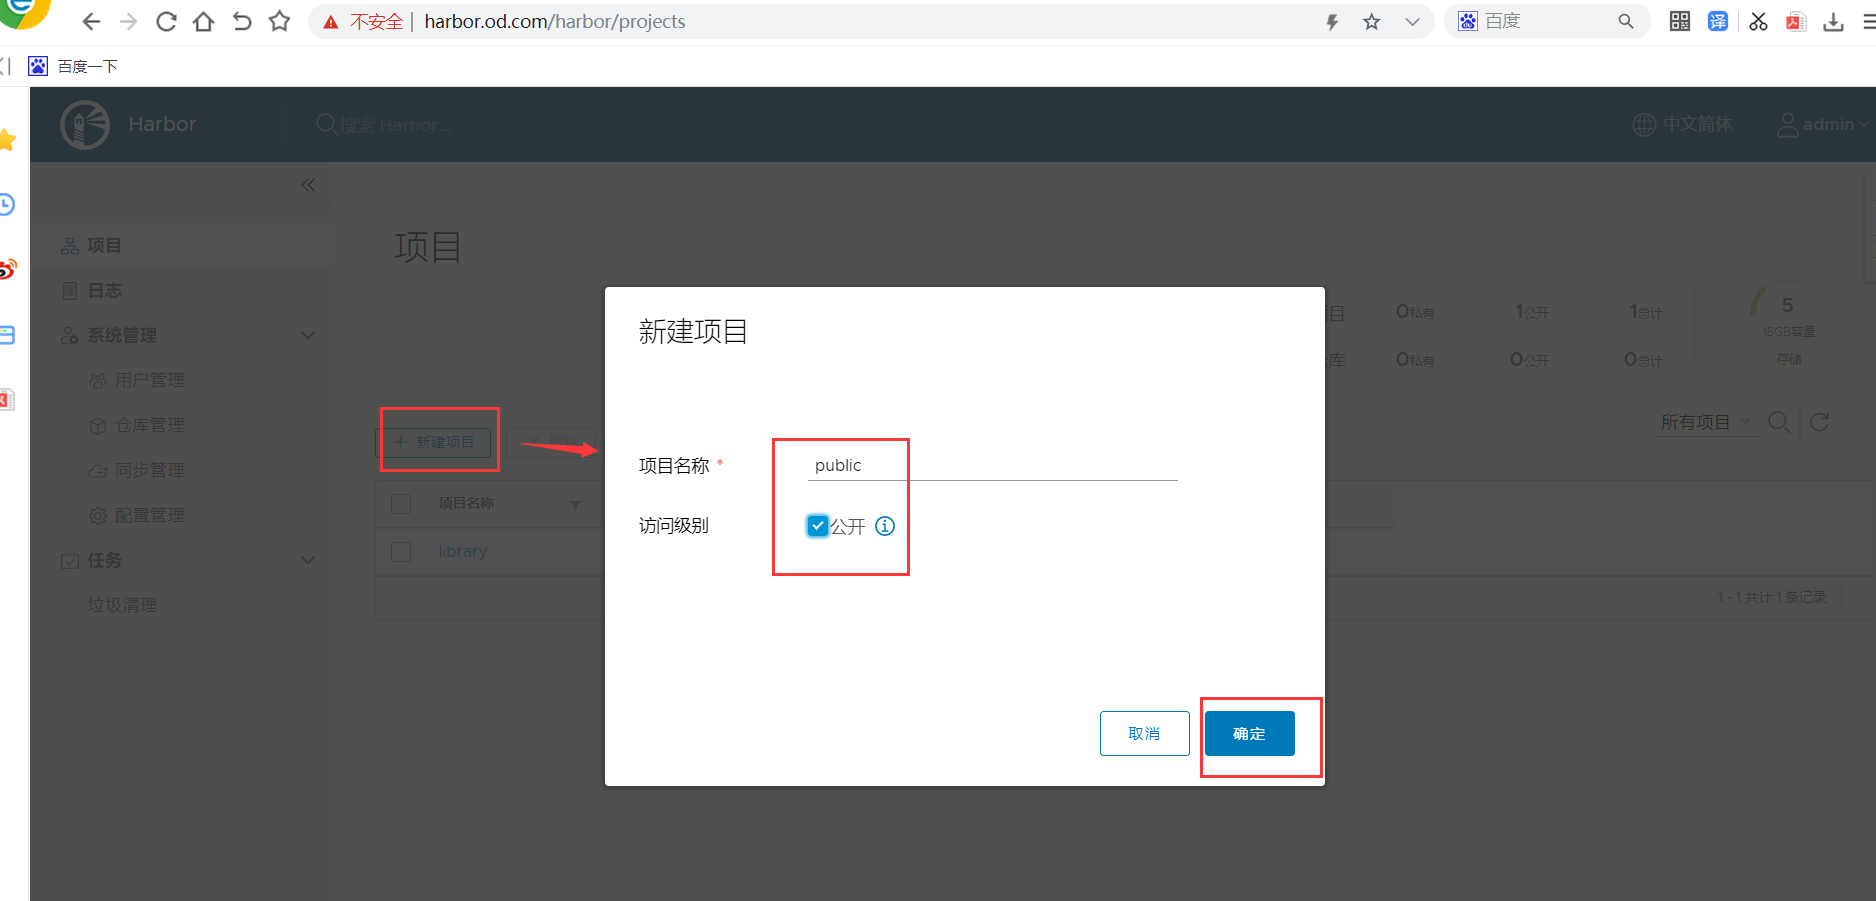
浏览器访问,新建一个public项目并公开
用户名:admin。密码:Harbor12345
6.8 下载一个镜像,并测试上传到harbor
[root@hdss7-200.host.com /opt/harbor]# docker pull nginx:1.7.9
[root@hdss7-200.host.com /opt/harbor]# docker images |grep 1.7.9
nginx                           1.7.9                      84581e99d807        5 years ago         91.7MB
[root@hdss7-200.host.com /opt/harbor]# docker tag 84581e99d807 harbor.od.com/public/nginx:v1.7.9
[root@hdss7-200.host.com /opt/harbor]# docker login harbor.od.com     # 登陆仓库
Username: admin
Password:
WARNING! Your password will be stored unencrypted in /root/.docker/config.json.
Configure a credential helper to remove this warning. See
https://docs.docker.com/engine/reference/commandline/login/#credentials-store

Login Succeeded
[root@hdss7-200.host.com /opt/harbor]# docker push harbor.od.com/public/nginx
6.9 如果需要重启harbor请使用如下命令
docker-compose up -d
浏览器查看上传结果

正式开始安装K8S
1. 部署Master节点的etcd集群
集群规划

1.1 创建基于根证书的config配置文件
操作:hdss7-200
[root@hdss7-200.host.com ~]# vim /opt/certs/ca-config.json
{
    "signing": {
        "default": {
            "expiry": "175200h"
        },
        "profiles": {
            "server": {         # 服务端通信客户端的配置,服务端通信客户端时需要证书
                "expiry": "175200h",
                "usages": [
                    "signing",
                    "key encipherment",
                    "server auth"
                ]
            },
            "client": {         # 客户端通信服务端的配置,客户端通信服务端时需要证书
                "expiry": "175200h",
                "usages": [
                    "signing",
                    "key encipherment",
                    "client auth"
                ]
            },
            "peer": {          # 服务端与客户端相互通信配置,相互通信时都需要证书
                "expiry": "175200h",
                "usages": [
                    "signing",
                    "key encipherment",
                    "server auth",
                    "client auth"
                ]
            }
        }
    }
}
1.2 创建etchd证书请求文件
[root@hdss7-200.host.com ~]# vim  /opt/certs/etcd-peer-csr.json
{
    "CN": "k8s-etcd",
    "hosts": [      # hosts配置段,表示etcd有可能安装的节点
        "10.4.7.11",
        "10.4.7.12",
        "10.4.7.21",
        "10.4.7.22"
    ],
    "key": {
        "algo": "rsa",
        "size": 2048
    },
    "names": [
        {
            "C": "CN",
            "ST": "beijing",
            "L": "beijing",
            "O": "od",
            "OU": "ops"
        }
    ]
}
1.3 签发etcd使用的证书
[root@hdss7-200.host.com ~]# cd /opt/certs/
[root@hdss7-200.host.com /opt/certs]# ll
total 24
-rw-r--r-- 1 root root  840 Oct 29 11:49 ca-config.json
-rw-r--r-- 1 root root  993 Oct 28 16:25 ca.csr
-rw-r--r-- 1 root root  329 Oct 28 16:24 ca-csr.json
-rw------- 1 root root 1675 Oct 28 16:25 ca-key.pem
-rw-r--r-- 1 root root 1346 Oct 28 16:25 ca.pem
-rw-r--r-- 1 root root  363 Oct 29 11:53 etcd-peer-csr.json
[root@hdss7-200.host.com /opt/certs]#  cfssl gencert -ca=ca.pem -ca-key=ca-key.pem -config=ca-config.json -profile=peer etcd-peer-csr.json |cfssl-json -bare etcd-peer        # 签发证书
2020/10/29 11:54:53 [INFO] generate received request
2020/10/29 11:54:53 [INFO] received CSR
2020/10/29 11:54:53 [INFO] generating key: rsa-2048
2020/10/29 11:54:53 [INFO] encoded CSR
2020/10/29 11:54:53 [INFO] signed certificate with serial number 518313688059201272353183692889297697137578166576
2020/10/29 11:54:53 [WARNING] This certificate lacks a "hosts" field. This makes it unsuitable for
websites. For more information see the Baseline Requirements for the Issuance and Management
of Publicly-Trusted Certificates, v.1.1.6, from the CA/Browser Forum (https://cabforum.org);
specifically, section 10.2.3 ("Information Requirements").
[root@hdss7-200.host.com /opt/certs]# ll
total 36
-rw-r--r-- 1 root root  840 Oct 29 11:49 ca-config.json
-rw-r--r-- 1 root root  993 Oct 28 16:25 ca.csr
-rw-r--r-- 1 root root  329 Oct 28 16:24 ca-csr.json
-rw------- 1 root root 1675 Oct 28 16:25 ca-key.pem
-rw-r--r-- 1 root root 1346 Oct 28 16:25 ca.pem
-rw-r--r-- 1 root root 1062 Oct 29 11:54 etcd-peer.csr        # 生成的证书
-rw-r--r-- 1 root root  363 Oct 29 11:53 etcd-peer-csr.json
-rw------- 1 root root 1679 Oct 29 11:54 etcd-peer-key.pem    # 生成的证书
-rw-r--r-- 1 root root 1428 Oct 29 11:54 etcd-peer.pem        # 生成的证书
[root@hdss7-200.host.com /opt/certs]#
1.4 部署etcd
1.4.1 下载etcd
https://github.com/etcd-io/etcd/tags #需要FQ
1.4.2 创建etcd专用用户(hdss7-12.host.com)
操作:hdss7-12.host.com
[root@hdss7-12.host.com /opt/src]# useradd -s /sbin/nologin -M etcd
[root@hdss7-12.host.com /opt/src]# id etcd
uid=1000(etcd) gid=1000(etcd) groups=1000(etcd)
1.4.3 上传etcd软件,并进行相关配置
[root@hdss7-12.host.com /opt/src]# tar zxf etcd-v3.1.20-linux-amd64.tar.gz -C /opt/
[root@hdss7-12.host.com /opt/src]# cd ..
[root@hdss7-12.host.com /opt]# ll
total 0
drwxr-xr-x 3 478493 89939 123 Oct 11  2018 etcd-v3.1.20-linux-amd64
drwxr-xr-x 2 root   root   45 Oct 29 14:11 src
[root@hdss7-12.host.com /opt]# mv etcd-v3.1.20-linux-amd64 etcd-v3.1.20
[root@hdss7-12.host.com /opt]# ln -s etcd-v3.1.20 etcd
[root@hdss7-12.host.com /opt]# ll
total 0
lrwxrwxrwx 1 root   root   12 Oct 29 14:12 etcd -> etcd-v3.1.20
drwxr-xr-x 3 478493 89939 123 Oct 11  2018 etcd-v3.1.20
drwxr-xr-x 2 root   root   45 Oct 29 14:11 src
[root@hdss7-12.host.com /opt]# cd etcd
[root@hdss7-12.host.com /opt/etcd]# ll
total 30068
drwxr-xr-x 11 478493 89939     4096 Oct 11  2018 Documentation
-rwxr-xr-x  1 478493 89939 16406432 Oct 11  2018 etcd           # etcd启动文件
-rwxr-xr-x  1 478493 89939 14327712 Oct 11  2018 etcdctl        # etcd命令行工具
-rw-r--r--  1 478493 89939    32632 Oct 11  2018 README-etcdctl.md
-rw-r--r--  1 478493 89939     5878 Oct 11  2018 README.md
-rw-r--r--  1 478493 89939     7892 Oct 11  2018 READMEv2-etcdctl.md
1.4.4 创建目录,拷贝证书、私钥
[root@hdss7-12.host.com /opt/etcd]# mkdir -p /opt/etcd/certs /data/etcd /data/logs/etcd-server

# 启动etcd需要用到3个证书:ca.pem、etcd-peer-key.pem、etcd-peer.pem

[root@hdss7-12.host.com /opt/etcd]# cd certs/
[root@hdss7-12.host.com /opt/etcd/certs]# ll
total 0
[root@hdss7-12.host.com /opt/etcd/certs]# scp hdss7-200:/opt/certs/ca.pem ./

[root@hdss7-12.host.com /opt/etcd/certs]# scp hdss7-200:/opt/certs/etcd-peer-key.pem ./
[root@hdss7-12.host.com /opt/etcd/certs]# scp hdss7-200:/opt/certs/etcd-peer.pem ./
[root@hdss7-12.host.com /opt/etcd/certs]# ll
total 12
-rw-r--r-- 1 root root 1346 Oct 29 14:18 ca.pem             # 证书
-rw------- 1 root root 1679 Oct 29 14:19 etcd-peer-key.pem  # 私钥,注意私钥权限为600
-rw-r--r-- 1 root root 1428 Oct 29 14:19 etcd-peer.pem      # 证书
1.4.5 创建etcd启动文件
[root@hdss7-12.host.com /opt/etcd/certs]# cd ..
[root@hdss7-12.host.com /opt/etcd]# vim etcd-server-startup.sh
#!/bin/sh
./etcd --name etcd-server-7-12
       --data-dir /data/etcd/etcd-server
       --listen-peer-urls https://10.4.7.12:2380
       --listen-client-urls https://10.4.7.12:2379,http://127.0.0.1:2379
       --quota-backend-bytes 8000000000
       --initial-advertise-peer-urls https://10.4.7.12:2380
       --advertise-client-urls https://10.4.7.12:2379,http://127.0.0.1:2379
       --initial-cluster  etcd-server-7-12=https://10.4.7.12:2380,etcd-server-7-21=https://10.4.7.21:2380,etcd-server-7-22=https://10.4.7.22:2380
       --ca-file ./certs/ca.pem
       --cert-file ./certs/etcd-peer.pem
       --key-file ./certs/etcd-peer-key.pem
       --client-cert-auth
       --trusted-ca-file ./certs/ca.pem
       --peer-ca-file ./certs/ca.pem
       --peer-cert-file ./certs/etcd-peer.pem
       --peer-key-file ./certs/etcd-peer-key.pem
       --peer-client-cert-auth
       --peer-trusted-ca-file ./certs/ca.pem
       --log-output stdout

[root@hdss7-12.host.com /opt/etcd]# chmod +x etcd-server-startup.sh
[root@hdss7-12.host.com /opt/etcd]# chown -R etcd. /opt/etcd-v3.1.20/
[root@hdss7-12.host.com /opt/etcd]# ll /opt/etcd-v3.1.20/
total 30072
drwxr-xr-x  2 etcd etcd       66 Oct 29 14:19 certs
drwxr-xr-x 11 etcd etcd     4096 Oct 11  2018 Documentation
-rwxr-xr-x  1 etcd etcd 16406432 Oct 11  2018 etcd
-rwxr-xr-x  1 etcd etcd 14327712 Oct 11  2018 etcdctl
-rwxr-xr-x  1 etcd etcd      981 Oct 29 14:45 etcd-server-startup.sh
-rw-r--r--  1 etcd etcd    32632 Oct 11  2018 README-etcdctl.md
-rw-r--r--  1 etcd etcd     5878 Oct 11  2018 README.md
-rw-r--r--  1 etcd etcd     7892 Oct 11  2018 READMEv2-etcdctl.md

[root@hdss7-12.host.com /opt/etcd]# chown -R etcd. /data/etcd/
[root@hdss7-12.host.com /opt/etcd]# chown -R etcd. /data/logs/etcd-server/
1.4.6 安装supervisor,让etcd后台运行
[root@hdss7-12.host.com /opt/etcd]#  yum install supervisor -y
[root@hdss7-12.host.com /opt/etcd]# systemctl start supervisord
[root@hdss7-12.host.com /opt/etcd]# systemctl enable supervisord
1.4.7 创建supervisor启动文件
[root@hdss7-12.host.com /opt/etcd]# vim /etc/supervisord.d/etcd-server.ini
[program:etcd-server-7-12]                      # 注意此处
command=/opt/etcd/etcd-server-startup.sh #etcd脚本启动位置                       ; the program (relative uses PATH, can take args)
numprocs=1                   #启动1个进程                                                   ; number of processes copies to start (def 1)
directory=/opt/etcd                                             ; directory to cwd to before exec (def no cwd)
autostart=true                # 是否自动启动                                              ; start at supervisord start (default: true)
autorestart=true              # 是否自动重启                                               ; retstart at unexpected quit (default: true)
startsecs=30                  # 启动后多长时间判定为启动成功                                                  ; number of secs prog must stay running (def. 1)
startretries=3                # 重启次数                                             ; max # of serial start failures (default 3)
exitcodes=0,2                 # 异常退出的codes                                             ; 'expected' exit codes for process (default 0,2)
stopsignal=QUIT               # 停止的信号                                             ; signal used to kill process (default TERM)
stopwaitsecs=10                                                 ; max num secs to wait b4 SIGKILL (default 10)
user=etcd                     # 使用的用户                                              ; setuid to this UNIX account to run the program
redirect_stderr=true                                            ; redirect proc stderr to stdout (default false)
stdout_logfile=/data/logs/etcd-server/etcd.stdout.log           ; stdout log path, NONE for none; default AUTO
stdout_logfile_maxbytes=64MB                                    ; max # logfile bytes b4 rotation (default 50MB)
stdout_logfile_backups=4                                        ; # of stdout logfile backups (default 10)
stdout_capture_maxbytes=1MB                                     ; number of bytes in 'capturemode' (default 0)
stdout_events_enabled=false                                     ; emit events on stdout writes (default false)
1.4.8 启动etcd
[root@hdss7-12.host.com /opt/etcd]# supervisorctl update
etcd-server-7-12: added process group

# etcd启动起来需要一点时间,如果启动异常,查看/data/logs/etcd-server/etcd.stdout.log
[root@hdss7-12.host.com /opt]# supervisorctl status
etcd-server-7-12                 STARTING
[root@hdss7-12host.com /opt]# supervisorctl status
etcd-server-7-12                 RUNNING   pid 9263, uptime 0:00:52

[root@hdss7-12.host.com /opt]# netstat -lntup |grep etcd      # 必须要监听了2379、2380两个端口才算启动成功
tcp        0      0 10.4.7.12:2379          0.0.0.0:*               LISTEN      9264/./etcd
tcp        0      0 127.0.0.1:2379          0.0.0.0:*               LISTEN      9264/./etcd
tcp        0      0 10.4.7.12:2380          0.0.0.0:*               LISTEN      9264/./etcd
1.4.9 创建etcd专用用户(hdss7-21.host.com)
操作:hdss7-21.host.com
[root@hdss7-21.host.com /opt/src]# useradd -s /sbin/nologin -M etcd
[root@hdss7-21.host.com /opt/src]# id etcd
uid=1000(etcd) gid=1000(etcd) groups=1000(etcd)
1.4.10 上传etcd软件,并进行相关配置
[root@hdss7-21.host.com /opt/src]# tar zxf etcd-v3.1.20-linux-amd64.tar.gz -C /opt/
[root@hdss7-21.host.com /opt/src]# cd ..
[root@hdss7-21.host.com /opt]# ll
total 0
drwxr-xr-x 3 478493 89939 123 Oct 11  2018 etcd-v3.1.20-linux-amd64
drwxr-xr-x 2 root   root   45 Oct 29 14:11 src
[root@hdss7-21.host.com /opt]# mv etcd-v3.1.20-linux-amd64 etcd-v3.1.20
[root@hdss7-21.host.com /opt]# ln -s etcd-v3.1.20 etcd
[root@hdss7-21.host.com /opt]# ll
total 0
lrwxrwxrwx 1 root   root   12 Oct 29 14:12 etcd -> etcd-v3.1.20
drwxr-xr-x 3 478493 89939 123 Oct 11  2018 etcd-v3.1.20
drwxr-xr-x 2 root   root   45 Oct 29 14:11 src
[root@hdss7-21.host.com /opt]# cd etcd
[root@hdss7-21.host.com /opt/etcd]# ll
total 30068
drwxr-xr-x 11 478493 89939     4096 Oct 11  2018 Documentation
-rwxr-xr-x  1 478493 89939 16406432 Oct 11  2018 etcd           # etcd启动文件
-rwxr-xr-x  1 478493 89939 14327712 Oct 11  2018 etcdctl        # etcd命令行工具
-rw-r--r--  1 478493 89939    32632 Oct 11  2018 README-etcdctl.md
-rw-r--r--  1 478493 89939     5878 Oct 11  2018 README.md
-rw-r--r--  1 478493 89939     7892 Oct 11  2018 READMEv2-etcdctl.md
1.4.11 创建目录,拷贝证书、私钥
[root@hdss7-21.host.com /opt/etcd]# mkdir -p /opt/etcd/certs /data/etcd /data/logs/etcd-server

# 启动etcd需要用到3个证书:ca.pem、etcd-peer-key.pem、etcd-peer.pem

[root@hdss7-21.host.com /opt/etcd]# cd certs/
[root@hdss7-21.host.com /opt/etcd/certs]# ll
total 0
[root@hdss7-21.host.com /opt/etcd/certs]# scp hdss7-200:/opt/certs/ca.pem ./

[root@hdss7-21.host.com /opt/etcd/certs]# scp hdss7-200:/opt/certs/etcd-peer-key.pem ./
[root@hdss7-21.host.com /opt/etcd/certs]# scp hdss7-200:/opt/certs/etcd-peer.pem ./
[root@hdss7-21.host.com /opt/etcd/certs]# ll
total 12
-rw-r--r-- 1 root root 1346 Oct 29 14:18 ca.pem             # 证书
-rw------- 1 root root 1679 Oct 29 14:19 etcd-peer-key.pem  # 私钥,注意私钥权限为600
-rw-r--r-- 1 root root 1428 Oct 29 14:19 etcd-peer.pem      # 证书
1.4.12 创建etcd启动文件
[root@hdss7-21.host.com /opt/etcd/certs]# cd ..
[root@hdss7-21.host.com /opt/etcd]# vim etcd-server-startup.sh
#!/bin/sh
./etcd --name etcd-server-7-21
       --data-dir /data/etcd/etcd-server
       --listen-peer-urls https://10.4.7.21:2380
       --listen-client-urls https://10.4.7.21:2379,http://127.0.0.1:2379
       --quota-backend-bytes 8000000000
       --initial-advertise-peer-urls https://10.4.7.21:2380
       --advertise-client-urls https://10.4.7.21:2379,http://127.0.0.1:2379
       --initial-cluster  etcd-server-7-12=https://10.4.7.12:2380,etcd-server-7-21=https://10.4.7.21:2380,etcd-server-7-22=https://10.4.7.22:2380
       --ca-file ./certs/ca.pem
       --cert-file ./certs/etcd-peer.pem
       --key-file ./certs/etcd-peer-key.pem
       --client-cert-auth
       --trusted-ca-file ./certs/ca.pem
       --peer-ca-file ./certs/ca.pem
       --peer-cert-file ./certs/etcd-peer.pem
       --peer-key-file ./certs/etcd-peer-key.pem
       --peer-client-cert-auth
       --peer-trusted-ca-file ./certs/ca.pem
       --log-output stdout

[root@hdss7-21.host.com /opt/etcd]# chmod +x etcd-server-startup.sh
[root@hdss7-21.host.com /opt/etcd]# chown -R etcd. /opt/etcd-v3.1.20/
[root@hdss7-21.host.com /opt/etcd]# ll /opt/etcd-v3.1.20/
total 30072
drwxr-xr-x  2 etcd etcd       66 Oct 29 14:19 certs
drwxr-xr-x 11 etcd etcd     4096 Oct 11  2018 Documentation
-rwxr-xr-x  1 etcd etcd 16406432 Oct 11  2018 etcd
-rwxr-xr-x  1 etcd etcd 14327712 Oct 11  2018 etcdctl
-rwxr-xr-x  1 etcd etcd      981 Oct 29 14:45 etcd-server-startup.sh
-rw-r--r--  1 etcd etcd    32632 Oct 11  2018 README-etcdctl.md
-rw-r--r--  1 etcd etcd     5878 Oct 11  2018 README.md
-rw-r--r--  1 etcd etcd     7892 Oct 11  2018 READMEv2-etcdctl.md

[root@hdss7-21.host.com /opt/etcd]# chown -R etcd. /data/etcd/
[root@hdss7-21.host.com /opt/etcd]# chown -R etcd. /data/logs/etcd-server/
1.4.13 安装supervisor,让etcd后台运行
[root@hdss7-21.host.com /opt/etcd]#  yum install supervisor -y
[root@hdss7-21.host.com /opt/etcd]# systemctl start supervisord
[root@hdss7-21.host.com /opt/etcd]# systemctl enable supervisord
1.4.14 创建supervisor启动文件
[root@hdss7-21.host.com /opt/etcd]# vim /etc/supervisord.d/etcd-server.ini
[program:etcd-server-7-21]                      # 注意此处
command=/opt/etcd/etcd-server-startup.sh #etcd脚本启动位置                       ; the program (relative uses PATH, can take args)
numprocs=1                   #启动1个进程                                                   ; number of processes copies to start (def 1)
directory=/opt/etcd                                             ; directory to cwd to before exec (def no cwd)
autostart=true                # 是否自动启动                                              ; start at supervisord start (default: true)
autorestart=true              # 是否自动重启                                               ; retstart at unexpected quit (default: true)
startsecs=30                  # 启动后多长时间判定为启动成功                                                  ; number of secs prog must stay running (def. 1)
startretries=3                # 重启次数                                             ; max # of serial start failures (default 3)
exitcodes=0,2                 # 异常退出的codes                                             ; 'expected' exit codes for process (default 0,2)
stopsignal=QUIT               # 停止的信号                                             ; signal used to kill process (default TERM)
stopwaitsecs=10                                                 ; max num secs to wait b4 SIGKILL (default 10)
user=etcd                     # 使用的用户                                              ; setuid to this UNIX account to run the program
redirect_stderr=true                                            ; redirect proc stderr to stdout (default false)
stdout_logfile=/data/logs/etcd-server/etcd.stdout.log           ; stdout log path, NONE for none; default AUTO
stdout_logfile_maxbytes=64MB                                    ; max # logfile bytes b4 rotation (default 50MB)
stdout_logfile_backups=4                                        ; # of stdout logfile backups (default 10)
stdout_capture_maxbytes=1MB                                     ; number of bytes in 'capturemode' (default 0)
stdout_events_enabled=false                                     ; emit events on stdout writes (default false)
1.4.15 启动etcd
[root@hdss7-21.host.com /opt/etcd]# supervisorctl update
etcd-server-7-21: added process group

# etcd启动起来需要一点时间,如果启动异常,查看/data/logs/etcd-server/etcd.stdout.log
[root@hdss7-21.host.com /opt]# supervisorctl status
etcd-server-7-21                 STARTING
[root@hdss7-12host.com /opt]# supervisorctl status
etcd-server-7-21                 RUNNING   pid 9263, uptime 0:00:52

[root@hdss7-21.host.com /opt]# netstat -lntup |grep etcd      # 必须要监听了2379、2380两个端口才算启动成功
tcp        0      0 10.4.7.21:2379          0.0.0.0:*               LISTEN      9264/./etcd
tcp        0      0 127.0.0.1:2379          0.0.0.0:*               LISTEN      9264/./etcd
tcp        0      0 10.4.7.21:2380          0.0.0.0:*               LISTEN      9264/./etcd
1.4.16 创建etcd专用用户(hdss7-22.host.com)
操作:hdss7-22.host.com
[root@hdss7-22.host.com /opt/src]# useradd -s /sbin/nologin -M etcd
[root@hdss7-22.host.com /opt/src]# id etcd
uid=1000(etcd) gid=1000(etcd) groups=1000(etcd)
1.4.17 上传etcd软件,并进行相关配置
[root@hdss7-22.host.com /opt/src]# tar zxf etcd-v3.1.20-linux-amd64.tar.gz -C /opt/
[root@hdss7-22.host.com /opt/src]# cd ..
[root@hdss7-22.host.com /opt]# ll
total 0
drwxr-xr-x 3 478493 89939 123 Oct 11  2018 etcd-v3.1.20-linux-amd64
drwxr-xr-x 2 root   root   45 Oct 29 14:11 src
[root@hdss7-22.host.com /opt]# mv etcd-v3.1.20-linux-amd64 etcd-v3.1.20
[root@hdss7-22.host.com /opt]# ln -s etcd-v3.1.20 etcd
[root@hdss7-22.host.com /opt]# ll
total 0
lrwxrwxrwx 1 root   root   12 Oct 29 14:12 etcd -> etcd-v3.1.20
drwxr-xr-x 3 478493 89939 123 Oct 11  2018 etcd-v3.1.20
drwxr-xr-x 2 root   root   45 Oct 29 14:11 src
[root@hdss7-22.host.com /opt]# cd etcd
[root@hdss7-22.host.com /opt/etcd]# ll
total 30068
drwxr-xr-x 11 478493 89939     4096 Oct 11  2018 Documentation
-rwxr-xr-x  1 478493 89939 16406432 Oct 11  2018 etcd           # etcd启动文件
-rwxr-xr-x  1 478493 89939 14327712 Oct 11  2018 etcdctl        # etcd命令行工具
-rw-r--r--  1 478493 89939    32632 Oct 11  2018 README-etcdctl.md
-rw-r--r--  1 478493 89939     5878 Oct 11  2018 README.md
-rw-r--r--  1 478493 89939     7892 Oct 11  2018 READMEv2-etcdctl.md
1.4.18 创建目录,拷贝证书、私钥
[root@hdss7-22.host.com /opt/etcd]# mkdir -p /opt/etcd/certs /data/etcd /data/logs/etcd-server

# 启动etcd需要用到3个证书:ca.pem、etcd-peer-key.pem、etcd-peer.pem

[root@hdss7-22.host.com /opt/etcd]# cd certs/
[root@hdss7-22.host.com /opt/etcd/certs]# ll
total 0
[root@hdss7-22.host.com /opt/etcd/certs]# scp hdss7-200:/opt/certs/ca.pem ./

[root@hdss7-22.host.com /opt/etcd/certs]# scp hdss7-200:/opt/certs/etcd-peer-key.pem ./
[root@hdss7-22.host.com /opt/etcd/certs]# scp hdss7-200:/opt/certs/etcd-peer.pem ./
[root@hdss7-22.host.com /opt/etcd/certs]# ll
total 12
-rw-r--r-- 1 root root 1346 Oct 29 14:18 ca.pem             # 证书
-rw------- 1 root root 1679 Oct 29 14:19 etcd-peer-key.pem  # 私钥,注意私钥权限为600
-rw-r--r-- 1 root root 1428 Oct 29 14:19 etcd-peer.pem      # 证书
1.4.19 创建etcd启动文件
[root@hdss7-22.host.com /opt/etcd/certs]# cd ..
[root@hdss7-22.host.com /opt/etcd]# vim etcd-server-startup.sh
#!/bin/sh
./etcd --name etcd-server-7-22
       --data-dir /data/etcd/etcd-server
       --listen-peer-urls https://10.4.7.22:2380
       --listen-client-urls https://10.4.7.22:2379,http://127.0.0.1:2379
       --quota-backend-bytes 8000000000
       --initial-advertise-peer-urls https://10.4.7.22:2380
       --advertise-client-urls https://10.4.7.22:2379,http://127.0.0.1:2379
       --initial-cluster  etcd-server-7-12=https://10.4.7.12:2380,etcd-server-7-21=https://10.4.7.21:2380,etcd-server-7-22=https://10.4.7.22:2380
       --ca-file ./certs/ca.pem
       --cert-file ./certs/etcd-peer.pem
       --key-file ./certs/etcd-peer-key.pem
       --client-cert-auth
       --trusted-ca-file ./certs/ca.pem
       --peer-ca-file ./certs/ca.pem
       --peer-cert-file ./certs/etcd-peer.pem
       --peer-key-file ./certs/etcd-peer-key.pem
       --peer-client-cert-auth
       --peer-trusted-ca-file ./certs/ca.pem
       --log-output stdout

[root@hdss7-22.host.com /opt/etcd]# chmod +x etcd-server-startup.sh
[root@hdss7-22.host.com /opt/etcd]# chown -R etcd. /opt/etcd-v3.1.20/
[root@hdss7-22.host.com /opt/etcd]# ll /opt/etcd-v3.1.20/
total 30072
drwxr-xr-x  2 etcd etcd       66 Oct 29 14:19 certs
drwxr-xr-x 11 etcd etcd     4096 Oct 11  2018 Documentation
-rwxr-xr-x  1 etcd etcd 16406432 Oct 11  2018 etcd
-rwxr-xr-x  1 etcd etcd 14327712 Oct 11  2018 etcdctl
-rwxr-xr-x  1 etcd etcd      981 Oct 29 14:45 etcd-server-startup.sh
-rw-r--r--  1 etcd etcd    32632 Oct 11  2018 README-etcdctl.md
-rw-r--r--  1 etcd etcd     5878 Oct 11  2018 README.md
-rw-r--r--  1 etcd etcd     7892 Oct 11  2018 READMEv2-etcdctl.md

[root@hdss7-22.host.com /opt/etcd]# chown -R etcd. /data/etcd/
[root@hdss7-22.host.com /opt/etcd]# chown -R etcd. /data/logs/etcd-server/
1.4.13 安装supervisor,让etcd后台运行
[root@hdss7-22.host.com /opt/etcd]#  yum install supervisor -y
[root@hdss7-22.host.com /opt/etcd]# systemctl start supervisord
[root@hdss7-22.host.com /opt/etcd]# systemctl enable supervisord
1.4.20 创建supervisor启动文件
[root@hdss7-22.host.com /opt/etcd]# vim /etc/supervisord.d/etcd-server.ini
[program:etcd-server-7-22]                      # 注意此处
command=/opt/etcd/etcd-server-startup.sh #etcd脚本启动位置                       ; the program (relative uses PATH, can take args)
numprocs=1                   #启动1个进程                                                   ; number of processes copies to start (def 1)
directory=/opt/etcd                                             ; directory to cwd to before exec (def no cwd)
autostart=true                # 是否自动启动                                              ; start at supervisord start (default: true)
autorestart=true              # 是否自动重启                                               ; retstart at unexpected quit (default: true)
startsecs=30                  # 启动后多长时间判定为启动成功                                                  ; number of secs prog must stay running (def. 1)
startretries=3                # 重启次数                                             ; max # of serial start failures (default 3)
exitcodes=0,2                 # 异常退出的codes                                             ; 'expected' exit codes for process (default 0,2)
stopsignal=QUIT               # 停止的信号                                             ; signal used to kill process (default TERM)
stopwaitsecs=10                                                 ; max num secs to wait b4 SIGKILL (default 10)
user=etcd                     # 使用的用户                                              ; setuid to this UNIX account to run the program
redirect_stderr=true                                            ; redirect proc stderr to stdout (default false)
stdout_logfile=/data/logs/etcd-server/etcd.stdout.log           ; stdout log path, NONE for none; default AUTO
stdout_logfile_maxbytes=64MB                                    ; max # logfile bytes b4 rotation (default 50MB)
stdout_logfile_backups=4                                        ; # of stdout logfile backups (default 10)
stdout_capture_maxbytes=1MB                                     ; number of bytes in 'capturemode' (default 0)
stdout_events_enabled=false                                     ; emit events on stdout writes (default false)
1.4.21 启动etcd
[root@hdss7-22.host.com /opt/etcd]# supervisorctl update
etcd-server-7-22: added process group

# etcd启动起来需要一点时间,如果启动异常,查看/data/logs/etcd-server/etcd.stdout.log
[root@hdss7-22.host.com /opt]# supervisorctl status
etcd-server-7-22                 STARTING
[root@hdss7-22.host.com /opt]# supervisorctl status
etcd-server-7-22                 RUNNING   pid 9263, uptime 0:00:52

[root@hdss7-22.host.com /opt]# netstat -lntup |grep etcd      # 必须要监听了2379、2380两个端口才算启动成功
tcp        0      0 10.4.7.22:2379          0.0.0.0:*               LISTEN      9264/./etcd
tcp        0      0 127.0.0.1:2379          0.0.0.0:*               LISTEN      9264/./etcd
tcp        0      0 10.4.7.22:2380          0.0.0.0:*               LISTEN      9264/./etcd
1.4.22 任意etdc节点检查节点健康状态(3台etcd均启动后)
方法1:
[root@hdss7-21.host.com /opt/etcd]# ./etcdctl cluster-health
member 988139385f78284 is healthy: got healthy result from http://127.0.0.1:2379
member 5a0ef2a004fc4349 is healthy: got healthy result from http://127.0.0.1:2379
member f4a0cb0a765574a8 is healthy: got healthy result from http://127.0.0.1:2379
cluster is healthy
方法2:
[root@hdss7-21.host.com /opt/etcd]# ./etcdctl member list       # 该命令可以查出节点中的Leader
988139385f78284: name=etcd-server-7-22 peerURLs=https://10.4.7.22:2380 clientURLs=http://127.0.0.1:2379,https://10.4.7.22:2379 isLeader=false
5a0ef2a004fc4349: name=etcd-server-7-21 peerURLs=https://10.4.7.21:2380 clientURLs=http://127.0.0.1:2379,https://10.4.7.21:2379 isLeader=false
f4a0cb0a765574a8: name=etcd-server-7-12 peerURLs=https://10.4.7.12:2380 clientURLs=http://127.0.0.1:2379,https://10.4.7.12:2379 isLeader=true
2. 部署kube-apiserver集群
集群规划
| 主机名 | 角色 | IP |
|---|---|---|
| hdss7-21.host.com | kube-apiserver | 10.4.7.21 |
| hdss7-22.host.com | kube-apiserver | 10.4.7.22 |
| hdss7-11.host.com | 4层负载均衡 | 10.4.7.11 |
| hdss7-12.host.com | 4层负载均衡 | 10.4.7.12 |
注意:这里10.4.7.11和10.4.7.12使用nginx做4层负载均衡器,用keepalived跑一个vip:10.4.7.10,代理两个kube-apiserver,实现高可用
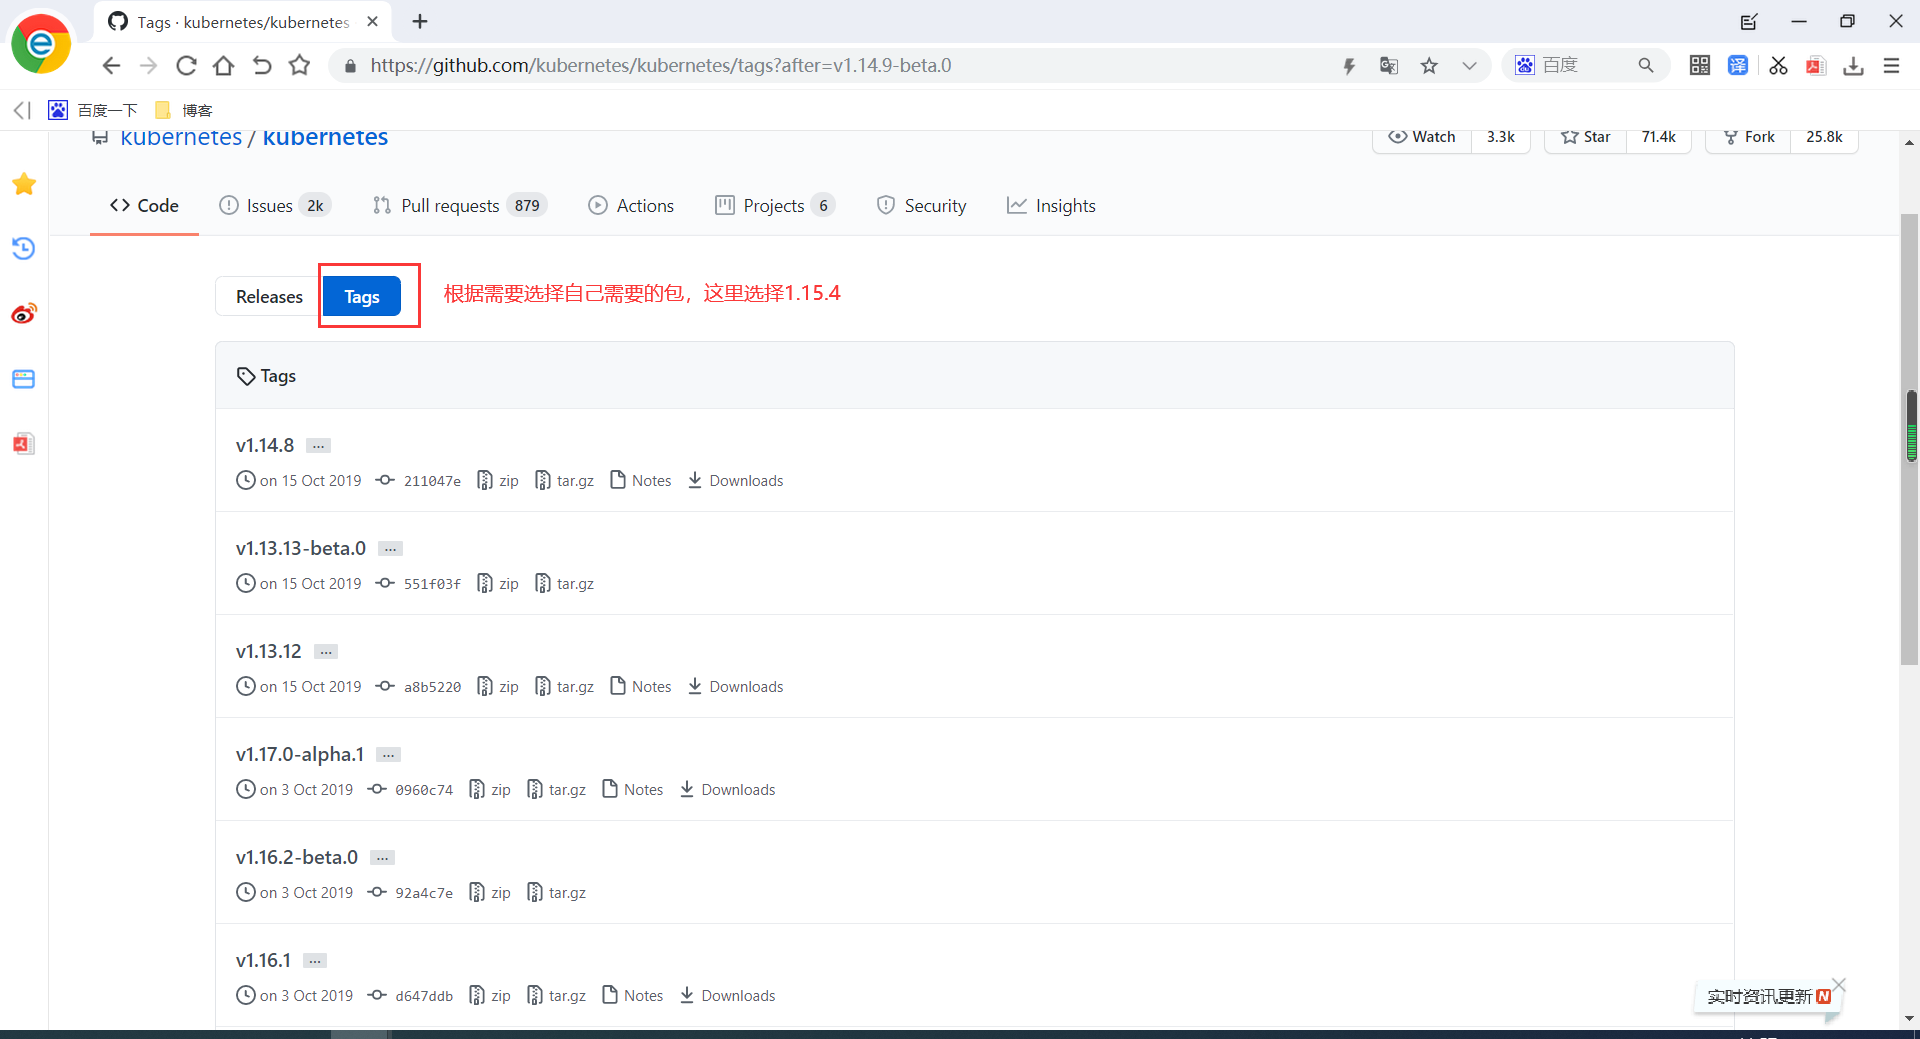
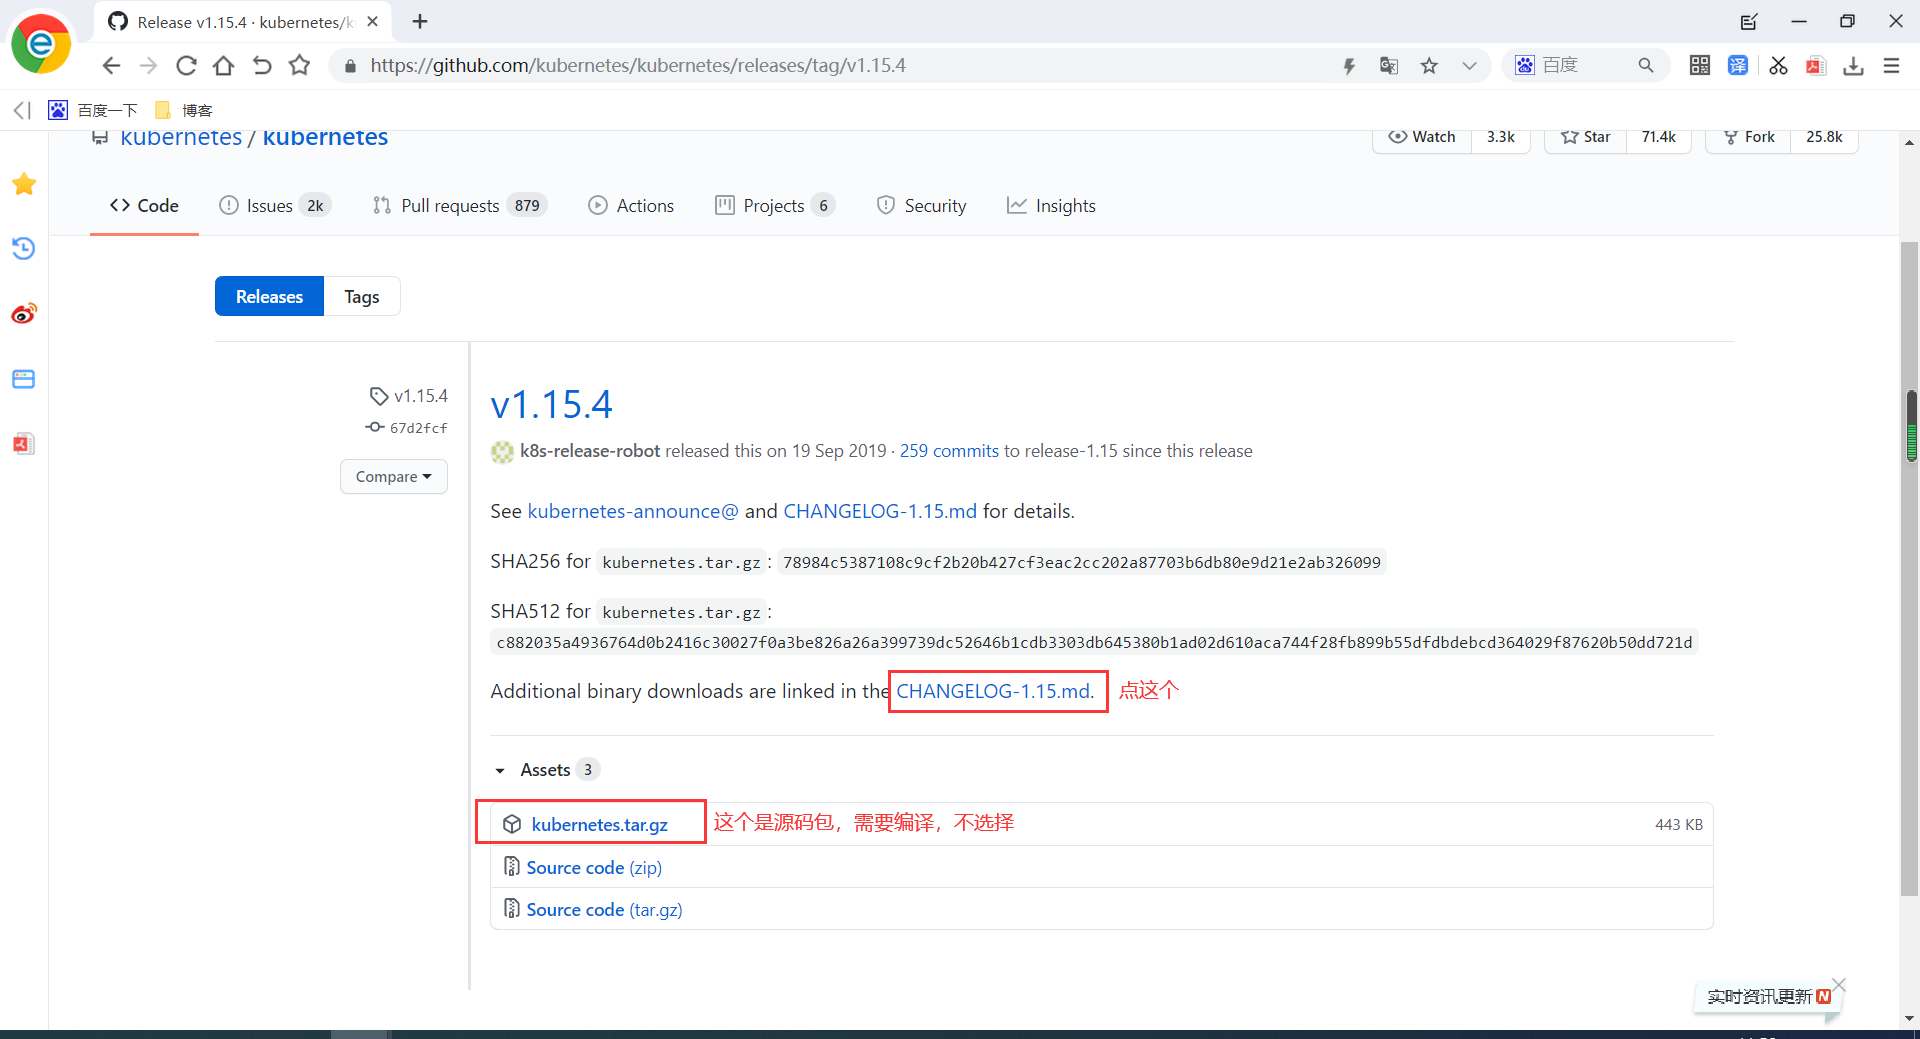
2.1 下载kubernetes
下载地址:https://github.com/kubernetes/kubernetes


2.2 安装kubernetes(hdss7-21.host.com操作)
[root@hdss7-21.host.com ~]# cd /opt/src/
[root@hdss7-21.host.com /opt/src]# ll
total 442992
-rw-r--r-- 1 root root   9850227 Nov  4 11:06 etcd-v3.1.20-linux-amd64.tar.gz
-rw-r--r-- 1 root root 443770238 Nov  4 14:05 kubernetes-server-linux-amd64-v1.15.2.tar.gz
[root@hdss7-21.host.com /opt/src]# tar zxf kubernetes-server-linux-amd64-v1.15.2.tar.gz -C /opt/
[root@hdss7-21.host.com /opt/src]#  cd /opt/
[root@hdss7-21.host.com /opt]# ll
total 0
drwx--x--x 4 root root  28 Nov  4 10:20 containerd
lrwxrwxrwx 1 root root  12 Nov  4 11:07 etcd -> etcd-v3.1.20
drwxr-xr-x 4 etcd etcd 166 Nov  4 11:17 etcd-v3.1.20
drwxr-xr-x 4 root root  79 Aug  5  2019 kubernetes
drwxr-xr-x 2 root root  97 Nov  4 14:05 src
[root@hdss7-21.host.com /opt]# mv kubernetes kubernetes-v1.15.2
[root@hdss7-21.host.com /opt]# ln -s kubernetes-v1.15.2 kubernetes
[root@hdss7-21.host.com /opt]# cd kubernetes
[root@hdss7-21.host.com /opt/kubernetes]# ll
total 27184
drwxr-xr-x 2 root root        6 Aug  5  2019 addons
-rw-r--r-- 1 root root 26625140 Aug  5  2019 kubernetes-src.tar.gz       # kubernetes源码包
-rw-r--r-- 1 root root  1205293 Aug  5  2019 LICENSES
drwxr-xr-x 3 root root       17 Aug  5  2019 server
[root@hdss7-21.host.com /opt/kubernetes]#  rm -f kubernetes-src.tar.gz
[root@hdss7-21.host.com /opt/kubernetes]# cd server/bin/
[root@hdss7-21.host.com /opt/kubernetes/server/bin]# ll
total 1548800
-rwxr-xr-x 1 root root  43534816 Aug  5  2019 apiextensions-apiserver
-rwxr-xr-x 1 root root 100548640 Aug  5  2019 cloud-controller-manager
-rw-r--r-- 1 root root         8 Aug  5  2019 cloud-controller-manager.docker_tag
-rw-r--r-- 1 root root 144437760 Aug  5  2019 cloud-controller-manager.tar           # .tar结尾的文件都是docker镜像
-rwxr-xr-x 1 root root 200648416 Aug  5  2019 hyperkube
-rwxr-xr-x 1 root root  40182208 Aug  5  2019 kubeadm
-rwxr-xr-x 1 root root 164501920 Aug  5  2019 kube-apiserver
-rw-r--r-- 1 root root         8 Aug  5  2019 kube-apiserver.docker_tag
-rw-r--r-- 1 root root 208390656 Aug  5  2019 kube-apiserver.tar           # .tar结尾的文件都是docker镜像
-rwxr-xr-x 1 root root 116397088 Aug  5  2019 kube-controller-manager
-rw-r--r-- 1 root root         8 Aug  5  2019 kube-controller-manager.docker_tag
-rw-r--r-- 1 root root 160286208 Aug  5  2019 kube-controller-manager.tar           # .tar结尾的文件都是docker镜像
-rwxr-xr-x 1 root root  42985504 Aug  5  2019 kubectl
-rwxr-xr-x 1 root root 119616640 Aug  5  2019 kubelet
-rwxr-xr-x 1 root root  36987488 Aug  5  2019 kube-proxy
-rw-r--r-- 1 root root         8 Aug  5  2019 kube-proxy.docker_tag
-rw-r--r-- 1 root root  84282368 Aug  5  2019 kube-proxy.tar           # .tar结尾的文件都是docker镜像
-rwxr-xr-x 1 root root  38786144 Aug  5  2019 kube-scheduler
-rw-r--r-- 1 root root         8 Aug  5  2019 kube-scheduler.docker_tag
-rw-r--r-- 1 root root  82675200 Aug  5  2019 kube-scheduler.tar           # .tar结尾的文件都是docker镜像
-rwxr-xr-x 1 root root   1648224 Aug  5  2019 mounter

# 这里用的是二进制安装,所以用不上上面的镜像,可以删除
[root@hdss7-21.host.com /opt/kubernetes/server/bin]# rm -f *.tar
[root@hdss7-21.host.com /opt/kubernetes/server/bin]# rm -f *_tag
[root@hdss7-21.host.com /opt/kubernetes/server/bin]# ll
total 884636
-rwxr-xr-x 1 root root  43534816 Aug  5  2019 apiextensions-apiserver
-rwxr-xr-x 1 root root 100548640 Aug  5  2019 cloud-controller-manager
-rwxr-xr-x 1 root root 200648416 Aug  5  2019 hyperkube
-rwxr-xr-x 1 root root  40182208 Aug  5  2019 kubeadm
-rwxr-xr-x 1 root root 164501920 Aug  5  2019 kube-apiserver
-rwxr-xr-x 1 root root 116397088 Aug  5  2019 kube-controller-manager
-rwxr-xr-x 1 root root  42985504 Aug  5  2019 kubectl
-rwxr-xr-x 1 root root 119616640 Aug  5  2019 kubelet
-rwxr-xr-x 1 root root  36987488 Aug  5  2019 kube-proxy
-rwxr-xr-x 1 root root  38786144 Aug  5  2019 kube-scheduler
-rwxr-xr-x 1 root root   1648224 Aug  5  2019 mounter
2.3 签发apiserver clinet证书(用于apiserver和etcd集群通信)
在apiserver和etcd集群通信过程中,etcd集群是server端,apiserver是客户端,所以这里需要签发client证书给apiserver。
操作:hdss7-200.host.com
[root@hdss7-200.host.com ~]# cd /opt/certs/
[root@hdss7-200.host.com /opt/certs]# vim client-csr.json

{
    "CN": "k8s-node",
    "hosts": [
    ],
    "key": {
        "algo": "rsa",
        "size": 2048
    },
    "names": [
        {
            "C": "CN",
            "ST": "beijing",
            "L": "beijing",
            "O": "od",
            "OU": "ops"
        }
    ]
}

[root@hdss7-200.host.com /opt/certs]# cfssl gencert -ca=ca.pem -ca-key=ca-key.pem -config=ca-config.json -profile=client client-csr.json |cfssl-json -bare client # 生成client证书和私钥
[root@hdss7-200.host.com /opt/certs]# ll
total 52
-rw-r--r-- 1 root root  836 Nov  4 10:49 ca-config.json
-rw-r--r-- 1 root root  993 Nov  4 09:59 ca.csr
-rw-r--r-- 1 root root  389 Nov  4 09:59 ca-csr.json
-rw------- 1 root root 1679 Nov  4 09:59 ca-key.pem
-rw-r--r-- 1 root root 1346 Nov  4 09:59 ca.pem
-rw-r--r-- 1 root root  993 Nov  4 14:23 client.csr         # 生成的clinet相关证书
-rw-r--r-- 1 root root  280 Nov  4 14:19 client-csr.json
-rw------- 1 root root 1675 Nov  4 14:23 client-key.pem         # 生成的clinet相关证书
-rw-r--r-- 1 root root 1363 Nov  4 14:23 client.pem         # 生成的clinet相关证书
-rw-r--r-- 1 root root 1062 Nov  4 10:50 etcd-peer.csr
-rw-r--r-- 1 root root  363 Nov  4 10:49 etcd-peer-csr.json
-rw------- 1 root root 1679 Nov  4 10:50 etcd-peer-key.pem
-rw-r--r-- 1 root root 1428 Nov  4 10:50 etcd-peer.pem
2.4 签发apiserver server端证书(apiserver对外提供服务时使用的证书)
有了该证书后,当有服务连接apiserver时,也需要通过ssl认证
root@hdss7-200.host.com /opt/certs]# vim apiserver-csr.json

{
    "CN": "apiserver",
    "hosts": [
        "127.0.0.1",
        "192.168.0.1",
        "kubernetes.default",
        "kubernetes.default.svc",
        "kubernetes.default.svc.cluster",
        "kubernetes.default.svc.cluster.local",
        "10.4.7.10",     # vip,下面其余IP都是apiserver可能部署的地址
        "10.4.7.21",
        "10.4.7.22",
        "10.4.7.23"
    ],
    "key": {
        "algo": "rsa",
        "size": 2048
    },
    "names": [
        {
            "C": "CN",
            "ST": "beijing",
            "L": "beijing",
            "O": "od",
            "OU": "ops"
        }
    ]
}

[root@hdss7-200.host.com /opt/certs]# cfssl gencert -ca=ca.pem -ca-key=ca-key.pem -config=ca-config.json -profile=server apiserver-csr.json | cfssl-json -bare apiserver  # 生成证书和私钥
[root@hdss7-200.host.com /opt/certs]# ll
total 68
-rw-r--r-- 1 root root 1245 Nov  4 14:33 apiserver.csr      # 生成的证书
-rw-r--r-- 1 root root  562 Nov  4 14:32 apiserver-csr.json
-rw------- 1 root root 1679 Nov  4 14:33 apiserver-key.pem      # 生成的证书
-rw-r--r-- 1 root root 1594 Nov  4 14:33 apiserver.pem      # 生成的证书
-rw-r--r-- 1 root root  836 Nov  4 10:49 ca-config.json
-rw-r--r-- 1 root root  993 Nov  4 09:59 ca.csr
-rw-r--r-- 1 root root  389 Nov  4 09:59 ca-csr.json
-rw------- 1 root root 1679 Nov  4 09:59 ca-key.pem
-rw-r--r-- 1 root root 1346 Nov  4 09:59 ca.pem
-rw-r--r-- 1 root root  993 Nov  4 14:23 client.csr
-rw-r--r-- 1 root root  280 Nov  4 14:19 client-csr.json
-rw------- 1 root root 1675 Nov  4 14:23 client-key.pem
-rw-r--r-- 1 root root 1363 Nov  4 14:23 client.pem
-rw-r--r-- 1 root root 1062 Nov  4 10:50 etcd-peer.csr
-rw-r--r-- 1 root root  363 Nov  4 10:49 etcd-peer-csr.json
-rw------- 1 root root 1679 Nov  4 10:50 etcd-peer-key.pem
-rw-r--r-- 1 root root 1428 Nov  4 10:50 etcd-peer.pem
2.5 拷贝证书至各运算节点,并创建配置(拷贝证书、私钥,注意私钥文件属性600)
操作:hdss7-21.host.com
[root@hdss7-21.host.com /opt/kubernetes/server/bin]# mkdir cert
[root@hdss7-21.host.com /opt/kubernetes/server/bin]# cd cert
[root@hdss7-21.host.com /opt/kubernetes/server/bin/cert]# scp hdss7-200:/opt/certs/ca.pem .
[root@hdss7-21.host.com /opt/kubernetes/server/bin/cert]# scp hdss7-200:/opt/certs/ca-key.pem .
[root@hdss7-21.host.com /opt/kubernetes/server/bin/cert]# scp hdss7-200:/opt/certs/client.pem .
[root@hdss7-21.host.com /opt/kubernetes/server/bin/cert]# scp hdss7-200:/opt/certs/client-key.pem .
[root@hdss7-21.host.com /opt/kubernetes/server/bin/cert]# scp hdss7-200:/opt/certs/apiserver.pem .
[root@hdss7-21.host.com /opt/kubernetes/server/bin/cert]# scp hdss7-200:/opt/certs/apiserver-key.pem .
[root@hdss7-21.host.com /opt/kubernetes/server/bin/cert]# ll
total 24
-rw------- 1 root root 1679 Nov  4 14:43 apiserver-key.pem
-rw-r--r-- 1 root root 1594 Nov  4 14:43 apiserver.pem
-rw------- 1 root root 1679 Nov  4 14:42 ca-key.pem
-rw-r--r-- 1 root root 1346 Nov  4 14:41 ca.pem
-rw------- 1 root root 1675 Nov  4 14:43 client-key.pem
-rw-r--r-- 1 root root 1363 Nov  4 14:42 client.pem
2.6 创建apiserver启动配置文件(日志审计)
[root@hdss7-21.host.com /opt/kubernetes/server/bin/cert]# cd ..
[root@hdss7-21.host.com /opt/kubernetes/server/bin]# mkdir conf
[root@hdss7-21.host.com /opt/kubernetes/server/bin]# cd conf
[root@hdss7-21.host.com /opt/kubernetes/server/bin/conf]# vi audit.yaml   # apiserver日志审计,是apiserver启动时必带配置
apiVersion: audit.k8s.io/v1beta1 # This is required.
kind: Policy
# Don't generate audit events for all requests in RequestReceived stage.
omitStages:
  - "RequestReceived"
rules:
  # Log pod changes at RequestResponse level
  - level: RequestResponse
    resources:
    - group: ""
      # Resource "pods" doesn't match requests to any subresource of pods,
      # which is consistent with the RBAC policy.
      resources: ["pods"]
  # Log "pods/log", "pods/status" at Metadata level
  - level: Metadata
    resources:
    - group: ""
      resources: ["pods/log", "pods/status"]

  # Don't log requests to a configmap called "controller-leader"
  - level: None
    resources:
    - group: ""
      resources: ["configmaps"]
      resourceNames: ["controller-leader"]

  # Don't log watch requests by the "system:kube-proxy" on endpoints or services
  - level: None
    users: ["system:kube-proxy"]
    verbs: ["watch"]
    resources:
    - group: "" # core API group
      resources: ["endpoints", "services"]

  # Don't log authenticated requests to certain non-resource URL paths.
  - level: None
    userGroups: ["system:authenticated"]
    nonResourceURLs:
    - "/api*" # Wildcard matching.
    - "/version"

  # Log the request body of configmap changes in kube-system.
  - level: Request
    resources:
    - group: "" # core API group
      resources: ["configmaps"]
    # This rule only applies to resources in the "kube-system" namespace.
    # The empty string "" can be used to select non-namespaced resources.
    namespaces: ["kube-system"]

  # Log configmap and secret changes in all other namespaces at the Metadata level.
  - level: Metadata
    resources:
    - group: "" # core API group
      resources: ["secrets", "configmaps"]

  # Log all other resources in core and extensions at the Request level.
  - level: Request
    resources:
    - group: "" # core API group
    - group: "extensions" # Version of group should NOT be included.

  # A catch-all rule to log all other requests at the Metadata level.
  - level: Metadata
    # Long-running requests like watches that fall under this rule will not
    # generate an audit event in RequestReceived.
    omitStages:
      - "RequestReceived"
2.7 创建apiserver启动脚本
[root@hdss7-21.host.com /opt/kubernetes/server/bin/conf]# vi kube-apiserver.sh
#!/bin/bash
./kube-apiserver    # apiserver启动命令
  --apiserver-count 2    # 指定apiserver启动数量
  --audit-log-path /data/logs/kubernetes/kube-apiserver/audit-log    # 日志路径
  --audit-policy-file ./conf/audit.yaml   # 日志审计
  --authorization-mode RBAC   # 鉴权模式,RBAC(基于角色的访问控制)
  --client-ca-file ./cert/ca.pem
  --requestheader-client-ca-file ./cert/ca.pem
  --enable-admission-plugins NamespaceLifecycle,LimitRanger,ServiceAccount,DefaultStorageClass,DefaultTolerationSeconds,MutatingAdmissionWebhook,ValidatingAdmissionWebhook,ResourceQuota
  --etcd-cafile ./cert/ca.pem
  --etcd-certfile ./cert/client.pem
  --etcd-keyfile ./cert/client-key.pem
  --etcd-servers https://10.4.7.12:2379,https://10.4.7.21:2379,https://10.4.7.22:2379
  --service-account-key-file ./cert/ca-key.pem
  --service-cluster-ip-range 192.168.0.0/16
  --service-node-port-range 3000-29999
  --target-ram-mb=1024    # 使用的内存
  --kubelet-client-certificate ./cert/client.pem
  --kubelet-client-key ./cert/client-key.pem
  --log-dir  /data/logs/kubernetes/kube-apiserver
  --tls-cert-file ./cert/apiserver.pem
  --tls-private-key-file ./cert/apiserver-key.pem
  --v 2
# 上述参数的更全面描述可以访问官网或./kube-apiserver --help

[root@hdss7-21.host.com /opt/kubernetes/server/bin/conf]# chmod +x kube-apiserver.sh
[root@hdss7-21.host.com /opt/kubernetes/server/bin/conf]# mkdir -p /data/logs/kubernetes/kube-apiserver  # 该路径必须创建,否则后续启动会报错
2.8 创建supervisor配置
[root@hdss7-21.host.com /opt/kubernetes/server/bin/conf]# cd /etc/supervisord.d/
[root@hdss7-21.host.com /etc/supervisord.d]# vi kube-apiserver.ini
[program:kube-apiserver-7-21]          # 注意此处的21,根据实际IP地址更改
command=/opt/kubernetes/server/bin/conf/kube-apiserver.sh            ; the program (relative uses PATH, can take args)
numprocs=1                                                      ; number of processes copies to start (def 1)
directory=/opt/kubernetes/server/bin                            ; directory to cwd to before exec (def no cwd)
autostart=true                                                  ; start at supervisord start (default: true)
autorestart=true                                                ; retstart at unexpected quit (default: true)
startsecs=22                                                    ; number of secs prog must stay running (def. 1)
startretries=3                                                  ; max # of serial start failures (default 3)
exitcodes=0,2                                                   ; 'expected' exit codes for process (default 0,2)
stopsignal=QUIT                                                 ; signal used to kill process (default TERM)
stopwaitsecs=10                                                 ; max num secs to wait b4 SIGKILL (default 10)
user=root                                                       ; setuid to this UNIX account to run the program
redirect_stderr=false                                           ; redirect proc stderr to stdout (default false)
stdout_logfile=/data/logs/kubernetes/kube-apiserver/apiserver.stdout.log        ; stdout log path, NONE for none; default AUTO
stdout_logfile_maxbytes=64MB                                    ; max # logfile bytes b4 rotation (default 50MB)
stdout_logfile_backups=4                                        ; # of stdout logfile backups (default 10)
stdout_capture_maxbytes=1MB                                     ; number of bytes in 'capturemode' (default 0)
stdout_events_enabled=false                                     ; emit events on stdout writes (default false)
stderr_logfile=/data/logs/kubernetes/kube-apiserver/apiserver.stderr.log        ; stderr log path, NONE for none; default AUTO
stderr_logfile_maxbytes=64MB                                    ; max # logfile bytes b4 rotation (default 50MB)
stderr_logfile_backups=4                                        ; # of stderr logfile backups (default 10)
stderr_capture_maxbytes=1MB                                     ; number of bytes in 'capturemode' (default 0)
stderr_events_enabled=false                                     ; emit events on stderr writes (default false)
2.9 启动服务并检查
[root@hdss7-21.host.com /etc/supervisord.d]# cd -
/opt/kubernetes/server/bin/conf
[root@hdss7-21.host.com /opt/kubernetes/server/bin/conf]# cd ..
[root@hdss7-21.host.com /opt/kubernetes/server/bin]# supervisorctl update
kube-apiserver: added process group
[root@hdss7-21.host.com /opt/kubernetes/server/bin]#
[root@hdss7-21.host.com /opt/kubernetes/server/bin]# supervisorctl status
etcd-server-7-21                 RUNNING   pid 8762, uptime 4:03:01
kube-apiserver                   RUNNING   pid 9250, uptime 0:00:34
2.10 hdss7-22.host.com安装apiserver
[root@hdss7-22.host.com ~]# cd /opt/src/
[root@hdss7-22.host.com /opt/src]# ll
total 442992
-rw-r--r-- 1 root root   9850227 Nov  4 11:20 etcd-v3.1.20-linux-amd64.tar.gz
-rw-r--r-- 1 root root 443770238 Nov  4 15:25 kubernetes-server-linux-amd64-v1.15.2.tar.gz
[root@hdss7-22.host.com /opt/src]# tar zxf kubernetes-server-linux-amd64-v1.15.2.tar.gz -C /opt/
[root@hdss7-22.host.com /opt/src]# cd /opt/
[root@hdss7-22.host.com /opt]# mv kubernetes kubernetes-v1.15.2
[root@hdss7-22.host.com /opt]# ln -s kubernetes-v1.15.2/ kubernetes
[root@hdss7-22.host.com /opt]# ll
total 0
drwx--x--x 4 root root  28 Nov  4 10:20 containerd
lrwxrwxrwx 1 root root  12 Nov  4 11:20 etcd -> etcd-v3.1.20
drwxr-xr-x 4 etcd etcd 166 Nov  4 11:22 etcd-v3.1.20
lrwxrwxrwx 1 root root  19 Nov  4 15:26 kubernetes -> kubernetes-v1.15.2/
drwxr-xr-x 4 root root  79 Aug  5  2019 kubernetes-v1.15.2
drwxr-xr-x 2 root root  97 Nov  4 15:25 src
[root@hdss7-22.host.com /opt]# cd kubernetes
[root@hdss7-22.host.com /opt/kubernetes]# ls
addons  kubernetes-src.tar.gz  LICENSES  server
[root@hdss7-22.host.com /opt/kubernetes]# rm -f kubernetes-src.tar.gz
[root@hdss7-22.host.com /opt/kubernetes]# cd server/bin/
[root@hdss7-22.host.com /opt/kubernetes/server/bin]# ls
apiextensions-apiserver              cloud-controller-manager.tar  kube-apiserver             kube-controller-manager             kubectl     kube-proxy.docker_tag  kube-scheduler.docker_tag
cloud-controller-manager             hyperkube                     kube-apiserver.docker_tag  kube-controller-manager.docker_tag  kubelet     kube-proxy.tar         kube-scheduler.tar
cloud-controller-manager.docker_tag  kubeadm                       kube-apiserver.tar         kube-controller-manager.tar         kube-proxy  kube-scheduler         mounter
[root@hdss7-22.host.com /opt/kubernetes/server/bin]# rm -f *.tar
[root@hdss7-22.host.com /opt/kubernetes/server/bin]# rm -f *_tag
[root@hdss7-22.host.com /opt/kubernetes/server/bin]# ll
total 884636
-rwxr-xr-x 1 root root  43534816 Aug  5  2019 apiextensions-apiserver
-rwxr-xr-x 1 root root 100548640 Aug  5  2019 cloud-controller-manager
-rwxr-xr-x 1 root root 200648416 Aug  5  2019 hyperkube
-rwxr-xr-x 1 root root  40182208 Aug  5  2019 kubeadm
-rwxr-xr-x 1 root root 164501920 Aug  5  2019 kube-apiserver
-rwxr-xr-x 1 root root 116397088 Aug  5  2019 kube-controller-manager
-rwxr-xr-x 1 root root  42985504 Aug  5  2019 kubectl
-rwxr-xr-x 1 root root 119616640 Aug  5  2019 kubelet
-rwxr-xr-x 1 root root  36987488 Aug  5  2019 kube-proxy
-rwxr-xr-x 1 root root  38786144 Aug  5  2019 kube-scheduler
-rwxr-xr-x 1 root root   1648224 Aug  5  2019 mounter

[root@hdss7-22.host.com /opt/kubernetes/server/bin]# mkdir cert
[root@hdss7-22.host.com /opt/kubernetes/server/bin]# cd cert
[root@hdss7-22.host.com /opt/kubernetes/server/bin/cert]# scp hdss7-200:/opt/certs/ca.pem .
[root@hdss7-22.host.com /opt/kubernetes/server/bin/cert]# scp hdss7-200:/opt/certs/ca-key.pem .
[root@hdss7-22.host.com /opt/kubernetes/server/bin/cert]# scp hdss7-200:/opt/certs/client.pem .
[root@hdss7-22.host.com /opt/kubernetes/server/bin/cert]# scp hdss7-200:/opt/certs/client-key.pem .
[root@hdss7-22.host.com /opt/kubernetes/server/bin/cert]# scp hdss7-200:/opt/certs/apiserver.pem .
[root@hdss7-22.host.com /opt/kubernetes/server/bin/cert]# scp hdss7-200:/opt/certs/apiserver-key.pem .
[root@hdss7-22.host.com /opt/kubernetes/server/bin/cert]#
[root@hdss7-22.host.com /opt/kubernetes/server/bin/cert]# cd ..
[root@hdss7-22.host.com /opt/kubernetes/server/bin]# mkdir conf
[root@hdss7-22.host.com /opt/kubernetes/server/bin]# cd conf
[root@hdss7-22.host.com /opt/kubernetes/server/bin/conf]# vi audit.yaml   # 该文件内容和21一样
[root@hdss7-22.host.com /opt/kubernetes/server/bin/conf]# vi kube-apiserver.sh   # 该文件内容和21一样
[root@hdss7-22.host.com /opt/kubernetes/server/bin/conf]# chmod +x kube-apiserver.sh
[root@hdss7-22.host.com /opt/kubernetes/server/bin/conf]# mkdir -p /data/logs/kubernetes/kube-apiserver
[root@hdss7-22.host.com /opt/kubernetes/server/bin/conf]# cd /etc/supervisord.d/
[root@hdss7-22.host.com /etc/supervisord.d]# vi kube-apiserver.ini
[program:kube-apiserver-7-22]   # 注意这里改成22
command=/opt/kubernetes/server/bin/conf/kube-apiserver.sh            ; the program (relative uses PATH, can take args)
numprocs=1                                                      ; number of processes copies to start (def 1)
directory=/opt/kubernetes/server/bin                            ; directory to cwd to before exec (def no cwd)
autostart=true                                                  ; start at supervisord start (default: true)
autorestart=true                                                ; retstart at unexpected quit (default: true)
startsecs=22                                                    ; number of secs prog must stay running (def. 1)
startretries=3                                                  ; max # of serial start failures (default 3)
exitcodes=0,2                                                   ; 'expected' exit codes for process (default 0,2)
stopsignal=QUIT                                                 ; signal used to kill process (default TERM)
stopwaitsecs=10                                                 ; max num secs to wait b4 SIGKILL (default 10)
user=root                                                       ; setuid to this UNIX account to run the program
redirect_stderr=false                                           ; redirect proc stderr to stdout (default false)
stdout_logfile=/data/logs/kubernetes/kube-apiserver/apiserver.stdout.log        ; stdout log path, NONE for none; default AUTO
stdout_logfile_maxbytes=64MB                                    ; max # logfile bytes b4 rotation (default 50MB)
stdout_logfile_backups=4                                        ; # of stdout logfile backups (default 10)
stdout_capture_maxbytes=1MB                                     ; number of bytes in 'capturemode' (default 0)
stdout_events_enabled=false                                     ; emit events on stdout writes (default false)
stderr_logfile=/data/logs/kubernetes/kube-apiserver/apiserver.stderr.log        ; stderr log path, NONE for none; default AUTO
stderr_logfile_maxbytes=64MB                                    ; max # logfile bytes b4 rotation (default 50MB)
stderr_logfile_backups=4                                        ; # of stderr logfile backups (default 10)
stderr_capture_maxbytes=1MB                                     ; number of bytes in 'capturemode' (default 0)
stderr_events_enabled=false                                     ; emit events on stderr writes (default false)
[root@hdss7-22.host.com /etc/supervisord.d]# cd -
/opt/kubernetes/server/bin/conf
[root@hdss7-22.host.com /opt/kubernetes/server/bin/conf]# cd ..
[root@hdss7-22.host.com /opt/kubernetes/server/bin]# supervisorctl update
kube-apiserver-7-22: added process group
[root@hdss7-22.host.com /opt/kubernetes/server/bin]# supervisorctl status
etcd-server-7-22                 RUNNING   pid 8925, uptime 4:09:11
kube-apiserver-7-22              RUNNING   pid 9302, uptime 0:00:24
[root@hdss7-22.host.com /opt/kubernetes/server/bin]# netstat -lntup | grep api
tcp        0      0 127.0.0.1:8080          0.0.0.0:*               LISTEN      9303/./kube-apiserv
tcp6       0      0 :::6443                 :::*                    LISTEN      9303/./kube-apiserv
3. 安装部署主控节点4层反向代理服务
操作:hdss7-11.host.com、hdss7-12.host.com
3.1 安装nginx并配置
# yum -y install nginx
# vi /etc/nginx/nginx.conf #在文件末尾添加如下内容
…… 省略部分内容
stream {   # 四层反代
    upstream kube-apiserver {
        server 10.4.7.21:6443     max_fails=3 fail_timeout=30s;
        server 10.4.7.22:6443     max_fails=3 fail_timeout=30s;
    }
    server {
        listen 7443;
        proxy_connect_timeout 2s;
        proxy_timeout 900s;
        proxy_pass kube-apiserver;
    }
}

# nginx -t
# systemctl start nginx
# systemctl enable nginx
3.2 安装keepalived并配置
操作:hdss7-11.host.com、hdss7-12.host.com
# yum -y install keepalived

# 配置监听脚本(作用:如果主节点的7443端口宕了,自动进行切换)
~]# vi /etc/keepalived/check_port.sh
#!/bin/bash
#keepalived 监控端口脚本
#使用方法:
#在keepalived的配置文件中
#vrrp_script check_port {#创建一个vrrp_script脚本,检查配置
#    script "/etc/keepalived/check_port.sh 6379" #配置监听的端口
#    interval 2 #检查脚本的频率,单位(秒)
#}
CHK_PORT=$1
if [ -n "$CHK_PORT" ];then
        PORT_PROCESS=`ss -lnt|grep $CHK_PORT|wc -l`
        if [ $PORT_PROCESS -eq 0 ];then
                echo "Port $CHK_PORT Is Not Used,End."
                exit 1
        fi
else
        echo "Check Port Cant Be Empty!"
fi

~]# chmod +x /etc/keepalived/check_port.sh
3.3 配置keepalived主
操作:hdss7-11.host.com
[root@hdss7-11.host.com ~]# vi /etc/keepalived/keepalived.conf  # 删除里面的默认配置,添加如下配置
! Configuration File for keepalived

global_defs {
   router_id 10.4.7.11

}

vrrp_script chk_nginx {
    script "/etc/keepalived/check_port.sh 7443"
    interval 2
    weight -20
}

vrrp_instance VI_1 {
    state MASTER
    interface eth0
    virtual_router_id 251
    priority 100
    advert_int 1
    mcast_src_ip 10.4.7.11
    nopreempt   # 非抢占机制,主宕掉后,从接管VIP。当主起来后,不去接管VIP地址。因为生产环境严禁VIP地址随意变动,进行VIP切换时只能在流量低谷时进行。

    authentication {
        auth_type PASS
        auth_pass 11111111
    }
    track_script {
         chk_nginx
    }
    virtual_ipaddress {
        10.4.7.10
    }
}
3.4 配置keepalived备
操作:hdss7-12.host.com
[root@hdss7-12.host.com ~]# vi /etc/keepalived/keepalived.conf  # 删除里面的默认配置,添加如下配置
! Configuration File for keepalived
global_defs {
	router_id 10.4.7.12
}
vrrp_script chk_nginx {
	script "/etc/keepalived/check_port.sh 7443"
	interval 2
	weight -20
}
vrrp_instance VI_1 {
	state BACKUP
	interface eth0
	virtual_router_id 251
	mcast_src_ip 10.4.7.12
	priority 90
	advert_int 1
	authentication {
		auth_type PASS
		auth_pass 11111111
	}
	track_script {
		chk_nginx
	}
	virtual_ipaddress {
		10.4.7.10
	}
}
3.5 启动keepalived
操作:hdss7-11.host.com、hdss7-12.host.com
[root@hdss7-11.host.com ~]# systemctl start keepalived.service
[root@hdss7-11.host.com ~]# systemctl enable keepalived.service
[root@hdss7-12.host.com ~]# systemctl start keepalived.service
[root@hdss7-12.host.com ~]# systemctl enable keepalived.service
[root@hdss7-11.host.com ~]# ip a
1: lo: <LOOPBACK,UP,LOWER_UP> mtu 65536 qdisc noqueue state UNKNOWN group default qlen 1000
    link/loopback 00:00:00:00:00:00 brd 00:00:00:00:00:00
    inet 127.0.0.1/8 scope host lo
       valid_lft forever preferred_lft forever
    inet6 ::1/128 scope host
       valid_lft forever preferred_lft forever
2: eth0: <BROADCAST,MULTICAST,UP,LOWER_UP> mtu 1500 qdisc pfifo_fast state UP group default qlen 1000
    link/ether 00:0c:29:8a:60:c1 brd ff:ff:ff:ff:ff:ff
    inet 10.4.7.11/24 brd 10.4.7.255 scope global noprefixroute eth0
       valid_lft forever preferred_lft forever
    inet 10.4.7.10/32 scope global eth0           # vip已生成
3.6 测试keepalived
[root@hdss7-11.host.com ~]#  systemctl stop nginx  # 停止11的nginx
[root@hdss7-12.host.com ~]# ip a|grep 10.4.7.10   # 此时vip已经转移到12上
    inet 10.4.7.10/32 scope global eth0
[root@hdss7-11.host.com ~]#  systemctl start nginx  # 主 11 再次启动nginx
[root@hdss7-11.host.com ~]# ip a   # 这个时候的VIP是不会自动切换回来的,因为主keeplived配置文件中配置了nopreempt参数,不主动切换VIP。
2: eth0: <BROADCAST,MULTICAST,UP,LOWER_UP> mtu 1500 qdisc pfifo_fast state UP group default qlen 1000
    link/ether 00:0c:29:8a:60:c1 brd ff:ff:ff:ff:ff:ff
    inet 10.4.7.11/24 brd 10.4.7.255 scope global noprefixroute eth0
       valid_lft forever preferred_lft forever
    inet6 fe80::9b0c:62d2:22eb:3e41/64 scope link tentative noprefixroute dadfailed
       valid_lft forever preferred_lft forever
    inet6 fe80::59f0:e5a9:c574:795e/64 scope link tentative noprefixroute dadfailed
       valid_lft forever preferred_lft forever
    inet6 fe80::1995:f2a1:11a8:cb1e/64 scope link tentative noprefixroute dadfailed
       valid_lft forever preferred_lft forever

# 切换方法如下:
[root@hdss7-11.host.com ~]# systemctl restart keepalived.service

[root@hdss7-12.host.com ~]# systemctl restart keepalived.service

[root@hdss7-11.host.com ~]# ip a
2: eth0: <BROADCAST,MULTICAST,UP,LOWER_UP> mtu 1500 qdisc pfifo_fast state UP group default qlen 1000
    link/ether 00:0c:29:8a:60:c1 brd ff:ff:ff:ff:ff:ff
    inet 10.4.7.11/24 brd 10.4.7.255 scope global noprefixroute eth0
       valid_lft forever preferred_lft forever
    inet 10.4.7.10/32 scope global eth0  # 此时的VIP已经切换回来
4. 部署controller-manager
集群规划
| 主机名 | 角色 | IP |
|---|---|---|
| hdss7-21.host.com | controller-manager | 10.4.7.21 |
| hdss7-22.host.com | controller-manager | 10.4.7.22 |
4.1 创建启动脚本
操作:hdss7-21.host.com
[root@hdss7-21.host.com ~]# cd /opt/kubernetes/server/bin/
[root@hdss7-21.host.com /opt/kubernetes/server/bin]# vi kube-controller-manager.sh
#!/bin/sh
./kube-controller-manager
 --cluster-cidr 172.7.0.0/16
 --leader-elect true
 --log-dir /data/logs/kubernetes/kube-controller-manager   # 这个路径稍后需要创建出来
 --master http://127.0.0.1:8080
 --service-account-private-key-file ./cert/ca-key.pem
 --service-cluster-ip-range 192.168.0.0/16
 --root-ca-file ./cert/ca.pem
 --v 2
4.2 调整文件权限,创建目录
[root@hdss7-21.host.com /opt/kubernetes/server/bin]# chmod +x kube-controller-manager.sh
[root@hdss7-21.host.com /opt/kubernetes/server/bin]# mkdir -p /data/logs/kubernetes/kube-controller-manager
4.3 创建supervisor配置
[root@hdss7-21.host.com /opt/kubernetes/server/bin]# cd /etc/supervisord.d/
[root@hdss7-21.host.com /etc/supervisord.d]# vi kube-conntroller-manager.ini
[program:kube-controller-manager-7-21]   # 注意此处,21在不同机器上时,应变成对应机器的ip
command=/opt/kubernetes/server/bin/kube-controller-manager.sh                     ; the program (relative uses PATH, can take args)
numprocs=1                                                               ; number of processes copies to start (def 1)
directory=/opt/kubernetes/server/bin                                     ; directory to cwd to before exec (def no cwd)
autostart=true                                                           ; start at supervisord start (default: true)
autorestart=true                                                         ; retstart at unexpected quit (default: true)
startsecs=30                                                             ; number of secs prog must stay running (def. 1)
startretries=3                                                           ; max # of serial start failures (default 3)
exitcodes=0,2                                                            ; 'expected' exit codes for process (default 0,2)
stopsignal=QUIT                                                          ; signal used to kill process (default TERM)
stopwaitsecs=10                                                          ; max num secs to wait b4 SIGKILL (default 10)
user=root                                                                ; setuid to this UNIX account to run the program
redirect_stderr=true                                                     ; redirect proc stderr to stdout (default false)
stdout_logfile=/data/logs/kubernetes/kube-controller-manager/controller.stdout.log ; stderr log path, NONE for none; default AUTO
stdout_logfile_maxbytes=64MB                                             ; max # logfile bytes b4 rotation (default 50MB)
stdout_logfile_backups=4                                                 ; # of stdout logfile backups (default 10)
stdout_capture_maxbytes=1MB                                              ; number of bytes in 'capturemode' (default 0)
stdout_events_enabled=false                                              ; emit events on stdout writes (default false)
4.4 启动服务并检查
[root@hdss7-21.host.com /etc/supervisord.d]# cd -
[root@hdss7-21.host.com /opt/kubernetes/server/bin]# supervisorctl update
kube-controller-manager-7-22: added process group
[root@hdss7-21.host.com /opt/kubernetes/server/bin]# supervisorctl status
etcd-server-7-21                 RUNNING   pid 8762, uptime 6:24:01
kube-apiserver                   RUNNING   pid 9250, uptime 2:21:34
kube-controller-manager-7-21     RUNNING   pid 9763, uptime 0:00:35

[root@hdss7-21.host.com /opt/kubernetes/server/bin]# netstat -lntup |grep contro
tcp6       0      0 :::10252                :::*                    LISTEN      9764/./kube-control
tcp6       0      0 :::10257                :::*                    LISTEN      9764/./kube-control
4.5 hdss7-22.host.com进行相同操作
[root@hdss7-22.host.com ~]# cd /opt/kubernetes/server/bin/
[root@hdss7-22.host.com /opt/kubernetes/server/bin]# vi kube-controller-manager.sh
#!/bin/sh
./kube-controller-manager
  --cluster-cidr 172.7.0.0/16
  --leader-elect true
  --log-dir /data/logs/kubernetes/kube-controller-manager   # 这个路径稍后需要创建出来
  --master http://127.0.0.1:8080
  --service-account-private-key-file ./cert/ca-key.pem
  --service-cluster-ip-range 192.168.0.0/16
  --root-ca-file ./cert/ca.pem
  --v 2

[root@hdss7-22.host.com /opt/kubernetes/server/bin]# chmod +x kube-controller-manager.sh
[root@hdss7-22.host.com /opt/kubernetes/server/bin]# mkdir -p /data/logs/kubernetes/kube-controller-manager
[root@hdss7-22.host.com /opt/kubernetes/server/bin]#  cd /etc/supervisord.d/
[root@hdss7-22.host.com /etc/supervisord.d]# vi kube-conntroller-manager.ini
[program:kube-controller-manager-7-22]
command=/opt/kubernetes/server/bin/kube-controller-manager.sh                     ; the program (relative uses PATH, can take args)
numprocs=1                                                               ; number of processes copies to start (def 1)
directory=/opt/kubernetes/server/bin                                     ; directory to cwd to before exec (def no cwd)
autostart=true                                                           ; start at supervisord start (default: true)
autorestart=true                                                         ; retstart at unexpected quit (default: true)
startsecs=30                                                             ; number of secs prog must stay running (def. 1)
startretries=3                                                           ; max # of serial start failures (default 3)
exitcodes=0,2                                                            ; 'expected' exit codes for process (default 0,2)
stopsignal=QUIT                                                          ; signal used to kill process (default TERM)
stopwaitsecs=10                                                          ; max num secs to wait b4 SIGKILL (default 10)
user=root                                                                ; setuid to this UNIX account to run the program
redirect_stderr=true                                                     ; redirect proc stderr to stdout (default false)
stdout_logfile=/data/logs/kubernetes/kube-controller-manager/controller.stdout.log ; stderr log path, NONE for none; default AUTO
stdout_logfile_maxbytes=64MB                                             ; max # logfile bytes b4 rotation (default 50MB)
stdout_logfile_backups=4                                                 ; # of stdout logfile backups (default 10)
stdout_capture_maxbytes=1MB                                              ; number of bytes in 'capturemode' (default 0)
stdout_events_enabled=false                                              ; emit events on stdout writes (default false)

[root@hdss7-22.host.com /etc/supervisord.d]# cd -
/opt/kubernetes/server/bin
[root@hdss7-22.host.com /opt/kubernetes/server/bin]# supervisorctl update
kube-controller-manager-7-22: added process group
[root@hdss7-22.host.com /opt/kubernetes/server/bin]# supervisorctl status
etcd-server-7-22                 RUNNING   pid 8925, uptime 6:28:56
kube-apiserver-7-22              RUNNING   pid 9302, uptime 2:20:09
kube-controller-manager-7-22     RUNNING   pid 9597, uptime 0:00:35
[root@hdss7-22.host.com /opt/kubernetes/server/bin]# netstat -lntup | grep con
Active Internet connections (only servers)
tcp6       0      0 :::10252                :::*                    LISTEN      9598/./kube-control
tcp6       0      0 :::10257                :::*                    LISTEN      9598/./kube-control
5. 部署kube-scheduler
集群规划
| 主机名 | 角色 | IP |
|---|---|---|
| hdss7-21.host.com | controller-manager | 10.4.7.21 |
| hdss7-22.host.com | controller-manager | 10.4.7.22 |
5.1 创建启动脚本
操作:hdss7-21.host.com
[root@hdss7-21.host.com /opt/kubernetes/server/bin]# vi kube-scheduler.sh
#!/bin/sh
./kube-scheduler
  --leader-elect
  --log-dir /data/logs/kubernetes/kube-scheduler
  --master http://127.0.0.1:8080
  --v 2
5.2 调整文件权限,创建目录
[root@hdss7-21.host.com /opt/kubernetes/server/bin]# chmod +x kube-scheduler.sh
[root@hdss7-21.host.com /opt/kubernetes/server/bin]#  mkdir -p /data/logs/kubernetes/kube-scheduler
5.3 创建supervisor配置
[root@hdss7-21.host.com /opt/kubernetes/server/bin]# vi /etc/supervisord.d/kube-scheduler.ini
[program:kube-scheduler-7-21]
command=/opt/kubernetes/server/bin/kube-scheduler.sh                     ; the program (relative uses PATH, can take args)
numprocs=1                                                               ; number of processes copies to start (def 1)
directory=/opt/kubernetes/server/bin                                     ; directory to cwd to before exec (def no cwd)
autostart=true                                                           ; start at supervisord start (default: true)
autorestart=true                                                         ; retstart at unexpected quit (default: true)
startsecs=30                                                             ; number of secs prog must stay running (def. 1)
startretries=3                                                           ; max # of serial start failures (default 3)
exitcodes=0,2                                                            ; 'expected' exit codes for process (default 0,2)
stopsignal=QUIT                                                          ; signal used to kill process (default TERM)
stopwaitsecs=10                                                          ; max num secs to wait b4 SIGKILL (default 10)
user=root                                                                ; setuid to this UNIX account to run the program
redirect_stderr=true                                                     ; redirect proc stderr to stdout (default false)
stdout_logfile=/data/logs/kubernetes/kube-scheduler/scheduler.stdout.log ; stderr log path, NONE for none; default AUTO
stdout_logfile_maxbytes=64MB                                             ; max # logfile bytes b4 rotation (default 50MB)
stdout_logfile_backups=4                                                 ; # of stdout logfile backups (default 10)
stdout_capture_maxbytes=1MB                                              ; number of bytes in 'capturemode' (default 0)
stdout_events_enabled=false                                              ; emit events on stdout writes (default false)
5.4 启动服务并检查
[root@hdss7-21.host.com /opt/kubernetes/server/bin]# supervisorctl update
kube-scheduler-7-21: added process group
[root@hdss7-21.host.com /opt/kubernetes/server/bin]# supervisorctl status
etcd-server-7-21                 RUNNING   pid 8762, uptime 6:57:55
kube-apiserver                   RUNNING   pid 9250, uptime 2:55:28
kube-controller-manager-7-21     RUNNING   pid 9763, uptime 0:34:29
kube-scheduler-7-21              RUNNING   pid 9824, uptime 0:01:31

[root@hdss7-21.host.com /opt/kubernetes/server/bin]# netstat -lntup | grep sch
tcp6       0      0 :::10251                :::*                    LISTEN      9825/./kube-schedul
tcp6       0      0 :::10259                :::*                    LISTEN      9825/./kube-schedul
5.5 hdss7-22.host.com进行相同操作
[root@hdss7-22.host.com /opt/kubernetes/server/bin]# vi kube-scheduler.sh
[root@hdss7-22.host.com /opt/kubernetes/server/bin]# chmod +x kube-scheduler.sh
[root@hdss7-22.host.com /opt/kubernetes/server/bin]# mkdir -p /data/logs/kubernetes/kube-scheduler
[root@hdss7-22.host.com /opt/kubernetes/server/bin]# vi /etc/supervisord.d/kube-scheduler.ini
[program:kube-scheduler-7-22]
command=/opt/kubernetes/server/bin/kube-scheduler.sh                     ; the program (relative uses PATH, can take args)
numprocs=1                                                               ; number of processes copies to start (def 1)
directory=/opt/kubernetes/server/bin                                     ; directory to cwd to before exec (def no cwd)
autostart=true                                                           ; start at supervisord start (default: true)
autorestart=true                                                         ; retstart at unexpected quit (default: true)
startsecs=30                                                             ; number of secs prog must stay running (def. 1)
startretries=3                                                           ; max # of serial start failures (default 3)
exitcodes=0,2                                                            ; 'expected' exit codes for process (default 0,2)
stopsignal=QUIT                                                          ; signal used to kill process (default TERM)
stopwaitsecs=10                                                          ; max num secs to wait b4 SIGKILL (default 10)
user=root                                                                ; setuid to this UNIX account to run the program
redirect_stderr=true                                                     ; redirect proc stderr to stdout (default false)
stdout_logfile=/data/logs/kubernetes/kube-scheduler/scheduler.stdout.log ; stderr log path, NONE for none; default AUTO
stdout_logfile_maxbytes=64MB                                             ; max # logfile bytes b4 rotation (default 50MB)
stdout_logfile_backups=4                                                 ; # of stdout logfile backups (default 10)
stdout_capture_maxbytes=1MB                                              ; number of bytes in 'capturemode' (default 0)
stdout_events_enabled=false                                              ; emit events on stdout writes (default false)

[root@hdss7-22.host.com /opt/kubernetes/server/bin]# supervisorctl update
kube-scheduler-7-22: added process group
[root@hdss7-22.host.com /opt/kubernetes/server/bin]# supervisorctl status
etcd-server-7-22                 RUNNING   pid 8925, uptime 6:54:05
kube-apiserver-7-22              RUNNING   pid 9302, uptime 2:45:18
kube-controller-manager-7-22     RUNNING   pid 9597, uptime 0:25:44
kube-scheduler-7-22              RUNNING   pid 9647, uptime 0:00:31
[root@hdss7-22.host.com /opt/kubernetes/server/bin]# netstat -lntup | grep sch
tcp6       0      0 :::10251                :::*                    LISTEN      9648/./kube-schedul
tcp6       0      0 :::10259                :::*                    LISTEN      9648/./kube-schedul
6. 检查集群健康节点状态
21、22做相同操作
~]# ln -s /opt/kubernetes/server/bin/kubectl /usr/bin/kubectl
~]# which kubectl
/usr/bin/kubectl

~]# kubectl get cs   # 检查集群的健康状态
NAME                 STATUS    MESSAGE              ERROR
controller-manager   Healthy   ok
scheduler            Healthy   ok
etcd-0               Healthy   {"health": "true"}
etcd-1               Healthy   {"health": "true"}
etcd-2               Healthy   {"health": "true"}
安装NODE(运算节点)节点所需服务
1. 部署kubelet服务
集群规划
| 主机名 | 角色 | ip |
|---|---|---|
| hdss7-21.host.com | kubelet | 10.4.7.21 |
| hdss7-22.host.com | kubelet | 10.4.7.22 |
kubeconfig文件:
- 这是一个k8s用户的配置文件
- 它里面包含了证书的信息
- 证书过期或更换,需要同步替换该文件
1.1 签发kubelet证书
操作:hdss7-200.host.com
[root@hdss7-200.host.com /opt/harbor]# cd /opt/certs/
[root@hdss7-200.host.com /opt/certs]# vi kubelet-csr.json
{
    "CN": "k8s-kubelet",
    "hosts": [
    "127.0.0.1",
    "10.4.7.10",
    "10.4.7.21",
    "10.4.7.22",
    "10.4.7.23",
    "10.4.7.24",
    "10.4.7.25",
    "10.4.7.26",
    "10.4.7.27",
    "10.4.7.28"
    ],
    "key": {
        "algo": "rsa",
        "size": 2048
    },
    "names": [
        {
            "C": "CN",
            "ST": "beijing",
            "L": "beijing",
            "O": "od",
            "OU": "ops"
        }
    ]
}
# 添加node节点IP,多写一些可有能安装使用的IP,如果新node的ip不在证书内,需要重新编写证书,拷贝至所有主机

[root@hdss7-200.host.com /opt/certs]# cfssl gencert -ca=ca.pem -ca-key=ca-key.pem -config=ca-config.json -profile=server kubelet-csr.json | cfssl-json -bare kubelet
2020/11/12 10:50:19 [INFO] generate received request
2020/11/12 10:50:19 [INFO] received CSR
2020/11/12 10:50:19 [INFO] generating key: rsa-2048
2020/11/12 10:50:20 [INFO] encoded CSR
2020/11/12 10:50:20 [INFO] signed certificate with serial number 24247126931064708243114791038394298910
2020/11/12 10:50:20 [WARNING] This certificate lacks a "hosts" field. This makes it unsuitable for
websites. For more information see the Baseline Requirements for the Issuance and Management
of Publicly-Trusted Certificates, v.1.1.6, from the CA/Browser Forum (https://cabforum.org);
specifically, section 10.2.3 ("Information Requirements").
[root@hdss7-200.host.com /opt/certs]# ll
total 84
……………………省略部分输出
-rw-r--r-- 1 root root 1115 Nov 12 10:50 kubelet.csr
-rw-r--r-- 1 root root  453 Nov 12 10:50 kubelet-csr.json
-rw------- 1 root root 1679 Nov 12 10:50 kubelet-key.pem
-rw-r--r-- 1 root root 1468 Nov 12 10:50 kubelet.pem
1.2 拷贝证书到各node(运算)节点,并创建配置
1.2.1 拷贝证书、私钥(私钥文件权限600)
操作:hdss7-21.host.com
[root@hdss7-21.host.com ~]# cd /opt/kubernetes/server/bin/cert/
[root@hdss7-21.host.com /opt/kubernetes/server/bin/cert]# scp 10.4.7.200:/opt/certs/kubelet-key.pem ./
[root@hdss7-21.host.com /opt/kubernetes/server/bin/cert]# scp 10.4.7.200:/opt/certs/kubelet.pem ./
[root@hdss7-21.host.com /opt/kubernetes/server/bin/cert]# ll
total 32
-rw------- 1 root root 1679 Nov  4 14:43 apiserver-key.pem
-rw-r--r-- 1 root root 1594 Nov  4 14:43 apiserver.pem
-rw------- 1 root root 1679 Nov  4 14:42 ca-key.pem
-rw-r--r-- 1 root root 1346 Nov  4 14:41 ca.pem
-rw------- 1 root root 1675 Nov  4 14:43 client-key.pem
-rw-r--r-- 1 root root 1363 Nov  4 14:42 client.pem
-rw------- 1 root root 1679 Nov 12 10:57 kubelet-key.pem
-rw-r--r-- 1 root root 1468 Nov 12 10:57 kubelet.pem
1.2.2 创建配置
set-cluster
[root@hdss7-21.host.com /opt/kubernetes/server/bin/cert]# cd ../conf/  # 一定要在conf目录下,因为下面的命令中指定的文件有些用的是相对路径,所需文件就存在conf目录
[root@hdss7-21.host.com /opt/kubernetes/server/bin/conf]#
[root@hdss7-21.host.com /opt/kubernetes/server/bin/conf]# ls
audit.yaml  kube-apiserver.sh
[root@hdss7-21.host.com /opt/kubernetes/server/bin/conf]# kubectl config set-cluster myk8s
--certificate-authority=/opt/kubernetes/server/bin/cert/ca.pem
--embed-certs=true
--server=https://10.4.7.10:7443    # vip
--kubeconfig=kubelet.kubeconfig
Cluster "myk8s" set.
set-credentials
[root@hdss7-21.host.com /opt/kubernetes/server/bin/conf]# kubectl config set-credentials k8s-node
--client-certificate=/opt/kubernetes/server/bin/cert/client.pem
--client-key=/opt/kubernetes/server/bin/cert/client-key.pem
--embed-certs=true
--kubeconfig=kubelet.kubeconfig
User "k8s-node" set.
set-context
[root@hdss7-21.host.com /opt/kubernetes/server/bin/conf]# kubectl config set-context myk8s-context
--cluster=myk8s
--user=k8s-node
--kubeconfig=kubelet.kubeconfig
Context "myk8s-context" created.
use-context
[root@hdss7-21.host.com /opt/kubernetes/server/bin/conf]# kubectl config use-context myk8s-context --kubeconfig=kubelet.kubeconfig
Switched to context "myk8s-context".
检查
[root@hdss7-21.host.com /opt/kubernetes/server/bin/conf]# ll
total 16
-rw-r--r-- 1 root root 2223 Nov  4 14:53 audit.yaml
-rwxr-xr-x 1 root root 1078 Nov  4 15:15 kube-apiserver.sh
-rw------- 1 root root 6195 Nov 12 11:17 kubelet.kubeconfig   # 生成的文件
1.3 创建资源配置文件,进行角色绑定
只创建一次就好,存到etcd里,然后拷贝到各个node节点上
[root@hdss7-21.host.com /opt/kubernetes/server/bin/conf]# vi k8s-node.yaml
apiVersion: rbac.authorization.k8s.io/v1
kind: ClusterRoleBinding
metadata:
  name: k8s-node
roleRef:
  apiGroup: rbac.authorization.k8s.io
  kind: ClusterRole
  name: system:node
subjects:
- apiGroup: rbac.authorization.k8s.io
  kind: User
  name: k8s-node

[root@hdss7-21.host.com /opt/kubernetes/server/bin/conf]# kubectl create -f k8s-node.yaml
clusterrolebinding.rbac.authorization.k8s.io/k8s-node created

[root@hdss7-21.host.com /opt/kubernetes/server/bin/conf]# kubectl get clusterrolebinding k8s-node
NAME       AGE
k8s-node   84s
[root@hdss7-21.host.com /opt/kubernetes/server/bin/conf]# kubectl get clusterrolebinding k8s-node -o yaml
apiVersion: rbac.authorization.k8s.io/v1
kind: ClusterRoleBinding  # 创建的资源类型
metadata:
  creationTimestamp: "2020-11-12T03:28:25Z"
  name: k8s-node  # 资源名称
  resourceVersion: "11898"
  selfLink: /apis/rbac.authorization.k8s.io/v1/clusterrolebindings/k8s-node
  uid: 861ca0b3-7d2f-4071-939e-98c21fe5780f
roleRef:
  apiGroup: rbac.authorization.k8s.io
  kind: ClusterRole
  name: system:node  # 集群角色名称
subjects:
- apiGroup: rbac.authorization.k8s.io
  kind: User
  name: k8s-node  # 集群用户名称
# 上述大概意思是:绑定了一个集群角色,k8s-node用户,具备成为这个集群里,成为运算节点的权限。
1.4 hdss7-22.host.com操作
[root@hdss7-22.host.com ~]# cd /opt/kubernetes/server/bin/conf
[root@hdss7-22.host.com /opt/kubernetes/server/bin/conf]# scp 10.4.7.21:/opt/kubernetes/server/bin/conf/kubelet.kubeconfig ./
[root@hdss7-22.host.com /opt/kubernetes/server/bin/conf]# ll
total 16
-rw-r--r-- 1 root root 2223 Nov  4 15:30 audit.yaml
-rwxr-xr-x 1 root root 1078 Nov  4 15:31 kube-apiserver.sh
-rw------- 1 root root 6195 Nov 12 11:37 kubelet.kubeconfig
1.5 准备pause基础镜像
操作:hdss7-200.host.com
kubelet在启动时,需要有一个基础镜像,来帮助我们启动关键的pod,来初始化业务容器的网络空间、ITC空间、UTS空间(在业务pod之前启动)。
1.5.1 拉取镜像,并推送到harbor仓库
[root@hdss7-200.host.com ~]# docker pull kubernetes/pause
[root@hdss7-200.host.com ~]# docker login harbor.od.com
[root@hdss7-200.host.com ~]# docker tag f9d5de079539 harbor.od.com/public/pause:latest
[root@hdss7-200.host.com ~]# docker push harbor.od.com/public/pause:latest
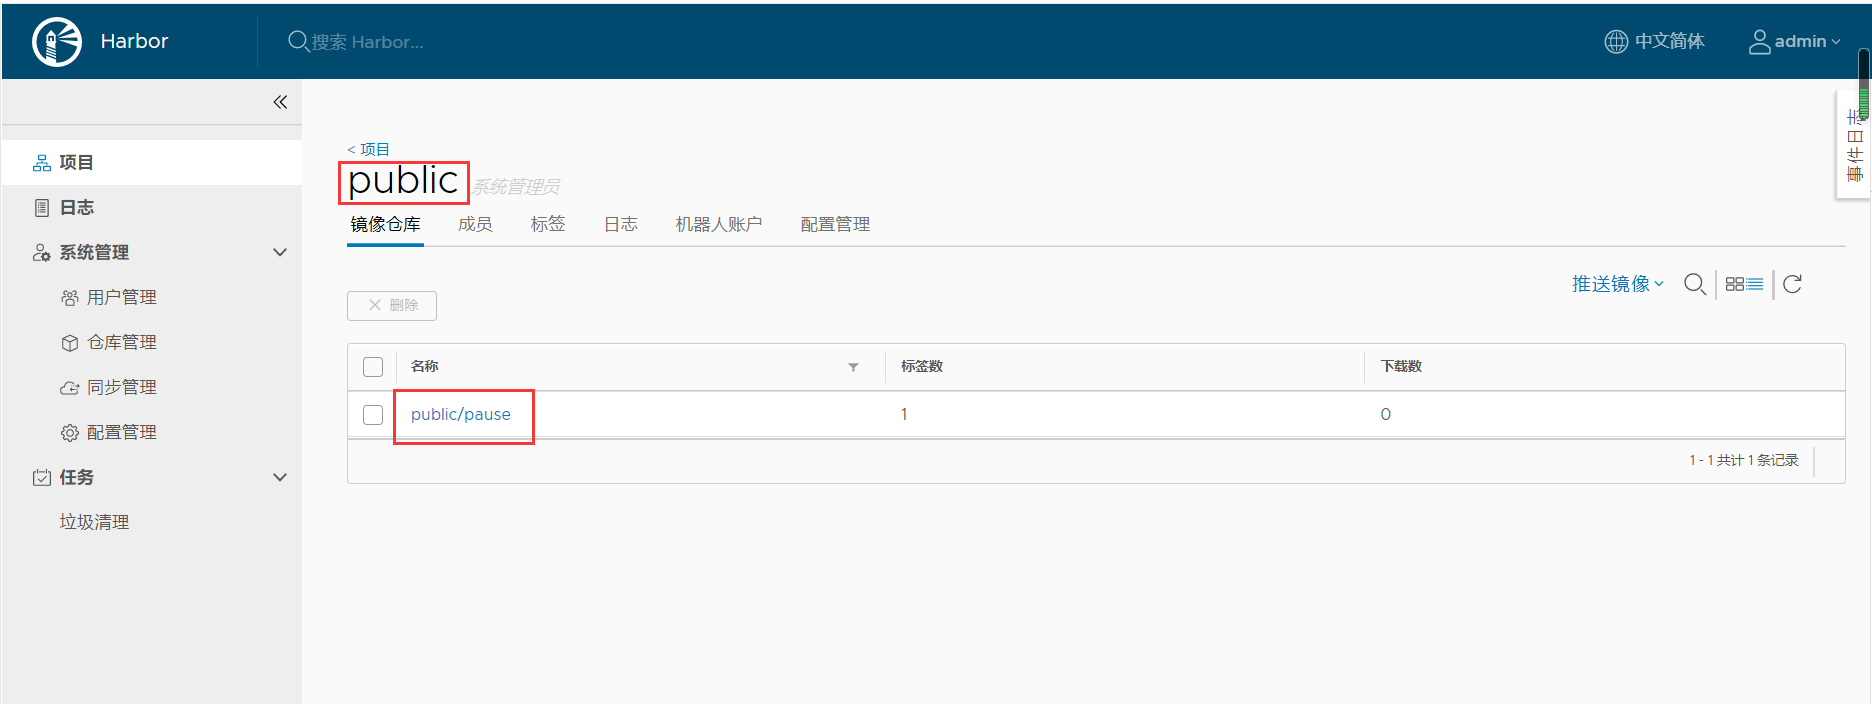
1.6 创建kubelet启动脚本
操作:hdss7-21.host.com
[root@hdss7-21.host.com /opt/kubernetes/server/bin]# vi kubelet.sh
#!/bin/sh
./kubelet
  --anonymous-auth=false
  --cgroup-driver systemd
  --cluster-dns 192.168.0.2
  --cluster-domain cluster.local
  --runtime-cgroups=/systemd/system.slice
  --kubelet-cgroups=/systemd/system.slice
  --fail-swap-on="false"
  --client-ca-file ./cert/ca.pem
  --tls-cert-file ./cert/kubelet.pem
  --tls-private-key-file ./cert/kubelet-key.pem
  --hostname-override hdss7-21.host.com 	# 在不同服务器时,需改成对应的主机名
  --kubeconfig ./conf/kubelet.kubeconfig
  --log-dir /data/logs/kubernetes/kube-kubelet
  --pod-infra-container-image harbor.od.com/public/pause:latest
  --root-dir /data/kubelet

[root@hdss7-21.host.com /opt/kubernetes/server/bin]# mkdir -p /data/logs/kubernetes/kube-kubelet /data/kubelet
[root@hdss7-21.host.com /opt/kubernetes/server/bin]# chmod +x /opt/kubernetes/server/bin/kubelet.sh
1.7 创建supervisor配置
[root@hdss7-21.host.com /opt/kubernetes/server/bin]# vi /etc/supervisord.d/kube-kubelet.ini
[program:kube-kubelet-7-21]	  # 注意不同机器上的主机名更改
command=/opt/kubernetes/server/bin/kubelet.sh     ; the program (relative uses PATH, can take args)
numprocs=1                                        ; number of processes copies to start (def 1)
directory=/opt/kubernetes/server/bin              ; directory to cwd to before exec (def no cwd)
autostart=true                                    ; start at supervisord start (default: true)
autorestart=true              		          ; retstart at unexpected quit (default: true)
startsecs=30                                      ; number of secs prog must stay running (def. 1)
startretries=3                                    ; max # of serial start failures (default 3)
exitcodes=0,2                                     ; 'expected' exit codes for process (default 0,2)
stopsignal=QUIT                                   ; signal used to kill process (default TERM)
stopwaitsecs=10                                   ; max num secs to wait b4 SIGKILL (default 10)
user=root                                         ; setuid to this UNIX account to run the program
redirect_stderr=true                              ; redirect proc stderr to stdout (default false)
stdout_logfile=/data/logs/kubernetes/kube-kubelet/kubelet.stdout.log   ; stderr log path, NONE for none; default AUTO
stdout_logfile_maxbytes=64MB                      ; max # logfile bytes b4 rotation (default 50MB)
stdout_logfile_backups=4                          ; # of stdout logfile backups (default 10)
stdout_capture_maxbytes=1MB                       ; number of bytes in 'capturemode' (default 0)
stdout_events_enabled=false                       ; emit events on stdout writes (default false)
1.8 启动kubelet并检查
1.8.1 启动kubelet
[root@hdss7-21.host.com /opt/kubernetes/server/bin]# supervisorctl update
kube-kubelet-7-21: added process group
[root@hdss7-21.host.com /opt/kubernetes/server/bin]# supervisorctl status
etcd-server-7-21                 RUNNING   pid 5993, uptime 4:21:20
kube-apiserver                   RUNNING   pid 6008, uptime 4:21:20
kube-controller-manager-7-21     RUNNING   pid 7312, uptime 0:36:36
kube-kubelet-7-21                RUNNING   pid 7507, uptime 0:00:52   # 启动成功
kube-scheduler-7-21              RUNNING   pid 7320, uptime 0:36:35
1.8.2 检查运算节点
[root@hdss7-21.host.com /opt/kubernetes/server/bin]# kubectl get no
NAME                STATUS   ROLES    AGE     VERSION
hdss7-21.host.com   Ready    <none>   2m54s   v1.15.2
1.8.3 添加角色标签
非必须,方便识别
[root@hdss7-21.host.com /opt/kubernetes/server/bin]# kubectl label node hdss7-21.host.com node-role.kubernetes.io/master=
node/hdss7-21.host.com labeled
[root@hdss7-21.host.com /opt/kubernetes/server/bin]# kubectl label node hdss7-21.host.com node-role.kubernetes.io/node=
node/hdss7-21.host.com labeled
[root@hdss7-21.host.com /opt/kubernetes/server/bin]# kubectl get no
NAME                STATUS   ROLES         AGE   VERSION
hdss7-21.host.com   Ready    master,node   27m   v1.15.2
1.9 部署hdss7-22.host.com上的kubelet
[root@hdss7-22.host.com ~]# cd /opt/kubernetes/server/bin/cert/
[root@hdss7-22.host.com /opt/kubernetes/server/bin/cert]# scp 10.4.7.200:/opt/certs/kubelet-key.pem ./
[root@hdss7-22.host.com /opt/kubernetes/server/bin/cert]# scp 10.4.7.200:/opt/certs/kubelet.pem ./
[root@hdss7-22.host.com /opt/kubernetes/server/bin/cert]# cd ../
[root@hdss7-22.host.com /opt/kubernetes/server/bin]# vi kubelet.sh
#!/bin/sh
./kubelet
  --anonymous-auth=false
  --cgroup-driver systemd
  --cluster-dns 192.168.0.2
  --cluster-domain cluster.local
  --runtime-cgroups=/systemd/system.slice
  --kubelet-cgroups=/systemd/system.slice
  --fail-swap-on="false"
  --client-ca-file ./cert/ca.pem
  --tls-cert-file ./cert/kubelet.pem
  --tls-private-key-file ./cert/kubelet-key.pem
  --hostname-override hdss7-22.host.com
  --kubeconfig ./conf/kubelet.kubeconfig
  --log-dir /data/logs/kubernetes/kube-kubelet
  --pod-infra-container-image harbor.od.com/public/pause:latest
  --root-dir /data/kubelet

[root@hdss7-22.host.com /opt/kubernetes/server/bin]# mkdir -p /data/logs/kubernetes/kube-kubelet /data/kubelet
[root@hdss7-22.host.com /opt/kubernetes/server/bin]# chmod +x /opt/kubernetes/server/bin/kubelet.sh
[root@hdss7-22.host.com /opt/kubernetes/server/bin]# vi /etc/supervisord.d/kube-kubelet.ini
[program:kube-kubelet-7-22]
command=/opt/kubernetes/server/bin/kubelet.sh     ; the program (relative uses PATH, can take args)
numprocs=1                                        ; number of processes copies to start (def 1)
directory=/opt/kubernetes/server/bin              ; directory to cwd to before exec (def no cwd)
autostart=true                                    ; start at supervisord start (default: true)
autorestart=true              		          ; retstart at unexpected quit (default: true)
startsecs=30                                      ; number of secs prog must stay running (def. 1)
startretries=3                                    ; max # of serial start failures (default 3)
exitcodes=0,2                                     ; 'expected' exit codes for process (default 0,2)
stopsignal=QUIT                                   ; signal used to kill process (default TERM)
stopwaitsecs=10                                   ; max num secs to wait b4 SIGKILL (default 10)
user=root                                         ; setuid to this UNIX account to run the program
redirect_stderr=true                              ; redirect proc stderr to stdout (default false)
stdout_logfile=/data/logs/kubernetes/kube-kubelet/kubelet.stdout.log   ; stderr log path, NONE for none; default AUTO
stdout_logfile_maxbytes=64MB                      ; max # logfile bytes b4 rotation (default 50MB)
stdout_logfile_backups=4                          ; # of stdout logfile backups (default 10)
stdout_capture_maxbytes=1MB                       ; number of bytes in 'capturemode' (default 0)
stdout_events_enabled=false                       ; emit events on stdout writes (default false)

[root@hdss7-22.host.com /opt/kubernetes/server/bin]# supervisorctl update
kube-kubelet-7-22: added process group
[root@hdss7-22.host.com /opt/kubernetes/server/bin]# supervisorctl status
etcd-server-7-22                 RUNNING   pid 6263, uptime 5:53:42
kube-apiserver-7-22              RUNNING   pid 6253, uptime 5:53:42
kube-controller-manager-7-22     RUNNING   pid 7723, uptime 0:38:56
kube-kubelet-7-22                RUNNING   pid 7891, uptime 0:07:13
kube-scheduler-7-22              RUNNING   pid 7574, uptime 1:10:07

[root@hdss7-22.host.com /opt/kubernetes/server/bin]# kubectl get no
NAME                STATUS   ROLES         AGE     VERSION
hdss7-21.host.com   Ready    master,node   93m     v1.15.2
hdss7-22.host.com   Ready    <none>        7m38s   v1.15.2

[root@hdss7-22.host.com /opt/kubernetes/server/bin]# kubectl label node hdss7-22.host.com node-role.kubernetes.io/master=
node/hdss7-22.host.com labeled
[root@hdss7-22.host.com /opt/kubernetes/server/bin]# kubectl label node hdss7-22.host.com node-role.kubernetes.io/node=
node/hdss7-22.host.com labeled
[root@hdss7-22.host.com /opt/kubernetes/server/bin]# kubectl get no
NAME                STATUS   ROLES         AGE     VERSION
hdss7-21.host.com   Ready    master,node   95m     v1.15.2
hdss7-22.host.com   Ready    master,node   9m12s   v1.15.2
2. 部署kube-proxy
主要作用是连接pod网络和集群网络。
集群规划
| 主机名 | 角色 | ip |
|---|---|---|
| hdss7-21.host.com | kube-proxy | 10.4.7.21 |
| hdss7-22.host.com | kube-proxy | 10.4.7.22 |
2.1 签发kube-proxy证书
操作:hdss7-200.host.com
2.1.1 创建生成证书签名请求(csr)的JSON配置文件
[root@hdss7-200.host.com /opt/certs]# vi kube-proxy-csr.json
{
    "CN": "system:kube-proxy",
    "key": {
        "algo": "rsa",
        "size": 2048
    },
    "names": [
        {
            "C": "CN",
            "ST": "beijing",
            "L": "beijing",
            "O": "od",
            "OU": "ops"
        }
    ]
}
2.1.2 创建生成证书签名请求(csr)的JSON配置文件
[root@hdss7-200.host.com /opt/certs]# cfssl gencert -ca=ca.pem -ca-key=ca-key.pem -config=ca-config.json -profile=client kube-proxy-csr.json | cfssl-json -bare kube-proxy-client

[root@hdss7-200.host.com /opt/certs]# ll
total 100
………………省略部分输出
-rw-r--r-- 1 root root 1005 Nov 12 16:32 kube-proxy-client.csr
-rw------- 1 root root 1679 Nov 12 16:32 kube-proxy-client-key.pem
-rw-r--r-- 1 root root 1375 Nov 12 16:32 kube-proxy-client.pem
-rw-r--r-- 1 root root  267 Nov 12 16:28 kube-proxy-csr.json
2.2 拷贝证书至各运算节点,并创建配置
2.2.1 拷贝成证书
操作:hdss7-200.host.com
[root@hdss7-200.host.com /opt/certs]# scp kube-proxy-client-key.pem hdss7-21.host.com:/opt/kubernetes/server/bin/cert
[root@hdss7-200.host.com /opt/certs]# scp kube-proxy-client-key.pem hdss7-22.host.com:/opt/kubernetes/server/bin/cert
[root@hdss7-200.host.com /opt/certs]# scp kube-proxy-client.pem hdss7-22.host.com:/opt/kubernetes/server/bin/cert
[root@hdss7-200.host.com /opt/certs]# scp kube-proxy-client.pem hdss7-21.host.com:/opt/kubernetes/server/bin/cert
2.2.2 创建配置
操作:hdss7-21.host.com
set-cluster
[root@hdss7-21.host.com /opt/kubernetes/server/bin/cert]# cd ../conf/
[root@hdss7-21.host.com /opt/kubernetes/server/bin/conf]# kubectl config set-cluster myk8s
--certificate-authority=/opt/kubernetes/server/bin/cert/ca.pem
--embed-certs=true
--server=https://10.4.7.10:7443
--kubeconfig=kube-proxy.kubeconfig
set-credentials
[root@hdss7-21.host.com /opt/kubernetes/server/bin/conf]# kubectl config set-credentials kube-proxy
--client-certificate=/opt/kubernetes/server/bin/cert/kube-proxy-client.pem
--client-key=/opt/kubernetes/server/bin/cert/kube-proxy-client-key.pem
--embed-certs=true
--kubeconfig=kube-proxy.kubeconfig
set-context
[root@hdss7-21.host.com /opt/kubernetes/server/bin/conf]# kubectl config set-context myk8s-context
--cluster=myk8s
--user=kube-proxy
--kubeconfig=kube-proxy.kubeconfig
use-context
[root@hdss7-21.host.com /opt/kubernetes/server/bin/conf]# kubectl config use-context myk8s-context --kubeconfig=kube-proxy.kubeconfig
2.3 加载ipvs模块
操作:hdss7-21.host.com
[root@hdss7-21.host.com /opt/kubernetes/server/bin/conf]# cd
[root@hdss7-21.host.com ~]# lsmod |grep ip_vs
[root@hdss7-21.host.com ~]# vi ipvs.sh
#!/bin/bash
ipvs_mods_dir="/usr/lib/modules/$(uname -r)/kernel/net/netfilter/ipvs"
for i in $(ls $ipvs_mods_dir|grep -o "^[^.]*")
do
  /sbin/modinfo -F filename $i &>/dev/null
  if [ $? -eq 0 ];then
    /sbin/modprobe $i
  fi
done

[root@hdss7-21.host.com ~]# chmod +x ipvs.sh
[root@hdss7-21.host.com ~]# ./ipvs.sh
[root@hdss7-21.host.com ~]# lsmod |grep ip_vs
ip_vs_wrr              12697  0                  # 加权轮询调度
ip_vs_wlc              12519  0                  # 加权最小连接调度
ip_vs_sh               12688  0                  # 源地址散列调度
ip_vs_sed              12519  0                  # 最短预期延时调度
ip_vs_rr               12600  0                  # 轮询调度
ip_vs_pe_sip           12740  0                  #
nf_conntrack_sip       33860  1 ip_vs_pe_sip
ip_vs_nq               12516  0                  # 不排队调度(本次使用的调度算法)
ip_vs_lc               12516  0                  # 最小连接调度
ip_vs_lblcr            12922  0                  # 带复制的基于局部性最少链接
ip_vs_lblc             12819  0                  # 基于局部性最少链接
ip_vs_ftp              13079  0
ip_vs_dh               12688  0                  # 目标地址散列调度
ip_vs                 145497  24 ip_vs_dh,ip_vs_lc,ip_vs_nq,ip_vs_rr,ip_vs_sh,ip_vs_ftp,ip_vs_sed,ip_vs_wlc,ip_vs_wrr,ip_vs_pe_sip,ip_vs_lblcr,ip_vs_lblc
nf_nat                 26787  3 ip_vs_ftp,nf_nat_ipv4,nf_nat_masquerade_ipv4
nf_conntrack          133095  8 ip_vs,nf_nat,nf_nat_ipv4,xt_conntrack,nf_nat_masquerade_ipv4,nf_conntrack_netlink,nf_conntrack_sip,nf_conntrack_ipv4
libcrc32c              12644  4 xfs,ip_vs,nf_nat,nf_conntrack

# 详细介绍:https://www.cnblogs.com/feisky/archive/2012/09/05/2672496.html
2.4 创建kube-proxy启动脚本,并进行相关配置
操作:hdss7-21.host.com
2.4.1 创建kube-proxy启动脚本
[root@hdss7-21.host.com ~]# cd /opt/kubernetes/server/bin/
[root@hdss7-21.host.com /opt/kubernetes/server/bin]# vi kube-proxy.sh
#!/bin/sh
./kube-proxy
  --cluster-cidr 172.7.0.0/16
  --hostname-override hdss7-21.host.com
  --proxy-mode=ipvs    # 如果使用iptables来调度流量,那么ipvs-scheduler就只能使用rr模式
  --ipvs-scheduler=nq
  --kubeconfig ./conf/kube-proxy.kubeconfig
2.4.2 检查配置,权限,创建日志目录
[root@hdss7-21.host.com /opt/kubernetes/server/bin]# chmod +x kube-proxy.sh
[root@hdss7-21.host.com /opt/kubernetes/server/bin]# chmod +x kube-proxy
[root@hdss7-21.host.com /opt/kubernetes/server/bin]# mkdir -p /data/logs/kubernetes/kube-proxy
2.5 创建supervisor配置并启动
2.5.1 创建supervisor配置
操作:hdss7-21.host.com
[root@hdss7-21.host.com /opt/kubernetes/server/bin]# vi /etc/supervisord.d/kube-proxy.ini
[program:kube-proxy-7-21]
command=/opt/kubernetes/server/bin/kube-proxy.sh                     ; the program (relative uses PATH, can take args)
numprocs=1                                                           ; number of processes copies to start (def 1)
directory=/opt/kubernetes/server/bin                                 ; directory to cwd to before exec (def no cwd)
autostart=true                                                       ; start at supervisord start (default: true)
autorestart=true                                                     ; retstart at unexpected quit (default: true)
startsecs=30                                                         ; number of secs prog must stay running (def. 1)
startretries=3                                                       ; max # of serial start failures (default 3)
exitcodes=0,2                                                        ; 'expected' exit codes for process (default 0,2)
stopsignal=QUIT                                                      ; signal used to kill process (default TERM)
stopwaitsecs=10                                                      ; max num secs to wait b4 SIGKILL (default 10)
user=root                                                            ; setuid to this UNIX account to run the program
redirect_stderr=true                                                 ; redirect proc stderr to stdout (default false)
stdout_logfile=/data/logs/kubernetes/kube-proxy/proxy.stdout.log     ; stderr log path, NONE for none; default AUTO
stdout_logfile_maxbytes=64MB                                         ; max # logfile bytes b4 rotation (default 50MB)
stdout_logfile_backups=4                                             ; # of stdout logfile backups (default 10)
stdout_capture_maxbytes=1MB                                          ; number of bytes in 'capturemode' (default 0)
stdout_events_enabled=false                                          ; emit events on stdout writes (default false)
2.5.2 启动服务
[root@hdss7-21.host.com /opt/kubernetes/server/bin]# supervisorctl update
kube-proxy-7-21: added process group
[root@hdss7-21.host.com /opt/kubernetes/server/bin]# supervisorctl status
etcd-server-7-21                 RUNNING   pid 5993, uptime 7:52:46
kube-apiserver                   RUNNING   pid 6008, uptime 7:52:46
kube-controller-manager-7-21     RUNNING   pid 11597, uptime 2:27:53
kube-kubelet-7-21                RUNNING   pid 7507, uptime 3:32:18
kube-proxy-7-21                  RUNNING   pid 40375, uptime 0:00:34
kube-scheduler-7-21              RUNNING   pid 11584, uptime 2:27:53
2.6 部署hdss7-22.host.com的kube-proxy
[root@hdss7-22.host.com /opt/kubernetes/server/bin/conf]# scp hdss7-21:/opt/kubernetes/server/bin/conf/kube-proxy.kubeconfig /opt/kubernetes/server/bin/conf
[root@hdss7-22.host.com ~]# cd /opt/kubernetes/server/bin/conf/
[root@hdss7-22.host.com /opt/kubernetes/server/bin/conf]# ll
total 24
-rw-r--r-- 1 root root 2223 Nov  4 15:30 audit.yaml
-rwxr-xr-x 1 root root 1078 Nov  4 15:31 kube-apiserver.sh
-rw------- 1 root root 6195 Nov 12 11:37 kubelet.kubeconfig
-rw------- 1 root root 6219 Nov 12 18:00 kube-proxy.kubeconfig

[root@hdss7-22.host.com /opt/kubernetes/server/bin/conf]# cd
[root@hdss7-22.host.com ~]# vi ipvs.sh
#!/bin/bash
ipvs_mods_dir="/usr/lib/modules/$(uname -r)/kernel/net/netfilter/ipvs"
for i in $(ls $ipvs_mods_dir|grep -o "^[^.]*")
do
  /sbin/modinfo -F filename $i &>/dev/null
  if [ $? -eq 0 ];then
    /sbin/modprobe $i
  fi
done

[root@hdss7-22.host.com ~]# chmod +x ipvs.sh
[root@hdss7-22.host.com ~]# ./ipvs.sh

[root@hdss7-22.host.com ~]# cd /opt/kubernetes/server/bin/
[root@hdss7-22.host.com /opt/kubernetes/server/bin]# vi kube-proxy.sh
#!/bin/sh
./kube-proxy
  --cluster-cidr 172.7.0.0/16
  --hostname-override hdss7-22.host.com
  --proxy-mode=ipvs
  --ipvs-scheduler=nq
  --kubeconfig ./conf/kube-proxy.kubeconfig

[root@hdss7-22.host.com /opt/kubernetes/server/bin]# chmod +x kube-proxy
[root@hdss7-22.host.com /opt/kubernetes/server/bin]# chmod +x kube-proxy.sh
[root@hdss7-22.host.com /opt/kubernetes/server/bin]# mkdir -p /data/logs/kubernetes/kube-proxy

[root@hdss7-22.host.com /opt/kubernetes/server/bin]# vi /etc/supervisord.d/kube-proxy.ini
[root@hdss7-22.host.com /opt/kubernetes/server/bin]# cat /etc/supervisord.d/kube-proxy.ini
[program:kube-proxy-7-22]
command=/opt/kubernetes/server/bin/kube-proxy.sh                     ; the program (relative uses PATH, can take args)
numprocs=1                                                           ; number of processes copies to start (def 1)
directory=/opt/kubernetes/server/bin                                 ; directory to cwd to before exec (def no cwd)
autostart=true                                                       ; start at supervisord start (default: true)
autorestart=true                                                     ; retstart at unexpected quit (default: true)
startsecs=30                                                         ; number of secs prog must stay running (def. 1)
startretries=3                                                       ; max # of serial start failures (default 3)
exitcodes=0,2                                                        ; 'expected' exit codes for process (default 0,2)
stopsignal=QUIT                                                      ; signal used to kill process (default TERM)
stopwaitsecs=10                                                      ; max num secs to wait b4 SIGKILL (default 10)
user=root                                                            ; setuid to this UNIX account to run the program
redirect_stderr=true                                                 ; redirect proc stderr to stdout (default false)
stdout_logfile=/data/logs/kubernetes/kube-proxy/proxy.stdout.log     ; stderr log path, NONE for none; default AUTO
stdout_logfile_maxbytes=64MB                                         ; max # logfile bytes b4 rotation (default 50MB)
stdout_logfile_backups=4                                             ; # of stdout logfile backups (default 10)
stdout_capture_maxbytes=1MB                                          ; number of bytes in 'capturemode' (default 0)
stdout_events_enabled=false                                          ; emit events on stdout writes (default false)

[root@hdss7-22.host.com /opt/kubernetes/server/bin]# supervisorctl update
[root@hdss7-22.host.com /opt/kubernetes/server/bin]# supervisorctl status
etcd-server-7-22                 RUNNING   pid 6263, uptime 8:12:27
kube-apiserver-7-22              RUNNING   pid 6253, uptime 8:12:27
kube-controller-manager-7-22     RUNNING   pid 24945, uptime 0:58:50
kube-kubelet-7-22                RUNNING   pid 7891, uptime 2:25:58
kube-proxy-7-22                  RUNNING   pid 35978, uptime 0:04:18
kube-scheduler-7-22              RUNNING   pid 24916, uptime 0:58:51
扩展:安装ipvsadm,观察调度情况
/opt/kubernetes/server/bin]# yum -y install ipvsadm
/opt/kubernetes/server/bin]# ipvsadm -Ln         # 只要两个节点能看到这个结果,说明kube-proxy就部署成功了
IP Virtual Server version 1.2.1 (size=4096)
Prot LocalAddress:Port Scheduler Flags
  -> RemoteAddress:Port           Forward Weight ActiveConn InActConn
TCP  192.168.0.1:443 nq  # clusterIP:6443,指向了下面两个节点的6443
  -> 10.4.7.21:6443               Masq    1      0          0
  -> 10.4.7.22:6443               Masq    1      0          0
验证集群
1. 在任意一个运算节点,创建一个资源配置清单
[root@hdss7-21.host.com /opt/kubernetes/server/bin]# cd
[root@hdss7-21.host.com ~]# docker pull nginx
[root@hdss7-21.host.com ~]# docker tag nginx:latest harbor.od.com/public/nginx:latest
[root@hdss7-21.host.com ~]# docker push harbor.od.com/public/nginx:latest

[root@hdss7-21.host.com ~]# vi nginx-ds.yaml
apiVersion: extensions/v1beta1
kind: DaemonSet
metadata:
  name: nginx-ds
  labels:
    addonmanager.kubernetes.io/mode: Reconcile
spec:
  template:
    metadata:
      labels:
        app: nginx-ds
    spec:
      containers:
      - name: my-nginx
        image: harbor.od.com/public/nginx:latest
        ports:
        - containerPort: 80

[root@hdss7-21.host.com ~]# kubectl create -f nginx-ds.yaml
daemonset.extensions/nginx-ds created
[root@hdss7-21.host.com ~]# kubectl get po
NAME             READY   STATUS    RESTARTS   AGE
nginx-ds-n79zs   1/1     Running   0          7s
nginx-ds-vpjvn   1/1     Running   0          7s
2. 访问测试
[root@hdss7-21.host.com ~]# curl -I 172.7.21.2
HTTP/1.1 200 OK
Server: nginx/1.19.4
Date: Fri, 13 Nov 2020 02:19:30 GMT
Content-Type: text/html
Content-Length: 612
Last-Modified: Tue, 27 Oct 2020 15:09:20 GMT
Connection: keep-alive
ETag: "5f983820-264"
Accept-Ranges: bytes

[root@hdss7-21.host.com ~]# curl -I 172.7.22.2
curl: (7) Failed connect to 172.7.22.2:80; Connection refused

[root@hdss7-22.host.com ~]# curl -I 172.7.22.2
HTTP/1.1 200 OK
Server: nginx/1.19.4
Date: Fri, 13 Nov 2020 02:20:43 GMT
Content-Type: text/html
Content-Length: 612
Last-Modified: Tue, 27 Oct 2020 15:09:20 GMT
Connection: keep-alive
ETag: "5f983820-264"
Accept-Ranges: bytes

[root@hdss7-22.host.com ~]# curl -I 172.7.21.2
curl: (7) Failed connect to 172.7.21.2:80; Connection refused

# 上述在一台主机 无法curl通另一台主机的nginx原因是,容器跨宿主机不能通信,安装flannel插件就可以解决这个问题。
3. 集群最终完成效果
# 任意master节点
[root@hdss7-22.host.com ~]# kubectl get cs
NAME                 STATUS    MESSAGE              ERROR
scheduler            Healthy   ok
controller-manager   Healthy   ok
etcd-1               Healthy   {"health": "true"}
etcd-0               Healthy   {"health": "true"}
etcd-2               Healthy   {"health": "true"}
[root@hdss7-22.host.com ~]# kubectl get no
NAME                STATUS   ROLES         AGE   VERSION
hdss7-21.host.com   Ready    master,node   20h   v1.15.2
hdss7-22.host.com   Ready    master,node   18h   v1.15.2
[root@hdss7-22.host.com ~]# kubectl get po
NAME             READY   STATUS    RESTARTS   AGE
nginx-ds-2zvkb   1/1     Running   1          15h
nginx-ds-n6xcx   1/1     Running   1          15h
Flanneld插件安装
集群规划
| 主机名 | 角色 | IP |
|---|---|---|
| hdss7-21.host.com | flannel | 10.4.7.21 |
| hdss7-22.host.com | flannel | 10.4.7.22 |
1. 常见的CNI网络插件介绍
CNI网络查件的最主要功能就是实现POD资源能够跨宿主机进行通信,常见的如下:
- Flannel
- Calico
- Canal
- Contiv
- OpenContrail
- NSX-T
- Kube-route
2. 下载软件,解压
2.1 下载软件
操作:hdss7-21.host.com
下载地址:https://github.com/coreos/flannel/releases
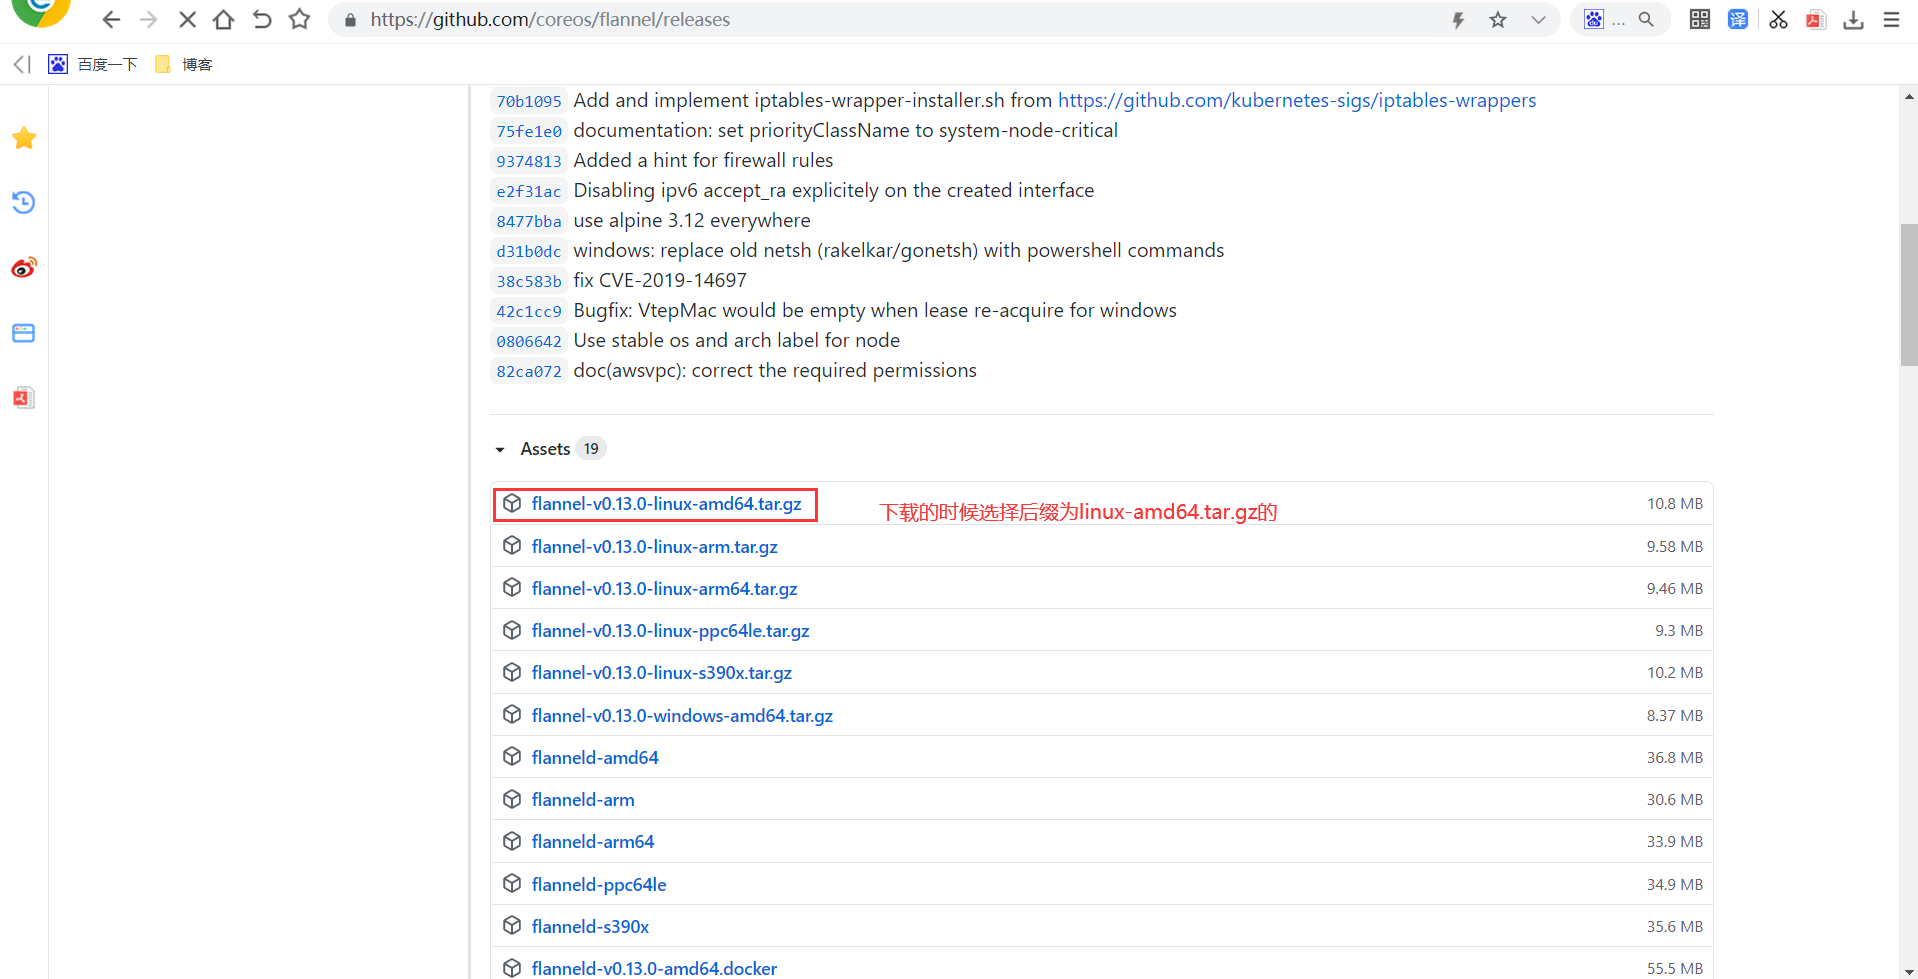
2.2 解压,做软连接
[root@hdss7-21.host.com ~]# cd /opt/src/
[root@hdss7-21.host.com /opt/src]# rz -E
rz waiting to receive.
[root@hdss7-21.host.com /opt/src]# ll
total 452336
-rw-r--r-- 1 root root   9850227 Nov  4 11:06 etcd-v3.1.20-linux-amd64.tar.gz
-rw-r--r-- 1 root root   9565743 Oct 27 14:14 flannel-v0.11.0-linux-amd64.tar.gz
-rw-r--r-- 1 root root 443770238 Nov  4 14:05 kubernetes-server-linux-amd64-v1.15.2.tar.gz
[root@hdss7-21.host.com /opt/src]# mkdir /opt/flannel-v0.11.0
[root@hdss7-21.host.com /opt/src]# tar zxf flannel-v0.11.0-linux-amd64.tar.gz -C /opt/flannel-v0.11.0
[root@hdss7-21.host.com /opt/src]#
[root@hdss7-21.host.com /opt/src]# ln -s /opt/flannel-v0.11.0/ /opt/flannel
[root@hdss7-21.host.com /opt/src]# cd /opt/flannel
[root@hdss7-21.host.com /opt/flannel]# ls
flanneld  mk-docker-opts.sh  README.md
3. 拷贝证书
# flannel默认会使用etcd去做一些存储和配置,所以flannel需要能够连接上etcd,这里就需要证书。
[root@hdss7-21.host.com /opt/flannel]# mkdir cert
[root@hdss7-21.host.com /opt/flannel]# cd cert
[root@hdss7-21.host.com /opt/flannel/cert]# scp hdss7-200:/opt/certs/ca.pem ./
[root@hdss7-21.host.com /opt/flannel/cert]# scp hdss7-200:/opt/certs/client.pem ./
[root@hdss7-21.host.com /opt/flannel/cert]# scp hdss7-200:/opt/certs/client-key.pem ./
[root@hdss7-21.host.com /opt/flannel/cert]# ll
total 12
-rw-r--r-- 1 root root 1346 Nov 15 16:28 ca.pem
-rw------- 1 root root 1675 Nov 15 16:37 client-key.pem
-rw-r--r-- 1 root root 1363 Nov 15 16:28 client.pem
4. 创建配置
注意:flannel集群各主机的配置略有不同,部署其他节点时注意修改。
# 定义flannel管理的网络
[root@hdss7-21.host.com /opt/flannel/cert]# cd ..
[root@hdss7-21.host.com /opt/flannel]# vi subnet.env
FLANNEL_NETWORK=172.7.0.0/16   # pod的网络
FLANNEL_SUBNET=172.7.21.1/24   # 本机ip地址
FLANNEL_NTU=1500
FLANNEL_IPMASQ=false
5. 创建启动脚本
[root@hdss7-21.host.com /opt/flannel]# vi flanneld.sh
#!/bin/sh
./flanneld
  --public-ip=10.4.7.21
  --etcd-endpoints=https://10.4.7.12:2379,https://10.4.7.21:2379,https://10.4.7.22:2379
  --etcd-keyfile=./cert/client-key.pem
  --etcd-certfile=./cert/client.pem
  --etcd-cafile=./cert/ca.pem
  --iface=eth0    # 注意此处的网卡类型
  --subnet-file=./subnet.env
  --healthz-port=2401

[root@hdss7-21.host.com /opt/flannel]# chmod +x flanneld.sh
[root@hdss7-21.host.com /opt/flannel]# mkdir -p /data/logs/flanneld
6. 操作etcd,增加host-gw
[root@hdss7-21.host.com /opt/flannel]# cd /opt/etcd
[root@hdss7-21.host.com /opt/etcd]# ./etcdctl member list  # 查看etcd主节点在哪儿(扩展)
988139385f78284: name=etcd-server-7-22 peerURLs=https://10.4.7.22:2380 clientURLs=http://127.0.0.1:2379,https://10.4.7.22:2379 isLeader=false
5a0ef2a004fc4349: name=etcd-server-7-21 peerURLs=https://10.4.7.21:2380 clientURLs=http://127.0.0.1:2379,https://10.4.7.21:2379 isLeader=false
f4a0cb0a765574a8: name=etcd-server-7-12 peerURLs=https://10.4.7.12:2380 clientURLs=http://127.0.0.1:2379,https://10.4.7.12:2379 isLeader=true  # 主节点

[root@hdss7-21.host.com /opt/etcd]# ./etcdctl set /coreos.com/network/config '{"Network": "172.7.0.0/16", "Backend": {"Type": "host-gw"}}'
{"Network": "172.7.0.0/16", "Backend": {"Type": "host-gw"}}

[root@hdss7-21.host.com /opt/etcd]# ./etcdctl get /coreos.com/network/config
{"Network": "172.7.0.0/16", "Backend": {"Type": "host-gw"}}
7. 创建supervisor配置
oot@hdss7-21.host.com /opt/etcd]# vi /etc/supervisord.d/flanneld.ini
[program:flanneld-7-21]
command=/opt/flannel/flanneld.sh                             ; the program (relative uses PATH, can take args)
numprocs=1                                                   ; number of processes copies to start (def 1)
directory=/opt/flannel                                       ; directory to cwd to before exec (def no cwd)
autostart=true                                               ; start at supervisord start (default: true)
autorestart=true                                             ; retstart at unexpected quit (default: true)
startsecs=30                   ; number of secs prog must stay running (def. 1)
startretries=3     				     ; max # of serial start failures (default 3)
exitcodes=0,2      				     ; 'expected' exit codes for process (default 0,2)
stopsignal=QUIT    				     ; signal used to kill process (default TERM)
stopwaitsecs=10    				     ; max num secs to wait b4 SIGKILL (default 10)
user=root                                                    ; setuid to this UNIX account to run the program
redirect_stderr=true                                        ; redirect proc stderr to stdout (default false)
stdout_logfile=/data/logs/flanneld/flanneld.stdout.log       ; stdout log path, NONE for none; default AUTO
stdout_logfile_maxbytes=64MB                                 ; max # logfile bytes b4 rotation (default 50MB)
stdout_logfile_backups=4                                     ; # of stdout logfile backups (default 10)
stdout_capture_maxbytes=1MB                                  ; number of bytes in 'capturemode' (default 0)
stdout_events_enabled=false                                  ; emit events on stdout writes (default false)
8. 启动服务并检查
[root@hdss7-21.host.com /opt/etcd]# supervisorctl update
flanneld-7-21: added process group
[root@hdss7-21.host.com /opt/etcd]# supervisorctl status|grep flannel
flanneld-7-21                    RUNNING   pid 34892, uptime 0:00:36
9. hdss7-22.host.com安装flannel
[root@hdss7-22.host.com ~]# cd /opt/src/
[root@hdss7-22.host.com /opt/src]# rz -E
rz waiting to receive.
[root@hdss7-22.host.com /opt/src]# ll
total 452336
-rw-r--r-- 1 root root   9850227 Nov  4 11:20 etcd-v3.1.20-linux-amd64.tar.gz
-rw-r--r-- 1 root root   9565743 Oct 27 14:14 flannel-v0.11.0-linux-amd64.tar.gz
-rw-r--r-- 1 root root 443770238 Nov  4 15:25 kubernetes-server-linux-amd64-v1.15.2.tar.gz
[root@hdss7-22.host.com /opt/src]# mkdir /opt/flannel-v0.11.0
[root@hdss7-22.host.com /opt/src]# tar zxf flannel-v0.11.0-linux-amd64.tar.gz -C /opt/flannel-v0.11.0
[root@hdss7-22.host.com /opt/src]# ln -s /opt/flannel-v0.11.0/ /opt/flannel
[root@hdss7-22.host.com /opt/src]#  cd /opt/flannel
[root@hdss7-22.host.com /opt/flannel]# ll
total 34436
-rwxr-xr-x 1 root root 35249016 Jan 29  2019 flanneld
-rwxr-xr-x 1 root root     2139 Oct 23  2018 mk-docker-opts.sh
-rw-r--r-- 1 root root     4300 Oct 23  2018 README.md

[root@hdss7-22.host.com /opt/flannel]# mkdir cert
[root@hdss7-22.host.com /opt/flannel]# cd cert
[root@hdss7-22.host.com /opt/flannel/cert]# scp hdss7-200:/opt/certs/ca.pem ./
[root@hdss7-22.host.com /opt/flannel/cert]# scp hdss7-200:/opt/certs/client.pem ./
[root@hdss7-22.host.com /opt/flannel/cert]# scp hdss7-200:/opt/certs/client-key.pem ./
[root@hdss7-22.host.com /opt/flannel/cert]# ll
total 12
-rw-r--r-- 1 root root 1346 Nov 15 17:22 ca.pem
-rw------- 1 root root 1675 Nov 15 17:22 client-key.pem
-rw-r--r-- 1 root root 1363 Nov 15 17:22 client.pem

[root@hdss7-22.host.com /opt/flannel/cert]# cd ..
[root@hdss7-22.host.com /opt/flannel]# vi subnet.env
FLANNEL_NETWORK=172.7.0.0/16
FLANNEL_SUBNET=172.7.22.1/24
FLANNEL_NTU=1500
FLANNEL_IPMASQ=false

[root@hdss7-22.host.com /opt/flannel]# vi flanneld.sh
#!/bin/sh
./flanneld
  --public-ip=10.4.7.22
  --etcd-endpoints=https://10.4.7.12:2379,https://10.4.7.21:2379,https://10.4.7.22:2379
  --etcd-keyfile=./cert/client-key.pem
  --etcd-certfile=./cert/client.pem
  --etcd-cafile=./cert/ca.pem
  --iface=eth0
  --subnet-file=./subnet.env
  --healthz-port=2401

[root@hdss7-22.host.com /opt/flannel]# chmod +x flanneld.sh
[root@hdss7-22.host.com /opt/flannel]# mkdir -p /data/logs/flanneld

[root@hdss7-22.host.com /opt/flannel]# cd /opt/etcd
[root@hdss7-22.host.com /opt/etcd]# ./etcdctl set /coreos.com/network/config '{"Network": "172.7.0.0/16", "Backend": {"Type": "host-gw"}}'
{"Network": "172.7.0.0/16", "Backend": {"Type": "host-gw"}}
[root@hdss7-22.host.com /opt/etcd]# ./etcdctl get /coreos.com/network/config
{"Network": "172.7.0.0/16", "Backend": {"Type": "host-gw"}}

[root@hdss7-22.host.com /opt/etcd]# cat /etc/supervisord.d/flanneld.ini
[program:flanneld-7-22]
command=/opt/flannel/flanneld.sh                             ; the program (relative uses PATH, can take args)
numprocs=1                                                   ; number of processes copies to start (def 1)
directory=/opt/flannel                                       ; directory to cwd to before exec (def no cwd)
autostart=true                                               ; start at supervisord start (default: true)
autorestart=true                                             ; retstart at unexpected quit (default: true)
startsecs=30                   ; number of secs prog must stay running (def. 1)
startretries=3     				     ; max # of serial start failures (default 3)
exitcodes=0,2      				     ; 'expected' exit codes for process (default 0,2)
stopsignal=QUIT    				     ; signal used to kill process (default TERM)
stopwaitsecs=10    				     ; max num secs to wait b4 SIGKILL (default 10)
user=root                                                    ; setuid to this UNIX account to run the program
redirect_stderr=true                                        ; redirect proc stderr to stdout (default false)
stdout_logfile=/data/logs/flanneld/flanneld.stdout.log       ; stdout log path, NONE for none; default AUTO
stdout_logfile_maxbytes=64MB                                 ; max # logfile bytes b4 rotation (default 50MB)
stdout_logfile_backups=4                                     ; # of stdout logfile backups (default 10)
stdout_capture_maxbytes=1MB                                  ; number of bytes in 'capturemode' (default 0)
stdout_events_enabled=false                                  ; emit events on stdout writes (default false

[root@hdss7-22.host.com /opt/etcd]# supervisorctl update
flanneld-7-22: added process group
[root@hdss7-22.host.com /opt/etcd]# supervisorctl status|grep flanneld
flanneld-7-22                    RUNNING   pid 38047, uptime 0:01:18
10. 连通性测试
[root@hdss7-21.host.com ~]# kubectl get po -o wide
NAME             READY   STATUS    RESTARTS   AGE     IP           NODE                NOMINATED NODE   READINESS GATES
nginx-ds-2zvkb   1/1     Running   2          2d22h   172.7.21.3   hdss7-21.host.com   <none>           <none>
nginx-ds-n6xcx   1/1     Running   2          2d22h   172.7.22.2   hdss7-22.host.com   <none>           <none>

oot@hdss7-21.host.com ~]# ping 172.7.22.2 -c 1
PING 172.7.22.2 (172.7.22.2) 56(84) bytes of data.
64 bytes from 172.7.22.2: icmp_seq=1 ttl=63 time=0.613 ms

[root@hdss7-22.host.com ~]# ping 172.7.21.3 -c 1
PING 172.7.21.3 (172.7.21.3) 56(84) bytes of data.
64 bytes from 172.7.21.3: icmp_seq=1 ttl=63 time=0.505 m
11. flannel工作模型介绍
(1)host-gw
(2)VxLAN
(3)直接路由
11.1 host-gw模型
该模型的主要作用就是给主机添加静态路由,也是flannel中效率最高、资源占用最小的模型,因为只维护了一张路由表,没有其他额外的资源开销。
但是,使用host-gw模型有一个非常重要的前提条件,那就是所有的运算节点宿主机,必须是处于同一个二层网络下。(指向同一个物理网关设备)
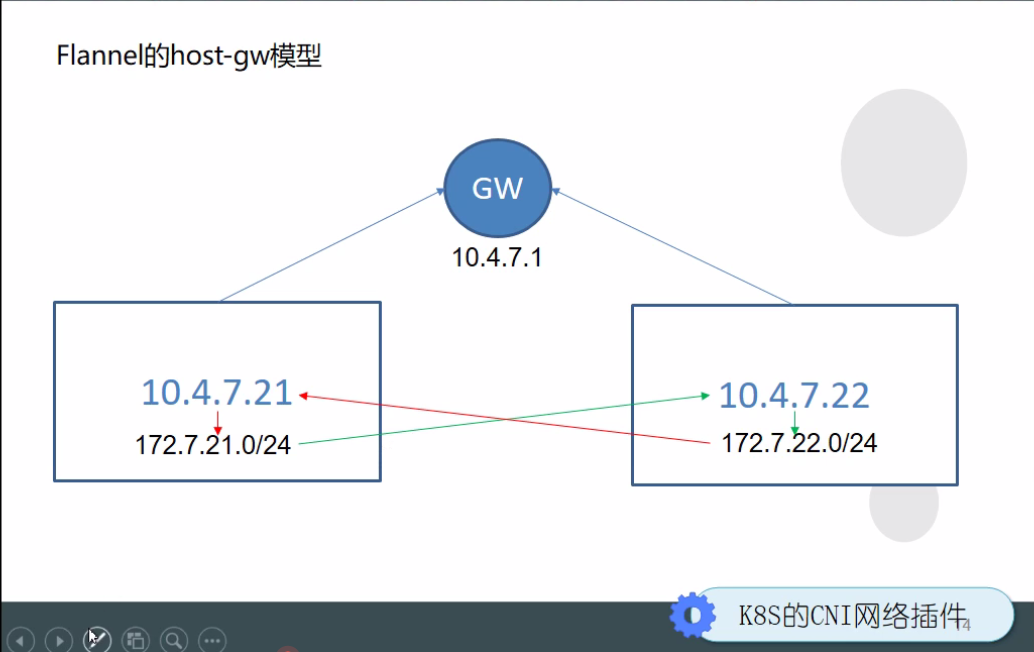
# '{"Network": "172.7.0.0/16", "Backend": {"Type": "host-gw"}}'
[root@hdss7-21.host.com ~]# route -n
Kernel IP routing table
Destination     Gateway         Genmask         Flags Metric Ref    Use Iface
0.0.0.0         10.4.7.254      0.0.0.0         UG    100    0        0 eth0
10.4.7.0        0.0.0.0         255.255.255.0   U     100    0        0 eth0
172.7.21.0      0.0.0.0         255.255.255.0   U     0      0        0 docker0
172.7.22.0      10.4.7.22       255.255.255.0   UG    0      0        0 eth0     # 添加的静态路由,如果10.4.7.21想跟172.7.22.0网络通信,那么经过的网关就是10.4.7.22。

[root@hdss7-22.host.com ~]# route -n
Kernel IP routing table
Destination     Gateway         Genmask         Flags Metric Ref    Use Iface
0.0.0.0         10.4.7.254      0.0.0.0         UG    100    0        0 eth0
10.4.7.0        0.0.0.0         255.255.255.0   U     100    0        0 eth0
172.7.21.0      10.4.7.21       255.255.255.0   UG    0      0        0 eth0  # 相反,如果10.4.7.22想跟172.7.21.0通信,那么经过的网关就是10.4.7.21
172.7.22.0      0.0.0.0         255.255.255.0   U     0      0        0 docker0
11.2 VxLAN模型
使用VxLAN模型的前提,就是所有的运算节点分别处于两个不同的二层网络(如下图)。
VxLAN的主要作用是在宿主机上安装了一个名为flannel.1的*虚拟网络设备,并且还打通的一条fannel网络隧道。
通信过程:如172.7.21.0/24,想和172.7.22.0/24,那么必须先通过宿主机10.4.7.21上的flannel.1设备,然后flanne.1对该通信加上头部、尾部信息(网络封包),通过fannel网络隧道,到达10.5.7.22实例的flannel.1设备,并进行拆包,最后到达172.7.22.0/24网络。
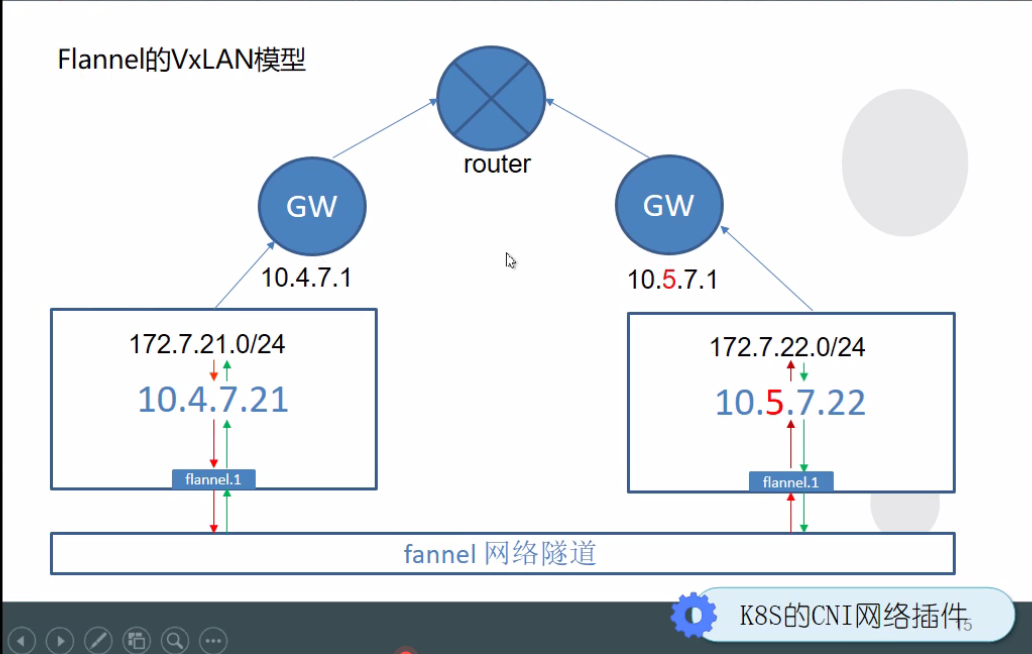
# '{"Network": "172.7.0.0/16", "Backend": {"Type": "VxLAN"}}'
# 模拟演示
# 停止flannel
[root@hdss7-21.host.com ~]# supervisorctl stop flanneld-7-21
flanneld-7-21: stopped
[root@hdss7-21.host.com ~]# ps -ef | grep flannel
root       6388      1  0 13:24 ?        00:00:07 ./flanneld --public-ip=10.4.7.21 --etcd-endpoints=https://10.4.7.12:2379,https://10.4.7.21:2379,https://10.4.7.22:2379 --etcd-keyfile=./cert/client-key.pem --etcd-certfile=./cert/client.pem --etcd-cafile=./cert/ca.pem --iface=eth0 --subnet-file=./subnet.env --healthz-port=2401
root      53779  19426  0 15:53 pts/1    00:00:00 grep --color=auto flannel
[root@hdss7-21.host.com ~]# kill -9 6388
[root@hdss7-21.host.com ~]# route -n
Kernel IP routing table
Destination     Gateway         Genmask         Flags Metric Ref    Use Iface
0.0.0.0         10.4.7.254      0.0.0.0         UG    100    0        0 eth0
10.4.7.0        0.0.0.0         255.255.255.0   U     100    0        0 eth0
172.7.21.0      0.0.0.0         255.255.255.0   U     0      0        0 docker0
172.7.22.0      10.4.7.22       255.255.255.0   UG    0      0        0 eth0
[root@hdss7-21.host.com ~]# route del -net 172.7.22.0/24 gw 10.4.7.22
[root@hdss7-21.host.com ~]# route -n
Kernel IP routing table
Destination     Gateway         Genmask         Flags Metric Ref    Use Iface
0.0.0.0         10.4.7.254      0.0.0.0         UG    100    0        0 eth0
10.4.7.0        0.0.0.0         255.255.255.0   U     100    0        0 eth0
172.7.21.0      0.0.0.0         255.255.255.0   U     0      0        0 docker0


[root@hdss7-22.host.com ~]# supervisorctl stop flanneld-7-22
flanneld-7-22: stopped
[root@hdss7-22.host.com ~]# ps -ef |grep [f]lannel
root       6155      1  0 13:24 ?        00:00:07 ./flanneld --public-ip=10.4.7.22 --etcd-endpoints=https://10.4.7.12:2379,https://10.4.7.21:2379,https://10.4.7.22:2379 --etcd-keyfile=./cert/client-key.pem --etcd-certfile=./cert/client.pem --etcd-cafile=./cert/ca.pem --iface=eth0 --subnet-file=./subnet.env --healthz-port=2401
[root@hdss7-22.host.com ~]# kill -9 6155
[root@hdss7-22.host.com ~]# route -n
Kernel IP routing table
Destination     Gateway         Genmask         Flags Metric Ref    Use Iface
0.0.0.0         10.4.7.254      0.0.0.0         UG    100    0        0 eth0
10.4.7.0        0.0.0.0         255.255.255.0   U     100    0        0 eth0
172.7.21.0      10.4.7.21       255.255.255.0   UG    0      0        0 eth0
172.7.22.0      0.0.0.0         255.255.255.0   U     0      0        0 docker0
[root@hdss7-22.host.com ~]# route del -net 172.7.21.0/24 gw 10.4.7.21
[root@hdss7-22.host.com ~]# route -n
Kernel IP routing table
Destination     Gateway         Genmask         Flags Metric Ref    Use Iface
0.0.0.0         10.4.7.254      0.0.0.0         UG    100    0        0 eth0
10.4.7.0        0.0.0.0         255.255.255.0   U     100    0        0 eth0
172.7.22.0      0.0.0.0         255.255.255.0   U     0      0        0 docker0

[root@hdss7-22.host.com ~]# ping 172.7.21.3
PING 172.7.21.3 (172.7.21.3) 56(84) bytes of data.

# 更换flannel工作模式
[root@hdss7-21.host.com ~]# cd /opt/etcd
[root@hdss7-21.host.com /opt/etcd]# ls
certs          etcd     etcd-server-startup.sh  README.md
Documentation  etcdctl  README-etcdctl.md       READMEv2-etcdctl.md
[root@hdss7-21.host.com /opt/etcd]# !./etcdctl get
./etcdctl get /coreos.com/network/config get
{"Network": "172.7.0.0/16", "Backend": {"Type": "host-gw"}}
[root@hdss7-21.host.com /opt/etcd]# ./etcdctl rm /coreos.com/network/config get
Error:  x509: certificate signed by unknown authority
[root@hdss7-21.host.com /opt/etcd]# ./etcdctl get /coreos.com/network/config get
{"Network": "172.7.0.0/16", "Backend": {"Type": "host-gw"}}
[root@hdss7-21.host.com /opt/etcd]# ./etcdctl rm /coreos.com/network/config get
PrevNode.Value: {"Network": "172.7.0.0/16", "Backend": {"Type": "host-gw"}}
[root@hdss7-21.host.com /opt/etcd]# ./etcdctl get /coreos.com/network/config get
Error:  100: Key not found (/coreos.com/network/config) [30]
[root@hdss7-21.host.com /opt/etcd]# ./etcdctl set /coreos.com/network/config '{"Network": "172.7.0.0/16", "Backend": {"Type": "VxLAN"}}'
{"Network": "172.7.0.0/16", "Backend": {"Type": "VxLAN"}}
[root@hdss7-21.host.com /opt/etcd]# ./etcdctl get /coreos.com/network/config get
{"Network": "172.7.0.0/16", "Backend": {"Type": "VxLAN"}}

# 启动flannel
[root@hdss7-21.host.com /opt/etcd]# supervisorctl start flanneld-7-21
flanneld-7-21: started

[root@hdss7-22.host.com ~]# supervisorctl start flanneld-7-22
flanneld-7-22: started

[root@hdss7-21.host.com /opt/etcd]# !ping
ping 172.7.22.3
PING 172.7.22.3 (172.7.22.3) 56(84) bytes of data.
64 bytes from 172.7.22.3: icmp_seq=1 ttl=63 time=1.25 ms

[root@hdss7-22.host.com ~]# ping 172.7.21.3
PING 172.7.21.3 (172.7.21.3) 56(84) bytes of data.
64 bytes from 172.7.21.3: icmp_seq=1 ttl=63 time=0.712 ms

[root@hdss7-21.host.com /opt/etcd]# ifconfig |grep flannel.1
flannel.1: flags=4163<UP,BROADCAST,RUNNING,MULTICAST>  mtu 1450  # 安装的虚拟网络设备
[root@hdss7-21.host.com /opt/etcd]# route -n
Kernel IP routing table
Destination     Gateway         Genmask         Flags Metric Ref    Use Iface
172.7.22.0      172.7.22.0      255.255.255.0   UG    0      0        0 flannel.1

# 网络环境恢复
[root@hdss7-21.host.com /opt/etcd]# supervisorctl stop flanneld-7-21
flanneld-7-21: stopped
[root@hdss7-21.host.com /opt/etcd]# ps -ef | grep [f]lannel
root      56607      1  0 16:03 ?        00:00:01 ./flanneld --public-ip=10.4.7.21 --etcd-endpoints=https://10.4.7.12:2379,https://10.4.7.21:2379,https://10.4.7.22:2379 --etcd-keyfile=./cert/client-key.pem --etcd-certfile=./cert/client.pem --etcd-cafile=./cert/ca.pem --iface=eth0 --subnet-file=./subnet.env --healthz-port=2401
[root@hdss7-21.host.com /opt/etcd]# kill -9 56607

[root@hdss7-22.host.com ~]# supervisorctl stop flanneld-7-22
flanneld-7-22: stopped

[root@hdss7-21.host.com /opt/etcd]# ./etcdctl get /coreos.com/network/config get
{"Network": "172.7.0.0/16", "Backend": {"Type": "VxLAN"}}
[root@hdss7-21.host.com /opt/etcd]# ./etcdctl rm /coreos.com/network/config get
PrevNode.Value: {"Network": "172.7.0.0/16", "Backend": {"Type": "VxLAN"}}
[root@hdss7-21.host.com /opt/etcd]# ./etcdctl get /coreos.com/network/config get
Error:  100: Key not found (/coreos.com/network/config) [34]
[root@hdss7-21.host.com /opt/etcd]# ./etcdctl set /coreos.com/network/config '{"Network": "172.7.0.0/16", "Backend": {"Type": "host-gw"}}'
{"Network": "172.7.0.0/16", "Backend": {"Type": "host-gw"}}
[root@hdss7-21.host.com /opt/etcd]# ./etcdctl get /coreos.com/network/config get
{"Network": "172.7.0.0/16", "Backend": {"Type": "host-gw"}}
[root@hdss7-21.host.com /opt/etcd]# supervisorctl start flanneld-7-21
flanneld-7-21: started
[root@hdss7-21.host.com /opt/etcd]# route
Kernel IP routing table
Destination     Gateway         Genmask         Flags Metric Ref    Use Iface
default         gateway         0.0.0.0         UG    100    0        0 eth0
10.4.7.0        0.0.0.0         255.255.255.0   U     100    0        0 eth0
172.7.21.0      0.0.0.0         255.255.255.0   U     0      0        0 docker0
172.7.22.0      10.4.7.22       255.255.255.0   UG    0      0        0 eth

[root@hdss7-22.host.com ~]# supervisorctl start flanneld-7-22
flanneld-7-22: started
[root@hdss7-22.host.com /opt/etcd]# route
Kernel IP routing table
Destination     Gateway         Genmask         Flags Metric Ref    Use Iface
default         gateway         0.0.0.0         UG    100    0        0 eth0
10.4.7.0        0.0.0.0         255.255.255.0   U     100    0        0 eth0
172.7.21.0      10.4.7.21       255.255.255.0   UG    0      0        0 eth0
172.7.22.0      0.0.0.0         255.255.255.0   U     0      0        0 docker0

[root@hdss7-22.host.com /opt/etcd]# !ping
ping 172.7.21.3
PING 172.7.21.3 (172.7.21.3) 56(84) bytes of data.
64 bytes from 172.7.21.3: icmp_seq=1 ttl=63 time=0.417 ms

[root@hdss7-21.host.com /opt/etcd]# !ping
ping 172.7.22.3
PING 172.7.22.3 (172.7.22.3) 56(84) bytes of data.
64 bytes from 172.7.22.3: icmp_seq=1 ttl=63 time=0.403 m
11.3 直接路由模型
直接路由模型是host-gw和VxLAN的混合模式。当该模式发现(自动判断)运算节点如果是处于同一个二层网络下,便会使用host-gw模型。如果不是同一个二层网络,便会使用VxLAN模型。
# '{"Network": "172.7.0.0/16", "Backend": {"Type": "VxLAN","Directrouting": true}}'
12. flannel之SNAT规则优化
# 之所以要做SNAT优化,是因为现在容器与容器之间的访问,使用的时宿主机的IP,并非容器本身的IP,如下:
[root@hdss7-21.host.com ~]# cat nginx-ds.yaml
apiVersion: extensions/v1beta1
kind: DaemonSet
metadata:
  name: nginx-ds
spec:
  template:
    metadata:
      labels:
        app: nginx-ds
    spec:
      containers:
      - name: my-nginx
        image: harbor.od.com/public/nginx:curl  # 把原来的镜像改成版本为curl的这个,就是nginx镜像能curl就行,方便后面的测试
        ports:
        - containerPort: 80

[root@hdss7-21.host.com ~]# kubectl get po
NAME             READY   STATUS    RESTARTS   AGE
nginx-ds-2tkdj   1/1     Running   0          169m
nginx-ds-7kqt4   1/1     Running   0          169m

[root@hdss7-21.host.com ~]# kubectl delete po nginx-ds-2tkdj  # 删除原有的pod
pod "nginx-ds-2tkdj" deleted
[root@hdss7-21.host.com ~]#
[root@hdss7-21.host.com ~]# kubectl delete po nginx-ds-7kqt4  # 删除原有的pod
pod "nginx-ds-7kqt4" deleted

[root@hdss7-21.host.com ~]#
[root@hdss7-21.host.com ~]# kubectl get po -o wide
NAME             READY   STATUS    RESTARTS   AGE     IP           NODE                NOMINATED NODE   READINESS GATES
nginx-ds-9t4bp   1/1     Running   0          2m57s   172.7.22.3   hdss7-22.host.com   <none>           <none>
nginx-ds-l85wg   1/1     Running   0          2m43s   172.7.21.3   hdss7-21.host.com   <none>           <none>


# 进入172.7.21.3这个pod
[root@hdss7-21.host.com ~]# kubectl exec -it nginx-ds-l85wg /bin/bash

# 然后切换到hdss7-22.hsot.com,实时查看172.7.22.3的日志
[root@hdss7-22.host.com /opt/etcd]# kubectl logs -f nginx-ds-9t4bp

# 切换到hdss7-21.host.com,访问hdss7-22.hsot.com的nginx
root@nginx-ds-l85wg:/# curl -I 172.7.22.3
HTTP/1.1 200 OK
Server: nginx/1.19.4
Date: Mon, 16 Nov 2020 09:25:17 GMT
Content-Type: text/html
Content-Length: 612
Last-Modified: Tue, 27 Oct 2020 15:09:20 GMT
Connection: keep-alive
ETag: "5f983820-264"
Accept-Ranges: bytes

root@nginx-ds-l85wg:/#

# 切换到hdss7-22.hsot.com,观察日志
10.4.7.21 - - [16/Nov/2020:09:25:17 +0000] "HEAD / HTTP/1.1" 200 0 "-" "curl/7.64.0" "-"  # 第一列的客户端IP,记录的是hdss7.21.host.com宿主机本身的IP,并不是容器本身的IP172.7.21.3,原因是因为被iptables做了SNAT地址转换,但是所有运算节点都是处于同一个局域网,这样的地址转换操作明显是多余的(后续节点多了,IPTABLES的压力也会增大,资源消耗变大,集群会出现问题)。

[root@hdss7-21.host.com ~]# iptables-save | grep -i postrouting
:POSTROUTING ACCEPT [15:909]
:KUBE-POSTROUTING - [0:0]
-A POSTROUTING -m comment --comment "kubernetes postrouting rules" -j KUBE-POSTROUTING
-A POSTROUTING -s 172.7.21.0/24 ! -o docker0 -j MASQUERADE  # 如果源地址172.7.21.0/24,不是从docker0出网的,就做SNAT地址转换。
-A KUBE-POSTROUTING -m comment --comment "kubernetes service traffic requiring SNAT" -m mark --mark 0x4000/0x4000 -j MASQUERADE
-A KUBE-POSTROUTING -m comment --comment "Kubernetes endpoints dst ip:port, source ip for solving hairpin purpose" -m set --match-set KUBE-LOOP-BACK dst,dst,src -j MASQUERADE
12.1 优化iptables规则
hdss7-21.host.com和hdss7-21.host.com都操作
12.1.1 安装iptables
~]# yum -y install iptables-services
~]# systemctl start iptables
~]# systemctl enable iptables
12.1.2 清理原有规则
# 21操作
[root@hdss7-21.host.com ~]# iptables-save | grep -i postrouting
#………… 省略部分输出
-A POSTROUTING -s 172.7.21.0/24 ! -o docker0 -j MASQUERADE

[root@hdss7-21.host.com ~]# iptables -t nat -D POSTROUTING -s 172.7.21.0/24 ! -o docker0 -j MASQUERADE

[root@hdss7-21.host.com ~]# iptables-save | grep -i reject
-A INPUT -j REJECT --reject-with icmp-host-prohibited
-A FORWARD -j REJECT --reject-with icmp-host-prohibited
[root@hdss7-21.host.com ~]# iptables -t filter -D INPUT -j REJECT --reject-with icmp-host-prohibited
[root@hdss7-21.host.com ~]# iptables -t filter -D FORWARD -j REJECT --reject-with icmp-host-prohibited

# 22操作
[root@hdss7-22.host.com ~]# iptables-save | grep -i postrouting
#………… 省略部分输出
-A POSTROUTING -s 172.7.22.0/24 ! -o docker0 -j MASQUERADE
[root@hdss7-22.host.com ~]# iptables -t nat -D POSTROUTING -s 172.7.22.0/24 ! -o docker0 -j MASQUERADE

[root@hdss7-22.host.com ~]# iptables-save | grep -i reject
-A INPUT -j REJECT --reject-with icmp-host-prohibited
-A FORWARD -j REJECT --reject-with icmp-host-prohibited
[root@hdss7-22.host.com ~]# iptables -t filter -D INPUT -j REJECT --reject-with icmp-host-prohibited
[root@hdss7-22.host.com ~]# iptables -t filter -D FORWARD -j REJECT --reject-with icmp-host-prohibited
12.1.3 新增规则并保存
# 21操作
[root@hdss7-21.host.com ~]# iptables -t nat -I POSTROUTING -s 172.7.21.0/24 ! -d 172.7.0.0/16 ! -o docker0 -j MASQUERADE  # 当源地址172.7.0.0/16,不是去往目的地之172.7.0.0/16,也不是从docker0出网的,都做地址转换。(简单点说,就是容器和容器之间通信,不做SNAT地址转换)

[root@hdss7-21.host.com ~]# service iptables save

# 22操作
[root@hdss7-22.host.com ~]# iptables -t nat -I POSTROUTING -s 172.7.22.0/24 ! -d 172.7.0.0/16 ! -o docker0 -j MASQUERADE
[root@hdss7-22.host.com ~]# service iptables save
12.1.4 再次访问测试
[root@hdss7-21.host.com ~]# kubectl exec -it nginx-ds-l85wg /bin/bash
root@nginx-ds-l85wg:/# !cu
curl -I 172.7.22.3


[root@hdss7-22.host.com ~]# kubectl logs -f nginx-ds-9t4bp
172.7.21.3 - - [16/Nov/2020:10:06:52 +0000] "HEAD / HTTP/1.1" 200 0 "-" "curl/7.64.0" "-"  # 这个时候,客户端地址,就不在进行snat转换了,直接记录容器的真实IP。
K8S服务发现
1. 什么是服务发现
· 简单来说,服务发现就是服务(应用)之间互相定位的过程。
· 服务发现并非云计算时代独有,传统的单体架构时代也会用到。如下场景更需要服务发现:
  · 服务(应用)的动态性强
  · 服务(应用)更新发布频繁
  · 服务(应用)支持自动伸缩
· 在K8S集群里,POD的IP时不断变化的,如何“以不变应万变”呢
  · 抽象出了Service资源,通过标签选择器,关联一组POD
  · 抽象出了网络集群,通过相对固定的“集群IP”,使服务接入点固定
· 那么如何自动关联Service资源的“名称”和“”集群网络IP,从而达到服务被集群自动发现的目的呢
  · 考虑传统DNS的模型:hdss7-21.host.com → 10.4.7.21
  · 能否在K8S里建立这样的模型:nginx-ds → 192.168.0.5  # 这里的最终实现效果svc名称关联cluster ip
· K8S里服务发现的方式——DNS
· 实现K8S里DNS功能的插件
  · Kube-dns-kubernetes-v1.2至kubernetes-v1.10
  · Coredns——kubernetes-v1.11至今
2. 安装Coredns(实现集群内部服务自动发现)
2.1 部署K8S的内网资源配置清单http服务
在运维主机200上,配置一个nginx虚拟机,用以提供k8s统一的资源配置清单访问入口
[root@hdss7-200.host.com ~]# cd /etc/nginx/conf.d/
[root@hdss7-200.host.com /etc/nginx/conf.d]# vi k8s-yaml.od.com.conf
server {
    listen       80;
    server_name  k8s-yaml.od.com;

    location / {
        autoindex on;
        default_type text/plain;
        root /data/k8s-yaml;
    }
}

[root@hdss7-200.host.com /data/k8s-yaml]# nginx -t
nginx: the configuration file /etc/nginx/nginx.conf syntax is ok
nginx: configuration file /etc/nginx/nginx.conf test is successful
[root@hdss7-200.host.com /data/k8s-yaml]# nginx -s reload
[root@hdss7-200.host.com /etc/nginx/conf.d]# mkdir /data/k8s-yaml
[root@hdss7-200.host.com /etc/nginx/conf.d]# cd /data/k8s-yaml
[root@hdss7-200.host.com /data/k8s-yaml]# mkdir coredns
2.2 添加内网DNS域名解析
hdss7-11.host.com操作
[root@hdss7-11.host.com ~]# vi /var/named/od.com.zone
$ORIGIN od.com.
$TTL 600	; 10 minutes
@   		IN SOA	dns.od.com. dnsadmin.od.com. (
				2020102803 ; serial  # 序列号前滚,802变成803
				10800      ; refresh (3 hours)
				900        ; retry (15 minutes)
				604800     ; expire (1 week)
				86400      ; minimum (1 day)
				)
				NS   dns.od.com.
$TTL 60	; 1 minute
dns                A    10.4.7.11
harbor             A    10.4.7.200
k8s-yaml           A    10.4.7.200  # 添加对应的域名解析

[root@hdss7-11.host.com ~]# systemctl restart named
[root@hdss7-11.host.com ~]# dig -t A k8s-yaml.od.com @10.4.7.11 +short
10.4.7.200
浏览器访问

2.3 部署kube-dns(coredns)
coredns官方GitHub地址:https://github.com/coredns/coredns/releases
coredns的DockerHub地址:https://hub.docker.com/r/coredns/coredns/tags
2.3.1 下载镜像
此处使用1.6.1
[root@hdss7-200.host.com /data/k8s-yaml]# cd coredns/
[root@hdss7-200.host.com /data/k8s-yaml/coredns]# docker pull coredns/coredns:1.6.1
[root@hdss7-200.host.com /data/k8s-yaml/coredns]# docker images | grep coredns
coredns/coredns                 1.6.1                      c0f6e815079e        15 months ago       42.2MB
[root@hdss7-200.host.com /data/k8s-yaml/coredns]# docker tag c0f6e815079e harbor.od.com/public/coredns:v1.6.1
[root@hdss7-200.host.com /data/k8s-yaml/coredns]# docker push harbor.od.com/public/coredns:v1.6.1
2.3.2 准备资源配置清单
[root@hdss7-200.host.com /data/k8s-yaml/coredns]# vi rbac.yaml  # 权限管理
apiVersion: v1
kind: ServiceAccount
metadata:
  name: coredns
  namespace: kube-system
  labels:
      kubernetes.io/cluster-service: "true"
      addonmanager.kubernetes.io/mode: Reconcile
---
apiVersion: rbac.authorization.k8s.io/v1
kind: ClusterRole
metadata:
  labels:
    kubernetes.io/bootstrapping: rbac-defaults
    addonmanager.kubernetes.io/mode: Reconcile
  name: system:coredns
rules:
- apiGroups:
  - ""
  resources:
  - endpoints
  - services
  - pods
  - namespaces
  verbs:
  - list
  - watch
---
apiVersion: rbac.authorization.k8s.io/v1
kind: ClusterRoleBinding
metadata:
  annotations:
    rbac.authorization.kubernetes.io/autoupdate: "true"
  labels:
    kubernetes.io/bootstrapping: rbac-defaults
    addonmanager.kubernetes.io/mode: EnsureExists
  name: system:coredns
roleRef:
  apiGroup: rbac.authorization.k8s.io
  kind: ClusterRole
  name: system:coredns
subjects:
- kind: ServiceAccount
  name: coredns
  namespace: kube-system

[root@hdss7-200.host.com /data/k8s-yaml/coredns]# vi cm.yaml  # Coredns配置
apiVersion: v1
kind: ConfigMap
metadata:
  name: coredns
  namespace: kube-system
data:
  Corefile: |
    .:53 {
        errors
        log
        health
        ready
        kubernetes cluster.local 192.168.0.0/16
        forward . 10.4.7.11
        cache 30
        loop
        reload
        loadbalance
       }

[root@hdss7-200.host.com /data/k8s-yaml/coredns]# vi dp.yaml  # coredns pod控制器
apiVersion: apps/v1
kind: Deployment
metadata:
  name: coredns
  namespace: kube-system
  labels:
    k8s-app: coredns
    kubernetes.io/name: "CoreDNS"
spec:
  replicas: 1
  selector:
    matchLabels:
      k8s-app: coredns
  template:
    metadata:
      labels:
        k8s-app: coredns
    spec:
      priorityClassName: system-cluster-critical
      serviceAccountName: coredns
      containers:
      - name: coredns
        image: harbor.od.com/public/coredns:v1.6.1
        args:
        - -conf
        - /etc/coredns/Corefile
        volumeMounts:
        - name: config-volume
          mountPath: /etc/coredns
        ports:
        - containerPort: 53
          name: dns
          protocol: UDP
        - containerPort: 53
          name: dns-tcp
          protocol: TCP
        - containerPort: 9153
          name: metrics
          protocol: TCP
        livenessProbe:
          httpGet:
            path: /health
            port: 8080
            scheme: HTTP
          initialDelaySeconds: 60
          timeoutSeconds: 5
          successThreshold: 1
          failureThreshold: 5
      dnsPolicy: Default
      volumes:
        - name: config-volume
          configMap:
            name: coredns
            items:
            - key: Corefile
              path: Corefile

[root@hdss7-200.host.com /data/k8s-yaml/coredns]# cat svc.yaml  # corends端口暴露
apiVersion: v1
kind: Service
metadata:
  name: coredns
  namespace: kube-system
  labels:
    k8s-app: coredns
    kubernetes.io/cluster-service: "true"
    kubernetes.io/name: "CoreDNS"
spec:
  selector:
    k8s-app: coredns
  clusterIP: 192.168.0.2
  ports:
  - name: dns
    port: 53
    protocol: UDP
  - name: dns-tcp
    port: 53
  - name: metrics
    port: 9153
    protocol: TCP

上述资源配置清单来源:https://github.com/kubernetes/kubernetes/blob/master/cluster/addons/dns/coredns/coredns.yaml.base
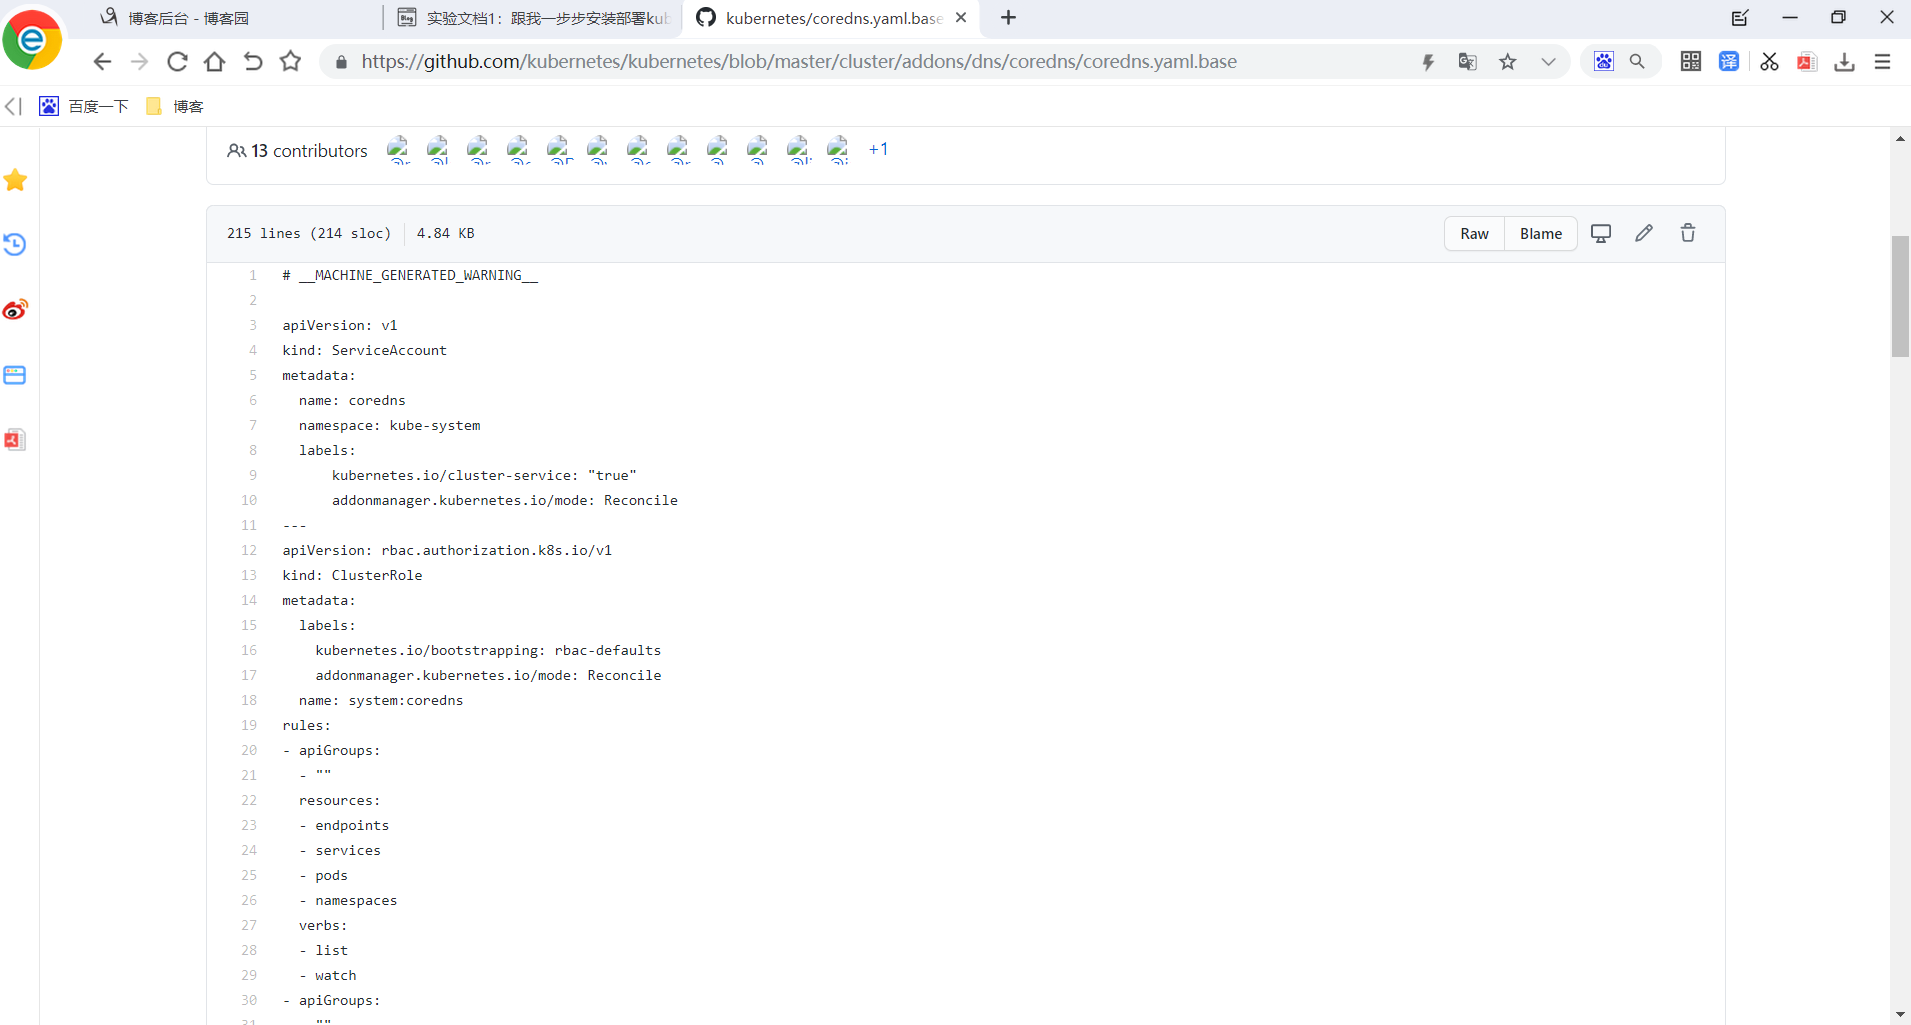
2.3.3 应用资源配置清单
任意运算节点操作
[root@hdss7-21.host.com ~]# kubectl apply -f http://k8s-yaml.od.com/coredns/rbac.yaml
serviceaccount/coredns created
clusterrole.rbac.authorization.k8s.io/system:coredns created
clusterrolebinding.rbac.authorization.k8s.io/system:coredns created

[root@hdss7-21.host.com ~]# kubectl apply -f http://k8s-yaml.od.com/coredns/cm.yaml
configmap/coredns created

[root@hdss7-21.host.com ~]# kubectl apply -f http://k8s-yaml.od.com/coredns/dp.yaml
deployment.apps/coredns created

[root@hdss7-21.host.com ~]# kubectl apply -f http://k8s-yaml.od.com/coredns/svc.yaml
service/coredns created

[root@hdss7-21.host.com ~]# kubectl get all -n kube-system -o wide
NAME                           READY   STATUS    RESTARTS   AGE     IP           NODE                NOMINATED NODE   READINESS GATES
pod/coredns-6b6c4f9648-nqgxr   1/1     Running   0          2m38s   172.7.21.4   hdss7-21.host.com   <none>           <none>


NAME              TYPE        CLUSTER-IP    EXTERNAL-IP   PORT(S)                  AGE     SELECTOR
service/coredns   ClusterIP   192.168.0.2   <none>        53/UDP,53/TCP,9153/TCP   2m34s   k8s-app=coredns
# 这里coredns的CLUSTER-IP是在/opt/kubernetes/server/bin/kubelet.sh中写死的,作为集群固定的接入点。

NAME                      READY   UP-TO-DATE   AVAILABLE   AGE     CONTAINERS   IMAGES                                SELECTOR
deployment.apps/coredns   1/1     1            1           2m38s   coredns      harbor.od.com/public/coredns:v1.6.1   k8s-app=coredns

NAME                                 DESIRED   CURRENT   READY   AGE     CONTAINERS   IMAGES                                SELECTOR
replicaset.apps/coredns-6b6c4f9648   1         1         1       2m38s   coredns      harbor.od.com/public/coredns:v1.6.1   k8s-app=coredns,pod-template-hash=6b6c4f9648
2.3.4 验证
[root@hdss7-21.host.com ~]# kubectl get po -n kube-public
NAME                        READY   STATUS    RESTARTS   AGE
nginx-dp-69595c9756-lhrd8   1/1     Running   3          3d21h
nginx-dp-69595c9756-vl84j   1/1     Running   3          3d21h
[root@hdss7-21.host.com ~]#  kubectl get svc -o wide -n kube-public  #如果这里没有svc资源,则 kubectl expose deployment nginx-dp --port=80 -n kube-public
NAME       TYPE        CLUSTER-IP       EXTERNAL-IP   PORT(S)   AGE     SELECTOR
nginx-dp   ClusterIP   192.168.186.97   <none>        80/TCP    3d21h   app=nginx-dp

# 集群外部域名解析验证
[root@hdss7-21.host.com ~]# dig -t A nginx-dp @192.168.0.2 +short
[root@hdss7-21.host.com ~]# # 这里要使用fqdn的方式去解析,才有结果
[root@hdss7-21.host.com ~]# dig -t A nginx-dp.kube-public.svc.cluster.local. @192.168.0.2 +short
192.168.186.97


# 集群内部域名解析验证
[root@hdss7-21.host.com ~]# kubectl get po -n kube-public -o wide
NAME                        READY   STATUS    RESTARTS   AGE     IP           NODE                NOMINATED NODE   READINESS GATES
nginx-dp-69595c9756-lhrd8   1/1     Running   3          3d21h   172.7.22.2   hdss7-22.host.com   <none>           <none>
nginx-dp-69595c9756-vl84j   1/1     Running   3          3d21h   172.7.21.3   hdss7-21.host.com   <none>           <none>

[root@hdss7-21.host.com ~]# kubectl get po -o wide
NAME             READY   STATUS    RESTARTS   AGE   IP           NODE                NOMINATED NODE   READINESS GATES
nginx-ds-9t4bp   1/1     Running   1          21h   172.7.22.3   hdss7-22.host.com   <none>           <none>
nginx-ds-l85wg   1/1     Running   1          21h   172.7.21.2   hdss7-21.host.com   <none>           <none>

[root@hdss7-21.host.com ~]# kubectl exec -it nginx-ds-l85wg /bin/bash
root@nginx-ds-l85wg:/# curl -I nginx-dp.kube-public  # pod名.命名空间
HTTP/1.1 200 OK
Server: nginx/1.19.4
Date: Tue, 17 Nov 2020 06:50:04 GMT
Content-Type: text/html
Content-Length: 612
Last-Modified: Tue, 27 Oct 2020 15:09:20 GMT
Connection: keep-alive
ETag: "5f983820-264"
Accept-Ranges: bytes

# 上面之所以crul pod.命名空间 能够访问,原因如下:
root@nginx-ds-l85wg:/# cat /etc/resolv.conf
nameserver 192.168.0.2
search default.svc.cluster.local svc.cluster.local cluster.local host.com  # 这里因为安装coredns,默认把default.svc.cluster.local svc.cluster.local cluster.local都添加到域里了,所以能够实现crul pod.命名空间(svc关联cluster ip)。
options ndots:5  # 这里的options ndots:5是有优化空间的,具体优化方法,参考下面的博客地址。
3. coredns原理解析及优化
http://ccnuo.com/2019/08/25/CoreDNS:Kubernetes内部域名解析原理、弊端及优化方式/
K8S服务暴露
1. 介绍
· K8S的DNS实现了服务在集群“内”被自动发现,那么如何使得服务在K8S集群“外”被使用和访问呢?
  · 使用NodePort型的Service
    · 注意:无法使用kube-proxy的ipvs模型,只能使用iptables模型
  · 使用Ingress资源
    · 注意:Ingress只能调度并暴露7层应用,特指http和https协议

· Ingress是K8S API的标准资源类型之一,也是一种核心资源,它其实就是一组基于域名和URL路径,把用户的请求转发到指定的Service资源的规则
· 可以将集群外部的请求流量,转发至集群内部,从而实现“服务暴露”
· Ingress控制器是能够为Ingress资源监听某套接字,然后根据Ingress规则匹配机制路由调度流量的一个组件
· 说白了,就是简化版的nginx+一段go脚本而已

· 常用的Ingress控制器的实现软件
  · Ingress-nginx
  · HAproxy
  · Traefik
  · …………
用户的请求,如何进到集群内部的
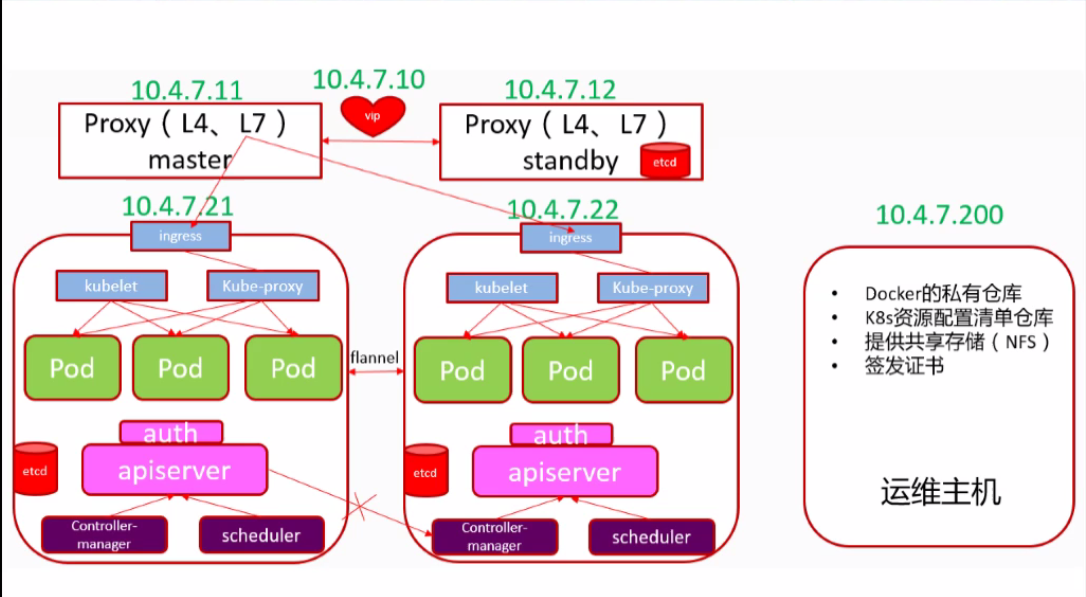
如用户A,请求www.od.com/abc,DNS会把该域名解析到集群的VIP上(图中的10.4.7.10),
由L7层的负载均衡负载到其中一个运算节点的Ingress上,Ingress上会监听一个www.od.com/abc的规则,然后找到由kube-proxy实现的service,最后找到对应的POD。
2. 部署部署Ingress控制器traefik
GitHub官方地址:https://github.com/traefik/traefik
DockerHub地址:https://hub.docker.com/_/traefik?tab=tags&page=1
操作:hdss7-200.host.com
2.1 准备traefik镜像
[root@hdss7-200.host.com /data/k8s-yaml/coredns]# cd ..
[root@hdss7-200.host.com /data/k8s-yaml]# mkdir traefik
[root@hdss7-200.host.com /data/k8s-yaml]# cd traefik
[root@hdss7-200.host.com /data/k8s-yaml/traefik]#
[root@hdss7-200.host.com /data/k8s-yaml/traefik]# docker pull traefik:v1.7.2-alpine
[root@hdss7-200.host.com /data/k8s-yaml/traefik]# docker images | grep traefik
traefik                         v1.7.2-alpine              add5fac61ae5        2 years ago         72.4MB
[root@hdss7-200.host.com /data/k8s-yaml/traefik]# docker tag add5fac61ae5 harbor.od.com/public/traefik:v1.7.2
[root@hdss7-200.host.com /data/k8s-yaml/traefik]# docker push harbor.od.com/public/traefik:v1.7.2
2.2 准备资源配置清单
资源配置清单来源
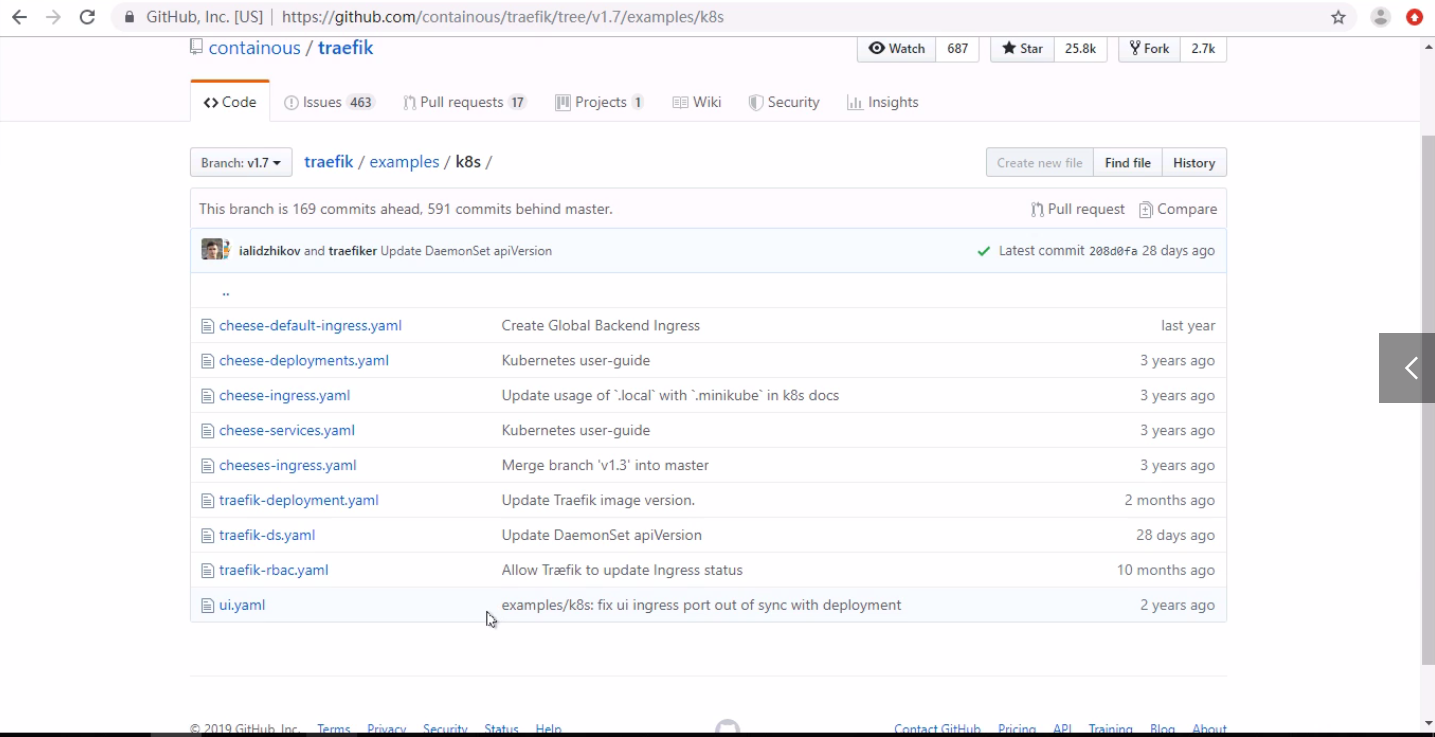
[root@hdss7-200.host.com /data/k8s-yaml/traefik]# cat rbac.yaml
apiVersion: v1
kind: ServiceAccount  # 声明一个服务账户
metadata:
  name: traefik-ingress-controller # 服务账户名为traefik-ingress-controller
  namespace: kube-system  # 属于kube-system命名空间
---
apiVersion: rbac.authorization.k8s.io/v1beta1
kind: ClusterRole  # 声明一个集群角色
metadata:
  name: traefik-ingress-controller  # 集群角色名为traefik-ingress-controller
rules:  # 规则定义段
  - apiGroups:  # api组
      - ""
    resources:  # 资源类型
      - services
      - endpoints
      - secrets
    verbs:  # 具体的权限定义
      - get
      - list
      - watch
  - apiGroups:
      - extensions
    resources:
      - ingresses
    verbs:
      - get
      - list
      - watch
---
kind: ClusterRoleBinding  # 集群角色绑定(把上面的服务账户和集群角色关联起来)
apiVersion: rbac.authorization.k8s.io/v1beta1
metadata:
  name: traefik-ingress-controller
roleRef:
  apiGroup: rbac.authorization.k8s.io
  kind: ClusterRole  # 参考的集群角色
  name: traefik-ingress-controller  # 参考的角色名
subjects:  # 定义上面绑定的集群角色,让那个账户使用
- kind: ServiceAccount  # 类型 服务账户
  name: traefik-ingress-controller  # 账户名
  namespace: kube-system  # 所在命名空间

[root@hdss7-200.host.com /data/k8s-yaml/traefik]# vi ds.yaml
apiVersion: extensions/v1beta1
kind: DaemonSet
metadata:
  name: traefik-ingress
  namespace: kube-system
  labels:
    k8s-app: traefik-ingress
spec:
  template:
    metadata:
      labels:
        k8s-app: traefik-ingress
        name: traefik-ingress
    spec:
      serviceAccountName: traefik-ingress-controller
      terminationGracePeriodSeconds: 60
      containers:
      - image: harbor.od.com/public/traefik:v1.7.2
        name: traefik-ingress
        ports:
        - name: controller
          containerPort: 80
          hostPort: 81
        - name: admin-web
          containerPort: 8080
        securityContext:
          capabilities:
            drop:
            - ALL
            add:
            - NET_BIND_SERVICE
        args:
        - --api
        - --kubernetes
        - --logLevel=INFO
        - --insecureskipverify=true
        - --kubernetes.endpoint=https://10.4.7.10:7443
        - --accesslog
        - --accesslog.filepath=/var/log/traefik_access.log
        - --traefiklog
        - --traefiklog.filepath=/var/log/traefik.log
        - --metrics.prometheus

[root@hdss7-200.host.com /data/k8s-yaml/traefik]# vi svc.yaml
kind: Service
apiVersion: v1
metadata:
  name: traefik-ingress-service
  namespace: kube-system
spec:
  selector:
    k8s-app: traefik-ingress
  ports:
    - protocol: TCP
      port: 80
      name: controller
    - protocol: TCP
      port: 8080
      name: admin-web

[root@hdss7-200.host.com /data/k8s-yaml/traefik]# vi ingress.yaml
apiVersion: extensions/v1beta1
kind: Ingress
metadata:
  name: traefik-web-ui
  namespace: kube-system
  annotations:
    kubernetes.io/ingress.class: traefik
spec:
  rules:
  - host: traefik.od.com
    http:
      paths:
      - path: /
        backend:
          serviceName: traefik-ingress-service
          servicePort: 8080
2.3 应用资源配置清单
任意选择一个运算节点
[root@hdss7-22.host.com ~]# kubectl apply -f http://k8s-yaml.od.com/traefik/rbac.yaml
serviceaccount/traefik-ingress-controller created
clusterrole.rbac.authorization.k8s.io/traefik-ingress-controller created
clusterrolebinding.rbac.authorization.k8s.io/traefik-ingress-controller created

[root@hdss7-22.host.com ~]# kubectl apply -f http://k8s-yaml.od.com/traefik/ds.yaml
daemonset.extensions/traefik-ingress created

[root@hdss7-22.host.com ~]# kubectl apply -f http://k8s-yaml.od.com/traefik/svc.yaml
service/traefik-ingress-service created

[root@hdss7-22.host.com ~]# kubectl apply -f http://k8s-yaml.od.com/traefik/ingress.yaml
ingress.extensions/traefik-web-ui created
2.4 检查
[root@hdss7-22.host.com ~]# kubectl get po -n kube-system  # 如果这里报错防火墙有问题,则重启kubelet和docker
NAME                       READY   STATUS    RESTARTS   AGE
coredns-6b6c4f9648-nqgxr   1/1     Running   0          3h48m
traefik-ingress-7h5lj      1/1     Running   0          17s
traefik-ingress-dbt6k      1/1     Running   0          17s

[root@hdss7-22.host.com ~]# netstat -lntup | grep 81
tcp6       0      0 :::81                   :::*                    LISTEN      81174/docker-proxy   # 这里的运算节点监听了一个81端口,所有的7层流量(http),都是要通过81端口进入,居然通过ingress规则分配流量(找到对应的service)
2.5 配置反代
hdss7-11.host.com和hdss7-12.host.com都要配置,以为VIP是在这个两个节点之间切换的
[root@hdss7-11.host.com ~]# vi /etc/nginx/conf.d/od.com.conf
upstream default_backend_traefik {
    server 10.4.7.21:81    max_fails=3 fail_timeout=10s;
    server 10.4.7.22:81    max_fails=3 fail_timeout=10s;
}
server {
    server_name *.od.com;  # 只要是od.com业务域的请求,都会丢给upstream里的节点代理

    location / {
        proxy_pass http://default_backend_traefik;
        proxy_set_header Host       $http_host;
        proxy_set_header x-forwarded-for $proxy_add_x_forwarded_for;
    }
}
[root@hdss7-11.host.com ~]# nginx -t
nginx: the configuration file /etc/nginx/nginx.conf syntax is ok
nginx: configuration file /etc/nginx/nginx.conf test is successful
[root@hdss7-11.host.com ~]# nginx -s reload


[root@hdss7-12.host.com ~]# cat /etc/nginx/conf.d/od.com.conf
upstream default_backend_traefik {
    server 10.4.7.21:81    max_fails=3 fail_timeout=10s;
    server 10.4.7.22:81    max_fails=3 fail_timeout=10s;
}
server {
    server_name *.od.com;

    location / {
        proxy_pass http://default_backend_traefik;
        proxy_set_header Host       $http_host;
        proxy_set_header x-forwarded-for $proxy_add_x_forwarded_for;
    }
}
[root@hdss7-12.host.com ~]# nginx -t
nginx: the configuration file /etc/nginx/nginx.conf syntax is ok
nginx: configuration file /etc/nginx/nginx.conf test is successful
[root@hdss7-12.host.com ~]# nginx -s reload
2.6 解析域名
操作:hdss7-11.host.com
[root@hdss7-11.host.com ~]# vi /var/named/od.com.zone
$ORIGIN od.com.
$TTL 600	; 10 minutes
@   		IN SOA	dns.od.com. dnsadmin.od.com. (
				2020102804 ; serial  # 序列号前滚,原来的803改成804
				10800      ; refresh (3 hours)
				900        ; retry (15 minutes)
				604800     ; expire (1 week)
				86400      ; minimum (1 day)
				)
				NS   dns.od.com.
$TTL 60	; 1 minute
dns                A    10.4.7.11
harbor             A    10.4.7.200
k8s-yaml           A    10.4.7.200
traefik            A    10.4.7.10  # 新添加的A记录

[root@hdss7-11.host.com ~]# systemctl restart named
2.7 浏览器访问
traefik.od.com
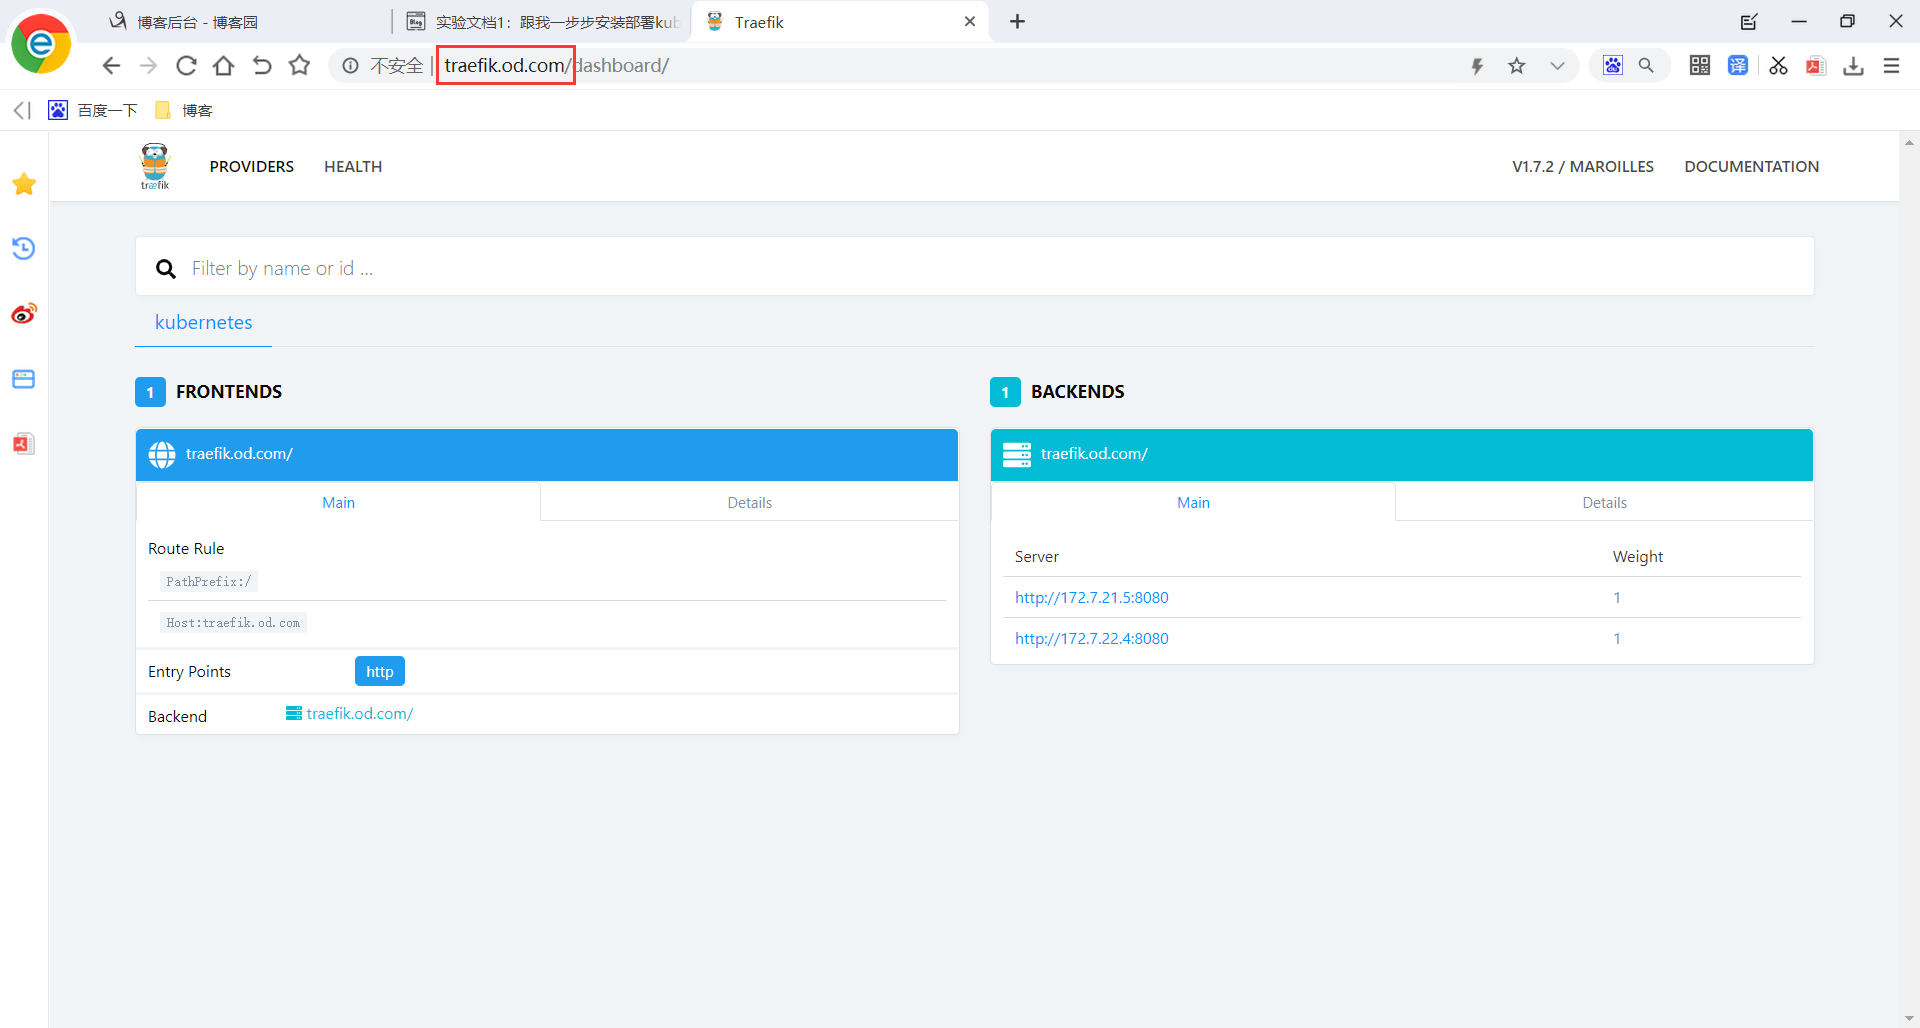
这里是如何成功访问到traefik.od.com的?(用户请求访问集群内pod流程)
用户访问traefik.od.com,由bindDNS解析到集群VIP10.4.7.10,由master节点上L7配置的nginx规则(od.com.conf),其中配置了把所有*.od.com的请求,全部丢给Ingrees。
Ingress由于定义了一个Ingress.yaml资源配置清单,其中有一个段配置了host的名字,名为traefik.od.com,还有一个path规则,- path / 等于nginx配置文件中的 localtaion /,也就是所有的请求,都会到一个名叫traefik-ingress-service的service上,然后service通过文件中指定的selector,最终会找到traefik-ingress这个pod。

但是这里要注意:由于此处使用的ingress是简化版的,无法做一些复杂的操作,如地址重写rewrite,如有复杂操作需求,需到L7的proxy上配置nginx配置文件。
部署部署Dashboard
1. 准备dashboard镜像
操作:hdss7-200.host.com
GitHub官方地址:https://github.com/kubernetes/dashboard/releases
[root@hdss7-200.host.com ~]# cd /data/k8s-yaml/
[root@hdss7-200.host.com /data/k8s-yaml]# docker pull k8scn/kubernetes-dashboard-amd64:v1.8.3
[root@hdss7-200.host.com /data/k8s-yaml]# docker images |grep dashb
k8scn/kubernetes-dashboard-amd64   v1.8.3                     fcac9aa03fd6        2 years ago         102MB
[root@hdss7-200.host.com /data/k8s-yaml]# docker tag fcac9aa03fd6 harbor.od.com/public/dashboard:v1.8.3
[root@hdss7-200.host.com /data/k8s-yaml]# docker push harbor.od.com/public/dashboard:v1.8.3
2. 准备资源配置清单
来源:https://github.com/kubernetes/kubernetes/tree/v1.18.3/cluster/addons/dashboard
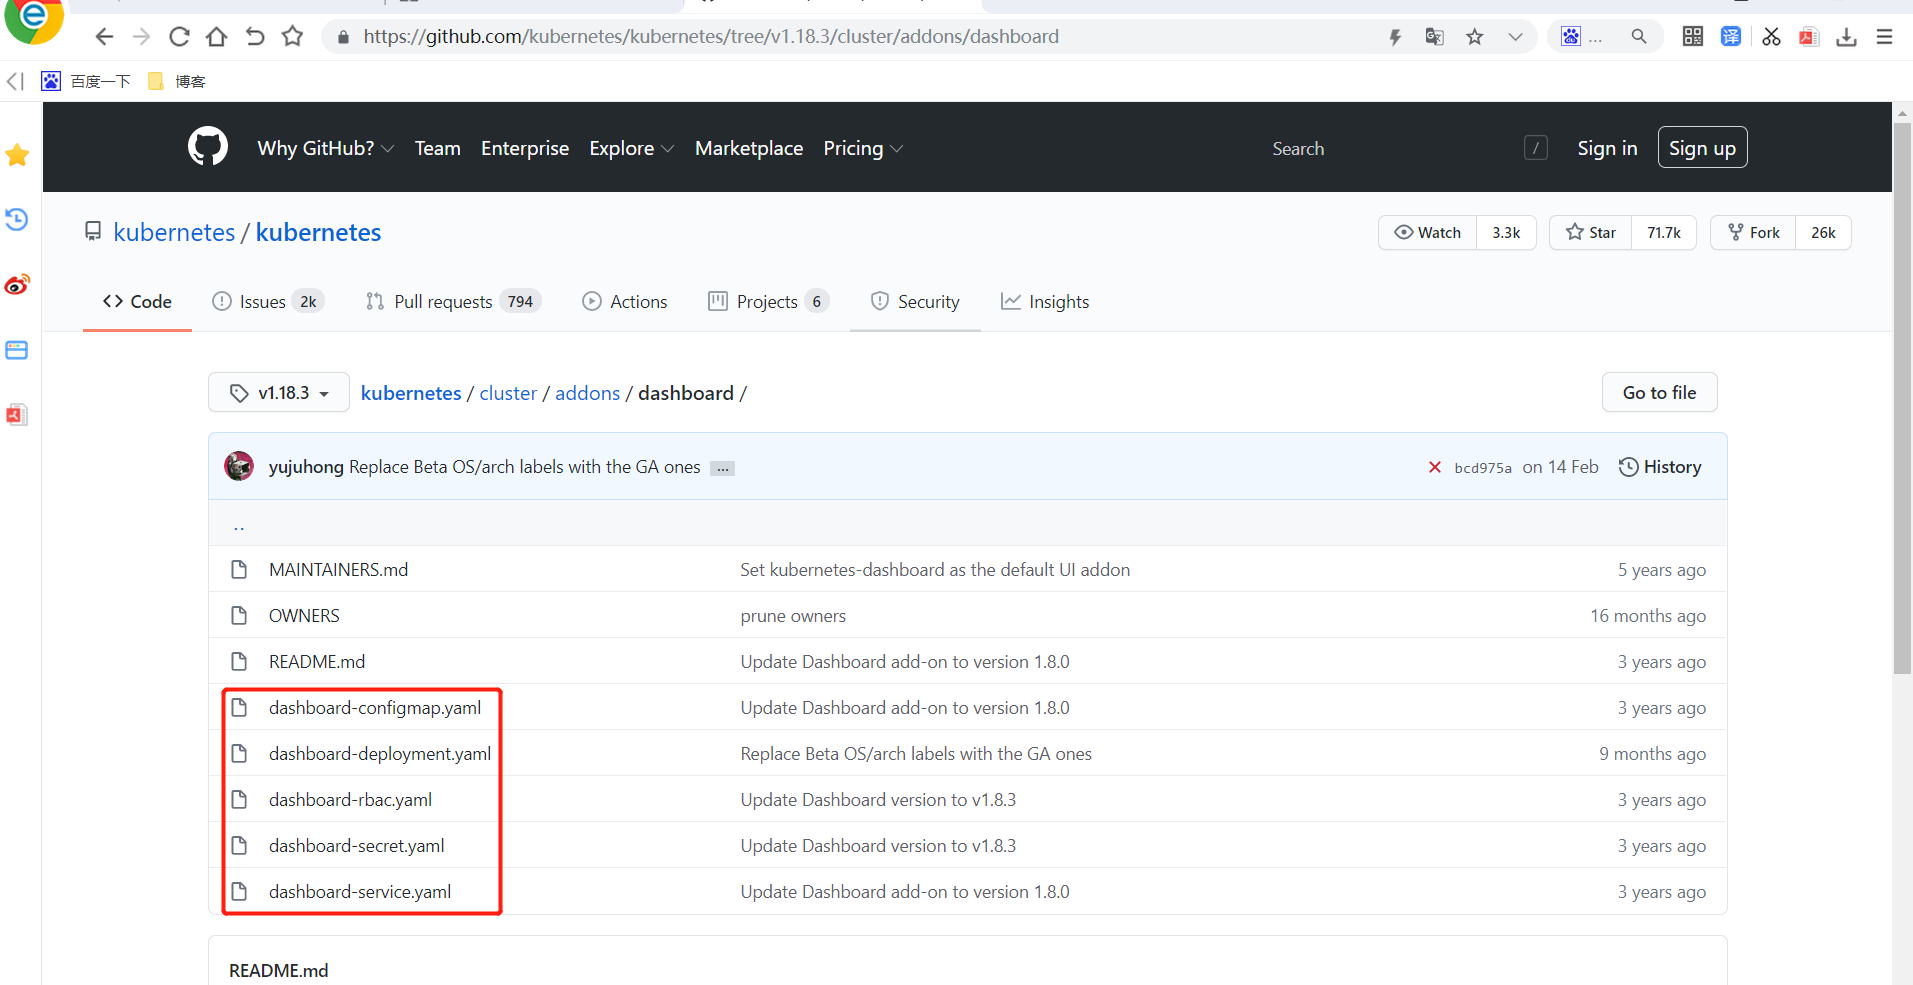
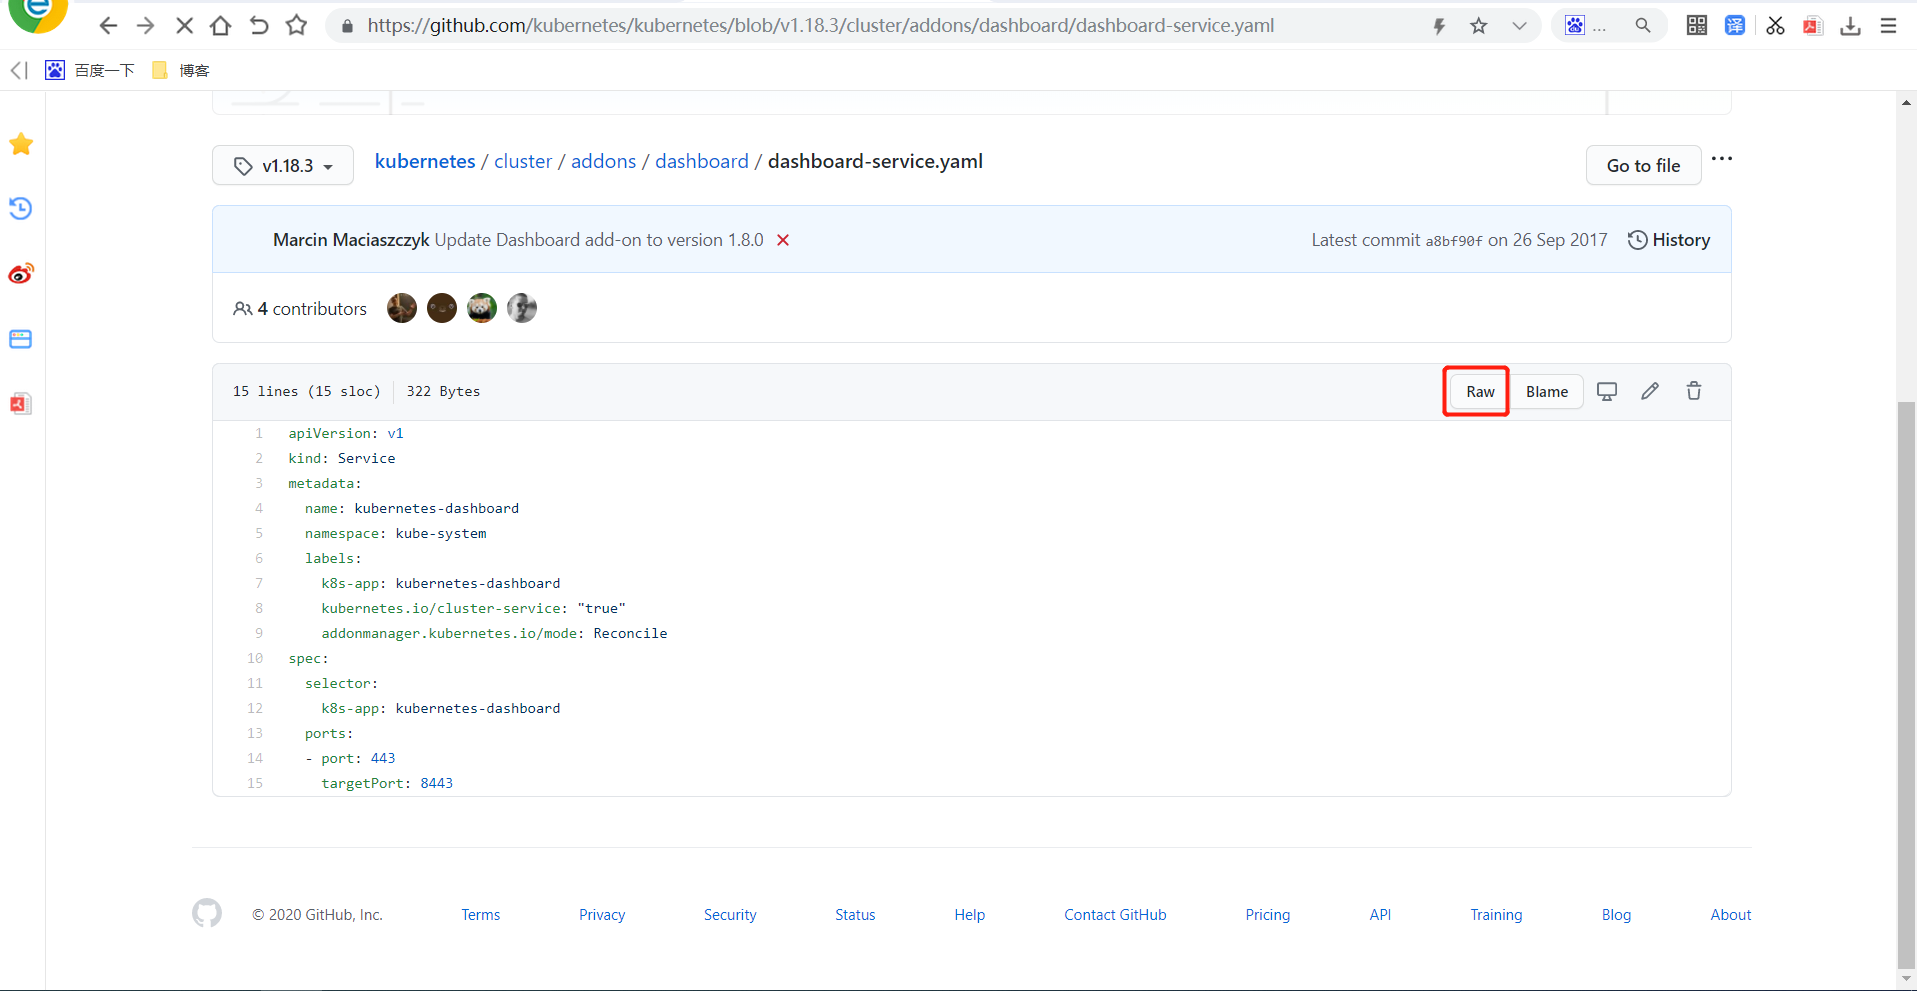
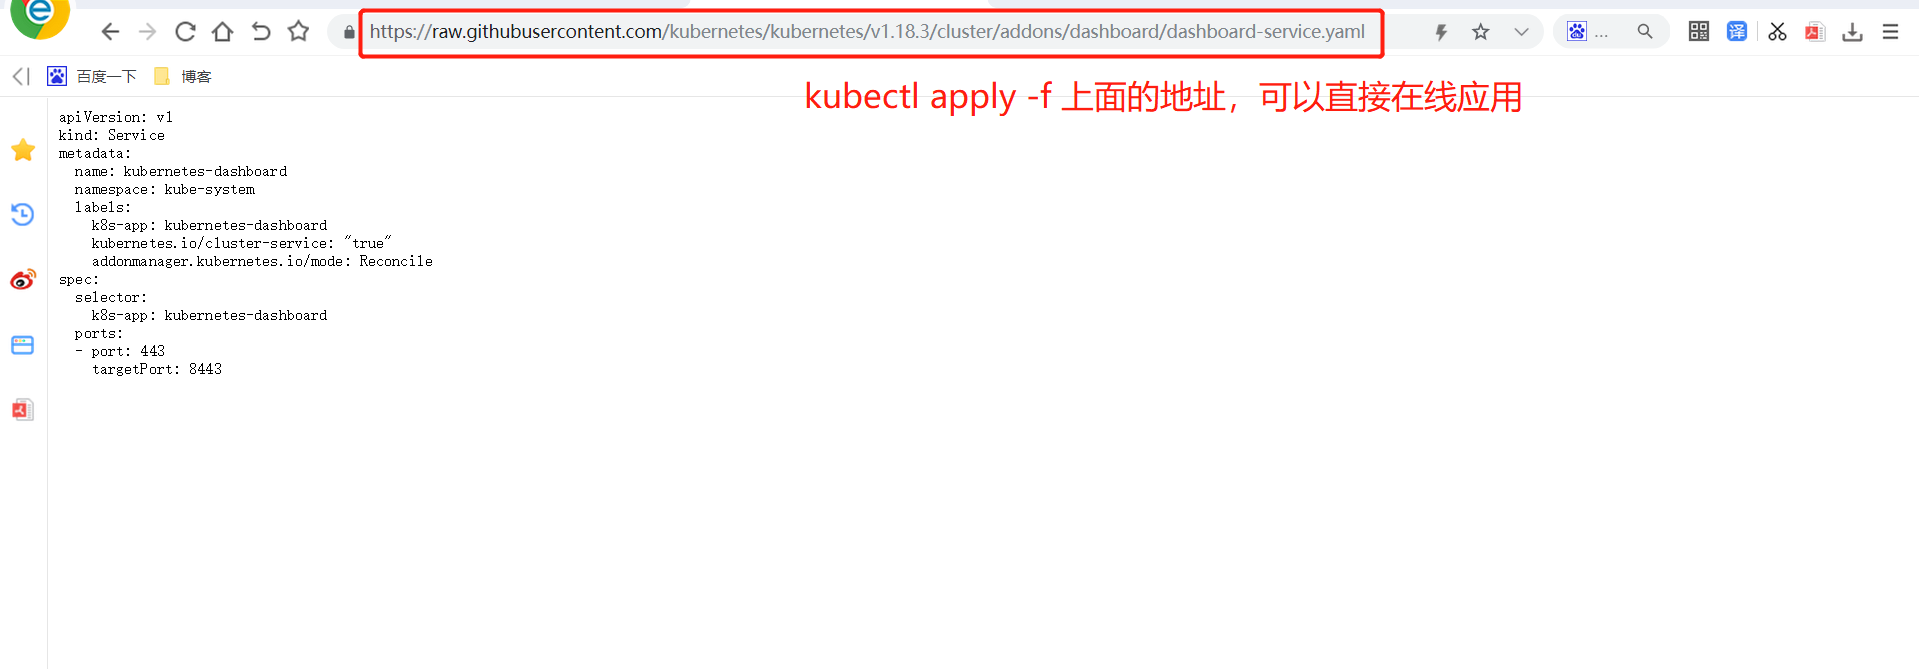
[root@hdss7-200.host.com /data/k8s-yaml]# mkdir dashboard
[root@hdss7-200.host.com /data/k8s-yaml]# cd dashboard
[root@hdss7-200.host.com /data/k8s-yaml/dashboard]# vi rbac.yaml
apiVersion: v1
kind: ServiceAccount  # 声明一个服务账户
metadata:
  labels:
    k8s-app: kubernetes-dashboard
    addonmanager.kubernetes.io/mode: Reconcile
  name: kubernetes-dashboard-admin  # 服务账户的名称为kubernetes-dashboard
  namespace: kube-system  # 名称空间为kube-system
---
apiVersion: rbac.authorization.k8s.io/v1
kind: ClusterRoleBinding  # 绑定集群角色
metadata:
  name: kubernetes-dashboard-admin  # 绑定集群角色资源的名称
  namespace: kube-system
  labels:
    k8s-app: kubernetes-dashboard
    addonmanager.kubernetes.io/mode: Reconcile
roleRef:  # 参考的角色
  apiGroup: rbac.authorization.k8s.io
  kind: ClusterRole  # 参考默认集群角色,查看默认角色可使用kubectl get clusterrole,然后使用kubectl get clusterrole cluster-admin -o yaml可以查看角色权限
  name: cluster-admin  # cluster-admin,k8s中默认的集群管理员
subjects:
- kind: ServiceAccount
  name: kubernetes-dashboard-admin
  namespace: kube-system

[root@hdss7-200.host.com /data/k8s-yaml/dashboard]# vi dp.yaml
apiVersion: apps/v1
kind: Deployment
metadata:
  name: kubernetes-dashboard
  namespace: kube-system
  labels:
    k8s-app: kubernetes-dashboard
    kubernetes.io/cluster-service: "true"
    addonmanager.kubernetes.io/mode: Reconcile
spec:  # sepc,定义pod控制器的属性
  selector:  # 标签选择器
    matchLabels:
      k8s-app: kubernetes-dashboard
  template:  # pod模板
    metadata:
      labels:
        k8s-app: kubernetes-dashboard
      annotations:
        scheduler.alpha.kubernetes.io/critical-pod: ''
    spec:
      priorityClassName: system-cluster-critical
      containers:
      - name: kubernetes-dashboard
        image: harbor.od.com/public/dashboard:v1.8.3
        resources:
          limits:   # 容器最多使用的资源(最多只能使用CPU100M和300M的内存)
            cpu: 100m
            memory: 300Mi
          requests:  # 容器启动后,最小使用资源(就是一启动,马上吃掉cpu50和100M的内存)
            cpu: 50m
            memory: 100Mi
        ports:
        - containerPort: 8443
          protocol: TCP
        args:
          # PLATFORM-SPECIFIC ARGS HERE
          - --auto-generate-certificates
        volumeMounts:
        - name: tmp-volume
          mountPath: /tmp
        livenessProbe:  # 容器存活性探针
          httpGet:
            scheme: HTTPS
            path: /
            port: 8443  # 探测https协议的8443端口,端口存在即判定存活
          initialDelaySeconds: 30
          timeoutSeconds: 30
      volumes:
      - name: tmp-volume
        emptyDir: {}
      serviceAccountName: kubernetes-dashboard-admin
      tolerations:
      - key: "CriticalAddonsOnly"
        operator: "Exists"

[root@hdss7-200.host.com /data/k8s-yaml/dashboard]# vi svc.yaml
apiVersion: v1
kind: Service
metadata:
  name: kubernetes-dashboard
  namespace: kube-system
  labels:
    k8s-app: kubernetes-dashboard
    kubernetes.io/cluster-service: "true"
    addonmanager.kubernetes.io/mode: Reconcile
spec:
  selector:
    k8s-app: kubernetes-dashboard
  ports:
  - port: 443
    targetPort: 8443

[root@hdss7-200.host.com /data/k8s-yaml/dashboard]# vi ingress.yaml
apiVersion: extensions/v1beta1
kind: Ingress
metadata:
  name: kubernetes-dashboard
  namespace: kube-system
  annotations:
    kubernetes.io/ingress.class: traefik
spec:
  rules:
  - host: dashboard.od.com
    http:
      paths:
      - backend:
          serviceName: kubernetes-dashboard
          servicePort: 443
3. 应用资源配置清单
任选一个运算节点
[root@hdss7-22.host.com ~]# kubectl apply -f http://k8s-yaml.od.com/dashboard/rbac.yaml
serviceaccount/kubernetes-dashboard-admin created
clusterrolebinding.rbac.authorization.k8s.io/kubernetes-dashboard-admin created
[root@hdss7-22.host.com ~]# kubectl apply -f http://k8s-yaml.od.com/dashboard/dp.yaml
deployment.apps/kubernetes-dashboard created
[root@hdss7-22.host.com ~]# kubectl apply -f http://k8s-yaml.od.com/dashboard/svc.yaml
service/kubernetes-dashboard created
[root@hdss7-22.host.com ~]# kubectl apply -f http://k8s-yaml.od.com/dashboard/ingress.yaml
ingress.extensions/kubernetes-dashboard created

[root@hdss7-22.host.com ~]# kubectl get po -n kube-system|grep dashboard
kubernetes-dashboard-76dcdb4677-gb46l   1/1     Running   0          9m49s

[root@hdss7-22.host.com ~]# kubectl get svc -n kube-system|grep dashboard
kubernetes-dashboard      ClusterIP   192.168.72.86   <none>        443/TCP                  9m7s

[root@hdss7-22.host.com ~]# kubectl get ingress -n kube-system|grep dashboard
kubernetes-dashboard   dashboard.od.com             80      9m
4. 配置域名解析
操作:hdss7-11.host.com
[root@hdss7-11.host.com ~]# vi /var/named/od.com.zone
$ORIGIN od.com.
$TTL 600	; 10 minutes
@   		IN SOA	dns.od.com. dnsadmin.od.com. (
				2020102805 ; serial  #序列号前滚,04改成05
				10800      ; refresh (3 hours)
				900        ; retry (15 minutes)
				604800     ; expire (1 week)
				86400      ; minimum (1 day)
				)
				NS   dns.od.com.
$TTL 60	; 1 minute
dns                A    10.4.7.11
harbor             A    10.4.7.200
k8s-yaml           A    10.4.7.200
traefik            A    10.4.7.10
dashboard          A    10.4.7.10  # 添加域名解析

[root@hdss7-11.host.com ~]# systemctl restart named
[root@hdss7-11.host.com ~]# dig -t A dashboard.od.com @10.4.7.11 +short
10.4.7.10
5. 浏览器访问

6. K8S的RBAC鉴权
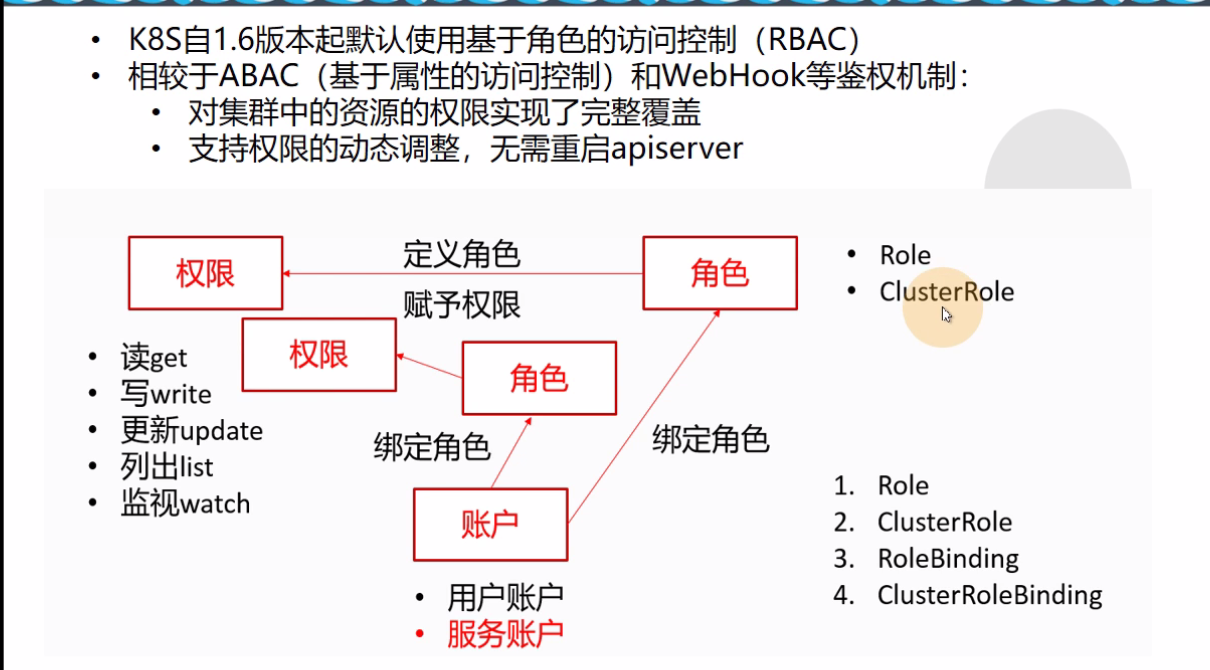
在RBAC中有以下几种概念需要理解:
(1)账户:在K8S中有以下两种账户
     用户账户(useraccount,简称ua)
     服务账户(serviceaccount,简称sa)
在搭建集群的时候,使用的kubelet.kubeconfig文件,就是一个用户账户文件。
在k8s中,所有的pod都必须有一个服务账户,如果没有指定,就会使用k8s默认的账户default。
每一个服务账户都会有一个唯一的secret,该sercret对应的权限,来自于账户绑定的集群角色所拥有的权限,如果是cluster-admin,那么输入这个sercet对应的token登录dashborad,就会拥有集群管理员的权限。

(2)角色
在k8s基于角色的访问控制机制下,无法直接对账户直接授予权限,只能先对用户账户或服务账户绑定一个角色,再对角色进行授权。
在k8s中有两种类型的角色:
     Role(普通角色,指定应用于某一个特定的名称空间下。如把该角色分配给a命名空间,那么该角色就只对a命名空间有效。)
     ClusterRole(集群角色,对整个集群有效。)
那么在k8s中,就有两种绑定角色的操作(把账户绑定成角色)。
分别是RoleBinding和ClusterRoleBinding

(3)权限
绑定角色后,顺便分配权限,常见权限以下几种:
  读(get)
  写(write)
  更新(update)
  列出(list)
  监视(watch)
  ………………等等

总结:交付到k8s集群中的使用服务账户,集群外的用用户账户。
7. K8S仪表盘鉴权方式详解
7.1 配置证书
操作:hdss7-200.host.com
# openssl类型
 # 创建dashboard网站私钥
[root@hdss7-200.host.com ~]# cd /opt/certs/
[root@hdss7-200.host.com /opt/certs]# (umask 077; openssl genrsa -out dashboard.od.com.key 2048)
Generating RSA private key, 2048 bit long modulus
..............................+++
.....................................................................................+++
e is 65537 (0x10001)

# 创建签发证书请求文件
[root@hdss7-200.host.com /opt/certs]# openssl req -new -key dashboard.od.com.key -out dashboard.od.com.csr -subj "/CN=dashboard.od.com/C=CN/ST=BJ/L=Beijing/O=OldboyEdu/OU=ops"

[root@hdss7-200.host.com /opt/certs]# ll |grep dash
-rw-r--r-- 1 root root 1005 Nov 18 17:04 dashboard.od.com.csr
-rw------- 1 root root 1675 Nov 18 15:43 dashboard.od.com.key

# 签发证书
[root@hdss7-200.host.com /opt/certs]# openssl x509 -req -in dashboard.od.com.csr -CA ca.pem -CAkey ca-key.pem -CAcreateserial -out dashboard.od.com.crt -days 3650
Signature ok
subject=/CN=dashboard.od.com/C=CN/ST=BJ/L=Beijing/O=OldboyEdu/OU=ops
Getting CA Private Key

[root@hdss7-200.host.com /opt/certs]# ll |grep dash
-rw-r--r-- 1 root root 1196 Nov 18 17:07 dashboard.od.com.crt
-rw-r--r-- 1 root root 1005 Nov 18 17:04 dashboard.od.com.csr
-rw------- 1 root root 1675 Nov 18 15:43 dashboard.od.com.key
7.2 修改nginx配置文件,使用https访问
在有VIP的那台节点上操作
[root@hdss7-12.host.com /etc/nginx/conf.d]# ip a|grep 7.10
    inet 10.4.7.10/32 scope global eth0
[root@hdss7-12.host.com ~]# cd /etc/nginx/
[root@hdss7-12.host.com /etc/nginx]# mkdir certs
[root@hdss7-12.host.com /etc/nginx]# cd certs
[root@hdss7-12.host.com /etc/nginx/certs]# scp hdss7-200:/opt/certs/dashboard.od.com.crt .
[root@hdss7-12.host.com /etc/nginx/certs]# scp hdss7-200:/opt/certs/dashboard.od.com.key .
[root@hdss7-12.host.com /etc/nginx/certs]# ll
total 8
-rw-r--r-- 1 root root 1196 Nov 18 17:13 dashboard.od.com.crt
-rw------- 1 root root 1675 Nov 18 17:13 dashboard.od.com.key

[root@hdss7-12.host.com /etc/nginx/certs]# cd ..
[root@hdss7-12.host.com /etc/nginx]# cd conf.d/
[root@hdss7-12.host.com /etc/nginx/conf.d]# vi dashboard.od.com.conf
server {
    listen       80;
    server_name  dashboard.od.com;

    rewrite ^(.*)$ https://${server_name}$1 permanent;
}
server {
    listen       443 ssl;
    server_name  dashboard.od.com;

    ssl_certificate "certs/dashboard.od.com.crt";
    ssl_certificate_key "certs/dashboard.od.com.key";
    ssl_session_cache shared:SSL:1m;
    ssl_session_timeout  10m;
    ssl_ciphers HIGH:!aNULL:!MD5;
    ssl_prefer_server_ciphers on;

    location / {
        proxy_pass http://default_backend_traefik;
	      proxy_set_header Host       $http_host;
        proxy_set_header x-forwarded-for $proxy_add_x_forwarded_for;
    }
}

[root@hdss7-12.host.com /etc/nginx/conf.d]# nginx -t
nginx: the configuration file /etc/nginx/nginx.conf syntax is ok
nginx: configuration file /etc/nginx/nginx.conf test is successful
[root@hdss7-12.host.com /etc/nginx/conf.d]# nginx -s reload
7.3 浏览器访问

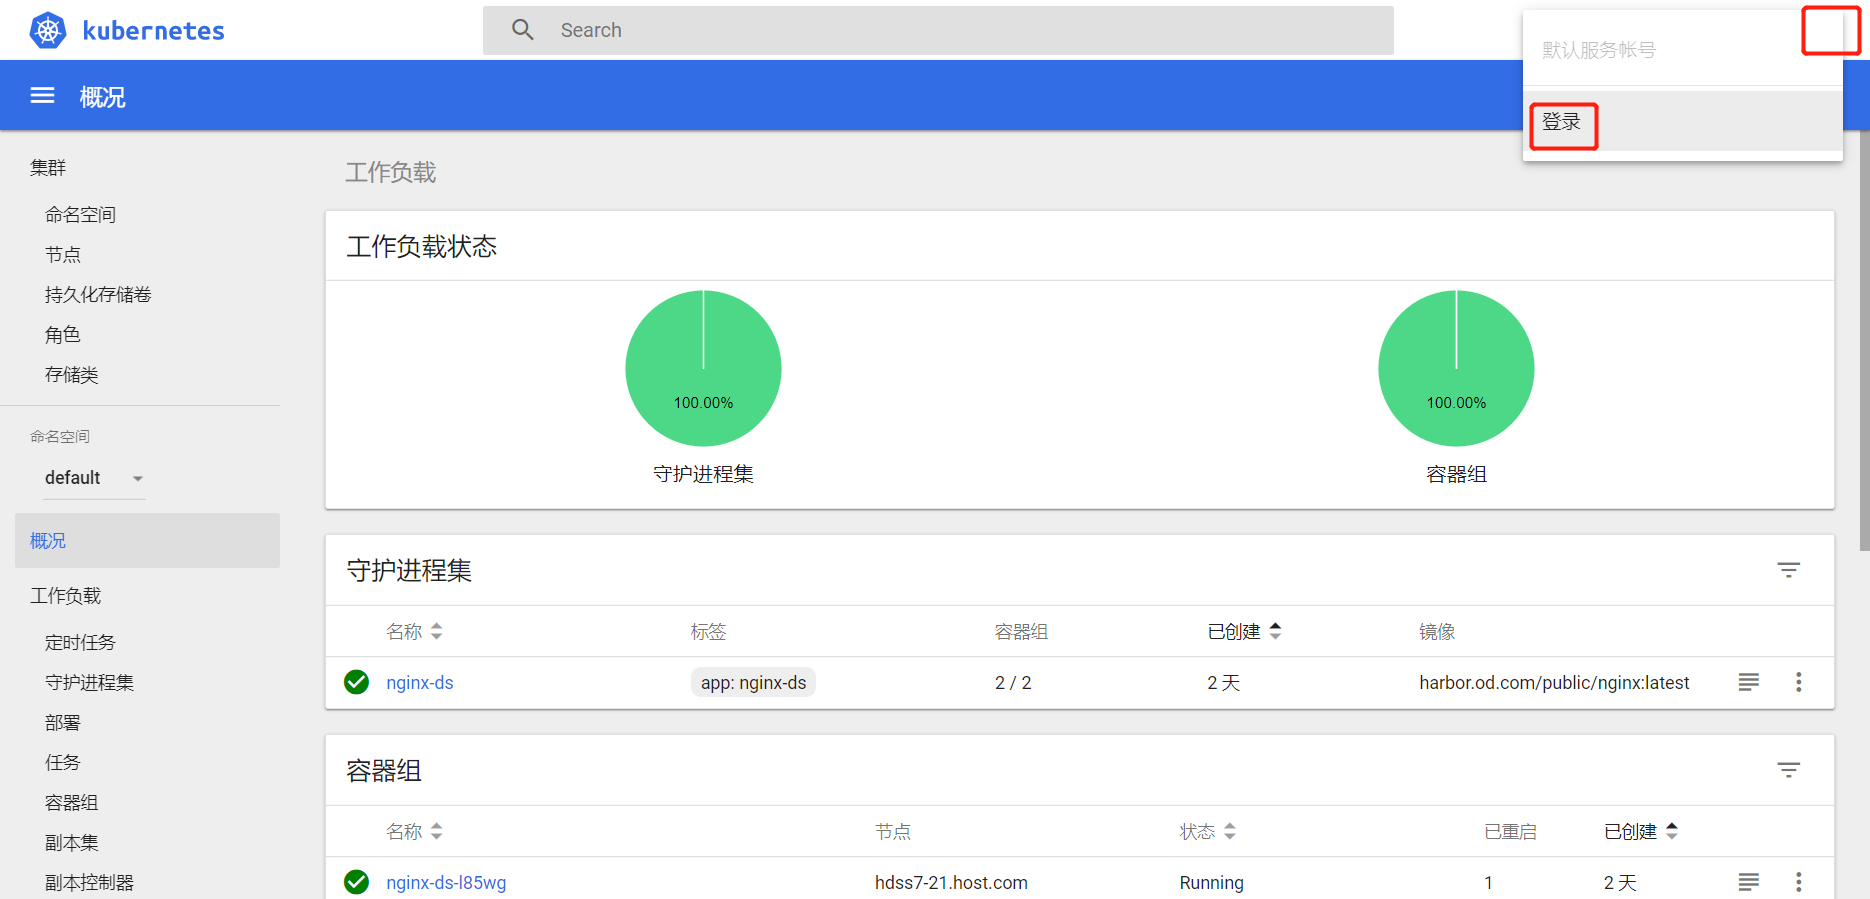
7.4 获取登陆的token
任意运算节点操作
[root@hdss7-21.host.com ~]# kubectl get secret -n kube-system
NAME                                     TYPE                                  DATA   AGE
coredns-token-ng9v4                      kubernetes.io/service-account-token   3      28h
default-token-2rqzv                      kubernetes.io/service-account-token   3      14d
kubernetes-dashboard-admin-token-dwbl2   kubernetes.io/service-account-token   3      7h3m   # token
kubernetes-dashboard-key-holder          Opaque                                2      6h55m
traefik-ingress-controller-token-8vwxr   kubernetes.io/service-account-token   3      24h
[root@hdss7-21.host.com ~]# kubectl describe secret kubernetes-dashboard-admin-token-dwbl2 -n kube-system
Name:         kubernetes-dashboard-admin-token-dwbl2
Namespace:    kube-system
Labels:       <none>
Annotations:  kubernetes.io/service-account.name: kubernetes-dashboard-admin
              kubernetes.io/service-account.uid: aa42522c-9fb4-4c37-a8a8-d5de7dbfa2a3

Type:  kubernetes.io/service-account-token

Data
====
ca.crt:     1346 bytes
namespace:  11 bytes
token:      eyJhbGciOiJSUzI1NiIsImtpZCI6IiJ9.eyJpc3MiOiJrdWJlcm5ldGVzL3NlcnZpY2VhY2NvdW50Iiwia3ViZXJuZXRlcy5pby9zZXJ2aWNlYWNjb3VudC9uYW1lc3BhY2UiOiJrdWJlLXN5c3RlbSIsImt1YmVybmV0ZXMuaW8vc2VydmljZWFjY291bnQvc2VjcmV0Lm5hbWUiOiJrdWJlcm5ldGVzLWRhc2hib2FyZC1hZG1pbi10b2tlbi1kd2JsMiIsImt1YmVybmV0ZXMuaW8vc2VydmljZWFjY291bnQvc2VydmljZS1hY2NvdW50Lm5hbWUiOiJrdWJlcm5ldGVzLWRhc2hib2FyZC1hZG1pbiIsImt1YmVybmV0ZXMuaW8vc2VydmljZWFjY291bnQvc2VydmljZS1hY2NvdW50LnVpZCI6ImFhNDI1MjJjLTlmYjQtNGMzNy1hOGE4LWQ1ZGU3ZGJmYTJhMyIsInN1YiI6InN5c3RlbTpzZXJ2aWNlYWNjb3VudDprdWJlLXN5c3RlbTprdWJlcm5ldGVzLWRhc2hib2FyZC1hZG1pbiJ9.gUgVLLX5wMd87mLo9qfBAWzn0B69j6HkvB3KzHUrASJT3nZie-BcJL8AJhzVOiUjqnNounrpThkXCgIZO3aAHE5E6sOe6tfaJNIwX6LGNj2pkOxaAH0bhhnJ_H6WgSUjk81r28sn8GeLfZbi_WsdhVtsxqxoHBbs_U3lK18cMJGJD9OmxvW4kzvnMeWaBkDC4kMAMnA-2Zzk8Ew82X7KCsngrRlhlVSTh4U-cPM11vpVIPqYSav98Wcoy5Y8kgmMFVpil-PYnczRXKN85m8KkcMKHeZLGixPVoxPV2VuRgSlKvCLul-6VE6LlWTVBl544bs7iMiPJ79iAcFiPZ1tyg  # 复制token:后的字符串

7.5 dashborad 1.8.3 升级到1.10.1
如果上面输入token后,点击登陆有异常,可以选择升级(比原版本高就行)
[root@hdss7-200.host.com ~]# docker pull hexun/kubernetes-dashboard-amd64:v1.10.1
[root@hdss7-200.host.com ~]# docker images |grep dash
hexun/kubernetes-dashboard-amd64        v1.10.1                    f9aed6605b81        23 months ago       122MB
k8scn/kubernetes-dashboard-amd64        v1.8.3                     fcac9aa03fd6        2 years ago         102MB
harbor.od.com/public/dashboard          v1.8.3                     fcac9aa03fd6        2 years ago         102MB
[root@hdss7-200.host.com ~]# docker tag f9aed6605b81 harbor.od.com/public/dashboard:v1.10.1
[root@hdss7-200.host.com ~]# docker push harbor.od.com/public/dashboard:v1.10.1

# 升级,这里有两种方式
(1)选择更改dp.yaml的镜像
[root@hdss7-200.host.com /data/k8s-yaml/dashboard]# cat dp.yaml |grep image
        image: harbor.od.com/public/dashboard:v1.8.3 #把1.8.3改成1.10.1,然后apply -f 应用即可

(2)图形化界面修改(dashborad),如下图
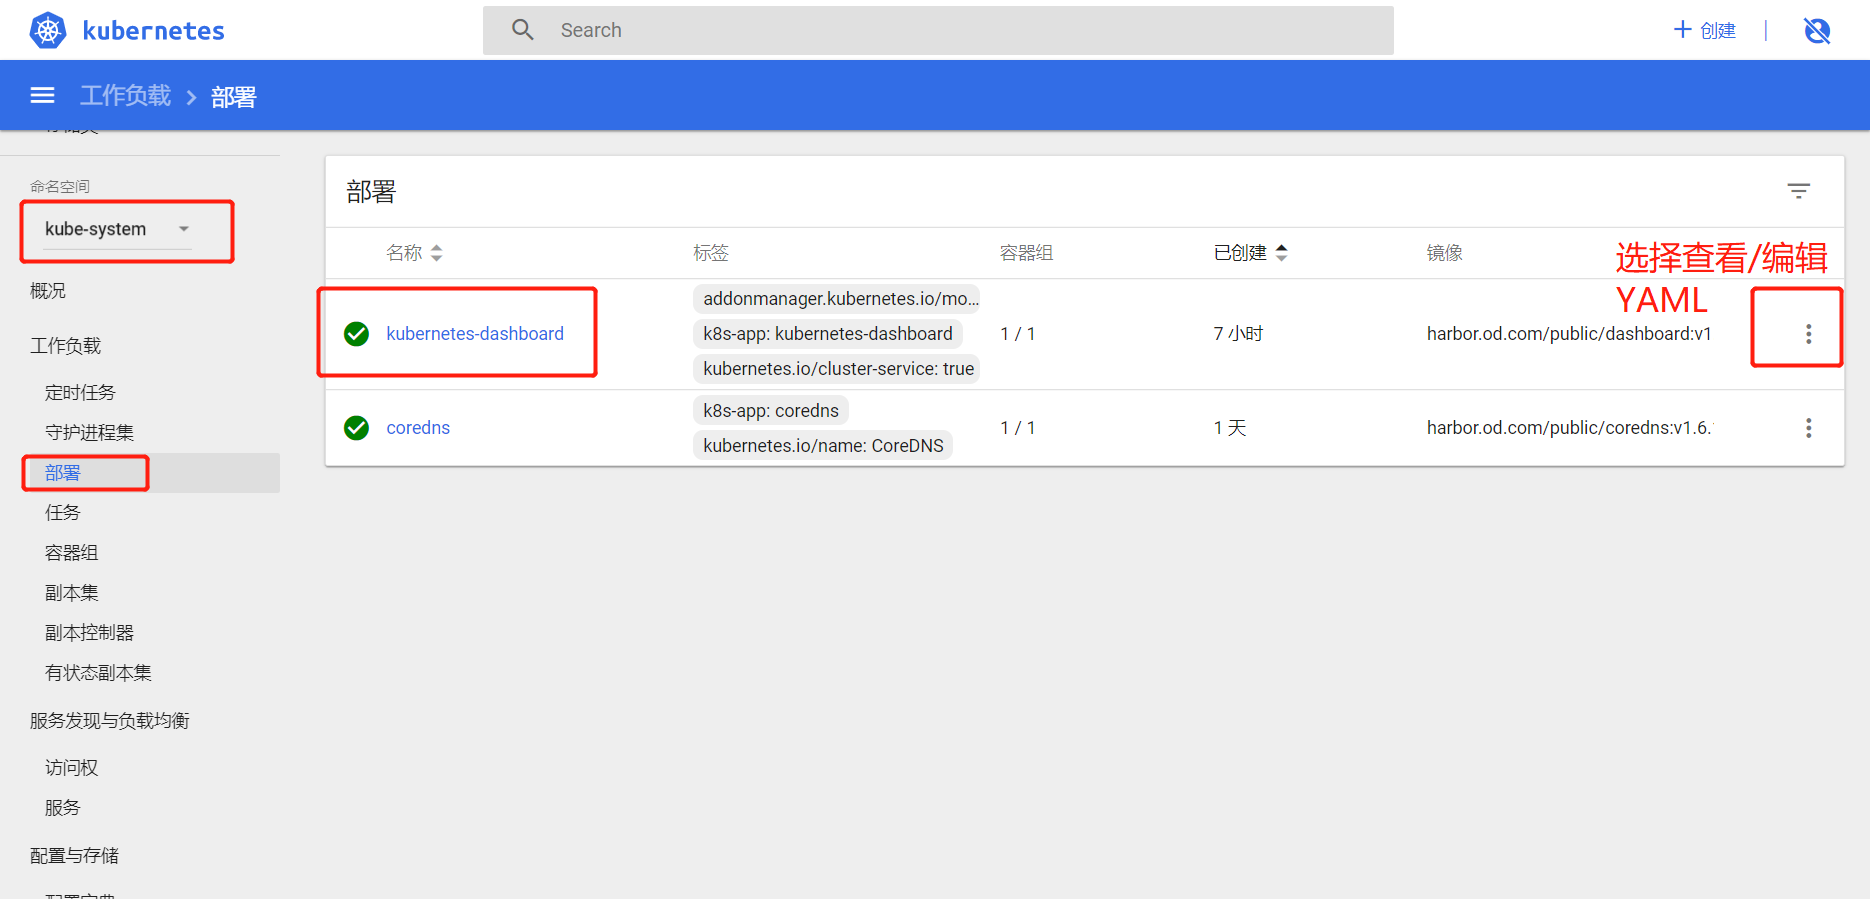
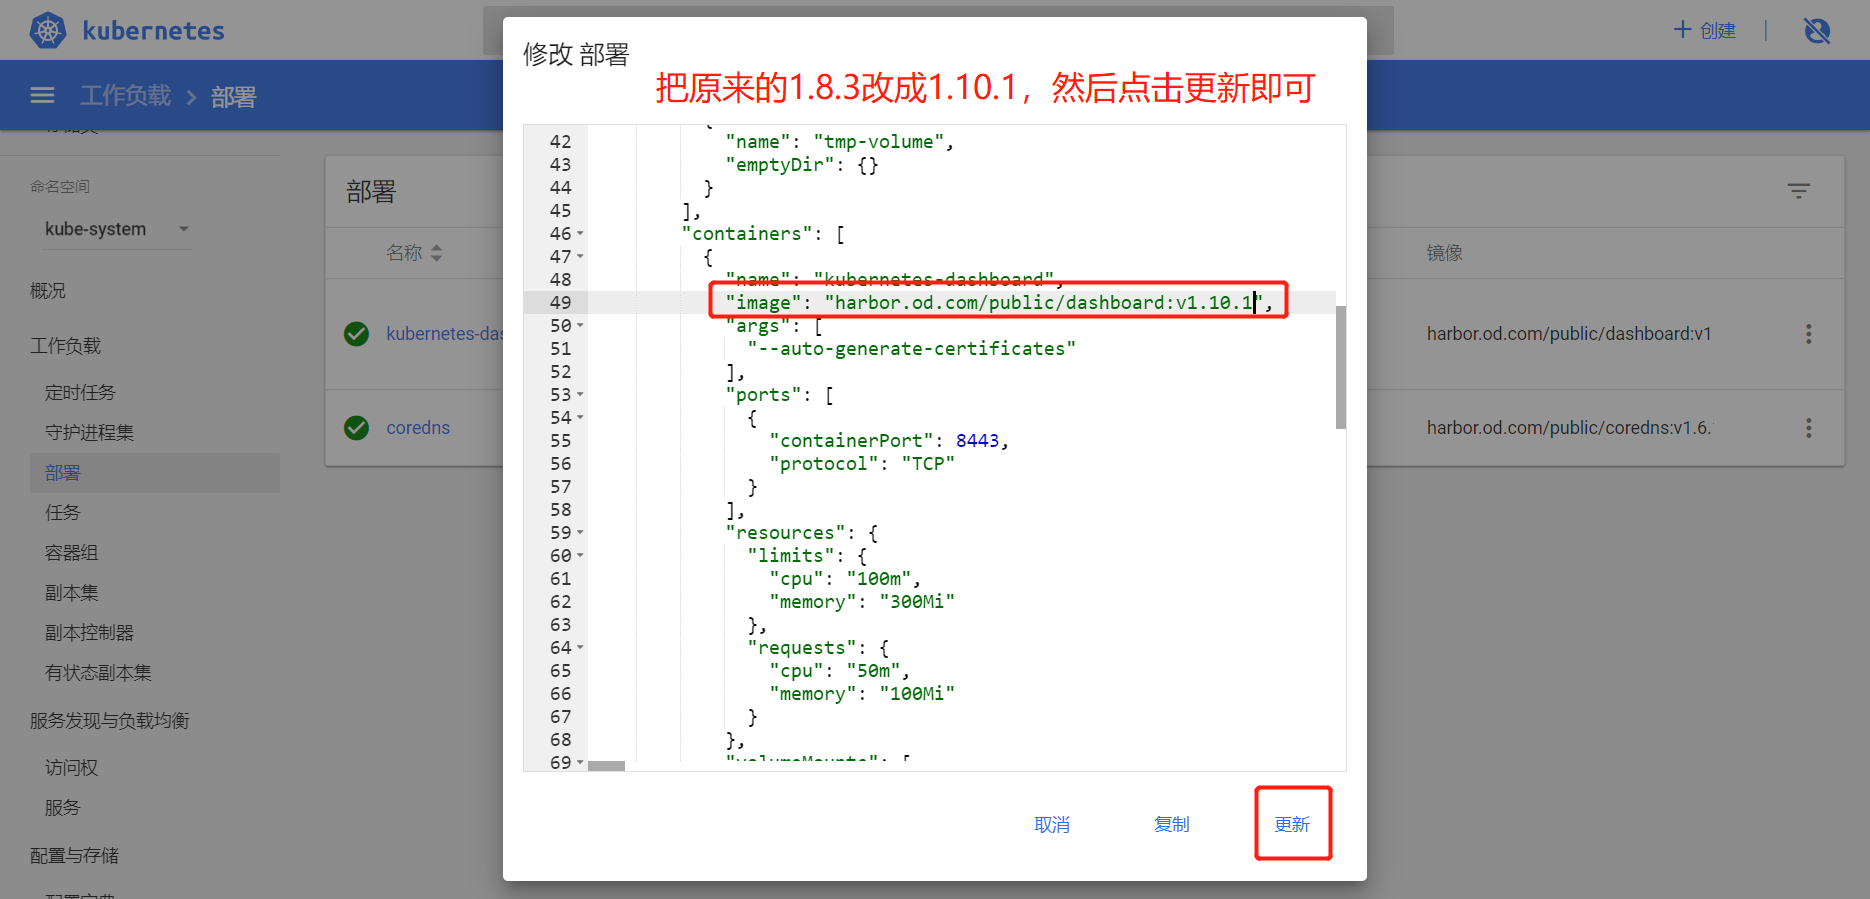

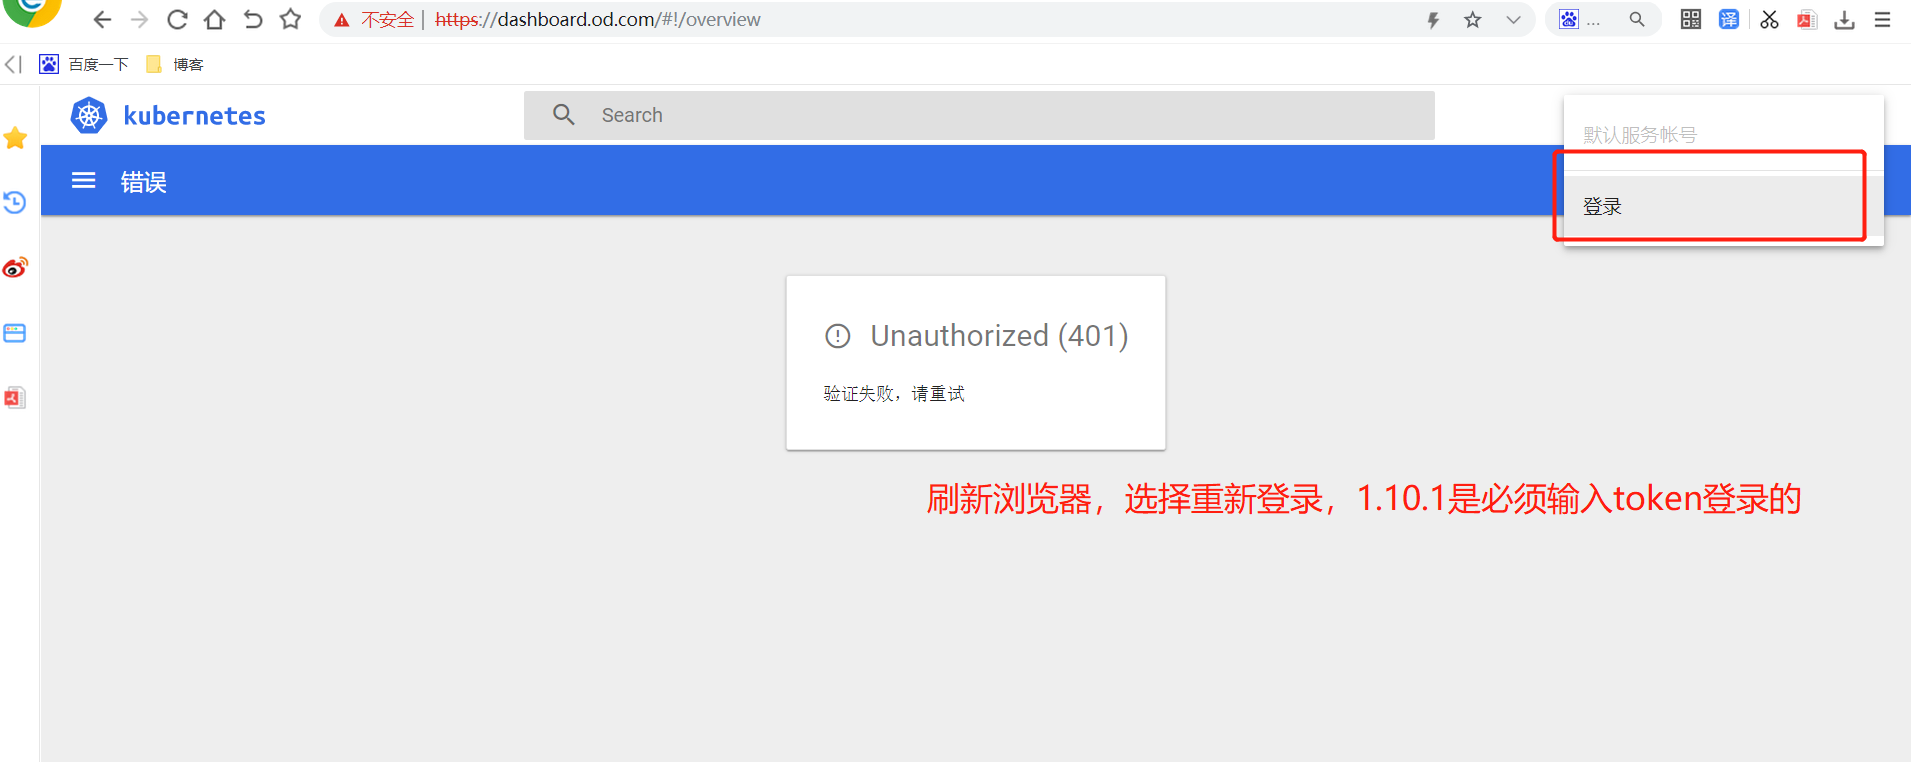
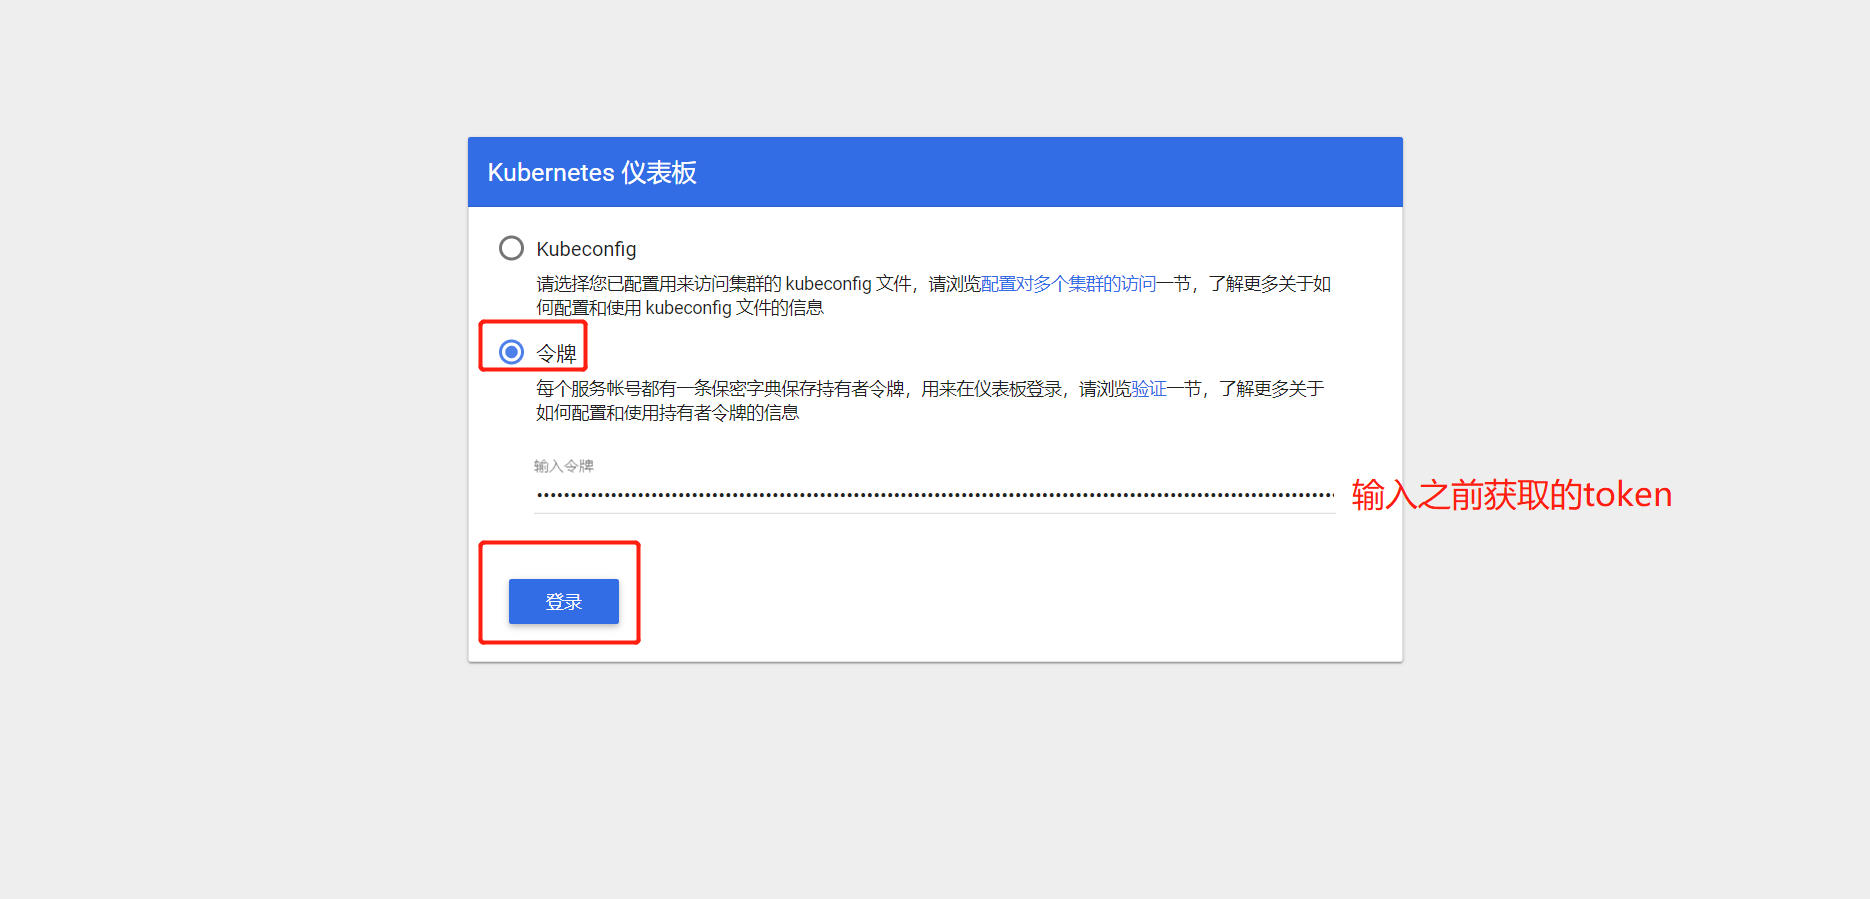
8. 扩展内容:安装heapster插件(dashborad图形化展示集群资源使用情况)
GitHub官方地址:https://github.com/kubernetes-retired/heapster
8.1 下载镜像
[root@hdss7-200.host.com ~]# docker pull quay.io/bitnami/heapster:1.5.4
[root@hdss7-200.host.com ~]# docker images | grep heapster
quay.io/bitnami/heapster                1.5.4                      c359b95ad38b        21 months ago       136MB
[root@hdss7-200.host.com ~]# docker tag c359b95ad38b harbor.od.com/public/heapster:v1.5.4
[root@hdss7-200.host.com ~]# docker push harbor.od.com/public/heapster:v1.5.4
8.2 准备资源配置清单
[root@hdss7-200.host.com ~]# mkdir /data/k8s-yaml/dashboard/heapster
[root@hdss7-200.host.com ~]# cd /data/k8s-yaml/dashboard/heapster
[root@hdss7-200.host.com /data/k8s-yaml/dashboard/heapster]# vi rbac.yaml
apiVersion: v1
kind: ServiceAccount
metadata:
  name: heapster
  namespace: kube-system
---
kind: ClusterRoleBinding
apiVersion: rbac.authorization.k8s.io/v1beta1
metadata:
  name: heapster
roleRef:
  apiGroup: rbac.authorization.k8s.io
  kind: ClusterRole
  name: system:heapster
subjects:
- kind: ServiceAccount
  name: heapster
  namespace: kube-system

[root@hdss7-200.host.com /data/k8s-yaml/dashboard/heapster]# vi dp.yaml
apiVersion: extensions/v1beta1
kind: Deployment
metadata:
  name: heapster
  namespace: kube-system
spec:
  replicas: 1
  template:
    metadata:
      labels:
        task: monitoring
        k8s-app: heapster
    spec:
      serviceAccountName: heapster
      containers:
      - name: heapster
        image: harbor.od.com/public/heapster:v1.5.4
        imagePullPolicy: IfNotPresent
        command:
        - /opt/bitnami/heapster/bin/heapster
        - --source=kubernetes:https://kubernetes.default

[root@hdss7-200.host.com /data/k8s-yaml/dashboard/heapster]# vi svc.yaml
apiVersion: v1
kind: Service
metadata:
  labels:
    task: monitoring
    # For use as a Cluster add-on (https://github.com/kubernetes/kubernetes/tree/master/cluster/addons)
    # If you are NOT using this as an addon, you should comment out this line.
    kubernetes.io/cluster-service: 'true'
    kubernetes.io/name: Heapster
  name: heapster
  namespace: kube-system
spec:
  ports:
  - port: 80
    targetPort: 8082
  selector:
    k8s-app: heapster
8.3 应用资源配置清单
[root@hdss7-21.host.com ~]# kubectl apply -f http://k8s-yaml.od.com/dashboard/heapster/rbac.yaml
serviceaccount/heapster created
clusterrolebinding.rbac.authorization.k8s.io/heapster created
[root@hdss7-21.host.com ~]# kubectl apply -f http://k8s-yaml.od.com/dashboard/heapster/dp.yaml
deployment.extensions/heapster created
[root@hdss7-21.host.com ~]# kubectl apply -f http://k8s-yaml.od.com/dashboard/heapster/svc.yaml
service/heapster created

[root@hdss7-21.host.com ~]# kubectl get po -n kube-system|grep heap
heapster-b5b9f794-pvdzn                1/1     Running   0          18s
8.4 浏览器访问
插件加载速度没那么快,等待1-2分钟即可加载完毕

