1. 项目说明
当前这篇教程是:
1. Gateway集成Sentinel做限流、熔断降级(超时、异常比例、异常数),集成Sentinel控制台动态配置策略
2. SpringCloud 2020版之后就集成LoadBalancer,默认是轮询策略。自定义负载均衡策略,比如某台服务器性能好,可以多分配
简单创建一个SpringCloud2021.0.3项目(一)
简单创建一个SpringCloud2021.0.3项目(二)
简单创建一个SpringCloud2021.0.3项目(三)
简单创建一个SpringCloud2021.0.3项目(四)
1. 版本
- SpringCloud版本为2021.0.3
- SpringBoot版本为2.7.2
2. 用到组件
- 注册中心:暂时用Eureka,后面再改成Nacos
- 网关:Gateway
- 权限:Security,Gateway集成
- 负载均衡:LoadBalancer,SpringCloud2020版之后就集成LoadBalancer
- 限流、熔断降级:Sentinel
- 配置中心:暂时用Config,后面改成Nacos
- 服务间访问:Feign
3. 功能
- 项目最基本功能,权限控制,在分布式系统中基于Token的身份验证。
- 前端登陆,做了2种方式。用户、密码、验证码;邮箱、验证码、图片滑块;并且前端加密传给后端解密;登陆异常次数限制;
- 限流、负载均衡,应对高并发情况,降低系统负载;
- 服务熔断降级:避免系统雪崩,提高系统可用性;
- 两种方式的多数据源,一种是通过AOP方式动态切换数据源,另一种是不同数据源管理的数据各不相同;
- 日志系统Logback,是SpringBoot默认集成
2. 上俩篇教程
简单创建一个SpringCloud2021.0.3项目(一)
简单创建一个SpringCloud2021.0.3项目(二)
- 新建Eureka注册中心
- 新建Config配置中心,producerService服务读取参数
- 2个业务服务(producerService和webService),webService通过Feign调用producerService的服务
- webService用到多数据源,不同的数据源管理不同的数据;security模块测试通过AOP方式动态切换数据源
- 抽取公共模块common,集成redis
- 新建Gateway网关,集成Security,做登陆和资源权限控制
- 前端登陆,做了2种方式。用户、密码、验证码;邮箱、验证码、图片滑块;并且前端加密传给后端解密;登陆异常次数限制
- 在分布式系统中基于Token的身份验证
- 每次请求刷新用户会话有效时间
3. Gateway集成sentinel,网关层做熔断降级
1. 超时熔断降级
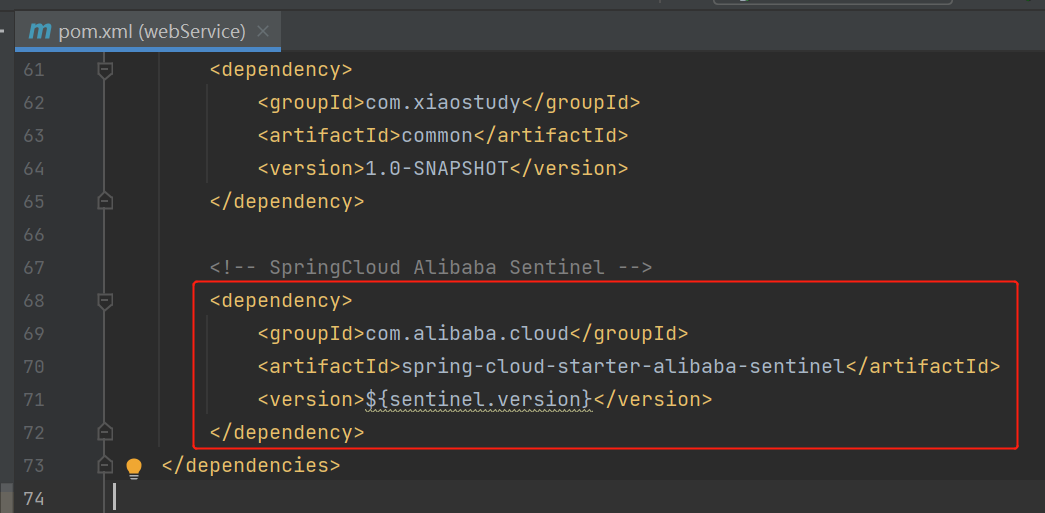
- 添加sentinel依赖
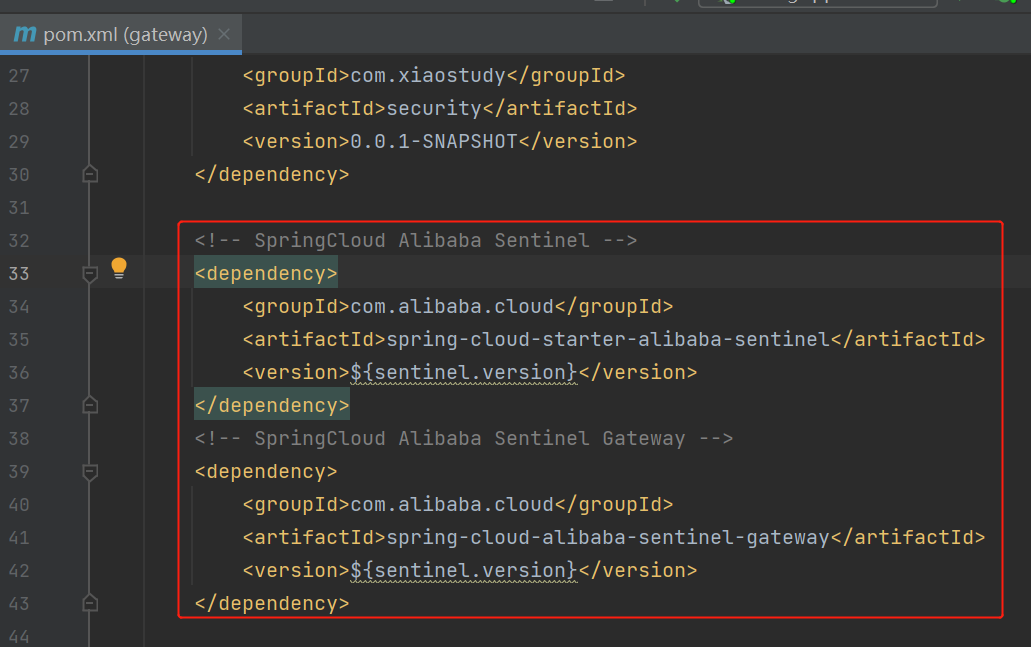
<!-- SpringCloud Alibaba Sentinel -->
<dependency>
    <groupId>com.alibaba.cloud</groupId>
    <artifactId>spring-cloud-starter-alibaba-sentinel</artifactId>
    <version>${sentinel.version}</version>
</dependency>
<!-- SpringCloud Alibaba Sentinel Gateway -->
<dependency>
    <groupId>com.alibaba.cloud</groupId>
    <artifactId>spring-cloud-alibaba-sentinel-gateway</artifactId>
    <version>${sentinel.version}</version>
</dependency>
- 配置熔断规则,配置类
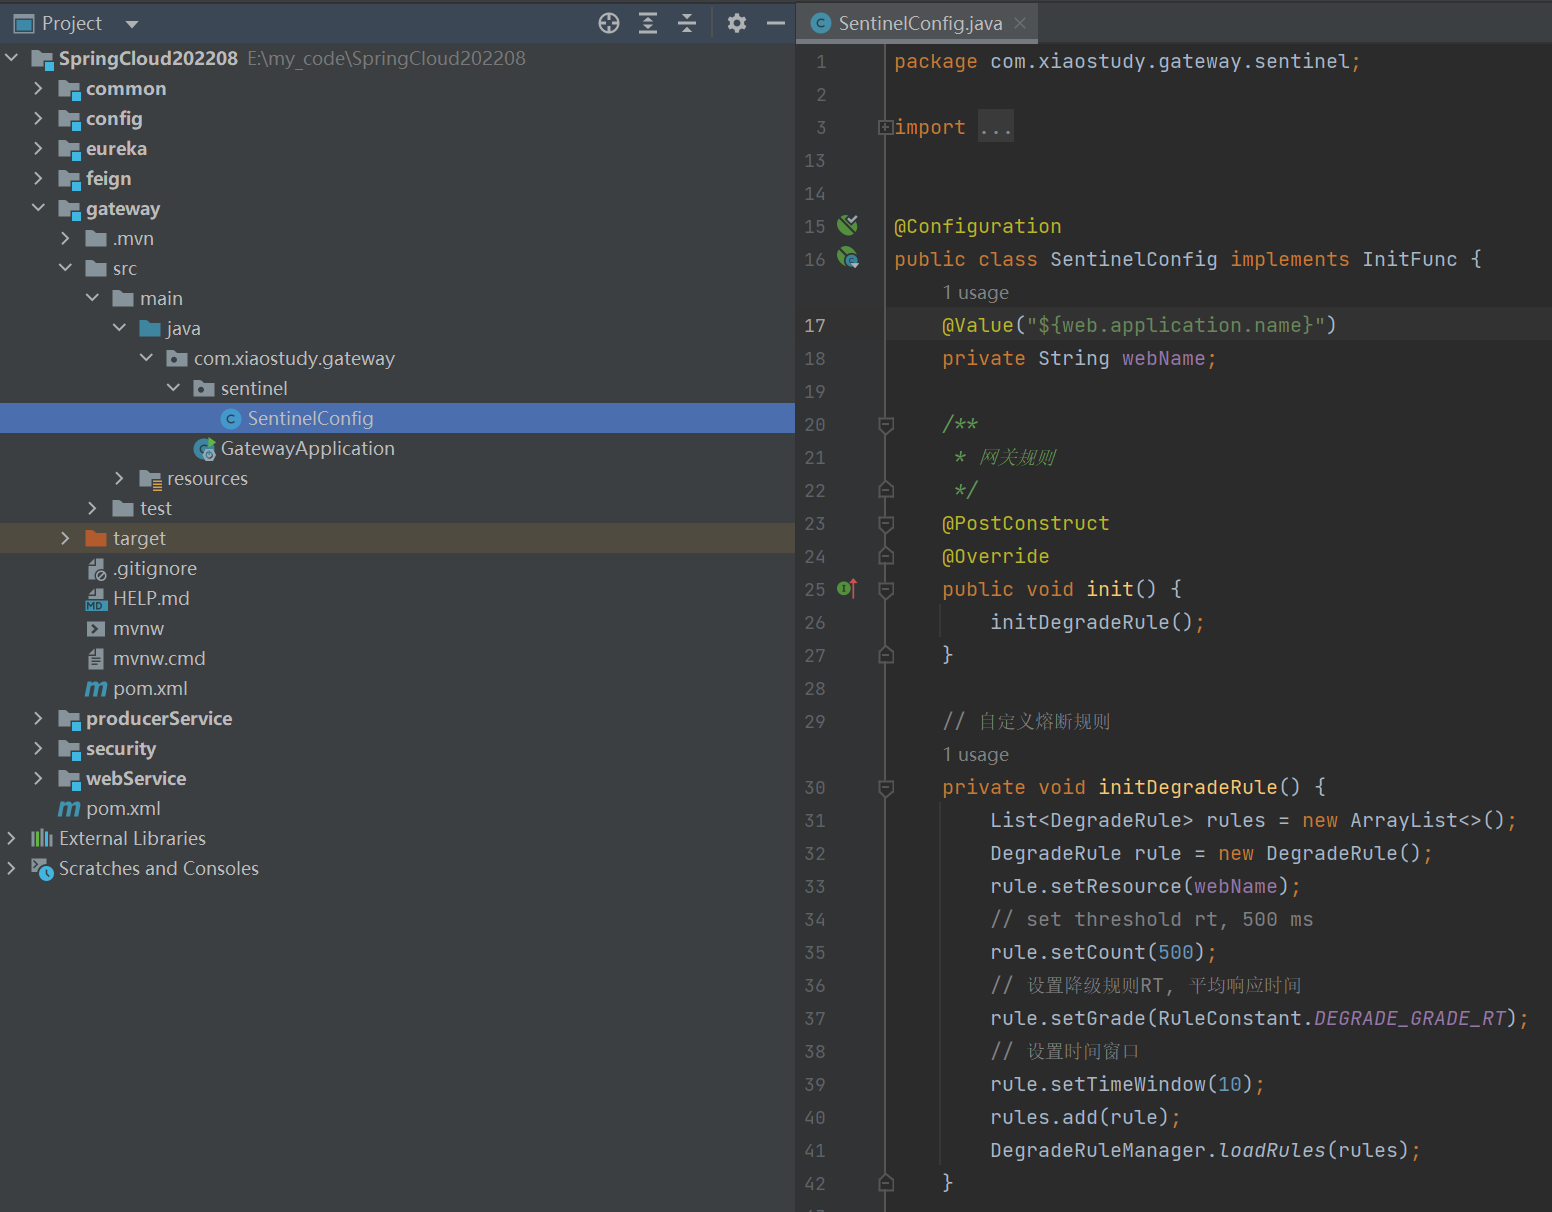
点击查看代码
package com.xiaostudy.gateway.sentinel;

import com.alibaba.csp.sentinel.init.InitFunc;
import com.alibaba.csp.sentinel.slots.block.RuleConstant;
import com.alibaba.csp.sentinel.slots.block.degrade.DegradeRule;
import com.alibaba.csp.sentinel.slots.block.degrade.DegradeRuleManager;
import org.springframework.beans.factory.annotation.Value;
import org.springframework.context.annotation.Configuration;

import javax.annotation.PostConstruct;
import java.util.ArrayList;
import java.util.List;


@Configuration
public class SentinelConfig implements InitFunc {
    @Value("${web.application.name}")
    private String webName;

    /**
     * 网关规则
     */
    @PostConstruct
    @Override
    public void init() {
        initDegradeRule();
    }

    // 自定义熔断规则
    private void initDegradeRule() {
        List<DegradeRule> rules = new ArrayList<>();
        DegradeRule rule = new DegradeRule();
        rule.setResource(webName);
        // set threshold rt, 500 ms
        rule.setCount(500);
        // 设置降级规则RT, 平均响应时间
        rule.setGrade(RuleConstant.DEGRADE_GRADE_RT);
        // 设置时间窗口
        rule.setTimeWindow(10);
        rules.add(rule);
        DegradeRuleManager.loadRules(rules);
    }

}
- 配置文件添加参数
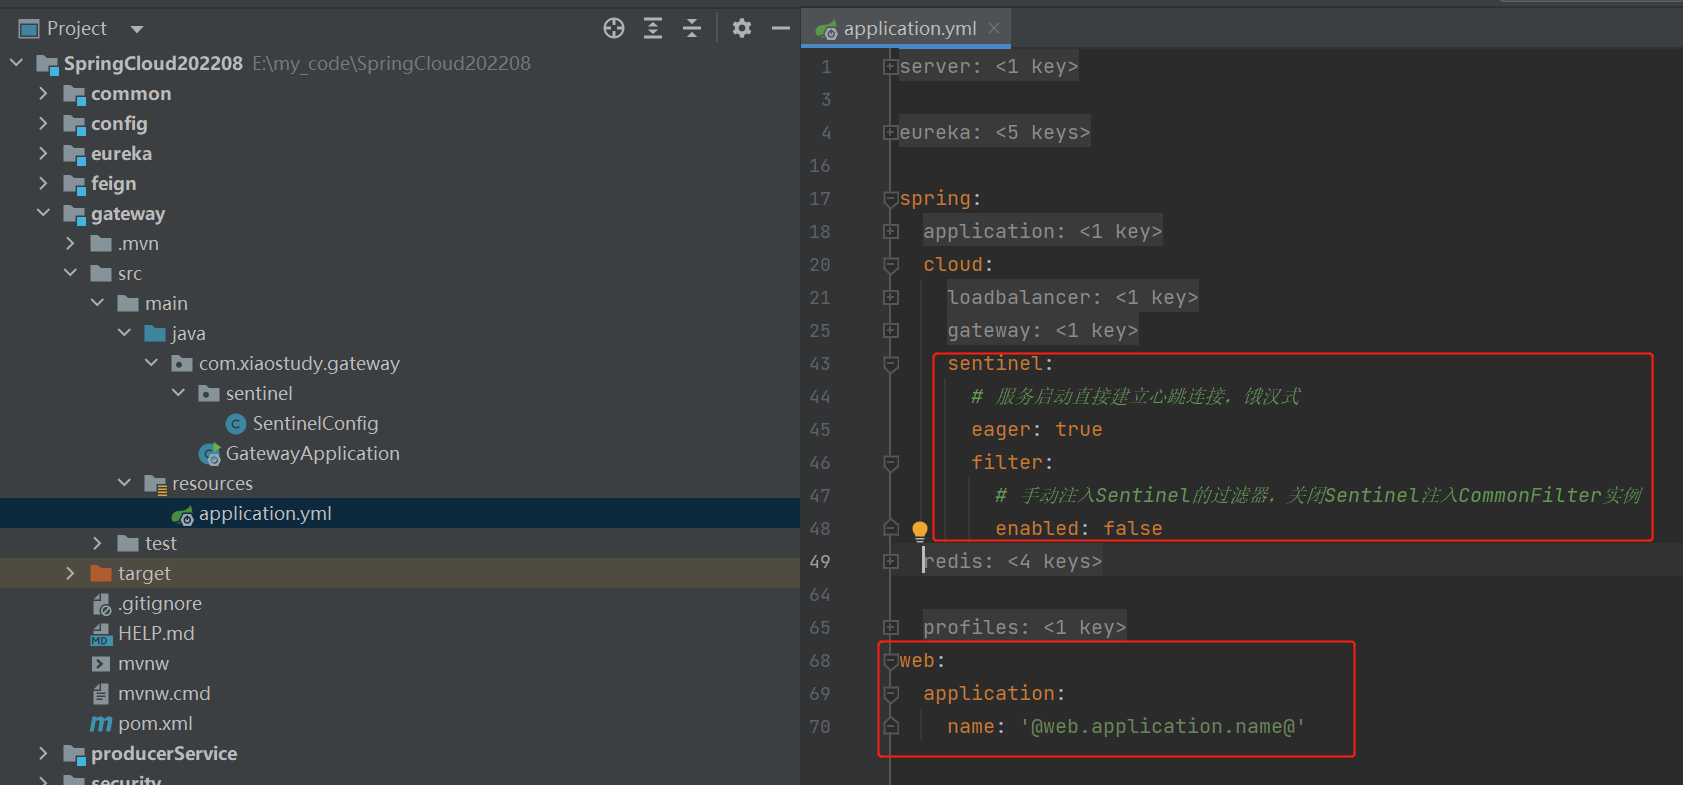
此时的配置文件
server:
  port: '@gateway.port@'

eureka:
  port: '@eureka.port@'
  ip: '@eureka.ip@'
  url-name: '@eureka.url.name@'
  instance:
    # 把本机IP注册到eureka而不是本机机器名
    preferIpAddress: true
    # 把本机IP注册到eureka,由下面参数组成
    instance-id: ${spring.cloud.client.ip-address}:${server.port}
  client:
    serviceUrl:
      defaultZone: http://@eureka.user.name@:@eureka.user.password@@${eureka.ip}:${eureka.port}/${eureka.url-name}/

spring:
  application:
    name: '@gateway.application.name@'
  cloud:
    loadbalancer:
      retry:
        # 关闭重试
        enabled: false
    gateway:
      routes:
        # 路由的id,没有规定规则但要求唯一,建议配合服务名
        - id: '@producer.application.name@'
          # 匹配后提供服务的路由地址,LoadBalancer做负载均衡
          uri: lb://@producer.application.name@
          predicates:
            # 断言,路径相匹配的进行路由
            - Path=/producer/**
          filters:
            # 去掉url一级前缀,例如http://localhost:9904/producer/producerTest/getByName,等同于http://localhost:9901/producerTest/getByName
            - StripPrefix=1
        - id: '@web.application.name@'
          uri: lb://@web.application.name@
          predicates:
            - Path=/web/**
          filters:
            - StripPrefix=1
    sentinel:
      # 服务启动直接建立心跳连接,饿汉式
      eager: true
      filter:
        # 手动注入Sentinel的过滤器,关闭Sentinel注入CommonFilter实例
        enabled: false
  redis:
    host: localhost
    port: 6379
    # 默认0
    database: 1
    lettuce:
      pool:
        # 连接池最大连接数(使用负值表示没有限制),默认值:8
        max-active: 20
        # 连接池中的最大空闲连接,默认值:8
        max-idle: 10
        # 连接池中的最小空闲连接,默认值:0
        min-idle: 1
        # 连接池最大阻塞等待时间(使用负值表示没有限制),默认值:-1,单位:毫秒
        max-wait: 2000

  profiles:
    # 使用的配置文件后缀application-security.yml。一个或多个,中间英文逗号分开
    active: security
web:
  application:
    name: '@web.application.name@'
-
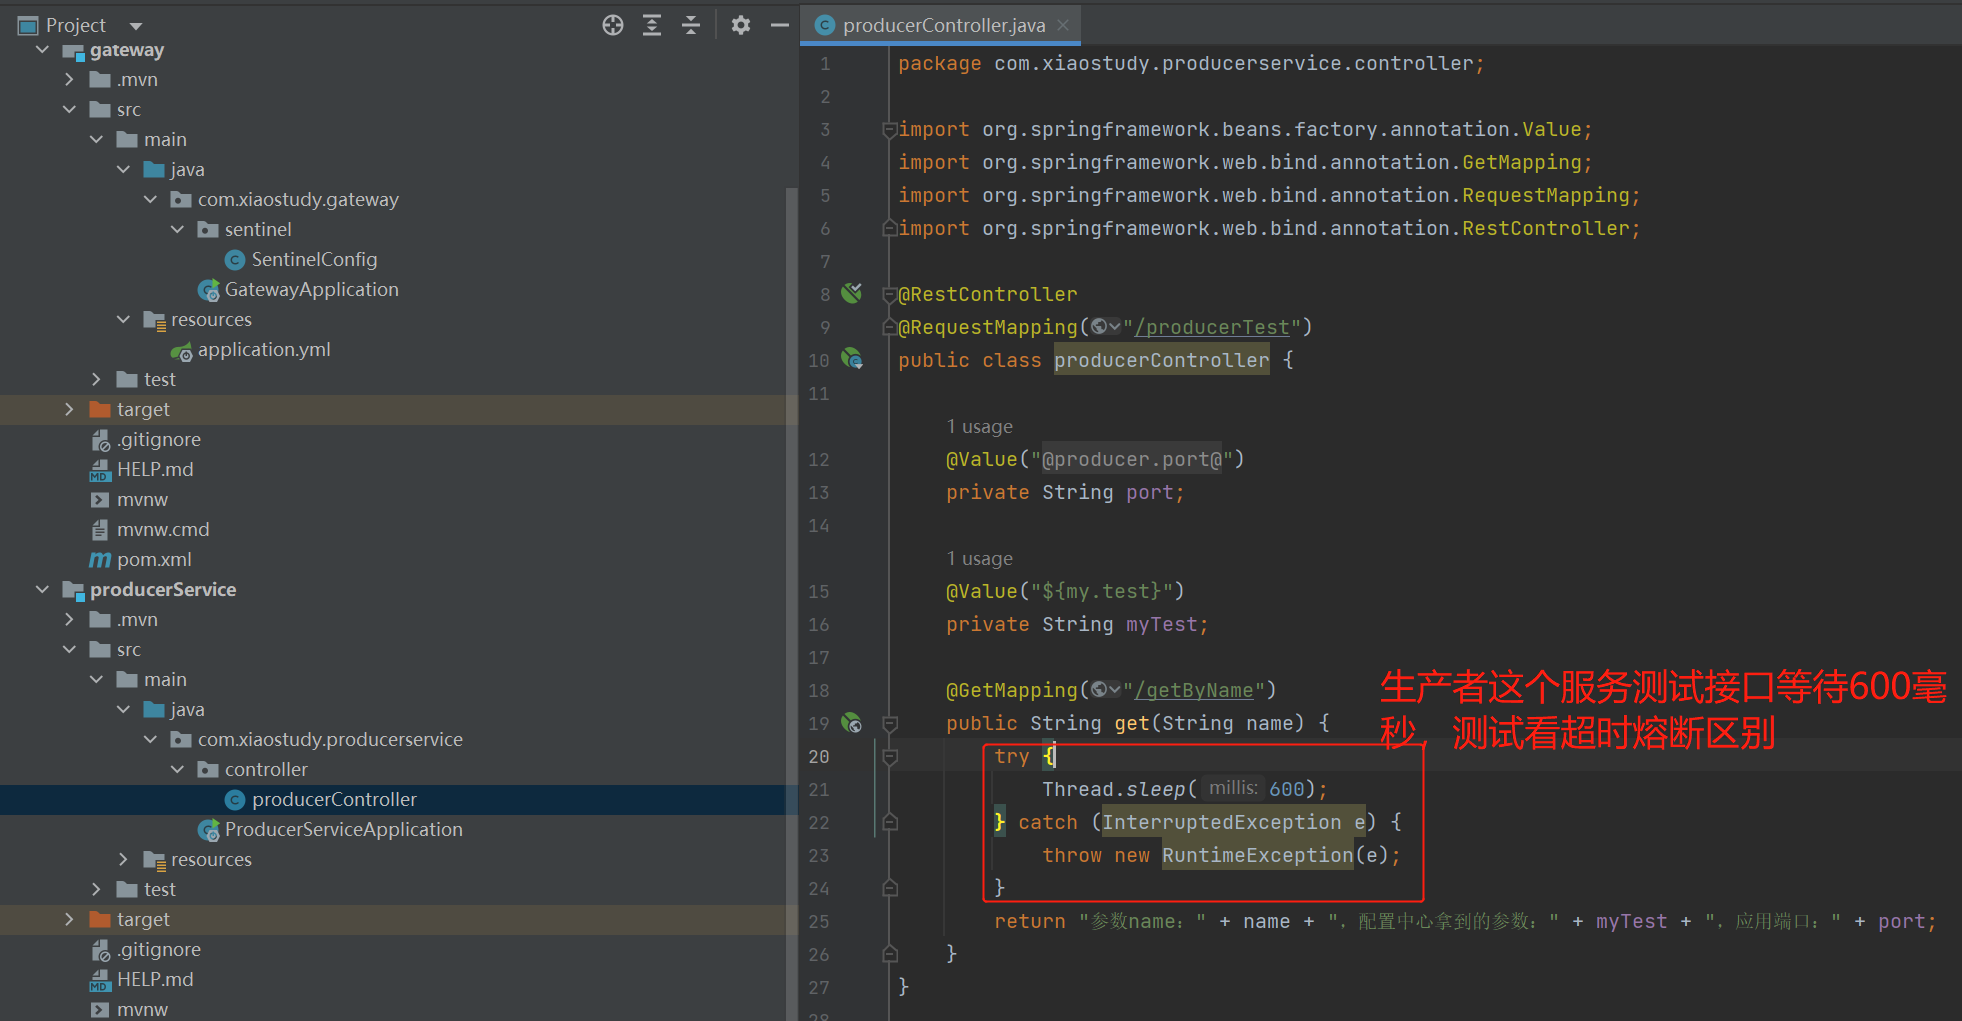
生产者这个接口睡眠600毫秒,一个从web通过feign读取,一个直接从producer读取,web的我们已经设置超时熔断,producer没有设置
-
重启producerService和gateway
-
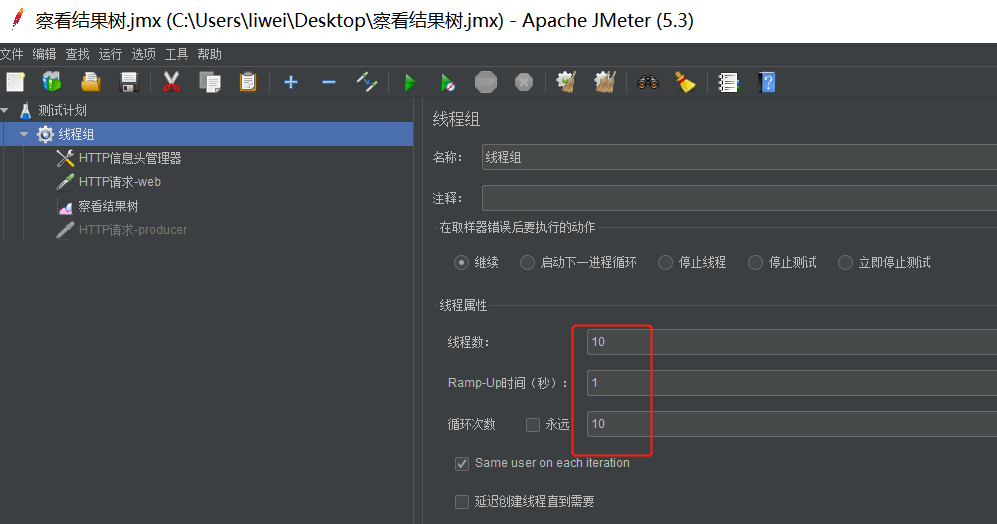
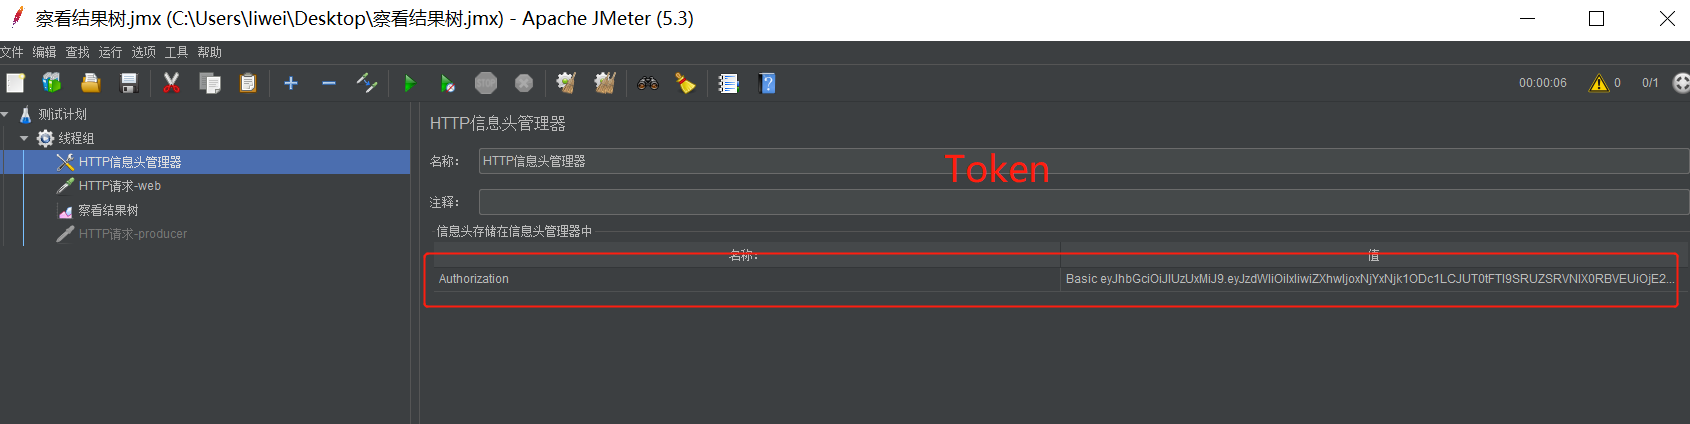
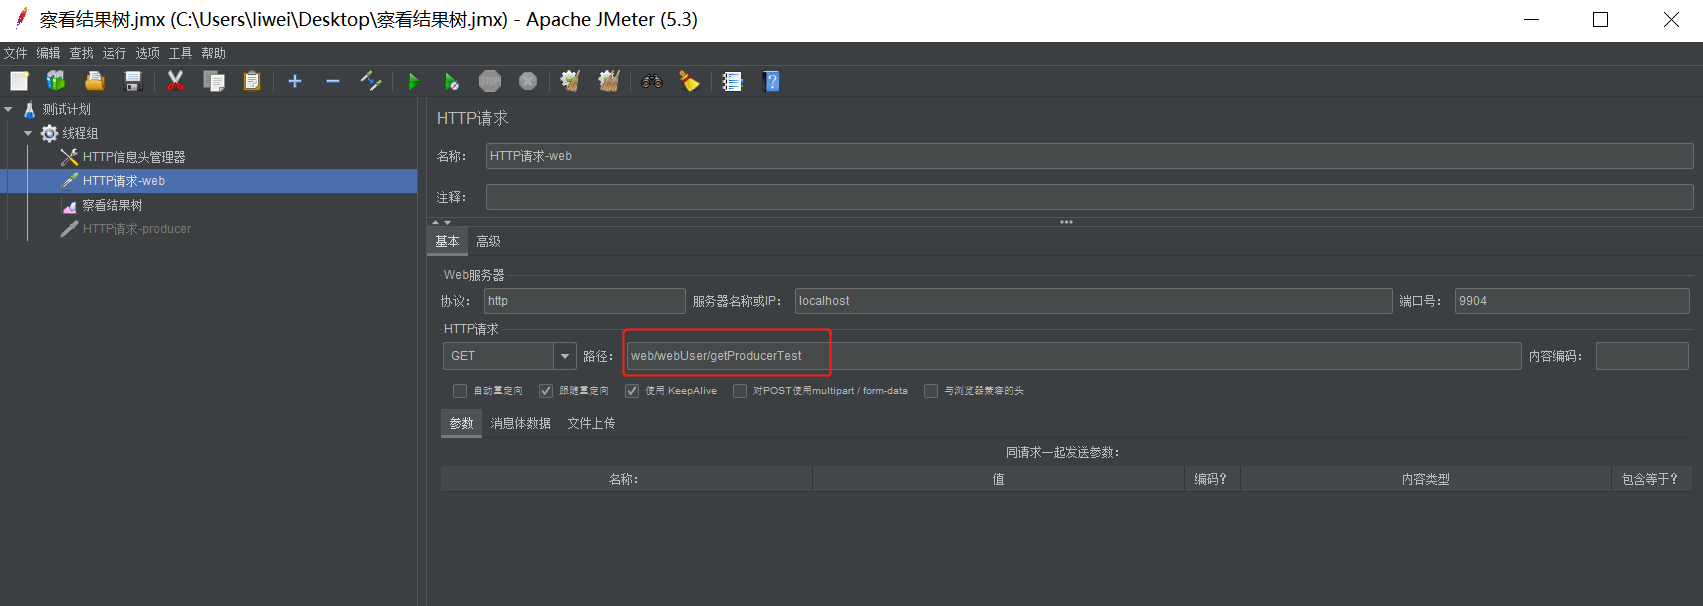
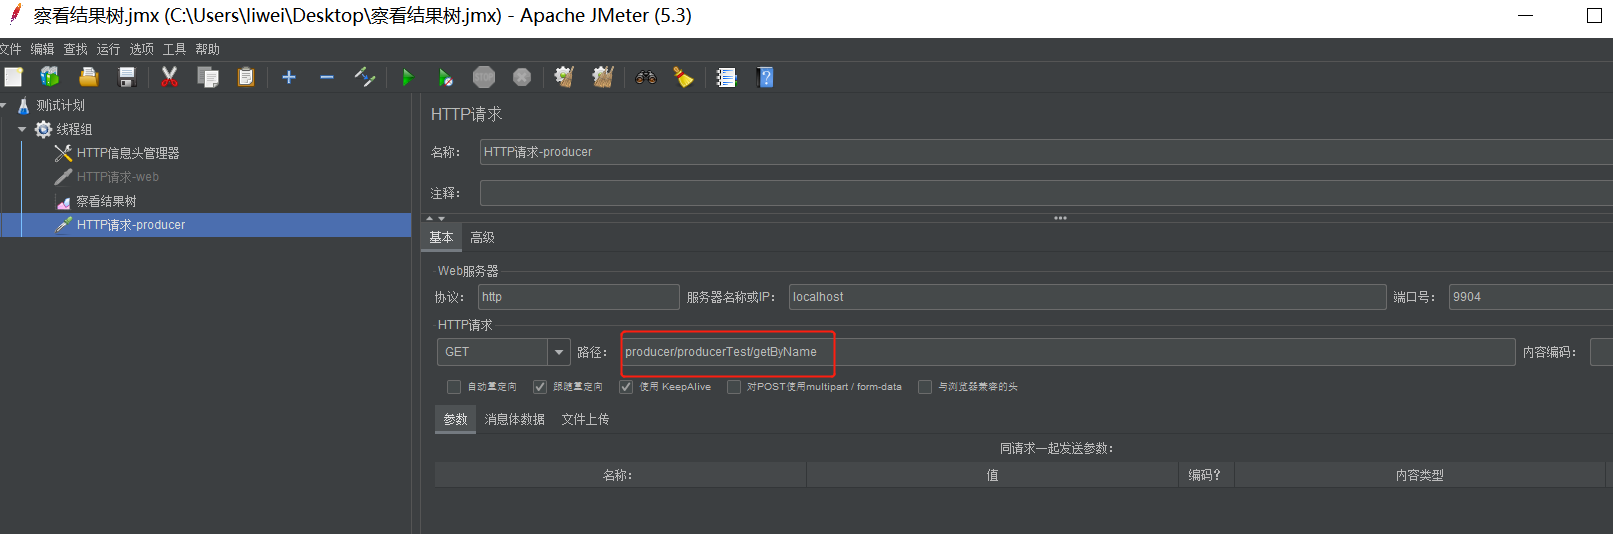
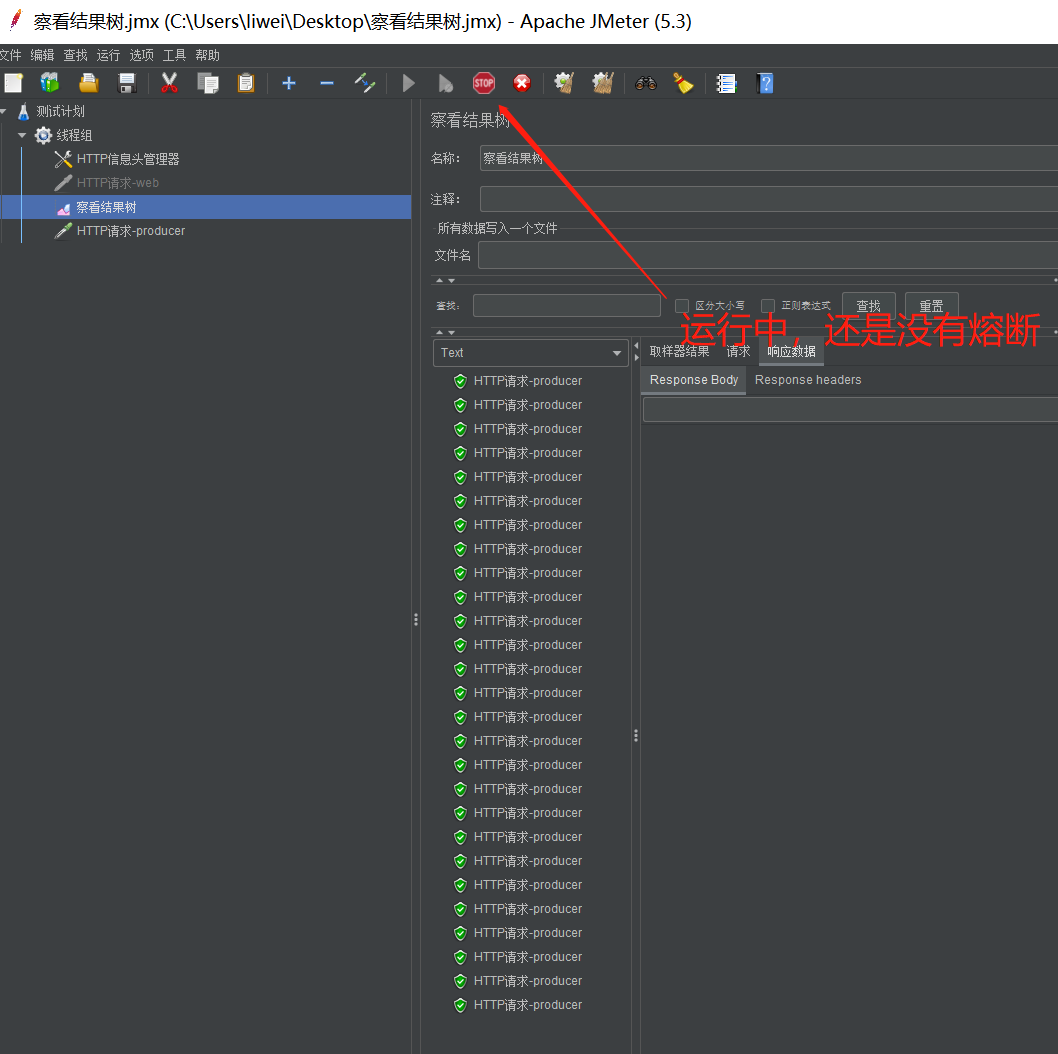
用Jmeter做压测,设置请求头、HTTP请求、监听结果


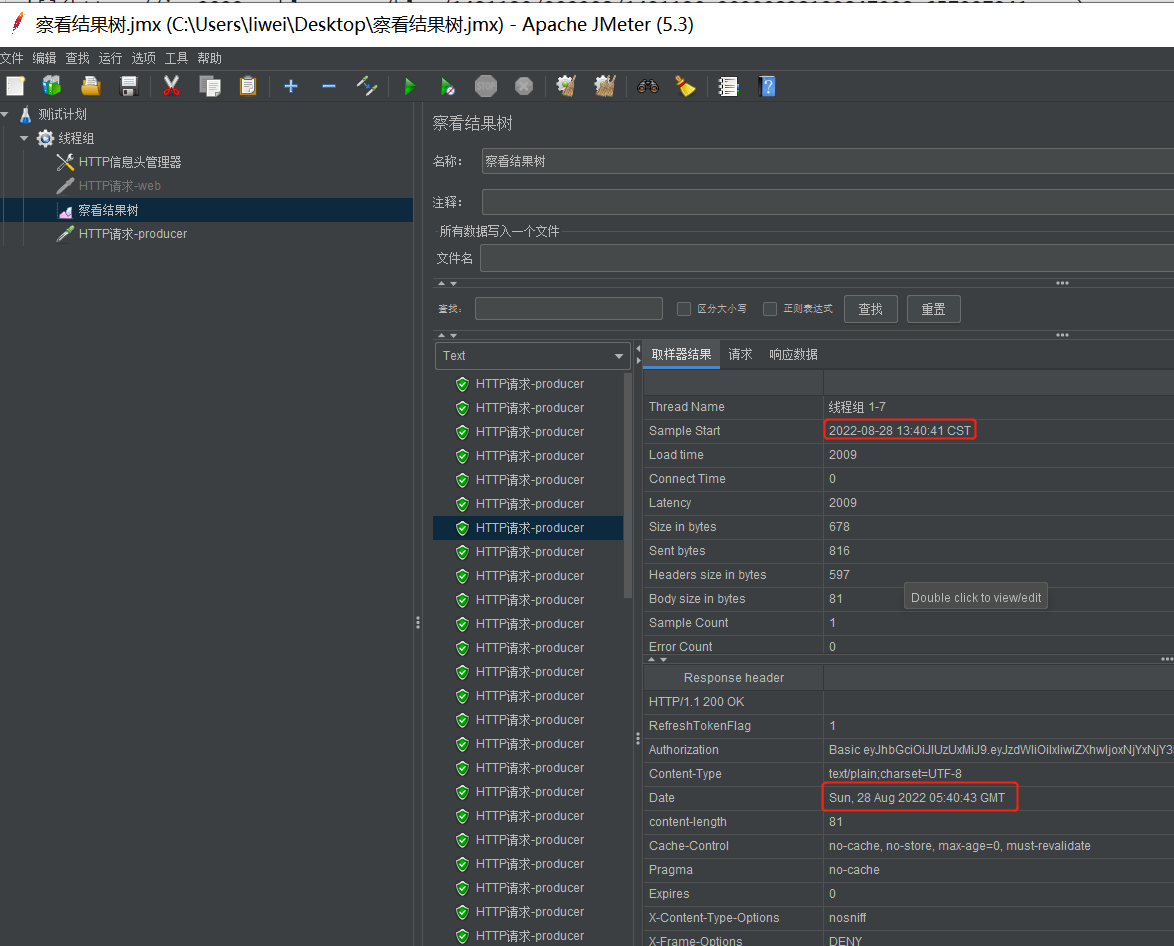
-
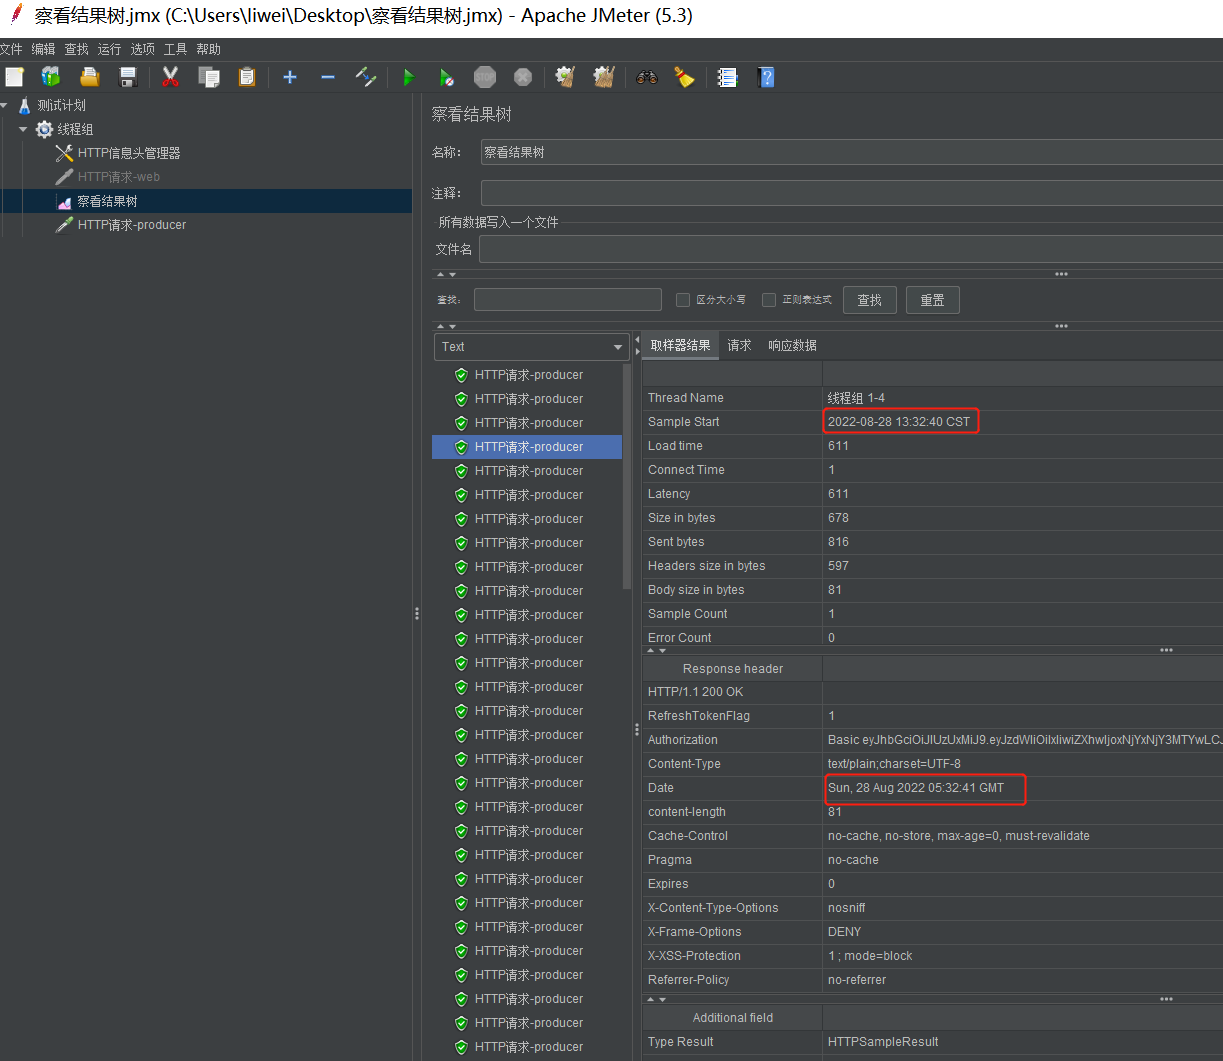
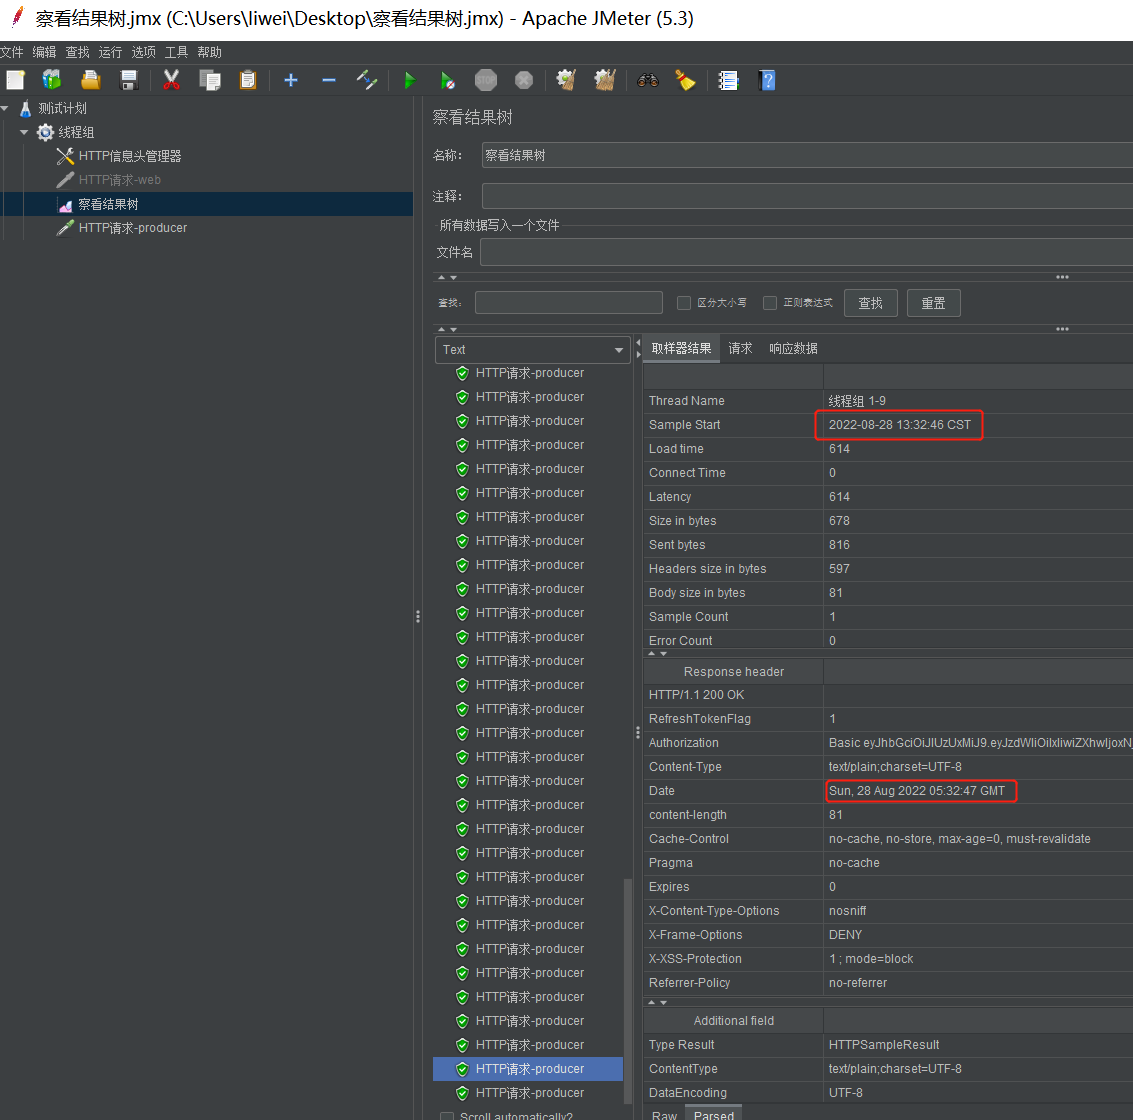
看看没有设置熔断的producer请求

-
修改一下producer测试接口睡眠时间和web熔断的RT时间
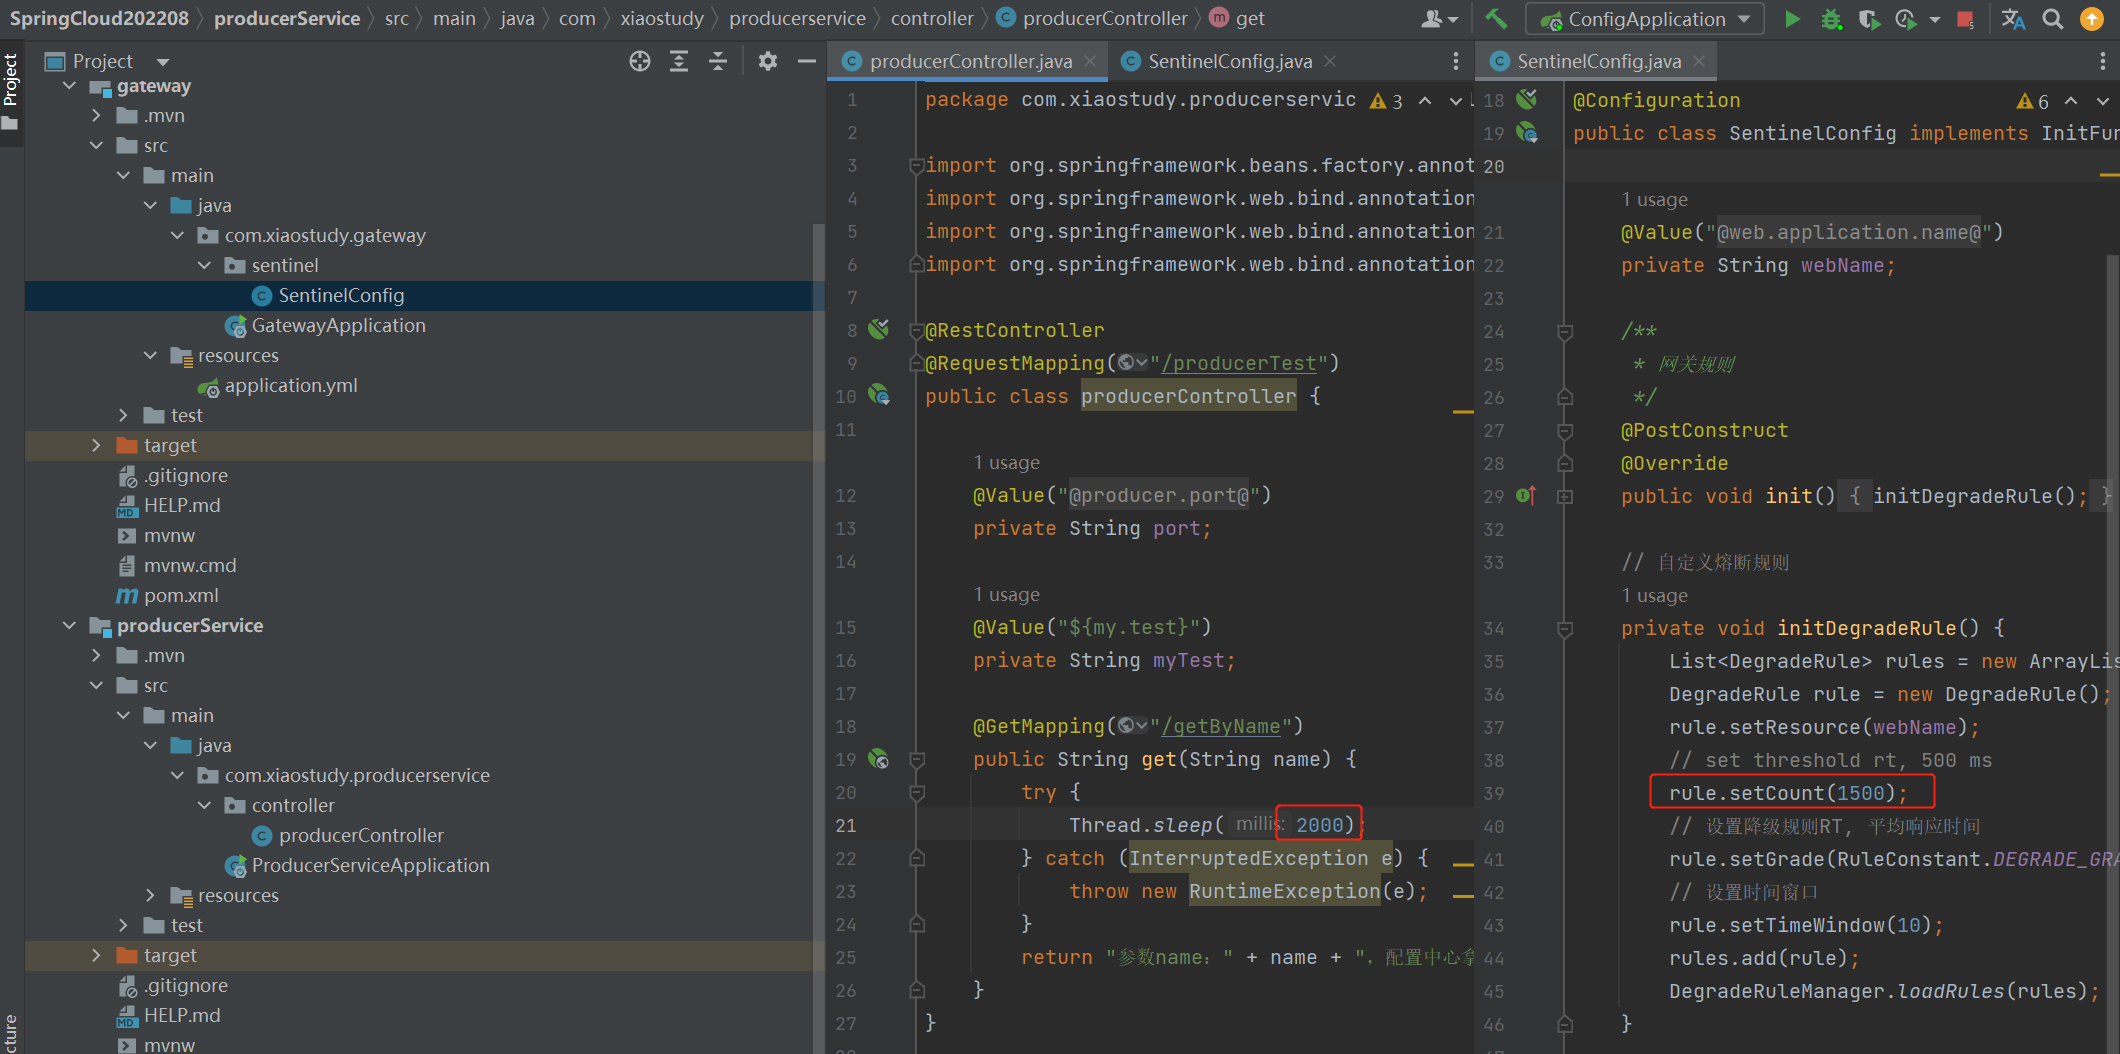

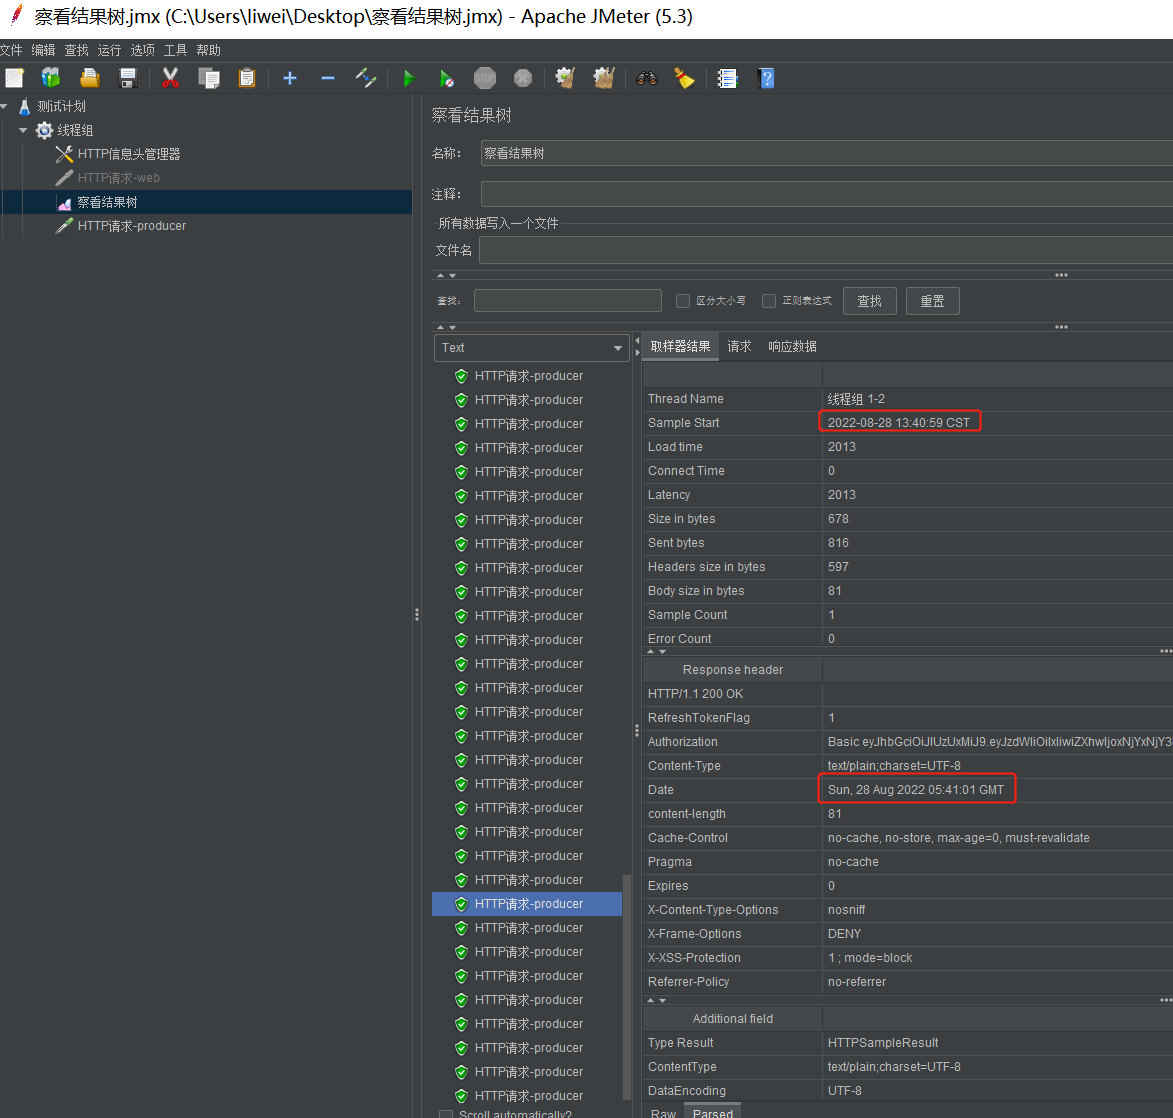
这表示熔断正常,设置监听的资源超时熔断
2. 异常熔断
web加入sentinel依赖


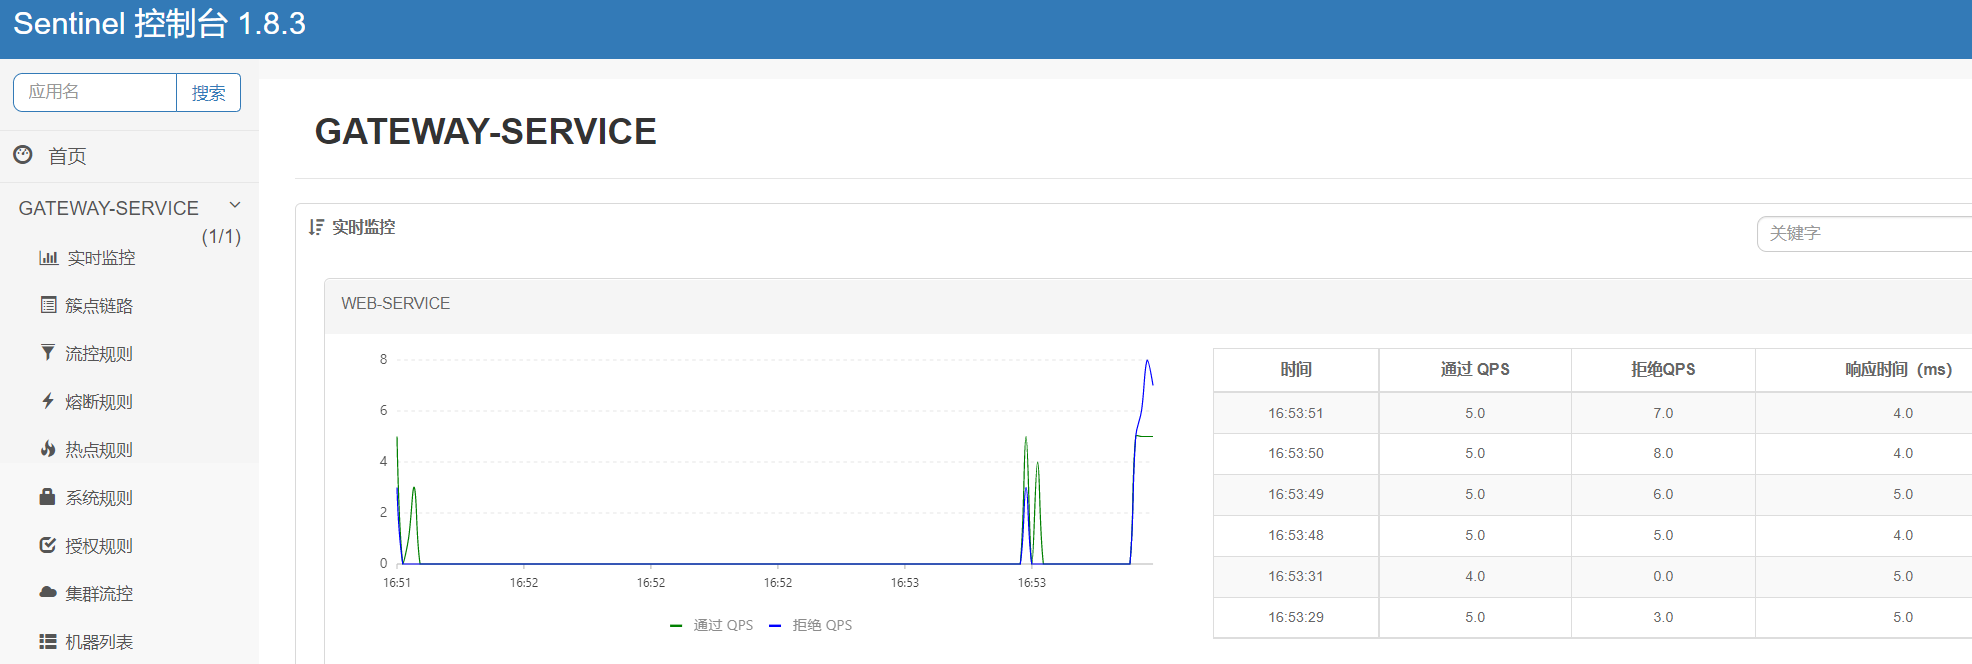
3. 集成sentinel-dashboard控制台
-
下载sentinel-dashboard-1.8.3.jar
https://github.com/alibaba/Sentinel/releases/tag/1.8.3
先下载一个sentinel-dashboard-1.8.3.jar -
启动命令
java -Dserver.port=9910 -jar sentinel-dashboard-1.8.3.jar
-
登陆
用户密码都是sentinel
http://localhost:9910/

-
webService的配置文件添加配置
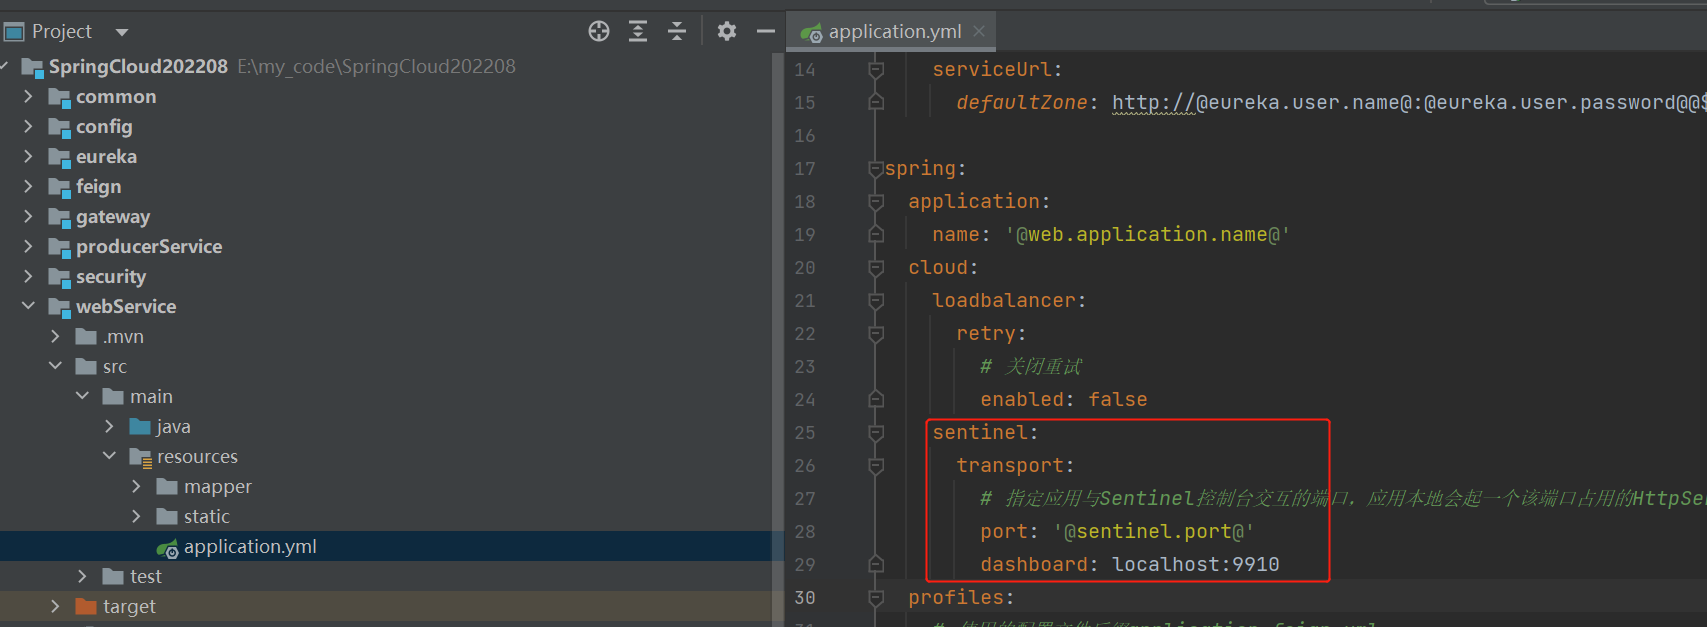
sentinel:
  transport:
    # 指定应用与Sentinel控制台交互的端口,应用本地会起一个该端口占用的HttpServer。如果端口被占用会往后+1,直到没有占用
    port: '@sentinel.port@'
    dashboard: localhost:9910

-
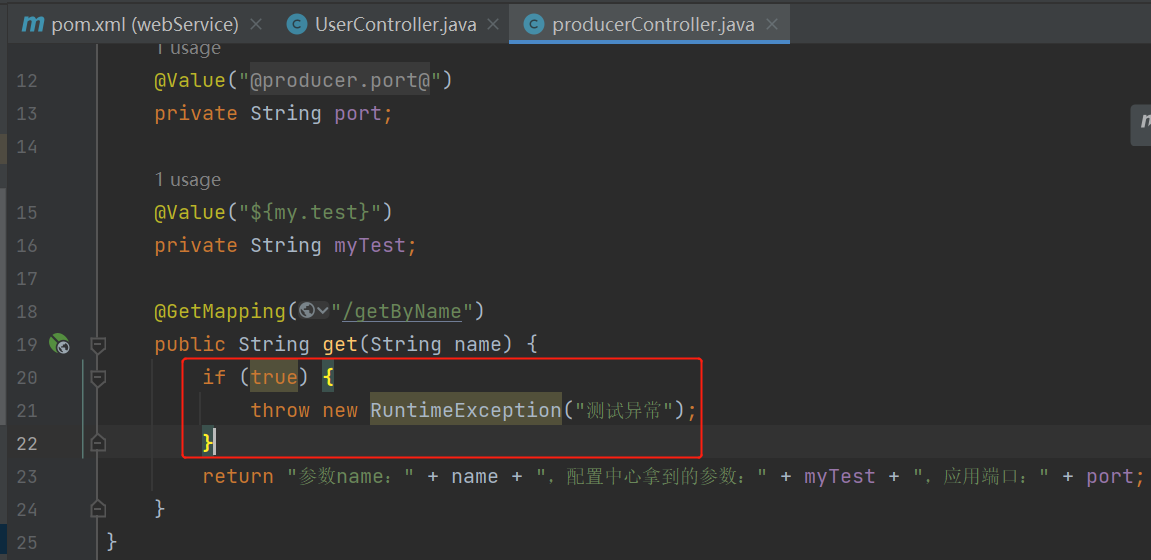
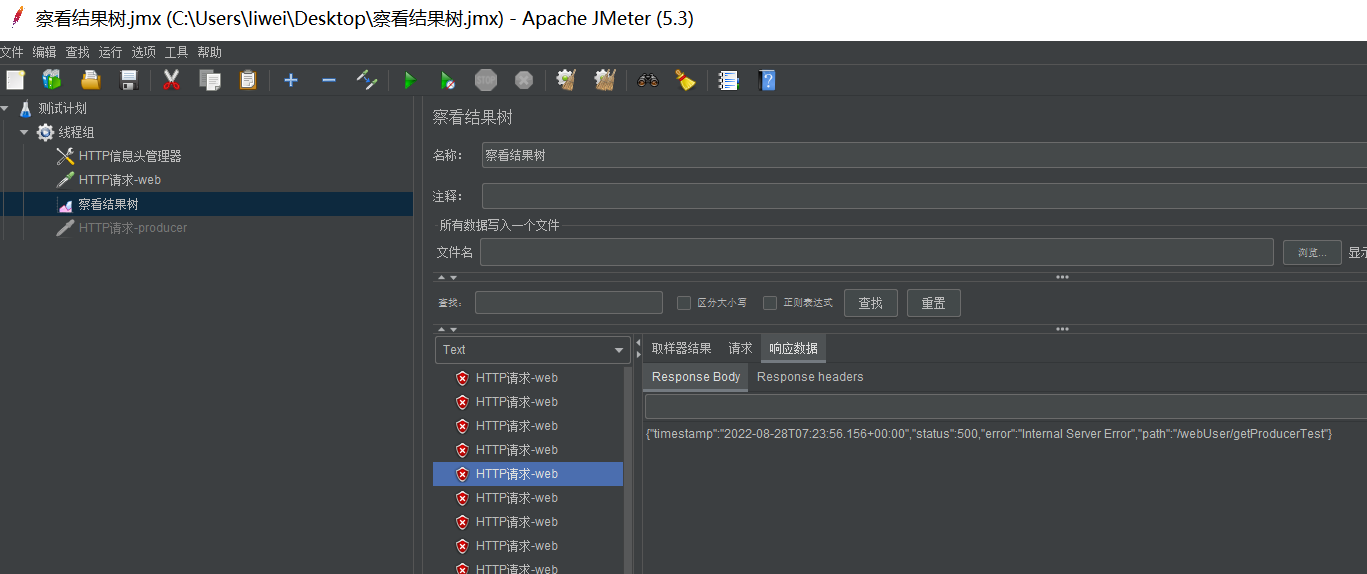
注释异常熔断返回
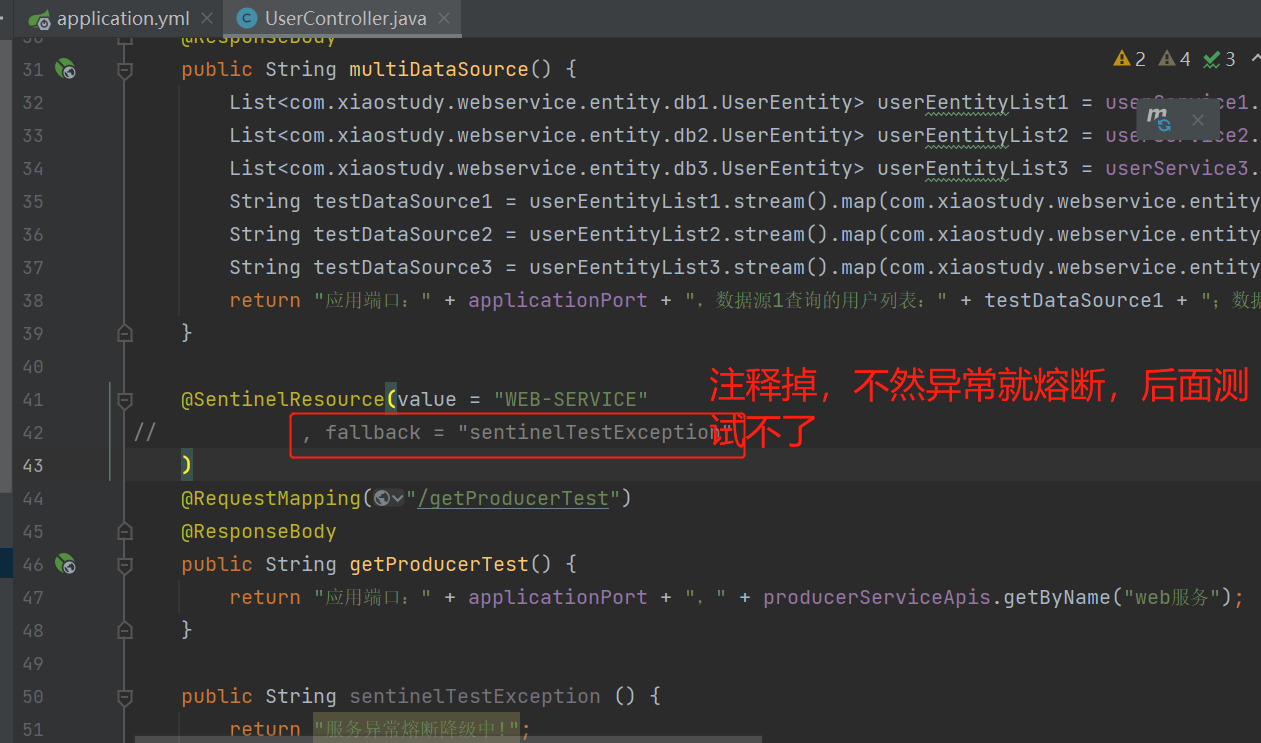
-
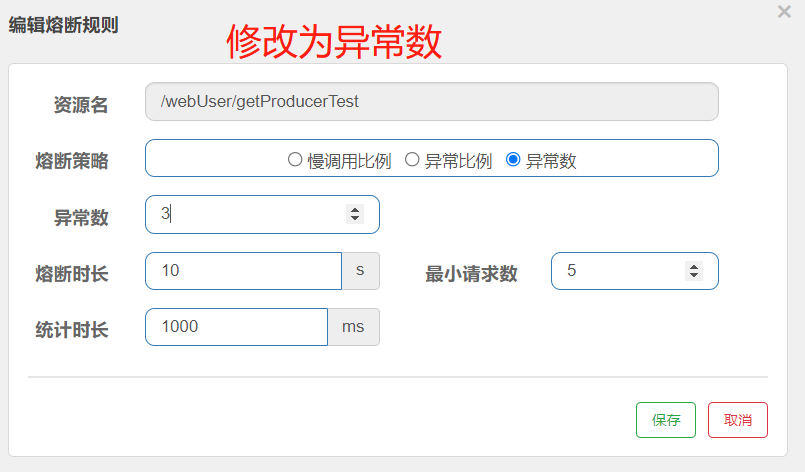
添加熔断规则


-
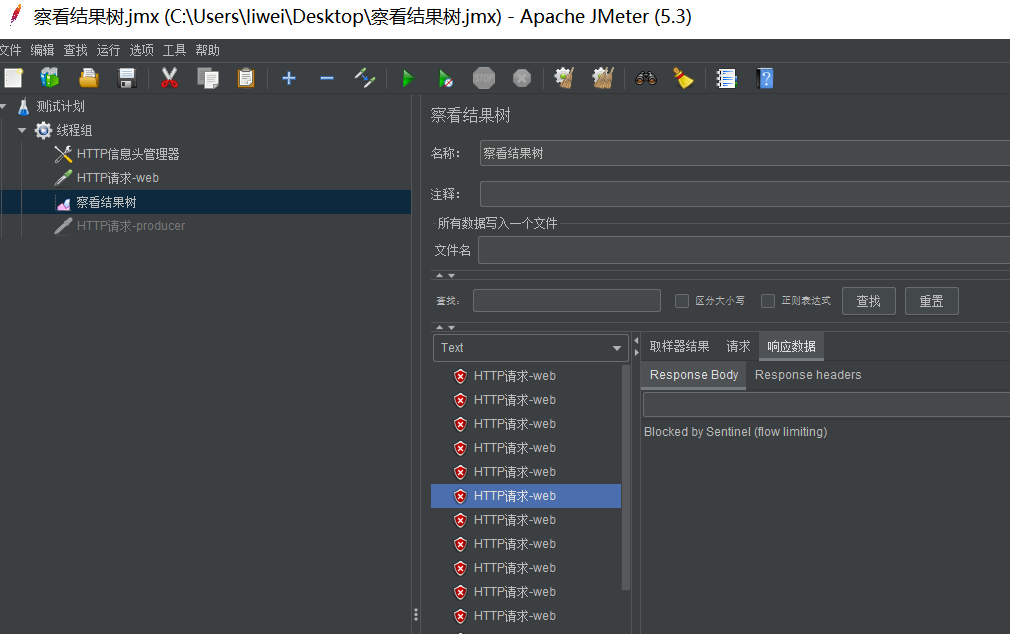
测试异常比例熔断降级
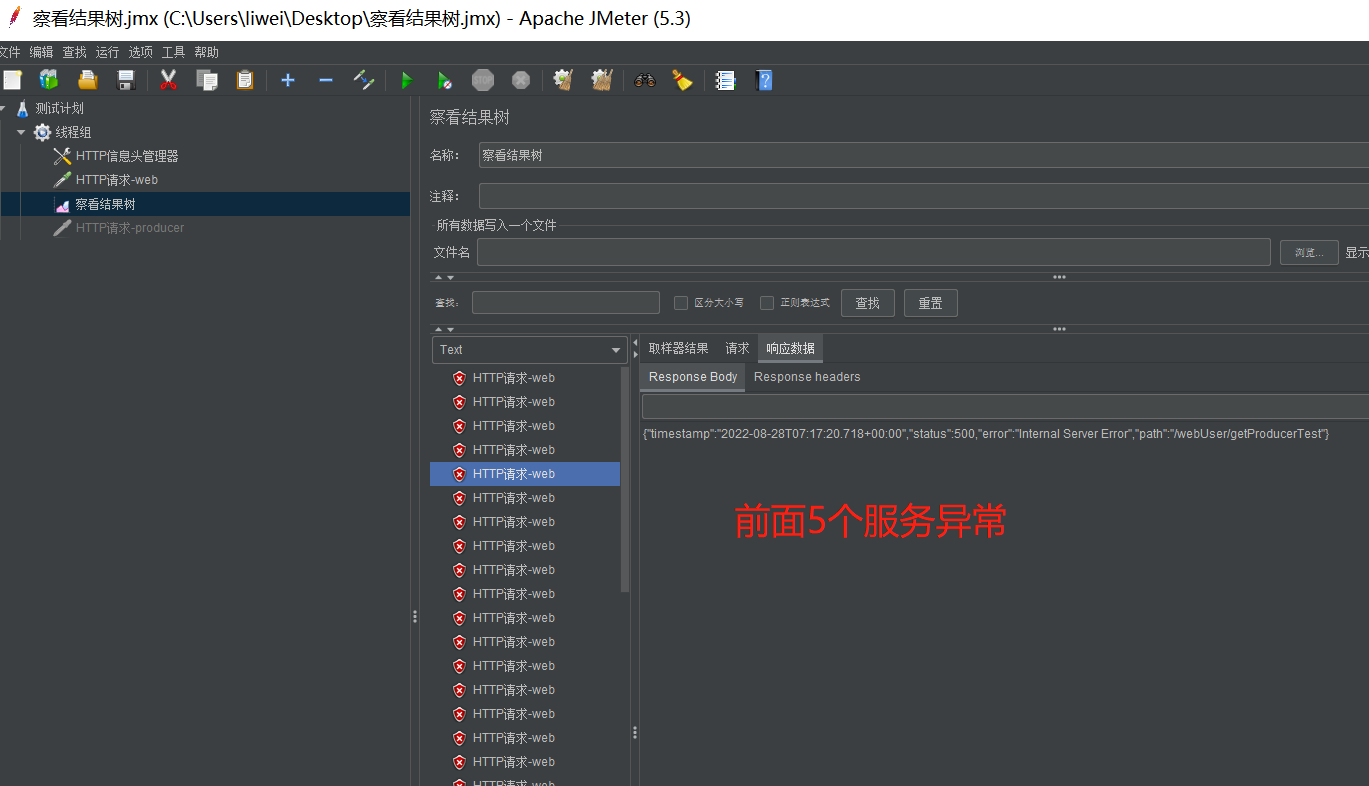
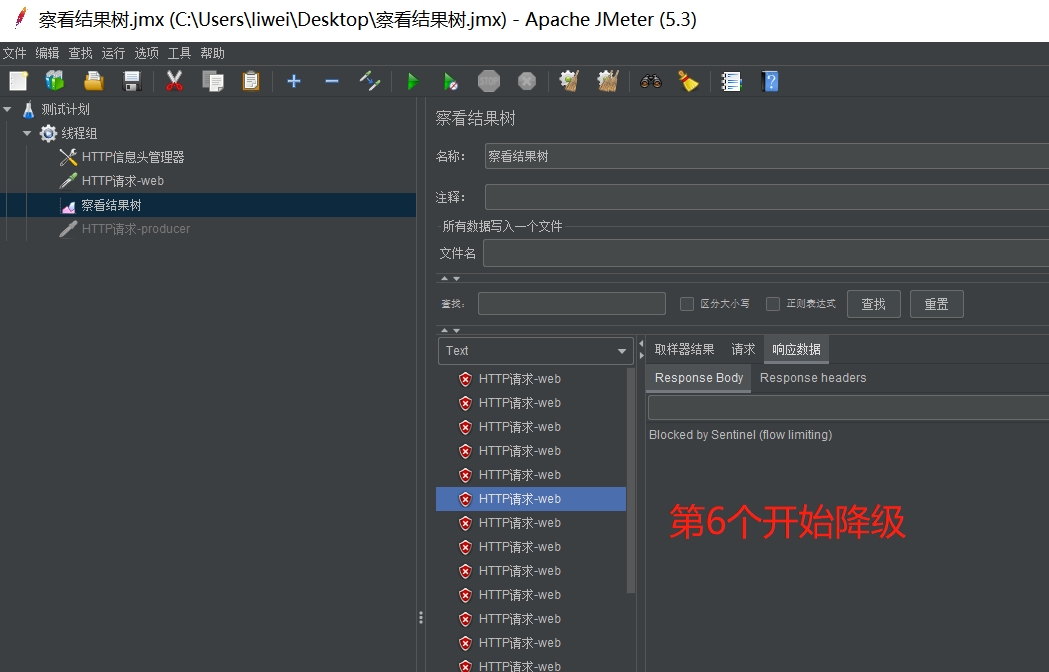
-
测试异常数熔断降级,效果也是一样的,因为这里每一个请求都是异常
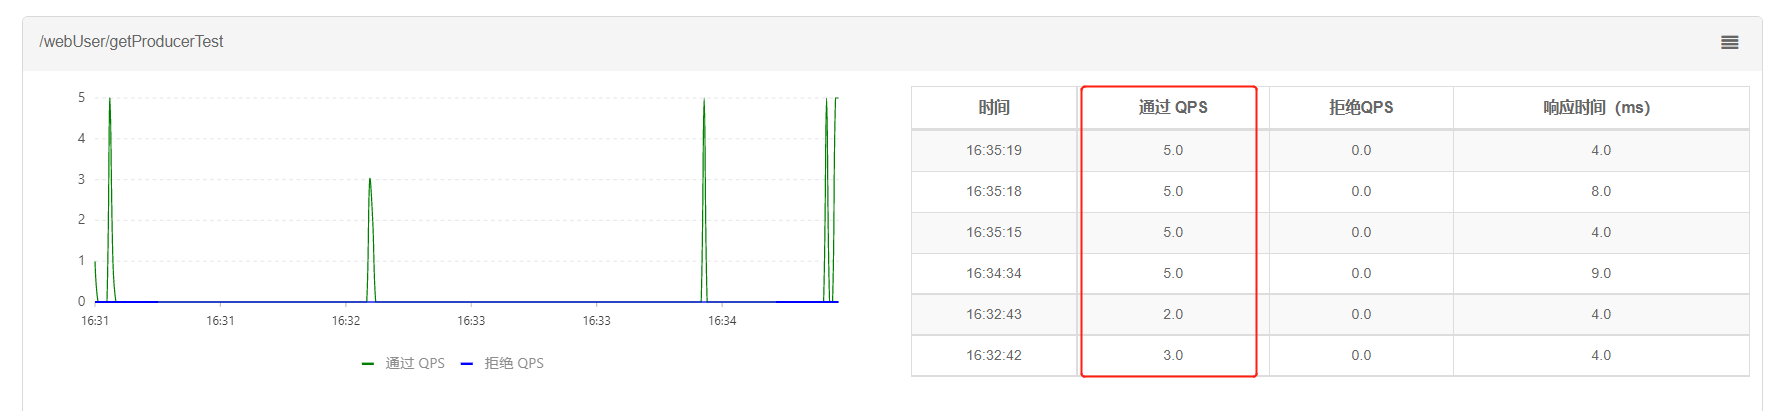
4. 限流
- 控制台方式


不过用sentinel控制台这种方式设置限流、熔断,随着服务停止而销毁,配合nacos的话就可以保存。
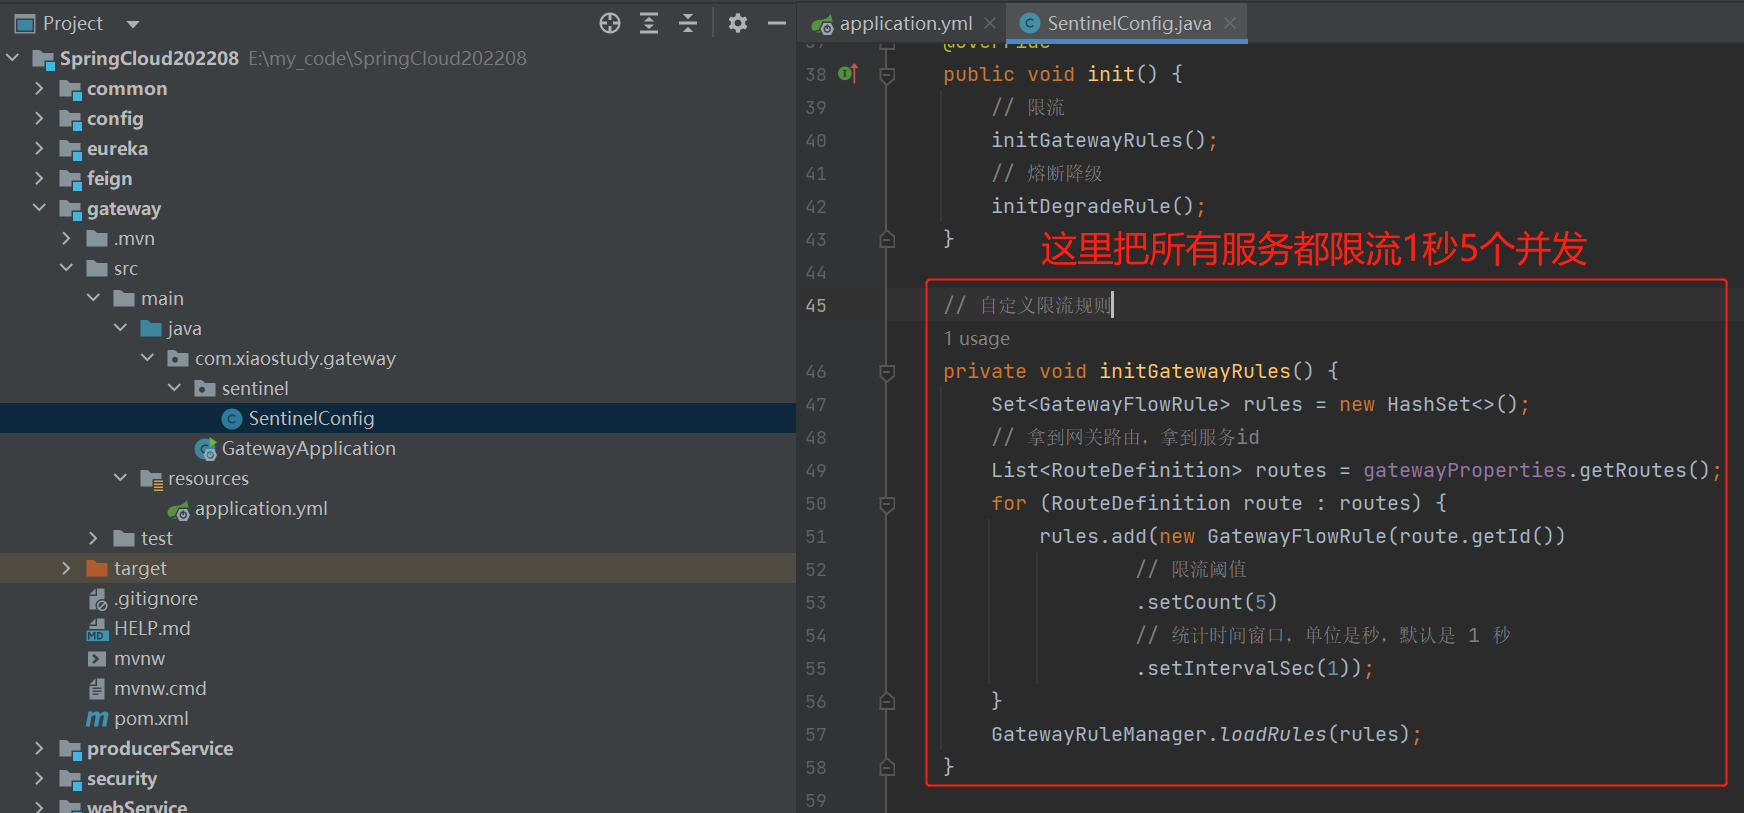
- gateway设置
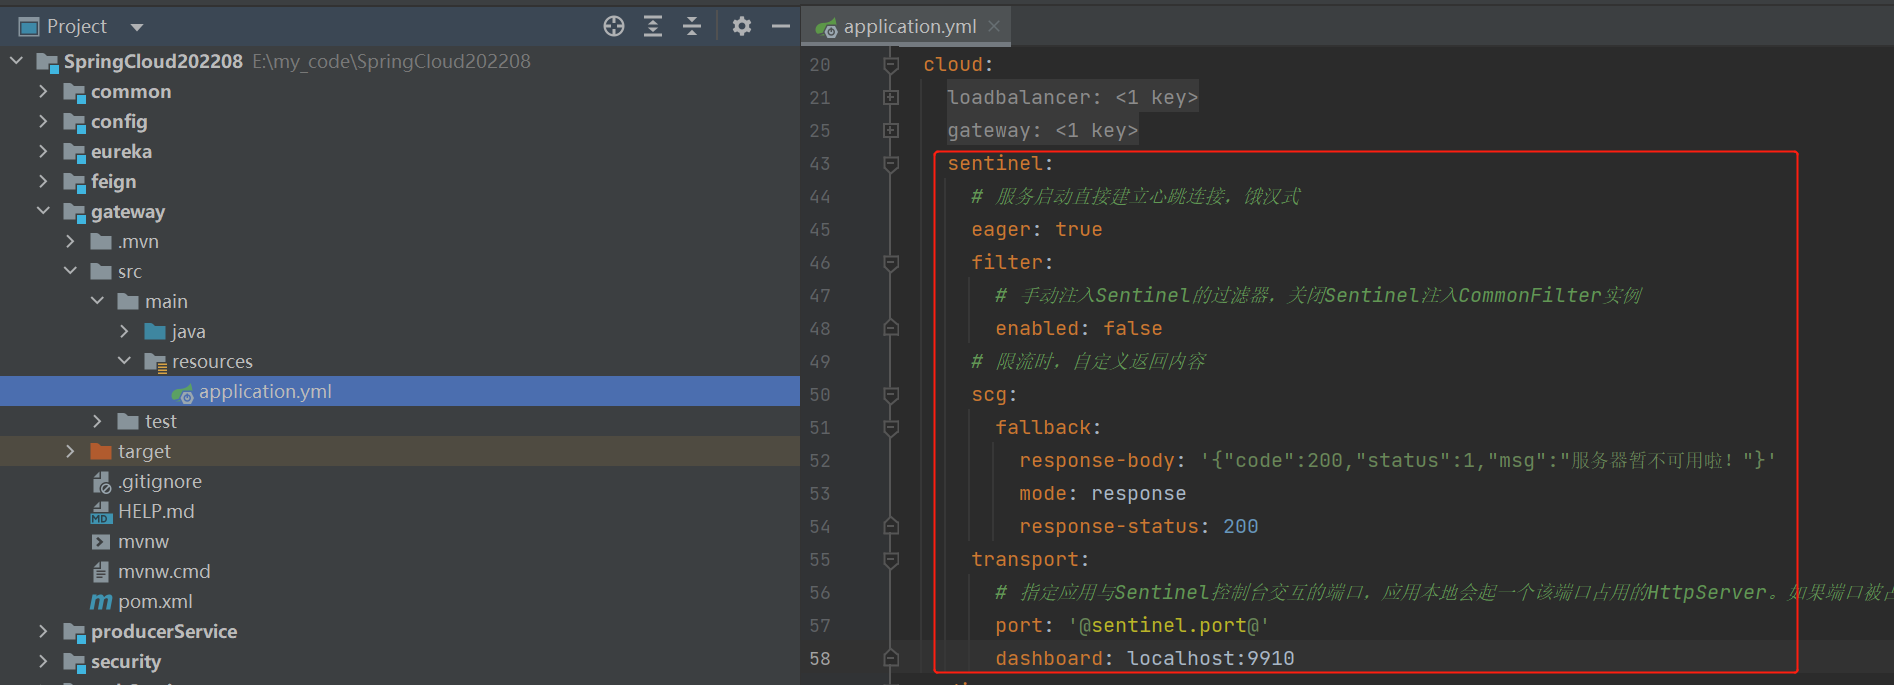
sentinel:
  # 服务启动直接建立心跳连接,饿汉式
  eager: true
  filter:
    # 手动注入Sentinel的过滤器,关闭Sentinel注入CommonFilter实例
    enabled: false
  # 限流时,自定义返回内容
  scg:
    fallback:
      response-body: '{"code":200,"status":1,"msg":"服务器暂不可用啦!"}'
      mode: response
      response-status: 200
  transport:
    # 指定应用与Sentinel控制台交互的端口,应用本地会起一个该端口占用的HttpServer。如果端口被占用会往后+1,直到没有占用
    port: '@sentinel.port@'
    dashboard: localhost:9910

5. 负载均衡
SpringCloud 2020版之后就集成LoadBalancer,所以无需再加入LoadBalancer依赖
目前支持2中负载均衡机制:1、轮询机制,也是默认使用的;2、随机机制;
gateway路由中使用lb开头的就是使用轮询负载均衡,lb就是LoadBalancer的简写;
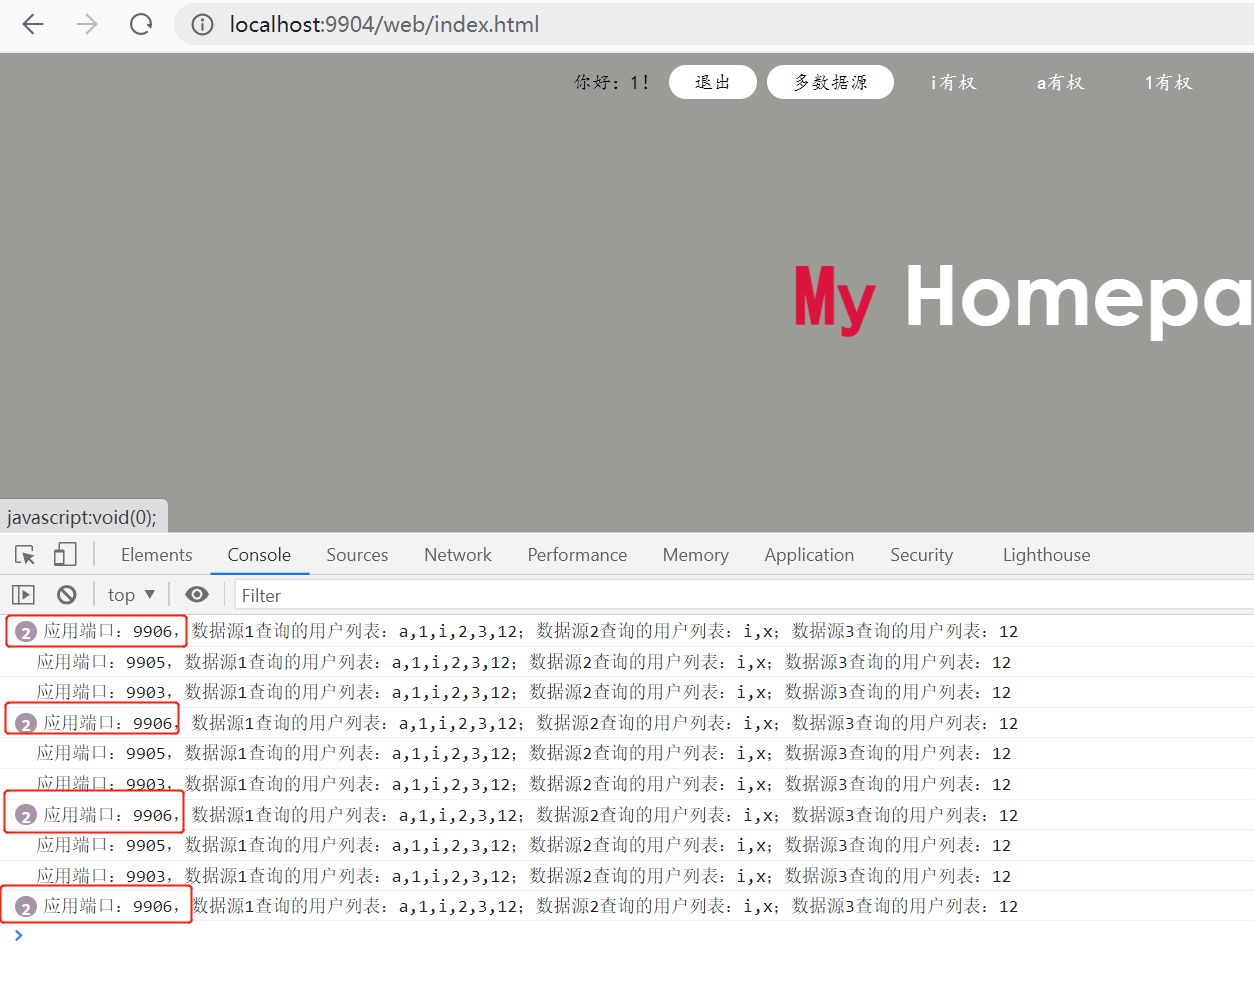
这里重写轮询方式,比如我们的服务器性能是不一样的,性能好的我们就给他多处理
- 重写ReactorServiceInstanceLoadBalancer
点击查看代码
package com.xiaostudy.gateway.loadbalancer;

import org.slf4j.Logger;
import org.slf4j.LoggerFactory;
import org.springframework.beans.factory.ObjectProvider;
import org.springframework.cloud.client.ServiceInstance;
import org.springframework.cloud.client.loadbalancer.DefaultResponse;
import org.springframework.cloud.client.loadbalancer.EmptyResponse;
import org.springframework.cloud.client.loadbalancer.Request;
import org.springframework.cloud.client.loadbalancer.Response;
import org.springframework.cloud.loadbalancer.core.NoopServiceInstanceListSupplier;
import org.springframework.cloud.loadbalancer.core.ReactorServiceInstanceLoadBalancer;
import org.springframework.cloud.loadbalancer.core.SelectedInstanceCallback;
import org.springframework.cloud.loadbalancer.core.ServiceInstanceListSupplier;
import reactor.core.publisher.Mono;

import java.util.List;
import java.util.Random;
import java.util.concurrent.atomic.AtomicInteger;

// 自定义轮询
public class MyRoundRobinLoadBalancer implements ReactorServiceInstanceLoadBalancer {
    private static final Logger log = LoggerFactory.getLogger(MyRoundRobinLoadBalancer.class);

    final AtomicInteger position;

    final String serviceId;

    ObjectProvider<ServiceInstanceListSupplier> serviceInstanceListSupplierProvider;

    /**
     * @param serviceInstanceListSupplierProvider a provider of
     *                                            {@link ServiceInstanceListSupplier} that will be used to get available instances
     * @param serviceId                           id of the service for which to choose an instance
     */
    public MyRoundRobinLoadBalancer(ObjectProvider<ServiceInstanceListSupplier> serviceInstanceListSupplierProvider,
                                    String serviceId) {
        this(serviceInstanceListSupplierProvider, serviceId, new Random().nextInt(1000));
    }

    /**
     * @param serviceInstanceListSupplierProvider a provider of
     *                                            {@link ServiceInstanceListSupplier} that will be used to get available instances
     * @param serviceId                           id of the service for which to choose an instance
     * @param seedPosition                        Round Robin element position marker
     */
    public MyRoundRobinLoadBalancer(ObjectProvider<ServiceInstanceListSupplier> serviceInstanceListSupplierProvider,
                                    String serviceId, int seedPosition) {
        this.serviceId = serviceId;
        this.serviceInstanceListSupplierProvider = serviceInstanceListSupplierProvider;
        this.position = new AtomicInteger(seedPosition);
    }

    @SuppressWarnings("rawtypes")
    @Override
    // see original
    // https://github.com/Netflix/ocelli/blob/master/ocelli-core/
    // src/main/java/netflix/ocelli/loadbalancer/RoundRobinLoadBalancer.java
    public Mono<Response<ServiceInstance>> choose(Request request) {
        ServiceInstanceListSupplier supplier = serviceInstanceListSupplierProvider
                .getIfAvailable(NoopServiceInstanceListSupplier::new);
        return supplier.get(request).next()
                .map(serviceInstances -> processInstanceResponse(supplier, serviceInstances));
    }

    private Response<ServiceInstance> processInstanceResponse(ServiceInstanceListSupplier supplier,
                                                              List<ServiceInstance> serviceInstances) {
        Response<ServiceInstance> serviceInstanceResponse = getInstanceResponse(serviceInstances);
        if (supplier instanceof SelectedInstanceCallback && serviceInstanceResponse.hasServer()) {
            ((SelectedInstanceCallback) supplier).selectedServiceInstance(serviceInstanceResponse.getServer());
        }
        return serviceInstanceResponse;
    }

    private Response<ServiceInstance> getInstanceResponse(List<ServiceInstance> instances) {
        if (instances.isEmpty()) {
            if (log.isWarnEnabled()) {
                log.warn("No servers available for service: " + serviceId);
            }
            return new EmptyResponse();
        }

        // Ignore the sign bit, this allows pos to loop sequentially from 0 to
        // Integer.MAX_VALUE
        int pos = this.position.incrementAndGet() & Integer.MAX_VALUE;

        // TODO 原来的算法
//        int i = pos % instances.size();
        // instances是指某个资源有几个服务,也就是集群数。pos是记录某个资源被访问次数
//        ServiceInstance instance = instances.get(i);

        // TODO 自定义算法,比如指定服务器多处理一次循环
        int i = pos % (instances.size() + 1);
        ServiceInstance instance = null;
        if (i == instances.size()) {
            for (ServiceInstance serviceInstance : instances) {
                if (serviceInstance.getHost().equals("192.168.1.6") && "9906".equals(serviceInstance.getPort())) {
                    instance = serviceInstance;
                }
            }
            if (null == instance) {
                instance = instances.get(i - 1);
            }
        } else {
            // instances是指某个资源有几个服务,也就是集群数。pos是记录某个资源被访问次数
            instance = instances.get(i);
        }

        return new DefaultResponse(instance);
    }
}
- 自定义负载均衡策略配置类
点击查看代码
package com.xiaostudy.gateway.loadbalancer;

import org.springframework.cloud.client.ServiceInstance;
import org.springframework.cloud.loadbalancer.core.ReactorLoadBalancer;
import org.springframework.cloud.loadbalancer.core.ServiceInstanceListSupplier;
import org.springframework.cloud.loadbalancer.support.LoadBalancerClientFactory;
import org.springframework.context.annotation.Bean;
import org.springframework.core.env.Environment;

// 自定义负载策略
public class MyLoadBalancerConfiguration {
    @Bean
    ReactorLoadBalancer<ServiceInstance> randomLoadBalancer(Environment environment,
                                                            LoadBalancerClientFactory loadBalancerClientFactory) {
        String name = environment.getProperty(LoadBalancerClientFactory.PROPERTY_NAME);
//        return new RoundRobinLoadBalancer(loadBalancerClientFactory.getLazyProvider(name, ServiceInstanceListSupplier.class), name);
        return new MyRoundRobinLoadBalancer(loadBalancerClientFactory.getLazyProvider(name, ServiceInstanceListSupplier.class), name);
    }
}
- 启动类添加
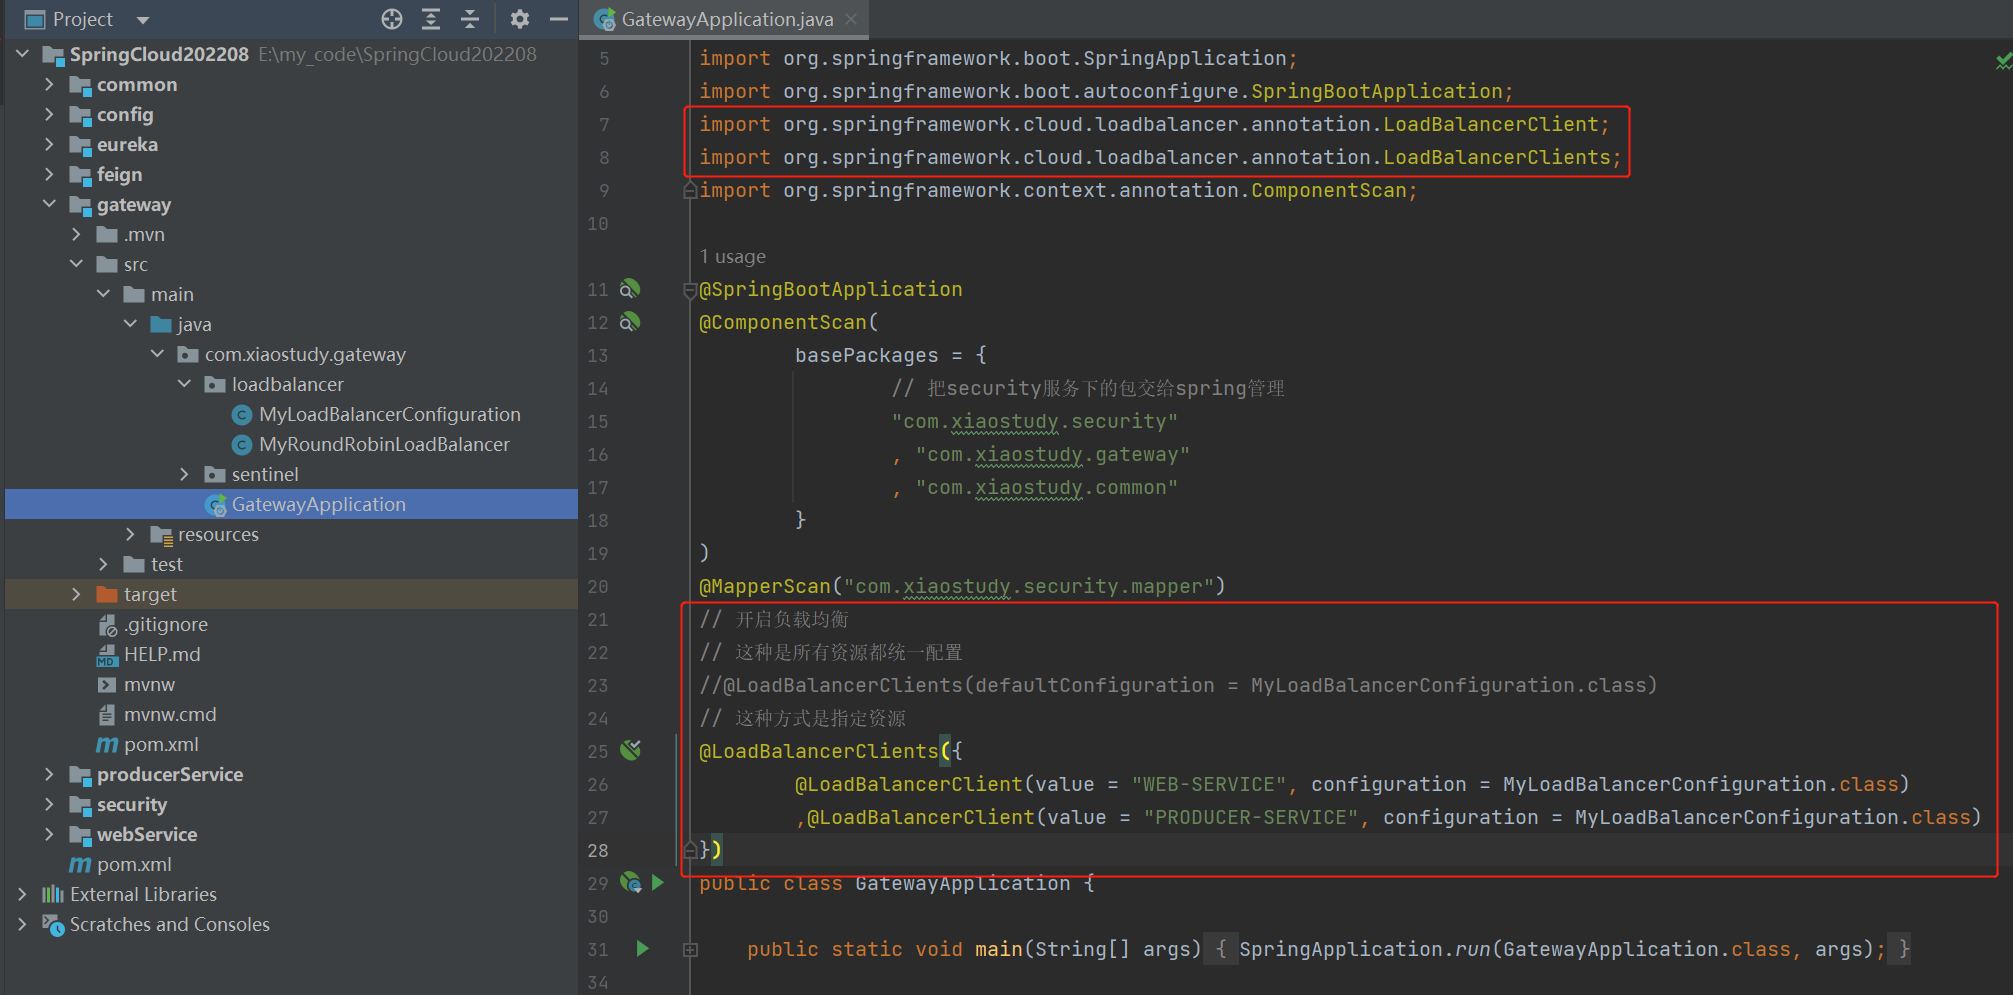
// 开启负载均衡
// 这种是所有资源都统一配置
//@LoadBalancerClients(defaultConfiguration = MyLoadBalancerConfiguration.class)
// 这种方式是指定资源
@LoadBalancerClients({
        @LoadBalancerClient(value = "WEB-SERVICE", configuration = MyLoadBalancerConfiguration.class)
        ,@LoadBalancerClient(value = "PRODUCER-SERVICE", configuration = MyLoadBalancerConfiguration.class)
})
-
启动gateway
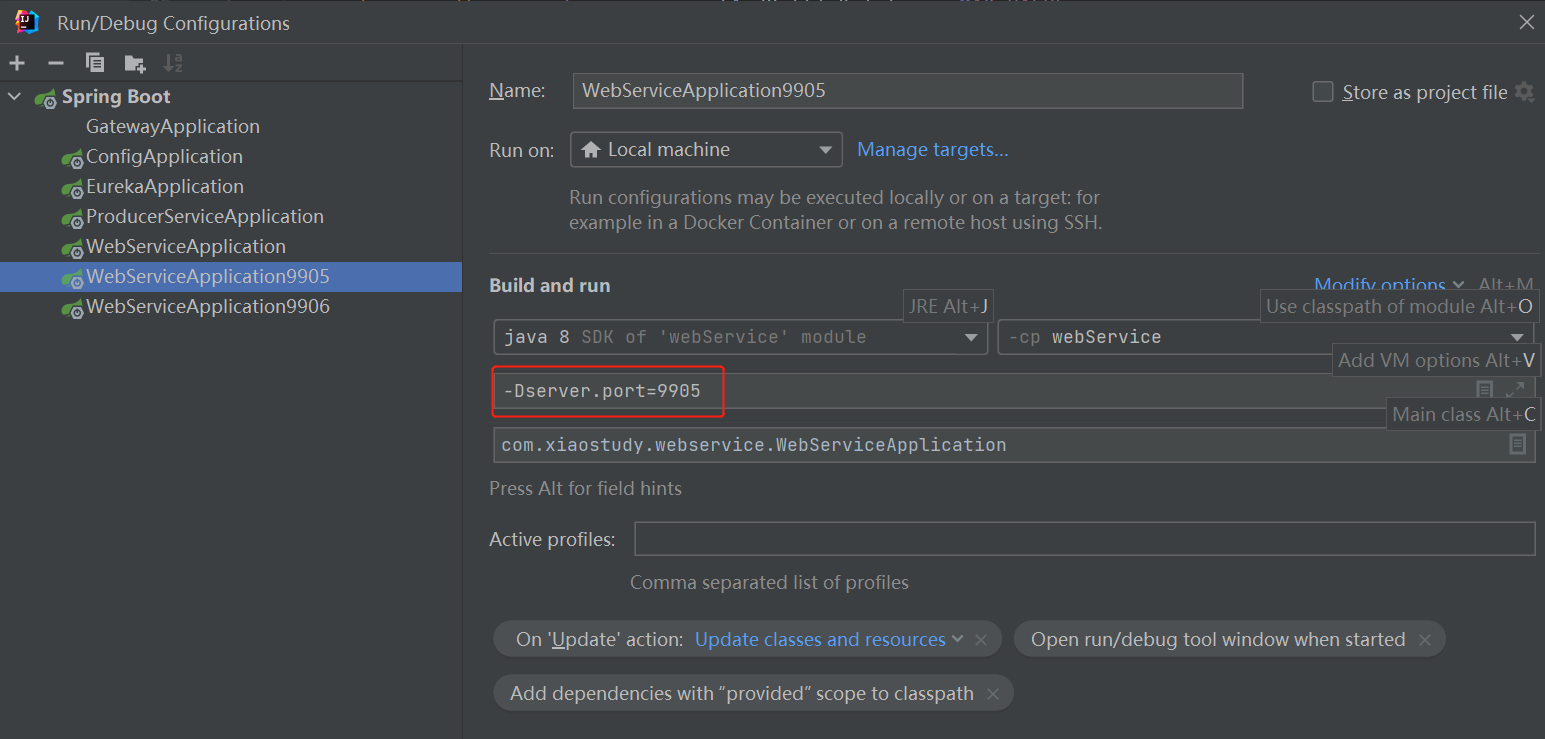
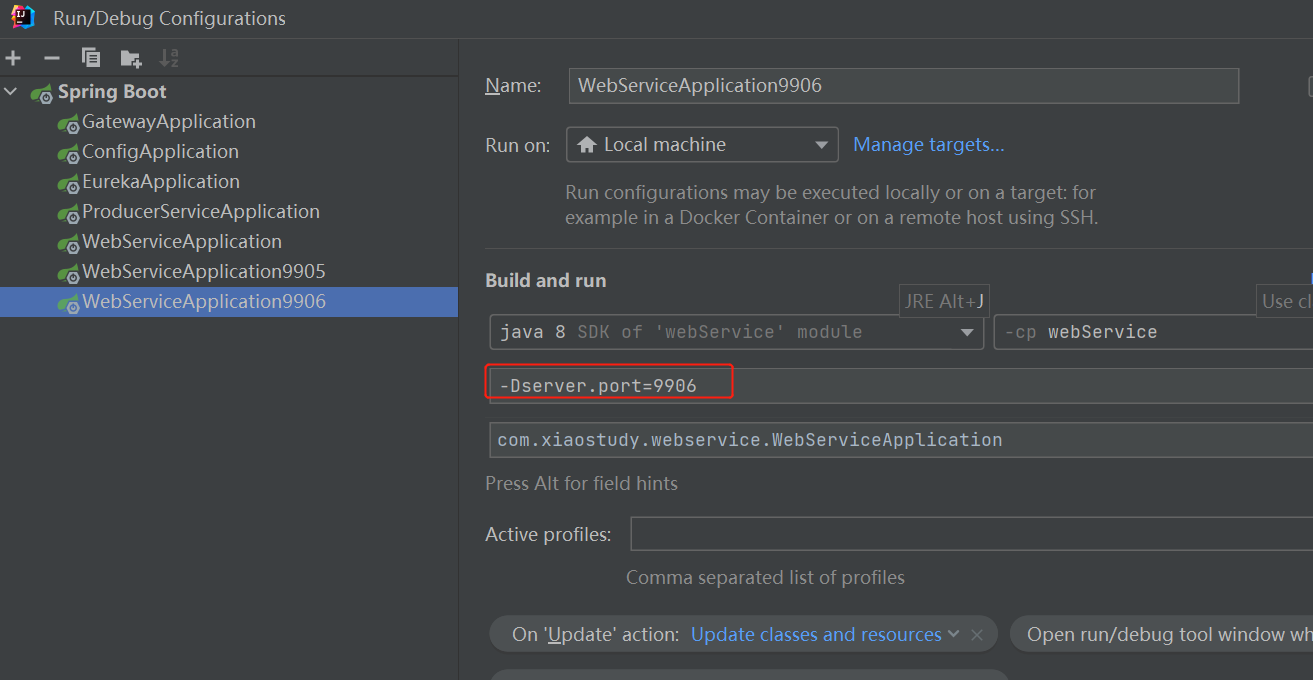
-
复制多个服务,改一下端口。并把服务启动

-
看效果