1. 项目说明
由于工作原因,有时间把之前学到的技术进行整理。
注意:由于截图过多,不方便浏览,会分开多个文章。
当前这篇教程是:
1. 新建Eureka注册中心
2. 新建Config配置中心,producerService服务读取参数
3. 2个业务服务(producerService和webService),webService通过Feign调用producerService的服务
4. webService用到多数据源,不同的数据源管理不同的数据
简单创建一个SpringCloud2021.0.3项目(一)
简单创建一个SpringCloud2021.0.3项目(二)
简单创建一个SpringCloud2021.0.3项目(三)
简单创建一个SpringCloud2021.0.3项目(四)
1. 版本
- SpringCloud版本为2021.0.3
- SpringBoot版本为2.7.2
2. 用到组件
- 注册中心:暂时用Eureka,后面再改成Nacos
- 网关:Gateway
- 权限:Security,Gateway集成
- 负载均衡:LoadBalancer,SpringCloud2020版之后就集成LoadBalancer
- 限流、熔断降级:Sentinel
- 配置中心:暂时用Config,后面改成Nacos
- 服务间访问:Feign
3. 功能
- 项目最基本功能,权限控制,在分布式系统中基于Token的身份验证。
- 前端登陆,做了2种方式。用户、密码、验证码;邮箱、验证码、图片滑块;并且前端加密传给后端解密;登陆异常次数限制;
- 限流、负载均衡,应对高并发情况,降低系统负载;
- 服务熔断降级:避免系统雪崩,提高系统可用性;
- 两种方式的多数据源,一种是通过AOP方式动态切换数据源,另一种是不同数据源管理的数据各不相同;
- 日志系统Logback,是SpringBoot默认集成
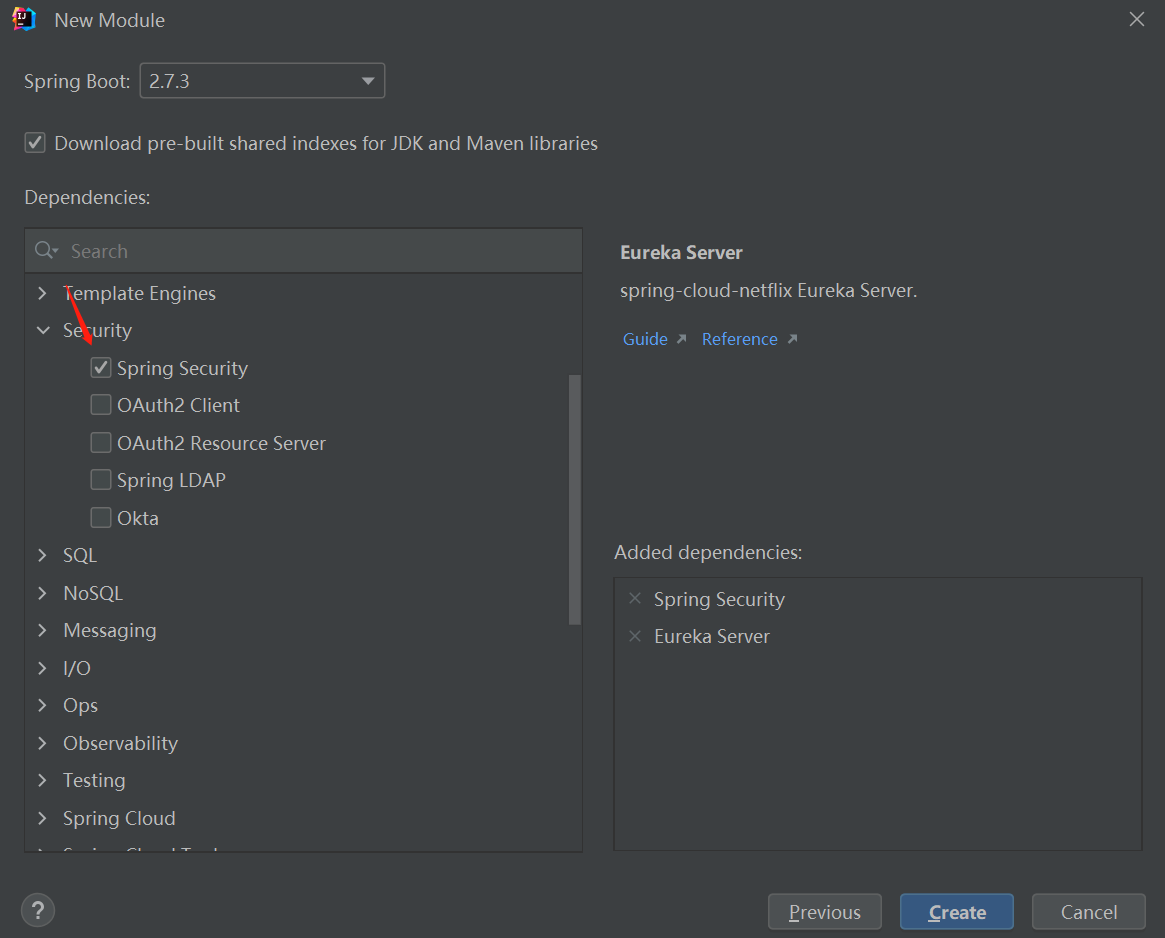
2. 新建父模块和注册中心
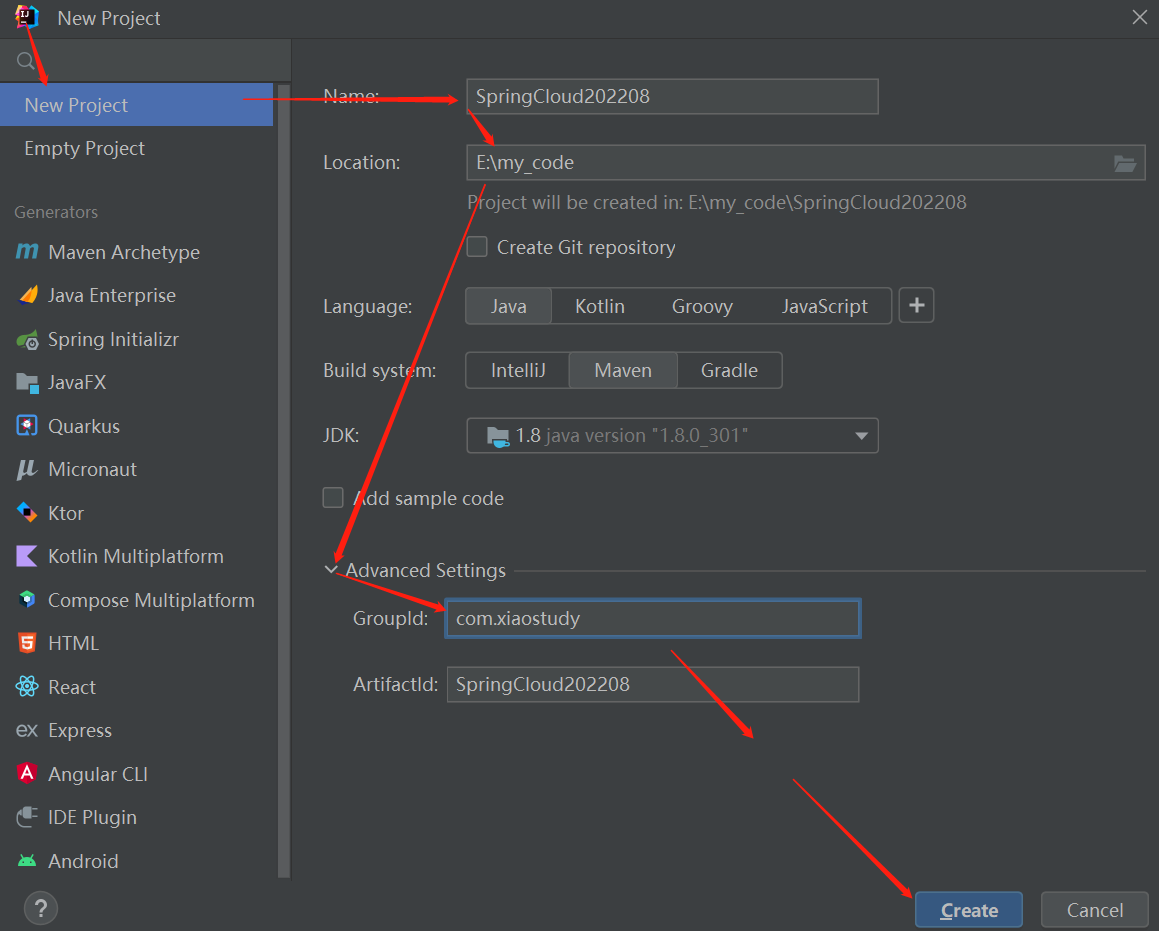
1. 新建父模块
父模块名称:SpringCloud202208
-
创建操作

-
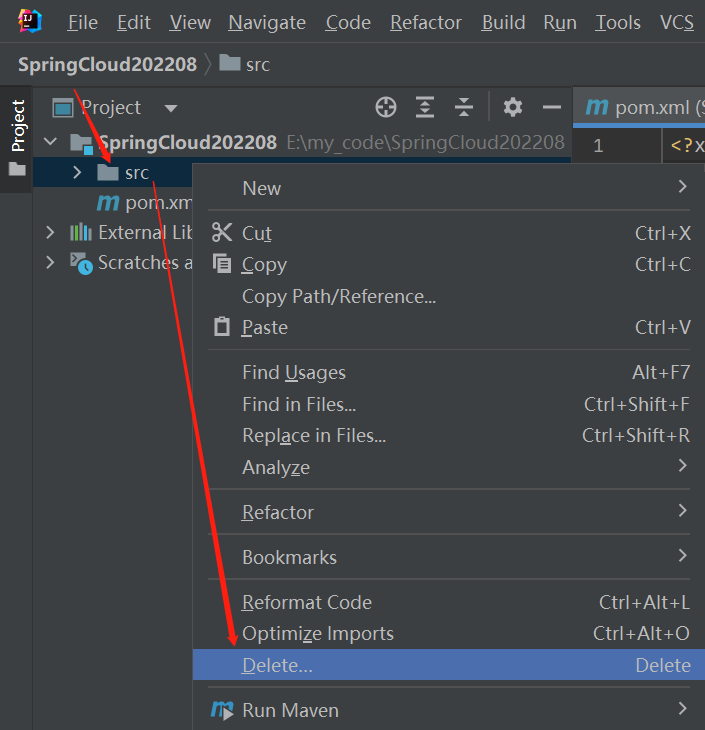
删除src文件夹
-
配置项目maven

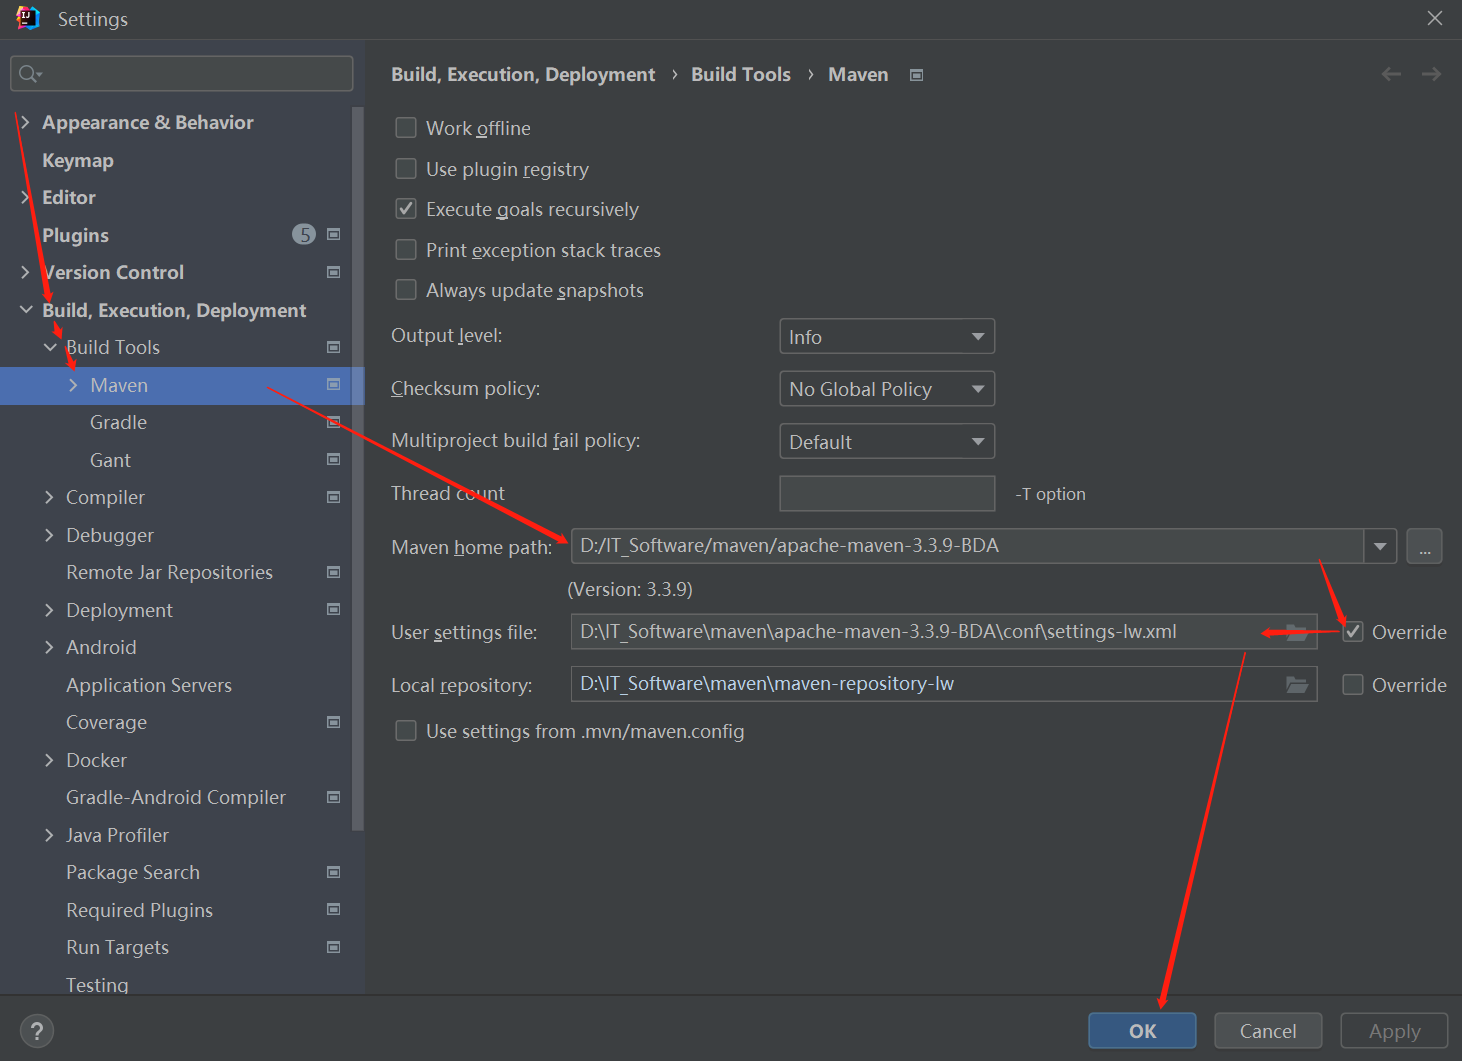
有详细注释的setting.xml文件
点击查看代码
<?xml version="1.0" encoding="UTF-8"?>
<!--
详解来源:https://blog.csdn.net/qq_47759220/article/details/119079050
-->
<settings xmlns="http://maven.apache.org/SETTINGS/1.0.0"
xmlns:xsi="http://www.w3.org/2001/XMLSchema-instance"
xsi:schemaLocation="http://maven.apache.org/SETTINGS/1.0.0 http://maven.apache.org/xsd/settings-1.0.0.xsd">
<!--
该值表示构建系统本地仓库的路径。
默认值:${user.home}/.m2/repository
-->
<localRepository>D:\IT_Software\maven\maven-repository-lw</localRepository>
<!--
表示maven是否需要和用户交互以获得输入。
如果maven需要和用户交互以获得输入,则设置成true,反之则应为false。
默认为true。
-->
<interactiveMode>true</interactiveMode>
<!--
maven是否需要使用plugin-registry.xml文件来管理插件版本。
如果需要让maven使用文件~/.m2/plugin-registry.xml来管理插件版本,则设为true。
默认为false。
-->
<usePluginRegistry>false</usePluginRegistry>
<!--
这个属性表示在Maven进行项目编译和部署等操作时是否允许Maven进行联网来下载所需要的信息。
如果构建系统需要在离线模式下运行,则为true,默认为false。
当由于网络设置原因或者安全因素,构建服务器不能连接远程仓库的时候,该配置就十分有用。
-->
<offline>false</offline>
<!--
在pluginGroups元素下面可以定义一系列的pluginGroup元素。
表示当通过plugin的前缀来解析plugin的时候到哪里寻找。pluginGroup元素指定的是plugin的groupId。
默认情况下,Maven会自动把org.apache.maven.plugins 和 org.codehaus.mojo 添加到pluginGroups下。
-->
<pluginGroups>
<!--plugin的组织Id(groupId) -->
<pluginGroup>org.codehaus.mojo</pluginGroup>
</pluginGroups>
<!--
一般,仓库的下载和部署是在pom.xml文件中的repositories和distributionManagement元素中定义的。
然而,一般类似用户名、密码(有些仓库访问是需要安全认证的)等信息不应该在pom.xml文件中配置,这些信息可以配置在settings.xml中。
-->
<servers>
<!--服务器元素包含配置服务器时需要的信息 -->
<server>
<!--这是server的id(注意不是用户登陆的id),该id与distributionManagement中repository元素的id相匹配。 -->
<id>server001</id>
<!--鉴权用户名。鉴权用户名和鉴权密码表示服务器认证所需要的登录名和密码。 -->
<username>my_login</username>
<!--鉴权密码 。鉴权用户名和鉴权密码表示服务器认证所需要的登录名和密码。密码加密功能已被添加到2.1.0 +。详情请访问密码加密页面 -->
<password>my_password</password>
<!--鉴权时使用的私钥位置。和前两个元素类似,私钥位置和私钥密码指定了一个私钥的路径(默认是${user.home}/.ssh/id_dsa)以及如果需要的话,一个密语。将来passphrase和password元素可能会被提取到外部,但目前它们必须在settings.xml文件以纯文本的形式声明。 -->
<privateKey>${usr.home}/.ssh/id_dsa</privateKey>
<!--鉴权时使用的私钥密码。 -->
<passphrase>some_passphrase</passphrase>
<!--文件被创建时的权限。如果在部署的时候会创建一个仓库文件或者目录,这时候就可以使用权限(permission)。这两个元素合法的值是一个三位数字,其对应了unix文件系统的权限,如664,或者775。 -->
<filePermissions>664</filePermissions>
<!--目录被创建时的权限。 -->
<directoryPermissions>775</directoryPermissions>
</server>
</servers>
<!--
用于定义一系列的远程仓库的镜像。我们可以在pom中定义一个下载工件的时候所使用的远程仓库。
但是有时候这个远程仓库会比较忙,所以这个时候人们就想着给它创建镜像以缓解远程仓库的压力,也就是说会把对远程仓库的请求转换到对其镜像地址的请求。
每个远程仓库都会有一个id,这样我们就可以创建自己的mirror来关联到该仓库,那么以后需要从远程仓库下载工件的时候Maven就可以从我们定义好的mirror站点来下载,这可以很好的缓解我们远程仓库的压力。
在我们定义的mirror中每个远程仓库都只能有一个mirror与它关联,也就是说你不能同时配置多个mirror的mirrorOf指向同一个repositoryId。
-->
<mirrors>
<!-- 给定仓库的下载镜像。 -->
<mirror>
<!-- 该镜像的唯一标识符。id用来区分不同的mirror元素。 -->
<id>nexus-aliyun</id>
<!-- 镜像名称 -->
<name>Nexus aliyun</name>
<!-- 该镜像的URL。构建系统会优先考虑使用该URL,而非使用默认的服务器URL。 -->
<url>http://maven.aliyun.com/nexus/content/groups/public/</url>
<!--
被镜像的服务器的id。
例如,如果我们要设置了一个Maven中央仓库(http://repo.maven.apache.org/maven2/)的镜像,就需要将该元素设置成central。
这必须和中央仓库的id central完全一致。
-->
<mirrorOf>central</mirrorOf>
</mirror>
<mirror>
<id>nexus-aliyun</id>
<name>Nexus aliyun</name>
<url>http://maven.aliyun.com/nexus/content/groups/public</url>
<mirrorOf>*,!cloudera</mirrorOf>
</mirror>
<mirror>
<id>central</id>
<name>Maven Repository Switchboard</name>
<url>http://repo1.maven.org/maven2/</url>
<mirrorOf>central</mirrorOf>
</mirror>
<mirror>
<id>repo2</id>
<name>Human Readable Name for this Mirror.</name>
<url>http://repo2.maven.org/maven2/</url>
<mirrorOf>central</mirrorOf>
</mirror>
</mirrors>
<!--
用来配置不同的代理。
-->
<!-- <proxies>-->
<!-- <!–代理元素包含配置代理时需要的信息 –>-->
<!-- <proxy>-->
<!-- <!–代理的唯一定义符,用来区分不同的代理元素。 –>-->
<!-- <id>myproxy</id>-->
<!-- <!–该代理是否是激活的那个。true则激活代理。当我们声明了一组代理,而某个时候只需要激活一个代理的时候,该元素就可以派上用处。 –>-->
<!-- <active>true</active>-->
<!-- <!–代理的协议。 协议://主机名:端口,分隔成离散的元素以方便配置。 –>-->
<!-- <protocol>http</protocol>-->
<!-- <!–代理的主机名。协议://主机名:端口,分隔成离散的元素以方便配置。 –>-->
<!-- <host>proxy.somewhere.com</host>-->
<!-- <!–代理的端口。协议://主机名:端口,分隔成离散的元素以方便配置。 –>-->
<!-- <port>8080</port>-->
<!-- <!–代理的用户名,用户名和密码表示代理服务器认证的登录名和密码。 –>-->
<!-- <username>proxyuser</username>-->
<!-- <!–代理的密码,用户名和密码表示代理服务器认证的登录名和密码。 –>-->
<!-- <password>somepassword</password>-->
<!-- <!–不该被代理的主机名列表。该列表的分隔符由代理服务器指定;例子中使用了竖线分隔符,使用逗号分隔也很常见。 –>-->
<!-- <nonProxyHosts>*.google.com|ibiblio.org</nonProxyHosts>-->
<!-- </proxy>-->
<!-- </proxies>-->
<!--
根据环境参数来调整构建配置的列表。
settings.xml中的profile元素是pom.xml中profile元素的裁剪版本。
它包含了id、activation、repositories、pluginRepositories和 properties元素。
这里的profile元素只包含这五个子元素是因为这里只关心构建系统这个整体(这正是settings.xml文件的角色定位),而非单独的项目对象模型设置。
如果一个settings.xml中的profile被激活,它的值会覆盖任何其它定义在pom.xml中带有相同id的profile。
当所有的约束条件都满足的时候就会激活这个profile。
-->
<profiles>
<profile>
<!-- profile的唯一标识 -->
<id>jdk-1.8</id>
<!-- 自动触发profile的条件逻辑 -->
<activation>
<!--当其值为true的时候表示如果没有其他的profile处于激活状态的时候,该profile将自动被激活。-->
<activeByDefault>true</activeByDefault>
<!--
<jdk>[1.4,1.7)</jdk> 表示1.4、1.5和1.6满足;
<jdk>[1.4,1.7]</jdk> 表示1.4、1.5、1.6和1.7满足;
-->
<jdk>1.8</jdk>
<!--表示当操作系统满足条件的时候激活。-->
<os>
<name>Windows 10</name>
<family>Windows</family>
<arch>x64</arch>
<version>10.0.19044.1706</version>
</os>
<!--
property是键值对的形式,表示当Maven检测到了这样一个键值对的时候就激活该profile。
(1)下面的示例表示当存在属性hello的时候激活该profile。
<property>
<name>hello</name>
</property>
(2)下面的示例表示当属性hello的值为world的时候激活该profile。
<property>
<name>hello</name>
<value>world</value>
</property>
这个时候如果要激活该profile的话,可以在调用Maven指令的时候加上参数hello并指定其值为world,如:mvn compile –Dhello=world
-->
<property>
<name>mavenVersion</name>
<value>2.0.3</value>
</property>
<!--
表示当文件存在或不存在的时候激活,exists表示存在,missing表示不存在。
如下面例子表示当文件hello/world不存在的时候激活该profile。
<profile>
<activation>
<file>
<missing>hello/world</missing>
</file>
</activation>
</profile>
-->
<file>
<exists>${basedir}/file2.properties</exists>
<missing>${basedir}/file1.properties</missing>
</file>
</activation>
<!--
用于定义属性键值对的。
当该profile是激活状态的时候,properties下面指定的属性都可以在pom.xml中使用。对应profile的扩展属性列表。
注:如果该profile被激活,则可以在pom.xml中使用${maven.compiler.compilerVersion}
-->
<properties>
<maven.compiler.source>1.8</maven.compiler.source>
<maven.compiler.target>1.8</maven.compiler.target>
<maven.compiler.compilerVersion>1.8</maven.compiler.compilerVersion>
</properties>
<!--
用于定义远程仓库的,当该profile是激活状态的时候,这里面定义的远程仓库将作为当前pom的远程仓库。
它是maven用来填充构建系统本地仓库所使用的一组远程仓库。
-->
<repositories>
<!--包含需要连接到远程仓库的信息 -->
<repository>
<!--远程仓库唯一标识 -->
<id>codehausSnapshots</id>
<!--远程仓库名称 -->
<name>Codehaus Snapshots</name>
<!--如何处理远程仓库里发布版本的下载 -->
<releases>
<!--true或者false表示该仓库是否为下载某种类型构件(发布版,快照版)开启。 -->
<enabled>false</enabled>
<!--
该元素指定更新发生的频率。
Maven会比较本地POM和远程POM的时间戳。
这里的选项是:always(一直),daily(默认,每日),interval:X(这里X是以分钟为单位的时间间隔),或者never(从不)。
-->
<updatePolicy>always</updatePolicy>
<!--当Maven验证构件校验文件失败时该怎么做-ignore(忽略),fail(失败),或者warn(警告)。 -->
<checksumPolicy>warn</checksumPolicy>
</releases>
<!--如何处理远程仓库里快照版本的下载。有了releases和snapshots这两组配置,POM就可以在每个单独的仓库中,为每种类型的构件采取不同的策略。例如,可能有人会决定只为开发目的开启对快照版本下载的支持。参见repositories/repository/releases元素 -->
<!-- <snapshots>-->
<!-- <!–表示这个仓库是否允许这种类型的工件–>-->
<!-- <enabled/>-->
<!-- <!–表示多久尝试更新一次。可选值有always、daily、interval:minutes(表示每多久更新一次)和never。–>-->
<!-- <updatePolicy/>-->
<!-- <!–当Maven在部署项目到仓库的时候会连同校验文件一起提交,checksumPolicy表示当这个校验文件缺失或不正确的时候该如何处理,可选项有ignore、fail和warn。–>-->
<!-- <checksumPolicy/>-->
<!-- </snapshots>-->
<!--远程仓库URL,按protocol://hostname/path形式 -->
<url>http://snapshots.maven.codehaus.org/maven2</url>
<!--用于定位和排序构件的仓库布局类型-可以是default(默认)或者legacy(遗留)。Maven 2为其仓库提供了一个默认的布局;然而,Maven 1.x有一种不同的布局。我们可以使用该元素指定布局是default(默认)还是legacy(遗留)。 -->
<layout>default</layout>
</repository>
</repositories>
<!--
在Maven中有两种类型的仓库,一种是存储工件的仓库,另一种就是存储plugin插件的仓库。
pluginRepositories的定义和repositories的定义类似,它表示Maven在哪些地方可以找到所需要的插件。
和repository类似,只是repository是管理jar包依赖的仓库,pluginRepositories则是管理插件的仓库。
maven插件是一种特殊类型的构件。由于这个原因,插件仓库独立于其它仓库。
pluginRepositories元素的结构和repositories元素的结构类似。
每个pluginRepository元素指定一个Maven可以用来寻找新插件的远程地址。
-->
<pluginRepositories>
<!-- 包含需要连接到远程插件仓库的信息.参见profiles/profile/repositories/repository元素的说明 -->
<!-- <pluginRepository>-->
<!-- <releases>-->
<!-- <enabled/>-->
<!-- <updatePolicy/>-->
<!-- <checksumPolicy/>-->
<!-- </releases>-->
<!-- <snapshots>-->
<!-- <enabled/>-->
<!-- <updatePolicy/>-->
<!-- <checksumPolicy/>-->
<!-- </snapshots>-->
<!-- <id>a</id>-->
<!-- <name/>-->
<!-- <url/>-->
<!-- <layout>b</layout>-->
<!-- </pluginRepository>-->
</pluginRepositories>
</profile>
<profile>
<!-- id必须唯一 -->
<id>myRepository2</id>
<repositories>
<repository>
<!-- id必须唯一 -->
<id>myRepository2_1</id>
<!-- 仓库的url地址 -->
<url>http://repository.jboss.org/nexus/content/groups/public-jboss/</url>
<releases>
<enabled>true</enabled>
</releases>
<snapshots>
<enabled>true</enabled>
<updatePolicy>always</updatePolicy>
</snapshots>
</repository>
</repositories>
</profile>
<profile>
<!-- id必须唯一 -->
<id>myRepositoryAliyun</id>
<repositories>
<repository>
<!-- id必须唯一 -->
<id>myRepositoryAliyun_1</id>
<!-- 仓库的url地址 -->
<url>http://maven.aliyun.com/nexus/content/groups/public/</url>
<releases>
<enabled>true</enabled>
</releases>
<snapshots>
<enabled>true</enabled>
<updatePolicy>always</updatePolicy>
</snapshots>
</repository>
</repositories>
</profile>
<profile>
<id>downloadSources</id>
<properties>
<downloadSources>true</downloadSources>
<downloadJavadocs>true</downloadJavadocs>
</properties>
</profile>
</profiles>
<!--
手动激活profiles的列表,按照profile被应用的顺序定义activeProfile。
该元素包含了一组activeProfile元素,每个activeProfile都含有一个profile id。
任何在activeProfile中定义的profile id,不论环境设置如何,其对应的 profile都会被激活。如果没有匹配的profile,则什么都不会发生。
例如,env-test是一个activeProfile,则在pom.xml(或者profile.xml)中对应id的profile会被激活。
如果运行过程中找不到这样一个profile,Maven则会像往常一样运行。
-->
<activeProfiles>
<!-- 要激活的profile id -->
<activeProfile>jdk-1.8</activeProfile>
<activeProfile>myRepositoryAliyun</activeProfile>
<activeProfile>myRepository2</activeProfile>
</activeProfiles>
</settings>
无注释的setting.xml文件
点击查看代码
<?xml version="1.0" encoding="UTF-8"?>

<settings xmlns="http://maven.apache.org/SETTINGS/1.0.0"
          xmlns:xsi="http://www.w3.org/2001/XMLSchema-instance"
          xsi:schemaLocation="http://maven.apache.org/SETTINGS/1.0.0 http://maven.apache.org/xsd/settings-1.0.0.xsd">

    <localRepository>D:\IT_Software\maven\maven-repository-lw</localRepository>

    <pluginGroups>
        <pluginGroup>org.codehaus.mojo</pluginGroup>
    </pluginGroups>

    <mirrors>
        <mirror>
            <id>nexus-aliyun</id>
            <name>Nexus aliyun</name>
            <url>http://maven.aliyun.com/nexus/content/groups/public/</url>
            <mirrorOf>central</mirrorOf>
        </mirror>
        <mirror>
            <id>nexus-aliyun</id>
            <name>Nexus aliyun</name>
            <url>http://maven.aliyun.com/nexus/content/groups/public</url>
            <mirrorOf>*,!cloudera</mirrorOf>
        </mirror>
        <mirror>
            <id>central</id>
            <name>Maven Repository Switchboard</name>
            <url>http://repo1.maven.org/maven2/</url>
            <mirrorOf>central</mirrorOf>
        </mirror>
        <mirror>
            <id>repo2</id>
            <name>Human Readable Name for this Mirror.</name>
            <url>http://repo2.maven.org/maven2/</url>
            <mirrorOf>central</mirrorOf>
        </mirror>
    </mirrors>

    <profiles>
        <profile>
            <id>jdk-1.8</id>
            <activation>
                <activeByDefault>true</activeByDefault>
                <jdk>1.8</jdk>
            </activation>
            <repositories>
                <repository>
                    <id>codehausSnapshots</id>
                    <name>Codehaus Snapshots</name>
                    <releases>
                        <enabled>true</enabled>
                    </releases>
                    <url>http://snapshots.maven.codehaus.org/maven2</url>
                </repository>
            </repositories>
        </profile>
        <profile>
            <id>myRepository2</id>
            <repositories>
                <repository>
                    <id>myRepository2_1</id>
                    <url>http://repository.jboss.org/nexus/content/groups/public-jboss/</url>
                    <releases>
                        <enabled>true</enabled>
                    </releases>
                    <snapshots>
                        <enabled>true</enabled>
                        <updatePolicy>always</updatePolicy>
                    </snapshots>
                </repository>
            </repositories>
        </profile>
        <profile>
            <id>myRepositoryAliyun</id>
            <repositories>
                <repository>
                    <id>myRepositoryAliyun_1</id>
                    <url>http://maven.aliyun.com/nexus/content/groups/public/</url>
                    <releases>
                        <enabled>true</enabled>
                    </releases>
                    <snapshots>
                        <enabled>true</enabled>
                        <updatePolicy>always</updatePolicy>
                    </snapshots>
                </repository>
            </repositories>
        </profile>
        <profile>
            <id>downloadSources</id>
            <properties>
                <downloadSources>true</downloadSources>
                <downloadJavadocs>true</downloadJavadocs>
            </properties>
        </profile>
    </profiles>

    <activeProfiles>
        <activeProfile>jdk-1.8</activeProfile>
        <activeProfile>myRepositoryAliyun</activeProfile>
        <activeProfile>myRepository2</activeProfile>
    </activeProfiles>
</settings>
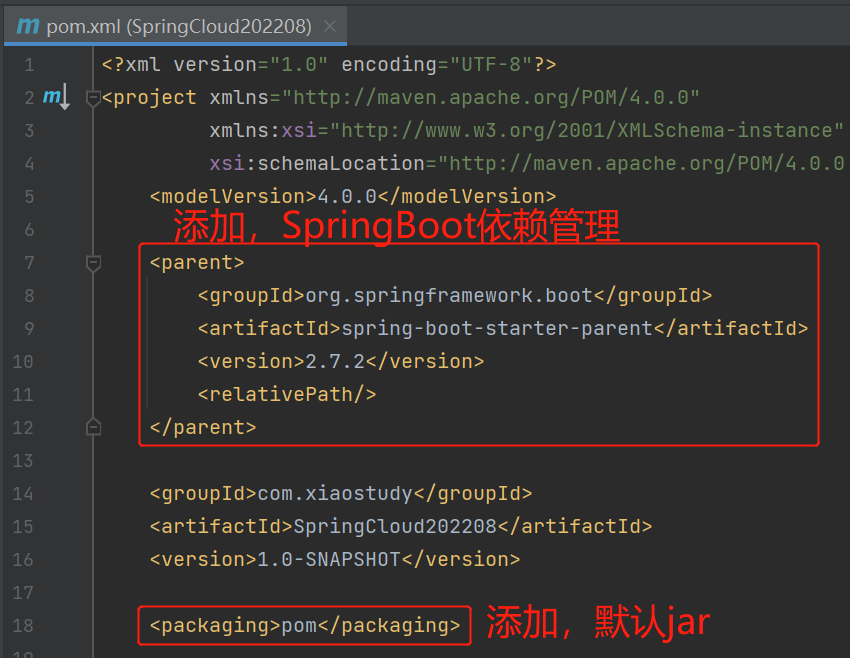
- 修改pom.xml文件
pom.xml文件
<?xml version="1.0" encoding="UTF-8"?>
<project xmlns="http://maven.apache.org/POM/4.0.0"
xmlns:xsi="http://www.w3.org/2001/XMLSchema-instance"
xsi:schemaLocation="http://maven.apache.org/POM/4.0.0 http://maven.apache.org/xsd/maven-4.0.0.xsd">
<modelVersion>4.0.0</modelVersion>
<parent>
<groupId>org.springframework.boot</groupId>
<artifactId>spring-boot-starter-parent</artifactId>
<version>2.7.2</version>
<relativePath/>
</parent>
<groupId>com.xiaostudy</groupId>
<artifactId>SpringCloud202208</artifactId>
<version>1.0-SNAPSHOT</version>
<packaging>pom</packaging>
<modules>
<module>eureka</module>
<module>config</module>
</modules>
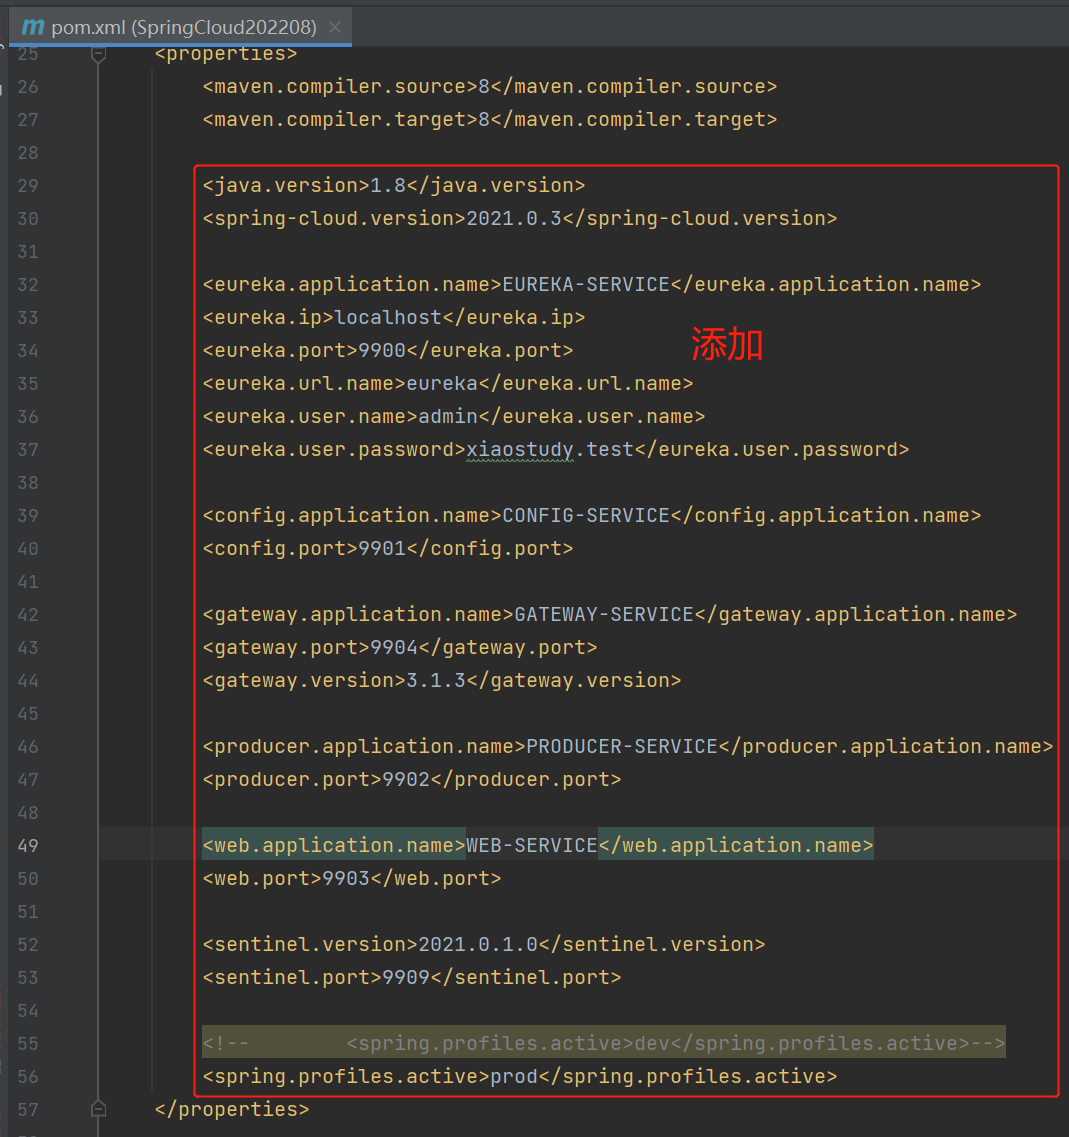
<properties>
<maven.compiler.source>8</maven.compiler.source>
<maven.compiler.target>8</maven.compiler.target>
<java.version>1.8</java.version>
<spring-cloud.version>2021.0.3</spring-cloud.version>
<eureka.application.name>EUREKA-SERVICE</eureka.application.name>
<eureka.ip>localhost</eureka.ip>
<eureka.port>9900</eureka.port>
<eureka.url.name>eureka</eureka.url.name>
<eureka.user.name>admin</eureka.user.name>
<eureka.user.password>xiaostudy.test</eureka.user.password>
<config.application.name>CONFIG-SERVICE</config.application.name>
<config.port>9901</config.port>
<gateway.application.name>GATEWAY-SERVICE</gateway.application.name>
<gateway.port>9904</gateway.port>
<gateway.version>3.1.3</gateway.version>
<producer.application.name>PRODUCER-SERVICE</producer.application.name>
<producer.port>9902</producer.port>
<web.application.name>WEB-SERVICE</web.application.name>
<web.port>9903</web.port>
<sentinel.version>2021.0.1.0</sentinel.version>
<sentinel.port>9909</sentinel.port>
<!-- <spring.profiles.active>dev</spring.profiles.active>-->
<spring.profiles.active>prod</spring.profiles.active>
</properties>
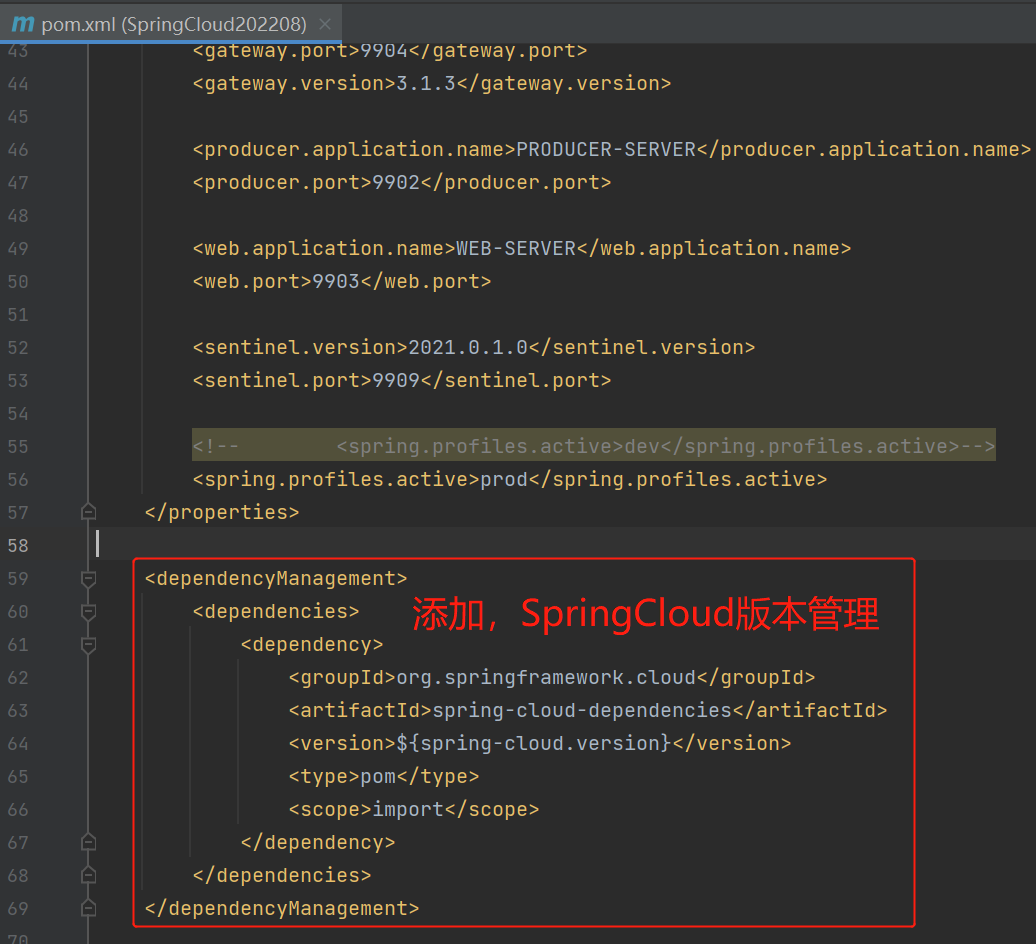
<dependencyManagement>
<dependencies>
<dependency>
<groupId>org.springframework.cloud</groupId>
<artifactId>spring-cloud-dependencies</artifactId>
<version>${spring-cloud.version}</version>
<type>pom</type>
<scope>import</scope>
</dependency>
</dependencies>
</dependencyManagement>
</project>
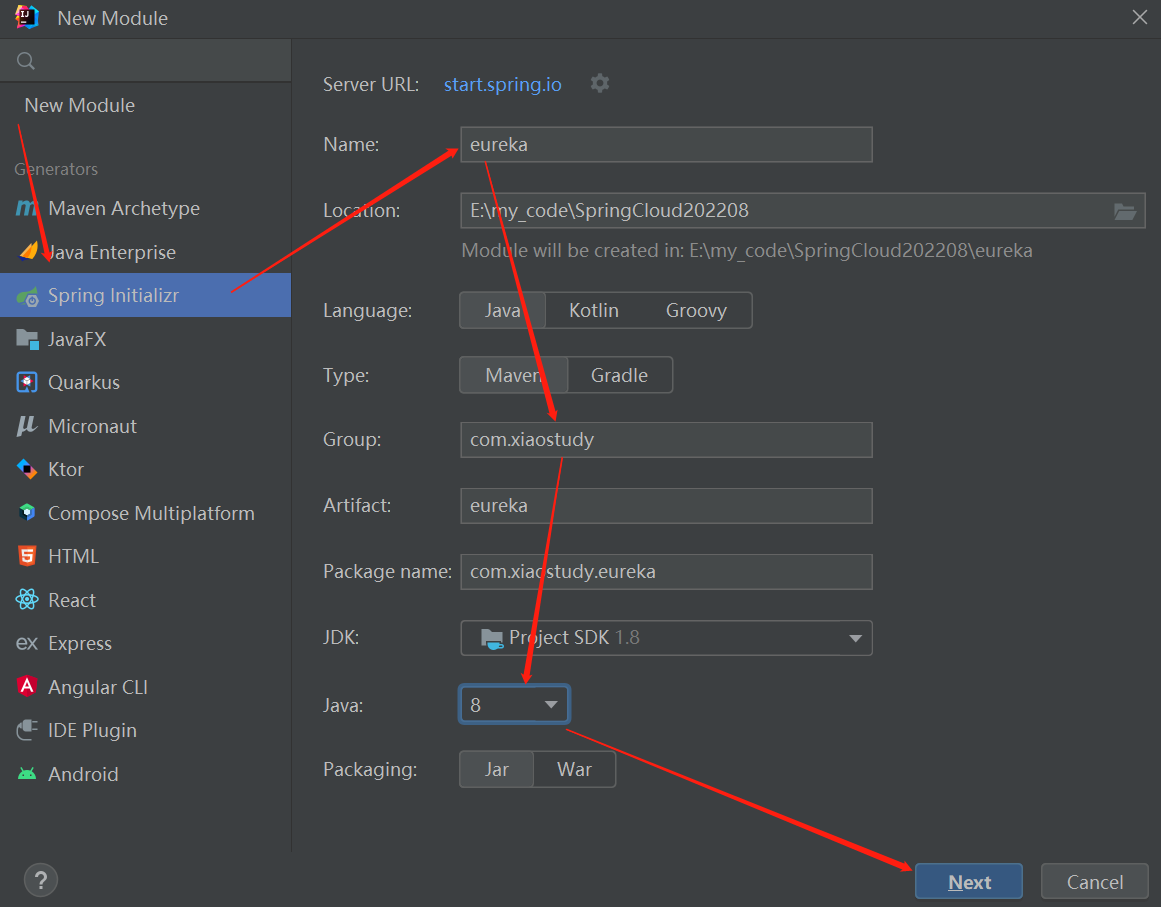
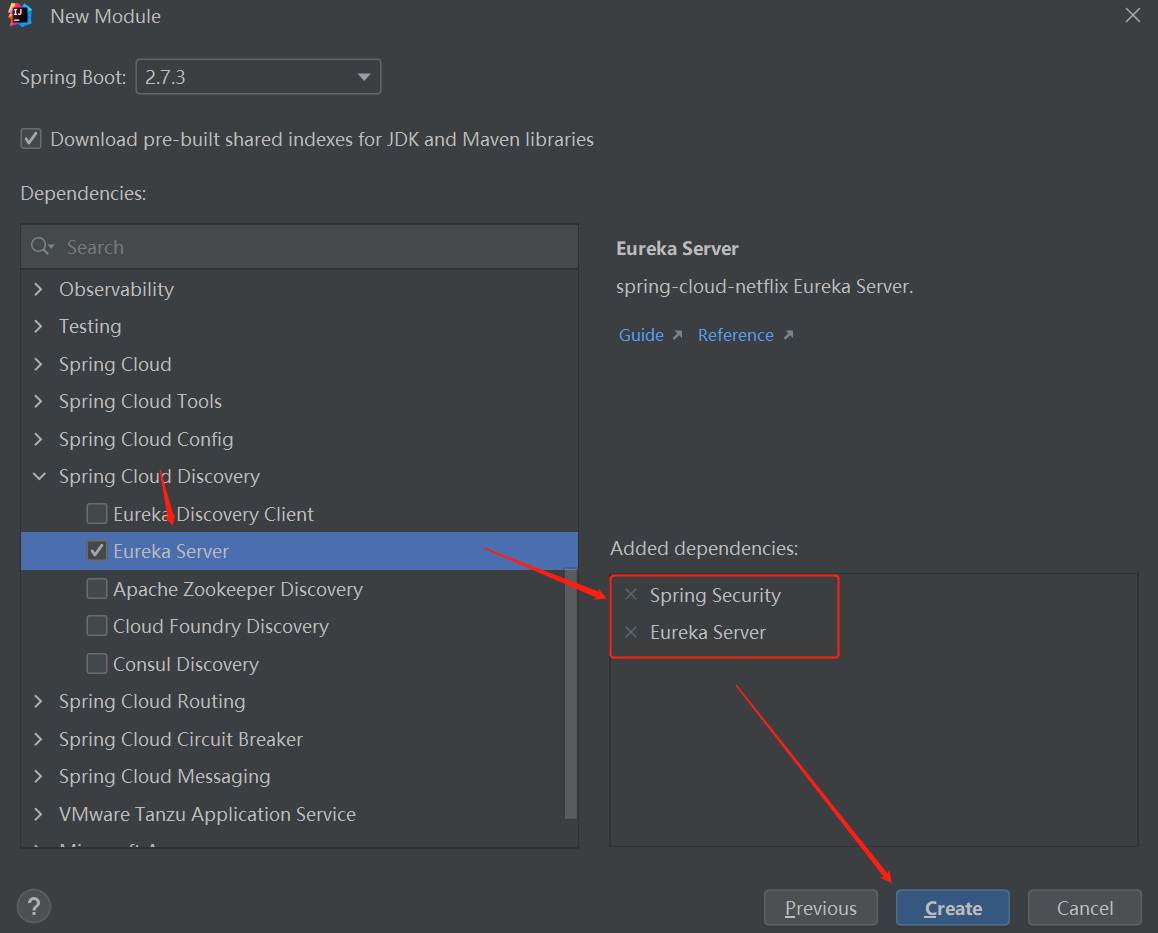
2. 新建注册中心Eureka
-
创建操作

-
父模块添加子模块
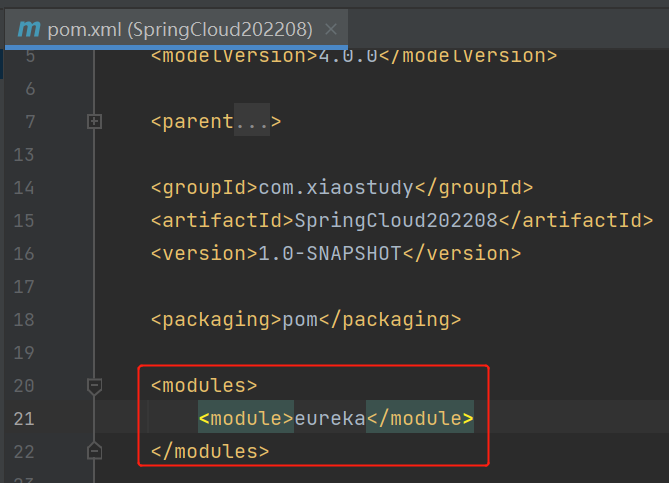
<modules>
    <module>eureka</module>
</modules>
- 修改pom.xml文件

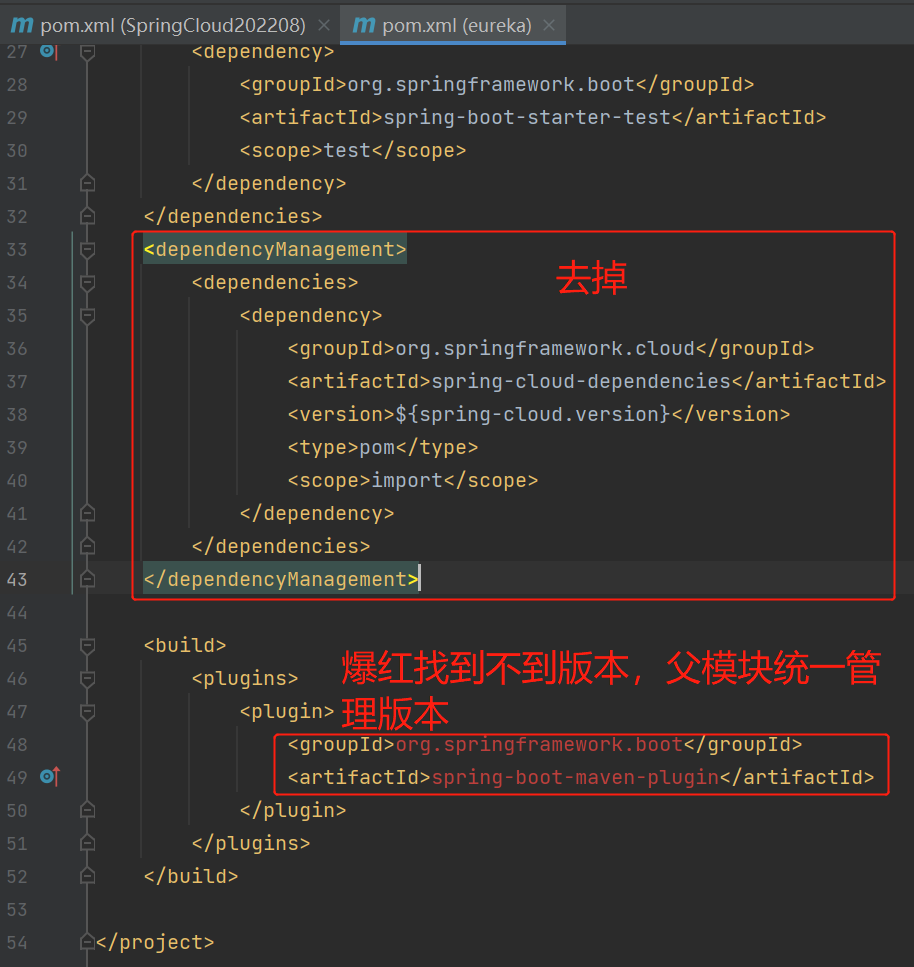
点击查看代码
<?xml version="1.0" encoding="UTF-8"?>
<project xmlns="http://maven.apache.org/POM/4.0.0" xmlns:xsi="http://www.w3.org/2001/XMLSchema-instance"
         xsi:schemaLocation="http://maven.apache.org/POM/4.0.0 https://maven.apache.org/xsd/maven-4.0.0.xsd">
    <modelVersion>4.0.0</modelVersion>
    <parent>
        <groupId>com.xiaostudy</groupId>
        <artifactId>SpringCloud202208</artifactId>
        <version>1.0-SNAPSHOT</version>
        <relativePath>../pom.xml</relativePath>
    </parent>
    <groupId>com.xiaostudy</groupId>
    <artifactId>eureka</artifactId>
    <version>0.0.1-SNAPSHOT</version>
    <name>eureka</name>
    <description>eureka</description>
    <dependencies>
        <dependency>
            <groupId>org.springframework.cloud</groupId>
            <artifactId>spring-cloud-starter-netflix-eureka-server</artifactId>
        </dependency>

        <dependency>
            <groupId>org.springframework.boot</groupId>
            <artifactId>spring-boot-starter-test</artifactId>
            <scope>test</scope>
        </dependency>
    </dependencies>

    <build>
        <plugins>
            <plugin>
                <groupId>org.springframework.boot</groupId>
                <artifactId>spring-boot-maven-plugin</artifactId>
            </plugin>
        </plugins>
    </build>

</project>
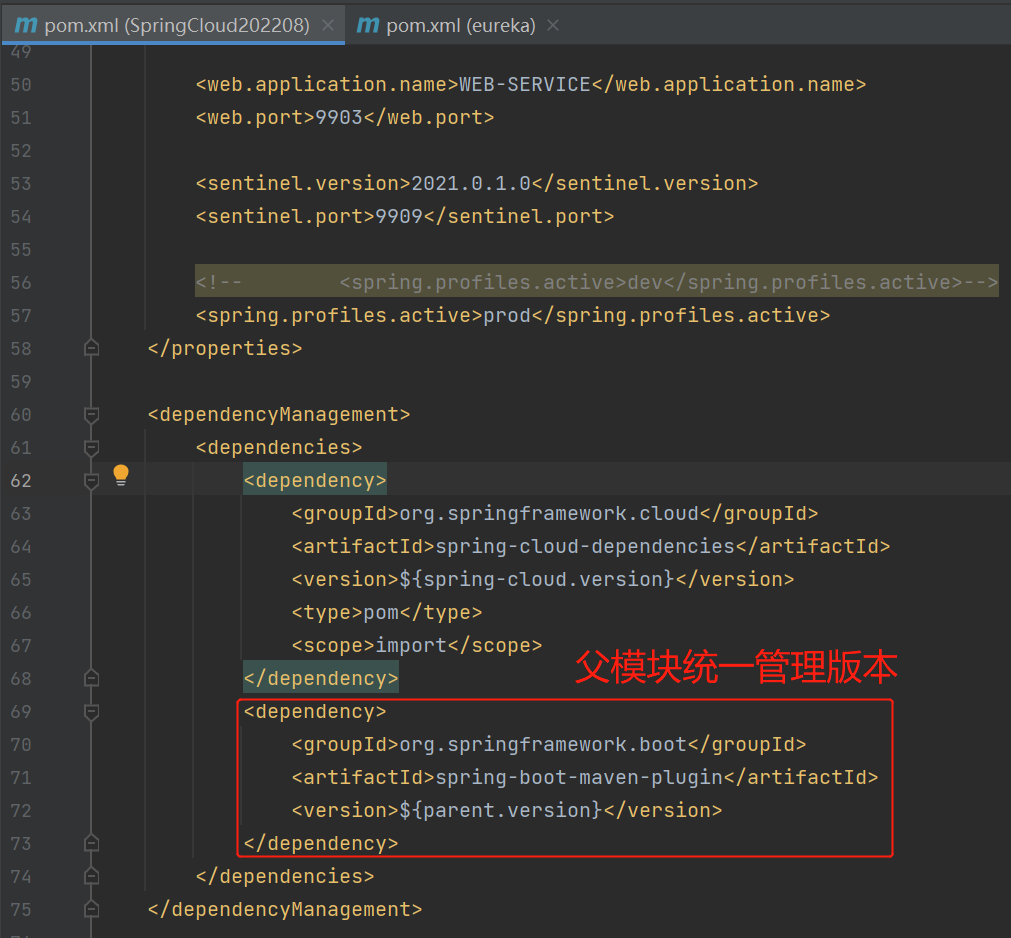
此时父模块的pom.xml
<?xml version="1.0" encoding="UTF-8"?>
<project xmlns="http://maven.apache.org/POM/4.0.0"
         xmlns:xsi="http://www.w3.org/2001/XMLSchema-instance"
         xsi:schemaLocation="http://maven.apache.org/POM/4.0.0 http://maven.apache.org/xsd/maven-4.0.0.xsd">
    <modelVersion>4.0.0</modelVersion>

    <parent>
        <groupId>org.springframework.boot</groupId>
        <artifactId>spring-boot-starter-parent</artifactId>
        <version>2.7.2</version>
        <relativePath/>
    </parent>

    <groupId>com.xiaostudy</groupId>
    <artifactId>SpringCloud202208</artifactId>
    <version>1.0-SNAPSHOT</version>

    <packaging>pom</packaging>

    <modules>
        <module>eureka</module>
    </modules>

    <properties>
        <maven.compiler.source>8</maven.compiler.source>
        <maven.compiler.target>8</maven.compiler.target>

        <java.version>1.8</java.version>
        <spring-cloud.version>2021.0.3</spring-cloud.version>

        <eureka.application.name>EUREKA-SERVICE</eureka.application.name>
        <eureka.ip>localhost</eureka.ip>
        <eureka.port>9900</eureka.port>
        <eureka.url.name>eureka</eureka.url.name>
        <eureka.user.name>admin</eureka.user.name>
        <eureka.user.password>xiaostudy.test</eureka.user.password>

        <config.application.name>CONFIG-SERVICE</config.application.name>
        <config.port>9901</config.port>

        <gateway.application.name>GATEWAY-SERVICE</gateway.application.name>
        <gateway.port>9904</gateway.port>
        <gateway.version>3.1.3</gateway.version>

        <producer.application.name>PRODUCER-SERVICE</producer.application.name>
        <producer.port>9902</producer.port>

        <web.application.name>WEB-SERVICE</web.application.name>
        <web.port>9903</web.port>

        <sentinel.version>2021.0.1.0</sentinel.version>
        <sentinel.port>9909</sentinel.port>

        <!--        <spring.profiles.active>dev</spring.profiles.active>-->
        <spring.profiles.active>prod</spring.profiles.active>
    </properties>

    <dependencyManagement>
        <dependencies>
            <dependency>
                <groupId>org.springframework.cloud</groupId>
                <artifactId>spring-cloud-dependencies</artifactId>
                <version>${spring-cloud.version}</version>
                <type>pom</type>
                <scope>import</scope>
            </dependency>
            <dependency>
                <groupId>org.springframework.boot</groupId>
                <artifactId>spring-boot-maven-plugin</artifactId>
                <version>${parent.version}</version>
            </dependency>
        </dependencies>
    </dependencyManagement>

</project>
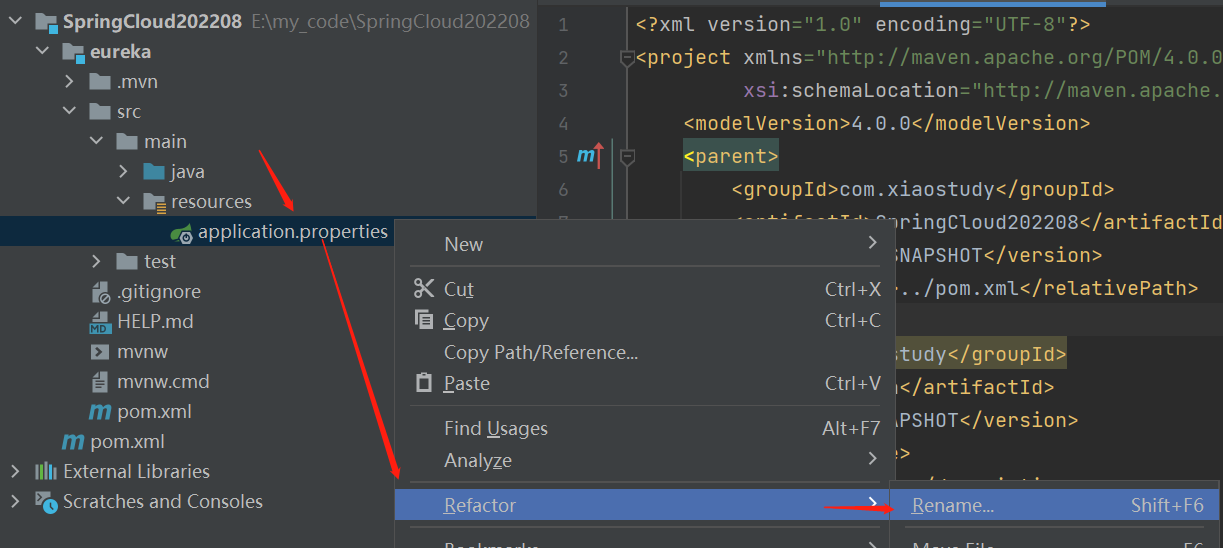
- 配置文件application.properties修改为application.yml,然后配置

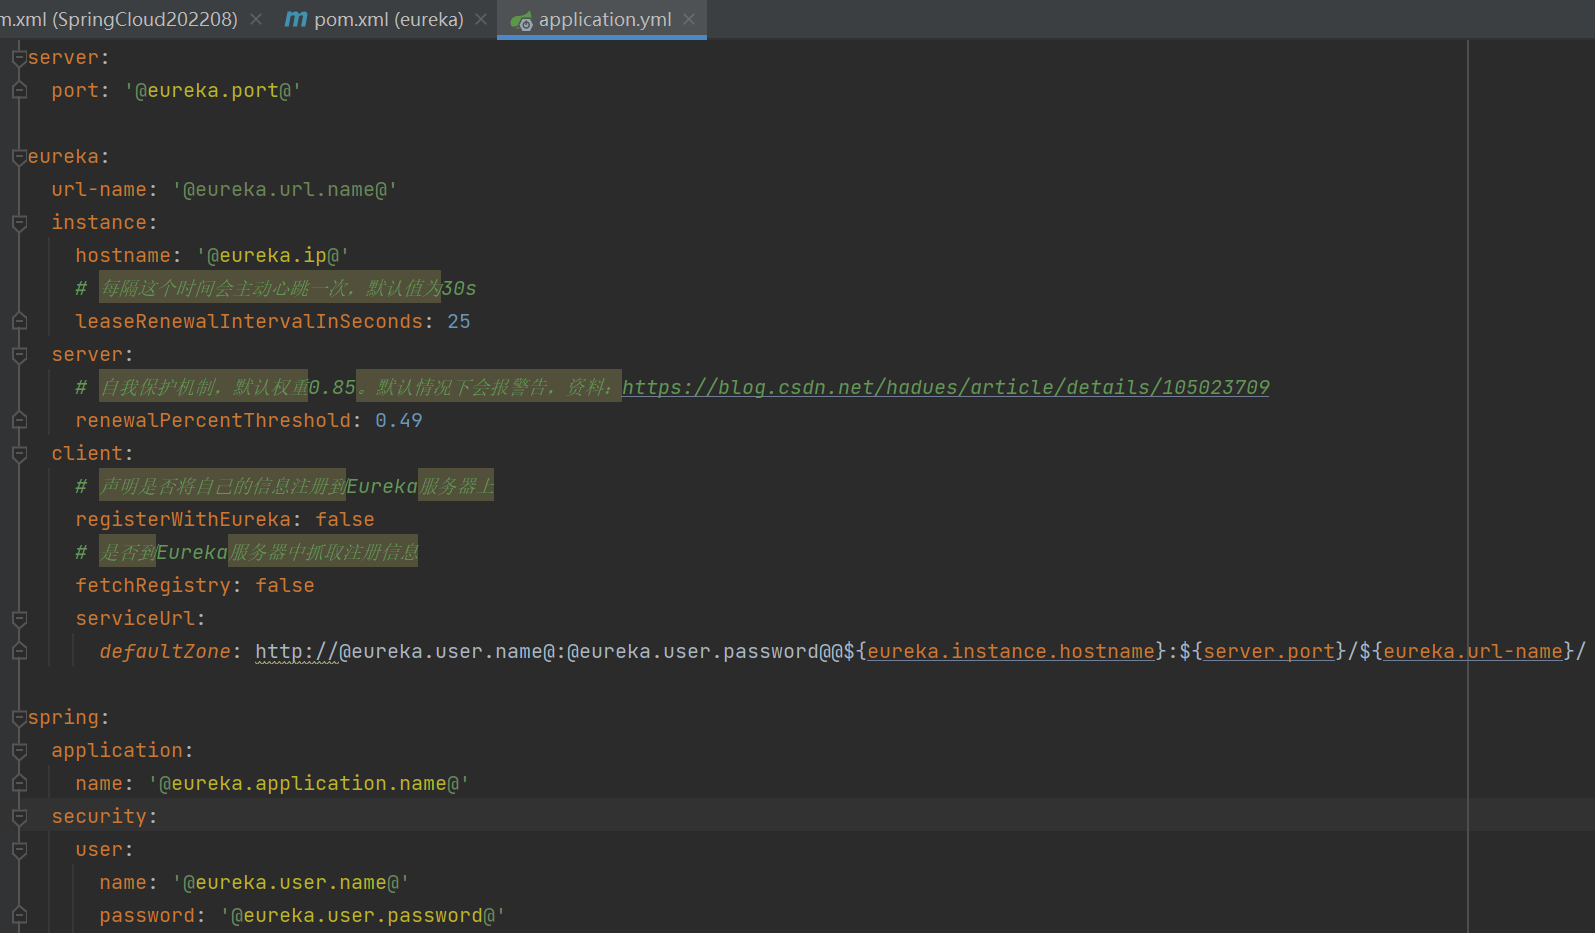
点击查看代码
server:
port: '@eureka.port@'
eureka:
url-name: '@eureka.url.name@'
instance:
hostname: '@eureka.ip@'
# 每隔这个时间会主动心跳一次,默认值为30s
leaseRenewalIntervalInSeconds: 25
server:
# 自我保护机制,默认权重0.85。默认情况下会报警告,资料:https://blog.csdn.net/hadues/article/details/105023709
renewalPercentThreshold: 0.49
client:
# 声明是否将自己的信息注册到Eureka服务器上
registerWithEureka: false
# 是否到Eureka服务器中抓取注册信息
fetchRegistry: false
serviceUrl:
defaultZone: http://@eureka.user.name@:@eureka.user.password@@${eureka.instance.hostname}:${server.port}/${eureka.url-name}/
spring:
application:
name: '@eureka.application.name@'
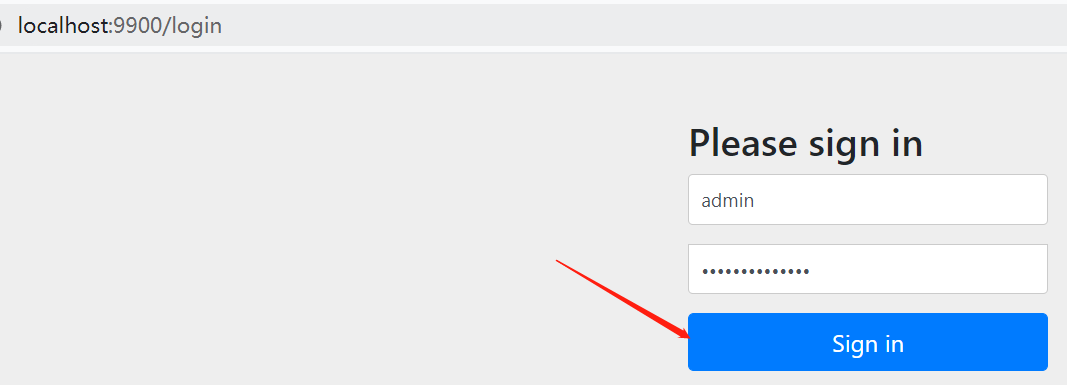
security:
user:
name: '@eureka.user.name@'
password: '@eureka.user.password@'
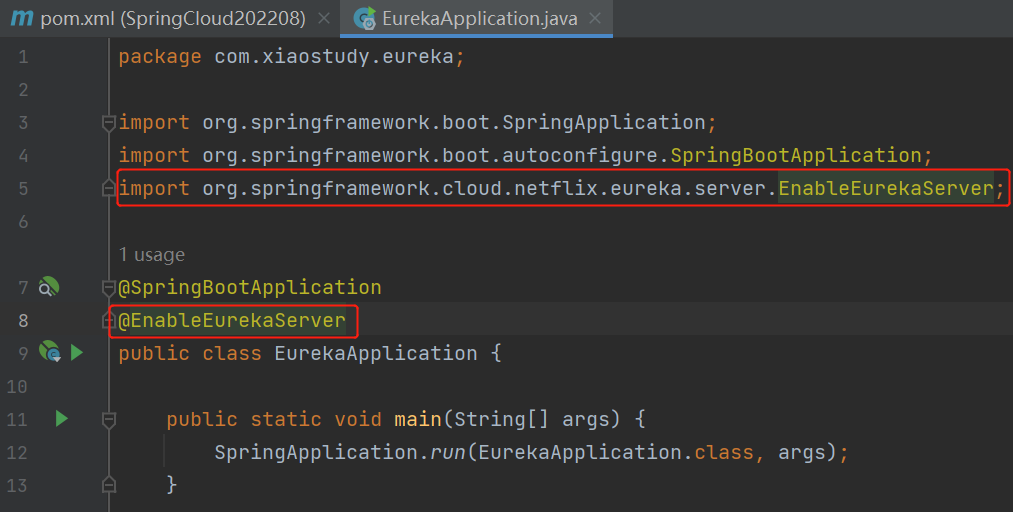
-
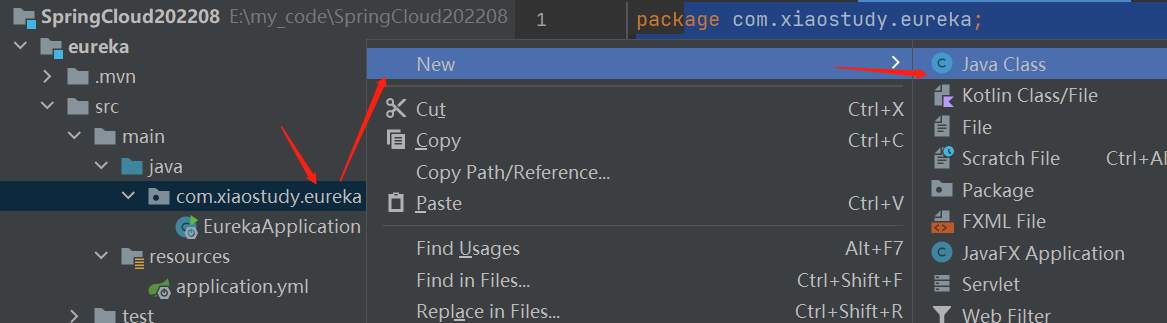
启动类添加注解@EnableEurekaServer
-
关闭csrf,不然其他服务注册不上
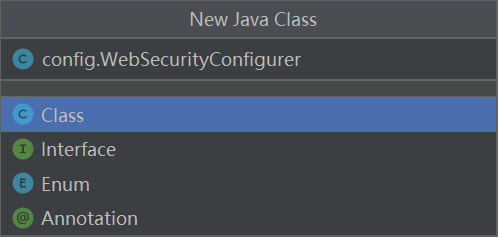
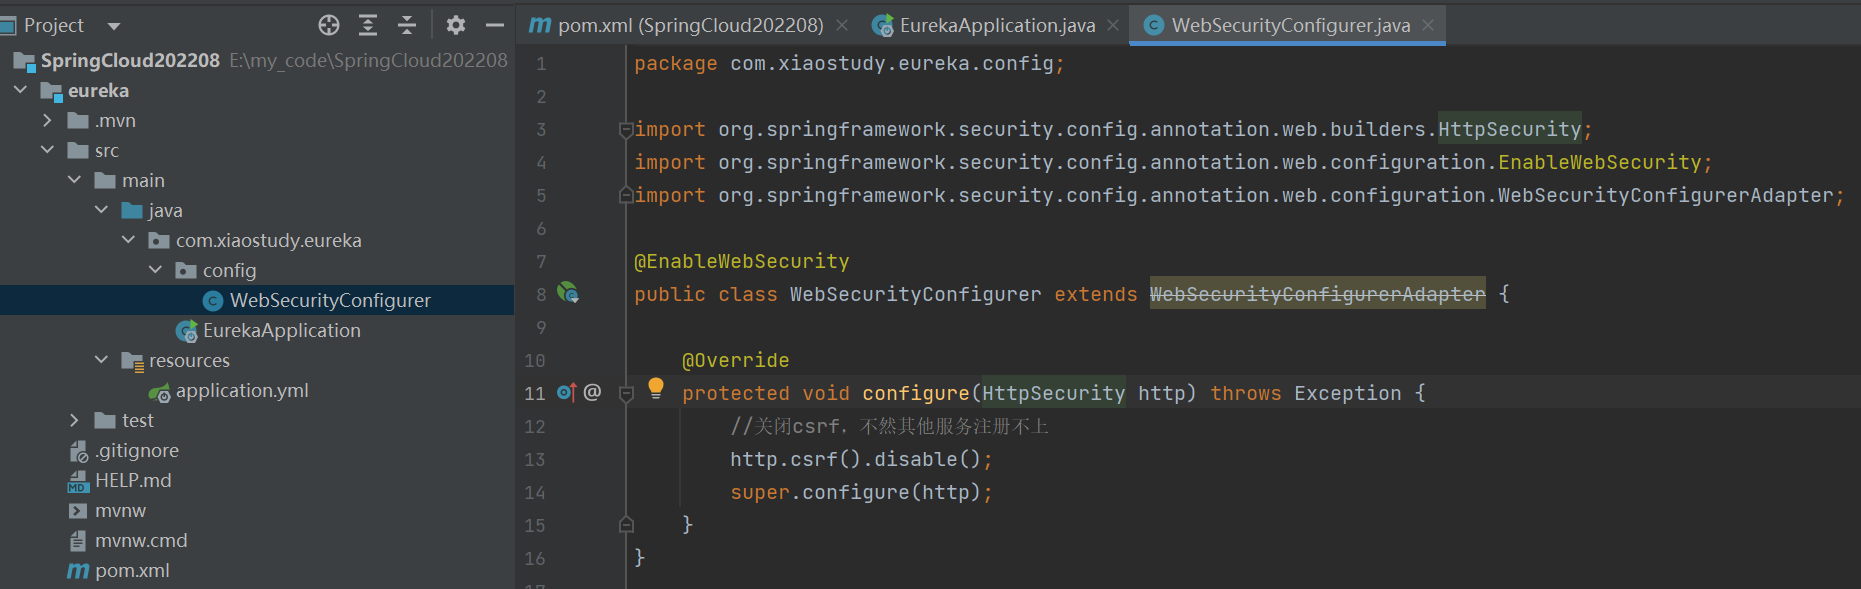
点击查看代码
package com.xiaostudy.eureka.config;

import org.springframework.security.config.annotation.web.builders.HttpSecurity;
import org.springframework.security.config.annotation.web.configuration.EnableWebSecurity;
import org.springframework.security.config.annotation.web.configuration.WebSecurityConfigurerAdapter;

@EnableWebSecurity
public class WebSecurityConfigurer extends WebSecurityConfigurerAdapter {

    @Override
    protected void configure(HttpSecurity http) throws Exception {
        //关闭csrf,不然其他服务注册不上
        http.csrf().disable();
        super.configure(http);
    }
}
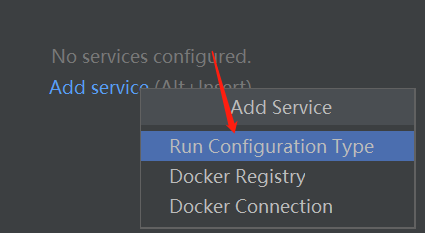
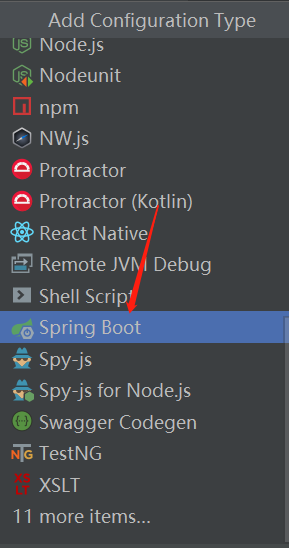
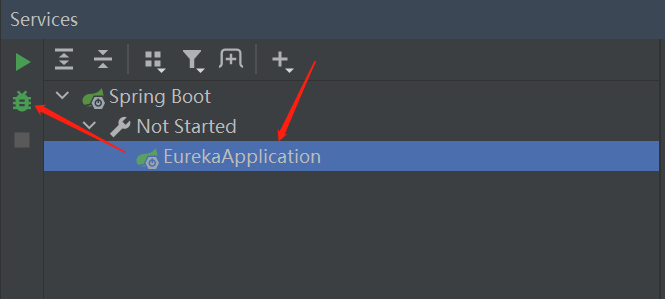
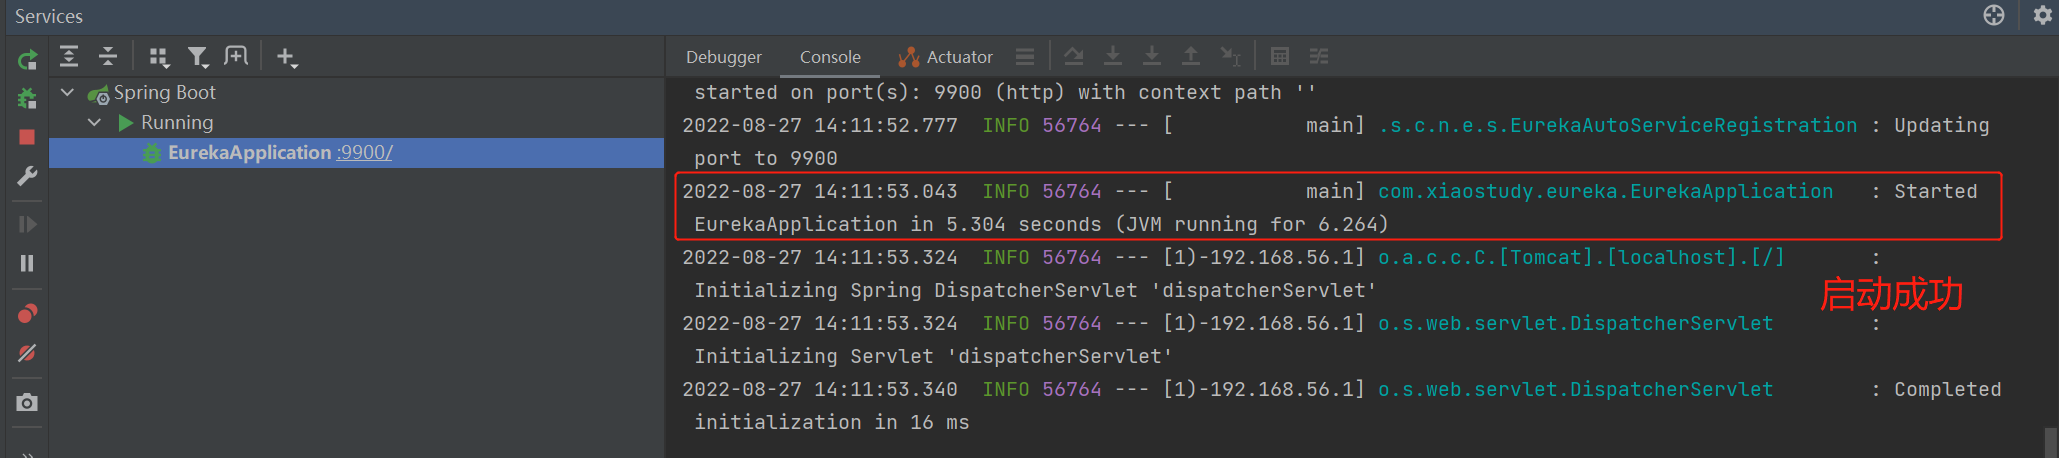
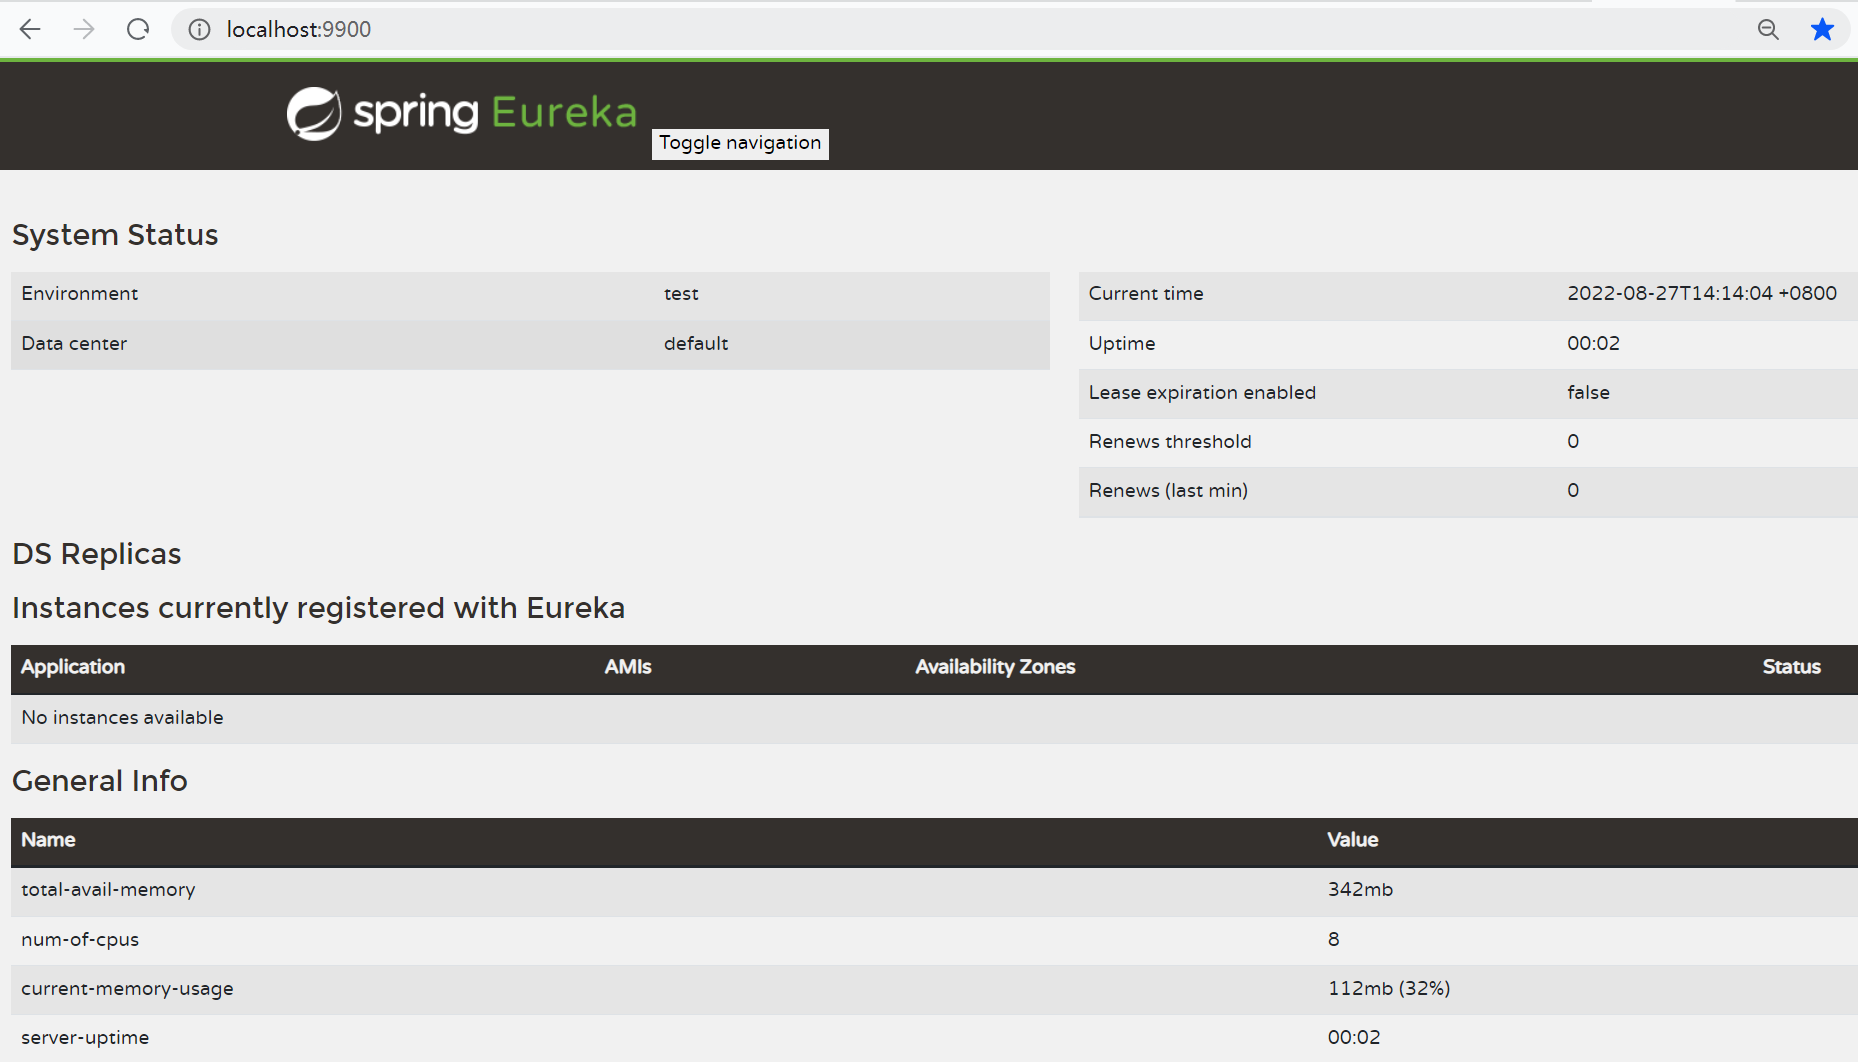
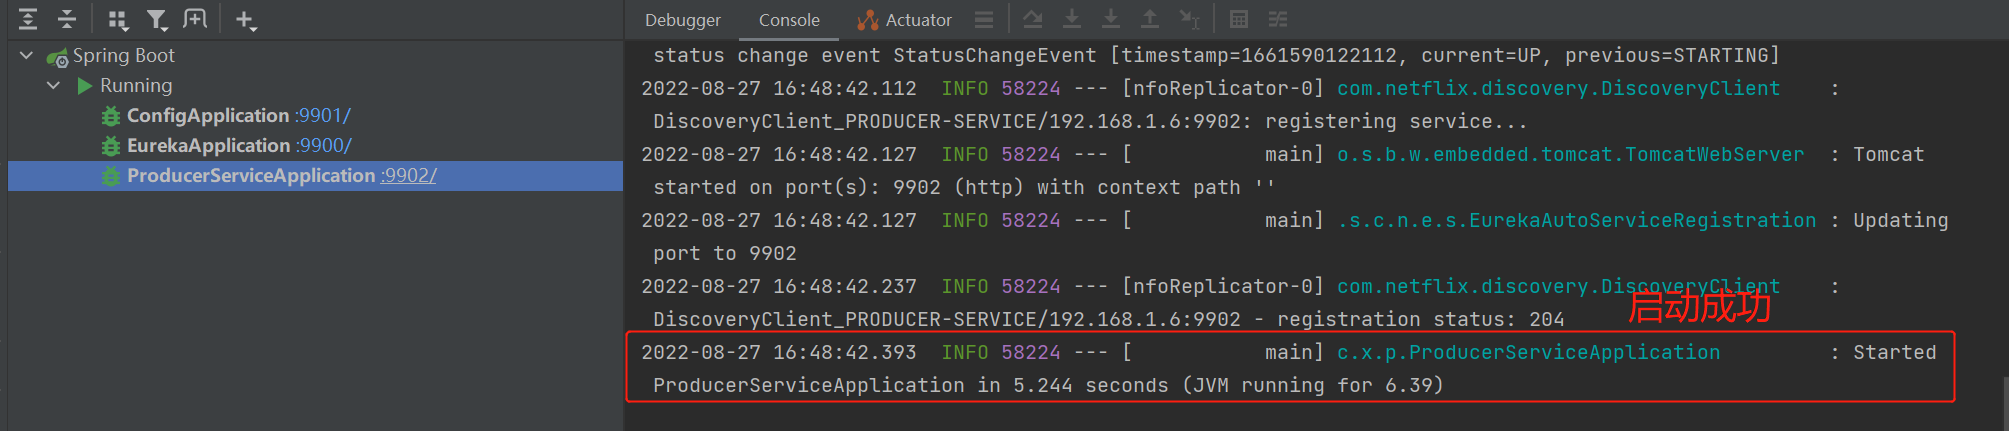
-
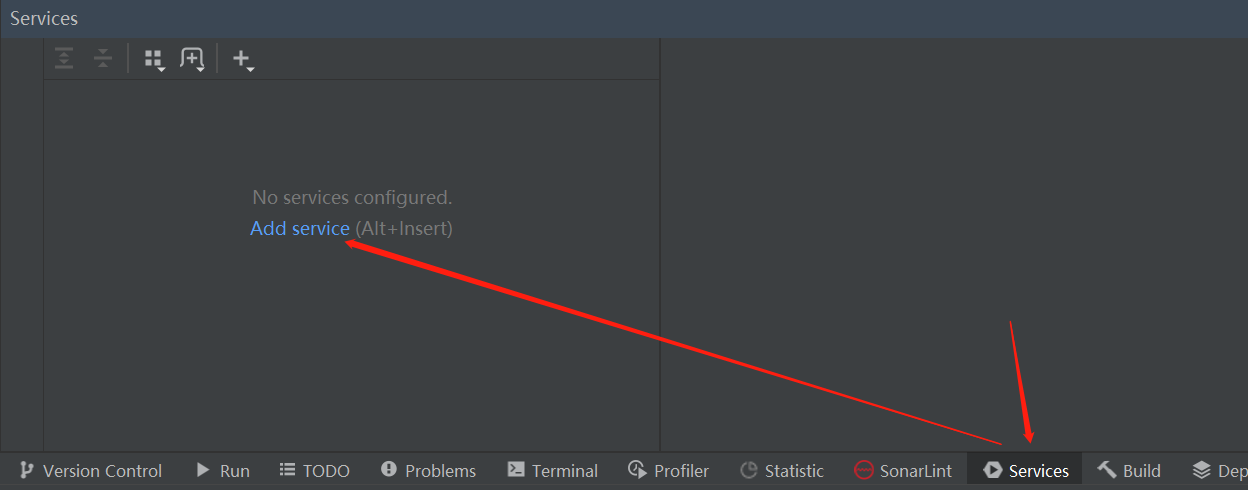
启动注册中心
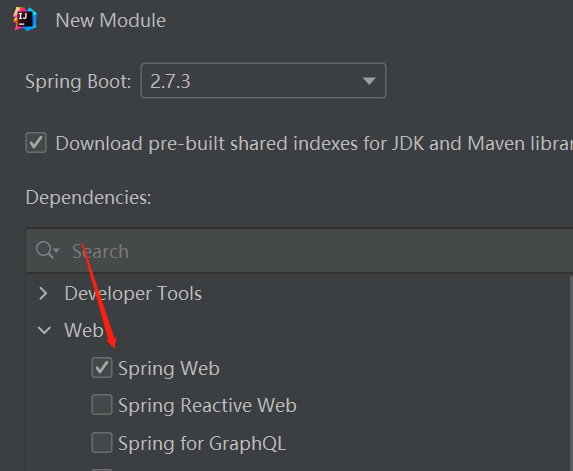
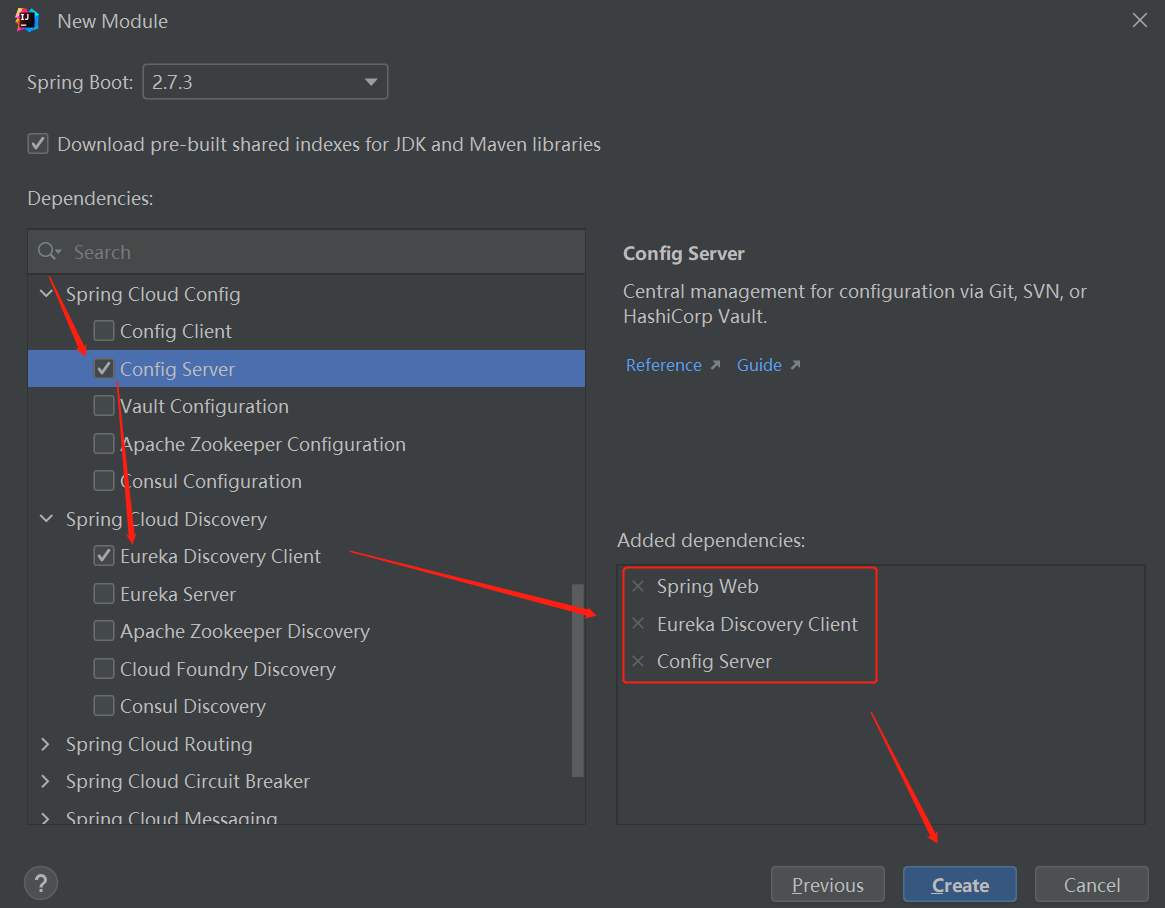
3. 新建配置中心Config
-
创建操作


-
父模块添加子模块
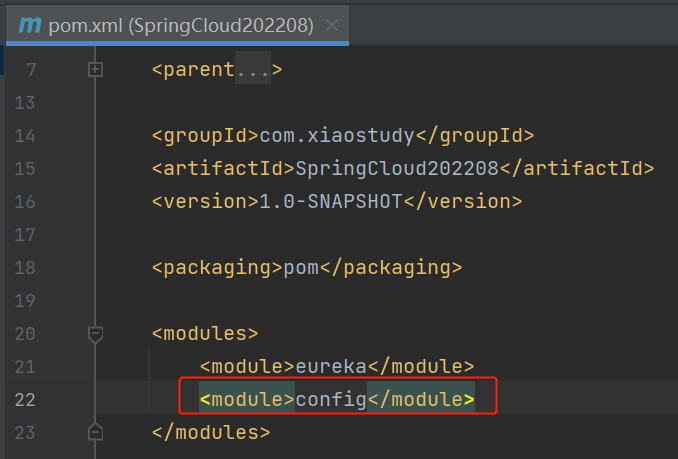
<module>config</module>
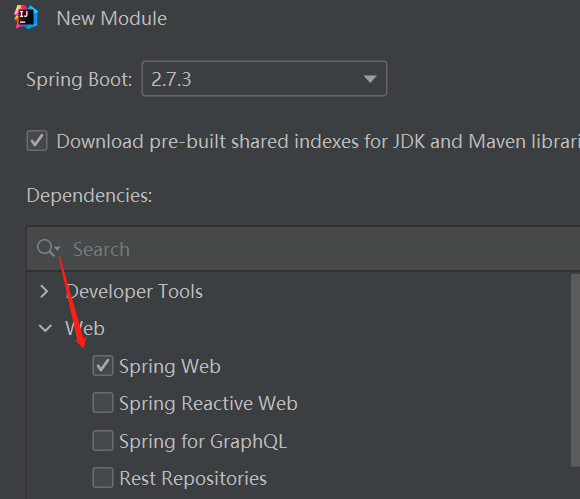
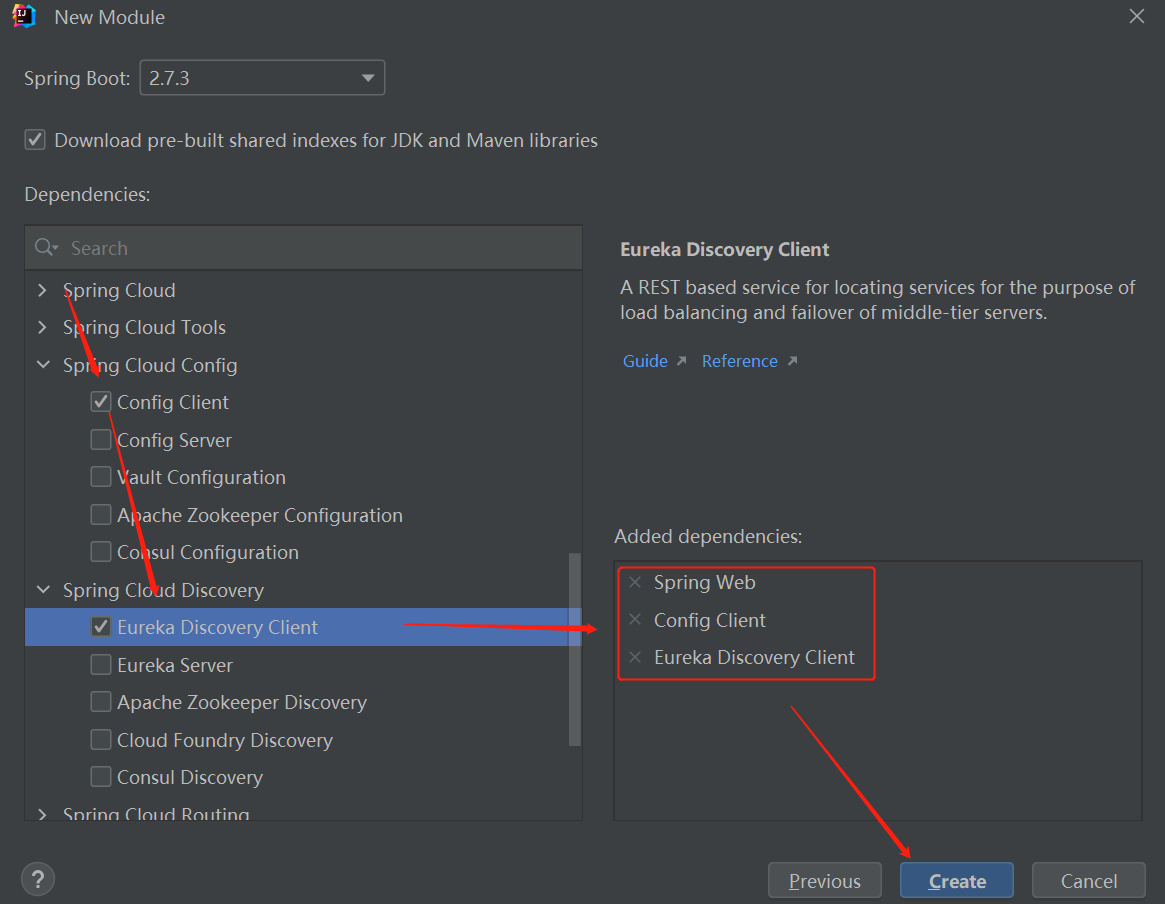
- 修改pom.xml文件
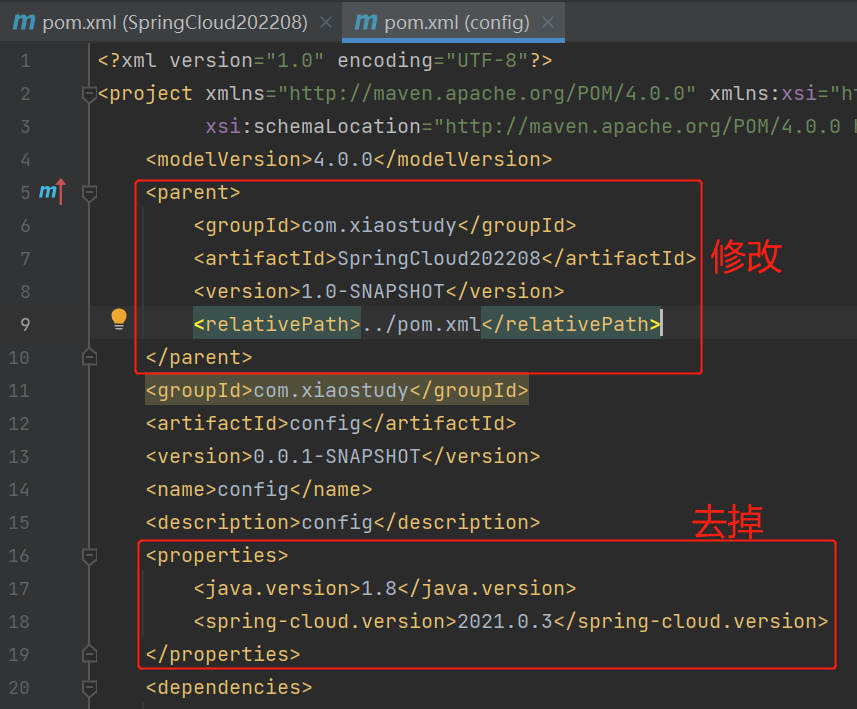
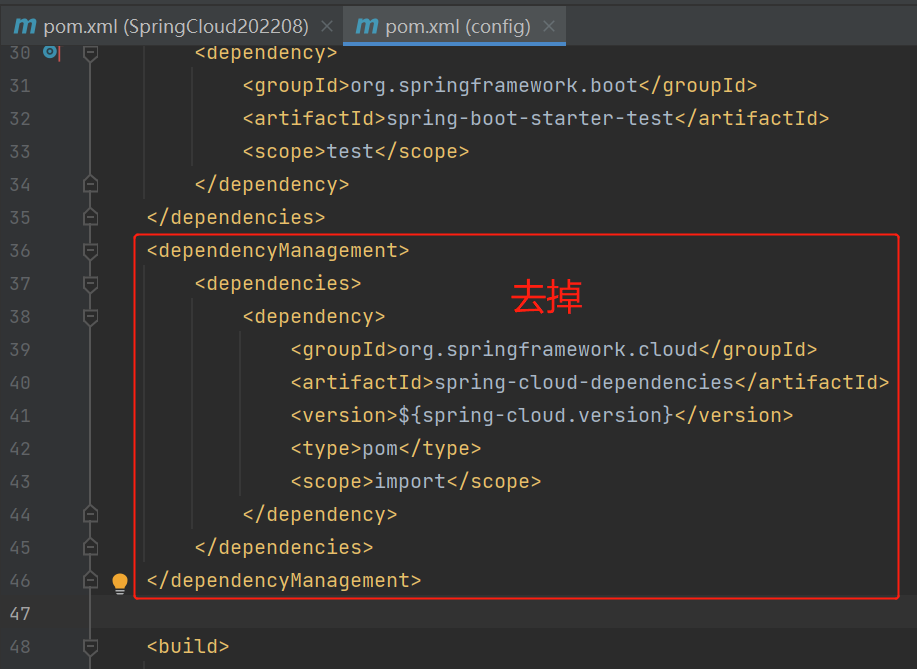
点击查看代码
<?xml version="1.0" encoding="UTF-8"?>
<project xmlns="http://maven.apache.org/POM/4.0.0" xmlns:xsi="http://www.w3.org/2001/XMLSchema-instance"
         xsi:schemaLocation="http://maven.apache.org/POM/4.0.0 https://maven.apache.org/xsd/maven-4.0.0.xsd">
    <modelVersion>4.0.0</modelVersion>
    <parent>
        <groupId>com.xiaostudy</groupId>
        <artifactId>SpringCloud202208</artifactId>
        <version>1.0-SNAPSHOT</version>
        <relativePath>../pom.xml</relativePath>
    </parent>
    <groupId>com.xiaostudy</groupId>
    <artifactId>config</artifactId>
    <version>0.0.1-SNAPSHOT</version>
    <name>config</name>
    <description>config</description>
    <dependencies>
        <dependency>
            <groupId>org.springframework.boot</groupId>
            <artifactId>spring-boot-starter-web</artifactId>
        </dependency>
        <dependency>
            <groupId>org.springframework.cloud</groupId>
            <artifactId>spring-cloud-config-server</artifactId>
        </dependency>
        <dependency>
            <groupId>org.springframework.cloud</groupId>
            <artifactId>spring-cloud-starter-netflix-eureka-client</artifactId>
        </dependency>

        <dependency>
            <groupId>org.springframework.boot</groupId>
            <artifactId>spring-boot-starter-test</artifactId>
            <scope>test</scope>
        </dependency>
    </dependencies>

    <build>
        <plugins>
            <plugin>
                <groupId>org.springframework.boot</groupId>
                <artifactId>spring-boot-maven-plugin</artifactId>
            </plugin>
        </plugins>
    </build>

</project>
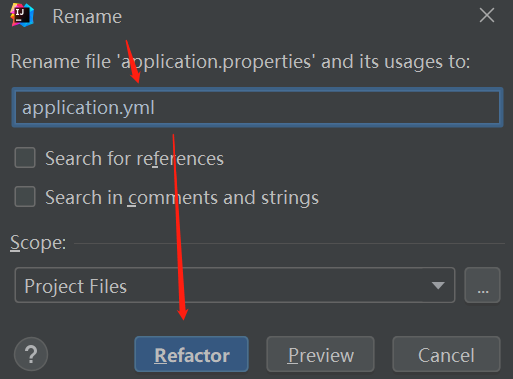
- 配置文件application.properties修改为application.yml,然后配置

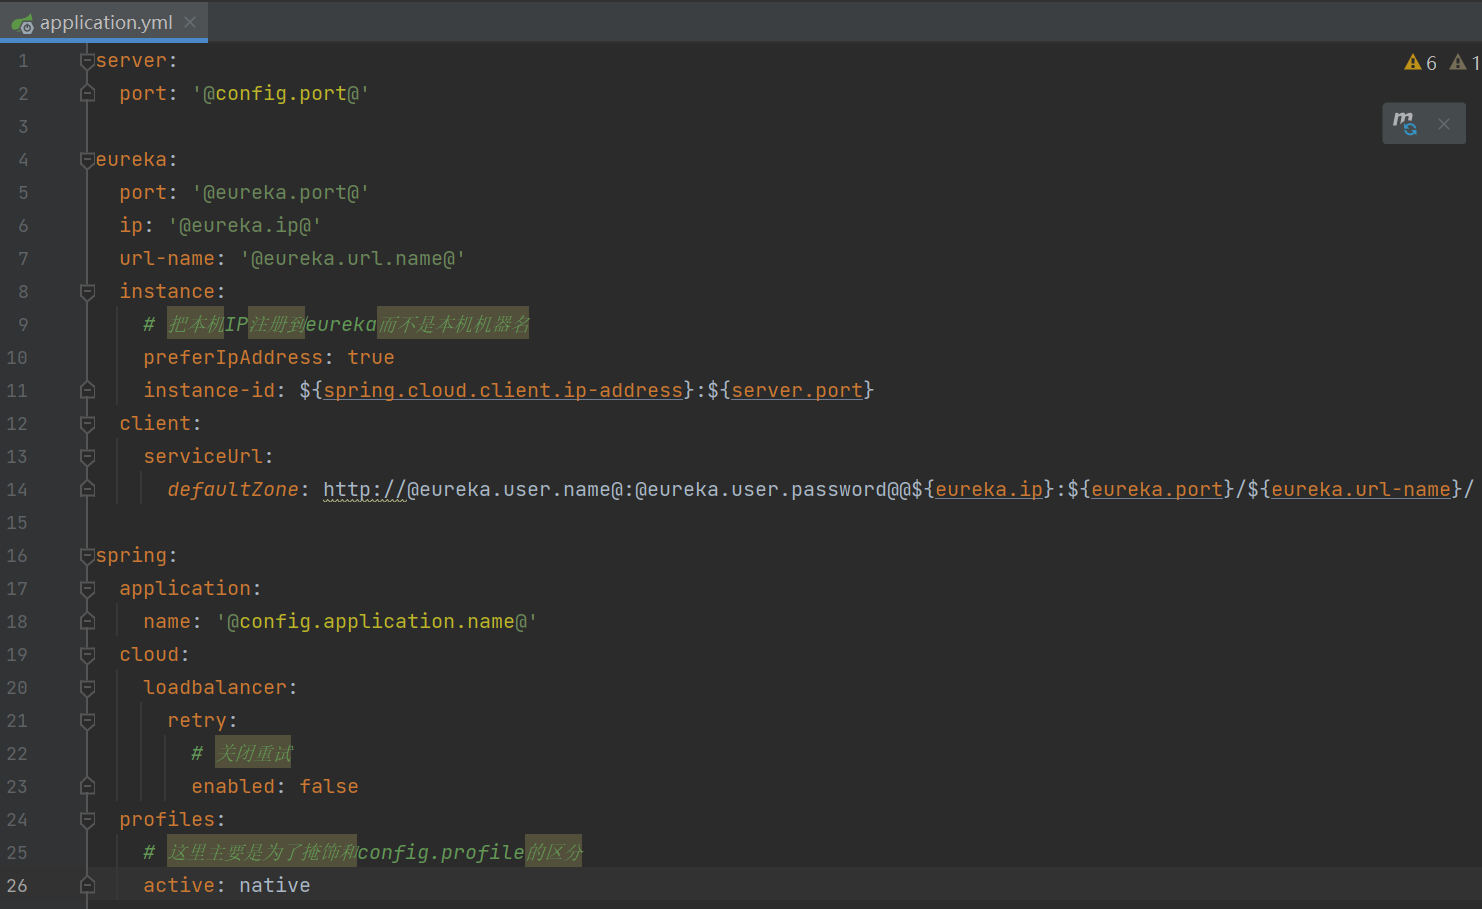
点击查看代码
server:
  port: '@config.port@'

eureka:
  port: '@eureka.port@'
  ip: '@eureka.ip@'
  url-name: '@eureka.url.name@'
  instance:
    # 把本机IP注册到eureka而不是本机机器名
    preferIpAddress: true
    instance-id: ${spring.cloud.client.ip-address}:${server.port}
  client:
    serviceUrl:
      defaultZone: http://@eureka.user.name@:@eureka.user.password@@${eureka.ip}:${eureka.port}/${eureka.url-name}/

spring:
  application:
    name: '@config.application.name@'
  cloud:
    loadbalancer:
      retry:
        # 关闭重试
        enabled: false
  profiles:
    # 这里主要是为了掩饰和config.profile的区分
    active: native
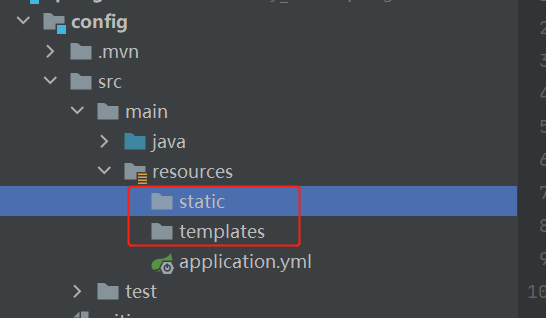
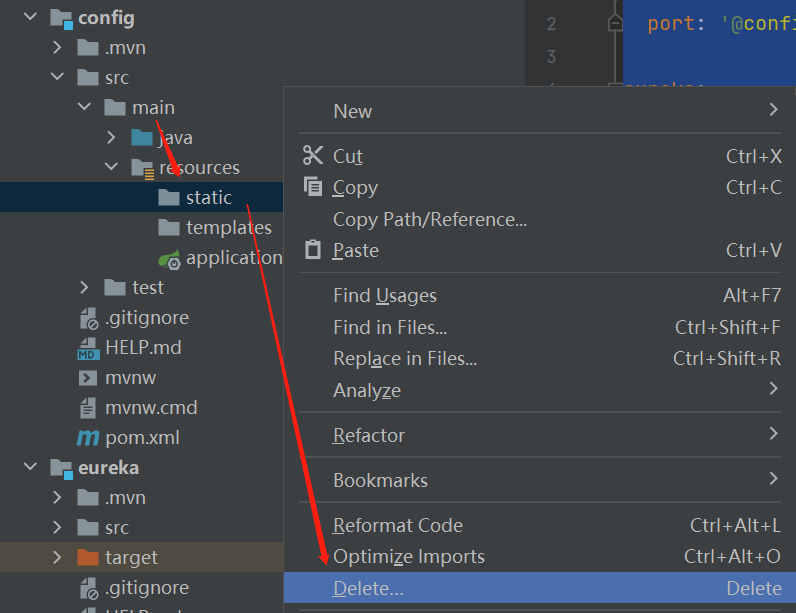
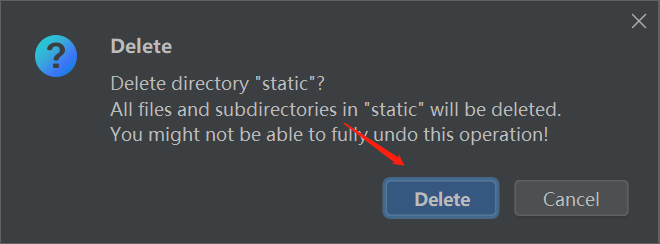
-
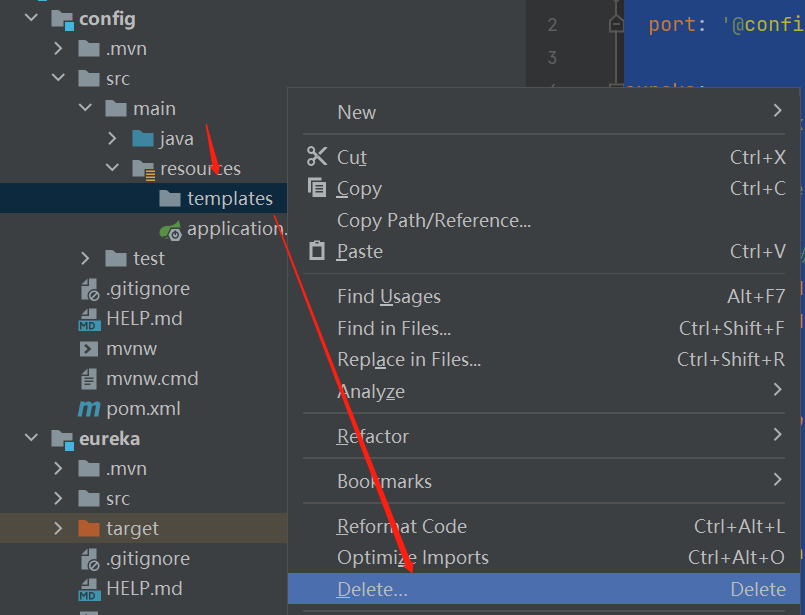
删除多余的文件夹

-
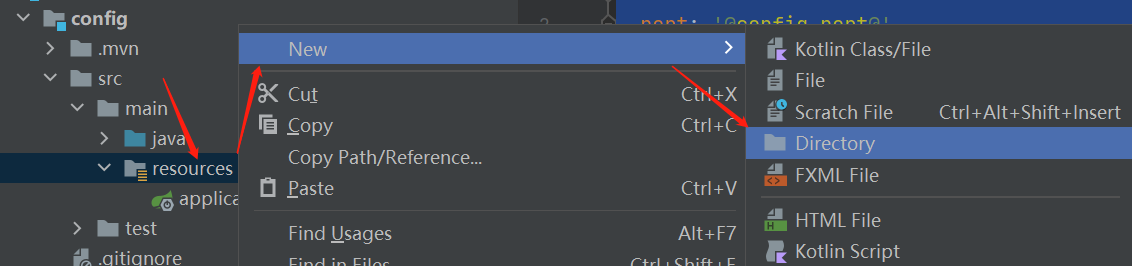
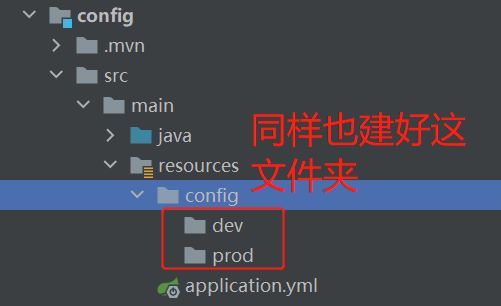
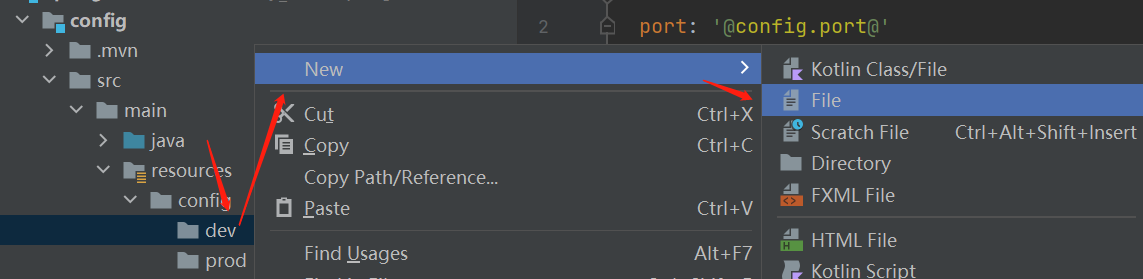
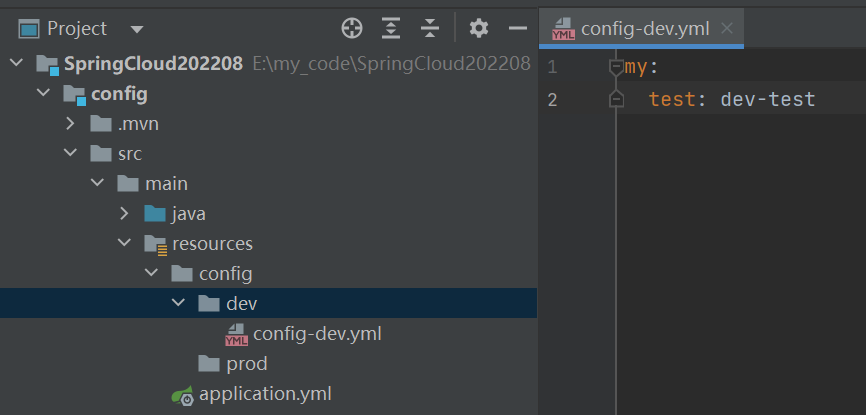
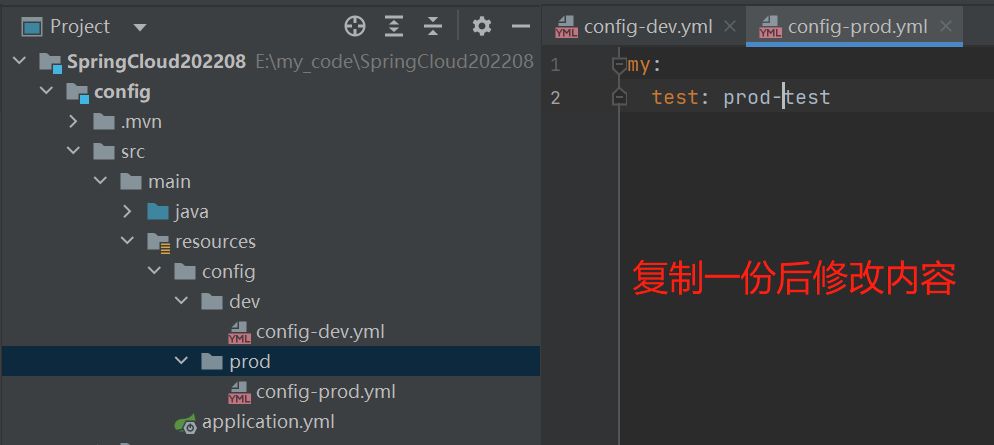
添加配置文件,给其他服务读取


-
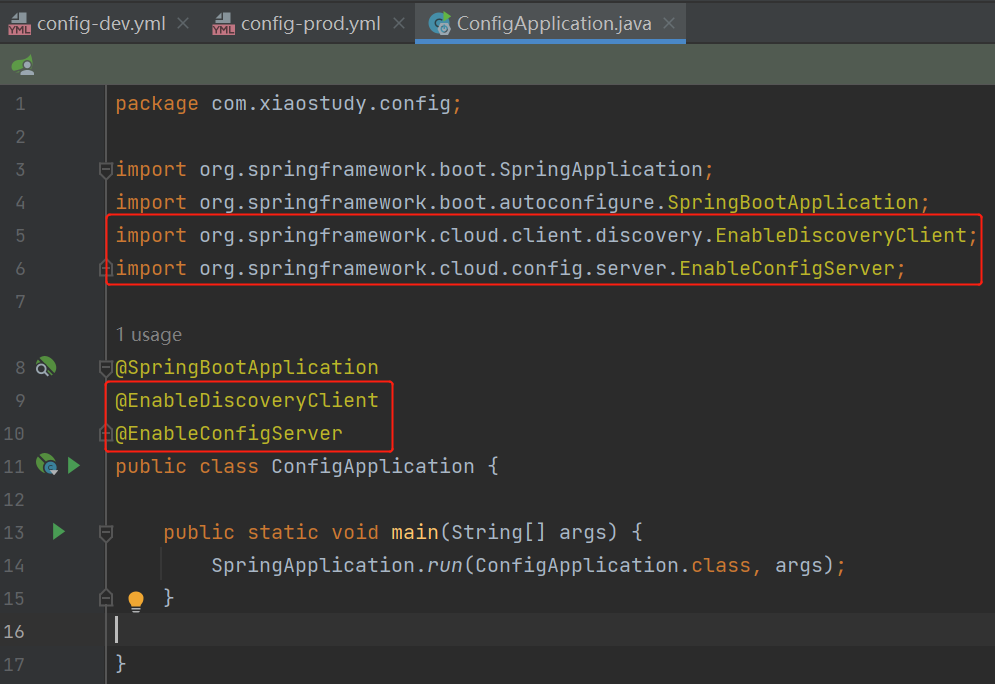
启动类添加注解@EnableDiscoveryClient和@EnableConfigServer
-
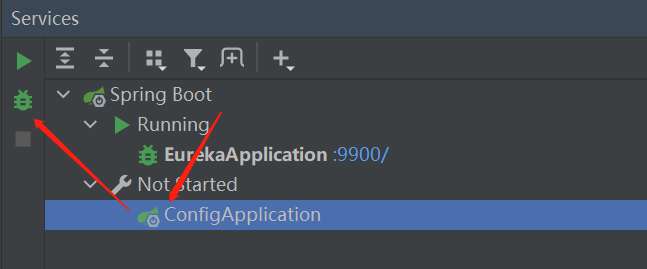
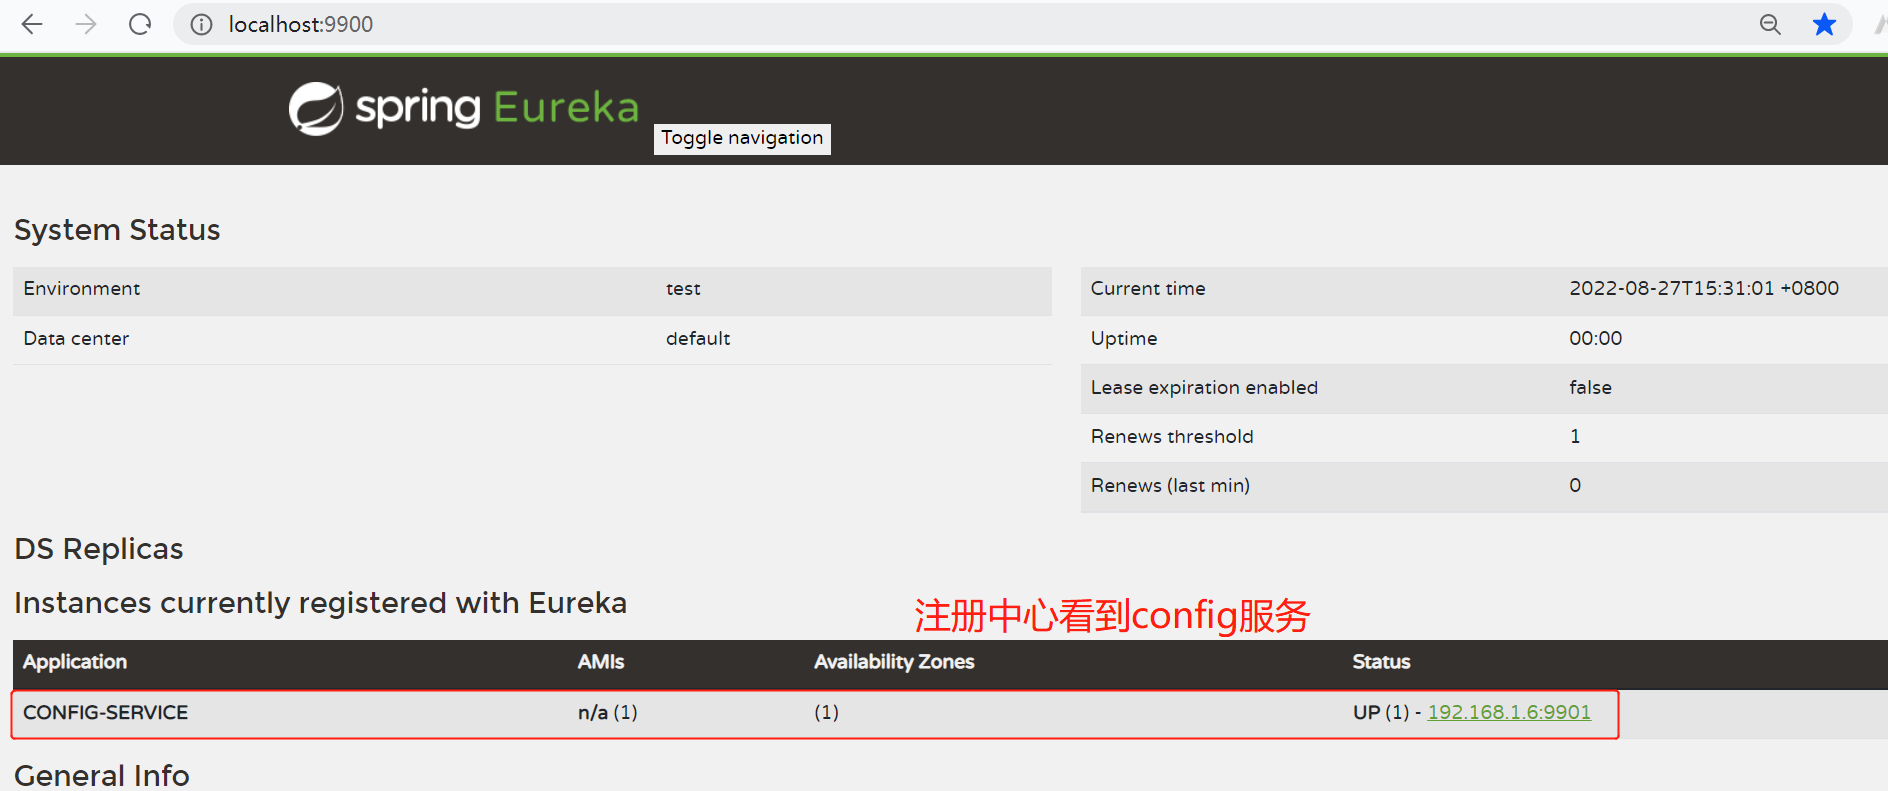
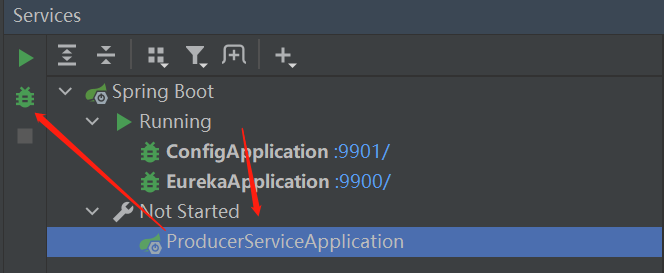
启动config服务
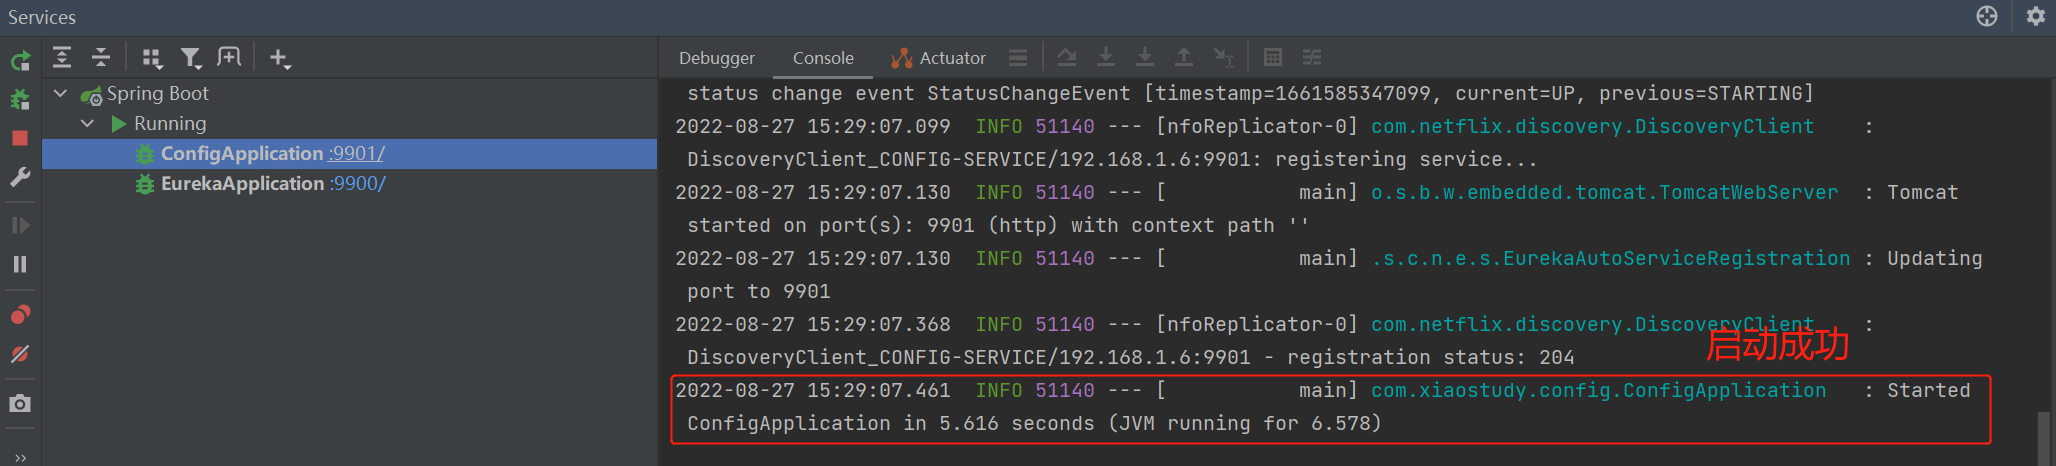
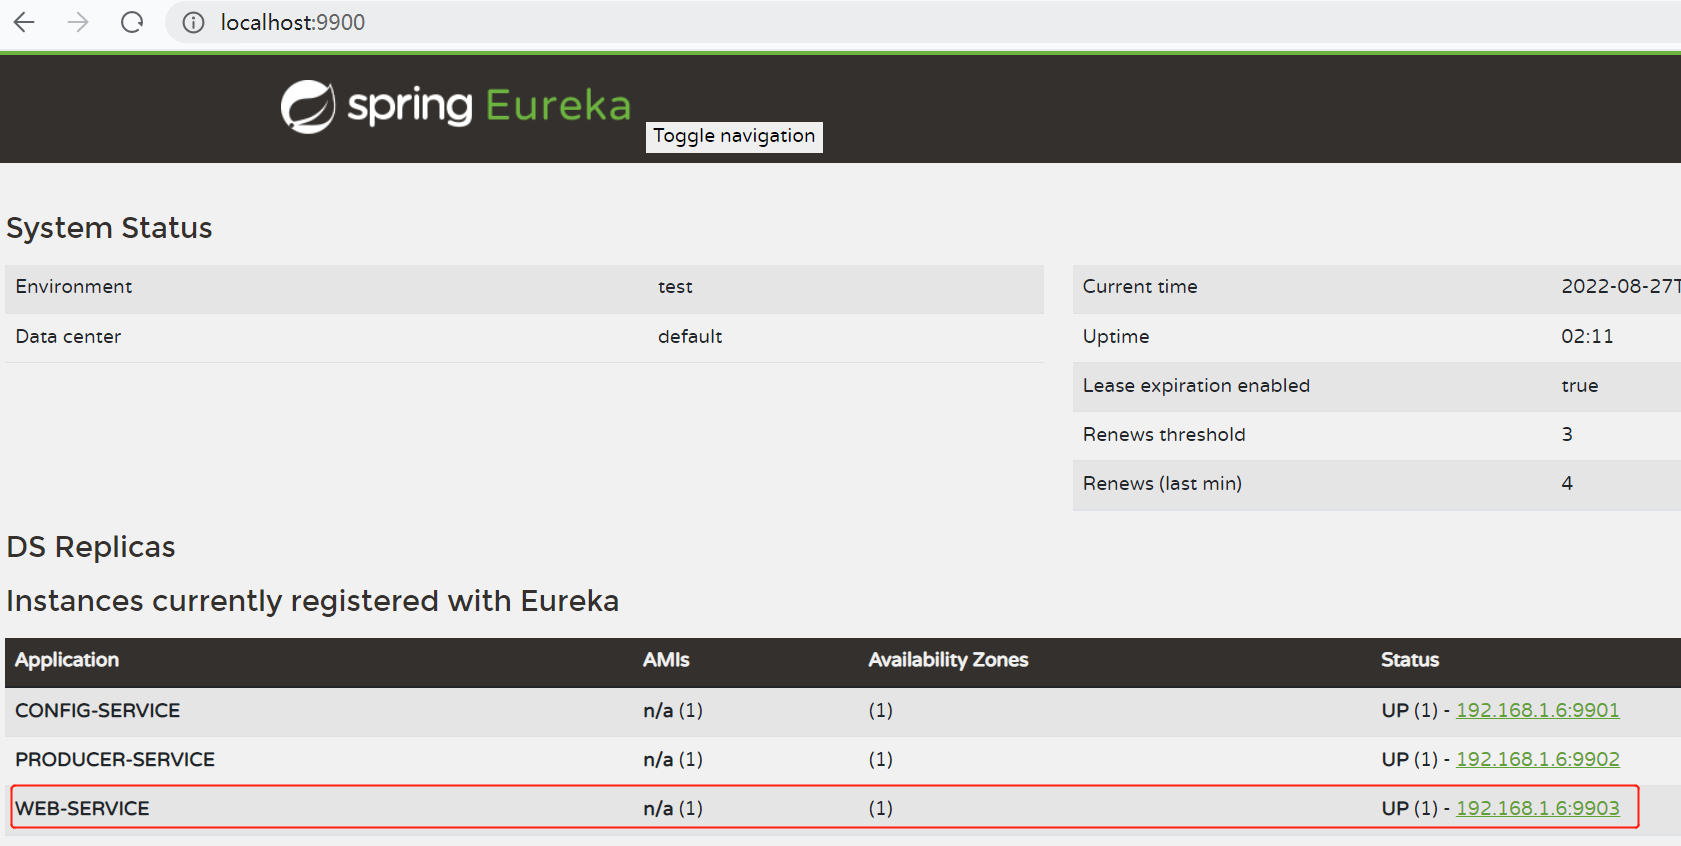
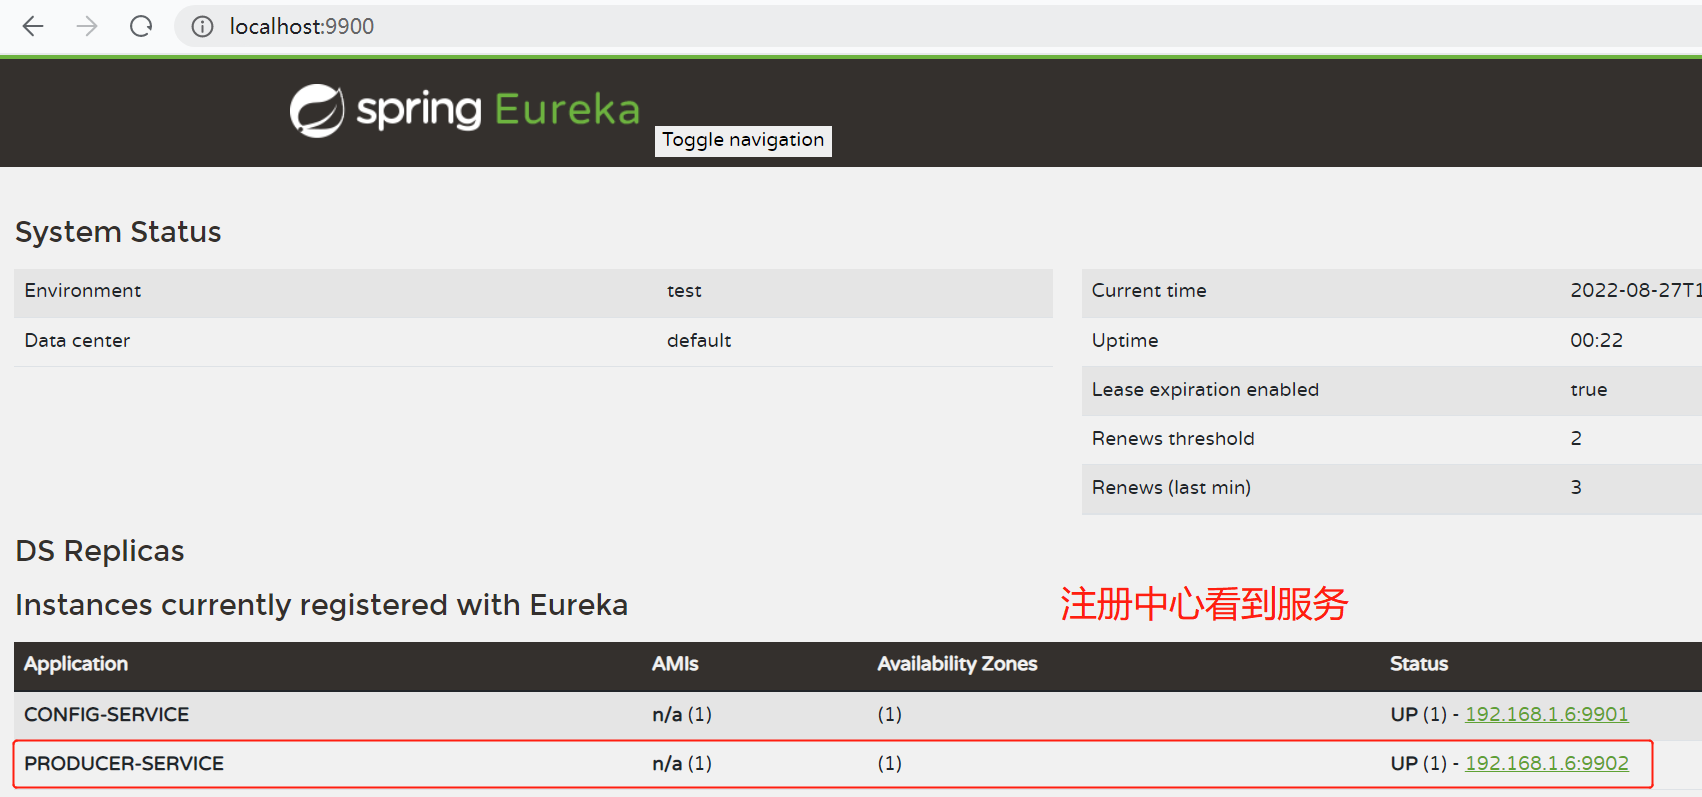
-
Eureka上面查看服务
4. 新建两个业务服务
1. producerService
-
创建操作


-
父模块添加子模块
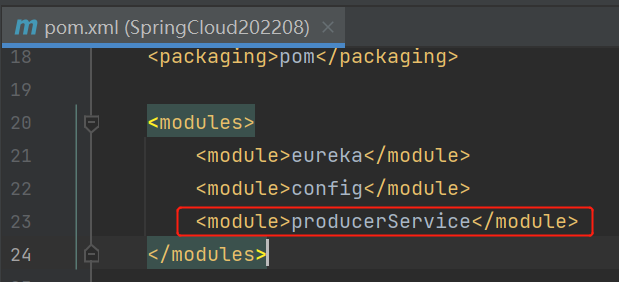
<module>producerService</module>
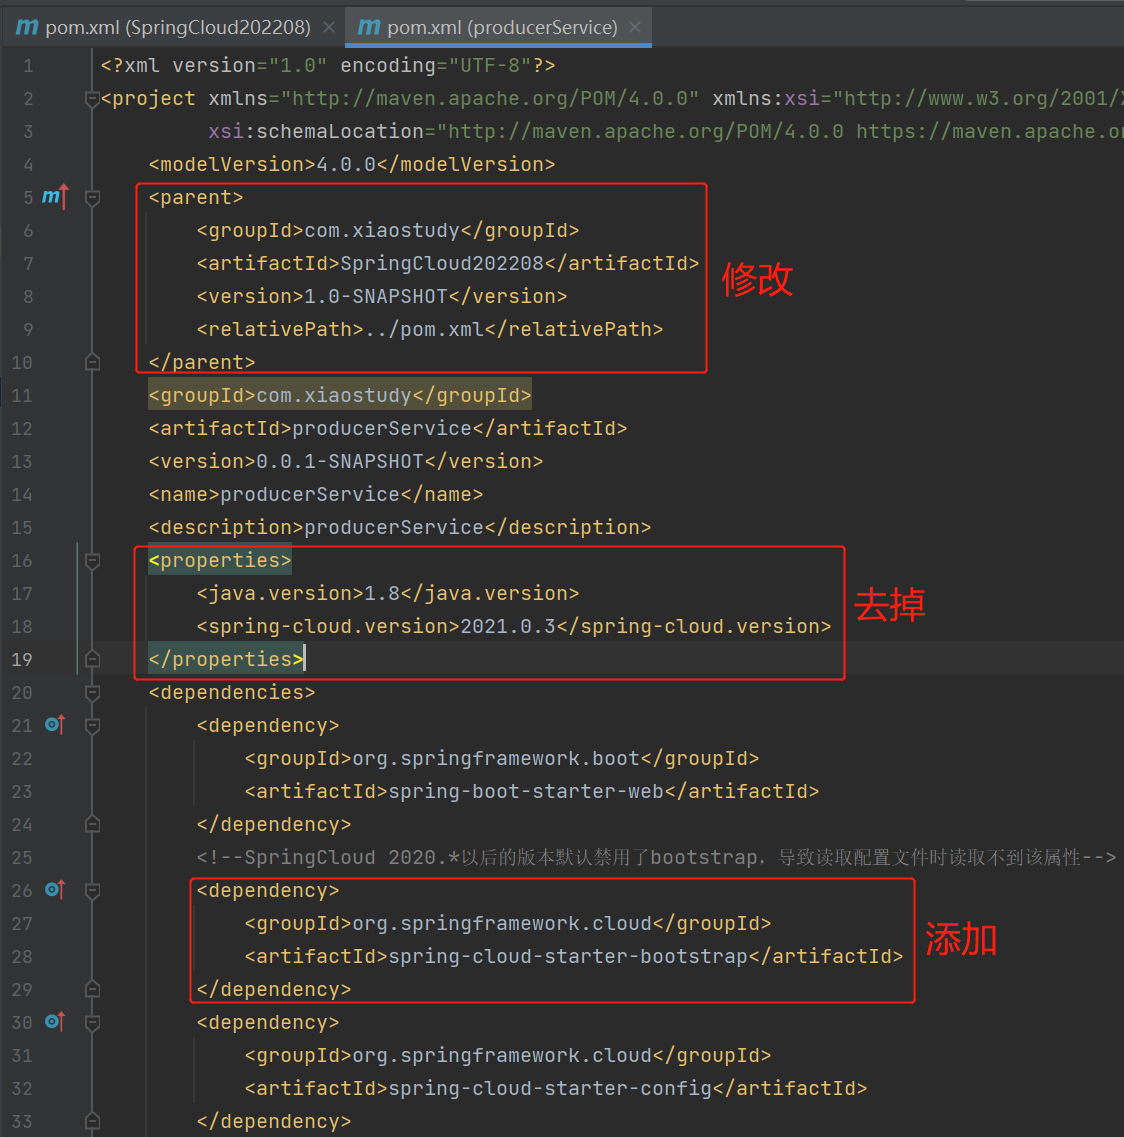
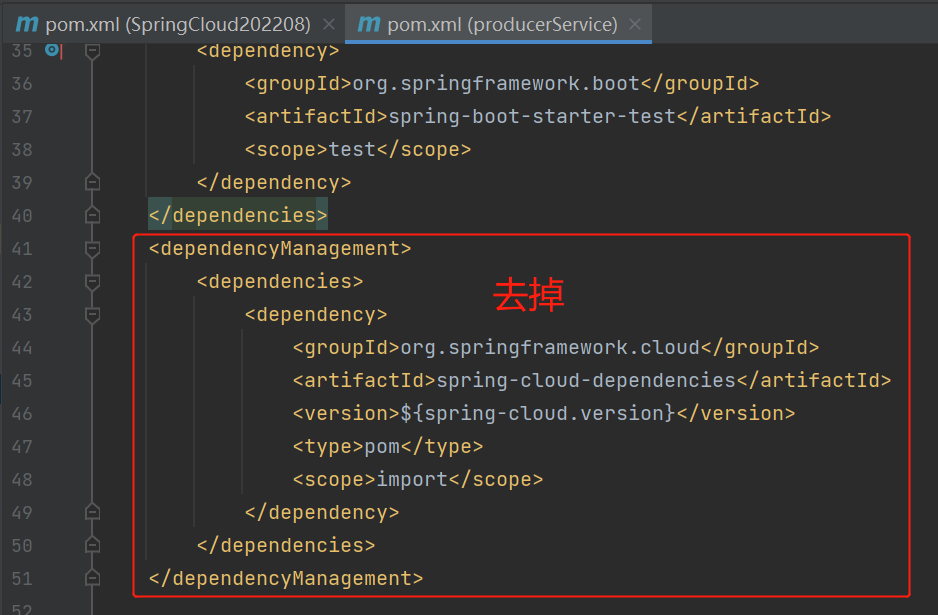
- pom.xml文件修改
点击查看代码
<?xml version="1.0" encoding="UTF-8"?>
<project xmlns="http://maven.apache.org/POM/4.0.0" xmlns:xsi="http://www.w3.org/2001/XMLSchema-instance"
         xsi:schemaLocation="http://maven.apache.org/POM/4.0.0 https://maven.apache.org/xsd/maven-4.0.0.xsd">
    <modelVersion>4.0.0</modelVersion>
    <parent>
        <groupId>com.xiaostudy</groupId>
        <artifactId>SpringCloud202208</artifactId>
        <version>1.0-SNAPSHOT</version>
        <relativePath>../pom.xml</relativePath>
    </parent>
    <groupId>com.xiaostudy</groupId>
    <artifactId>producerService</artifactId>
    <version>0.0.1-SNAPSHOT</version>
    <name>producerService</name>
    <description>producerService</description>
    <dependencies>
        <dependency>
            <groupId>org.springframework.boot</groupId>
            <artifactId>spring-boot-starter-web</artifactId>
        </dependency>
        <!--SpringCloud 2020.*以后的版本默认禁用了bootstrap,导致读取配置文件时读取不到该属性-->
        <dependency>
            <groupId>org.springframework.cloud</groupId>
            <artifactId>spring-cloud-starter-bootstrap</artifactId>
        </dependency>
        <dependency>
            <groupId>org.springframework.cloud</groupId>
            <artifactId>spring-cloud-starter-config</artifactId>
        </dependency>
        <dependency>
            <groupId>org.springframework.cloud</groupId>
            <artifactId>spring-cloud-starter-netflix-eureka-client</artifactId>
        </dependency>

        <dependency>
            <groupId>org.springframework.boot</groupId>
            <artifactId>spring-boot-starter-test</artifactId>
            <scope>test</scope>
        </dependency>
    </dependencies>

    <build>
        <plugins>
            <plugin>
                <groupId>org.springframework.boot</groupId>
                <artifactId>spring-boot-maven-plugin</artifactId>
            </plugin>
        </plugins>
    </build>

</project>
- 配置文件application.properties修改为application.yml,然后配置
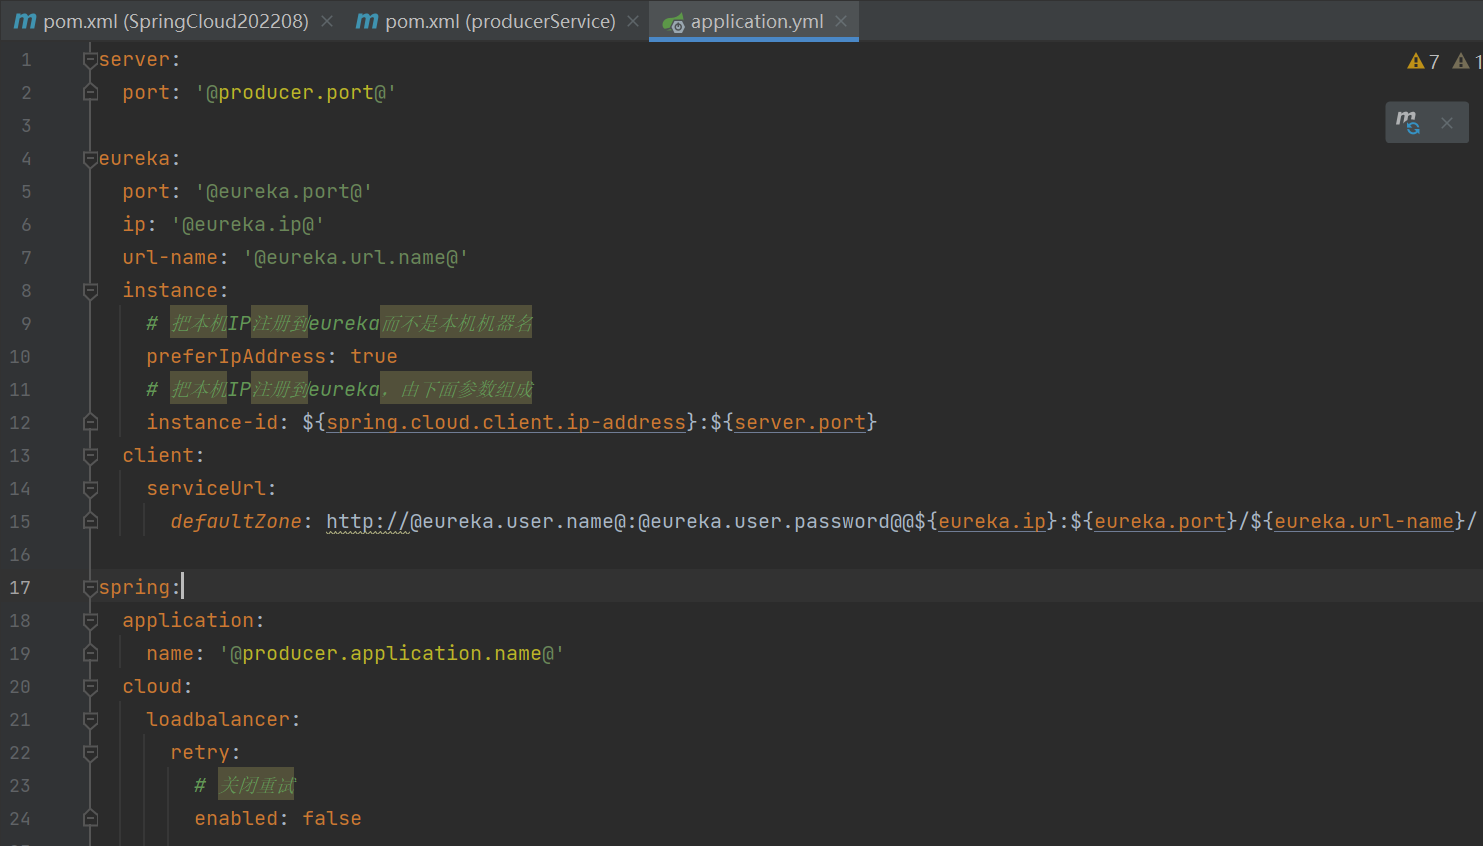
点击查看代码
server:
  port: '@producer.port@'

eureka:
  port: '@eureka.port@'
  ip: '@eureka.ip@'
  url-name: '@eureka.url.name@'
  instance:
    # 把本机IP注册到eureka而不是本机机器名
    preferIpAddress: true
    # 把本机IP注册到eureka,由下面参数组成
    instance-id: ${spring.cloud.client.ip-address}:${server.port}
  client:
    serviceUrl:
      defaultZone: http://@eureka.user.name@:@eureka.user.password@@${eureka.ip}:${eureka.port}/${eureka.url-name}/

spring:
  application:
    name: '@producer.application.name@'
  cloud:
    loadbalancer:
      retry:
        # 关闭重试
        enabled: false
- 添加bootstrap.yml配置文件,bootstrap.yml
SpringCloud-Config-Client配置文件为什么一定要是bootstrap.yml或者bootstrap.properties
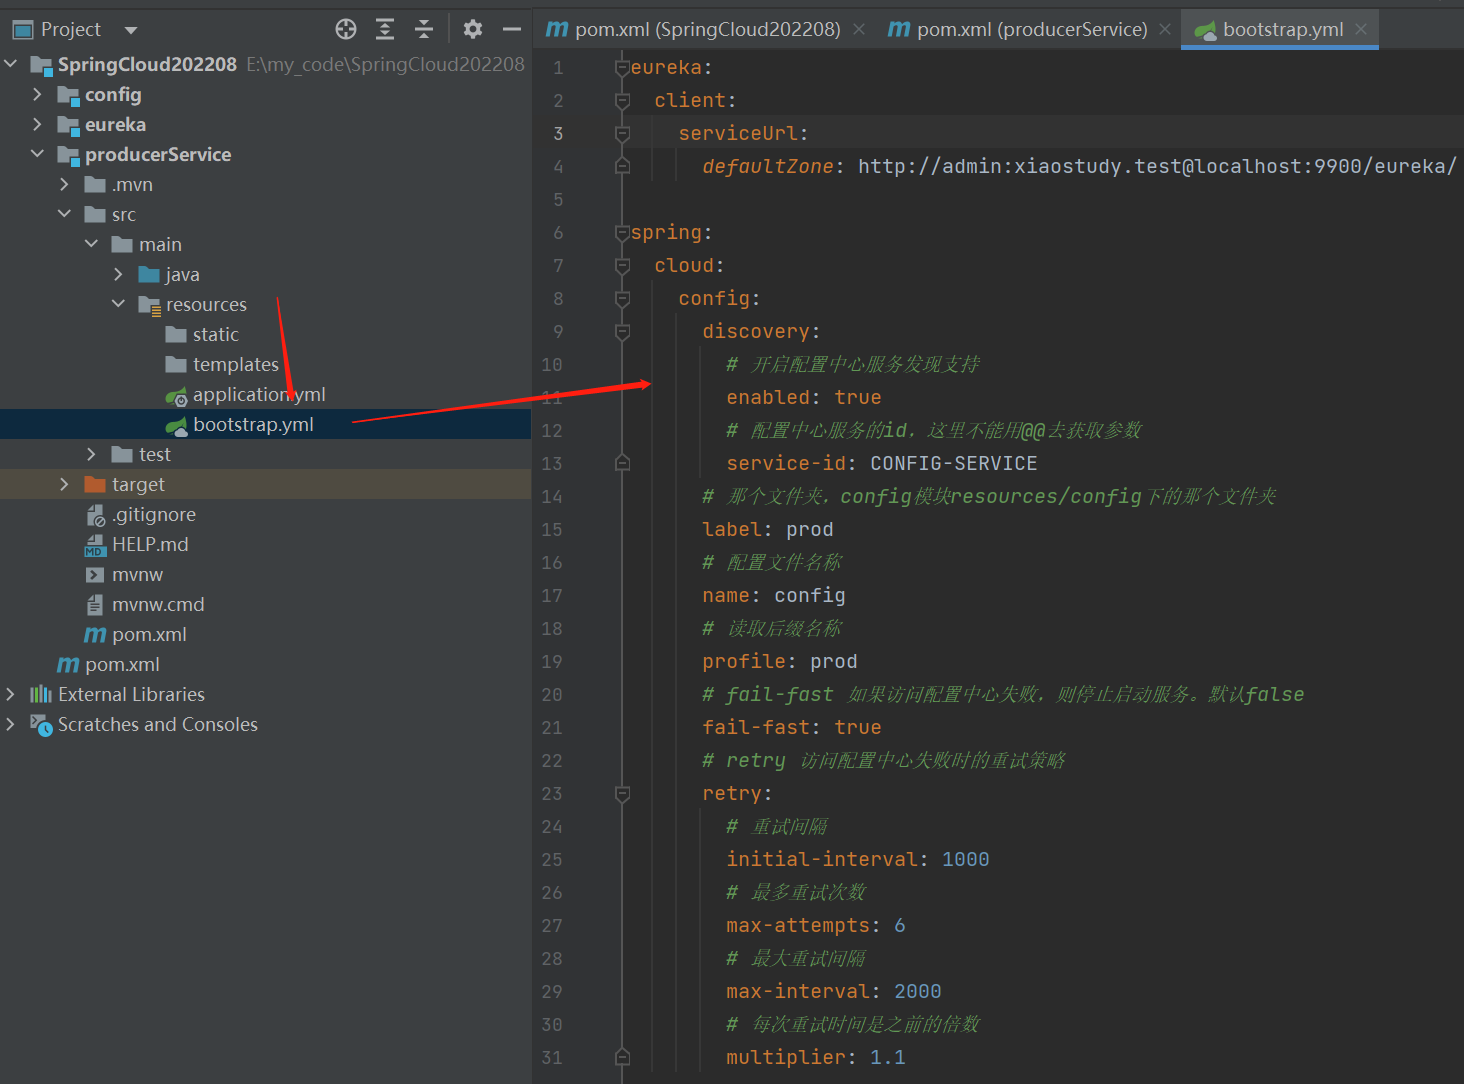
点击查看代码
eureka:
  client:
    serviceUrl:
      defaultZone: http://admin:xiaostudy.test@localhost:9900/eureka/

spring:
  cloud:
    config:
      discovery:
        # 开启配置中心服务发现支持
        enabled: true
        # 配置中心服务的id,这里不能用@@去获取参数
        service-id: CONFIG-SERVICE
      # 那个文件夹,config模块resources/config下的那个文件夹
      label: prod
      # 配置文件名称
      name: config
      # 读取后缀名称
      profile: prod
      # fail-fast 如果访问配置中心失败,则停止启动服务。默认false
      fail-fast: true
      # retry 访问配置中心失败时的重试策略
      retry:
        # 重试间隔
        initial-interval: 1000
        # 最多重试次数
        max-attempts: 6
        # 最大重试间隔
        max-interval: 2000
        # 每次重试时间是之前的倍数
        multiplier: 1.1
- 启动类添加注解
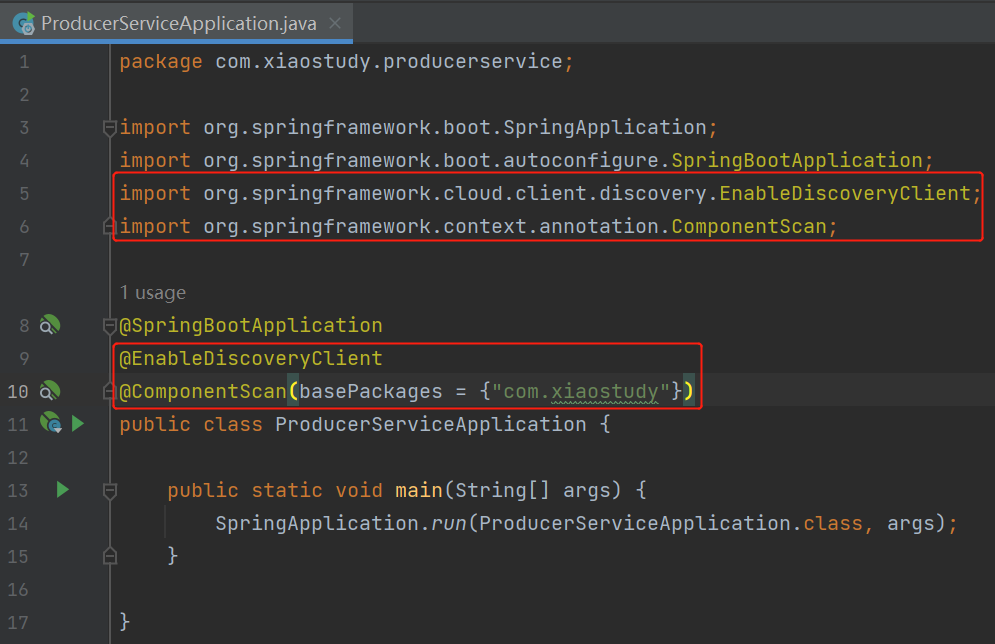
@EnableDiscoveryClient
@ComponentScan(basePackages = {"com.xiaostudy"})
- 写一个controller
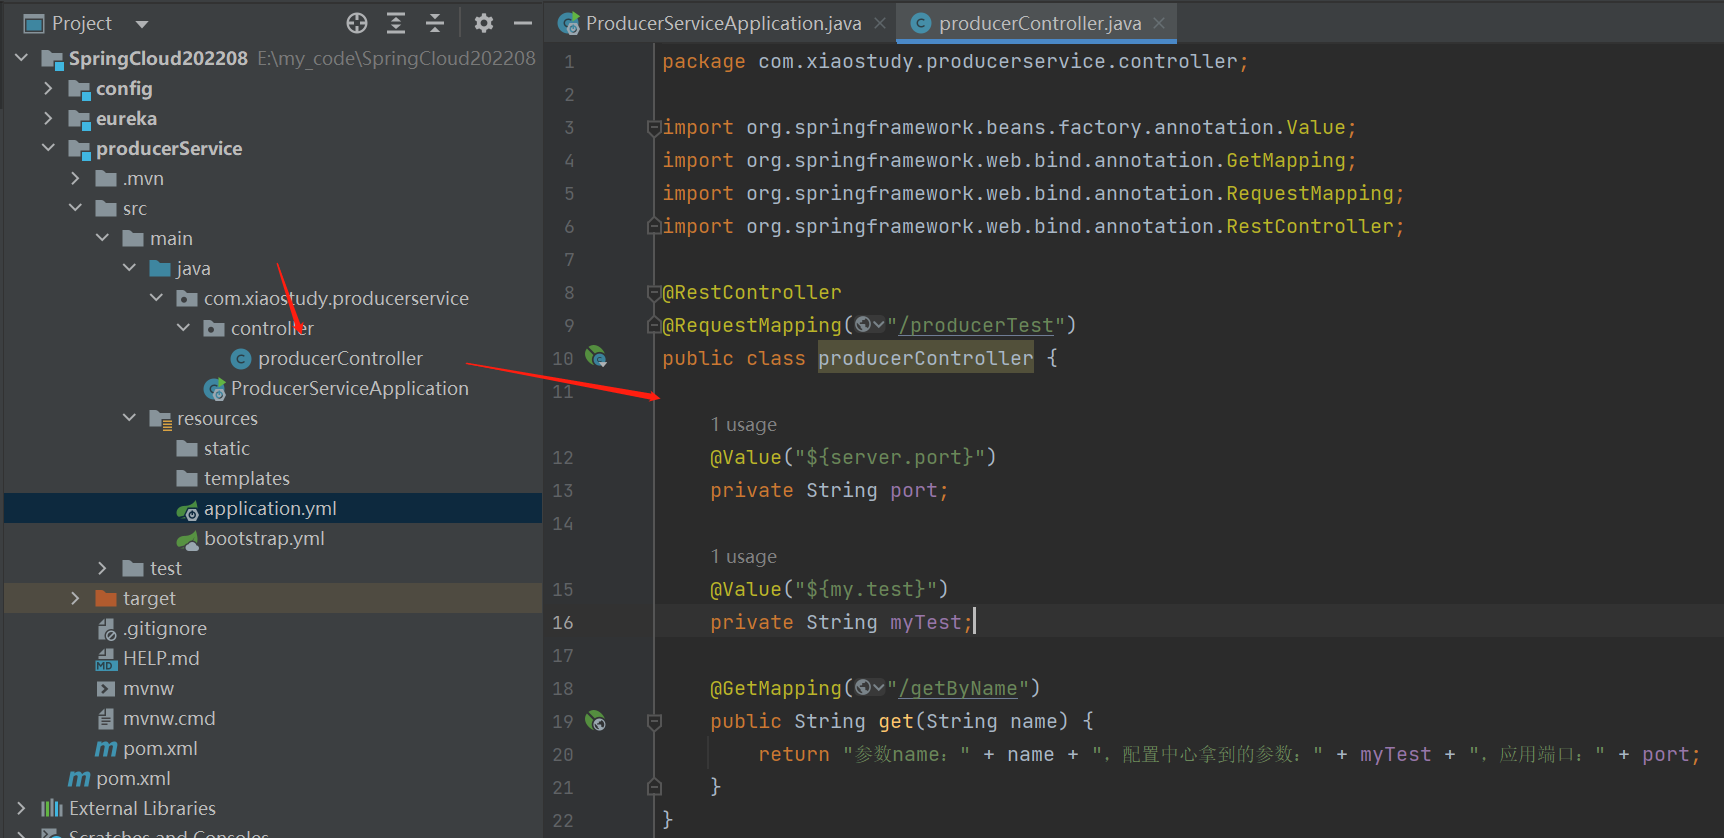
点击查看代码
package com.xiaostudy.producerservice.controller;

import org.springframework.beans.factory.annotation.Value;
import org.springframework.web.bind.annotation.GetMapping;
import org.springframework.web.bind.annotation.RequestMapping;
import org.springframework.web.bind.annotation.RestController;

@RestController
@RequestMapping("/producerTest")
public class producerController {

    @Value("${server.port}")
    private String port;

    @Value("${my.test}")
    private String myTest;

    @GetMapping("/getByName")
    public String get(String name) {
        return "参数name:" + name + ",配置中心拿到的参数:" + myTest + ",应用端口:" + port;
    }
}

2. 创建Feign
目前演示就只有一个feign,就是调producerService和后面的Security用户信息
-
创建操作
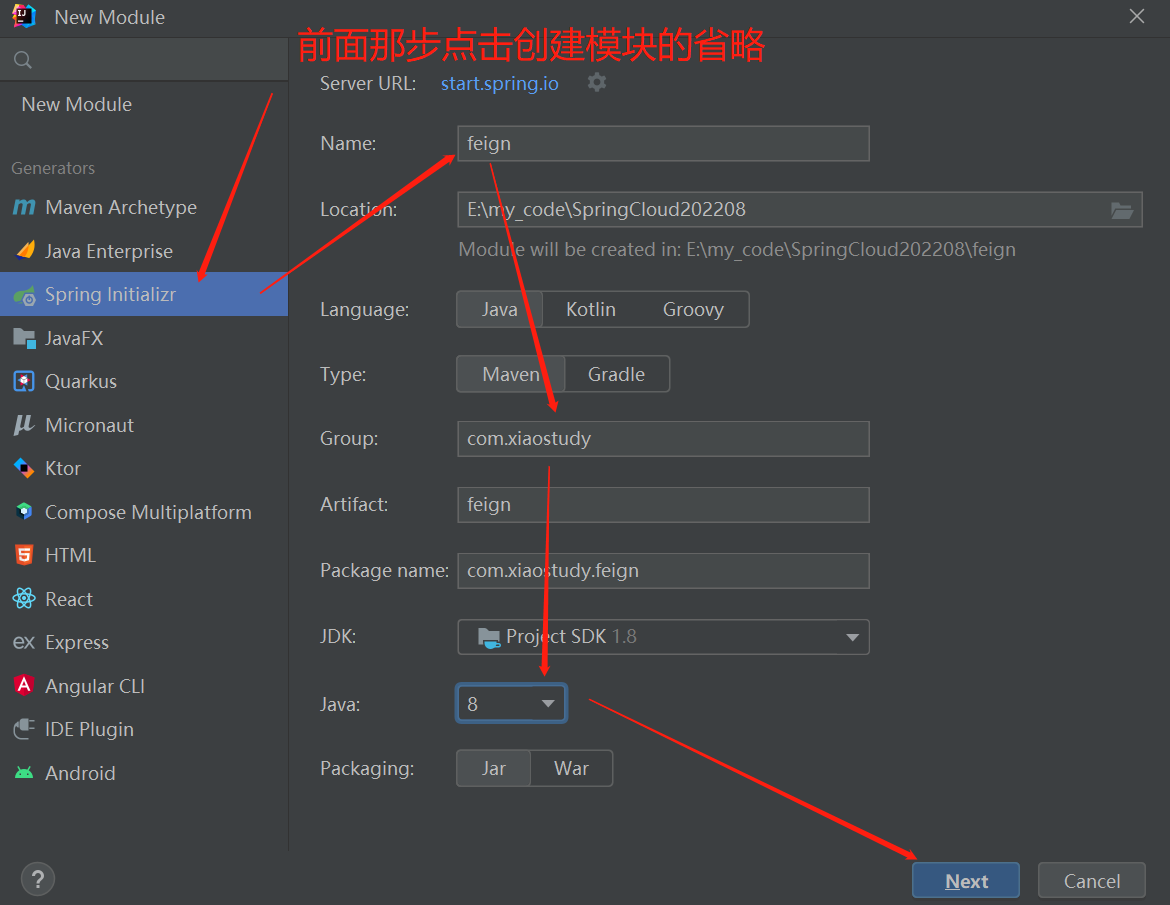
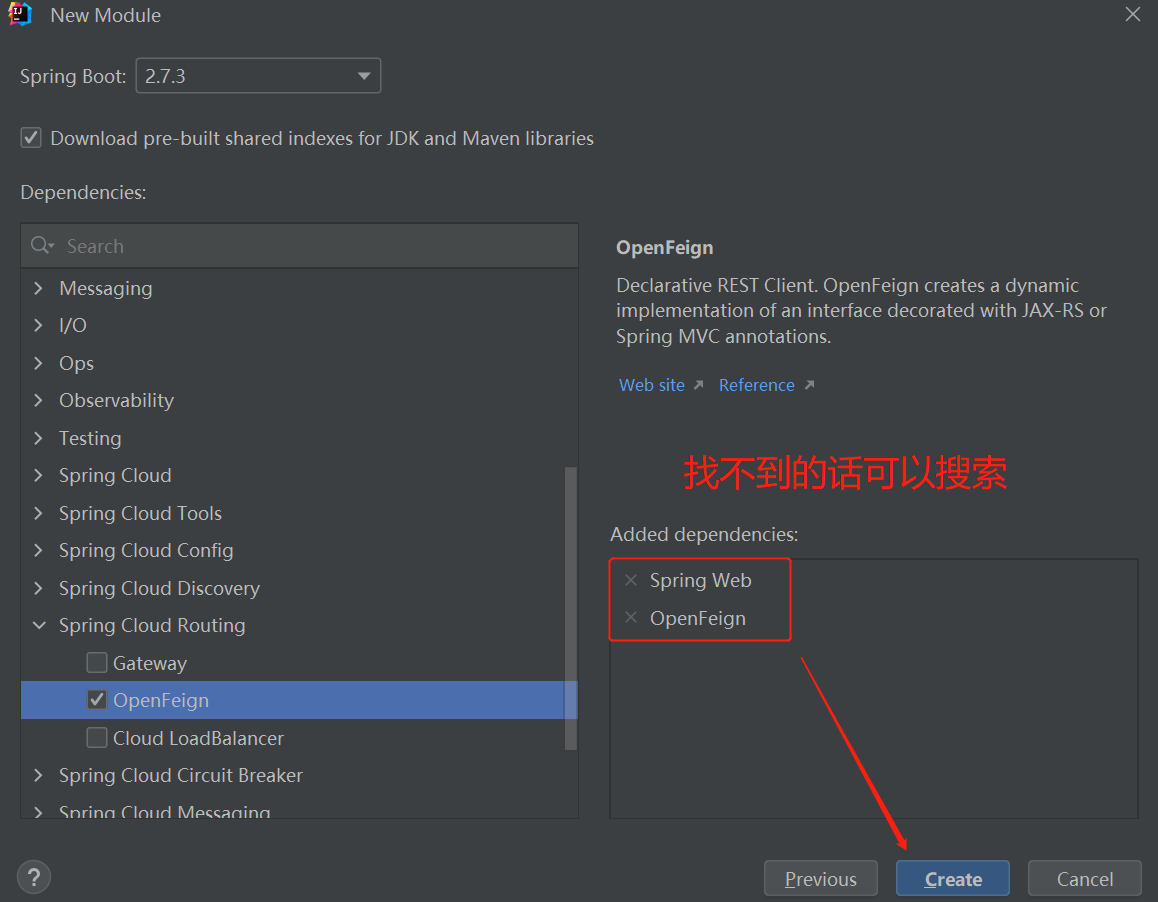
-
父模块添加子模块
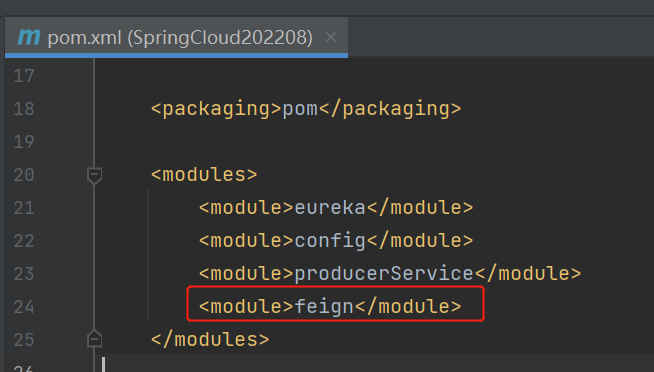
<module>feign</module>
- pom.xml文件修改
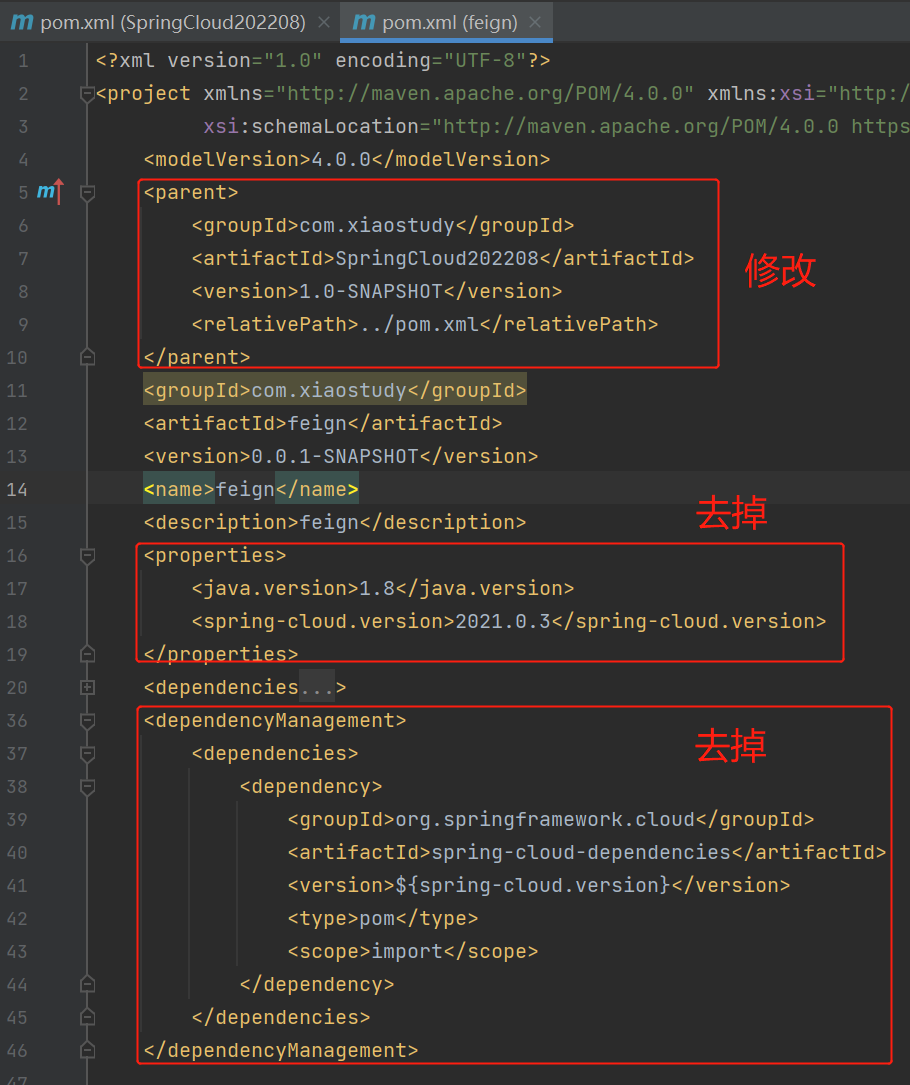
点击查看代码
<?xml version="1.0" encoding="UTF-8"?>
<project xmlns="http://maven.apache.org/POM/4.0.0" xmlns:xsi="http://www.w3.org/2001/XMLSchema-instance"
         xsi:schemaLocation="http://maven.apache.org/POM/4.0.0 https://maven.apache.org/xsd/maven-4.0.0.xsd">
    <modelVersion>4.0.0</modelVersion>
    <parent>
        <groupId>com.xiaostudy</groupId>
        <artifactId>SpringCloud202208</artifactId>
        <version>1.0-SNAPSHOT</version>
        <relativePath>../pom.xml</relativePath>
    </parent>
    <groupId>com.xiaostudy</groupId>
    <artifactId>feign</artifactId>
    <version>0.0.1-SNAPSHOT</version>
    <name>feign</name>
    <description>feign</description>
    <dependencies>
        <dependency>
            <groupId>org.springframework.boot</groupId>
            <artifactId>spring-boot-starter-web</artifactId>
        </dependency>
        <dependency>
            <groupId>org.springframework.cloud</groupId>
            <artifactId>spring-cloud-starter-openfeign</artifactId>
        </dependency>

        <dependency>
            <groupId>org.springframework.boot</groupId>
            <artifactId>spring-boot-starter-test</artifactId>
            <scope>test</scope>
        </dependency>
    </dependencies>

    <build>
        <plugins>
            <plugin>
                <groupId>org.springframework.boot</groupId>
                <artifactId>spring-boot-maven-plugin</artifactId>
            </plugin>
        </plugins>
    </build>

</project>
- 配置类,服务间调用把请求头带上,后面认证用到
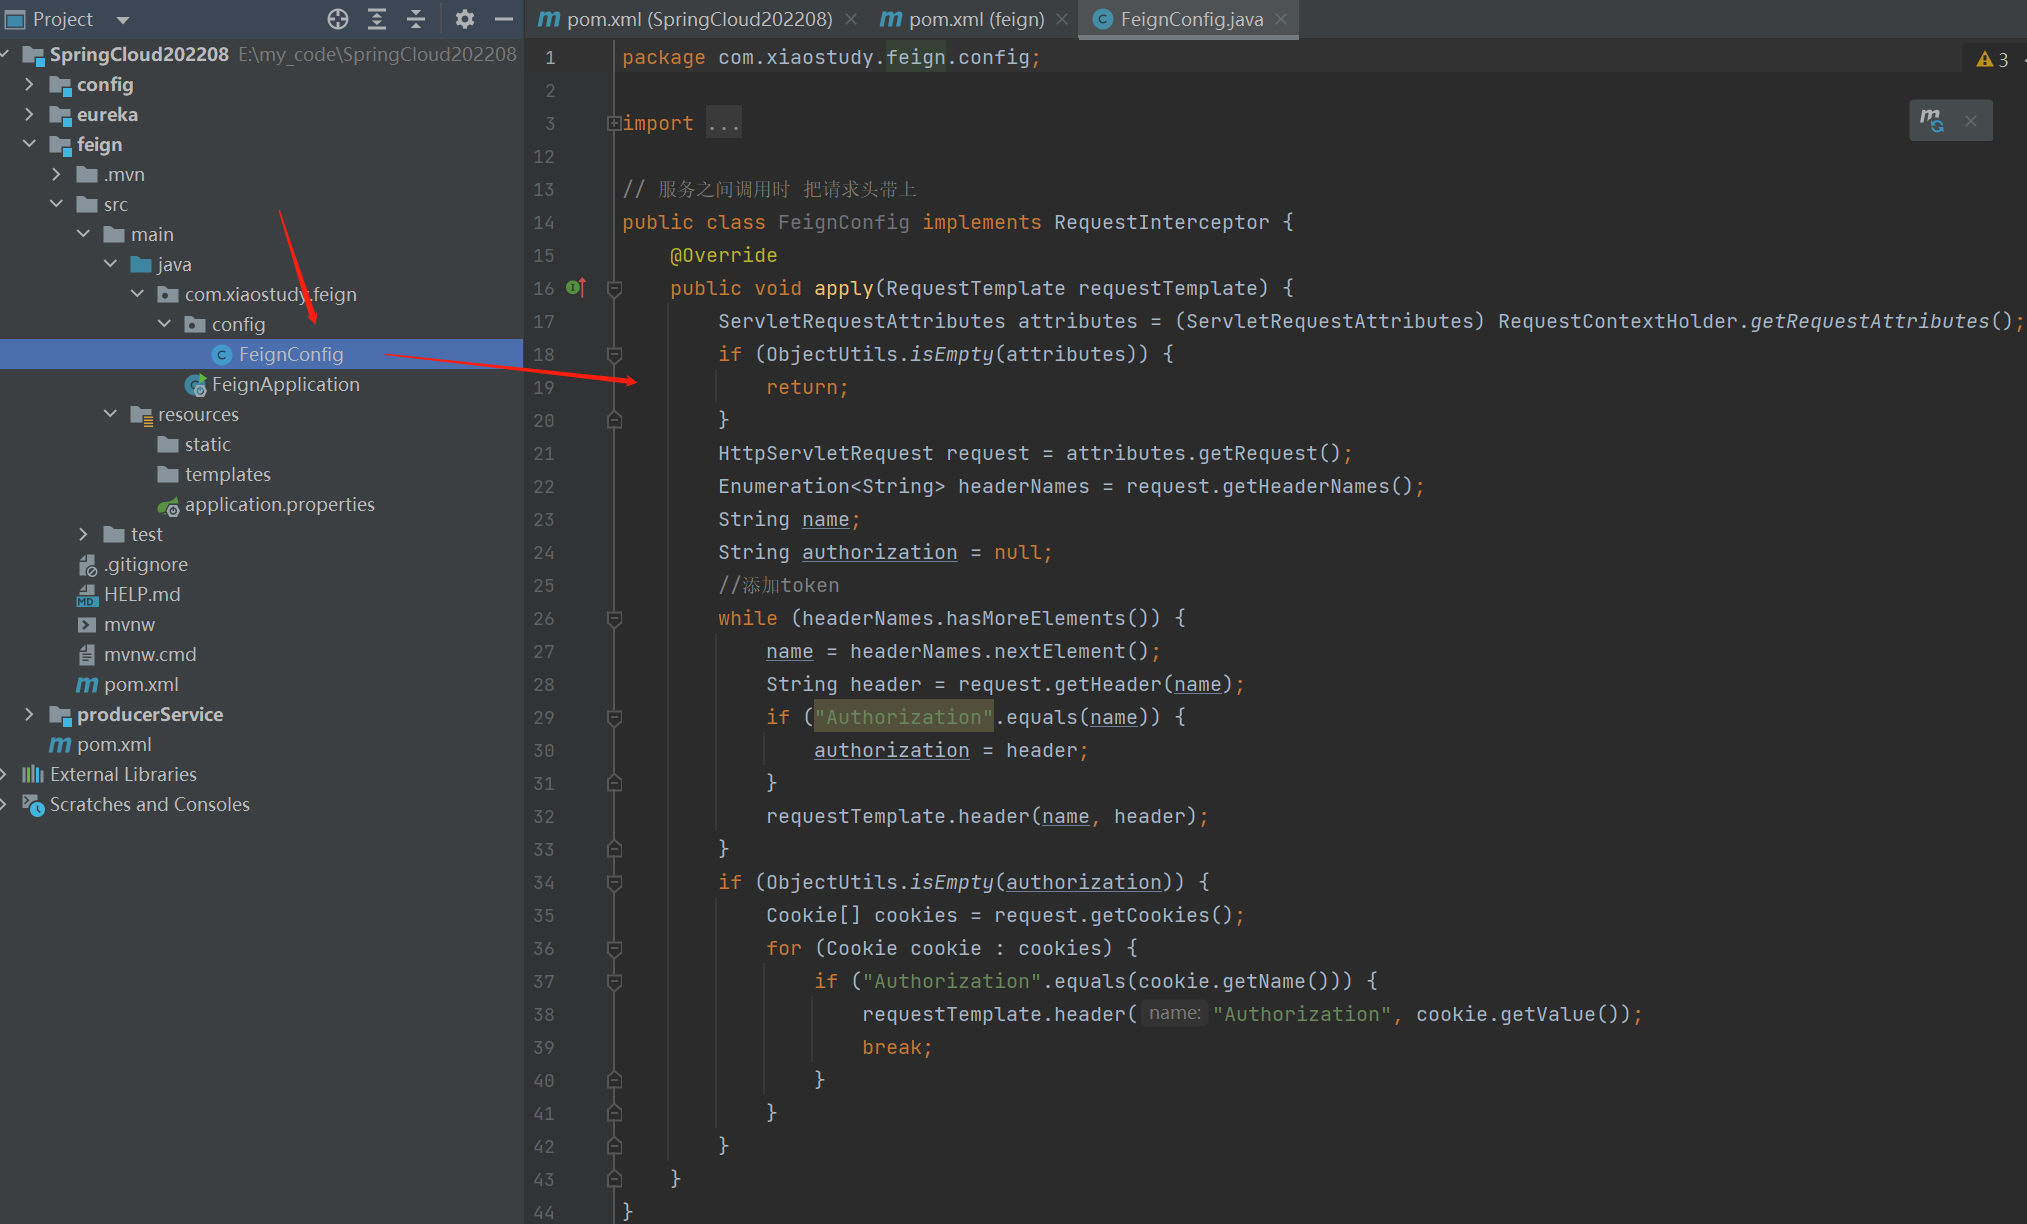
点击查看代码
package com.xiaostudy.feign.config;

import feign.RequestInterceptor;
import feign.RequestTemplate;
import org.springframework.util.ObjectUtils;
import org.springframework.web.context.request.RequestContextHolder;
import org.springframework.web.context.request.ServletRequestAttributes;

import javax.servlet.http.Cookie;
import javax.servlet.http.HttpServletRequest;
import java.util.Enumeration;
import java.util.Locale;

// 服务之间调用时 把请求头带上
public class FeignConfig implements RequestInterceptor {
    @Override
    public void apply(RequestTemplate requestTemplate) {
        ServletRequestAttributes attributes = (ServletRequestAttributes) RequestContextHolder.getRequestAttributes();
        if (ObjectUtils.isEmpty(attributes)) {
            return;
        }
        HttpServletRequest request = attributes.getRequest();
        Enumeration<String> headerNames = request.getHeaderNames();
        String name;
        String authorization = null;
        //添加token
        while (headerNames.hasMoreElements()) {
            name = headerNames.nextElement();
            String header = request.getHeader(name);
            if ("Authorization".equals(name) || (null != name && name.toLowerCase(Locale.ROOT).equals("authorization"))) {
                authorization = header;
            }
            requestTemplate.header(name, header);
        }
        if (ObjectUtils.isEmpty(authorization)) {
            Cookie[] cookies = request.getCookies();
            if (null == cookies) {
                return;
            }
            for (Cookie cookie : cookies) {
                if ("Authorization".equals(cookie.getName()) || "authorization".equals(cookie.getName().toLowerCase(Locale.ROOT))) {
                    requestTemplate.header("Authorization", cookie.getValue());
                    break;
                }
            }
        }
    }
}
- 配置文件application.properties修改为application-feign.yml,然后配置
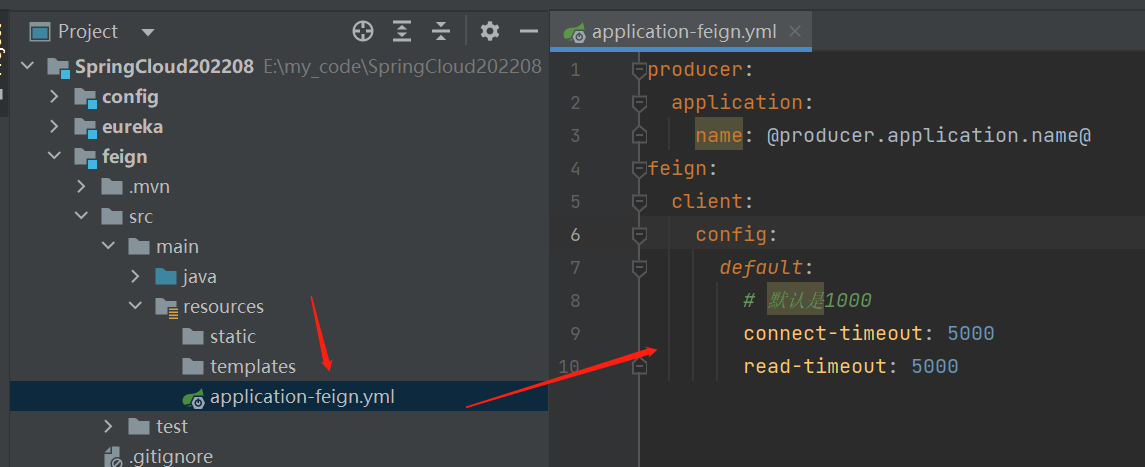
点击查看代码
producer:
  application:
    name: @producer.application.name@
feign:
  client:
    config:
      default:
        # 默认是1000
        connect-timeout: 5000
        read-timeout: 5000
- 创建feign接口
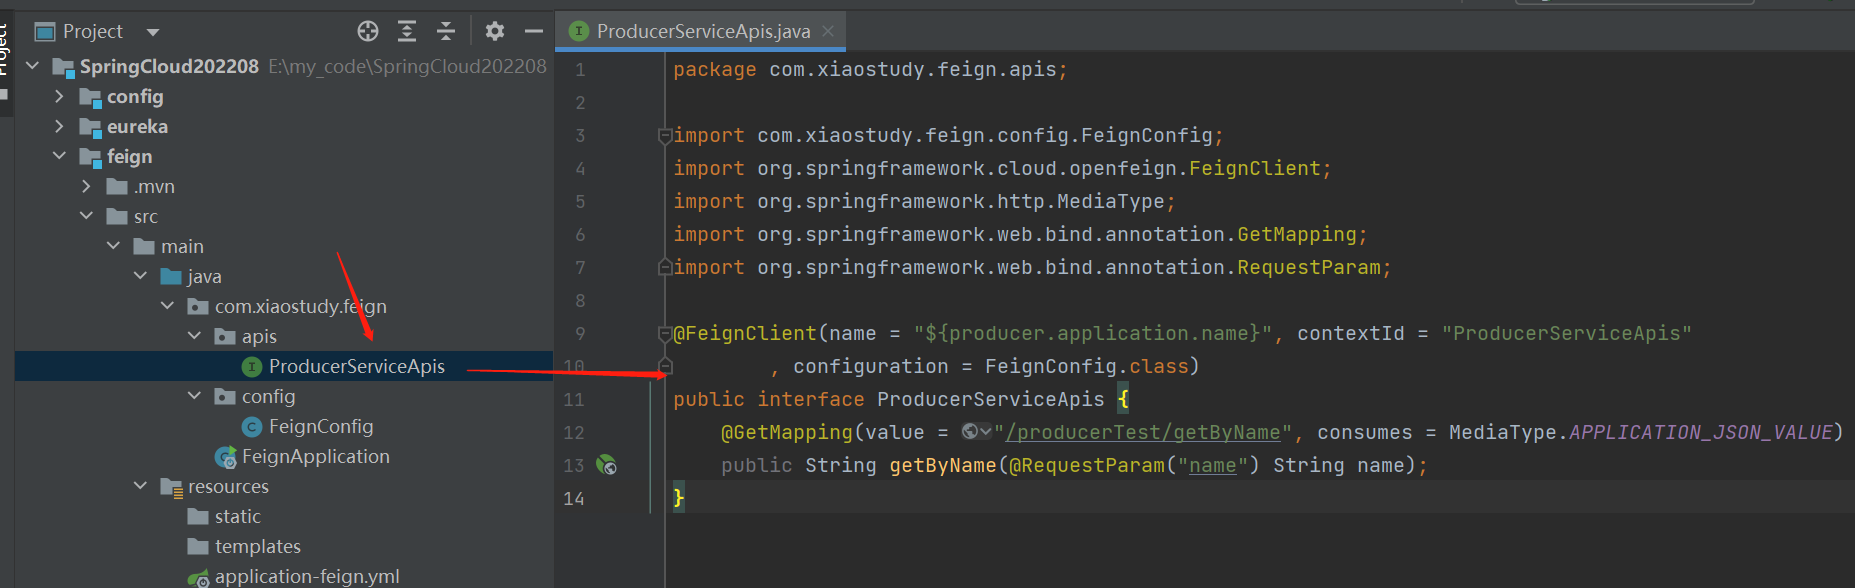
点击查看代码
package com.xiaostudy.feign.apis;

import com.xiaostudy.feign.config.FeignConfig;
import org.springframework.cloud.openfeign.FeignClient;
import org.springframework.http.MediaType;
import org.springframework.web.bind.annotation.GetMapping;
import org.springframework.web.bind.annotation.RequestParam;

@FeignClient(name = "${producer.application.name}", contextId = "ProducerServiceApis"
        , configuration = FeignConfig.class)
public interface ProducerServiceApis {
    @GetMapping(value = "/producerTest/getByName", consumes = MediaType.APPLICATION_JSON_VALUE)
    public String getByName(@RequestParam("name") String name);
}
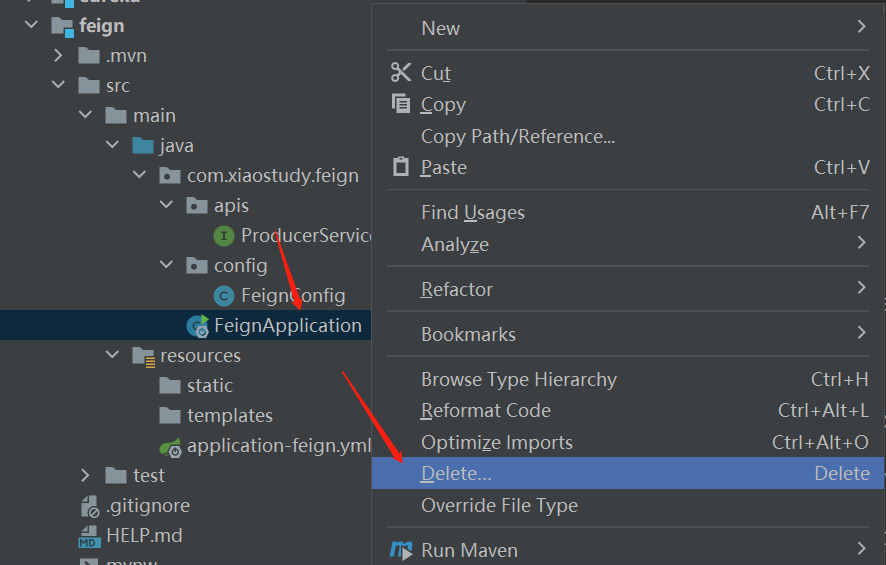
- 删除启动类
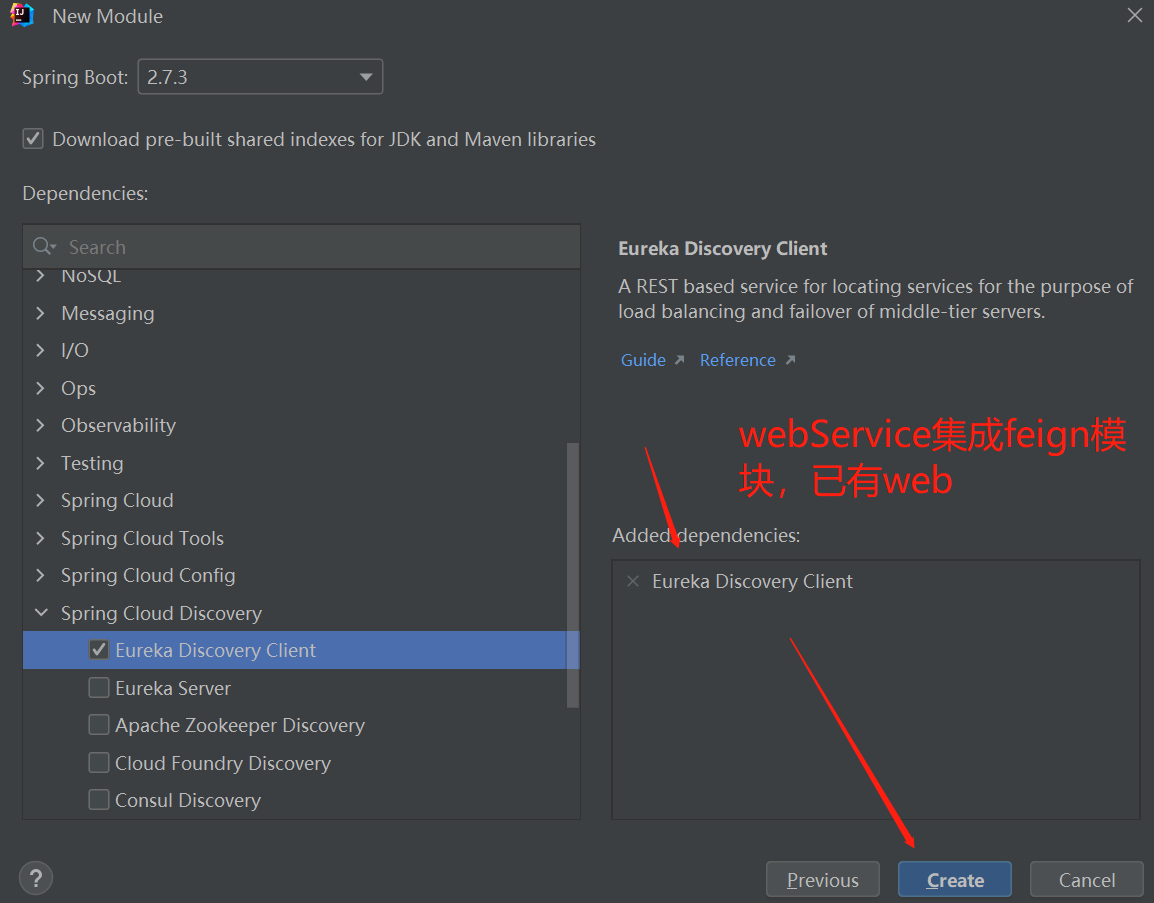
3. webService
-
创建操作
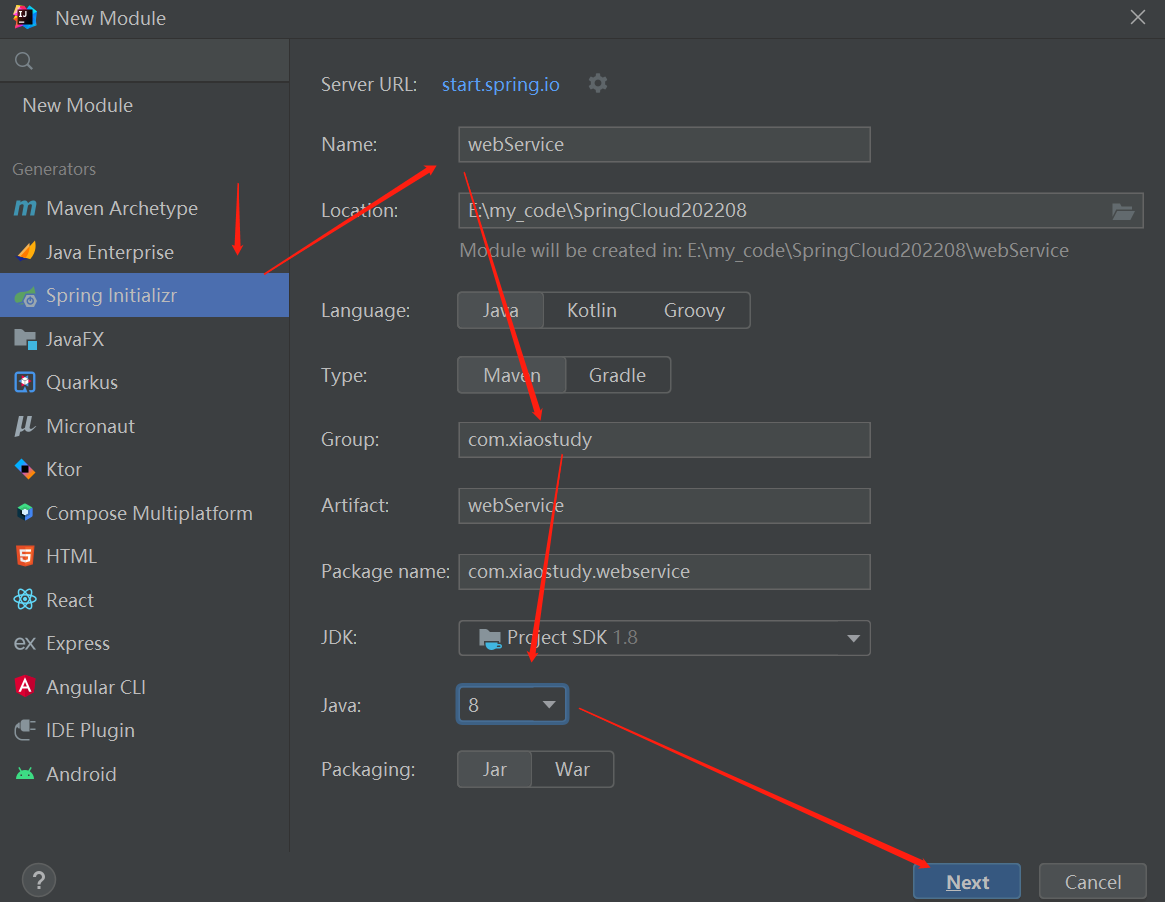
-
父模块添加子模块
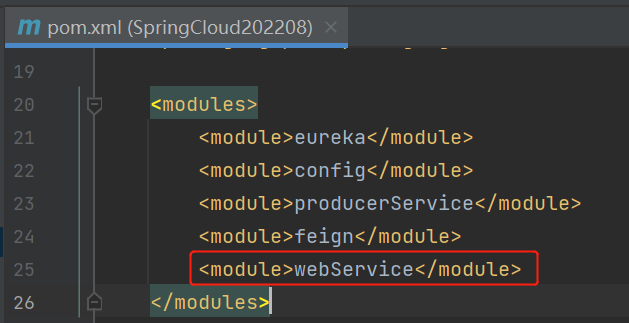
<module>webService</module>
- pom.xml文件修改
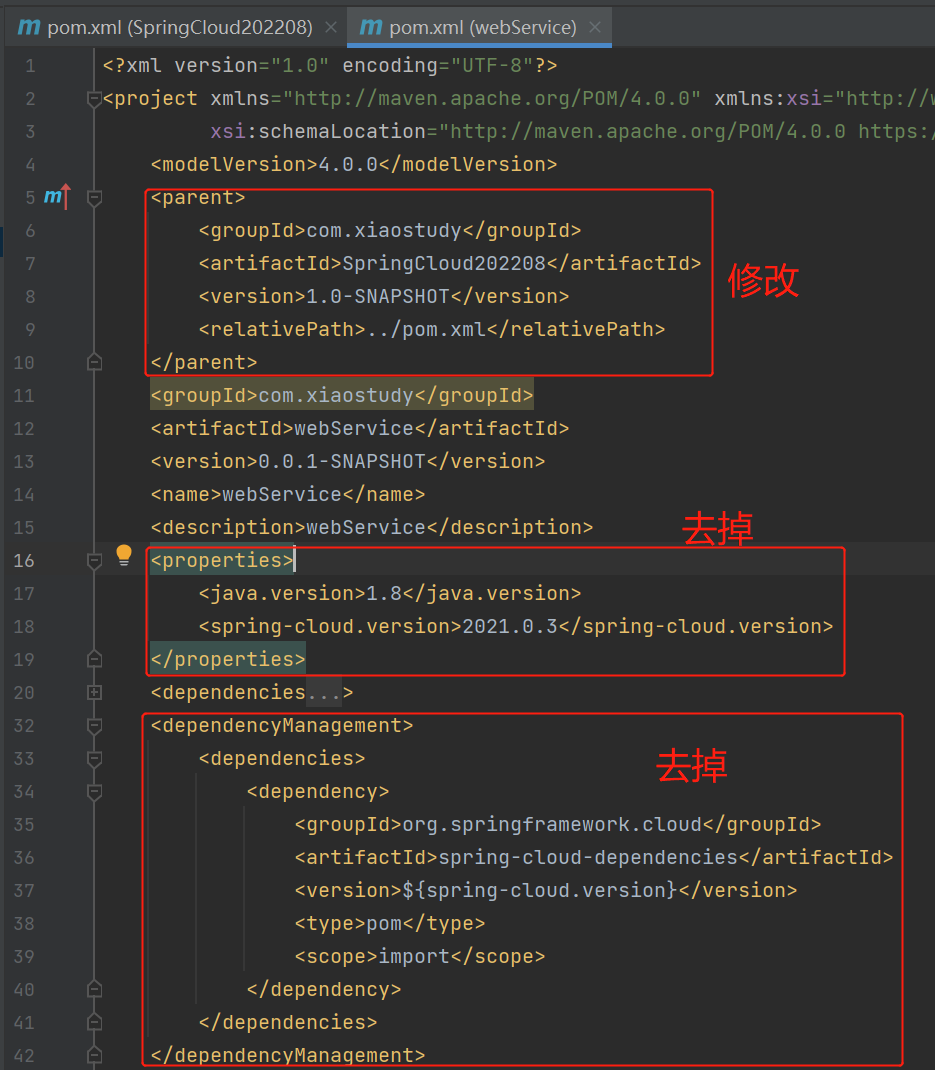
点击查看代码
<?xml version="1.0" encoding="UTF-8"?>
<project xmlns="http://maven.apache.org/POM/4.0.0" xmlns:xsi="http://www.w3.org/2001/XMLSchema-instance"
xsi:schemaLocation="http://maven.apache.org/POM/4.0.0 https://maven.apache.org/xsd/maven-4.0.0.xsd">
<modelVersion>4.0.0</modelVersion>
<parent>
<groupId>com.xiaostudy</groupId>
<artifactId>SpringCloud202208</artifactId>
<version>1.0-SNAPSHOT</version>
<relativePath>../pom.xml</relativePath>
</parent>
<groupId>com.xiaostudy</groupId>
<artifactId>webService</artifactId>
<version>0.0.1-SNAPSHOT</version>
<name>webService</name>
<description>webService</description>
<dependencies>
<dependency>
<groupId>org.springframework.cloud</groupId>
<artifactId>spring-cloud-starter-netflix-eureka-client</artifactId>
</dependency>
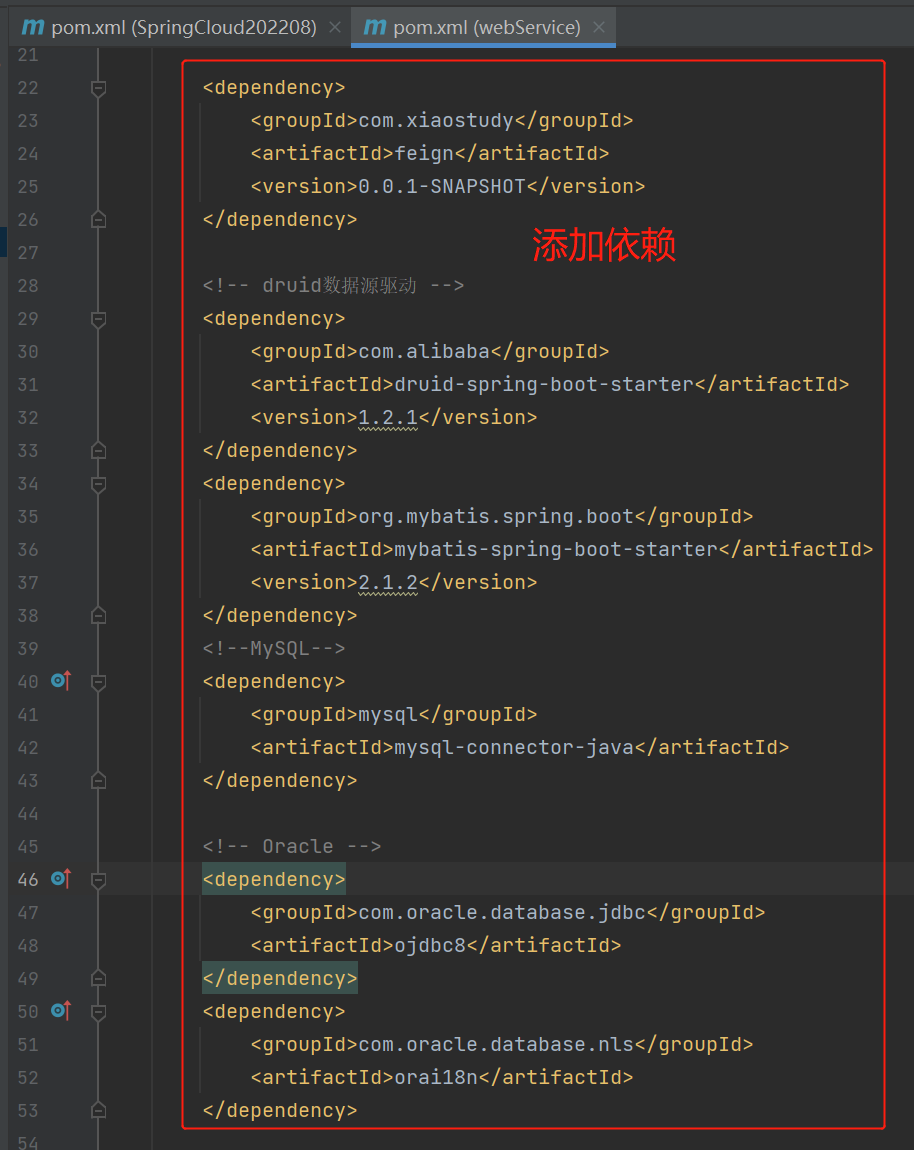
<dependency>
<groupId>com.xiaostudy</groupId>
<artifactId>feign</artifactId>
<version>0.0.1-SNAPSHOT</version>
</dependency>
<!-- druid数据源驱动 -->
<dependency>
<groupId>com.alibaba</groupId>
<artifactId>druid-spring-boot-starter</artifactId>
<version>1.2.1</version>
</dependency>
<dependency>
<groupId>org.mybatis.spring.boot</groupId>
<artifactId>mybatis-spring-boot-starter</artifactId>
<version>2.1.2</version>
</dependency>
<!--MySQL-->
<dependency>
<groupId>mysql</groupId>
<artifactId>mysql-connector-java</artifactId>
</dependency>
<!-- Oracle -->
<dependency>
<groupId>com.oracle.database.jdbc</groupId>
<artifactId>ojdbc8</artifactId>
</dependency>
<dependency>
<groupId>com.oracle.database.nls</groupId>
<artifactId>orai18n</artifactId>
</dependency>
<dependency>
<groupId>org.springframework.boot</groupId>
<artifactId>spring-boot-starter-test</artifactId>
<scope>test</scope>
</dependency>
</dependencies>
<build>
<plugins>
<plugin>
<groupId>org.springframework.boot</groupId>
<artifactId>spring-boot-maven-plugin</artifactId>
</plugin>
</plugins>
</build>
</project>
- 配置文件application.properties修改为application.yml,然后配置

点击查看代码
server:
  port: '@web.port@'

eureka:
  port: '@eureka.port@'
  ip: '@eureka.ip@'
  url-name: '@eureka.url.name@'
  instance:
    # 把本机IP注册到eureka而不是本机机器名
    preferIpAddress: true
    # 把本机IP注册到eureka,由下面参数组成
    instance-id: ${spring.cloud.client.ip-address}:${server.port}
  client:
    serviceUrl:
      defaultZone: http://@eureka.user.name@:@eureka.user.password@@${eureka.ip}:${eureka.port}/${eureka.url-name}/

spring:
  application:
    name: '@web.application.name@'
  cloud:
    loadbalancer:
      retry:
        # 关闭重试
        enabled: false
  profiles:
    # 使用的配置文件后缀application-feign.yml引进来
    active: feign
  datasource:
    type: com.alibaba.druid.pool.DruidDataSource
    druid:
      driverClassName: com.mysql.cj.jdbc.Driver
      url: jdbc:mysql://127.0.0.1:3306/test1?useUnicode=true&characterEncoding=utf8
      username: root
      password: 密码
    druid2:
      driverClassName: com.mysql.cj.jdbc.Driver
      url: jdbc:mysql://127.0.0.1:3306/test2?useUnicode=true&characterEncoding=utf8
      username: root
      password: 密码
    druid3:
      driverClassName: oracle.jdbc.OracleDriver
      url: jdbc:oracle:thin:@//localhost:1521/ORCL
      username: lw
      password: 密码
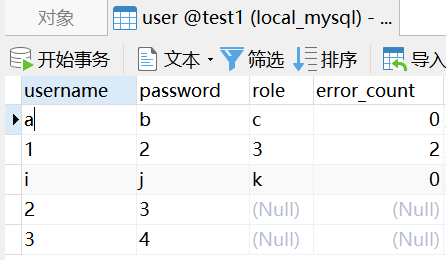
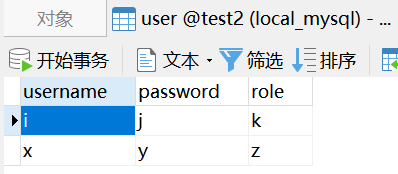
- MySQL测试用到的用户表,建表SQL,不规范哦
点击查看代码
CREATE TABLE `user` (
  `username` varchar(255) DEFAULT NULL,
  `password` varchar(255) DEFAULT NULL,
  `role` varchar(255) DEFAULT NULL,
  `error_count` int(10) DEFAULT NULL,
  `url` varchar(255) DEFAULT NULL,
  `email` varchar(255) DEFAULT NULL,
  `phone` varchar(255) DEFAULT NULL
) ENGINE=InnoDB DEFAULT CHARSET=utf8 COMMENT='用户信息表测试'
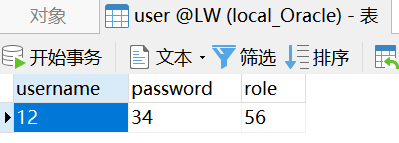
- Oracle测试用到的用户名,建表SQL,不规范哦
点击查看代码
CREATE TABLE "LW"."user" (
"username" VARCHAR2 ( 255 ),
"password" VARCHAR2 ( 255 ),
"role" VARCHAR2 ( 255 )
)
- 创建3个实体类
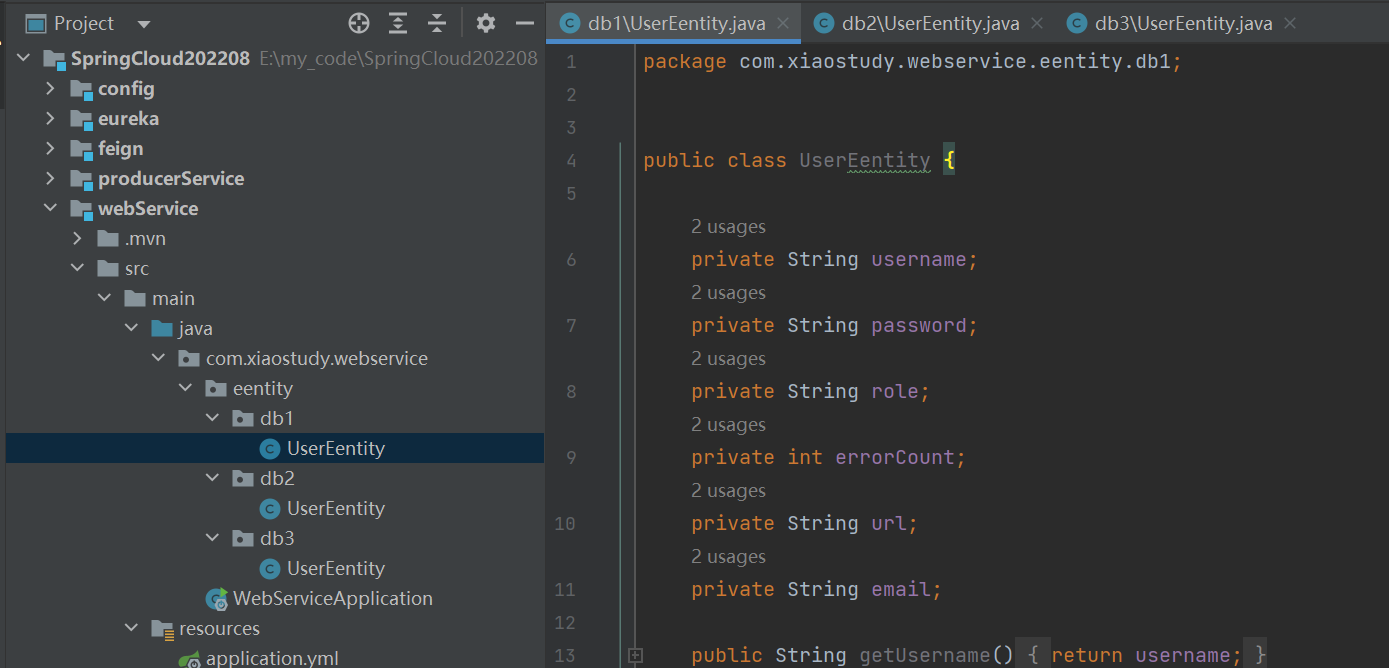
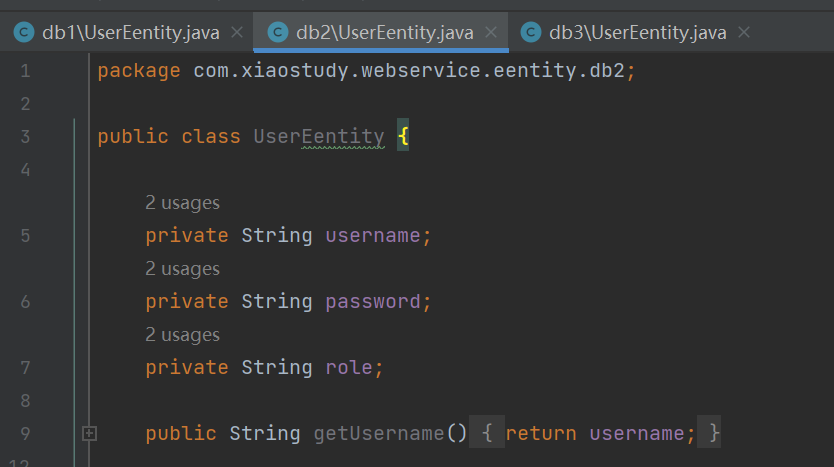
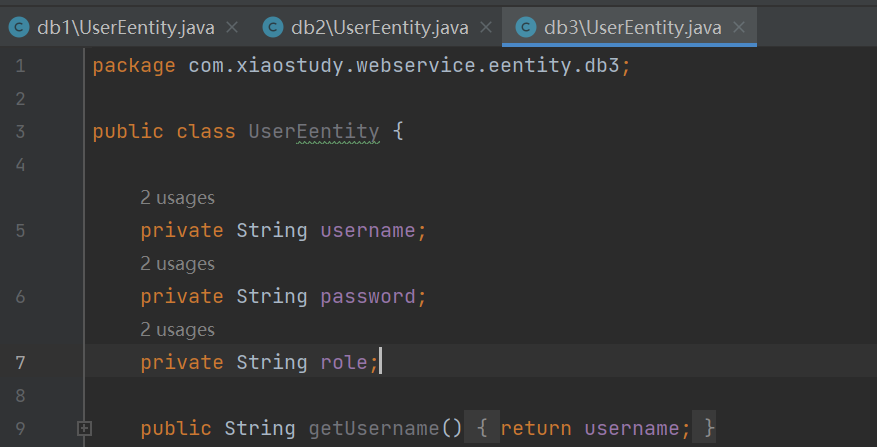
注意截图的实体类entity打错成eentity
db1的实体类
package com.xiaostudy.webservice.entity.db1;


public class UserEentity {

    private String username;
    private String password;
    private String role;
    private int errorCount;
    private String url;
    private String email;

    public String getUsername() {
        return username;
    }

    public void setUsername(String username) {
        this.username = username;
    }

    public String getPassword() {
        return password;
    }

    public void setPassword(String password) {
        this.password = password;
    }

    public String getRole() {
        return role;
    }

    public void setRole(String role) {
        this.role = role;
    }

    public int getErrorCount() {
        return errorCount;
    }

    public void setErrorCount(int errorCount) {
        this.errorCount = errorCount;
    }

    public String getUrl() {
        return url;
    }

    public void setUrl(String url) {
        this.url = url;
    }

    public String getEmail() {
        return email;
    }

    public void setEmail(String email) {
        this.email = email;
    }
}
db2的实体类
package com.xiaostudy.webservice.entity.db2;

public class UserEentity {

    private String username;
    private String password;
    private String role;

    public String getUsername() {
        return username;
    }

    public void setUsername(String username) {
        this.username = username;
    }

    public String getPassword() {
        return password;
    }

    public void setPassword(String password) {
        this.password = password;
    }

    public String getRole() {
        return role;
    }

    public void setRole(String role) {
        this.role = role;
    }
}
db3的实体类
package com.xiaostudy.webservice.entity.db3;

public class UserEentity {

    private String username;
    private String password;
    private String role;

    public String getUsername() {
        return username;
    }

    public void setUsername(String username) {
        this.username = username;
    }

    public String getPassword() {
        return password;
    }

    public void setPassword(String password) {
        this.password = password;
    }

    public String getRole() {
        return role;
    }

    public void setRole(String role) {
        this.role = role;
    }
}
- 字符串工具类
字符串工具类
package com.xiaostudy.webservice.utils;


public class StringUtils {
    public static final String DB_1_MAPPER_PACKAGE = "com.xiaostudy.webservice.mapper.db1";
    public static final String DB_1_ENTITY_PACKAGE = "com.xiaostudy.webservice.entity.db1";
    public static final String DB_1_MAPPER_LOCATION = "classpath*:mapper/db1/*.xml";
    public static final String DB_1_SQL_SESSION_FACTORY_REF = "db1SqlSessionFactory";
    public static final String DB_1_DATA_SOURCE_NAME = "db1DataSource";
    public static final String DB_1_TRANSACTION_MANAGER_NAME = "db1TransactionManager";

    public static final String DB_2_MAPPER_PACKAGE = "com.xiaostudy.webservice.mapper.db2";
    public static final String DB_2_ENTITY_PACKAGE = "com.xiaostudy.webservice.entity.db2";
    public static final String DB_2_MAPPER_LOCATION = "classpath*:mapper/db2/*.xml";
    public static final String DB_2_SQL_SESSION_FACTORY_REF = "db2SqlSessionFactory";
    public static final String DB_2_DATA_SOURCE_NAME = "db2DataSource";
    public static final String DB_2_TRANSACTION_MANAGER_NAME = "db2TransactionManager";

    public static final String DB_3_MAPPER_PACKAGE = "com.xiaostudy.webservice.mapper.db3";
    public static final String DB_3_ENTITY_PACKAGE = "com.xiaostudy.webservice.entity.db3";
    public static final String DB_3_MAPPER_LOCATION = "classpath*:mapper/db3/*.xml";
    public static final String DB_3_SQL_SESSION_FACTORY_REF = "db3SqlSessionFactory";
    public static final String DB_3_DATA_SOURCE_NAME = "db3DataSource";
    public static final String DB_3_TRANSACTION_MANAGER_NAME = "db3TransactionManager";

    public static final String DB_1_SERVICE_BEAN_NAME = "UserService1";
    public static final String DB_2_SERVICE_BEAN_NAME = "UserService2";
    public static final String DB_3_SERVICE_BEAN_NAME = "UserService3";

    public static final String DB_1_MAPPER_BEAN_NAME = "UserMapper1";
    public static final String DB_2_MAPPER_BEAN_NAME = "UserMapper2";
    public static final String DB_3_MAPPER_BEAN_NAME = "UserMapper3";
}
- mapper接口
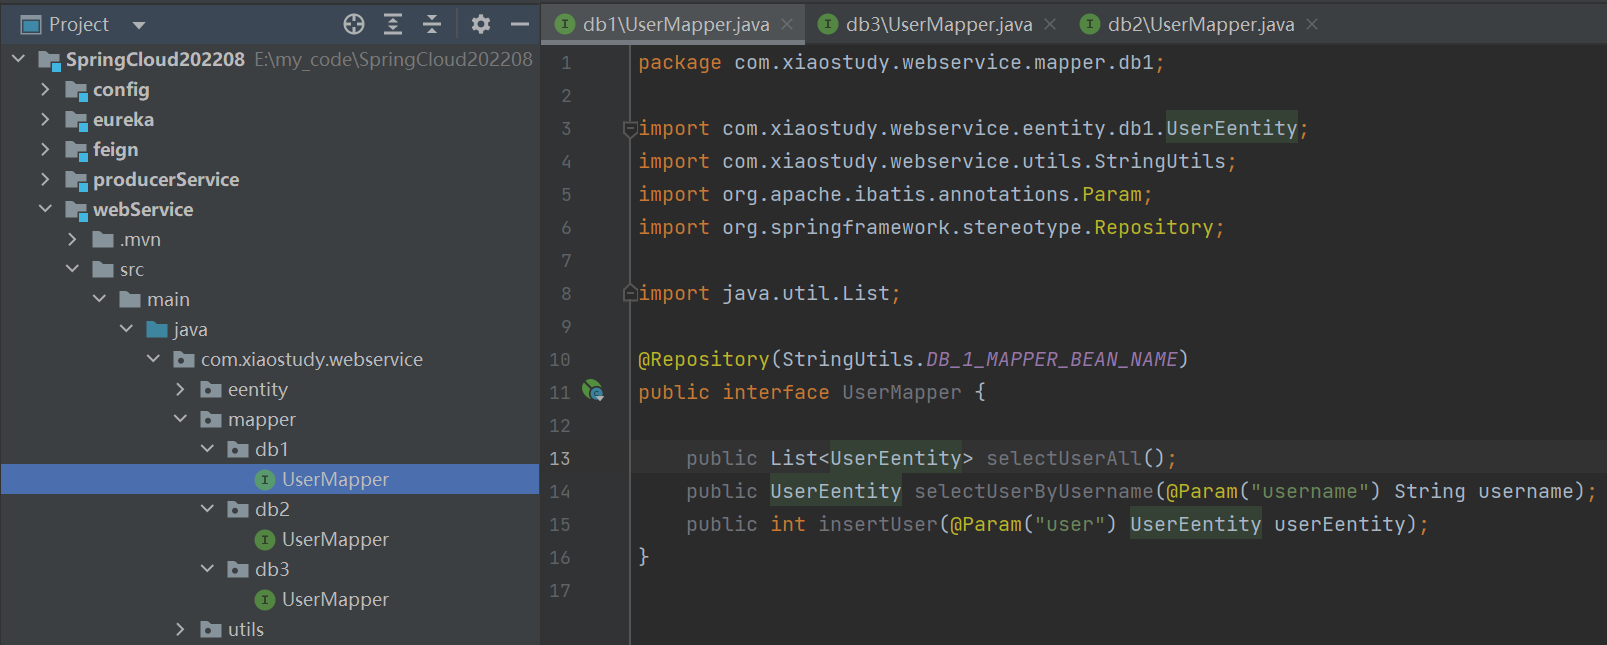
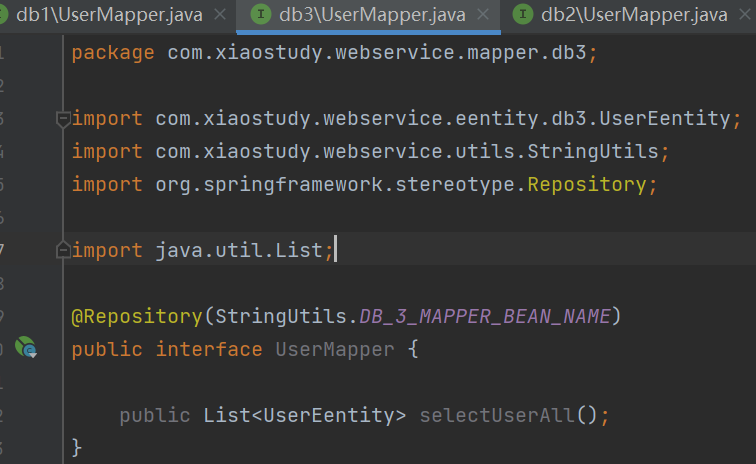
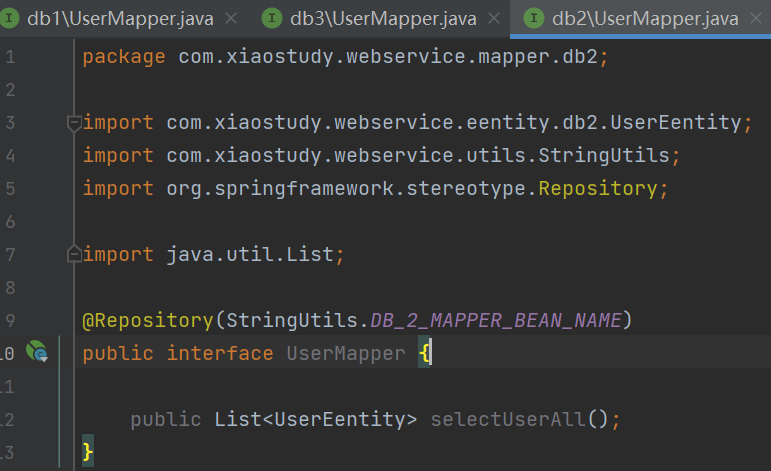
注意截图的实体类entity打错成eentity
db1的Mapper接口
package com.xiaostudy.webservice.mapper.db1;

import com.xiaostudy.webservice.entity.db1.UserEentity;
import com.xiaostudy.webservice.utils.StringUtils;
import org.apache.ibatis.annotations.Param;
import org.springframework.stereotype.Repository;

import java.util.List;

@Repository(StringUtils.DB_1_MAPPER_BEAN_NAME)
public interface UserMapper {

    public List<UserEentity> selectUserAll();
    public UserEentity selectUserByUsername(@Param("username") String username);
    public int insertUser(@Param("user") UserEentity userEentity);
}
db2的Mapper接口
package com.xiaostudy.webservice.mapper.db2;

import com.xiaostudy.webservice.entity.db2.UserEentity;
import com.xiaostudy.webservice.utils.StringUtils;
import org.springframework.stereotype.Repository;

import java.util.List;

@Repository(StringUtils.DB_2_MAPPER_BEAN_NAME)
public interface UserMapper {

    public List<UserEentity> selectUserAll();
}
db3的Mapper接口
package com.xiaostudy.webservice.mapper.db3;

import com.xiaostudy.webservice.entity.db3.UserEentity;
import com.xiaostudy.webservice.utils.StringUtils;
import org.springframework.stereotype.Repository;

import java.util.List;

@Repository(StringUtils.DB_3_MAPPER_BEAN_NAME)
public interface UserMapper {

    public List<UserEentity> selectUserAll();
}
- Mapper.xml文件
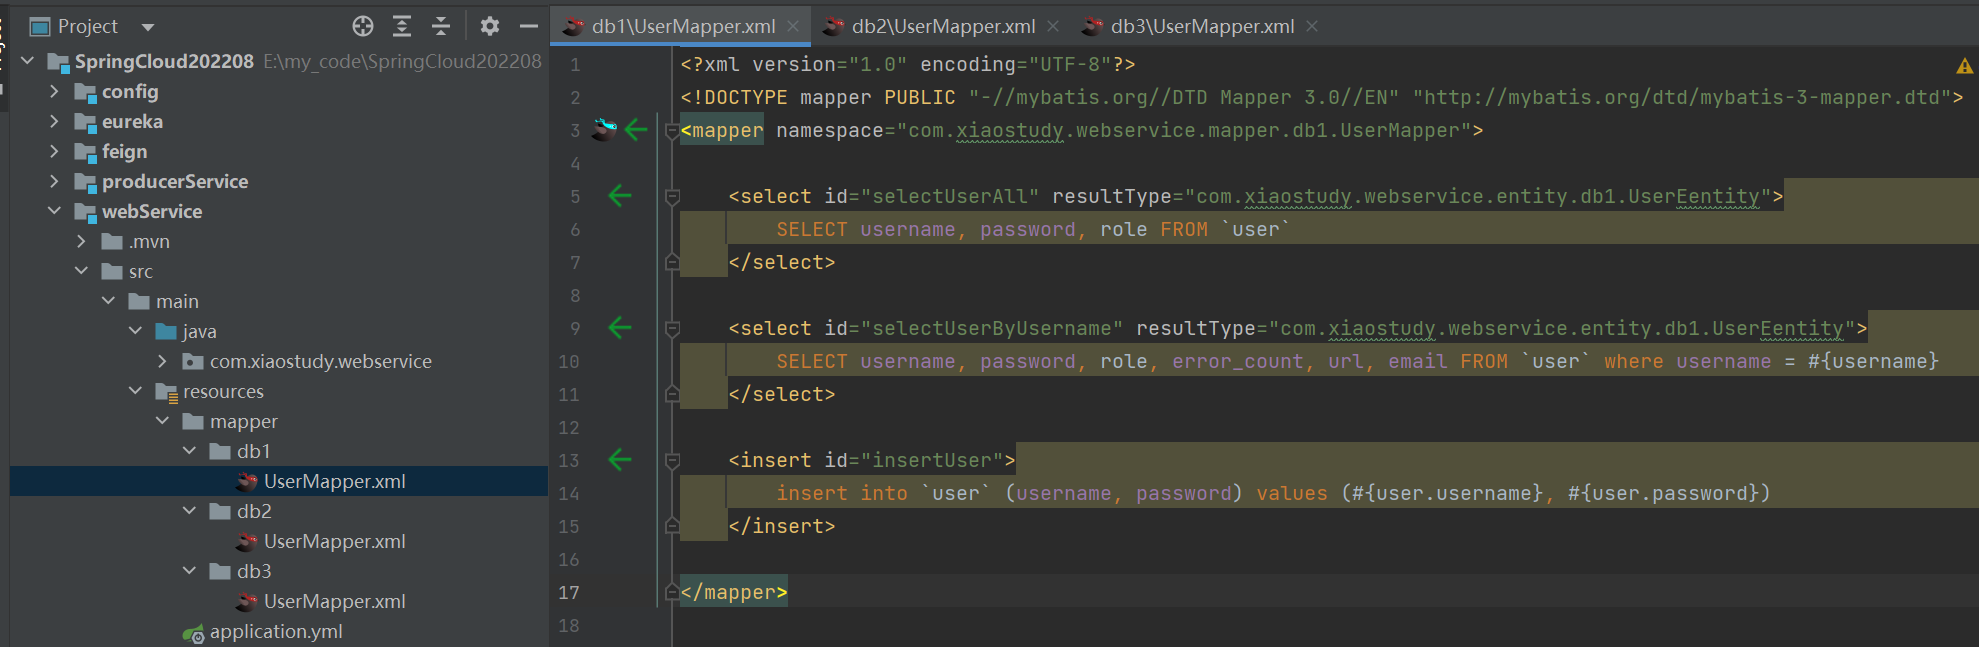
db1的Mapper.xml文件
<?xml version="1.0" encoding="UTF-8"?>
<!DOCTYPE mapper PUBLIC "-//mybatis.org//DTD Mapper 3.0//EN" "http://mybatis.org/dtd/mybatis-3-mapper.dtd">
<mapper namespace="com.xiaostudy.webservice.mapper.db1.UserMapper">

    <select id="selectUserAll" resultType="com.xiaostudy.webservice.entity.db1.UserEentity">
        SELECT username, password, role FROM `user`
    </select>

    <select id="selectUserByUsername" resultType="com.xiaostudy.webservice.entity.db1.UserEentity">
        SELECT username, password, role, error_count, url, email FROM `user` where username = #{username}
    </select>

    <insert id="insertUser">
        insert into `user` (username, password) values (#{user.username}, #{user.password})
    </insert>

</mapper>
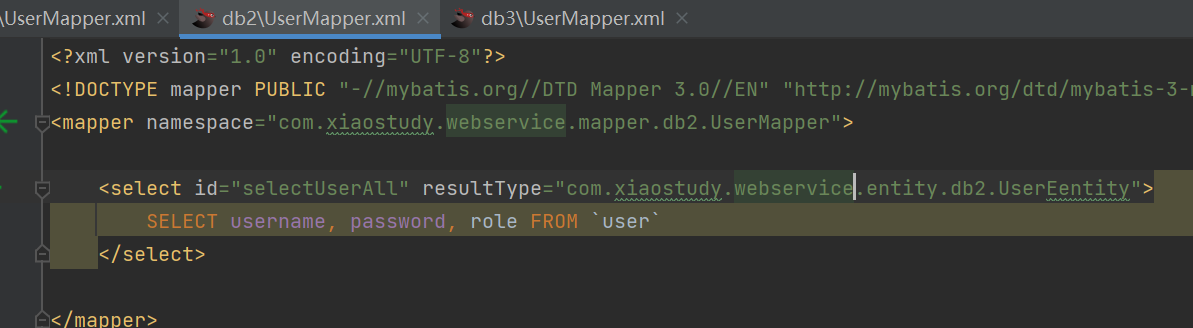
db2的Mapper.xml文件
<?xml version="1.0" encoding="UTF-8"?>
<!DOCTYPE mapper PUBLIC "-//mybatis.org//DTD Mapper 3.0//EN" "http://mybatis.org/dtd/mybatis-3-mapper.dtd">
<mapper namespace="com.xiaostudy.webservice.mapper.db2.UserMapper">

    <select id="selectUserAll" resultType="com.xiaostudy.webservice.entity.db2.UserEentity">
        SELECT username, password, role FROM `user`
    </select>

</mapper>
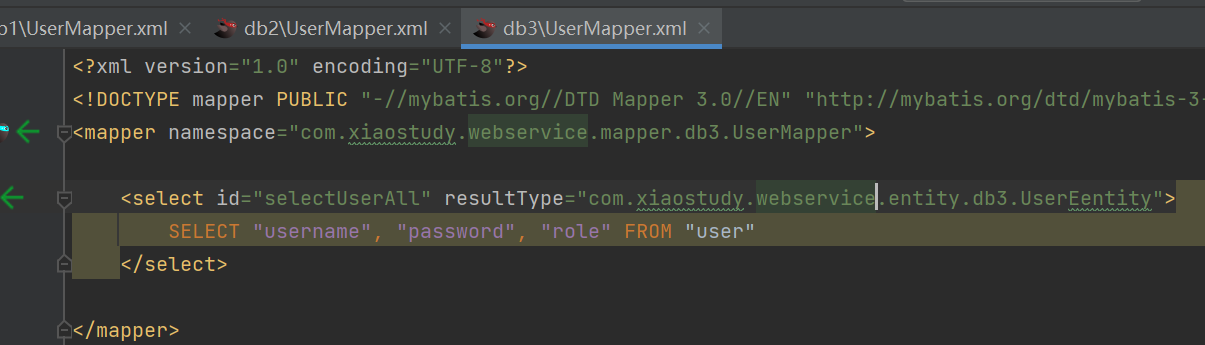
db3的Mapper.xml文件
<?xml version="1.0" encoding="UTF-8"?>
<!DOCTYPE mapper PUBLIC "-//mybatis.org//DTD Mapper 3.0//EN" "http://mybatis.org/dtd/mybatis-3-mapper.dtd">
<mapper namespace="com.xiaostudy.webservice.mapper.db3.UserMapper">

    <select id="selectUserAll" resultType="com.xiaostudy.webservice.entity.db3.UserEentity">
        SELECT "username", "password", "role" FROM "user"
    </select>

</mapper>
- service代码,不截图了,直接放代码
db1的service接口
package com.xiaostudy.webservice.service.db1;


import com.xiaostudy.webservice.entity.db1.UserEentity;

import java.util.List;

public interface UserService {

    public List<UserEentity> selectUserAll();
    public UserEentity selectUserByUsername(String username);
    public boolean insertUser(UserEentity userEentity);
}
db2的service接口
package com.xiaostudy.webservice.service.db2;


import com.xiaostudy.webservice.entity.db2.UserEentity;

import java.util.List;

public interface UserService {

    public List<UserEentity> selectUserAll();
}
db3的service接口
package com.xiaostudy.webservice.service.db3;


import com.xiaostudy.webservice.entity.db3.UserEentity;

import java.util.List;

public interface UserService {

    public List<UserEentity> selectUserAll();
}
db1的service实现类
package com.xiaostudy.webservice.service.db1.impl;

import com.xiaostudy.webservice.entity.db1.UserEentity;
import com.xiaostudy.webservice.mapper.db1.UserMapper;
import com.xiaostudy.webservice.service.db1.UserService;
import com.xiaostudy.webservice.utils.StringUtils;
import org.springframework.beans.factory.annotation.Autowired;
import org.springframework.lang.NonNull;
import org.springframework.stereotype.Service;
import org.springframework.util.ObjectUtils;

import java.util.List;

@Service(StringUtils.DB_1_SERVICE_BEAN_NAME)
public class UserServiceImpl implements UserService {

    @Autowired
    private UserMapper userMapper;

    @Override
    public List<UserEentity> selectUserAll() {
        return userMapper.selectUserAll();
    }

    @Override
    public UserEentity selectUserByUsername(@NonNull String username) {
        return userMapper.selectUserByUsername(username);
    }

    @Override
    public boolean insertUser(@NonNull UserEentity userEentity) {
        String username = userEentity.getUsername();
        if (ObjectUtils.isEmpty(username)) {
            return false;
        }
        UserEentity userEentity1 = this.selectUserByUsername(username);
        if (!ObjectUtils.isEmpty(userEentity1)) {
            return false;
        }
        int i = userMapper.insertUser(userEentity);
        return i > 0;
    }
}
db2的service实现类
package com.xiaostudy.webservice.service.db2.impl;

import com.xiaostudy.webservice.entity.db2.UserEentity;
import com.xiaostudy.webservice.mapper.db2.UserMapper;
import com.xiaostudy.webservice.service.db2.UserService;
import com.xiaostudy.webservice.utils.StringUtils;
import org.springframework.beans.factory.annotation.Autowired;
import org.springframework.stereotype.Service;

import java.util.List;

@Service(StringUtils.DB_2_SERVICE_BEAN_NAME)
public class UserServiceImpl implements UserService {

    @Autowired
    private UserMapper userMapper;

    @Override
    public List<UserEentity> selectUserAll() {
        return userMapper.selectUserAll();
    }
}
db3的service实现类
package com.xiaostudy.webservice.service.db3.impl;

import com.xiaostudy.webservice.entity.db3.UserEentity;
import com.xiaostudy.webservice.mapper.db3.UserMapper;
import com.xiaostudy.webservice.service.db3.UserService;
import com.xiaostudy.webservice.utils.StringUtils;
import org.springframework.beans.factory.annotation.Autowired;
import org.springframework.stereotype.Service;

import java.util.List;

@Service(StringUtils.DB_3_SERVICE_BEAN_NAME)
public class UserServiceImpl implements UserService {

    @Autowired
    private UserMapper userMapper;

    @Override
    public List<UserEentity> selectUserAll() {
        return userMapper.selectUserAll();
    }
}
- 多数据源配置类,直接上代码
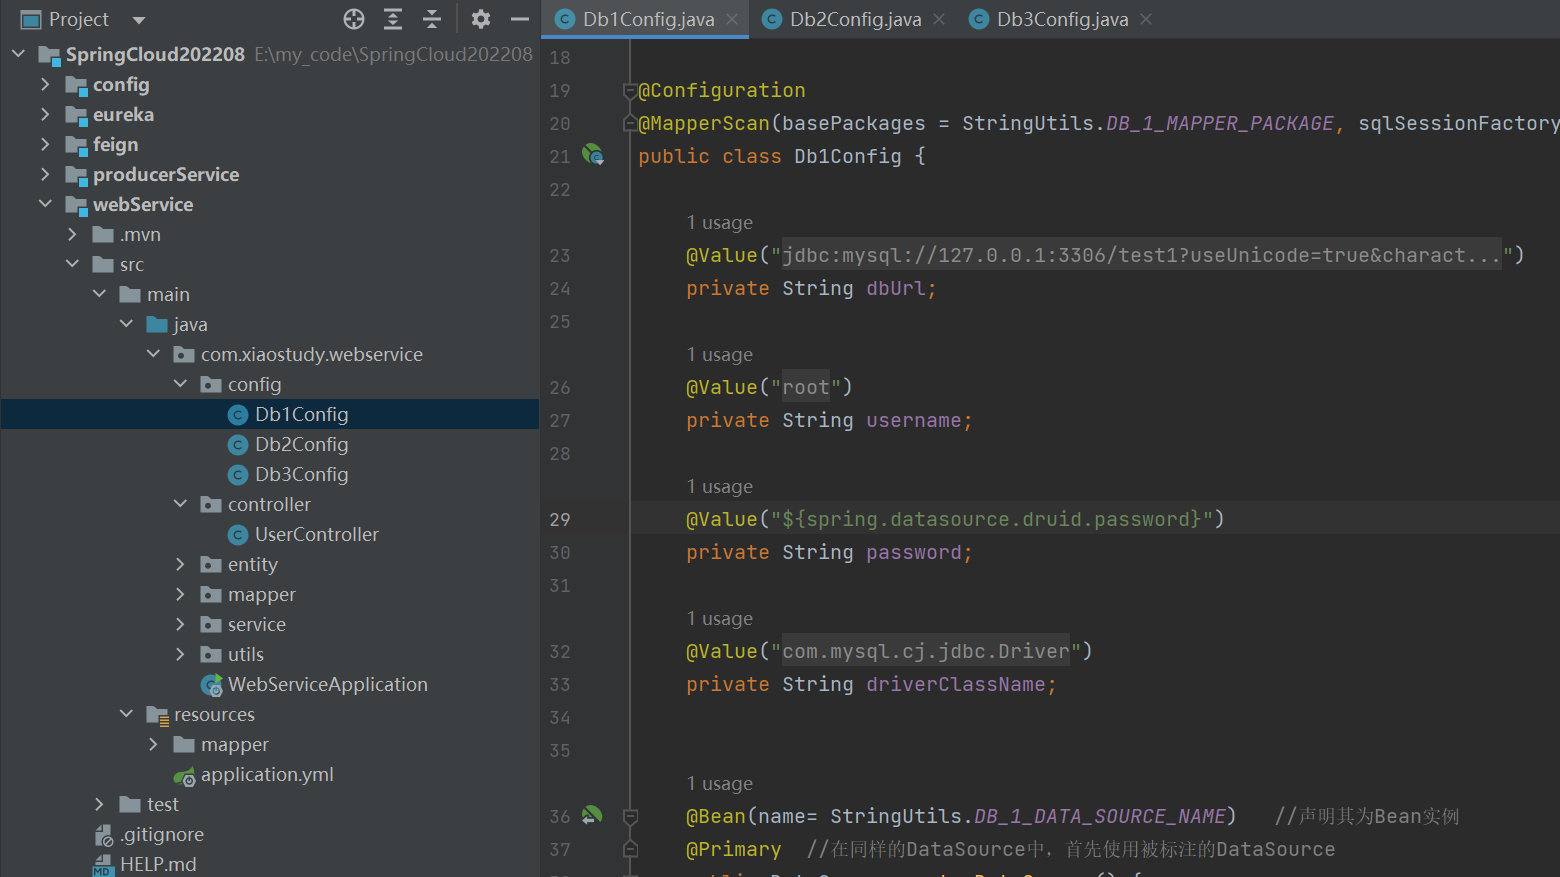
db1的数据源配置类
package com.xiaostudy.webservice.config;


import com.alibaba.druid.pool.DruidDataSource;
import com.xiaostudy.webservice.utils.StringUtils;
import org.apache.ibatis.session.SqlSessionFactory;
import org.mybatis.spring.SqlSessionFactoryBean;
import org.mybatis.spring.annotation.MapperScan;
import org.springframework.beans.factory.annotation.Qualifier;
import org.springframework.beans.factory.annotation.Value;
import org.springframework.context.annotation.Bean;
import org.springframework.context.annotation.Configuration;
import org.springframework.context.annotation.Primary;
import org.springframework.core.io.support.PathMatchingResourcePatternResolver;
import org.springframework.jdbc.datasource.DataSourceTransactionManager;

import javax.sql.DataSource;

@Configuration
@MapperScan(basePackages = StringUtils.DB_1_MAPPER_PACKAGE, sqlSessionFactoryRef = StringUtils.DB_1_SQL_SESSION_FACTORY_REF)
public class Db1Config {

    @Value("${spring.datasource.druid.url}")
    private String dbUrl;

    @Value("${spring.datasource.druid.username}")
    private String username;

    @Value("${spring.datasource.druid.password}")
    private String password;

    @Value("${spring.datasource.druid.driverClassName}")
    private String driverClassName;


    @Bean(name= StringUtils.DB_1_DATA_SOURCE_NAME)   //声明其为Bean实例
    @Primary  //在同样的DataSource中,首先使用被标注的DataSource
    public DataSource masterDataSource() {
        DruidDataSource datasource = new DruidDataSource();

        datasource.setUrl(dbUrl);
        datasource.setUsername(username);
        datasource.setPassword(password);
        datasource.setDriverClassName(driverClassName);

        return datasource;
    }

    @Bean(name = StringUtils.DB_1_TRANSACTION_MANAGER_NAME)
    @Primary
    public DataSourceTransactionManager masterTransactionManager() {
        return new DataSourceTransactionManager(this.masterDataSource());
    }

    @Bean(name = StringUtils.DB_1_SQL_SESSION_FACTORY_REF)
    @Primary
    public SqlSessionFactory masterSqlSessionFactory(@Qualifier(StringUtils.DB_1_DATA_SOURCE_NAME) DataSource masterDataSource)
            throws Exception {
        final SqlSessionFactoryBean sessionFactory = new SqlSessionFactoryBean();
        sessionFactory.setDataSource(masterDataSource);
        sessionFactory.setMapperLocations(new PathMatchingResourcePatternResolver()
                // 精确到目录,以便跟其他数据源隔离
                .getResources(StringUtils.DB_1_MAPPER_LOCATION));
        sessionFactory.setTypeAliasesPackage(StringUtils.DB_1_ENTITY_PACKAGE);
        //mybatis 数据库字段与实体类属性驼峰映射配置
        sessionFactory.getObject().getConfiguration().setMapUnderscoreToCamelCase(true);
        return sessionFactory.getObject();
    }
}
db2的数据源配置类
package com.xiaostudy.webservice.config;


import com.alibaba.druid.pool.DruidDataSource;
import com.xiaostudy.webservice.utils.StringUtils;
import org.apache.ibatis.session.SqlSessionFactory;
import org.mybatis.spring.SqlSessionFactoryBean;
import org.mybatis.spring.annotation.MapperScan;
import org.springframework.beans.factory.annotation.Qualifier;
import org.springframework.beans.factory.annotation.Value;
import org.springframework.context.annotation.Bean;
import org.springframework.context.annotation.Configuration;
import org.springframework.context.annotation.Primary;
import org.springframework.core.io.support.PathMatchingResourcePatternResolver;
import org.springframework.jdbc.datasource.DataSourceTransactionManager;

import javax.sql.DataSource;

@Configuration
@MapperScan(basePackages = StringUtils.DB_2_MAPPER_PACKAGE, sqlSessionFactoryRef = StringUtils.DB_2_SQL_SESSION_FACTORY_REF)
public class Db2Config {

    @Value("${spring.datasource.druid2.url}")
    private String dbUrl;

    @Value("${spring.datasource.druid2.username}")
    private String username;

    @Value("${spring.datasource.druid2.password}")
    private String password;

    @Value("${spring.datasource.druid2.driverClassName}")
    private String driverClassName;


    @Bean(name= StringUtils.DB_2_DATA_SOURCE_NAME)   //声明其为Bean实例
    @Primary  //在同样的DataSource中,首先使用被标注的DataSource
    public DataSource masterDataSource() {
        DruidDataSource datasource = new DruidDataSource();

        datasource.setUrl(dbUrl);
        datasource.setUsername(username);
        datasource.setPassword(password);
        datasource.setDriverClassName(driverClassName);

        return datasource;
    }

    @Bean(name = StringUtils.DB_2_TRANSACTION_MANAGER_NAME)
    @Primary
    public DataSourceTransactionManager masterTransactionManager() {
        return new DataSourceTransactionManager(masterDataSource());
    }

    @Bean(name = StringUtils.DB_2_SQL_SESSION_FACTORY_REF)
    @Primary
    public SqlSessionFactory masterSqlSessionFactory(@Qualifier(StringUtils.DB_2_DATA_SOURCE_NAME) DataSource masterDataSource)
            throws Exception {
        final SqlSessionFactoryBean sessionFactory = new SqlSessionFactoryBean();
        sessionFactory.setDataSource(masterDataSource);
        sessionFactory.setMapperLocations(new PathMatchingResourcePatternResolver()
                // 精确到目录,以便跟其他数据源隔离
                .getResources(StringUtils.DB_2_MAPPER_LOCATION));
        sessionFactory.setTypeAliasesPackage(StringUtils.DB_2_ENTITY_PACKAGE);
        //mybatis 数据库字段与实体类属性驼峰映射配置
        sessionFactory.getObject().getConfiguration().setMapUnderscoreToCamelCase(true);
        return sessionFactory.getObject();
    }
}
db3的数据源配置类
package com.xiaostudy.webservice.config;


import com.alibaba.druid.pool.DruidDataSource;
import com.xiaostudy.webservice.utils.StringUtils;
import org.apache.ibatis.session.SqlSessionFactory;
import org.mybatis.spring.SqlSessionFactoryBean;
import org.mybatis.spring.annotation.MapperScan;
import org.springframework.beans.factory.annotation.Qualifier;
import org.springframework.beans.factory.annotation.Value;
import org.springframework.context.annotation.Bean;
import org.springframework.context.annotation.Configuration;
import org.springframework.context.annotation.Primary;
import org.springframework.core.io.support.PathMatchingResourcePatternResolver;
import org.springframework.jdbc.datasource.DataSourceTransactionManager;

import javax.sql.DataSource;

@Configuration
@MapperScan(basePackages = StringUtils.DB_3_MAPPER_PACKAGE, sqlSessionFactoryRef = StringUtils.DB_3_SQL_SESSION_FACTORY_REF)
public class Db3Config {

    @Value("${spring.datasource.druid3.url}")
    private String dbUrl;

    @Value("${spring.datasource.druid3.username}")
    private String username;

    @Value("${spring.datasource.druid3.password}")
    private String password;

    @Value("${spring.datasource.druid3.driverClassName}")
    private String driverClassName;


    @Bean(name= StringUtils.DB_3_DATA_SOURCE_NAME)   //声明其为Bean实例
    @Primary  //在同样的DataSource中,首先使用被标注的DataSource
    public DataSource masterDataSource() {
        DruidDataSource datasource = new DruidDataSource();

        datasource.setUrl(dbUrl);
        datasource.setUsername(username);
        datasource.setPassword(password);
        datasource.setDriverClassName(driverClassName);

        return datasource;
    }

    @Bean(name = StringUtils.DB_3_TRANSACTION_MANAGER_NAME)
    @Primary
    public DataSourceTransactionManager masterTransactionManager() {
        return new DataSourceTransactionManager(masterDataSource());
    }

    @Bean(name = StringUtils.DB_3_SQL_SESSION_FACTORY_REF)
    @Primary
    public SqlSessionFactory masterSqlSessionFactory(@Qualifier(StringUtils.DB_3_DATA_SOURCE_NAME) DataSource masterDataSource)
            throws Exception {
        final SqlSessionFactoryBean sessionFactory = new SqlSessionFactoryBean();
        sessionFactory.setDataSource(masterDataSource);
        sessionFactory.setMapperLocations(new PathMatchingResourcePatternResolver()
                // 精确到目录,以便跟其他数据源隔离
                .getResources(StringUtils.DB_3_MAPPER_LOCATION));
        sessionFactory.setTypeAliasesPackage(StringUtils.DB_3_ENTITY_PACKAGE);
        //mybatis 数据库字段与实体类属性驼峰映射配置
        sessionFactory.getObject().getConfiguration().setMapUnderscoreToCamelCase(true);
        return sessionFactory.getObject();
    }
}
- 用户controller测试
多数据源,数据分开管;测试feign服务
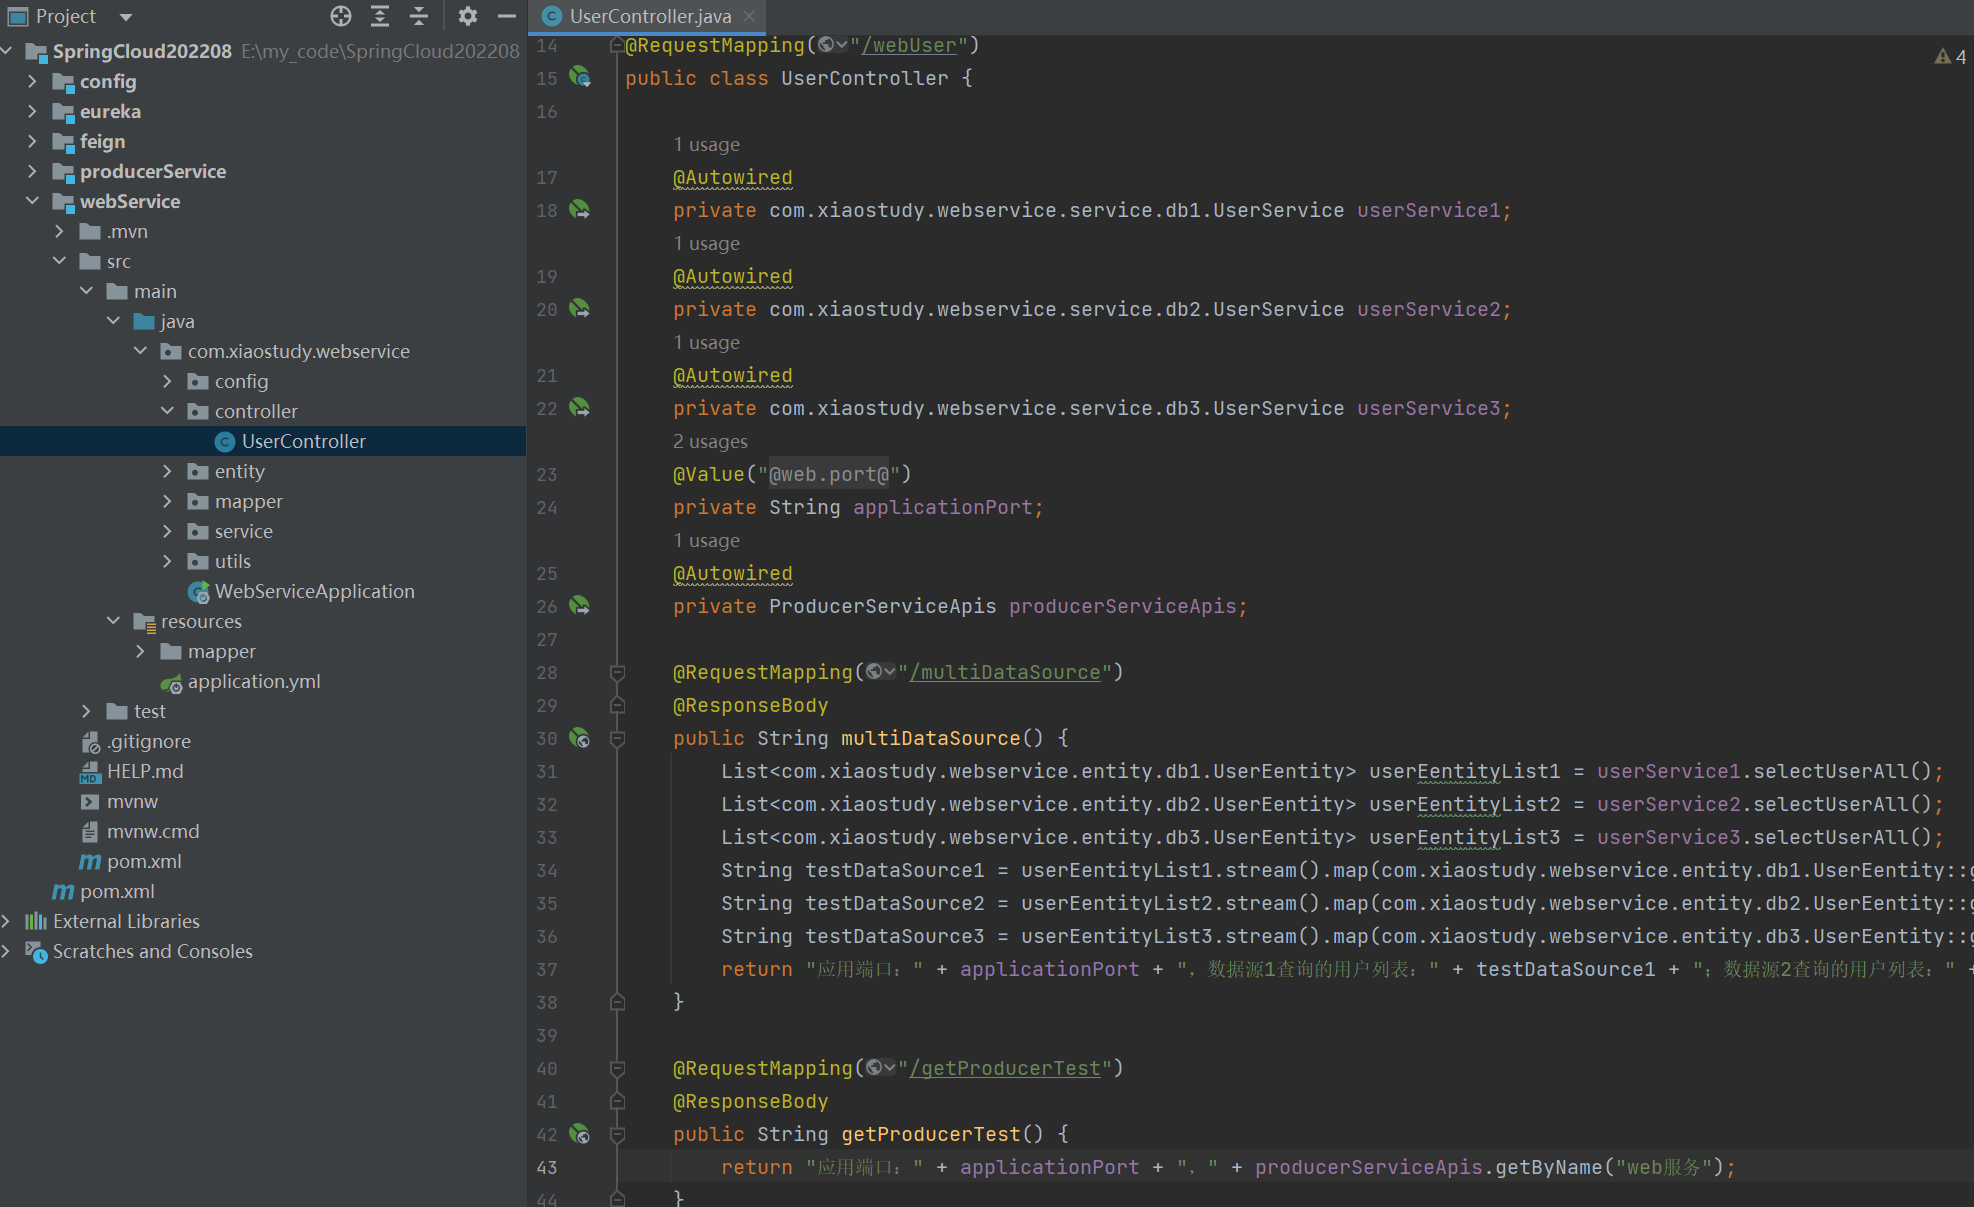
点击查看代码
package com.xiaostudy.webservice.controller;

import com.xiaostudy.feign.apis.ProducerServiceApis;
import org.springframework.beans.factory.annotation.Autowired;
import org.springframework.beans.factory.annotation.Value;
import org.springframework.stereotype.Controller;
import org.springframework.web.bind.annotation.RequestMapping;
import org.springframework.web.bind.annotation.ResponseBody;

import java.util.List;
import java.util.stream.Collectors;

@Controller
@RequestMapping("/webUser")
public class UserController {

    @Autowired
    private com.xiaostudy.webservice.service.db1.UserService userService1;
    @Autowired
    private com.xiaostudy.webservice.service.db2.UserService userService2;
    @Autowired
    private com.xiaostudy.webservice.service.db3.UserService userService3;
    @Value("${server.port}")
    private String applicationPort;
    @Autowired
    private ProducerServiceApis producerServiceApis;

    @RequestMapping("/multiDataSource")
    @ResponseBody
    public String multiDataSource() {
        List<com.xiaostudy.webservice.entity.db1.UserEentity> userEentityList1 = userService1.selectUserAll();
        List<com.xiaostudy.webservice.entity.db2.UserEentity> userEentityList2 = userService2.selectUserAll();
        List<com.xiaostudy.webservice.entity.db3.UserEentity> userEentityList3 = userService3.selectUserAll();
        String testDataSource1 = userEentityList1.stream().map(com.xiaostudy.webservice.entity.db1.UserEentity::getUsername).collect(Collectors.joining(","));
        String testDataSource2 = userEentityList2.stream().map(com.xiaostudy.webservice.entity.db2.UserEentity::getUsername).collect(Collectors.joining(","));
        String testDataSource3 = userEentityList3.stream().map(com.xiaostudy.webservice.entity.db3.UserEentity::getUsername).collect(Collectors.joining(","));
        return "应用端口:" + applicationPort + ",数据源1查询的用户列表:" + testDataSource1 + ";数据源2查询的用户列表:" + testDataSource2 + ";数据源3查询的用户列表:" + testDataSource3;
    }

    @RequestMapping("/getProducerTest")
    @ResponseBody
    public String getProducerTest() {
        return "应用端口:" + applicationPort + "," + producerServiceApis.getByName("web服务");
    }

}
- 启动类添加注解

@EnableDiscoveryClient
@EnableFeignClients(basePackages = "com.xiaostudy.feign")
@ComponentScan(basePackages = {"com.xiaostudy"})
-
数据库用户信息
-
启动
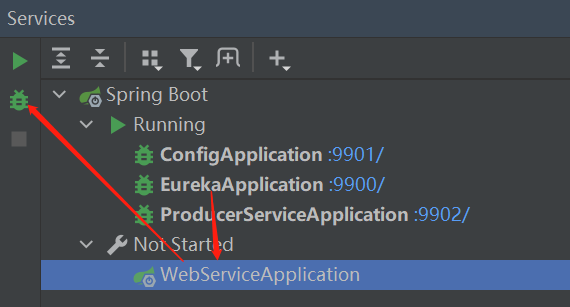
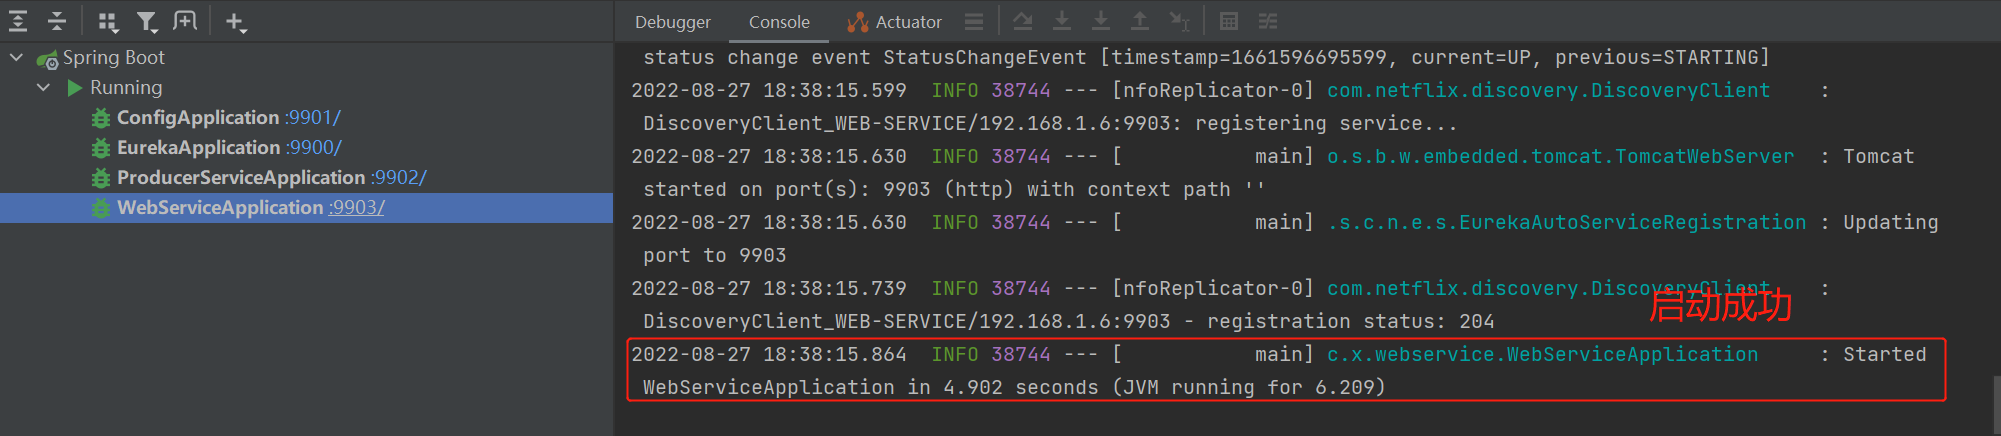
-
访问