1.1 flask介绍
参考博客: https://www.cnblogs.com/sss4/p/8097653.html
1、django、tornado、flask比较
1. Django:1个重武器,包含了web开发中常用的功能、组件的框架;(ORM、Session、Form、Admin、分页、中间件、信号、缓存、ContenType....);
2. Tornado:2大特性就是异步非阻塞、原生支持WebSocket协议;
3. Flask:封装功能不及Django完善,性能不及Tornado,但是Flask的第三方开源组件比丰富;http://flask.pocoo.org/extensions/
2、使用参考
1. 小型web应用设计的功能点不多使用Flask;
2. 大型web应用设计的功能点比较多使用的组件也会比较多,使用Django(自带功能多不用去找插件);
3. 如果追求性能可以考虑Tornado;
3、flask介绍
1. Flask是一个基于Python开发并且依赖jinja2模板和Werkzeug WSGI服务的一个微型框架
2. 对于Werkzeug本质是Socket服务端,其用于接收http请求并对请求进行预处理,然后触发Flask框架
3. 开发人员基于Flask框架提供的功能对请求进行相应的处理,并返回给用户
4. 如果要返回给用户复杂的内容时,需要借助jinja2模板来实现对模板的处理
5. 即:将模板和数据进行渲染,将渲染后的字符串返回给用户浏览器。
6. 如同是 Flask 本身实现的一样。众多的扩展提供了数据库集成、表单验证、上传处理、各种各样的开放认证技术等功能
4、安装
pip install flask
1.2 flask简单使用
1、定义路由
@app.route('/')是装饰器,定义如下:
app.route(rule, options)
rule参数:是绑定URL与函数。
options参数:是可选参数。
2、run() 函数来让应用运行在本地服务器上。定义如下 :
app.run(host, port, debug, options)
host:服务器主机名,默认是127.0.0.1 (localhost),如果设置0.0.0.0可以在本机之外访问。
port:主机端口,默认是5000。
debug:调试模式,默认是false;如果设置true,服务器会在代码修改后自动重新载入。
options:可选参数。

from flask import Flask

app = Flask(__name__)

@app.route('/')
def hello_world():
    return 'Hello World'

if __name__ == '__main__':
    app.run(debug=True)
1.3 路由系统
1、动态路由获取参数
1. request.form # 获取post请求
2. request.values.get('name') 或 request.args.get('name') # 获取post请求数据
3. 访问:http://127.0.0.1:5000/user/zhangsan?name=aaa

#! /usr/bin/env python
# -*- coding: utf-8 -*-
from flask import Flask
from flask import request

app=Flask(__name__)

@app.route('/user/<name>')  #设置url传参数 http://127.0.0.1:5000/user/zhangsan?name=aaa
def first_flask(name):      #视图必须有对应接收参数
    print(name)             # zhangsan
    print(request.form)     # 获取post请求
    print(request.values.get('name'))   # 获取get请求中参数
    print(request.args.get('name'))     # 获取get请求中参数
    return 'Hello World'


if __name__ == '__main__':
    app.run()
2、指定允许的请求方法( @app.route('/login', methods=['GET', 'POST']) )
1. @app.route('/login', methods=['GET', 'POST']) # 指定允许的请求

#! /usr/bin/env python
# -*- coding: utf-8 -*-
from flask import Flask
from flask import request

app=Flask(__name__)

@app.route('/<path:url>/',methods=['get']) #只允许get请求
def first_flask(url):
    print(url)  # http://www.baidu.com
    return 'Hello World'  #response

if __name__ == '__main__':
    app.run()
3、反向生成url

#! /usr/bin/env python
# -*- coding: utf-8 -*-
from flask import Flask,url_for
from flask import request

#反向生成url
app=Flask(__name__)

@app.route('/<path:url>',endpoint='name1')
def first_flask(url):
    print(url_for('name1',url=url)) #如果设置了url参数,url_for(别名,加参数)
    return 'Hello World'

if __name__ == '__main__':
    app.run()
4、通过app.add_url_rule()调用路由
http://127.0.0.1:5000/index/

#! /usr/bin/env python
# -*- coding: utf-8 -*-
from flask import Flask,url_for
from flask import request

#方式2通过app.add_url_rule()方法的方式调用路由
app=Flask(__name__)

def first_flask():
    return 'Hello World'

app.add_url_rule(rule='/index/',endpoint='name1',view_func=first_flask,methods=['GET'])
#app.add_url_rule(rule=访问的url,endpoint=路由别名,view_func=视图名称,methods=[允许访问的方法])
if __name__ == '__main__':
    app.run()
5、扩展路由功能:正则匹配url

from flask import Flask, views, url_for
from werkzeug.routing import BaseConverter

app = Flask(import_name=__name__)


class RegexConverter(BaseConverter):
    """
    自定义URL匹配正则表达式
    """
    def __init__(self, map, regex):
        super(RegexConverter, self).__init__(map)
        self.regex = regex

    def to_python(self, value):
        """
        路由匹配时,匹配成功后传递给视图函数中参数的值
        :param value:
        :return:
        """
        return int(value)

    def to_url(self, value):
        """
        使用url_for反向生成URL时,传递的参数经过该方法处理,返回的值用于生成URL中的参数
        :param value:
        :return:
        """
        val = super(RegexConverter, self).to_url(value)
        return val

# 添加到flask中
app.url_map.converters['regex'] = RegexConverter

# http://127.0.0.1:5000/index/9999
@app.route('/index/<regex("d+"):nid>')
def index(nid):
    print(url_for('index', nid='888'))   # /index/888
    print(nid)  # 9999
    return 'Index'


if __name__ == '__main__':
    app.run()
1.4 视图
1、给Flask视图函数加装饰器
注意如果要给视图函数加装饰器,一点要加在路由装饰器下面,才会被路由装饰器装饰

from flask import Flask, views, url_for
from werkzeug.routing import BaseConverter

#1、定义1个装饰器
def auth(func):
    print('我在上面')
    def inner(*args,**kwargs):
        return func(*args,**kwargs)
    return inner


app=Flask(__name__)

@app.route('/',methods=['GET'])
@auth #注意如果要给视图函数加装饰器,一点要加在路由装饰器下面,才会被路由装饰器装饰
def first_flask():
    print('ffff')
    return 'Hello World'

if __name__ == '__main__':
    app.run()
2、request获取请求信息
request.method: 获取请求方法
request.json
request.json.get("json_key"):获取json数据 **较常用
request.argsget('name') :获取get请求参数
request.form.get('name') :获取POST请求参数
request.form.getlist('name_list'):获取POST请求参数列表(多个)
request.values.get('age') :获取GET和POST请求携带的所有参数(GET/POST通用)
request.cookies.get('name'):获取cookies信息
request.headers.get('Host'):获取请求头相关信息
request.path:获取用户访问的url地址,例如(/,/login/,/ index/);
request.full_path:获取用户访问的完整url地址+参数 例如(/login/?age=18)
request.script_root: 抱歉,暂未理解其含义;
request.url:获取访问url地址,例如http://127.0.0.1:5000/?age=18;
request.base_url:获取访问url地址,例如 http://127.0.0.1:5000/;
request.url_root
request.host_url
request.host:获取主机地址
request.files:获取用户上传的文件
obj = request.files['the_file_name']
obj.save('/var/www/uploads/' + secure_filename(f.filename)) 直接保存
3、响应相关信息
return "字符串" :响应字符串
return render_template('html模板路径',**{}):响应模板
return redirect('/index.html'):跳转页面
方式一:响应json数据
return jsonify(user_list)

app.config['JSON_AS_ASCII']=False  #指定json编码格式 如果为False 就不使用ascii编码,
app.config['JSONIFY_MIMETYPE'] ="application/json;charset=utf-8" #指定浏览器渲染的文件类型,和解码格式;
方式二:响应json数据
return Response(data,mimetype="application/json;charset=utf-8",)
4、如果需要设置响应头就需要借助make_response()方法

from flask import Flask,request,make_response

response = make_response(render_template('index.html'))
# response是flask.wrappers.Response类型
response.delete_cookie('key')
response.set_cookie('key', 'value')
response.headers['X-Something'] = 'A value'
return respons
1.4 FBV和CBV
1、CBV使用
http://127.0.0.1:5000/index/

#CBV视图
from flask import Flask,url_for,views
#-----------------------------------------------------
app=Flask(__name__)               #装饰器

def auth(func):
    print('我在上面')
    def inner(*args,**kwargs):
        return func(*args,**kwargs)
    return inner

#--------------------------------------------------------
class IndexView(views.MethodView):  #CBV视图
    methods=['GET']                #允许的http请求方法(改CBV只允许GET方法)
    decorators = [auth,]            #每次请求过来都加auth装饰器

    def get(self):
        return 'Index.GET'
    def post(self):
        return 'Index.POST'

app.add_url_rule('/index/',view_func=IndexView.as_view(name='name1')) #(name='name1'反向生成url别名


if __name__ == '__main__':
    app.run()
1.5 使用Jinja2模板
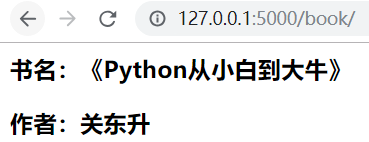
1、模板基本使用

from flask import Flask, render_template

app = Flask(__name__)


@app.route('/book/')
def show_book_info():
    return render_template('book.html', book_name = 'Python从小白到大牛', author='关东升' '')

if __name__ == '__main__':
    app.run(debug=True)

<html>
    <body>
        <h3>书名:《{{ book_name }}》</h3>
        <h3>作者:{{  author }}</h3>
    </body>
</html>
2、Jinja2中使用表达式

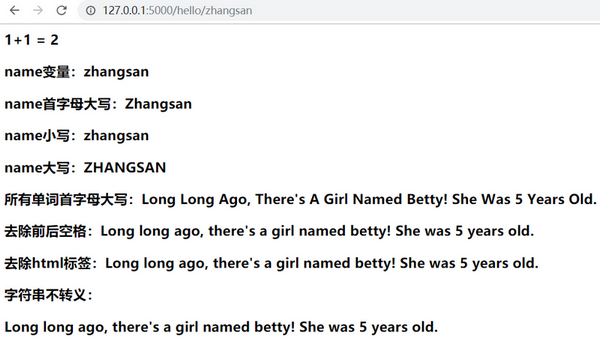
from flask import Flask, render_template

app = Flask(__name__)


@app.route('/hello/<name>')
def hello(name):
    s1 = "Long long ago, there's a girl named betty! She was 5 years old."
    s2 = "  " + s1 + "  "
    s3 = "<p>" + s1 + "</p>"
    return render_template('hello.html', name=name, message=(s1, s2, s3))


if __name__ == '__main__':
    app.run(debug=True)

<html>
    <body>
        <h3>1+1 = {{ 1+1 }}</h3>
        <h3>name变量:{{ name }}</h3>
        <h3>name首字母大写:{{ name|capitalize }}</h3>
        <h3>name小写:{{ name|lower }}</h3>
        <h3>name大写:{{ name|upper }}</h3>
        <h3>所有单词首字母大写:{{ message[0]|title }}</h3>
        <h3>去除前后空格:{{ message[1]|trim }}</h3>
        <h3>去除html标签:{{ message[2]|striptags }}</h3>
        <h3>字符串不转义:{{ message[2]|safe }}</h3>
    </body>
</html>
3、Jinjia2模板中语句

from flask import Flask, render_template

app = Flask(__name__)

@app.route('/book/<float:price>')
def show_book_price1(price):
    info = '''
    书名:《Python从小白到大牛》
    作者:关东升
    '''
    return render_template('book_info.html', price=price, info=info)

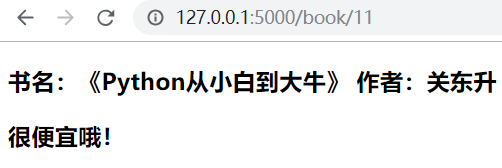
@app.route('/book/<int:price>')
def show_book_price2(price):
    info = '''
    书名:《Python从小白到大牛》
    作者:关东升
    '''
    return render_template('book_info.html', price=price, info=info)

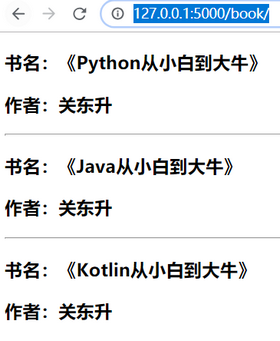
@app.route('/book/')
def show_book_info():
    book1 = {"bookname": "Python从小白到大牛", "author": "关东升"}
    book2 = {"bookname": "Java从小白到大牛", "author": "关东升"}
    book3 = {"bookname": "Kotlin从小白到大牛", "author": "关东升"}
    list = []
    list.append(book1)
    list.append(book2)
    list.append(book3)
    return render_template('books.html', book_list=list)

if __name__ == '__main__':
    app.run(debug=True)

<!DOCTYPE html>
<html>
<head>
    <title>图书信息</title>
</head>
<body>
    {% for book in book_list %}
        <h3>书名:《{{ book.bookname }}》</h3>
        <h3>作者:{{  book.author }}</h3>
        <hr>
    {% endfor %}
</body>
</html>

<!DOCTYPE html>
<html>
<head>
    <title>图书信息</title>
</head>
<body>
    <h3>{{ info }}</h3>
    {% if price <= 50.0 %}
        <h3>很便宜哦!</h3>
    {% else %}
        <h3>好贵哦!</h3>
    {% endif %}
</body>
</html>
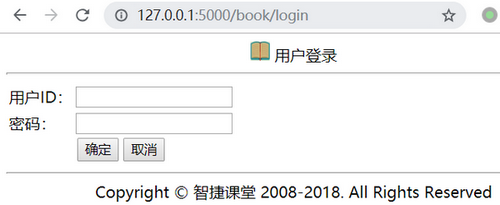
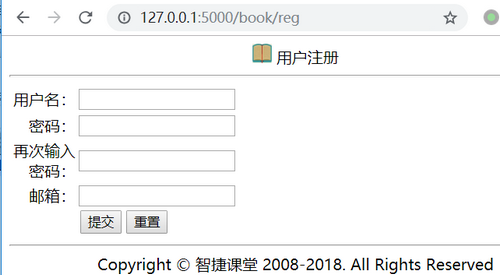
4、模板继承 & 访问静态文件

from flask import Flask, render_template

app = Flask(__name__)

@app.route('/book/login')
def login():
    return render_template('login.html')

@app.route('/book/reg')
def register():
    return render_template('registration.html')

if __name__ == '__main__':
    app.run(debug=True)

#footer,#header {
    text-align: center;
}

td.label {
    text-align: right;
}

book_img1.jpg
book_img2.jpg

<!doctype html>
<html>
<head>
<meta charset="utf-8">
<title>图书管理系统-{% block title %}{% endblock %}</title>
<link rel="stylesheet" type="text/css" href="{{ url_for('static', filename = 'css/book.css') }}">
</head>

<body>
<!-- 页面头部信息 -->
<div id="header">
    <img src="{{ url_for('static', filename = 'images/book_img2.jpg') }}" width="20px" height="20px">
    {% block header %}{% endblock %}
    <hr/>
</div>
<!-- 页面内容信息 -->
<div id="content">
    {% block body %}
    {% endblock %}
</div>
<!-- 页面底部信息 -->
<div id="footer">
  <hr/>
  Copyright © 智捷课堂 2008-2018. All Rights Reserved
</div>

</body>
</html>

{% extends "base.html" %}
{% block title %}用户登录{% endblock %}
{% block header %}用户登录{% endblock %}
{% block body %}
  <table width="40%" border="0">
    <tbody>
      <tr>
        <td>用户ID:</td>
        <td><input type="text"/></td>
      </tr>
      <tr>
        <td>密码:</td>
        <td><input type="password"/></td>
      </tr>
      <tr align="center">
        <td colspan="2">
          <input type="submit" value="确定">
          <input type="reset" value="取消">
        </td>
      </tr>
    </tbody>
  </table>
{% endblock %}

{% extends "base.html" %}
{% block title %}用户注册{% endblock %}
{% block header %}用户注册{% endblock %}
{% block body %}
    <table width="40%" border="0">
      <tbody>
        <tr>
          <td class="label">用户名:</td>
          <td><input type="text"/></td>
        </tr>
        <tr>
          <td class="label">密码:</td>
          <td><input type="password"/></td>
        </tr>
        <tr>
          <td class="label">再次输入密码:</td>
          <td><input type="password"/></td>
        </tr>
        <tr>
          <td class="label">邮箱:</td>
          <td><input type="text"/></td>
        </tr>
        <tr align="center">
          <td colspan="2">
            <input type="submit">
            <input type="reset">
          </td>
        </tr>
      </tbody>
    </table>
{% endblock %}
1.6 cookie和session操作
1、设置和获取cookie
set_cookie('userid', 'tony', expires=timeoutdate) # 设置cookie http://127.0.0.1:5000/setcookie
request.cookies.get('userid') # 获取cookie http://127.0.0.1:5000/getcookie

from flask import Flask, make_response, request
from datetime import datetime, timedelta

app = Flask(__name__)

@app.route('/setcookie')
def set_cookie():
    response = make_response('<h1>设置Cookie')
    timeoutdate = datetime.today() + timedelta(days=10)
    # response.set_cookie('userid', 'tony')
    response.set_cookie('userid', 'tony', expires=timeoutdate)
    return response

@app.route('/getcookie')
def get_cookie():
    name = request.cookies.get('userid')
    s = '<h1>Cookie中userid:{0}</h1>'.format(name)
    return s

if __name__ == '__main__':
    app.run(debug=True)
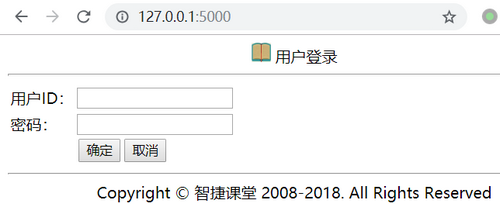
2、使用session登录注销

from flask import Flask, render_template, request, session

app = Flask(__name__)
app.secret_key = '任何不容易被猜到的字符串'

@app.route('/')
def index():
    return render_template('login.html')

@app.route('/login', methods=['GET', 'POST'])
def login():
    if request.method == 'POST':
        session['userid'] = request.form['userid']
    return render_template('result.html')

@app.route('/logout')
def logout():
    session.pop('userid', None)
    return render_template('result.html')


if __name__ == '__main__':
    app.run(debug=True)

#footer,#header {
    text-align: center;
}

td.label {
    text-align: right;
}

book_img1.jpg
book_img2.jpg

<!doctype html>
<html>
<head>
<meta charset="utf-8">
<title>图书管理系统-{% block title %}{% endblock %}</title>
<link rel="stylesheet" type="text/css" href="{{ url_for('static', filename = 'css/book.css') }}">
</head>

<body>
<!-- 页面头部信息 -->
<div id="header">
    <img src="{{ url_for('static', filename = 'images/book_img2.jpg') }}" width="20px" height="20px">
    {% block header %}{% endblock %}
    <hr/>
</div>
<!-- 页面内容信息 -->
<div id="content">
    {% block body %}
    {% endblock %}
</div>
<!-- 页面底部信息 -->
<div id="footer">
  <hr/>
  Copyright © 智捷课堂 2008-2018. All Rights Reserved
</div>

</body>
</html>

{% extends "base.html" %}
{% block title %}用户登录{% endblock %}
{% block header %}用户登录{% endblock %}
{% block body %}
<form action = "/login" method = "POST">
  <table width="40%" border="0">
    <tbody>
      <tr>
        <td>用户ID:</td>
        <td><input name="userid" type="text"/></td>
      </tr>
      <tr>
        <td>密码:</td>
        <td><input name="userpwd" type="password"/></td>
      </tr>
      <tr align="center">
        <td colspan="2">
          <input type="submit" value="确定">
          <input type="reset" value="取消">
        </td>
      </tr>
    </tbody>
  </table>
</form>
{% endblock %}

<!DOCTYPE html>
<html>
<head>
    <meta charset="UTF-8">
    <title>运行结果</title>
</head>
<body>
    <h3>存储在Session中的userid数据:{{ session['userid'] }}</h3>
    <h3><a href="/logout">Logout</a></h3>
</body>
</html>

1.7 图片上传预览

from flask import Flask, render_template, request, redirect, url_for, send_from_directory
from werkzeug.utils import secure_filename
import os

app = Flask(__name__)
app.config['UPLOAD_FOLDER'] = 'C:/desktop_Important_Document/flask/code/code'
# app.config['MAX_CONTENT_LENGTH'] = 1 * 1024 * 1024  # 小于1M

@app.route('/')
def index():
    return render_template('upload.html')

@app.route('/upload', methods=['GET', 'POST'])
def upload():
    if request.method == 'POST':
        f = request.files['myfile']
        filename = secure_filename(f.filename)
        f.save(os.path.join(app.config['UPLOAD_FOLDER'], filename))
    return redirect(url_for('uploaded_file',
                            filename=filename))

@app.route('/uploaded/<filename>')
def uploaded_file(filename):
    return send_from_directory(app.config['UPLOAD_FOLDER'],
                               filename)


if __name__ == '__main__':
    app.run(debug=True)

<!DOCTYPE html>
<html>
<head>
  <meta charset="utf-8">
  <title>上传文件</title>
</head>
<body>
    <form action="/upload" method="POST"
          enctype="multipart/form-data">
      <input type="file" name="myfile"><br><br>
      <input type="submit" name="开始上传">
    </form>
</body>
</html>

<!DOCTYPE html>
<html>
<head>
    <meta charset="UTF-8">
    <title>上传结果</title>
</head>
<body>
<h1>{{ result }}</h1>
<img src="{{ path }}">
</body>
</html>
1.8 Flask-Migrate 数据库操作
1、安装相关包
pip install Flask==0.11.1
pip install Flask-Script==2.0.5
pip install Flask-Migrate==1.8.0
pip install Flask-SQLAlchemy==2.2

#! /usr/bin/env python
# -*- coding: utf-8 -*-
from flask import Flask
from flask_sqlalchemy import SQLAlchemy
from flask_script import Manager
from flask_migrate import Migrate, MigrateCommand

app = Flask(__name__)
app.config['SQLALCHEMY_DATABASE_URI'] = 'sqlite:///app.db'

db = SQLAlchemy(app)
migrate = Migrate(app, db)

manager = Manager(app)
manager.add_command('db', MigrateCommand)

class User(db.Model):
    id = db.Column(db.Integer, primary_key=True)
    name = db.Column(db.String(128))

if __name__ == '__main__':
    manager.run()
2、相关文件

#! /usr/bin/env python
# -*- coding: utf-8 -*-
from flask_script import Manager
from flask_migrate import Migrate, MigrateCommand
from platform import app
from exts import db
from models import User, Question, Answer

manager = Manager(app)

# 使用Migrate绑定app和db
migrate = Migrate(app, db)

# 添加迁移脚本的命令到manager中
manager.add_command('db', MigrateCommand)

if __name__ == '__main__':
    manager.run()

#! /usr/bin/env python
# -*- coding: utf-8 -*-
import os

DEBUG = True

SECRET_KEY = os.urandom(24)

SQLALCHEMY_DATABASE_URI = 'mysql://root:1@localhost/testdb'
SQLALCHEMY_TRACK_MODIFICATIONS = True

#! /usr/bin/env python
# -*- coding: utf-8 -*-
from flask_sqlalchemy import SQLAlchemy

db = SQLAlchemy()

#! /usr/bin/env python
# -*- coding: utf-8 -*-

from exts import db
from datetime import datetime

class User(db.Model):
    __tablename__ = 'user'
    id = db.Column(db.Integer, primary_key=True, autoincrement=True)
    telephone1 = db.Column(db.String(11), nullable=False)
    username = db.Column(db.String(50), nullable=False)
    password = db.Column(db.String(100), nullable=False)


class Question(db.Model):
    __tablename__ = 'question'
    id = db.Column(db.Integer, primary_key=True, autoincrement=True)
    title = db.Column(db.String(100), nullable=False)
    content = db.Column(db.Text, nullable=False)
    # now()获取的是服务器第一次运行的时间
    # now就是每次创建一个模型的时候,都获取当前的时间
    create_time = db.Column(db.DateTime, default=datetime.now)
    author_id = db.Column(db.Integer, db.ForeignKey('user.id'))
    author = db.relationship('User', backref=db.backref('questions'))

class Answer(db.Model):
    __tablename__ = 'answer'
    id = db.Column(db.Integer, primary_key=True, autoincrement=True)
    content = db.Column(db.Text, nullable=False)
    create_time = db.Column(db.DateTime, default=datetime.now)
    question_id = db.Column(db.Integer, db.ForeignKey('question.id'))
    author_id = db.Column(db.Integer, db.ForeignKey('user.id'))
    question = db.relationship('Question', backref=db.backref('answers', order_by=id.desc()))
    author = db.relationship('User', backref=db.backref('answers'))

#! /usr/bin/env python
# -*- coding: utf-8 -*-

from flask import Flask, render_template, request, redirect, url_for, session
import config
from models import User, Question, Answer
from exts import db


app = Flask(__name__)
app.config.from_object(config)
db.init_app(app)

@app.route('/')
def index():
    # context = {
    #     'questions': Question.query.order_by('-create_time').all()
    # }
    return 'test '
3、创建数据库表命令
python manage.py db init # 创建迁移的仓库
Python manage.py db migrate # 创建迁移的脚本
python manage.py db upgrade # 更新数据库
python manage.py runserver # 运行项目
11111111111111111111
