SpringBoot是什么:
SpringBoot是Spring项目中的一个子工程,是一个轻量级框架。
SpringBoot框架中有两个个非常重要的策略:开箱即用和约定优于配置
一、构建工程
1.开发工具:
IDEA,JDK1.8以上,Maven3.0+
2代码实现:
打开Idea-> new Project ->Spring Initializr ->填写group、artifact ->钩上web(开启web功能)->点next...
建立好项目结构如下:
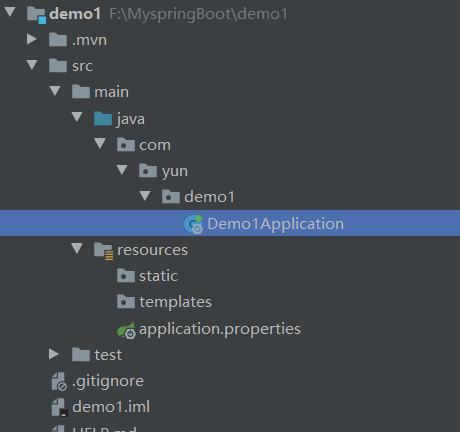
AppLication.java:程序的入口
resources:资源文件
static:放置静态资源,例如css.js等
templates:模板资源
application.properties:配置文件,在这里我用的properties格式文件,SpringBoot还支持另外一种yml格式的配置文件,在后面会讲到配置文件的使用
pom:依赖文件,这里只说明了几个依赖
!--SpringBoot的起步依赖-->
<parent>
    <groupId>org.springframework.boot</groupId>
    <artifactId>spring-boot-starter-parent</artifactId>
    <version>2.2.0.RELEASE</version>
    <relativePath/> <!-- lookup parent from repository -->
</parent>
<!-- SpringBoot要继承SpringMvc的controller的开发,导入的web依赖-->
    <dependency>
        <groupId>org.springframework.boot</groupId>
        <artifactId>spring-boot-starter-web</artifactId>
    </dependency>
<!-- SpringBoot的热部署-->
    <dependency>
        <groupId>org.springframework.boot</groupId>
        <artifactId>spring-boot-devtools</artifactId>
        <optional>true</optional>
    </dependency>
编写Controller内容:
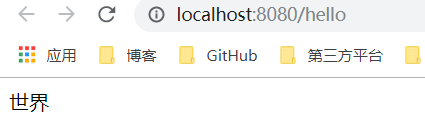
@RestController
public class MyController {
    @RequestMapping("/hello")
    public String index(){
        return "世界";
    }
}
注意;@RestController返回的是json数据类型,而@Controlle返回的是Html页面
运行程序主接口Application.java
浏览器访问http://localhost:8080/hello
在这里测试了Springboot在启动的时候注入的bean实例
@SpringBootApplication
public class Demo1Application {

    public static void main(String[] args) {
        SpringApplication.run(Demo1Application.class, args);
    }

    @Bean
    public CommandLineRunner commandLineRunner(ApplicationContext applicationContext){
        return args -> {
            System.out.println("springBoot中出现的bean:");
            String[] beanNames = applicationContext.getBeanDefinitionNames();
            Arrays.sort(beanNames);
            for (String benName:beanNames){
                System.out.println(benName);
            }
        };
    }
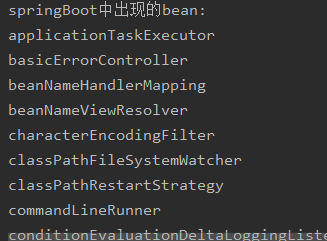
打印结果如上,大概会出现40-50个bean
Springboot开启单元测试
在src/test下的测试入口
package com.yun.demo1.controllet;

/*SpringBoot单元测试开启*/

import com.yun.demo1.Demo1Application;
import org.junit.Before;
import org.junit.Test;
import org.junit.runner.RunWith;
import org.springframework.beans.factory.annotation.Autowired;
import org.springframework.boot.test.context.SpringBootTest;
import org.springframework.boot.test.web.client.TestRestTemplate;
import org.springframework.boot.web.server.LocalServerPort;
import org.springframework.http.ResponseEntity;
import org.springframework.test.context.junit4.SpringRunner;
import static org.junit.Assert.assertThat;
import static org.hamcrest.Matchers.equalTo;
import java.net.URL;

@RunWith(SpringRunner.class)  //单元测试
//RANDOM_PORT : 加载一个EmbeddedWebApplicationContext并提供一个真正的servlet环境。
// 嵌入式servlet容器启动并在随机端口上侦听
@SpringBootTest(webEnvironment = SpringBootTest.WebEnvironment.RANDOM_PORT)
public class TestController {
    @LocalServerPort
    private int port;

    private URL url;

    @Autowired
    private TestRestTemplate testRestTemplate;

    @Before
    public void setUp() throws Exception {
        this.url = new URL("http://localhost:" + port + "/");
    }
    @Test
    public void hello()throws Exception{
        ResponseEntity<String> responseEntity = testRestTemplate.getForEntity(url.toString(),String.class);
        assertThat(responseEntity.getBody(),equalTo("SpringBoot的测试案例"));
    }
}
二、SpringBoot的配置文件详解
当创建SpringBoot工程时,系统会默认创建一个在src/main/resources目录下创建一个application.properties文件,这个文件就是SpringBoot的配置文件
propertions格式:
person.name:=zhangsan
yml文件格式:
person:
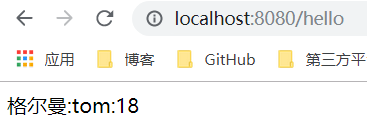
name: tom
age: 18
这里由于个人习惯,我将application.properties改为application.yml文件
编写controller
@RestController
public class myController {
//    @Value:注入Spring boot application.properties配置的属性的值
    @Value("${person.name}")
    private String name;

    @Value("${person.age}")
    private Integer age;

    @RequestMapping("/hello")
    public String quick(){
        return "格尔曼:"+name+":"+age;
    }
}
打印结果如下:
SpringBoot加载自定义配置文件使用@ConfigurationProperties
自义定一个配置文件test.yml
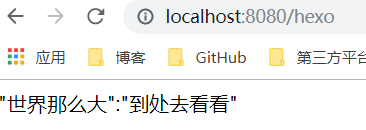
yun:
  title: "世界那么大"
  desc:"到处去看看"
编写控制器controller,并启动程序
@RestController
@PropertySource(value = "classpath:test.yml")
@ConfigurationProperties(prefix = "yun")
public class myController2 {
    @Value("${title}")
    private String title;
    @Value("${desc}")
    private String desc;

    @RequestMapping("/hexo")
    public String quick(){
        return title+":"+desc;
    }
}
打印结果如下:
三、Springboot使用模板引擎
SpringBoot不推荐使用jsp,但是支持一些模板引擎,比如
Thymeleaf模板引擎的优点:
动静结合:在有无网络的环境下皆可运行
开箱即用:提供标准和spring标准两种语言
多放方言支持:可以快速实现表单绑定,属性编辑器等功能
与SpringBoot完美整合:SpringBoot提供了Thymeleaf的默认配置,并且为Thymeleaf设置了视图解析器,我们可以像以前操作jsp一样来操作Thymeleaf。
引入依赖
<dependency>
    <groupId>org.springframework.boot</groupId>
    <artifactId>spring-boot-starter-thymeleaf</artifactId>
</dependency>
Thymeleaf的标准表达式语法
变量表达式
<p>UserName is : <span th:text="${user.name}">xiaoming</span> !</p>
URL表达式
<a th:href="@{http://www.thymeleaf.org}">Thymeleaf</a>
其他表达式请看:https://www.jianshu.com/p/908b48b10702
创建一个用户类,并编写controller
@Controller
public class IndexController {
    @GetMapping("/index")
    public String index(Model model){
        List<user> users = new ArrayList<>();
        for (int i = 0; i<10; i++){
            user u = new user();
            u.setId(i);
            u.setName("yun"+i);
            u.setAddress("世界"+i);
            users.add(u);
        }
        model.addAttribute("users",users);
        return "index";
    }
}
在src/tamplates下创建index.html
<!DOCTYPE html>
<html lang="en" xmlns:th="http://www.thymeleaf.org">
<head>
    <meta charset="UTF-8">
    <title>Title</title>
</head>
<body>
<table border="1">
    <tr>
        <td>编号</td>
        <td>姓名</td>
        <td>地址</td>
    </tr>
    <tr th:each="user:${users}">
        <td th:text="${user.id}"></td>
        <td th:text="${user.name}"></td>
        <td th:text="${user.address}"></td>
    </tr>
</table>
</body>
</html>
运行程序,打印解结果如下
