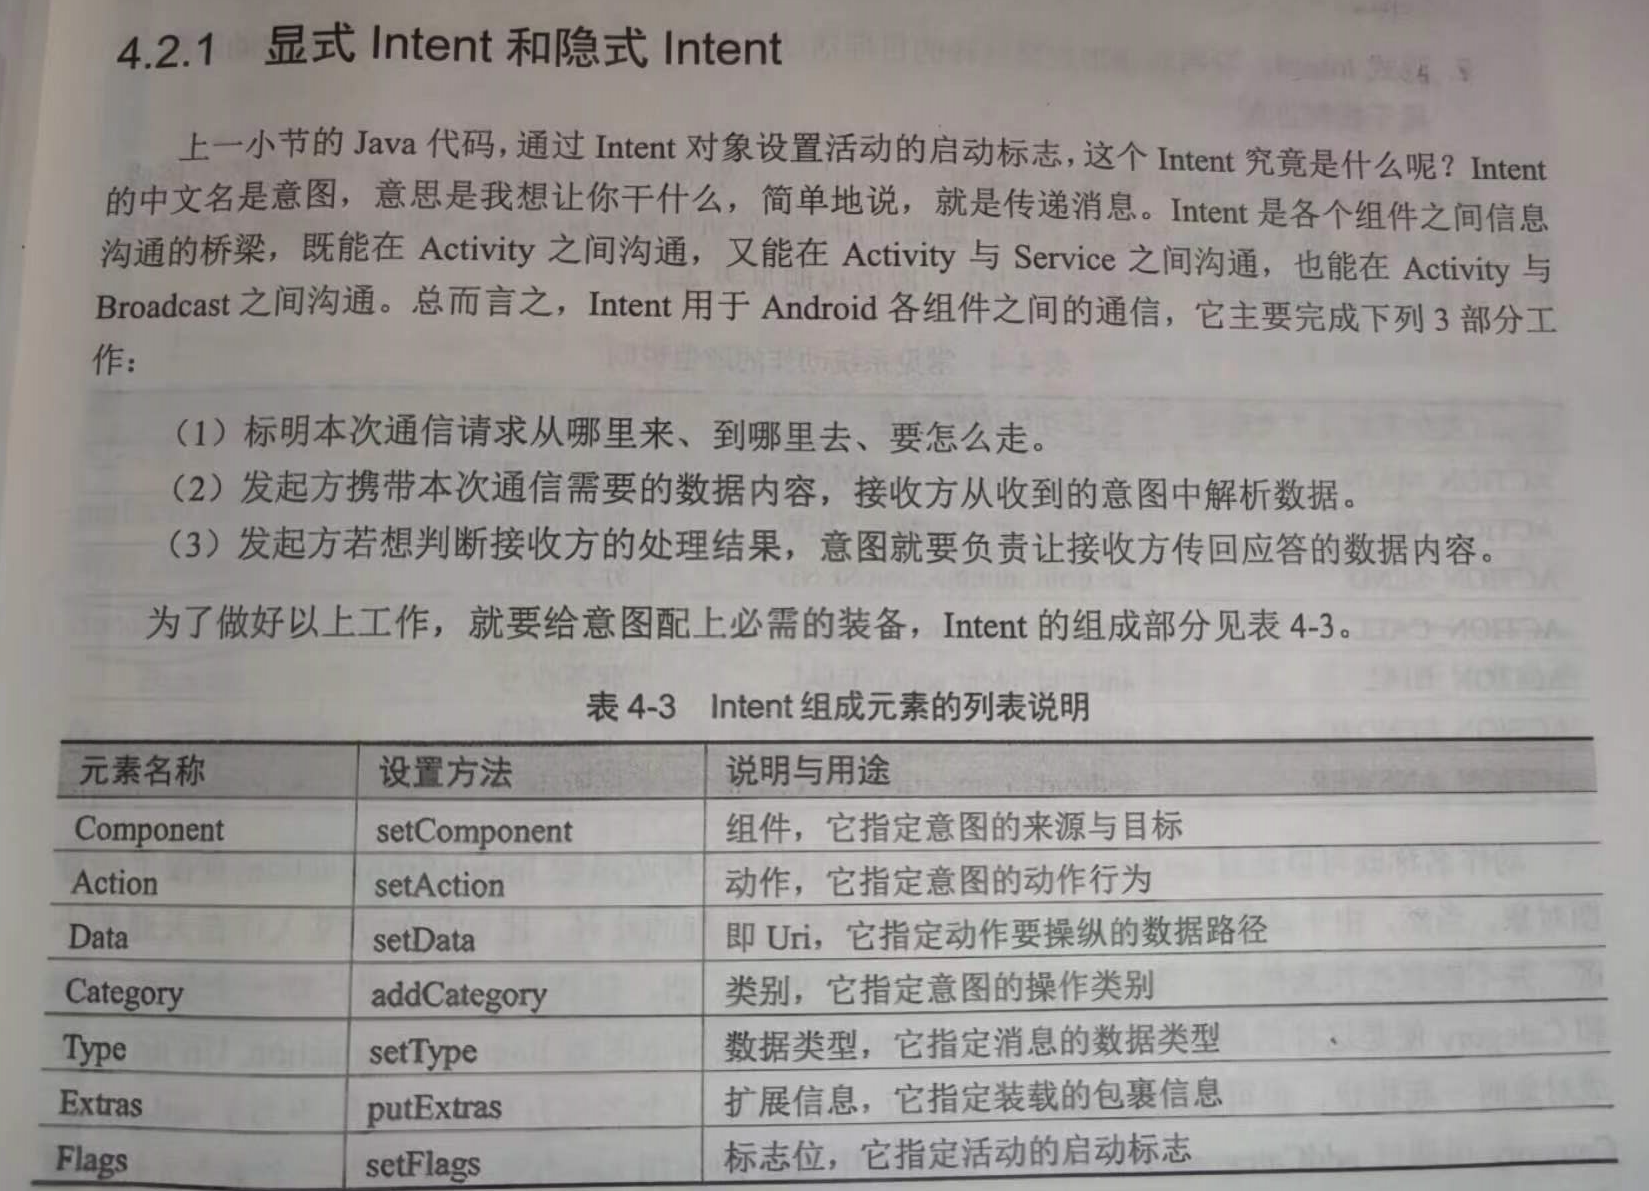
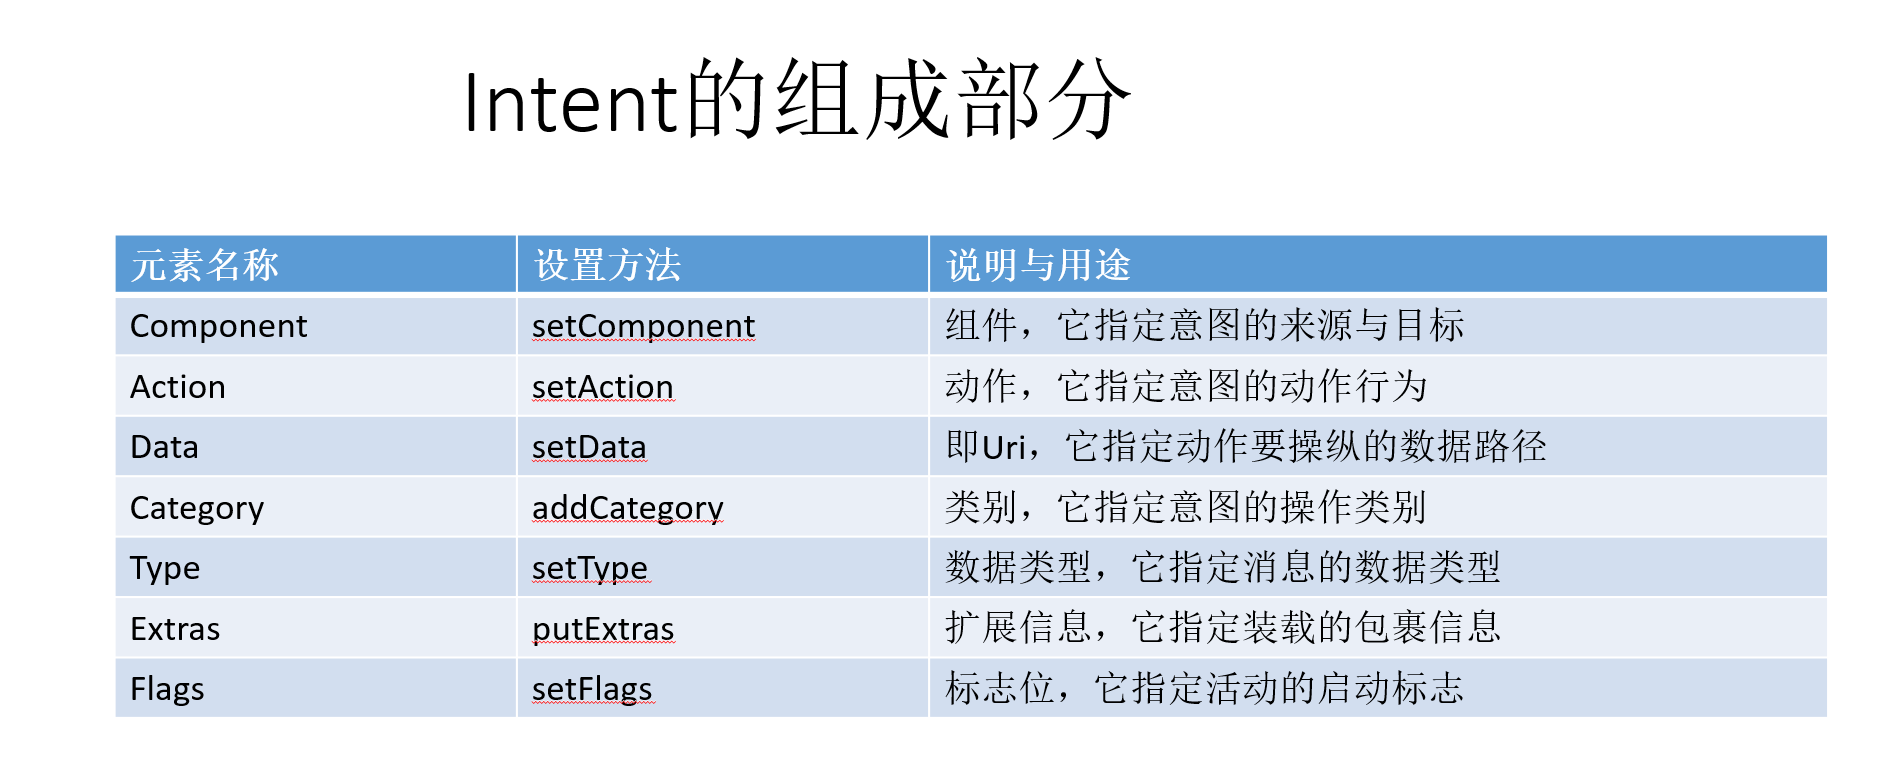
Intent是各个组件之间信息沟通的桥梁,它用于Android各组件之间的通信,主要完成下列工作:
(1)标明本次通信请求从哪里来、到哪里去、要怎么走。
(2)发起方携带本次通信需要的数据内容,接收方从收到的意图中解析数据。
(3)发起方若想判断接收方的处理结果,意图就要负责让接收方传回应答的数据内容。

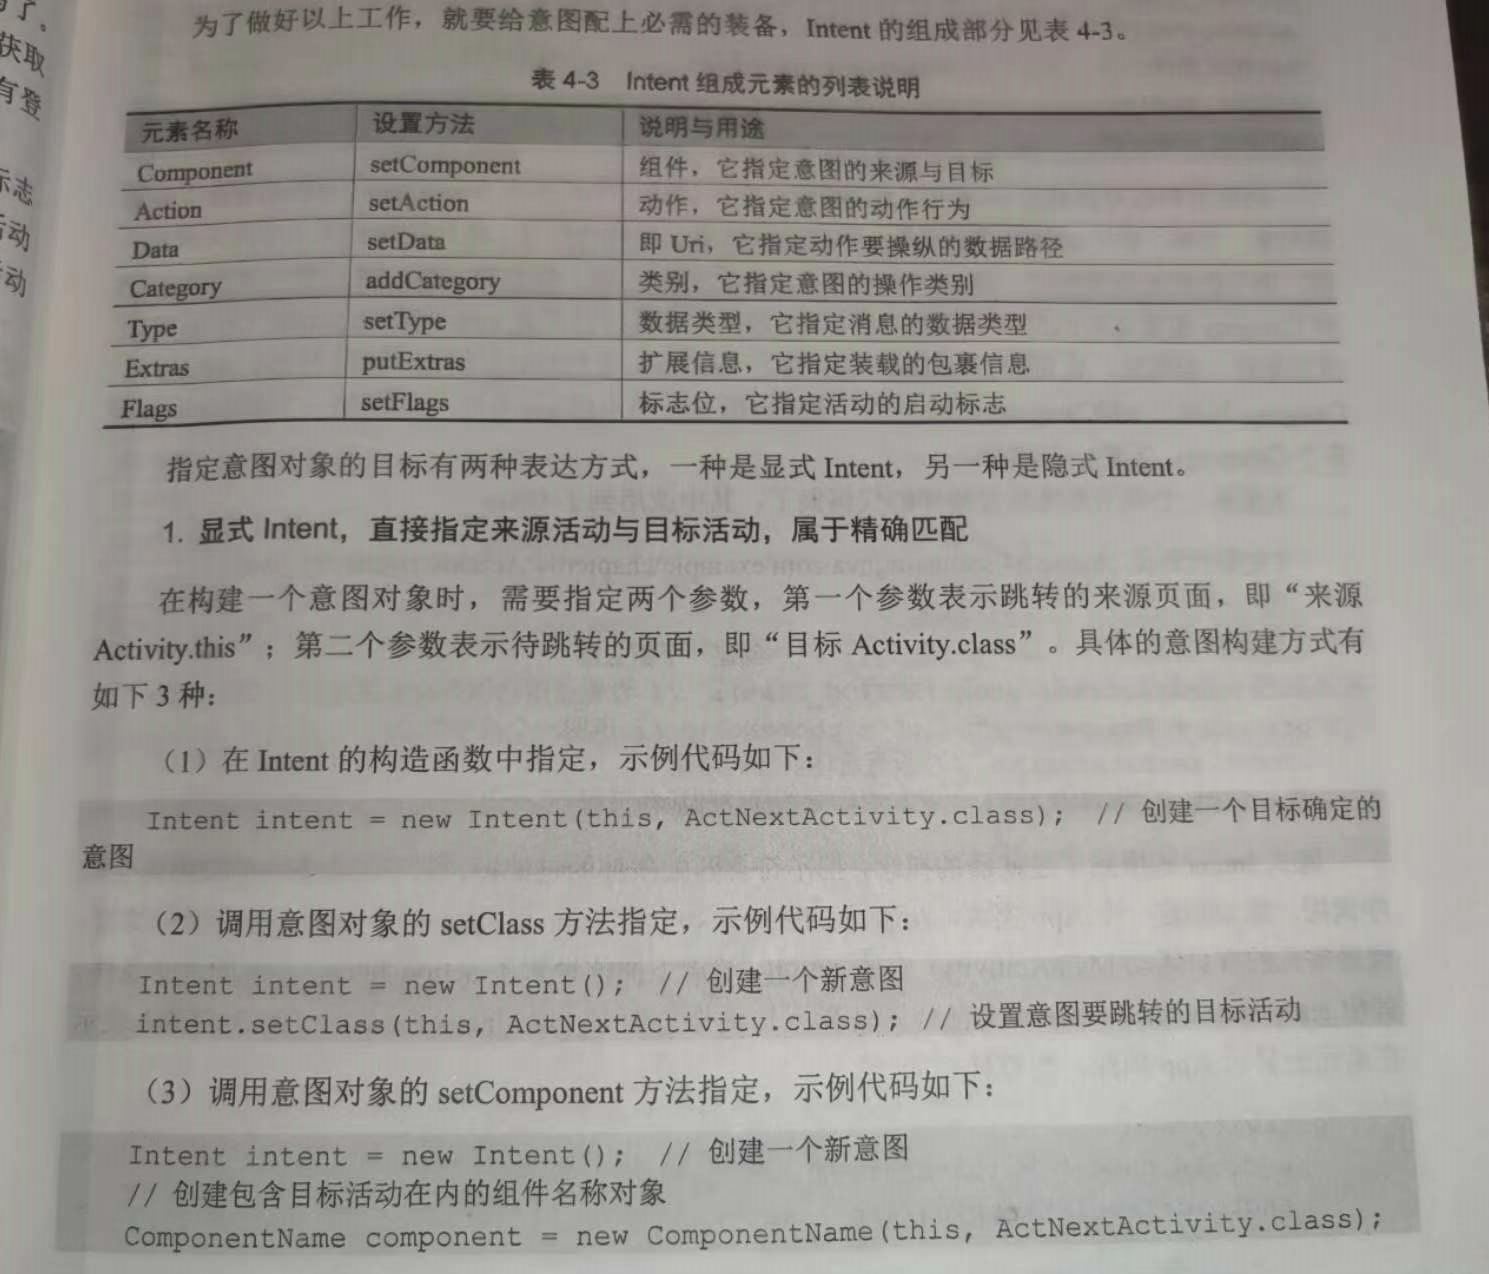
显式Intent,直接指定来源活动与目标活动,属于精确匹配。它有三种构建方式:
(1)在Intent的构造函数中指定,示例代码如下:
Intent intent = new Intent(this, ActNextActivity.class); // 创建一个目标确定的意图
(2)调用意图对象的setClass方法指定,示例代码如下:
Intent intent = new Intent(); // 创建一个新意图
intent.setClass(this, ActNextActivity.class); // 设置意图要跳转的目标活动
(3)调用意图对象的setComponent方法指定,示例代码如下:
Intent intent = new Intent(); // 创建一个新意图
// 创建包含目标活动在内的组件名称对象
ComponentName component = new ComponentName(this, ActNextActivity.class);
intent.setComponent(component); // 设置意图携带的组件信息

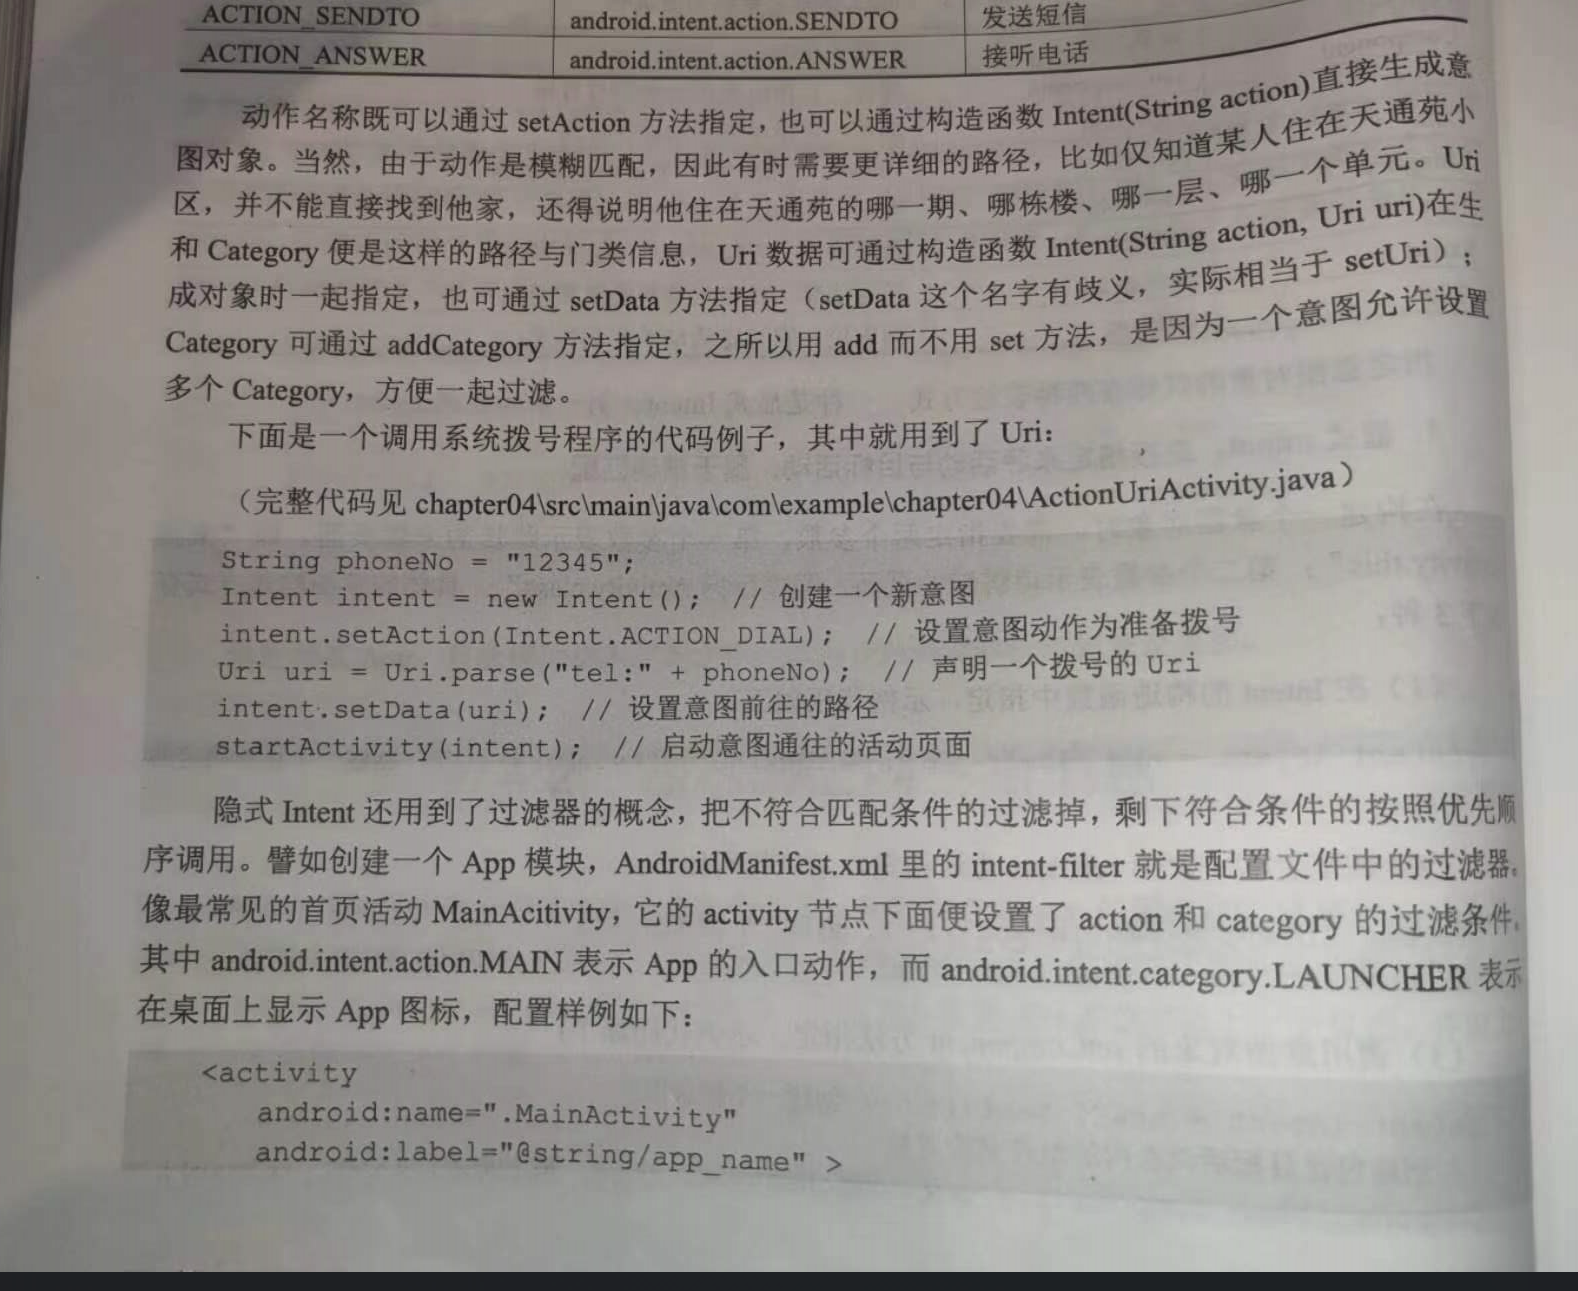
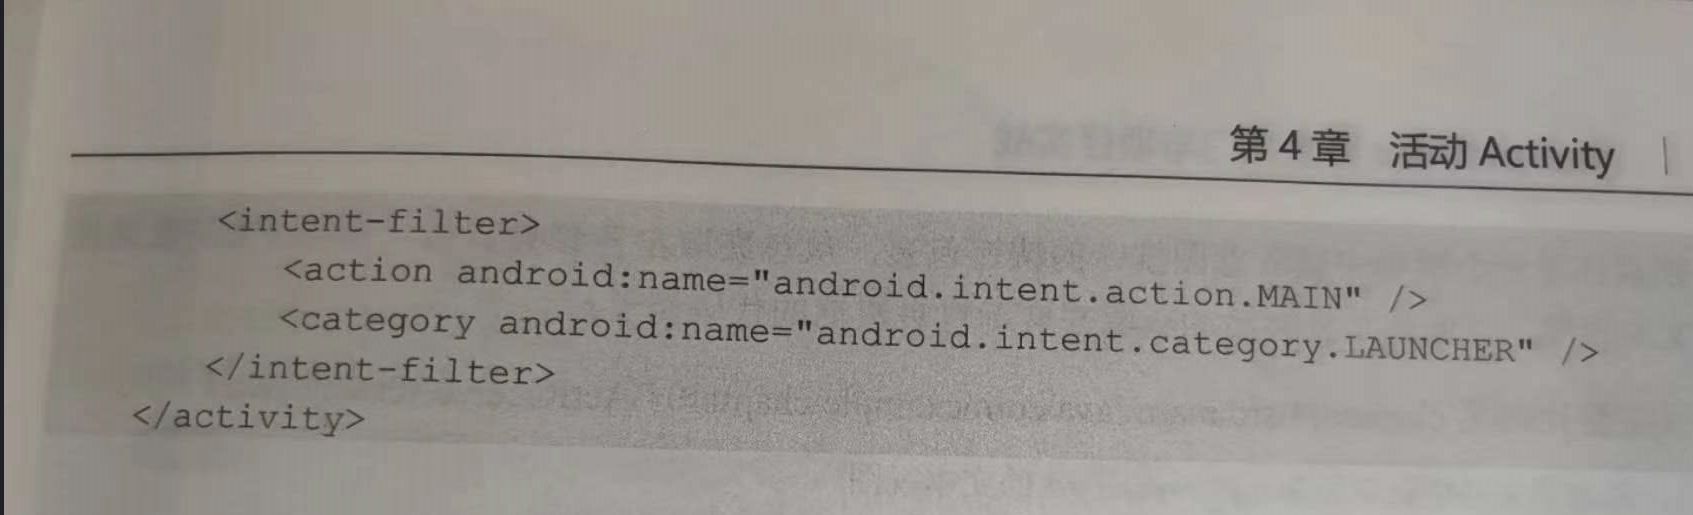
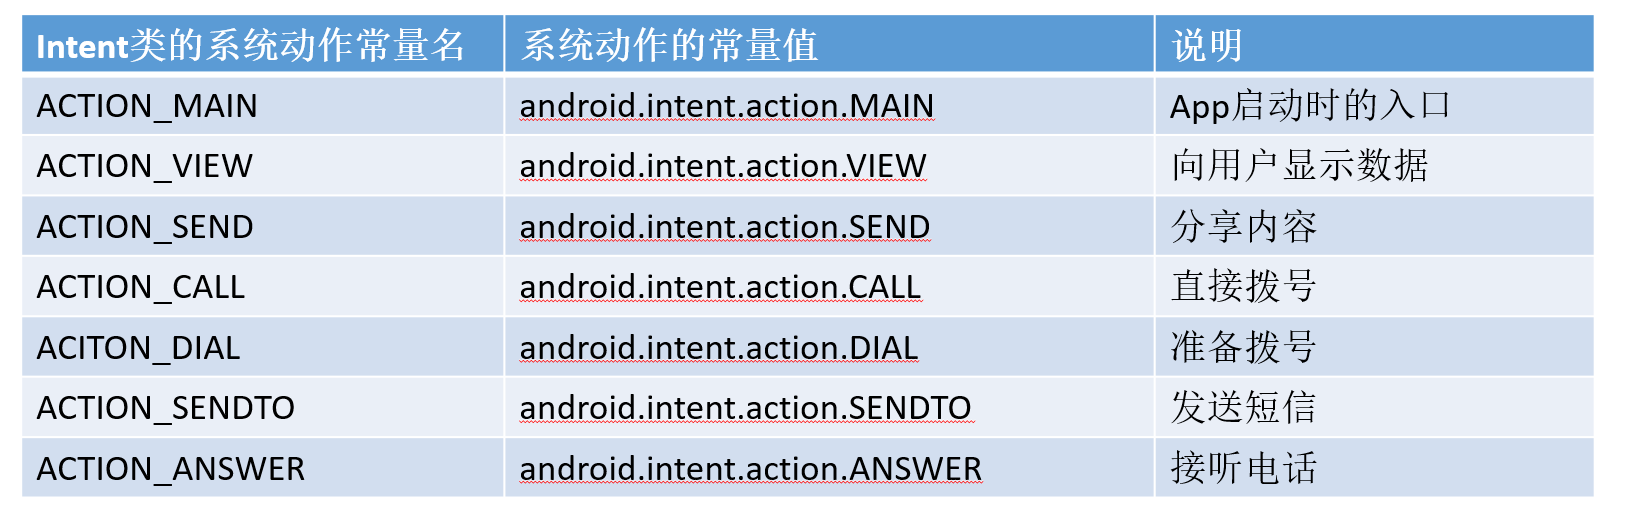
隐式Intent,没有明确指定要跳转的目标活动,只给出一个动作字符串让系统自动匹配,属于模糊匹配。
动作名称既可以通过setAction方法指定,也可以通过构造函数Intent(String action)直接生成意图对象。
常见的系统动作如下表:
=================================================================================
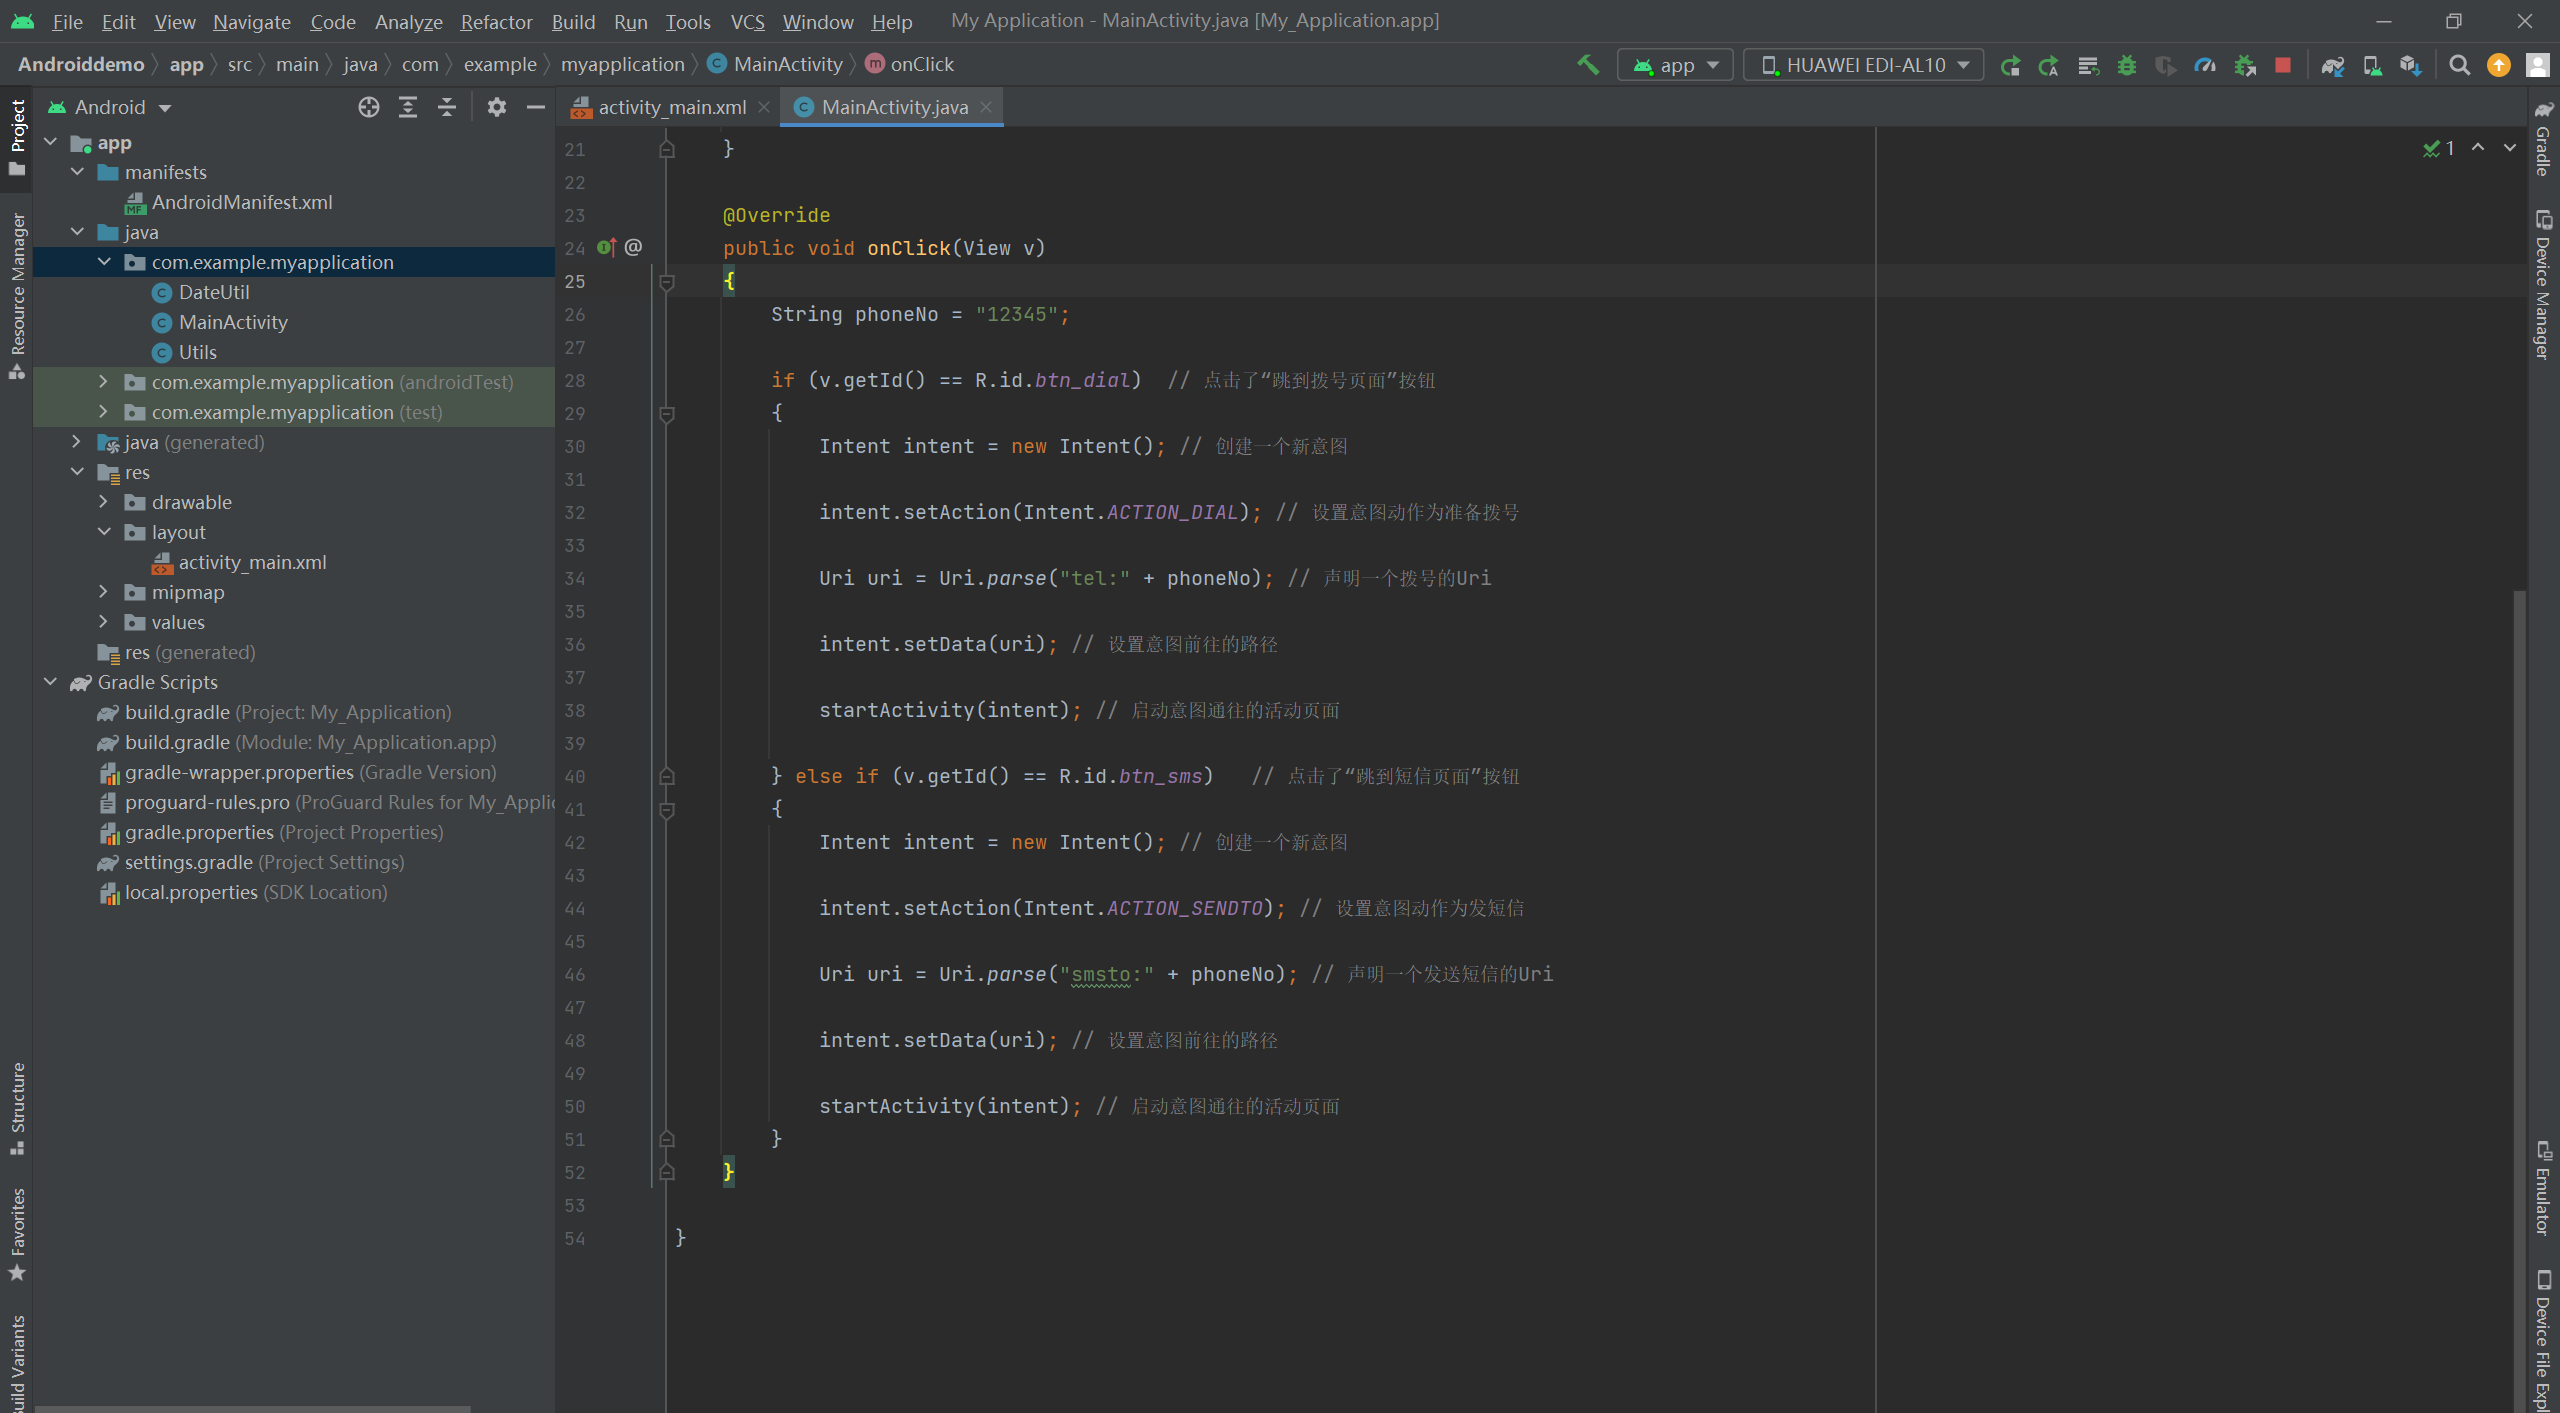
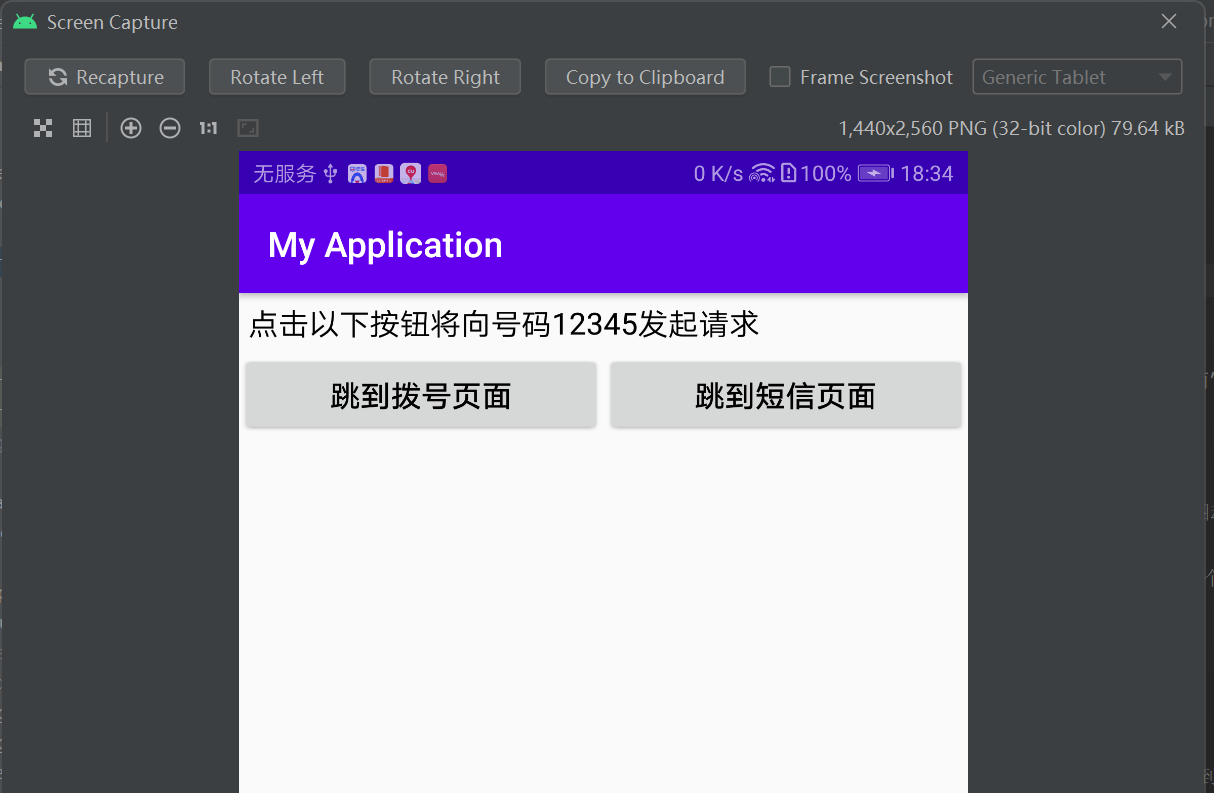
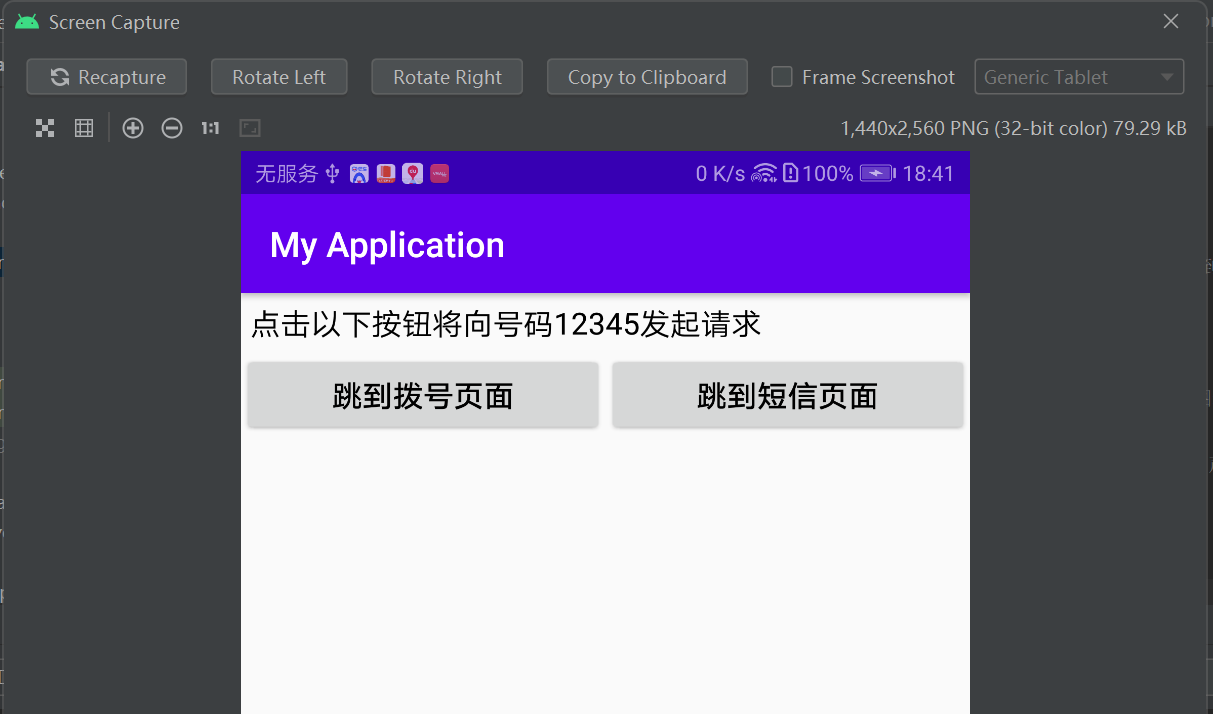
PS:页面跳转示例:
隐式示例:
<LinearLayout xmlns:android="http://schemas.android.com/apk/res/android"
    android:layout_width="match_parent"
    android:layout_height="match_parent"
    android:orientation="vertical">

    <TextView
        android:layout_width="match_parent"
        android:layout_height="wrap_content"
        android:padding="5dp"
        android:text="点击以下按钮将向号码12345发起请求"
        android:textColor="@color/black"
        android:textSize="17sp" />

    <LinearLayout
        android:layout_width="match_parent"
        android:layout_height="wrap_content"
        android:orientation="horizontal">

        <Button
            android:id="@+id/btn_dial"
            android:layout_width="0dp"
            android:layout_height="wrap_content"
            android:layout_weight="1"
            android:text="跳到拨号页面"
            android:textColor="@color/black"
            android:textSize="17sp" />

        <Button
            android:id="@+id/btn_sms"
            android:layout_width="0dp"
            android:layout_height="wrap_content"
            android:layout_weight="1"
            android:text="跳到短信页面"
            android:textColor="@color/black"
            android:textSize="17sp" />
    </LinearLayout>

</LinearLayout>
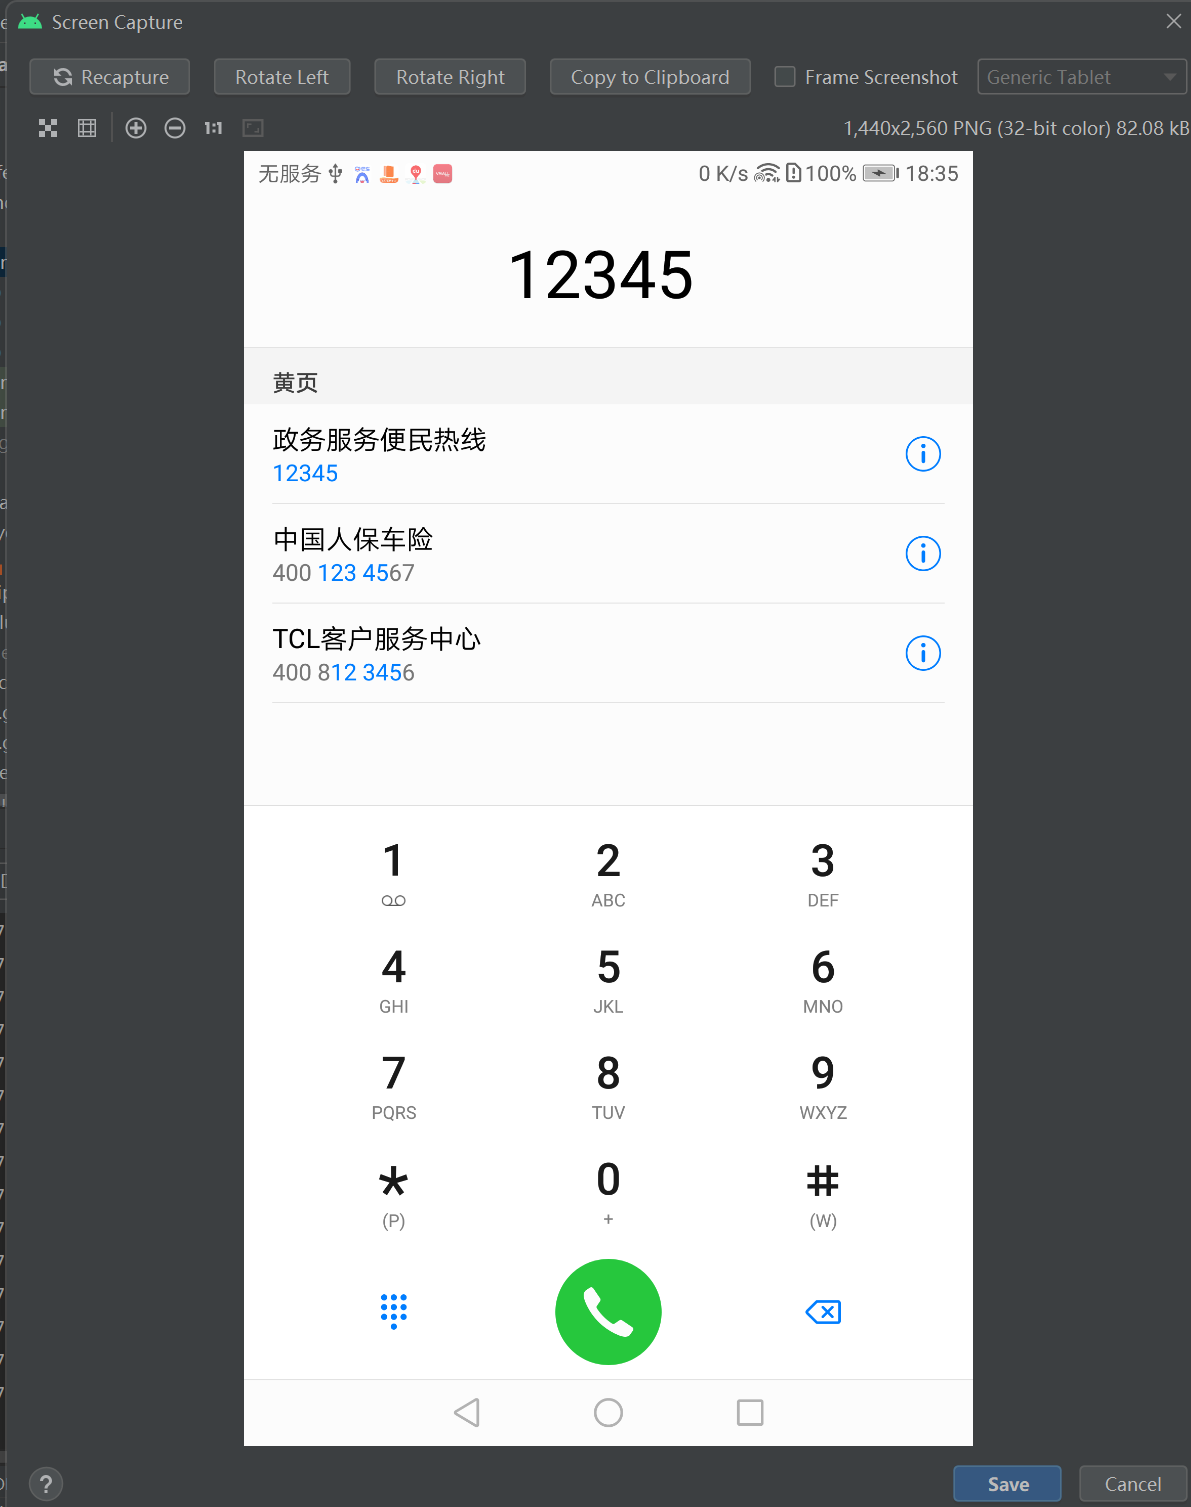
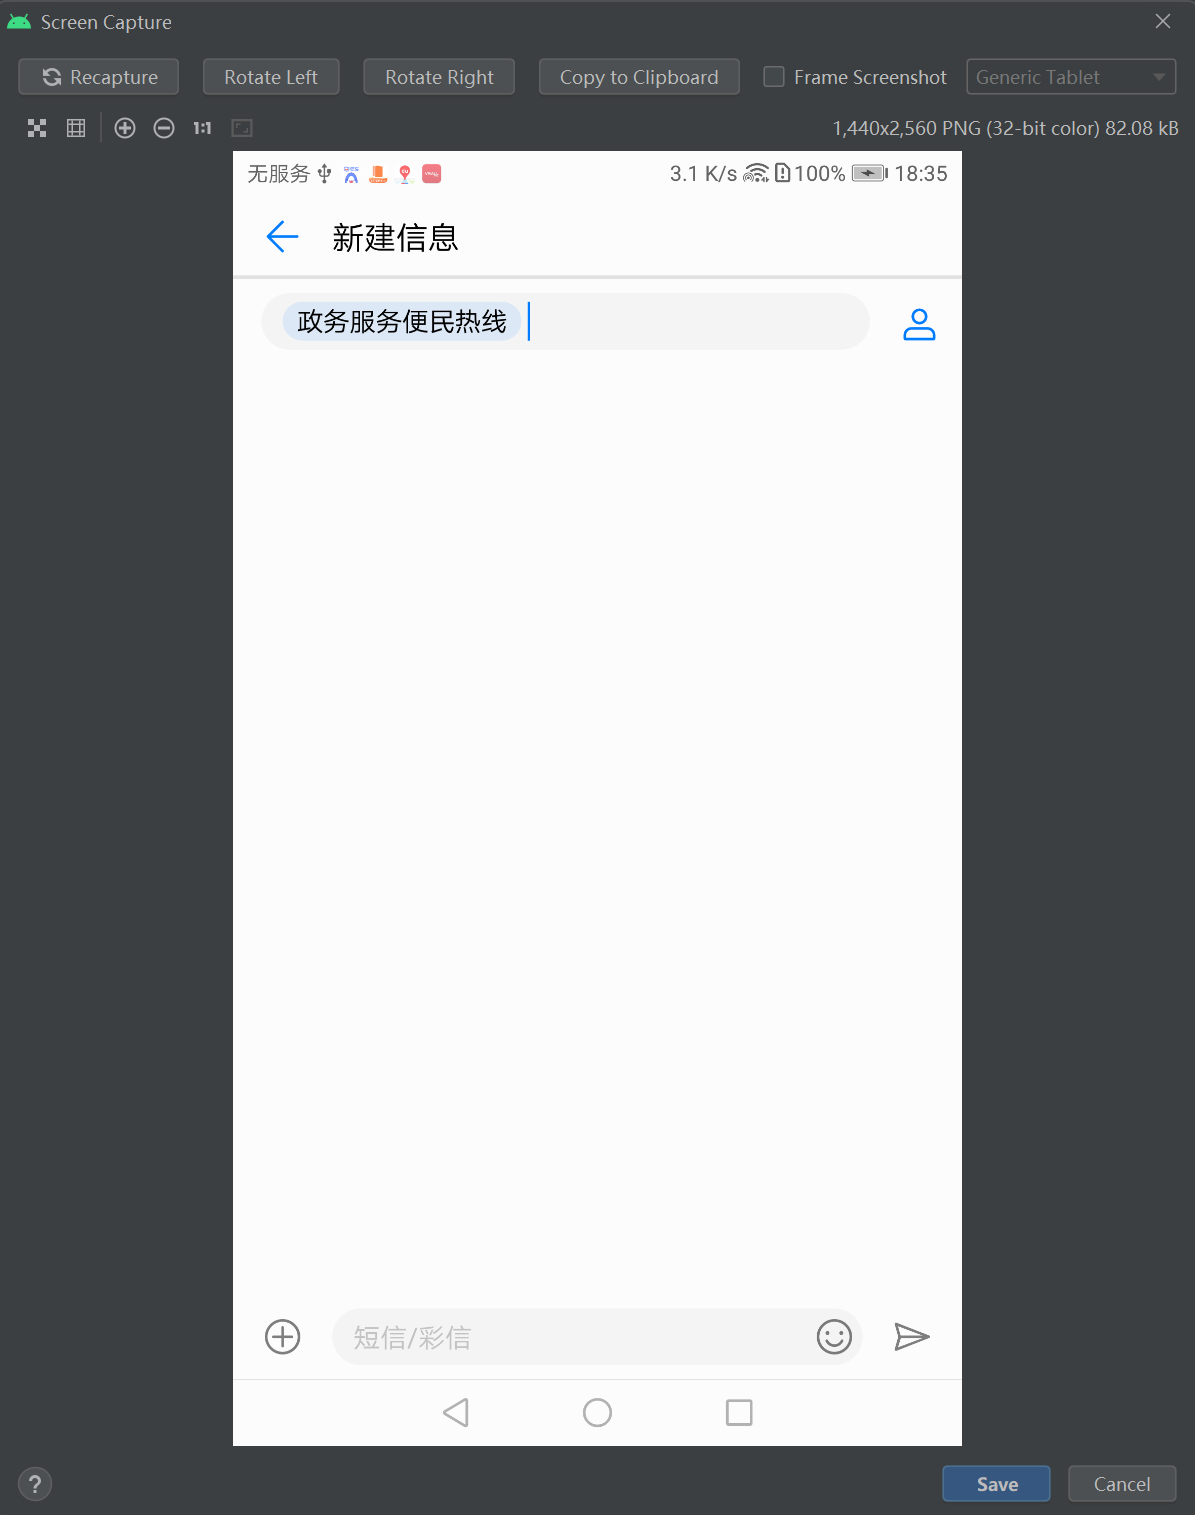
package com.example.myapplication;

import android.content.Intent;
import android.net.Uri;
import android.support.v7.app.AppCompatActivity;
import android.os.Bundle;
import android.view.View;

public class MainActivity extends AppCompatActivity implements View.OnClickListener
{

    @Override
    protected void onCreate(Bundle savedInstanceState)
    {
        super.onCreate(savedInstanceState);
        setContentView(R.layout.activity_main);


        findViewById(R.id.btn_dial).setOnClickListener(this);
        findViewById(R.id.btn_sms).setOnClickListener(this);
    }

    @Override
    public void onClick(View v)
    {
        String phoneNo = "12345";

        if (v.getId() == R.id.btn_dial)  // 点击了“跳到拨号页面”按钮
        {
            Intent intent = new Intent(); // 创建一个新意图

            intent.setAction(Intent.ACTION_DIAL); // 设置意图动作为准备拨号

            Uri uri = Uri.parse("tel:" + phoneNo); // 声明一个拨号的Uri

            intent.setData(uri); // 设置意图前往的路径

            startActivity(intent); // 启动意图通往的活动页面

        } else if (v.getId() == R.id.btn_sms)   // 点击了“跳到短信页面”按钮
        {
            Intent intent = new Intent(); // 创建一个新意图

            intent.setAction(Intent.ACTION_SENDTO); // 设置意图动作为发短信

            Uri uri = Uri.parse("smsto:" + phoneNo); // 声明一个发送短信的Uri

            intent.setData(uri); // 设置意图前往的路径

            startActivity(intent); // 启动意图通往的活动页面
        }
    }

}


====================================================================================
PS:其他隐式:https://blog.csdn.net/sinat_35181040/article/details/52710638


-------------------------------------------------------------------------------
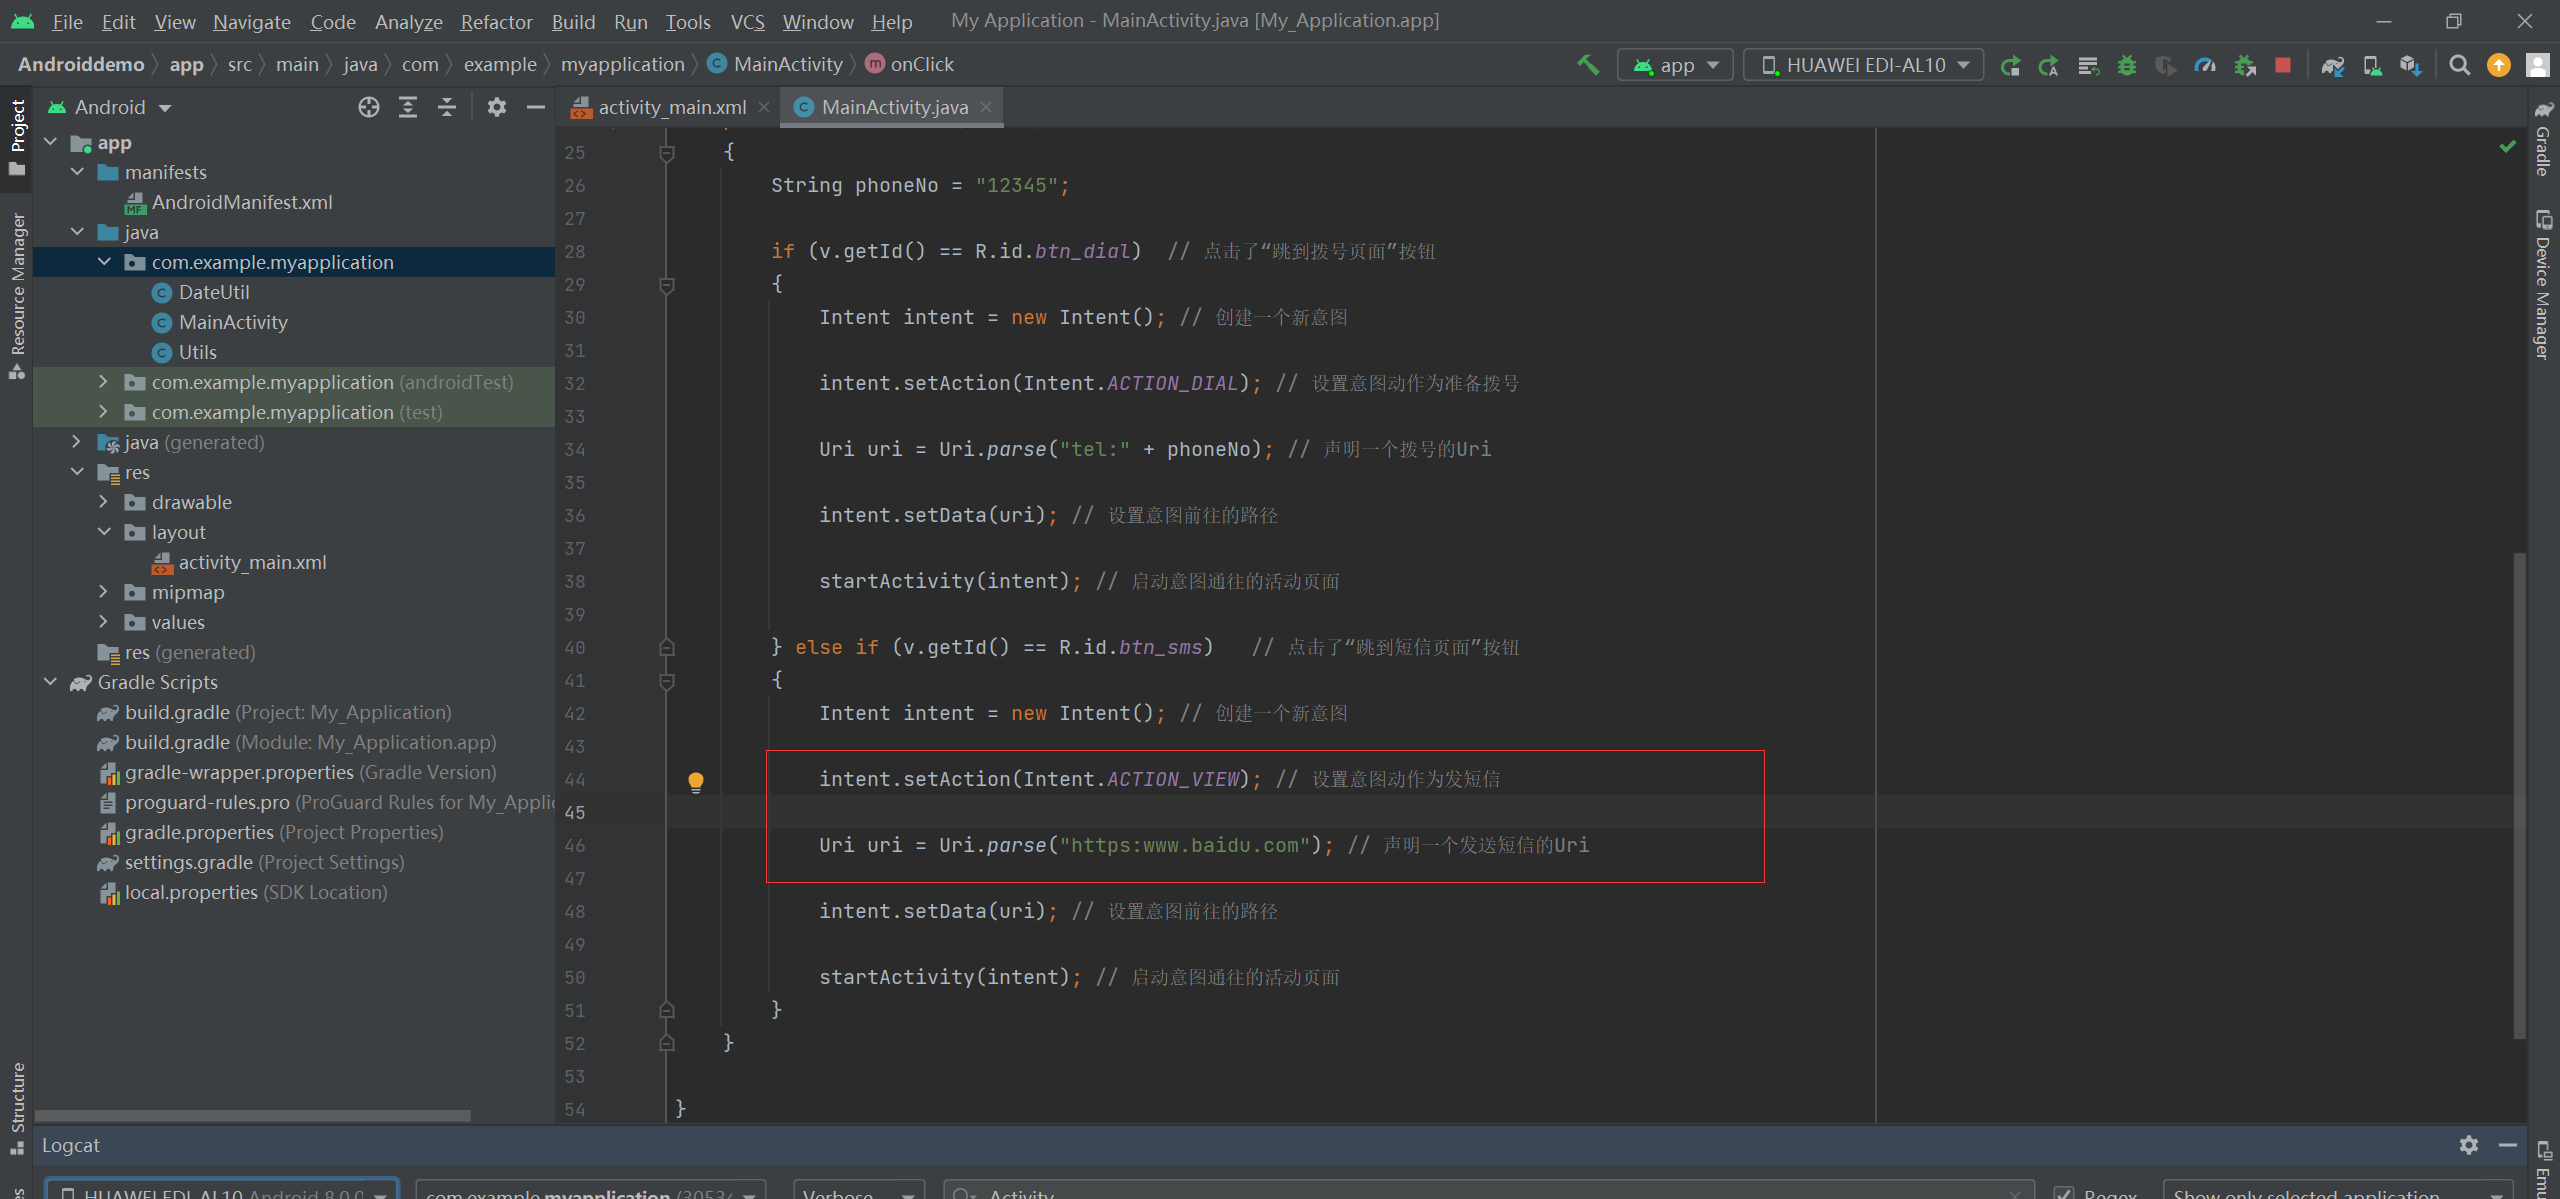
修改,跳到短信页面的事件:
            Intent intent = new Intent(); // 创建一个新意图

            intent.setAction(Intent.ACTION_VIEW); // 设置意图动作为发短信

            Uri uri = Uri.parse("https:www.baidu.com"); // 声明一个发送短信的Uri

            intent.setData(uri); // 设置意图前往的路径

            startActivity(intent); // 启动意图通往的活动页面

=============================================================================