昨日内容回顾


多表方案:
    如何确定表关系呢?
    表关系是在2张表之间建立的,没有超过2个表的情况。
    那么相互之间有2条关系线,先来判断一对多的关系。
    如果其中一张表的记录能够对应另外一张表的多条记录,那么关系线成立!

    如果只有一条线成立,那么就是一对多的关系。
    如果有2条线成立,那么就是多对多的关系。

    比如book和publish。一本书不能对应多个出版社(常规是这样的,否则就盗版了),那么不成立。
    一个出版社可以对应多本书,关系线成立。所以book和publish表的关系是一对多的关系

    多对多的关系,就是2张表互相对应多条记录。
    比如book和author。一本书可以有多个作者,一个作者可以写多本!

    一对一的关系,就很简单了,彼此唯一。
    比如author和authordetail是一对一的关系。


    一对多:
        book和publish表的关系是一对多的关系

        一旦确定一对多的关系:在多的表中创建关联字段
            # 与Publish建立一对多的关系,外键字段建立在多的一方
            publish=models.ForeignKey(to="Publish",to_field="id",on_delete=models.CASCADE)
            #创建的字段名为publish_id。它会自动加_id后缀

    多对多:
        book和author是多对多的关系

        一旦确定多对多的关系:创建第三张关系表
            # 与Author表建立多对多的关系,ManyToManyField可以建在两个模型中的任意一个,自动创建第三张表
            authors=models.ManyToManyField(to="Author")
            #注意:表名为应用名+book类名小写+authors,也就是book_authors。
            #它只有3个字段,分别是主键id,book_id,author_id。
            #book_id和author_id分别表示book表和author表的主键id

    一对一:
        author和authordetail是一对一的关系

        一旦确定一对一的关系 : 创建关联字段(任意一张表创建都可以)
        #但是一般,我们会判断谁是重要的,谁是次要的。在重要的表上面创建关联字段!比如author
        #由于authordetail表是author表的延伸,所以在author表创建关联字段
        # 与AuthorDetail建立一对一的关系
        ad=models.OneToOneField(to="AuthorDetail",to_field="id",on_delete=models.CASCADE,)
        #创建的字段名为ad_id,它会自动加_id后缀。一对一关联字段,必须设置唯一属性!
一、django多表添加
昨天已经把5张表,都创建出来了。models.py里面有4个模型,其中第5张表,是book表和author表的关系表。
由book类的authors属性来创建了关系表,表名为:应用名+book+'_'+authors。
修改urls.py,添加add路径
from app01 import views
urlpatterns = [
    path('admin/', admin.site.urls),
    path('add/', views.add),
]
由于pycharm对sqlite数据库的时间字段,添加时,会自动转换为时间戳。
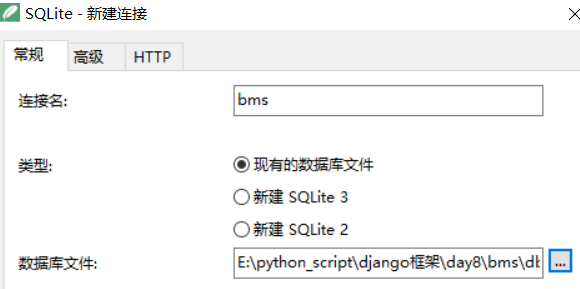
这样很不好,所以我使用navicat来连接。
新建一个连接
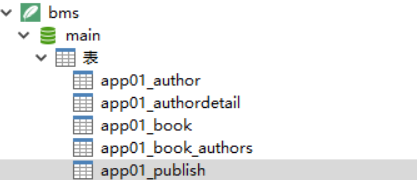
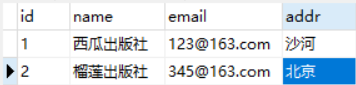
找到表publish
添加2条记录
添加表记录
create(**kwargs) 建立新对象
返回值是添加的model对象
一对一
举例:添加一条作者信息
姓名=hong,年龄=25,女朋友=唐安琪,电话=1314
def add(request):
    #先添加作者详细信息
    hong_gf = AuthorDetail.objects.create(gf="唐安琪",tel=1314)
    #再添加作者,因为它依赖AuthorDetail表
    hong = Author.objects.create(name="hong",age="25",ad=hong_gf)
    print(hong)

    return HttpResponse('添加成功')
注意:因为author的ad属性是关联authordetail表,必须添加authordetail表,才能添加author表。
ad必须接收一个model对象。可以从这个model对象中,获取插入的id值。
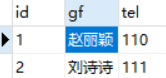
刷新页面,查看authordetail表,发现多了一条记录

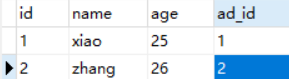
查看author表,发现多了一条记录

一对多
方式1(推荐)
修改views.py,增加add视图函数
from django.shortcuts import render,HttpResponse
from app01.models import Book
# Create your views here.

def add(request):
    #publish_id就是Book类的publish属性。它的字段为publish_id
    book = Book.objects.create(title='西游记',price=100,pub_date="1743-4-12",publish_id=2)
    print(book.title) #打印title
    return HttpResponse('添加成功')
访问url:http://127.0.0.1:8000/add/
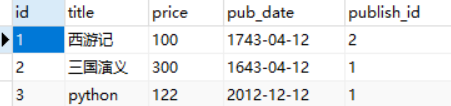
查看book表记录,发现多了一条

方式2
添加一本书《三国演义》,指定出版社为西瓜出版社
首要要导入Publish
def add(request):
    xigua = Publish.objects.filter(name="西瓜出版社").first()  #model对象
    book = Book.objects.create(title='三国演义',price=300,pub_date="1643-4-12",publish=xigua)
    print(book.title) #打印标题
    print(book.publish)  # 与这本书籍关联的出版社对象
    print(type(book.publish))  # 打印属性
    print(book.publish.id)  # 出版社id
    print(book.publish.name)  # 出版社name

    return HttpResponse('添加成功')
注意:xigua它是一个model对象,它表示publish表的一条记录
create里面的publish只能接收publish表的model对象,不能接收别的表model对象!
查看models.py的Book类的publish属性
publish=models.ForeignKey(to="Publish",to_field="id",on_delete=models.CASCADE)
注意:它只能接收publish表的id字段。
所以执行sql时,它相当于publish_id=xigua.id。
这种添加方式,有严格的限制,必须接收publish的model对象才可以的。不推荐使用
查看控制台信息:
三国演义
[29/Jun/2018 16:47:44] "GET /add/ HTTP/1.1" 200 12
Publish object (1)
<class 'app01.models.Publish'>
1
西瓜出版社
book.publish 是与这本书籍关联的出版社对象
那么就可以得到出版社的id和name属性值
查看表记录,发现多了一条

现在书籍和作者还没有绑定关系,先增加作者详细记录
修改authordetail表,增加2条记录
修改author表,增加2条记录
多对多
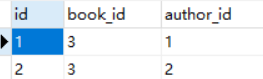
现在需要在book表里面插入一本书《python》,这本书有2个作者。那么book_authors应该有2条记录
它应该是这样的
id book_id author_id
1        3        1
2        3        2
那么如何将这2条记录,插入进去呢?
修改add视图函数,注意导入author类
先插入一条记录
book = Book.objects.create(title='python',price=122,pub_date="2012-12-12",publish_id=1)
再获取2个作者
xiao = Author.objects.filter(name="xiao").first()
zhang = Author.objects.filter(name="zhang").first()
最后插入2条记录,注意:下面2行代码是不能执行的,它是伪代码!
book_authors.objects.create(book_id=book.id,author_id=xiao.id)
book_authors.objects.create(book_id=book.id, author_id=zhang.id)
上面2行代码表示在book_authors表中添加2条记录,只增加book_id和author_id。
那么问题来了,book_authors这张表是用orm创建的
但是orm的models.py里面找不到book_authors这张表的模型类。如果存在的话,那肯定没有问题的。
因为第3张表,是在book类里面的authors属性,用ManyToManyField创建的
因为一本书,对应的不止一个作者,所以不能直接赋值操作。
add() 增加多个关系对象
使用方法1:add(obj1, obj2, ...)
ORM提供了add方法,来添加多对多的关系表。
def add(request):
    book = Book.objects.create(title='python',price=122,pub_date="2012-12-12",publish_id=1)
    xiao = Author.objects.filter(name="xiao").first()
    zhang = Author.objects.filter(name="zhang").first()
    book.authors.add(xiao,zhang)  # 添加2条数据,接收一个参数,就会产生一条记录

    return HttpResponse('添加成功')
注意:book.authors.add(xiao,zhang),相当于执行上面2句伪代码!
它会自动获取2个对象的主键id,并插入到对应的字段中。
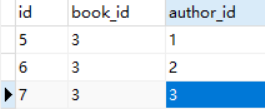
刷新页面,查看book表,发现多了一条记录
查看book_authors表,发现多2条数据
如果需要为书籍绑定所有作者呢?
author_list = Author.objects.all()
book.authors.add(*author_list)
上面2行代码,就搞定了,非常简洁!
使用方法2:add(主键1, 主键2, ...)
下面这种写法,也是可以的。在html表单页面添加时,会用到此写法!
book.authors.add(1,2)
还有一种写法,是属于python的。*[1,2],表示打散。它相当于上面的写法
book.authors.add(*[1,2])
区别在于:add(1,2)这种写法,它是执行了2次,在book_authors表中插入2条记录。
那么在不知道有多少数值的情况下,需要使用*[args1,args2]这种写法。
注意:在html表单中的复选框中,它提交的数据是多个值,必须使用getlist方法获取,它是列表类型。
因为不知道用户,到底会选择多少个选项。所以就需要使用这种打散写法!
删除记录
remove(obj1, obj2, ...) 去除多个关系对象
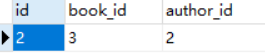
举例:删除python这本书的xiao作者
那么只需要删除book_authors表,id为1的这一条记录,就可以了
但是,不能直接对这张表,直接删除。因为它是2个表的关联表。
解除绑定的关系
def add(request):
    book = Book.objects.filter(id=3).first()  # 先找到这本书
    xiao = Author.objects.filter(name="xiao").first()  # 再找到作者
    book.authors.remove(xiao)  # 解除绑定的关系
    return HttpResponse('添加成功')
刷新页面,查看book_authors表记录,发现作者没有了
注意:这里可不是级联删除,book_authors并没有on_delete=models.CASCADE属性
clear() 清理所有关系对象
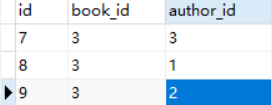
修改book_authors表记录,添加1条记录
举例:将book_id等于3的所有的作者删除
上面的例子,用remove,可以将一个删除。如果这本书,有5个作者呢?
一个个remove?太累了!django提供了clear方法,可以清理所有关系对象。
def add(request):
    book = Book.objects.filter(id=3).first()
    book.authors.clear()  # 清理所有关系对象
    return HttpResponse('添加成功')
刷新页面,再次查看book_authors表记录,发现已经空了!

修改authordetail表,增加一条记录
修改author表,增加一条记录
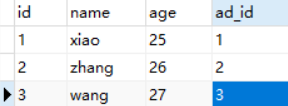
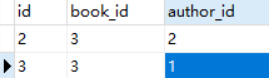
修改book_authors表,增加3条数据
set([obj1,obj2...]) 先清空再设置
set([obj1,obj2,...]) 它接收多个值,可以一个,也可以多个。适用于后台网页修改操作!
举例:
python这本书目前有3个作者,将wang设置为这本书的唯一作者
怎么做呢?将另外2个作者解除关系就可以了。
def add(request):
    book = Book.objects.filter(id=3).first()  # 先找到书
    xiao = Author.objects.filter(name="xiao").first()  # 再找到作者
    zhang = Author.objects.filter(name="zhang").first()
    book.authors.remove(xiao,zhang)  # 解除绑定的关系

    return HttpResponse('添加成功')
但是这样将2个作者解除,太麻烦了。
还有一种做法,先清空,再设置
def add(request):
    book = Book.objects.filter(id=3).first()  # 先找到书
    book.authors.clear()  # 清理所有关系对象
    wang = Author.objects.filter(name="wang").first()
    book.authors.add(wang)

    return HttpResponse('添加成功')
django提示了set方法,直接合并了先清空再设置的操作
它必须接收一个数组,因为可以接收多个值
def add(request):
    book = Book.objects.filter(id=3).first()  # 先找到书
    wang = Author.objects.filter(name="wang").first()  # 再找作者
    book.authors.set([wang])  #先清空再设置

    return HttpResponse('添加成功')
刷新页面,查看book_authors表记录,发现只有一条了

总结:
重点掌握create,add,remove,clear,set这五个方法!
添加表记录:
一对一和一对多,使用create方法。它有2种使用方法:
1. create(字段名1=值1...)。适用于表单添加操作!注意,这里面的字段名是ORM创建表之后的的字段名
比如: book类的publish属性,它是关联字段,ORM创建之后,字段名为publish_id
2.create(模型类属性1=值1...)。比如book类的publish属性,它是关联字段。
直接create(publish=obj1),注意,它接收一个model对象,对象包含了主键id
多对多使用add方法。add用2种使用方法:
1.add(obj1,obj2...) 它接收一个model对象,对象包含了主键id
2.add(主键id1,主键id2...) 它接收一个主键id。适用于表单添加操作!
还有一个python的打散语法,前面加一个*就可以了。比如*[1,2],它会依次调用前置方法,每次只取一个值。表单操作,会用到!
删除记录:
适用于一对一,一对多,多对一。
remove(obj1, obj2, ...) 去除多个关系对象。它需要指定一个或者多个对象
clear() 清理所有关系对象。不管现有的关系有多少,一律清空!
set([obj1,obj2...]) 先清空再设置。不管现有的关系有多少,一律清空再设置。适用于网页后台修改操作
基于对象的跨表查询(子查询)
先来查询id为3的书籍,打印publish和authors是什么?
def add(request):
    book = Book.objects.filter(id=3).first()
    print(book.publish)  # 查看publish属性
    print(book.authors)
    print(type(book.authors))  # 查看类型
    print(book.authors.all())  # 返回所有book的关联对象
    print(book.authors.all().values())  # 查看关联对象的值

    return HttpResponse('添加成功')
刷新页面,查看控制台信息
Publish object (1)
app01.Author.None
<class 'django.db.models.fields.related_descriptors.create_forward_many_to_many_manager.<locals>.ManyRelatedManager'>
<QuerySet [<Author: Author object (3)>]>
<QuerySet [{'name': 'wang', 'age': 27, 'id': 3, 'ad_id': 3}]>
注意:book.authors不能直接print,否则返回的值是None。它是一个多对多的关系管理器,必须用all()才能取值。
book.authors.all() 表示返回所有book的关联对象。注意:这里的book对象,是一个model对象,它是表示id为3的一条记录。从最后一条打印信息中,就可以看出来!
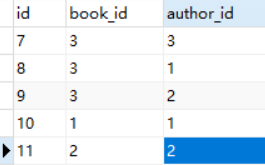
修改book_authors表,添加2条记录
再次刷新页面,查看控制台信息
Publish object (1)
app01.Author.None
<class 'django.db.models.fields.related_descriptors.create_forward_many_to_many_manager.<locals>.ManyRelatedManager'>
<QuerySet [<Author: Author object (1)>, <Author: Author object (2)>, <Author: Author object (3)>]>
<QuerySet [{'name': 'xiao', 'id': 1, 'ad_id': 1, 'age': 25}, {'name': 'zhang', 'id': 2, 'ad_id': 2, 'age': 26}, {'name': 'wang', 'id': 3, 'ad_id': 3, 'age': 27}]>
注意最后一条信息,它返回了3个model对象。为什么会返回3条信息呢?
它实际是执行了下面这句SQL
SELECT
    author.id,
    author.name,
    author.age,
    author.ad_id
FROM
    author
INNER JOIN book_authors ON (
    author.id = book_authors.author_id
)
WHERE
    book_authors.book_id = 3
LIMIT 21;
因为book的id为3,它先从关系表book_authors,查找book_id=3的记录。此时有3条记录!
再和author表关联查询,找出3个作者的记录。所以最终结果就是author的3条记录!
book.authors.all()是与这本书关联的作者对象queryset对象集合
django有2个日期类型,一个是DateField(),它的格式是yyyy-mm-dd
还有一个类型是DateTimeField(),它的格式是yyyy-mm-dd h:i:s。它是带时分秒的!
python中的datetime
举例:
import datetime
now = datetime.datetime.now()
print(now)  # 当前时间
print(now.today())  # 当前时间
print(now.date())  # 日期
print(now.time())  # 排除日期,取时分秒
print(now.strftime("%Y-%m-%d %H:%I:%S"))  # 格式化时间

delta = datetime.timedelta(days=3)  # 时间差
print(delta)
print(now+delta)  # 3天后
print(now-delta)  # 3天后
输出:
2018-06-29 20:59:02.741780
2018-06-29 20:59:02.741781
2018-06-29
20:59:02.741780
2018-06-29 20:08:02
3 days, 0:00:00
2018-07-02 20:59:02.741780
2018-06-26 20:59:02.741780
一对多查询(Publish 与 Book)
book_authors表添加2条数据
举例:
查询西游记这本书的出版社的名字
普通写法
先找出这本书,然后取出publish_id。在publish表中,通过publish_id找到对应记录。
def add(request):
    book = Book.objects.filter(title="西游记").first()
    publish_id = book.publish_id
    publish = Publish.objects.filter(id=publish_id).first()
    print(publish.name)

    return HttpResponse('添加成功')
刷新网页,查看控制台,输出:
榴莲出版社
推荐写法:
上面的步骤太麻烦了,下面使用简洁写法,2行就搞定了!
def add(request):
    book = Book.objects.filter(title="西游记").first()
    print(book.publish.name)

    return HttpResponse('添加成功')
举例:查询西瓜出版社出版过的所有书籍的名称
def add(request):
    publish = Publish.objects.filter(name="西瓜出版社").first()  # 先找出版社
    ret = Book.objects.filter(publish_id=publish.id).values("title")  # 再找书籍
    print(ret)

    return HttpResponse('添加成功')
刷新网页,查看控制台,效果同上
上面写的太麻烦,下面来介绍正向查询和反向查询
正向和反向,就看关键字段在哪里?
如果是通过关联字段查询,就是正向。否则是反向!
简单来说:正向,按照字段。反向,按照表名
正向与反向查询
正向查询:关联属性在book表中,所以book对象找出关联出版社对象,正向查询
反向查询:关联属性在book表中,所以publish对象找出关联书籍,正向查询
    正向:按字段:publish
book -----------> publish
     <-----------
    反向:按表名小写_set() 例如:publish.obj.book_set()
正向查询
还是上面的例子:查询西瓜出版社出版过的所有书籍的名称
简洁写法:
def add(request):
    publish = Publish.objects.filter(name="西瓜出版社").first()  # 先找出版社
    # ret = Book.objects.filter(publish_id=publish.id).values("title")  # 再找书籍
    # print(ret)
    #正向查询--简洁写法
    ret = publish.book_set.all().values("title")
    print(ret)

    return HttpResponse('添加成功')
刷新网页,控制台输出:
<QuerySet [{'title': '三国演义'}, {'title': 'python'}]>
推荐使用简洁写法,为什么呢?因为如果表越来越多,那么SQL就非常复杂。使用简洁写法,就能避免!
那么它是如何实现的呢?通过Book模型类的authors属性
authors=models.ManyToManyField(to="Author")
反向查询
举例:查询与西瓜出版社关联的所有书籍的名字
def add(request):
    publish = Publish.objects.filter(name="西瓜出版社").first()  # 先找出版社
    ret = publish.book_set.all().values("title")  # 再找书籍,过滤title
    print(ret)

    return HttpResponse('添加成功')
刷新网页,控制台输出:
<QuerySet [{'title': '三国演义'}, {'title': 'python'}]>
多对多查询 (Author 与 Book)
正向查询:关联属性在book表中,所以book对象找出关联作者集合,正向查询
反向查询:关联属性在book表中,所以author对象找出关联书籍,正向查询
因为记录有多条,所以结尾要加.all()
    正向:按字段:authors.all()
book -----------> author
     <-----------
    反向:按表名小写_set().all() 例如:author.obj.book_set().all()
正向查询
举例:查询西游记这本书籍的所有作者的姓名和年龄
def add(request):
    book = Book.objects.filter(title="西游记").first()  # 先找书籍
    ret = book.authors.all().values("name","age")  # 再找作者,过滤name和age
    print(ret)

    return HttpResponse('添加成功')
刷新网页,控制台输出:
<QuerySet [{'age': 25, 'name': 'xiao'}]>
反向查询
举例:查询作者xiao出版过的所有书籍名称
def add(request):
    xiao = Author.objects.filter(name="xiao").first()  # 先找作者
    ret = xiao.book_set.all().values("title")  # 再找书籍,过滤title
    print(ret)

    return HttpResponse('添加成功')
刷新网页,控制台输出:
<QuerySet [{'title': 'python'}, {'title': '西游记'}]>
一对一查询(Author 与 AuthorDetail)
正向查询:关联属性在author表中,所以author对象找出关联作者详细信息对象,正向查询
反向查询:关联属性在book表中,所以author对象找出关联书籍,正向查询
因为记录只有一条,所以直接.ad就可以了。ad是关联字段
    正向:按字段:.ad
author -----------> authordetail
     <-----------
    反向:按表名小写 例如:authordetail_obj.author
正向查询
举例:查询xiao的女朋友的名字
def add(request):
    xiao = Author.objects.filter(name="xiao").first()  # 先找作者
    ret = xiao.ad.gf  # 再找女朋友
    print(ret)

    return HttpResponse('添加成功')
刷新网页,控制台输出:
赵丽颖
反向查询
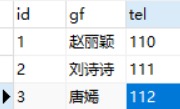
举例:查询手机号为112的作者名字
def add(request):
    phone = AuthorDetail.objects.filter(tel="112").first()  # 先找号码
    ret = phone.author.name  # 再找作者的名字
    print(ret)
刷新网页,控制台输出:
wang
周末作业
基于多表的图书管理系统

注意:出版社和作者,是从数据库中读取的。
作业是复选框,可以选择多个
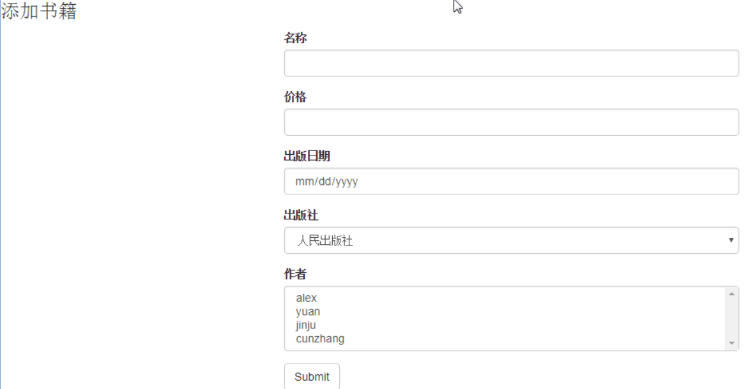
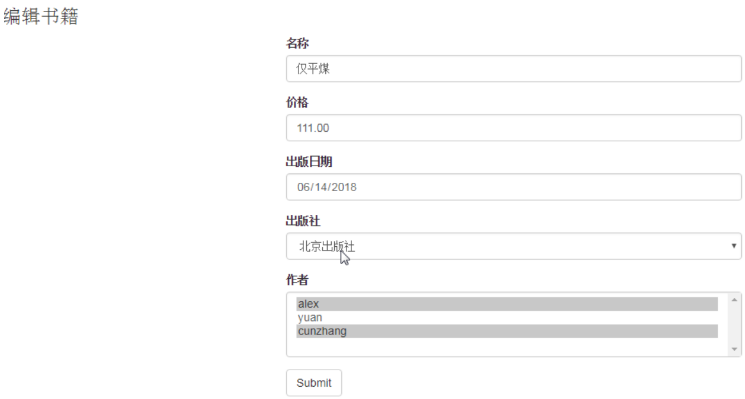
编辑页面,作者一栏的灰色背景。表示现有绑定的作者!
它是选择状,使用selected属性
提示:
视图函数接收复选框的值,需要使用request.POST.getlist()。使用get只能获取一个值!
答案
修改urls.py,添加路径
from django.contrib import admin
from django.urls import path,re_path

from book import views
urlpatterns = [
    path('admin/', admin.site.urls),
    path('', views.index),
    path('index/', views.index),
    path('books/add/', views.add),
    path('books/manage/', views.manage),
    re_path('books/delete/(?P<id>d+)', views.delete),
    re_path('books/modify/(?P<id>d+)', views.modify),
]
修改settings.py
注册app
INSTALLED_APPS = [
    'django.contrib.admin',
    'django.contrib.auth',
    'django.contrib.contenttypes',
    'django.contrib.sessions',
    'django.contrib.messages',
    'django.contrib.staticfiles',
    'book',
]
指定模板路径
TEMPLATES = [
    {
        'BACKEND': 'django.template.backends.django.DjangoTemplates',
        'DIRS': [os.path.join(BASE_DIR, 'templates')],
        'APP_DIRS': True,
        'OPTIONS': {
            'context_processors': [
                'django.template.context_processors.debug',
                'django.template.context_processors.request',
                'django.contrib.auth.context_processors.auth',
                'django.contrib.messages.context_processors.messages',
            ],
        },
    },
]
默认使用sqlite3数据库,有需要的使用其他数据库的,自行更改
指定静态资源路径
STATIC_URL = '/static/'
STATICFILES_DIRS=[
    os.path.join(BASE_DIR,"static")
]
手动创建templates和static目录。
在static目录创建css目录,下载bootstrap 3.3.7的数据包。将将bootstrap.min.css放到css目录
修改models.py
from django.db import models

# Create your models here.
class Book(models.Model):
    title=models.CharField(max_length=32,unique=True)
    price=models.DecimalField(max_digits=8,decimal_places=2,null=True)
    pub_date=models.DateField()
    # 与Publish建立一对多的关系,外键字段建立在多的一方
    publish=models.ForeignKey(to="Publish",to_field="id",on_delete=models.CASCADE)
    # 与Author表建立多对多的关系,ManyToManyField可以建在两个模型中的任意一个,自动创建关系表book_authors
    authors=models.ManyToManyField(to="Author")

class Publish(models.Model):
    name=models.CharField(max_length=32)
    email=models.CharField(max_length=32)
    addr=models.CharField(max_length=32)


class Author(models.Model):
    name=models.CharField(max_length=32)
    age=models.IntegerField()
    # 与AuthorDetail建立一对一的关系
    # ad=models.ForeignKey(to="AuthorDetail",to_field="id",on_delete=models.CASCADE,unique=True)
    ad=models.OneToOneField(to="AuthorDetail",to_field="id",on_delete=models.CASCADE,)


class AuthorDetail(models.Model):
    gf=models.CharField(max_length=32)
    tel=models.CharField(max_length=32)
使用2个命令生成表
python manage.py makemigrations
python manage.py migrate
使用navicat打开sqlite数据库,5个表,添加初始数据
注意修改应用名,因为每个人的应用名不一样!
下面是sql语句:
#作者详情表
INSERT INTO book_authordetail (`id`, `gf`, `tel`) VALUES (1, '赵丽颖',110);
INSERT INTO book_authordetail (`id`, `gf`, `tel`) VALUES (2, '刘诗诗',111);
INSERT INTO book_authordetail (`id`, `gf`, `tel`) VALUES (3, '唐嫣',112);

#作者表

INSERT INTO book_author (`id`, `name`, `age`, `ad_id`) VALUES (1, 'xiao',25,1);
INSERT INTO book_author (`id`, `name`, `age`, `ad_id`) VALUES (2, 'zhang',26,2);
INSERT INTO book_author (`id`, `name`, `age`, `ad_id`) VALUES (3, 'wang',27,3);

#出版社表

INSERT INTO book_publish (`id`, `name`, `email`, `addr`) VALUES (1, '人民教育出版社', 'rm@qq.com', '北京');
INSERT INTO book_publish (`id`, `name`, `email`, `addr`) VALUES (2, '中国农业出版社', 'zg@qq.com', '北京');
INSERT INTO book_publish (`id`, `name`, `email`, `addr`) VALUES (3, '中国林业出版社', 'ly@qq.com', '云南');

#书籍表
INSERT INTO book_book (`id`, `title`, `price`, `pub_date`, `publish_id`) VALUES (1, '西游记',2, '1501-01-23',1);
INSERT INTO book_book (`id`, `title`, `price`, `pub_date`, `publish_id`) VALUES (2, '红楼梦',3, '1715-02-13',2);
INSERT INTO book_book (`id`, `title`, `price`, `pub_date`, `publish_id`) VALUES (3, '三国演义',4, '1330-03-25',3);


#书籍和作者关系表
INSERT INTO book_book_authors (`id`, `book_id`, `author_id`) VALUES (1,1,1);
INSERT INTO book_book_authors (`id`, `book_id`, `author_id`) VALUES (2,2,2);
INSERT INTO book_book_authors (`id`, `book_id`, `author_id`) VALUES (3,3,3);
修改views.py
from django.shortcuts import render,HttpResponse
#导入4个表模型
from book.models import Book,Publish,Author,AuthorDetail

# Create your views here.
def index(request):  #首页
    ret = Book.objects.all().exists()  # 判断表是否有记录
    if ret:
        book_list = Book.objects.all() # 查询表的所有记录
        return render(request, "index.html", {"book_list": book_list})

    else:
        hint = '<script>alert("没有书籍,请添加书籍");window.location.href="/books/add"</script>'
        return HttpResponse(hint)  # js跳转到添加页面

def add(request):  # 添加
    if request.method=="POST":
        # print(request.POST)
        title=request.POST.get("title")
        the_book = Book.objects.filter(title=title).exists()
        if the_book:
            hint = '<script>alert("书籍已存在!不能重复添加");window.location.href="/books/add/"</script>'
            return HttpResponse(hint)  # js跳转到添加页面
        else:
            price=request.POST.get("price")
            pub_date=request.POST.get("pub_date")
            publish_id=request.POST.get("publish_id")
            author_id=request.POST.getlist("author_id")  # 返回列表
            print(title,price,pub_date,publish_id,author_id)
            #先插入书籍
            book = Book.objects.create(title=title, price=price, pub_date=pub_date, publish_id=publish_id)
            #再插入作者
            book.authors.add(*author_id)

            hint = '<script>alert("添加成功");window.location.href="/index/"</script>'
            return HttpResponse(hint)  # js跳转到首页

    #读取所有出版社,过滤出id和name
    publish_list = Publish.objects.all().values("id","name")
    # 读取所有作者,过滤出id和name
    author_list = Author.objects.all().values("id","name")

    return render(request, "add.html", {"publish_list": publish_list,"author_list":author_list})


def delete(request,id):  # 删除
    # 先删除关系表中的作者
    book_ad = Book.objects.filter(id=id).first()
    book_ad.authors.clear()

    # 再删除书籍
    ret = Book.objects.filter(id=id).delete() # 返回元组
    print(ret)

    if ret[0]:  # 取值为1的情况下
        hint = '<script>alert("删除成功");window.location.href="/index/"</script>'
        return HttpResponse(hint)
    else:  # 取值为0的情况下
        hint = '<script>alert("删除失败");window.location.href="/index/"</script>'
        return HttpResponse(hint)

def manage(request):  # 管理页面
    ret = Book.objects.all().exists()
    if ret:
        book_list = Book.objects.all()
        #加载管理页面
        return render(request, "manage.html", {"book_list": book_list})
    else:
        hint = '<script>alert("没有书籍,请添加书籍");window.location.href="/books/add"</script>'
        return HttpResponse(hint)

def modify(request,id):  # 修改
    if request.method == "POST":
        title = request.POST.get("title")
        price = request.POST.get("price")
        pub_date = request.POST.get("pub_date")
        publish_id = request.POST.get("publish_id")
        author_id = request.POST.getlist("author_id")  # 返回列表

        # 先修改书籍
        ret = Book.objects.filter(id=id).update(title=title, price=price, pub_date=pub_date, publish_id=publish_id)
        # 获取当前书籍
        book_ad = Book.objects.filter(id=id).first()
        book_ad.authors.set(author_id)  # 先清空再设置

        if ret:  # 判断返回值为1
            hint = '<script>alert("修改成功");window.location.href="/index/"</script>'
            return HttpResponse(hint)  # js跳转
        else:  # 返回为0
            hint = '<script>alert("修改失败");window.location.href="/index/"</script>'
            return HttpResponse(hint)  # js跳转

    book = Book.objects.get(id=id)  # 默认获取id值
    # print(book)

    # 读取所有出版社,过滤出id和name
    publish_list = Publish.objects.all().values("id", "name")
    # 读取所有作者,过滤出id和name
    author_list = Author.objects.all().values("id", "name")
    the_author = []  # 当前书籍的作者
    for i in book.authors.all():
        the_author.append(i.name)  # 最加到列表中
    print(the_author)

    return render(request, "modify.html", {"book":book,"publish_list": publish_list, "author_list": author_list,"the_author":the_author})
在templates目录新建几个html文件
base.html,这个是所有html的母版文件
<!DOCTYPE html>
<html lang="en">
<head>
    <meta charset="UTF-8">
    {% block title %}
        <title>title</title>
    {% endblock title %}
    {#bootstrap,版本为3.3.7#}
    <link rel="stylesheet" href="/static/css/bootstrap.min.css">
    {#美化复选框#}
    <link rel="stylesheet" href="https://cdn.bootcss.com/awesome-bootstrap-checkbox/0.3.7/awesome-bootstrap-checkbox.css">
    <link href="http://cdn.bootcss.com/font-awesome/4.6.3/css/font-awesome.min.css" rel="stylesheet">
    <style>
        * {
            margin: 0;
            padding: 0;
        }

        .header {
             100%;
            height: 60px;
            background-color: #369;
        }

        .title {

            line-height: 60px;
            color: white;
            font-weight: 100;
            margin-left: 20px;
            font-size: 20px;
        }

        .container {
            margin-top: 20px;
        }

        .table th, .table td {
            text-align: center;
            vertical-align: middle !important;
        }
    </style>
</head>
<body>

<div class="header">
    <p class="title">
        图书管理系统
    </p>
</div>

<div class="container">
    <div class="row">
        <div class="col-md-3">
            <div class="panel panel-danger">
                <div class="panel-heading"><a href="/index/">查看书籍</a></div>
                <div class="panel-body">
                    Panel content
                </div>
            </div>
            <div class="panel panel-success">
                <div class="panel-heading"><a href="/books/add/">添加书籍</a></div>
                <div class="panel-body">
                    Panel content
                </div>
            </div>
            <div class="panel panel-warning">
                <div class="panel-heading"><a href="/books/manage/">管理书籍</a></div>
                <div class="panel-body">
                    Panel content
                </div>
            </div>
        </div>
        <div class="col-md-9">
            {% block content %}

            {% endblock %}
        </div>
    </div>
</div>

</body>
</html>
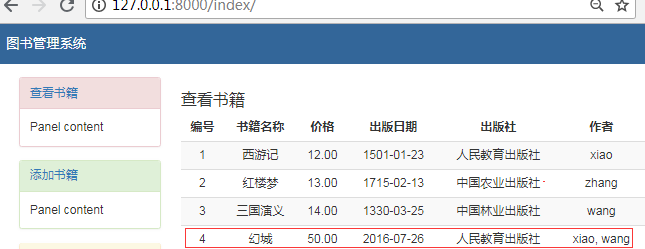
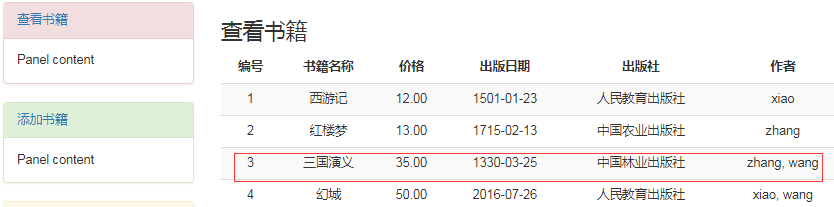
index.html,首页
{% extends 'base.html' %}

{% block title %}

    <title>查看书籍</title>

{% endblock title %}

{% block content %}
    <h3>查看书籍</h3>
    <table class="table table-hover table-striped ">
        <thead>
        <tr>
            <th>编号</th>
            <th>书籍名称</th>
            <th>价格</th>
            <th>出版日期</th>
            <th>出版社</th>
            <th>作者</th>
        </tr>
        </thead>
        <tbody>
        {#遍历所有书籍#}
        {% for book in book_list %}
            <tr>
                <td>{{ book.id }}</td>
                <td>{{ book.title }}</td>
                <td>{{ book.price }}</td>
                <td>{{ book.pub_date|date:"Y-m-d" }}</td>
                <td>{{ book.publish.name }}</td>
                <td>
                    {#遍历所有书籍相关的作者#}
                    {% for j in book.authors.all %}
                        {#使用forloop.last判断,如果如果是最后一个,不增加逗号#}
                        {{ j.name }}{% if not forloop.last %},{% endif %}
                    {% endfor %}
                </td>

            </tr>
        {% endfor %}

        </tbody>
    </table>

{% endblock content %}
add.html,添加页面
{% extends 'base.html' %}

{% block title %}

    <title>添加书籍</title>

{% endblock title %}

{% block content %}
    <h3>添加书籍</h3>
    <form action="" method="post">
        {% csrf_token %}
        <div class="form-group">
            <label for="">书籍名称</label>
            <input type="text" name="title" class="form-control">
        </div>
        <div class="form-group">
            <label for="">价格</label>
            <input type="text" name="price" class="form-control">
        </div>
        <div class="form-group">
            <label for="">出版日期</label>
            <input type="date" name="pub_date" class="form-control">
        </div>
        <div class="form-group">
            <label for="">出版社</label>
            <select name="publish_id" id="" class="form-control">
                {#使用for循环遍历所有出版社#}
                {% for p in publish_list %}
                    {#由于表关系是通过id关联的,所以value值必须是id#}
                    <option value="{{ p.id }}">{{ p.name }}</option>
                {% endfor %}
            </select>

        </div>
        <div class="form-group">
            <label for="">作者</label>
            <ul class="list-group">
                {#使用for循环遍历所有作者#}
                {% for author in author_list %}
                    <li class="list-group-item">
                        <div class="checkbox checkbox-success ">
                            {#由于表关系是通过id关联的,所以value值必须是id#}
                            <input class="styled" type="checkbox" name="author_id" value="{{ author.id }}">
                            <label class="checkbox-inline">
                                {{ author.name }}
                            </label>
                        </div>
                    </li>
                {% endfor %}
            </ul>

        </div>
        <input type="submit" class="btn btn-success pull-right" value="添加">
    </form>

{% endblock content %}
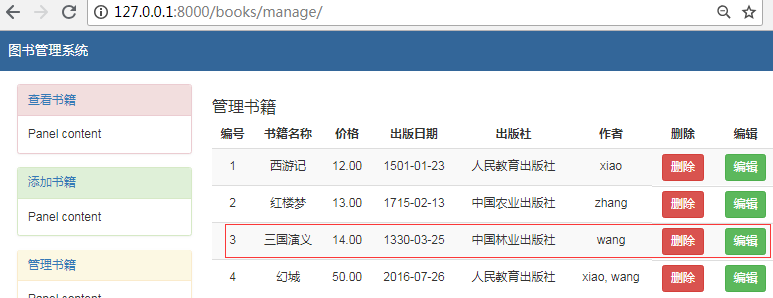
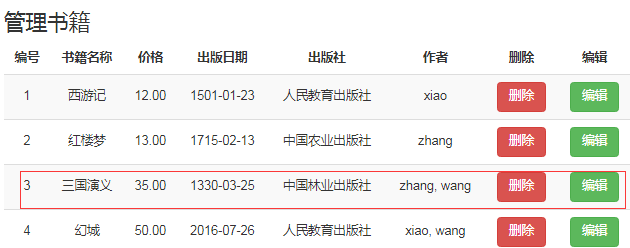
manage.html,管理页面,用来删除和修改的
{% extends 'base.html' %}

{% block title %}

    <title>管理书籍</title>

{% endblock title %}

{% block content %}
    <h3>管理书籍</h3>
    <table class="table table-hover table-striped ">
        <thead>
        <tr>
            <th>编号</th>
            <th>书籍名称</th>
            <th>价格</th>
            <th>出版日期</th>
            <th>出版社</th>
            <th>作者</th>
            <th>删除</th>
            <th>编辑</th>
        </tr>
        </thead>
        <tbody>
        {% for book in book_list %}
            <tr>
                <td>{{ book.id }}</td>
                <td>{{ book.title }}</td>
                <td>{{ book.price }}</td>
                <td>{{ book.pub_date|date:"Y-m-d" }}</td>
                <td>{{ book.publish.name }}</td>
                <td>
                    {#遍历所有书籍相关的作者#}
                    {% for j in book.authors.all %}
                        {#使用forloop.last判断,如果如果是最后一个,不增加逗号#}
                        {{ j.name }}{% if not forloop.last %},{% endif %}
                    {% endfor %}
                </td>
                <td>
                    {#由于表关系是通过id关联的,所以参数必须是id#}
                    <a href="/books/delete/{{ book.id }}">
                        <button type="button" class="btn btn-danger" data-toggle="modal" id="modelBtn">删除</button>
                    </a>
                </td>
                <td>
                    <a href="/books/modify/{{ book.id }}">
                        <button type="button" class="btn btn-success" data-toggle="modal">编辑</button>
                    </a>
                </td>
            </tr>
        {% endfor %}

        </tbody>
    </table>

{% endblock content %}
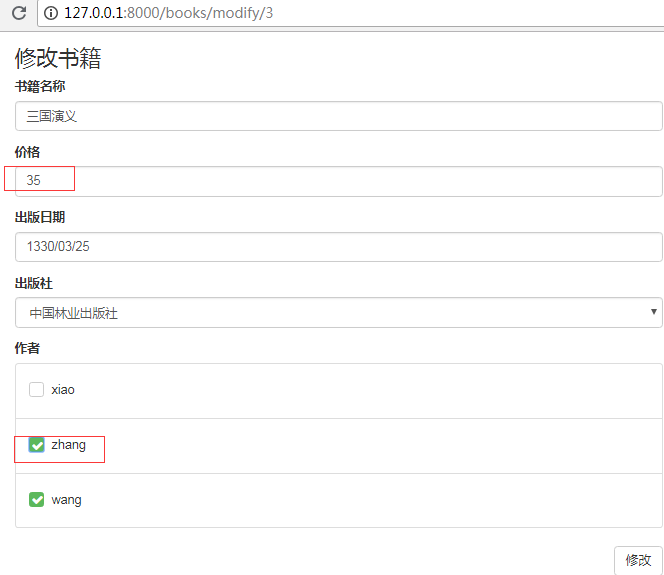
modify.html,修改页面
{% extends 'base.html' %}

{% block title %}

    <title>修改书籍</title>

{% endblock title %}

{% block content %}
    <h3>修改书籍</h3>
    <form action="" method="post">
        {% csrf_token %}
        <div class="form-group">
            <label for="">书籍名称</label>
            <input type="text" name="title" class="form-control" value="{{ book.title }}">
        </div>
        <div class="form-group">
            <label for="">价格</label>
            <input type="text" name="price" class="form-control" value="{{ book.price }}">
        </div>
        <div class="form-group">
            <label for="">出版日期</label>
            <input type="date" name="pub_date" class="form-control" value="{{ book.pub_date|date:"Y-m-d" }}">
        </div>
        <div class="form-group">
            <label for="">出版社</label>
            <select name="publish_id" id="" class="form-control">
                {#遍历所有出版社#}
                {% for p in publish_list %}
                    {#判断当前书籍的出版社id等于出版社表的id时#}
                    {% if book.publish_id == p.id %}
                        {#添加选中状态selected="selected"#}
                        {#由于表关系是通过id关联的,所以value值必须是id#}
                        <option value="{{ p.id }}" selected="selected">{{ p.name }}</option>
                    {% else %}
                        <option value="{{ p.id }}">{{ p.name }}</option>
                    {% endif %}

                {% endfor %}
            </select>
        </div>
        <div class="form-group">
            <label for="">作者</label>
            <ul class="list-group">
                {% for author in author_list %}
                    <li class="list-group-item">
                        <div class="checkbox checkbox-success ">
                            {#判断作者的名字在当前书籍作者列表中#}
                            {% if author.name in the_author %}
                                {#添加选中状态checked="checked"#}
                                {#由于表关系是通过id关联的,所以value值必须是id#}
                                <input class="styled" type="checkbox" checked="checked" name="author_id"
                                       value="{{ author.id }}">
                                <label class="checkbox-inline">{{ author.name }}</label>
                            {% else %}
                                <input class="styled" type="checkbox" name="author_id" value="{{ author.id }}">
                                <label class="checkbox-inline">{{ author.name }}</label>
                            {% endif %}
                        </div>
                    </li>
                {% endfor %}
            </ul>

        </div>
        <input type="submit" class="btn btn-default pull-right" value="修改">
    </form>

{% endblock content %}
项目文件结构如下:
bms_mto
├── bms_mto
│   ├── __init__.py
│   ├── settings.py
│   ├── urls.py
│   └── wsgi.py
├── book
│   ├── admin.py
│   ├── apps.py
│   ├── __init__.py
│   ├── models.py
│   ├── tests.py
│   └── views.py
├── db.sqlite3
├── manage.py
├── static
│   └── css
│       ├── bootstrap.min.css
└── templates
    ├── add.html
    ├── base.html
    ├── index.html
    ├── manage.html
    └── modify.html
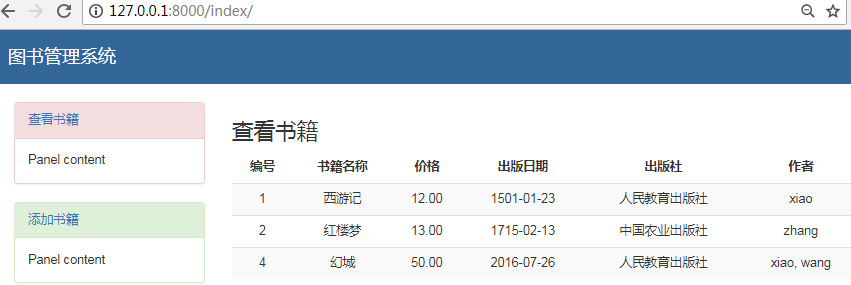
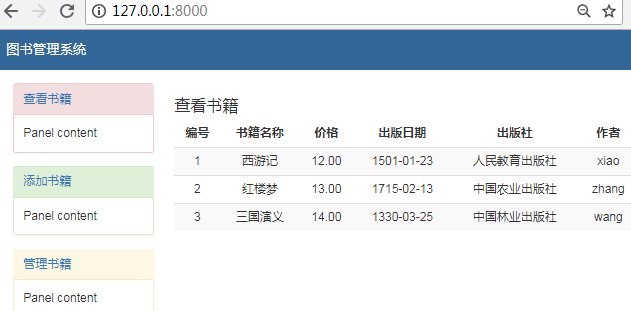
启动项目访问首页:http://127.0.0.1:8000/
点击左侧的添加书籍
添加一本书,选择2个作者
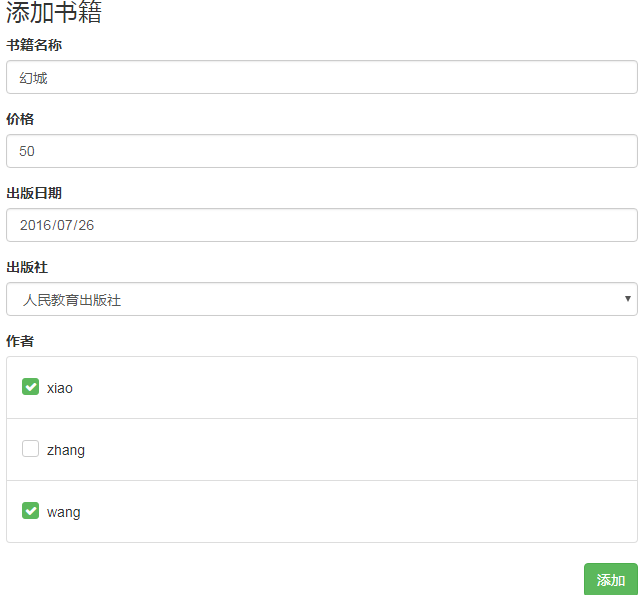
提示添加成功

首页就会多一本书籍
点击编辑按钮
修改价格,增加一个作者
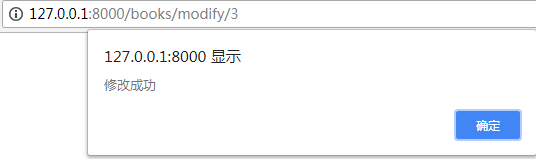
提示修改成功
首页的书籍,价格和作者更新过来了
点击删除
提示删除成功
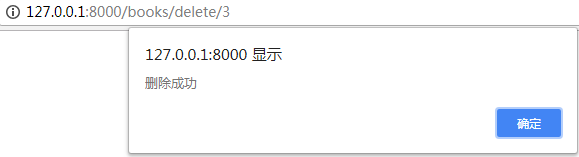
首页少了一条数据