最近用springboot构建rest接口,考虑到最方便的验证接口,想到了引入swagger。
基本步骤如下:
1.pom中引入swagger依赖:
<dependency>
<groupId>io.springfox</groupId>
<artifactId>springfox-swagger2</artifactId>
</dependency>


<dependency>
<groupId>io.springfox</groupId>
<artifactId>springfox-swagger-ui</artifactId>
</dependency>
2.创建swagger的配置类:
/**
 * <Description> <br>
 *
 * @author luoluocaihong<br>
 * @version 1.0<br>
 * @taskId <br>
 * @CreateDate Oct 24, 2016 <br>
 * @since V8.1<br>
 * @see XXXX <br>
 */
@Configuration
@EnableWebMvc
@EnableSwagger2
@ComponentScan(basePackages={"XXXX"})
public class SwaggerConfig{
 /**
     *
     * Description: <br>
     *
     * @author luoluocaihong<br>
     * @taskId <br>
     * @return <br>
     */
ApiInfo apiInfo(){
  return new ApiInfoBuilder()
            .title("XXX Web SelfService APIs")
            .description("")
            .license("")
            .licenseUrl("")
            .termsOfServiceUrl("")
            .version("1.0.0")
            .build();
}
 /**
     *
     * Description: <br>
     *
     * @author luoluocaihong<br>
     * @taskId <br>
     * @return <br>
     */
@Bean
public Docket customImplementation(){
    return new Docket(DocumentationType.SWAGGER_2)
          .select()
          .apis(RequestHanderSelectors.basePackage("XXXX"))
          .build()
.directModelSubstitute(org.joda.time.LocalDate.class,java.sql.Date.class)
.directModelSubstitute(org.joda.time.DateTime.class,java.util.Date.class)
.apiInfo(apiInfo());


}
}
3.添加文档内容
/**
 * <Description> <br>
 *
 * @author luoluocaihong<br>
 * @version 1.0<br>
 * @taskId <br>
 * @CreateDate Jul 2, 2017 <br>
 * @since V8.0<br>
 * @see XXXX <br>
 */
@Api(value = "Rule Cateory")
@RestController
@EnableAutoConfiguration
@RequestMapping(value = "/iot/ruleengine/v1/rulecatg")
public class RuleCateoryController {

    /**
     * 自动注入
     */
    @Autowired
    private RuleCateoryService ruleCateoryService;

    @ApiOperation(value = "Query Rule Category and rule", notes = "Query Rule Category and rule",
        response = RuleCatgObj.class, tags = {"Rule Cateory" })
    @RequestMapping(value = "", produces = {"application/json" }, method = RequestMethod.GET)
    @ResponseStatus(value = HttpStatus.OK)
    @ResponseBody
    public RuleCatgObj QueryRuleCategoryAndRule() {
        RuleCatgObj ruleCatgObj = ruleCateoryService.queryRuleCategoryAndRule();
        return ruleCatgObj;
    }
}
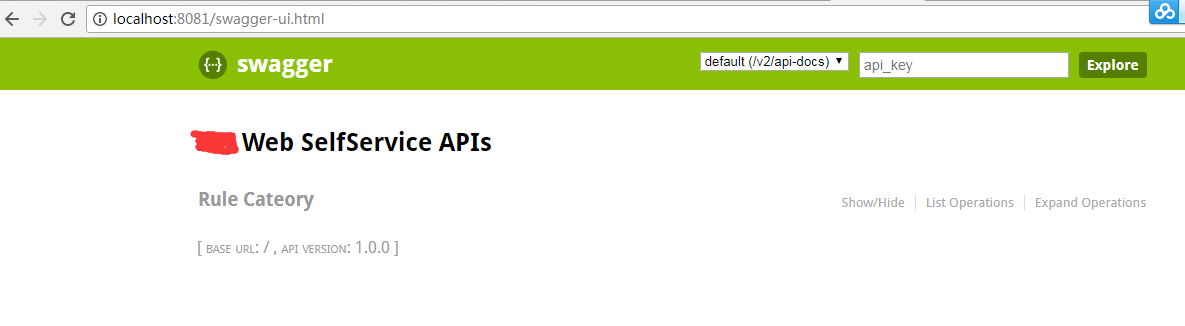
4.启动springboot,访问http://localhost:8081/swagger-ui.html
会发现页面显示报错:

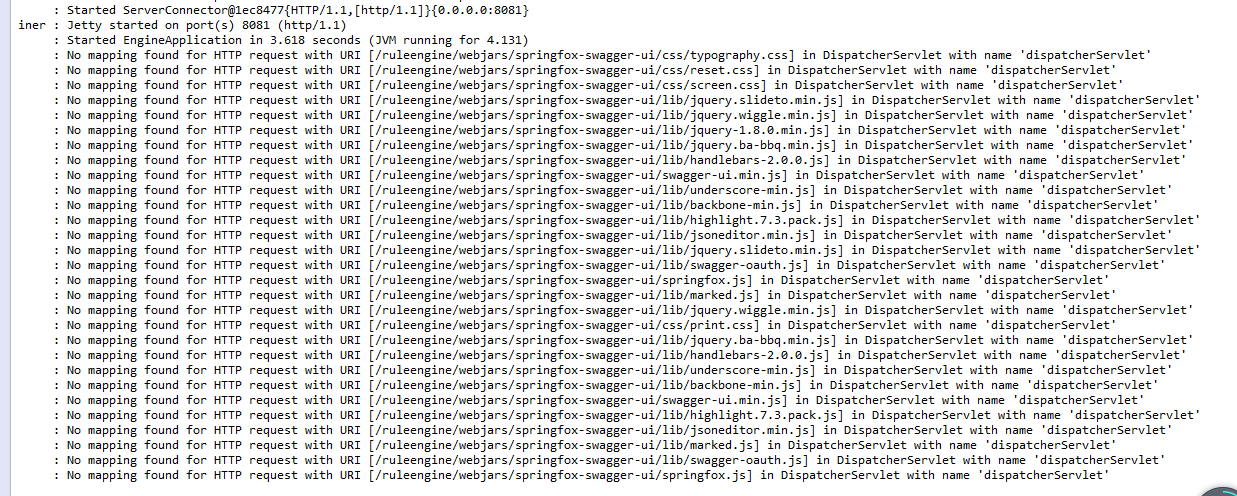
后台报错:
2017-07-02 15:56:51.988 WARN 7176 --- [ qtp20577666-17] o.s.web.servlet.PageNotFound : No mapping found for HTTP request with URI [/swagger-ui.html] in DispatcherServlet with name 'dispatcherServlet'
想一下swagger-ui.html 是在springfox-swagger-ui.jar里的

如何才能让我们能访问到swagger-ui.html???
【百度到,MARK http://www.jianshu.com/p/840320d431a1】
Spring Boot自动配置本身不会自动把/swagger-ui.html这个路径映射到对应的目录META-INF/resources/下面。我们加上这个映射即可。
@Configuration
public class WebMVCConfig extens WebMvcConfigureAdapter{
@Override
  public void addResourceHanders(ResourceHanderRegistry registry){
   registry.addResourceHandler("swagger-ui.html")
              .addResourceLocations("classpath:/META-INF/resources/");
 registry.addResourceHandler("/webjars/**")
                 .addResourceLocations("classpath:/META-INF/resources/webjars/");
 }
}
再次启动springboot,访问http://localhost:8081/swagger-ui.html,OK:
将默认访问路径“/”修改为“/ruleengine” ,如果不加上下面这段代码,访问将有问题:
registry.addResourceHandler("/webjars/**")
                 .addResourceLocations("classpath:/META-INF/resources/webjars/");

参照来源:https://www.cnblogs.com/luoluocaihong/p/7106276.html