应用程序通过使用客户端凭据授权,请求访问令牌以访问其自己的资源,而不是代表用户
oauth
https://www.oauth.com/oauth2-servers/access-tokens/client-credentials/
请求参数
grant_type
必填,grant_type 参数必须设置为client_credentials。
scope
可选,服务可以支持客户端凭据授予的不同范围。
客户端身份验证
必须的,客户端需要对此请求进行身份验证,通常该服务将允许附加请求参数 client_id 和 client_secret ,或接受HTTP Basic auth 标头中的客户端和机密。
示例
--请求地址
POST /token HTTP/1.1
Host: authorization-server.com
--参数
grant_type=client_credentials
&client_id=xxxxxxxxxx
&client_secret=xxxxxxxxxx
实现client credentials
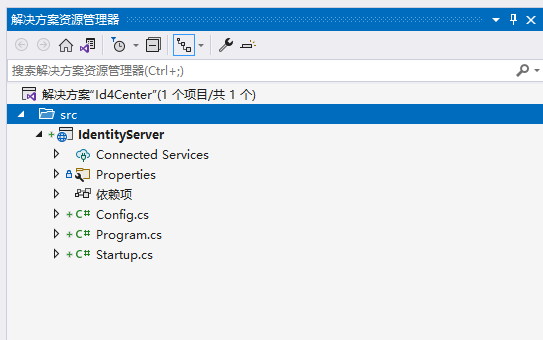
创建解决方案
# 创建存放解决方案的目录
md Id4Center
# 进入目录 通过 .net cli 创建解决方案
cd Id4Center
dotnet new sln -n Id4Center
使用identityserver is4empty 模板创建 一个asp.net core web app
# 存放项目的目录
md src
cd src
# 使用 is4empty 创建项目
dotnet new is4empty -n IdentityServer
# 返回到Id4Center 目录,将 IdentityServer 项目添加到解决文件中
cd ..
dotnet  sln add  .\src\IdentityServer\IdentityServer.csproj
使用IDE打开Id4Center.sln文件
定义要保护的API范围
API 是系统中需要进行保护的资源。
资源定义可以通过多种方式加载,如代码,配置文件,数据库等方式 Is4empty使用代码即配置方法。
打开Config.cs文件 ApiScopes 方法就是存放要保护的api 资源,将代码更新为如下所示:
        public static IEnumerable<ApiScope> ApiScopes =>
            new ApiScope[]
            {
                new ApiScope()
                {
                    Name="api1",
                    DisplayName="My API"
                },
             new ApiScope()
                {
                    Name="api2",
                    DisplayName="My API"
                }
            };
添加客户端
将ClientId和ClientSecret 视为应用程序本身的登录名和密码它向身份服务器标识您的应用程序,以便它知道那个应用程序正在尝试连接到它。
public static IEnumerable<Client> Clients =>
new List<Client>
{
new Client
{
ClientId = "client",
// 没有交互式用户,使用 clientid/secret 进行身份验证
AllowedGrantTypes = GrantTypes.ClientCredentials,
// 身份验证的密钥
ClientSecrets =
{
new Secret("secret".Sha256())
},
// 有权访问的范围
AllowedScopes = { "api1","api2" }
}
};配置服务
public void ConfigureServices(IServiceCollection services)
{
    var builder = services.AddIdentityServer()
        .AddDeveloperSigningCredential()//没有要使用的证书时,这仅适用于开发方案。
        .AddInMemoryApiScopes(Config.ApiScopes)//api
        .AddInMemoryClients(Config.Clients);//client
}运行服务器并将浏览器导航到https://localhost:5001/.well-known/openid-configuration,会看到所谓的发现文档。发现文档是身份服务器中的标准端点.
{
issuer: "https://localhost:5001",
jwks_uri: "https://localhost:5001/.well-known/openid-configuration/jwks",
//授权端点
authorization_endpoint: "https://localhost:5001/connect/authorize",
//token端点
token_endpoint: "https://localhost:5001/connect/token",
//用户信息端点
userinfo_endpoint: "https://localhost:5001/connect/userinfo",
end_session_endpoint: "https://localhost:5001/connect/endsession",
check_session_iframe: "https://localhost:5001/connect/checksession",
revocation_endpoint: "https://localhost:5001/connect/revocation",
introspection_endpoint: "https://localhost:5001/connect/introspect",
device_authorization_endpoint: "https://localhost:5001/connect/deviceauthorization",
frontchannel_logout_supported: true,
frontchannel_logout_session_supported: true,
backchannel_logout_supported: true,
backchannel_logout_session_supported: true,
//受保护的api
scopes_supported: [
"api1",
"offline_access"
],
claims_supported: [ ],
//授予类型
grant_types_supported: [
"authorization_code",
"client_credentials",
"refresh_token",
"implicit",
"urn:ietf:params:oauth:grant-type:device_code"
],
//响应类型
response_types_supported: [
"code",
"token",
"id_token",
"id_token token",
"code id_token",
"code token",
"code id_token token"
],
//响应模式
response_modes_supported: [
"form_post",
"query",
"fragment"
],
token_endpoint_auth_methods_supported: [
"client_secret_basic",
"client_secret_post"
],
id_token_signing_alg_values_supported: [
"RS256"
],
//主题类型
subject_types_supported: [
"public"
],
code_challenge_methods_supported: [
"plain",
"S256"
],
//请求参数支持
request_parameter_supported: true
}
添加API项目
# 进入 src
cd src
# 创建 webapi项目
dotnet new webapi -n Api
# 返回到Id4Center目录
cd ..
# 将Api项目添加到解决方案
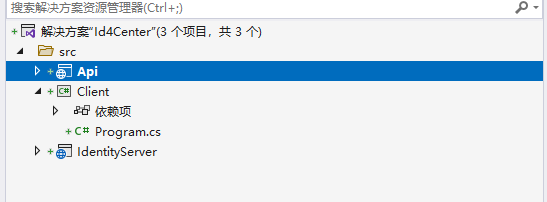
dotnet sln add .\src\Api\Api.csprojIDE 中多出Api项目

创建IdentityServer控制器添加Get方法
    [Route("api/[controller]/[action]")]
    [ApiController]
    //授权
    [Authorize]
    public class IdentityServerController : ControllerBase
    {
        [HttpGet]
        public IActionResult Get()
        {
            return new JsonResult(from c in User.Claims select new { c.Type, c.Value });
        }
    }
配置授权服务
安装nuget包
Microsoft.AspNetCore.Authentication.JwtBearer将Authentication注入DI和管道
builder.Services.AddAuthentication("Bearer")
.AddJwtBearer("Bearer", options =>
{
options.Authority = "https://localhost:5001";
options.TokenValidationParameters = new TokenValidationParameters
{
ValidateAudience = false
};
}); app.UseAuthentication();
app.UseAuthorization();启动服务
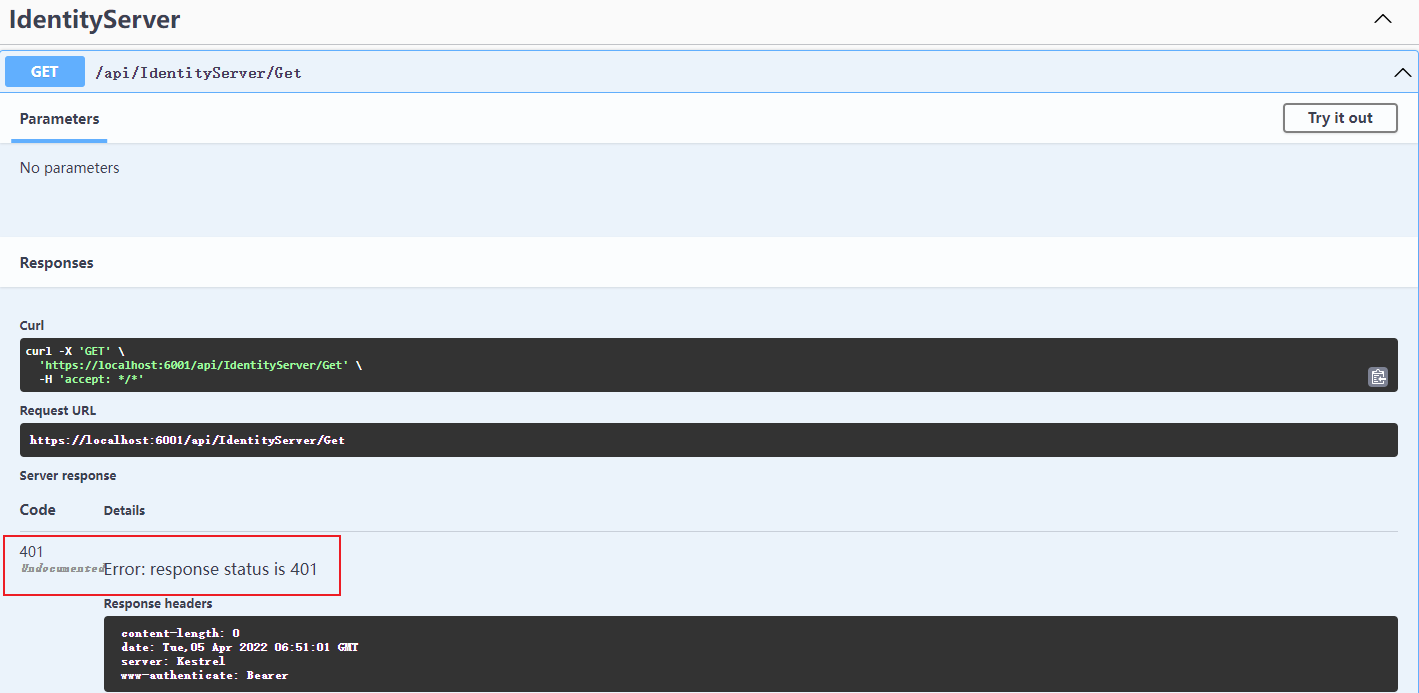
调用https://localhost:6001/api/IdentityServer/Get应返回 401 状态代码。这意味着您的 API 需要凭据,并且现在受 IdentityServer 保护。
创建客户端
创建一个控制台程序用来请求令牌,并通过令牌访问资源
# 进入src目录
cd src
# 创建控制台项目
dotnet new console -n Client
# 切换到Id4Center 目录
cd ..
# 添加到解决方案中
dotnet sln add .\src\Client\Client.csproj
IDE 中多出Client项目
实现客户端功能
IdentityServer 的令牌端点实现了 OAuth 2.0 协议,您可以使用原始 HTTP 来访问它。
通过添加nuget包 IdentityModel进行访问
添加Nuget包
IdentityModel
Identityserver 基地址
IdentityModel 包括一个与发现端点一起使用的客户端库。这样您只需要知道 IdentityServer 的基地址 - 可以从元数据中读取实际的端点地址:
var client = new HttpClient();
// 从元数据发现端点
var disco = await client.GetDiscoveryDocumentAsync("https://localhost:5001");
if (disco.IsError)
{
    Console.WriteLine(disco.Error);
    return;
}
请求Token
// 请求 Token
var tokenResponse = await client.RequestClientCredentialsTokenAsync(new ClientCredentialsTokenRequest
{
Address = disco.TokenEndpoint,
ClientId = "client",
ClientSecret = "secret",
Scope = "api1"
});
if (tokenResponse.IsError)
{
Console.WriteLine(tokenResponse.Error);
return;
}// 访问资源Api
var apiClient = new HttpClient();
apiClient.SetBearerToken(tokenResponse.AccessToken);
var response = await apiClient.GetAsync("https://localhost:6001/api/IdentityServer/Get");
if (!response.IsSuccessStatusCode)
{
Console.WriteLine(response.StatusCode);
}
else
{
var content = await response.Content.ReadAsStringAsync();
Console.WriteLine(JArray.Parse(content));
}
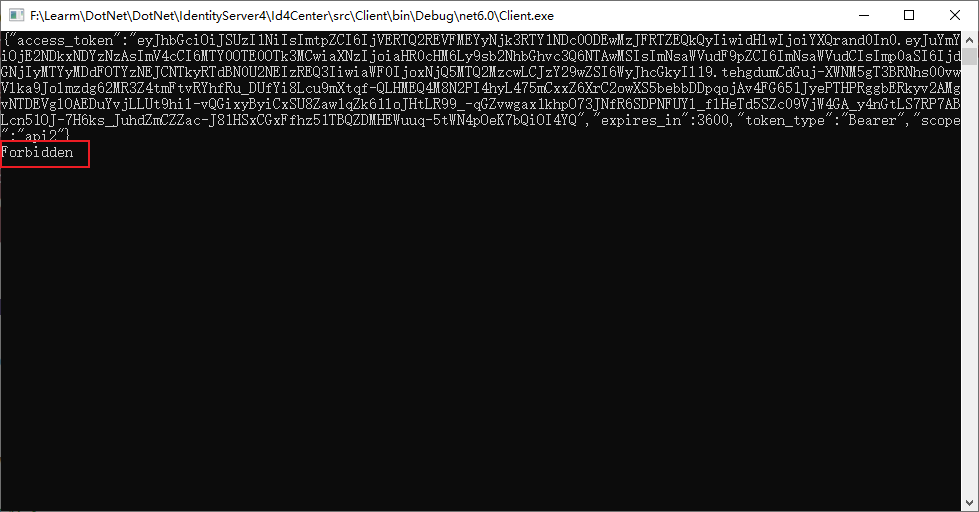
Console.ReadKey();{"access_token":"eyJhbGciOiJSUzI1NiIsImtpZCI6IjVERTQ2REVFMEYyNjk3RTY1NDc0ODEwMzJFRTZEQkQyIiwidHlwIjoiYXQrand0In0.eyJuYmYiOjE2NDkxNDQ3NzcsImV4cCI6MTY0OTE0ODM3NywiaXNzIjoiaHR0cHM6Ly9sb2NhbGhvc3Q6NTAwMSIsImNsaWVudF9pZCI6ImNsaWVudCIsImp0aSI6IkFBRkRDMzA1OTE4Q0M3NEQ0MDFFRUM5RkI1RUE2QjZEIiwiaWF0IjoxNjQ5MTQ0Nzc3LCJzY29wZSI6WyJhcGkxIl19.sIsQtJ5AsAT-amzKGKaL21qTkR7OM-TT20XrjMLnQV-pcn1kH5-WbDXFxblv0ndL_JyCgkhL4hemu16-4S8Yufrn3ZM4A5i9w3_Zv6IKPBj5ycNVlrU76Ij6NKpeN7rDLiYD81zQ3sQcSIr2M8rQA2kR7d_oLYm-Dz1Vv3yGSAK46TGNyxFHpzenjLnqrZazFkk-uNLVZVbsz6WQr2TfOKG7xf7TbBN8ZoVjzZZcvV_PA2WVu0IeWoQfA_4F0gTWFTMtlIMUuJao8BdKKSJtaVMzzzpRX_4zoWn9-aFKP72FdO_pu7Ul0EUpf_eyM9nG43PHNIUhkIaOp7NH6lX1Fw","expires_in":3600,"token_type":"Bearer","scope":"api1"}
[
{
"type": "nbf",
"value": "1649144777"
},
{
"type": "exp",
"value": "1649148377"
},
{
"type": "iss",
"value": "https://localhost:5001"
},
{
"type": "client_id",
"value": "client"
},
{
"type": "jti",
"value": "AAFDC305918CC74D401EEC9FB5EA6B6D"
},
{
"type": "iat",
"value": "1649144777"
},
{
"type": "scope",
"value": "api1"
}
]api 授权
目前 API 接受您的身份服务器发出的任何访问令牌。
上面定义的ApiScopes和Clients 中的api1和api2都可以在客户端中使用
var tokenResponse = await client.RequestClientCredentialsTokenAsync(new ClientCredentialsTokenRequest
{
Address = disco.TokenEndpoint,
ClientId = "client",
ClientSecret = "secret",
Scope = "api1 api2"
});
下面将使用 ASP.NET Core 授权策略系统,添加允许检查客户端请求(并被授予)的访问令牌中是否存在范围的代码。
在Api 项目DI中注入
builder.Services.AddAuthorization(options =>
{
    options.AddPolicy("ApiScope", policy =>
    {
        policy.RequireAuthenticatedUser();
        policy.RequireClaim("scope", "api1");
    });
});
可以在各个级别执行此策略
-
globally
-
for all API endpoints
-
for specific controllers/actions
为路由系统中的所有 API 端点设置策略:
app.UseEndpoints(endpoints =>
{
    endpoints.MapControllers()
        .RequireAuthorization("ApiScope");
});
现在只能api1 才能访问api资源了,api2 会返回 Forbidden
var tokenResponse = await client.RequestClientCredentialsTokenAsync(new ClientCredentialsTokenRequest
{
Address = disco.TokenEndpoint,
ClientId = "client",
ClientSecret = "secret",
//Scope = "api1"
Scope = "api2" //Forbidden
});