Hibernate 入门
1. 什么是hibernate
ORM框架/持久层框架
jdbc的一个框架
object reference mapping
通过管理对象来改变数据库中的数据
通过管理对象来操作数据库
mybatis
优势:跨数据库的无缝移植
2. 如何在项目中添加hibernate支持(手动添加)
在pom.xml添加hibernate相关依赖
 1   <properties>
 2         <project.build.sourceEncoding>UTF-8</project.build.sourceEncoding>
 3         <maven.compiler.source>1.8</maven.compiler.source>
 4         <maven.compiler.target>1.8</maven.compiler.target>
 5         <junit.version>4.12</junit.version>
 6         <servlet.version>4.0.0</servlet.version>
 7         <hibernate.version>5.3.0.Final</hibernate.version>
 8         <mysql.driver.version>5.1.46</mysql.driver.version>
 9     </properties>
10   <dependencies>
11     <dependency>
12             <groupId>junit</groupId>
13             <artifactId>junit</artifactId>
14             <version>${junit.version}</version>
15             <scope>test</scope>
16         </dependency>
17
18         <dependency>
19             <groupId>javax.servlet</groupId>
20             <artifactId>javax.servlet-api</artifactId>
21             <version>${servlet.version}</version>
22             <scope>provided</scope>
23         </dependency>
24
25         <dependency>
26             <groupId>org.hibernate</groupId>
27             <artifactId>hibernate-core</artifactId>
28             <version>${hibernate.version}</version>
29         </dependency>
30
31         <dependency>
32             <groupId>mysql</groupId>
33             <artifactId>mysql-connector-java</artifactId>
34             <version>${mysql.driver.version}</version>
35         </dependency>
36         <dependency>
37             <groupId>org.apache.tomcat</groupId>
38             <artifactId>tomcat-jsp-api</artifactId>
39             <version>8.0.47</version>
40         </dependency>
41   </dependencies>
42   <build>
43     <finalName>hibernate1</finalName>
44     <plugins>
45             <plugin>
46                 <groupId>org.apache.maven.plugins</groupId>
47                 <artifactId>maven-compiler-plugin</artifactId>
48                 <version>3.7.0</version>
49                 <configuration>
50                     <source>${maven.compiler.source}</source>
51                     <target>${maven.compiler.target}</target>
52                     <encoding>${project.build.sourceEncoding}</encoding>
53                 </configuration>
54             </plugin>
55         </plugins>
56   </build>
在resource目录下添加hibernate.cfg.xml(核心配置文件)
 1 <?xml version="1.0" encoding="UTF-8"?>
 2 <!DOCTYPE hibernate-configuration PUBLIC
 3     "-//Hibernate/Hibernate Configuration DTD 3.0//EN"
 4     "http://www.hibernate.org/dtd/hibernate-configuration-3.0.dtd">
 5     <hibernate-configuration>
 6        <session-factory>
 7        <!-- 1. 数据库相关 -->
 8         <property name="connection.username">root</property>
 9         <property name="connection.password">123</property>
10         <property name="connection.url">jdbc:mysql://localhost:3306/sys?useUnicode=true&characterEncoding=UTF-8
11         </property>
12         <property name="connection.driver_class">com.mysql.jdbc.Driver</property>
13         <property name="dialect">org.hibernate.dialect.MySQLDialect</property>
14
15         <!-- 配置本地事务(No CurrentSessionContext configured!) -->
16         <property name="hibernate.current_session_context_class">thread</property>
17
18         <!-- 2. 调试相关 -->
19         <property name="show_sql">true</property>
20         <property name="format_sql">true</property>
21
22         <!-- 3. 添加实体映射文件 -->
23         <mapping resource="com/MavenHidernate/entity/User.hbm.xml"/>
24        </session-factory>
25     </hibernate-configuration>
创建实体类和实体映射文件(*.hbm.xml)
创建实体类User
 1 package com.MavenHidernate.entity;
 2
 3 import java.sql.Date;
 4 import java.sql.Timestamp;
 5
 6 public class User {
 7     private Integer id;
 8     private String userName;
 9     private String userPwd;
10     private String realName;
11     private String sex;
12     private Date birthday;
13     private Timestamp createDatetime;
14     private String remark;
15     public Integer getId() {
16         return id;
17     }
18     public void setId(Integer id) {
19         this.id = id;
20     }
21     public String getUserName() {
22         return userName;
23     }
24     public void setUserName(String userName) {
25         this.userName = userName;
26     }
27     public String getUserPwd() {
28         return userPwd;
29     }
30     public void setUserPwd(String userPwd) {
31         this.userPwd = userPwd;
32     }
33     public String getRealName() {
34         return realName;
35     }
36     public void setRealName(String realName) {
37         this.realName = realName;
38     }
39     public String getSex() {
40         return sex;
41     }
42     public void setSex(String sex) {
43         this.sex = sex;
44     }
45     public Date getBirthday() {
46         return birthday;
47     }
48     public void setBirthday(Date birthday) {
49         this.birthday = birthday;
50     }
51     public Timestamp getCreateDatetime() {
52         return createDatetime;
53     }
54     public void setCreateDatetime(Timestamp createDatetime) {
55         this.createDatetime = createDatetime;
56     }
57     public String getRemark() {
58         return remark;
59     }
60     public void setRemark(String remark) {
61         this.remark = remark;
62     }
63     @Override
64     public String toString() {
65         return "User [id=" + id + ", userName=" + userName + ", userPwd=" + userPwd + ", realName=" + realName
66                 + ", sex=" + sex + ", birthday=" + birthday + ", createDatetime=" + createDatetime + ", remark="
67                 + remark + "]";
68     }
69     public User(String userName, String userPwd, String realName, String sex, Date birthday,
70             Timestamp createDatetime, String remark) {
71         super();
72         this.userName = userName;
73         this.userPwd = userPwd;
74         this.realName = realName;
75         this.sex = sex;
76         this.birthday = birthday;
77         this.createDatetime = createDatetime;
78         this.remark = remark;
79     }
80     public User() {
81         super();
82         // TODO Auto-generated constructor stub
83     }
84
85 }<br>
创建实体映射文件(*.hbm.xml)
实体映射文件必须与实体类中的属性一一对应
 1 <?xml version="1.0" encoding="UTF-8"?>
 2 <!DOCTYPE hibernate-mapping PUBLIC
 3     "-//Hibernate/Hibernate Mapping DTD 3.0//EN"
 4     "http://www.hibernate.org/dtd/hibernate-mapping-3.0.dtd">
 5 <hibernate-mapping>
 6 <!--
 7 class标签中的 name:实体类的全路径名   table:实体类对应的数据库表
 8 id标签:name:实体类中的属性(映射的是表的主键)
 9        type:属性对应的类型
10        column:属性对应该=的表中的那个列段
11 property
12        name:实体类中的属性(映射的是表的非主键)
13        type:属性对应的类型
14        column:属性对应该=的表中的那个列段
15  List list = session.createQuery("from User").list();
16  为什么我们可以得出一个list集合
17  1,建模hibernate.cfg.xml对象 从中拿到了com/zl/one/entity/User.hbm.xml
18  2,建模了User.hbm.xml这个文件拿到了com.zl.one.entity.User拿到了它并且拿到t_hibernate_user
19  3.User user=class.forName("com.zl.one.entity.User").newInstance();
20  拿到User对象 然后Fild  f=euser.getClass("userName");
21   select user_name,user_pwd,... from t_hibernate_user
22
23 Fild  userNameFild=user.getClass("userName");
24 Fild userPwdFild=user.getClass("userpwd");
25 13  xxx 123456  xxx 1   2018-11-17 00:00:00 2018-11-17 09:48:48 xxx
26 14  精华  123456  金燕  女       2018-11-18 09:24:38 开小差
27
28 UserNameField.set(user,精华)
29 UserPwdField.set(user,123456)
30 最后user中的所有属性之都有了
31 4.循环上一步操作,最终所有user实咧都放入list集合中List list
32  -->
33
34  <class name="com.MavenHibernate.one.entity.User" table="t_hibernate_user">
35         <id name="id" type="java.lang.Integer" column="id">
36             <generator class="increment" />
37         </id>
38         <property name="userName" type="java.lang.String" column="user_name">
39         </property>
40         <property name="userPwd" type="java.lang.String" column="user_pwd">
41         </property>
42         <property name="realName" type="java.lang.String" column="real_name">
43         </property>
44         <property name="sex" type="java.lang.String" column="sex">
45         </property>
46         <property name="birthday" type="java.sql.Date" column="birthday">
47         </property>
48         <property insert="false" update="false" name="createDatetime"
49             type="java.sql.Timestamp" column="create_datetime">
50         </property>
51         <property name="remark" type="java.lang.String" column="remark">
52         </property>
53     </class>
54
55 </hibernate-mapping>
hibernate.cfg.xml(1)/*.hbm.xml(N)
实体映射文件一定要加到核心配置文件
使用hibernate完成CRUD操作
1.对hibernate.cfg.xml进行建模拿到sessionfactory工厂(两步)
3.通过工厂获取到session对话(操作数据库)
4.获取事务对象
5.直接操作数据库
6.提交事务
7. 关闭资源
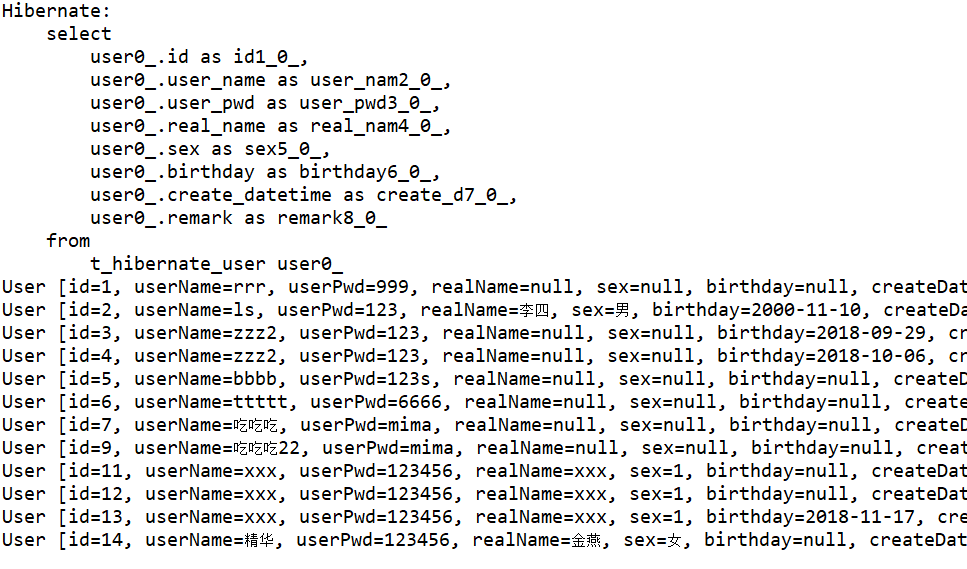
查询
QueryDemo
 1 public class QueryDemo {
 2
 3     public static void main(String[] args) {
 4         //对hibernate.cfg.xml进行建模拿到sessionfactory工厂(两步)
 5         Configuration configure = new Configuration().configure("/hibernate.cfg.xml");
 6         SessionFactory sessionFactory = configure.buildSessionFactory();
 7         //通过工厂获取到session会话(操作数据库的)
 8         Session session = sessionFactory.openSession();
 9         //直接操作数据库
10         List list = session.createQuery("from User").list();
11         for (Object obj : list) {
12             System.out.println(obj);
13         }
14         //关闭数据库
15         session.close();
16     }
新增
AddDemo
 1 public class AddDemo {
 2
 3     public static void main(String[] args) {
 4         //对hibernate.cfg.xml进行建模拿到sessionfactory工厂(两步)
 5         Configuration configure = new Configuration().configure("/hibernate.cfg.xml");
 6         SessionFactory sessionFactory = configure.buildSessionFactory();
 7         //通过工厂获取到session会话(操作数据库的)
 8         Session session = sessionFactory.openSession();
 9         //获取事务对象
10         Transaction Transaction = session.beginTransaction();
11         //直接操作数据库
12         session.save(new User("xfq", "123456","王五", "男", new Date(System.currentTimeMillis()),new Timestamp(System.currentTimeMillis()), "暂无介绍"));
13         //提交事务
14         Transaction.commit();
15         //关闭数据库
16         session.close();
17     }
   }
修改
EditDemo
 1 public class EditDemo {
 2
 3     public static void main(String[] args) {
 4         //对hibernate.cfg.xml进行建模拿到sessionfactory工厂(两步)
 5         Configuration configure = new Configuration().configure("/hibernate.cfg.xml");
 6         SessionFactory sessionFactory = configure.buildSessionFactory();
 7         //通过工厂获取到session会话(操作数据库的)
 8         Session session = sessionFactory.openSession();
 9         //获取事务对象
10         Transaction Transaction = session.beginTransaction();
11         //直接操作数据库
12         User user = new User("jt2", "123456","王五2", "男", new Date(System.currentTimeMillis()),new Timestamp(System.currentTimeMillis()), "暂无介绍2");
13         user.setId(15);
14         session.update(user);
15 //        User user = session.get(User.class,15);
16 //        System.out.println(user);
17 //        user.setRealName("jt3");
18
19         //提交事务
20         Transaction.commit();
21         //关闭数据库
22         session.close();
23     }
24 }
删除
DelDemo
 1 public class DelDemo {
 2
 3     public static void main(String[] args) {
 4         //对hibernate.cfg.xml进行建模拿到sessionfactory工厂(两步)
 5         Configuration configure = new Configuration().configure("/hibernate.cfg.xml");
 6         SessionFactory sessionFactory = configure.buildSessionFactory();
 7         //通过工厂获取到session会话(操作数据库的)
 8         Session session = sessionFactory.openSession();
 9         //获取事务对象
10         Transaction Transaction = session.beginTransaction();
11         //直接操作数据库
12         User user=new User();
13         user.setId(15);
14         session.delete(user);
15         //提交事务
16         Transaction.commit();
17         //关闭数据库
18         session.close();
19     }
20 }