需要掌握知识python,opencv和机器学习一类的基础
过一段时间代码上传github,本人菜j一个,虽然是我自己写的,也有好多不懂,或者我这就是错误方向
链接:https://pan.baidu.com/s/15IK5RWrRAr_wNLFreuK7VQ 提取码:ykkn
人脸识别的步骤:
人脸检测
    haar人脸检测,
    lbp人脸检测
特征处理
    图片大小尺寸统一
    彩色灰度转换
    图片编成一维矩阵
特征提取处理
    归一化
    特征选择-删除低方差的特征
    分析进行特征降维
    训练集与测试集以一定比例数据分割
预测与训练
    朴素贝叶斯算法的预测
    决策树进行预测
    K-近邻预测
    得出准确率
程序运行:自己安装调用的库
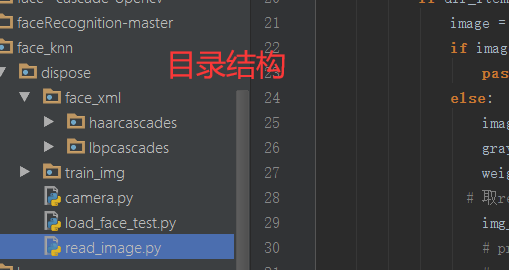
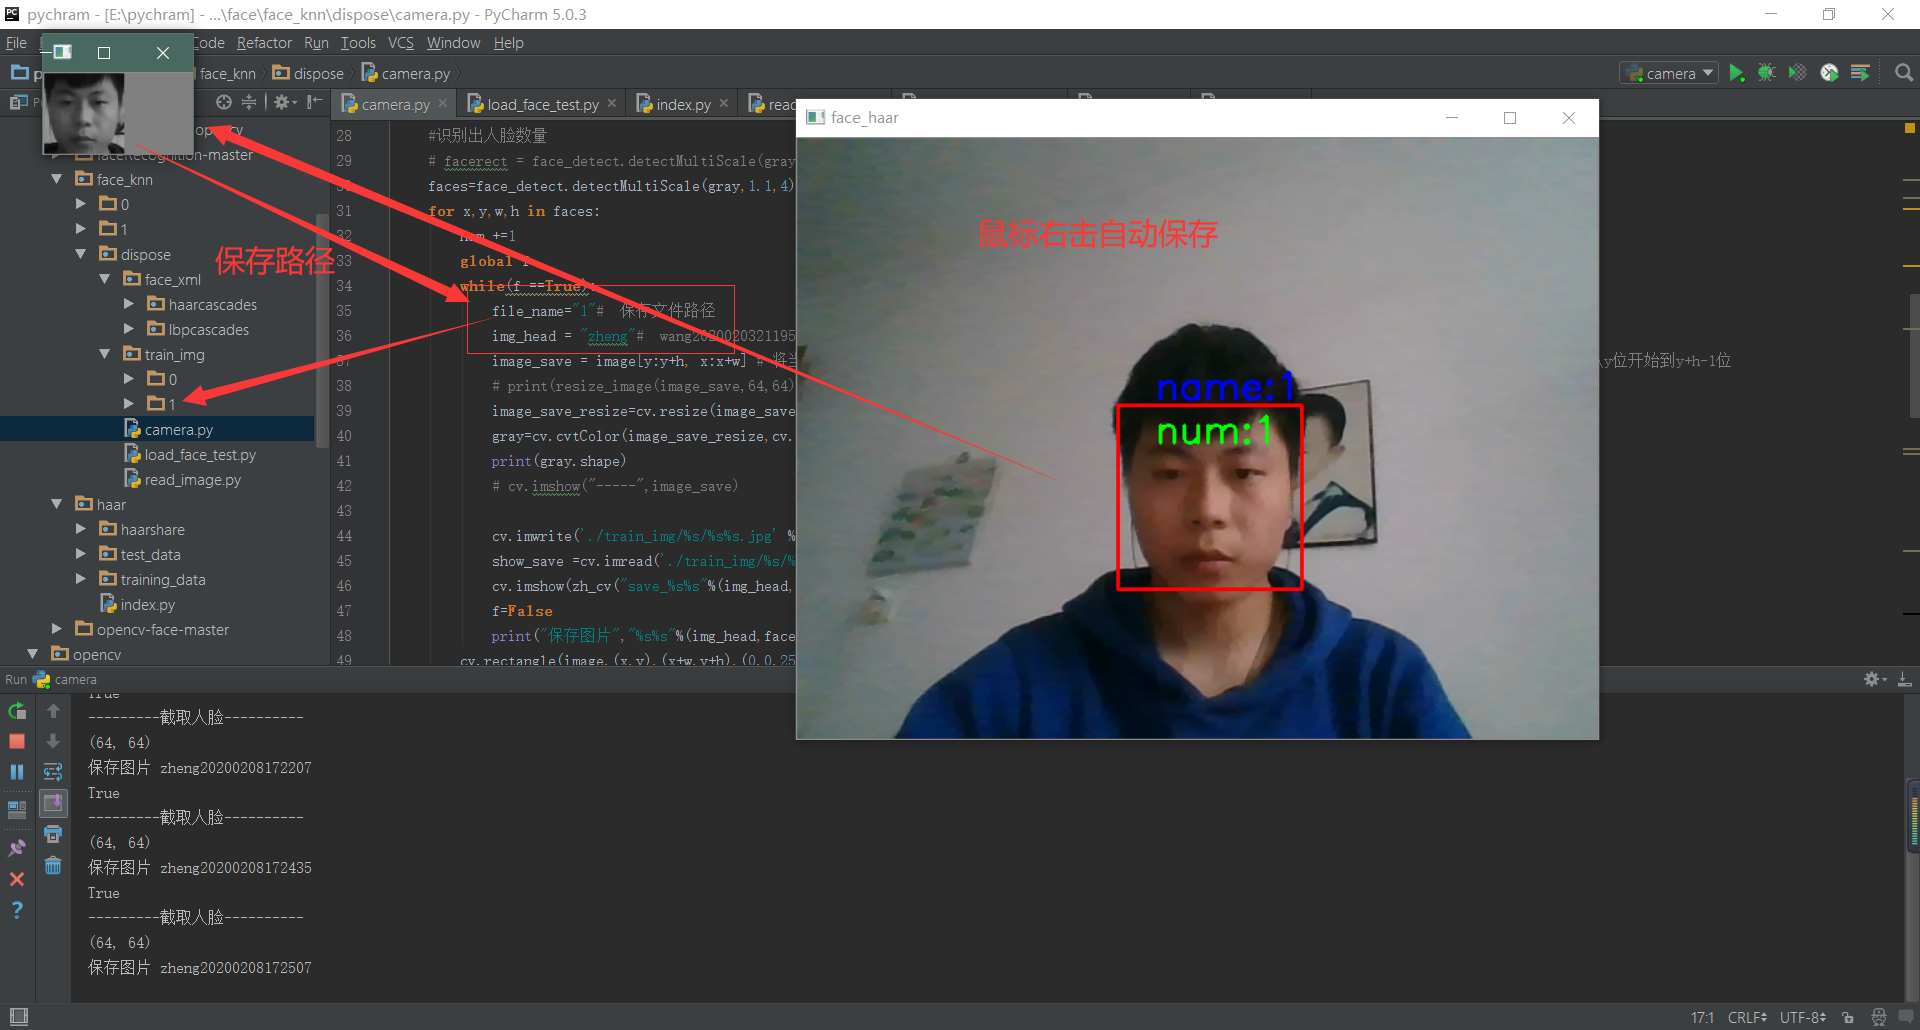
camera.py 运行会调用笔记本摄像头,鼠标右击会保存摄像头检测的人脸,保存到0和1文件夹,但是保存文件的路径需要自己手改
read_image 会调用保存两个文件夹采集的人脸数据图片,test_pre方法读取的图片路径使用自己人脸照片(属于上面采集两个人脸之一)
load_face_test.py 是把俩个程序结合出来,再有人脸数据集和haarcascades和lbp(opencv自带人脸检测网上可下就是慢,lbp是对比用的,我这里最后没有使用)
# camera.py 运行会调用笔记本摄像头,鼠标右击会保存摄像头检测的人脸,保存到0和1文件夹,但是保存文件的路径需要自己手改
import cv2 as cv
import time
def zh_cv(string):
    return  string.encode("gbk").decode(errors="ignore")
def get_video():
    capture =cv.VideoCapture(0)# VideoCapture(0) 开发默认摄像头,如果你有多个摄像头可以试试除0之外的其他参数
    print("-----打开摄像头--------")
    while(capture.isOpened()) :

        ret, frame=capture.read()
        if ret ==False :

            break;
        # print(frame)
        cv.flip(frame,1)# 左右变换
        # print("---------haar检测算法----------")
        face_detect_dome(frame)
        # face_lbp_dome(frame)
        # cv.imshow("voide",frame)
        # cv.imshow(zh_cv("摄像头"),frame)
        c=cv.waitKey(50)
        if c == 27:
            break;
def face_detect_dome(image):
    num =0
    gray=cv.cvtColor(image,cv.COLOR_BGR2GRAY)
    face_detect=cv.CascadeClassifier("./face_xml/haarcascades/haarcascade_frontalface_alt.xml")
    #识别出人脸数量
    # facerect = face_detect.detectMultiScale(gray, scaleFactor=1.2, minNeighbors=3, minSize=(12, 12))
    faces=face_detect.detectMultiScale(gray,1.1,4)
    for x,y,w,h in faces:
        num +=1
        global f
        while(f ==True):
            file_name="1"#  保存文件路径
            img_head = "zheng"#  wang20200203211958
            image_save = image[y:y+h, x:x+w] # 将当前帧含人脸部分保存为图片,注意这里存的还是彩色图片,前面检测时灰度化是为了降低计算量;这里访问的是从y位开始到y+h-1位
            # print(resize_image(image_save,64,64))
            image_save_resize=cv.resize(image_save,(64,64))
            gray=cv.cvtColor(image_save_resize,cv.COLOR_BGR2GRAY)# 灰度
            print(gray.shape)
            # cv.imshow("-----",image_save)

            cv.imwrite('./train_img/%s/%s%s.jpg' %(file_name,img_head,face_time()), gray)
            show_save =cv.imread('./train_img/%s/%s%s.jpg' %(file_name,img_head,face_time()))
            cv.imshow(zh_cv("save_%s%s"%(img_head,face_time())),show_save)
            f=False
            print("保存图片","%s%s"%(img_head,face_time()))
        cv.rectangle(image,(x,y),(x+w,y+h),(0,0,255),2)
        #          原图         位置  ,h         颜色
        # cv.namedWindow("face lbp",cv.WINDOW_NORMAL)

        # 显示当前捕捉到了多少人脸图片了
        font = cv.FONT_HERSHEY_SIMPLEX
        cv.putText(image, 'num:%d' % (num), (x + 30, y + 30), font, 1, (0, 255, 0), 2)
        cv.putText(image, 'name:%d' % (num), (x + 30, y -5), font, 1, (255, 0, 0), 2)
        # cv.namedWindow("face_haar",cv.WINDOW_NORMAL)
        cv.setMouseCallback('face_haar',img_save)
        cv.imshow("face_haar",image)

def face_lbp_dome(image):
    gray=cv.cvtColor(image,cv.COLOR_BGR2GRAY)
    face_detect=cv.CascadeClassifier("./face_xml/lbpcascades/lbpcascade_frontalface.xml")
    faces=face_detect.detectMultiScale(gray,1.1,4)
    print("---------lbp----------")
    for x,y,w,h in faces:
        cv.rectangle(image,(x,y),(x+w,y+h),(0,0,255),2)
        #          原图         位置  w,h         颜色
        cv.namedWindow("face_lbp",cv.WINDOW_NORMAL)
        cv.setMouseCallback('face_lbp',img_save)
        cv.imshow("face_lbp",image)

def img_save(event, x, y, flags, param):
    global f
    if event == cv.EVENT_RBUTTONDOWN:
        f = True
        print(f)
        print("---------截取人脸----------")
        # cv.waitKey(0)
def face_time():
    # print(time.strftime("%Y%m%d%H%M%S", time.localtime()))
    n_time =str(time.strftime("%Y%m%d%H%M%S", time.localtime()))
    return n_time
if __name__ == '__main__':
    f = False
    get_video()
#read_image 会调用保存两个文件夹采集的人脸数据图片,test_pre方法读取的图片路径使用自己人脸照片(属于上面采集两个人脸之一)
import os
from sklearn.preprocessing import MinMaxScaler, StandardScaler
from sklearn.decomposition import PCA
import numpy as np
from sklearn.model_selection import train_test_split, GridSearchCV
from sklearn.preprocessing import StandardScaler
from sklearn.naive_bayes import MultinomialNB
import cv2
images = []
labels = []
img_list =[]
# path_name是当前工作目录,后面会由os.getcwd()获得
def read_path(path_name):
    for dir_item in os.listdir(path_name): # os.listdir() 方法用于返回指定的文件夹包含的文件或文件夹的名字的列表
        # 从当前工作目录寻找训练集图片的文件夹
        full_path = os.path.abspath(os.path.join(path_name, dir_item))
        if os.path.isdir(full_path): # 如果是文件夹,继续递归调用,去读取文件夹里的内容
            read_path(full_path)
        else: # 如果是文件了
            if dir_item.endswith('.jpg'):
                image = cv2.imread(full_path)
                if image is None: # 遇到部分数据有点问题,报错'NoneType' object has no attribute 'shape'
                    pass
                else:
                    image_resize=cv2.resize(image,(64,64))
                    gray=cv2.cvtColor(image_resize,cv2.COLOR_BGR2GRAY)# 灰度
                    weight,height = gray.shape
                  # 取reshape后的矩阵的第一维度数据,即所需要的数据列表
                    img_reshape = gray.reshape(1,weight*height)[0]
                    # print(list(img_reshape))
                    #   转换列表添加images
                    image_list=list(img_reshape)
                    images.append(image_list)
                    # global labels
                    labels.append(path_name)
                    # 标注数据,me文件夹下是我,指定为0,其他指定为1,这里的0和1不是logistic regression二分类输出下的0和1,而是softmax下的多分类的类别
        label = np.array(["%s"%"zhaoban" if label.endswith("%d"%0)   else "unknow" for label in labels])
    # label = np.array([endwith(labels)])
    return images,label

def mm(img_mm):
    """
    归一化处理
    :return: NOne
    """
    mm = MinMaxScaler(feature_range=(0,1))
    data = mm.fit_transform(img_mm)
    print(data)
    print("----------归一化处理-------------")
    return data
def pca(img_pca):
    """
    主成分分析进行特征降维
    :return: None
    """
    pca = PCA(n_components=0.9)
    data = pca.fit_transform(img_pca)
    print("------------主成分分析进行特征降维---------------")
    # print(data)
    return data
def stand(stand_data):
    """
    标准化缩放
    :return:
    """
    std = StandardScaler()

    data = std.fit_transform(stand_data)

    # print(data)

    return data
def naviebayes(data,target):
    """
    朴素贝叶斯进行文本分类
    :return: None,t
    """
    # news = fetch_20newsgroups(subset='all')
    # 进行数据分割
    x_train, x_test, y_train, y_test = train_test_split(data,target, test_size=0.25)

    mlt = MultinomialNB(alpha=1.0)
    mlt.fit(x_train, y_train)
    # print(x_test)
    # print(test_pre())
    y_predict = mlt.predict(test_pre())
    print("分类类别为:", y_predict)
    # # 得出准确率
    print("准确率为:", mlt.score(x_test, y_test))
    return None
def test_pre():
    image_test =[]
    image =cv2.imread("qq.jpg")
    image_resize=cv2.resize(image,(64,64))
    gray=cv2.cvtColor(image_resize,cv2.COLOR_BGR2GRAY)# 灰度
    weight,height = gray.shape
  # 取reshape后的矩阵的第一维度数据,即所需要的数据列表
    img_reshape = gray.reshape(1,weight*height)[0]
    # print(list(img_reshape))
    #   转换列表添加images
    image_list=list(img_reshape)
    image_test.append(image_list)
    return image_test


if __name__ == "__main__":
    # print(read_path("./train_img/"))
    images ,labels= read_path("./train_img/")

    # image_mm =mm(images)
    # image_stand =stand(image_mm)
    # image_pca=pca(image_mm)
    print("---------------------------------------")
    naviebayes(images,labels)
    print("-----------------")
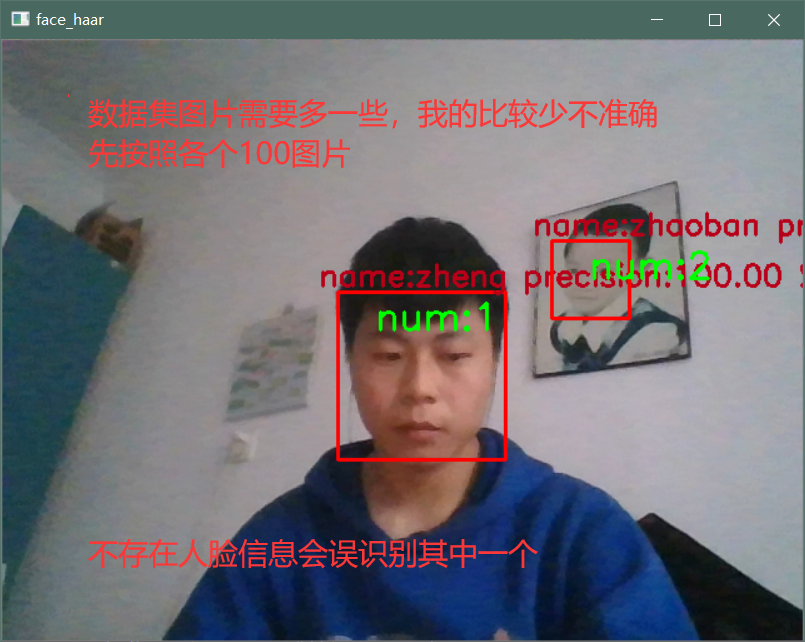
#load_face_test.py 是把俩个程序结合出来,再有人脸数据集和haarcascades和lbp(opencv自带人脸检测网上可下就是慢,lbp是对比用的,我这里最后没有使用)
import cv2 as cv
import time
import os
from sklearn.preprocessing import MinMaxScaler, StandardScaler
from sklearn.decomposition import PCA
import numpy as np
from sklearn.model_selection import train_test_split, GridSearchCV
from sklearn.preprocessing import StandardScaler
from sklearn.naive_bayes import MultinomialNB

import cv2
images = []
labels = []
img_list =[]
# path_name是当前工作目录,后面会由os.getcwd()获得
def read_path(path_name):
    for dir_item in os.listdir(path_name): # os.listdir() 方法用于返回指定的文件夹包含的文件或文件夹的名字的列表
        # 从当前工作目录寻找训练集图片的文件夹
        full_path = os.path.abspath(os.path.join(path_name, dir_item))
        if os.path.isdir(full_path): # 如果是文件夹,继续递归调用,去读取文件夹里的内容
            read_path(full_path)
        else: # 如果是文件了
            if dir_item.endswith('.jpg'):
                image = cv2.imread(full_path)
                if image is None: # 遇到部分数据有点问题,报错'NoneType' object has no attribute 'shape'
                    pass
                else:
                    image_resize=cv2.resize(image,(64,64))
                    gray=cv2.cvtColor(image_resize,cv2.COLOR_BGR2GRAY)# 灰度
                    weight,height = gray.shape
                  # 取reshape后的矩阵的第一维度数据,即所需要的数据列表
                    img_reshape = gray.reshape(1,weight*height)[0]
                    # print(list(img_reshape))
                    #   转换列表添加images
                    image_list=list(img_reshape)
                    images.append(image_list)
                    # global labels
                    labels.append(path_name)
                    # 标注数据,me文件夹下是我,指定为0,其他指定为1,这里的0和1不是logistic regression二分类输出下的0和1,而是softmax下的多分类的类别
    # dict ={0:"办",1:"long"}
    # for key in range(2):
    #     print(dict[key])
    label = np.array(["%s"%"zheng" if label.endswith("%d"%1)   else "zhaoban" for label in labels])
    # label = np.array(["%s"%dict[i] if label.endswith("%d"%(i for i in range(2))) for label in labels])
    return images,label

def mm(img_mm):
    """
    归一化处理
    :return: NOne
    """
    mm = MinMaxScaler(feature_range=(0,1))
    data = mm.fit_transform(img_mm)
    print(data)
    print("----------归一化处理-------------")
    return data
def pca(img_pca):
    """
    主成分分析进行特征降维
    :return: None
    """
    pca = PCA(n_components=0.9)
    data = pca.fit_transform(img_pca)
    print("------------主成分分析进行特征降维---------------")
    # print(data)
    return data
def stand(stand_data):
    """
    标准化缩放
    :return:
    """
    std = StandardScaler()
    data = std.fit_transform(stand_data)
    # print(data)
    return data
def naviebayes(data,target,test_img):
    """
    朴素贝叶斯进行文本分类
    :return: None,t
    """
    # news = fetch_20newsgroups(subset='all')
    # 进行数据分割
    x_train, x_test, y_train, y_test = train_test_split(data,target, test_size=0.25)

    mlt = MultinomialNB(alpha=1.0)
    mlt.fit(x_train, y_train)
    # print(x_test)
    # print(test_pre())
    y_predict = mlt.predict(test_img)
    print("分类类别为:", y_predict)
    # # 得出准确率
    print("准确率为:", mlt.score(x_test, y_test))
    return y_predict,mlt.score(x_test, y_test)
def test_pre(gray):
    image_test =[]
    weight,height = gray.shape
  # 取reshape后的矩阵的第一维度数据,即所需要的数据列表
    img_reshape = gray.reshape(1,weight*height)[0]
    # print(list(img_reshape))
    #   转换列表添加images
    image_list=list(img_reshape)
    image_test.append(image_list)
    return image_test

def zh_cv(string):
    return  string.encode("gbk").decode(errors="ignore")
def get_video():
    capture =cv.VideoCapture(0)# VideoCapture(0) 开发默认摄像头,如果你有多个摄像头可以试试除0之外的其他参数
    print("-----打开摄像头--------")
    while(capture.isOpened()) :
        ret, frame=capture.read()
        if ret ==False :

            break;
        # print(frame)
        cv.flip(frame,1)# 左右变换
        # print("---------haar检测算法----------")
        face_detect_dome(frame)

        # face_lbp_dome(frame)
        # cv.imshow("voide",frame)
        # cv.imshow(zh_cv("摄像头"),frame)
        c=cv.waitKey(50)
        if c == 27:
            break;

def face_detect_dome(image):
    num =0
    gray=cv.cvtColor(image,cv.COLOR_BGR2GRAY)
    face_detect=cv.CascadeClassifier("./face_xml/haarcascades/haarcascade_frontalface_alt.xml")
    #识别出人脸数量
    # facerect = face_detect.detectMultiScale(gray, scaleFactor=1.2, minNeighbors=3, minSize=(12, 12))
    faces=face_detect.detectMultiScale(gray,1.1,4)
    for x,y,w,h in faces:
        num +=1
        image_save = image[y:y+h, x:x+w] # 将当前帧含人脸部分保存为图片,注意这里存的还是彩色图片,前面检测时灰度化是为了降低计算量;这里访问的是从y位开始到y+h-1位++
        # print(resize_image(image_save,64,64))
        image_save_resize=cv.resize(image_save,(64,64))
        gray=cv.cvtColor(image_save_resize,cv.COLOR_BGR2GRAY)# 灰度
        predict,score =naviebayes(images,labels,test_pre(gray))
        print(score)
        global f
        # while(f ==True):
        #     file_name="0"
        #     img_head = "wang"#  wang20200203211958
        #     print(gray.shape)
        #     cv.imwrite('./train_img/%s/%s%s.jpg' %(file_name,img_head,face_time()), gray)
        #     show_save =cv.imread('./train_img/%s/%s%s.jpg' %(file_name,img_head,face_time()))
        #     cv.imshow(zh_cv("save_%s%s"%(img_head,face_time())),show_save)
        #     f=False
        #     print("保存图片","%s%s"%(img_head,face_time()))

            # image_test =cv.imread('./train_img/%s/%s%s.jpg' %(file_name,img_head,face_time()))

            # cv.imshow("-----",image_save)
        cv.rectangle(image,(x,y),(x+w,y+h),(0,0,255),2)
        #          原图         位置  ,h         颜色
        # cv.namedWindow("face lbp",cv.WINDOW_NORMAL)

        # 显示当前捕捉到了多少人脸图片了
        font = cv.FONT_HERSHEY_SIMPLEX
        cv.putText(image, 'num:%d' % (num), (x + 30, y + 30), font, 1, (0, 255, 0), 2)
        cv.putText(image, 'name:%s precision:%3.2f %%' % (predict[0],score*100),(x -15, y -5), font, 0.8, (25, 0, 185), 2)
        #cv.namedWindow("face_haar",cv.WINDOW_NORMAL)
        cv.setMouseCallback('face_haar',img_save)
        cv.imshow("face_haar",image)

def face_lbp_dome(image):
    gray=cv.cvtColor(image,cv.COLOR_BGR2GRAY)
    face_detect=cv.CascadeClassifier("./face_xml/lbpcascades/lbpcascade_frontalface.xml")
    faces=face_detect.detectMultiScale(gray,1.1,4)
    print("---------lbp----------")
    for x,y,w,h in faces:
        cv.rectangle(image,(x,y),(x+w,y+h),(0,0,255),2)
        #          原图         位置  w,h         颜色
        cv.namedWindow("face_lbp",cv.WINDOW_NORMAL)
        cv.setMouseCallback('face_lbp',img_save)
        cv.imshow("face_lbp",image)

def img_save(event, x, y, flags, param):
    global f
    if event == cv.EVENT_RBUTTONDOWN:
        f = True
        print(f)
        print("---------截取人脸----------")
        # cv.waitKey(0)
def face_time():
    # print(time.strftime("%Y%m%d%H%M%S", time.localtime()))
    n_time =str(time.strftime("%Y%m%d%H%M%S", time.localtime()))
    return n_time

if __name__ == '__main__':
    f = False
    images ,labels= read_path("./train_img/")
    get_video()