资料
我们基于之前的MvcCookieAuthSample来做开发
MvcCookieAuthSample下载地址:https://files.cnblogs.com/files/wyt007/ASPNETCore%E5%BF%AB%E9%80%9F%E5%85%A5%E9%97%A8.rar
MvcCookieAuthSample教程地址:http://www.cnblogs.com/wyt007/p/8204731.html
正文
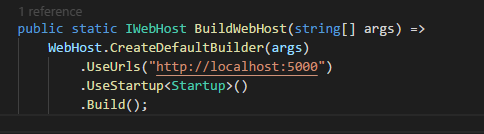
给网站设置默认地址 http://localhost:5000
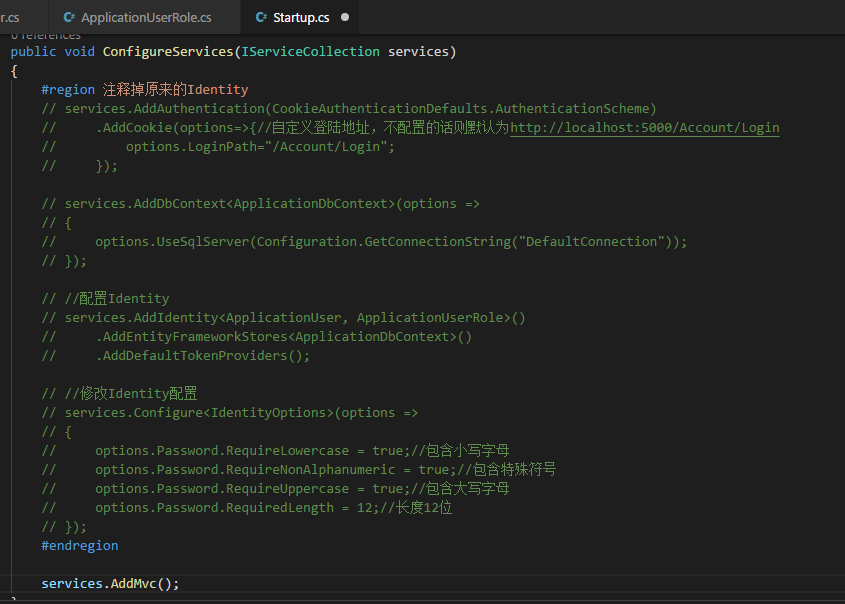
首先,我们将之前写的系统的Identity注释掉,在Startup.cs中
第一步:添加Nuget包:IdentityServer4
我们可以在vscode中使用ctrl+P键来打开命令面板。然后输入nuget按回车,输入identityserver4后按回车来选择版本进行安装
第二步:添加Config.cs配置类
我们接下来添加一个Config.cs类,这个类是用来初始化IdentityServer的
using System.Collections;
using System.Collections.Generic;
using IdentityServer4;
using IdentityServer4.Models;
using IdentityServer4.Test;

namespace MvcCookieAuthSample
{
    public class Config
    {
        //所有可以访问的Resource
        public static IEnumerable<ApiResource> GetApiResources()
        {
            return new List<ApiResource>
            {
                new ApiResource("api1","API Application")
            };
        }

        //客户端
        public static IEnumerable<Client> GetClients()
        {
            return new List<Client>
            {
                new Client()
                {
                    ClientId="mvc",
                    AllowedGrantTypes= GrantTypes.Implicit,//模式:最简单的模式
                    ClientSecrets={//私钥
                        new Secret("secret".Sha256())
                    },
                    AllowedScopes={//可以访问的Resource
                        IdentityServerConstants.StandardScopes.Profile,
                        IdentityServerConstants.StandardScopes.OpenId,
                    },
                    RedirectUris={"http://localhost:5001/signin-oidc"},//跳转登录到的客户端的地址
                    PostLogoutRedirectUris={"http://localhost:5001/signout-callback-oidc"},//跳转登出到的客户端的地址
                    RequireConsent=false//是否需要用户点击确认进行跳转
                }
            };
        }

        //测试用户
        public static List<TestUser> GetTestUsers()
        {
            return new List<TestUser>{
                new TestUser{
                    SubjectId="10000",
                    Username="wyt",
                    Password="password"
                }
            };
        }

        //定义系统中的资源
        public static IEnumerable<IdentityResource> GetIdentityResources()
        {
            return new List<IdentityResource>
            {
                new IdentityResources.OpenId(),
                new IdentityResources.Profile(),
                new IdentityResources.Email()
            };
        }

    }
}
以上使用IdentityServer4测试数据类添加数据,直接存在内存中。IdentityServer4 是支持持久化。
第三步:添加Startup配置
引用命名空间:
using IdentityServer4;
然后打开Startup.cs 加入如下:
services.AddIdentityServer()
    .AddDeveloperSigningCredential()//添加开发人员签名凭据
    .AddInMemoryApiResources(Config.GetApiResources())//添加内存apiresource
    .AddInMemoryClients(Config.GetClients())//添加内存client
    .AddInMemoryIdentityResources(Config.GetIdentityResources())//添加系统中的资源
    .AddTestUsers(Config.GetTestUsers());//添加测试用户
public void Configure(IApplicationBuilder app, IHostingEnvironment env, ILoggerFactory loggerFactory)
 {
    ...
    //app.UseAuthentication();
    app.UseIdentityServer();
    ...
接着安装UI,UI部分也可以自己编写,也就是登录 注销 允许和错误。
可以到 https://github.com/IdentityServer/IdentityServer4.Quickstart.UI/tree/release 下载,然后解压到项目目录下。
也可以使用命令提示符快速安装:
powershell iex ((New-Object System.Net.WebClient).DownloadString('https://raw.githubusercontent.com/IdentityServer/IdentityServer4.Quickstart.UI/release/get.ps1'))
在项目目录下打开命令提示符,输入以上命令。
更多信息,可以查看官方readme:https://github.com/IdentityServer/IdentityServer4.Quickstart.UI/blob/release/README.md
大神博客:https://www.cnblogs.com/linezero/p/identityserver4openidconnect.html
修改LoginViewModel,将Email改为UserName,并修改强类型视图的引用部分Login.cshtml
namespace MvcCookieAuthSample.ViewModels
{
    public class LoginViewModel
    {
        //[Required]//必须的
        //[DataType(DataType.EmailAddress)]//内容检查是否为邮箱
        //public string Email { get; set; }

        [Required]
        public string UserName { get; set; }

        [Required]//必须的
        [DataType(DataType.Password)]//内容检查是否为密码
        public string Password { get; set; }
    }
}
修改AccountController,原来的_userManager和_signInManager不再使用
using Microsoft.AspNetCore.Authentication;
using Microsoft.AspNetCore.Authorization;
using Microsoft.AspNetCore.Authentication.Cookies;
using System.Security.Claims;
using Microsoft.AspNetCore.Mvc;
using System.Collections.Generic;
using Microsoft.AspNetCore.Identity;
using MvcCookieAuthSample.Models;
using System.Threading.Tasks;
using MvcCookieAuthSample.ViewModels;
using IdentityServer4.Test;
using System;

namespace MvcCookieAuthSample.Controllers
{
    public class AccountController : Controller
    {
        // private UserManager<ApplicationUser> _userManager;//创建用户的
        // private SignInManager<ApplicationUser> _signInManager;//用来登录的

        private readonly TestUserStore _users;
        public AccountController(TestUserStore users)
        {
            _users=users;
        }

                // //依赖注入
        // public AccountController(UserManager<ApplicationUser> userManager, SignInManager<ApplicationUser> signInManager)
        // {
        //     _userManager = userManager;
        //     _signInManager = signInManager;
        // }

        //内部跳转
        private IActionResult RedirectToLocal(string returnUrl)
        {
            if (Url.IsLocalUrl(returnUrl))
            {//如果是本地
                return Redirect(returnUrl);
            }

            return RedirectToAction(nameof(HomeController.Index), "Home");
        }

        //添加验证错误
        private void AddError(IdentityResult result)
        {
            //遍历所有的验证错误
            foreach (var error in result.Errors)
            {
                //返回error到model
                ModelState.AddModelError(string.Empty, error.Description);
            }
        }


        public IActionResult Register(string returnUrl = null)
        {
            ViewData["returnUrl"] = returnUrl;
            return View();
        }

        [HttpPost]
        public async Task<IActionResult> Register(RegisterViewModel registerViewModel, string returnUrl = null)
        {
            // if (ModelState.IsValid)
            // {
            //     ViewData["returnUrl"] = returnUrl;

            //     var identityUser = new ApplicationUser
            //     {
            //         Email = registerViewModel.Email,
            //         UserName = registerViewModel.Email,
            //         NormalizedUserName = registerViewModel.Email
            //     };
            //     var identityResult = await _userManager.CreateAsync(identityUser, registerViewModel.Password);
            //     if (identityResult.Succeeded)
            //     {
            //         //注册完成登录生成cookies信息
            //         await _signInManager.SignInAsync(identityUser, new AuthenticationProperties { IsPersistent = true });

            //         return RedirectToLocal(returnUrl);
            //     }
            //     else//注册失败
            //     {
            //         //添加验证错误
            //         AddError(identityResult);
            //     }
            // }

            return View();
        }

        public IActionResult Login(string returnUrl = null)
        {
            ViewData["returnUrl"] = returnUrl;
            return View();
        }

        [HttpPost]
        public async Task<IActionResult> Login(LoginViewModel  loginViewModel, string returnUrl = null)
        {
            if (ModelState.IsValid)
            {
                ViewData["returnUrl"] = returnUrl;

                //var user = await _userManager.FindByEmailAsync(loginViewModel.Email);
                var user = _users.FindByUsername(loginViewModel.UserName);

                if (user == null)
                {
                    ModelState.AddModelError(nameof(loginViewModel.UserName), "UserName not exists");
                }
                else
                {
                    if (_users.ValidateCredentials(loginViewModel.UserName,loginViewModel.Password))
                    {
                        //是否记住
                        var prop = new AuthenticationProperties()
                        {
                            IsPersistent = true,
                            ExpiresUtc = DateTimeOffset.UtcNow.Add(TimeSpan.FromMinutes(30))
                        };

                        //HttpContext.SignInAsync(user.SubjectId, user.Username, prop);
                        await Microsoft.AspNetCore.Http.AuthenticationManagerExtensions.SignInAsync(HttpContext, user.SubjectId, user.Username, prop);
                    }
                }
                //账号密码先不做验证,需要可以自己写
                //await _signInManager.SignInAsync(user, new AuthenticationProperties { IsPersistent = true });

                return RedirectToLocal(returnUrl);
            }

            return View();

        }

        //登出
        public async Task<IActionResult> Logout()
        {

            await HttpContext.SignOutAsync();
            return RedirectToAction("Index", "Home");
        }

    }
}
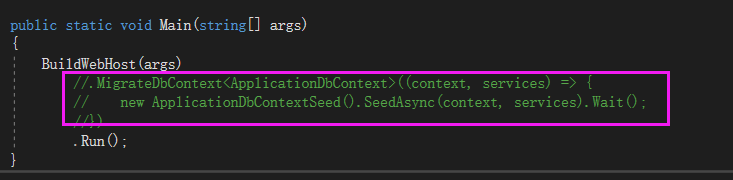
接下来我们需要将原来的Program.cs中的数据库初始化的内容注释掉
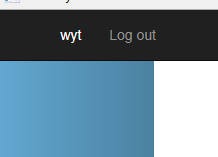
然后我们就可以运行网站,输入用户名和密码进行登录了
新建客户端
新建一个MVC网站MvcClient
dotnet new mvc --name MvcClient
给网站设置默认地址 http://localhost:5001

MVC的网站已经内置帮我们实现了Identity,所以我们不需要再额外添加Identity引用
添加认证
services.AddAuthentication(options =>
{
    options.DefaultScheme = "Cookies";//使用Cookies认证
    options.DefaultChallengeScheme = "oidc";//使用oidc
})
.AddCookie("Cookies")//配置Cookies认证
.AddOpenIdConnect("oidc",options=> {//配置oidc
    options.SignInScheme = "Cookies";
    options.Authority = "http://localhost:5000";
    options.RequireHttpsMetadata = false;

    options.ClientId = "mvc";
    options.ClientSecret = "secret";
    options.SaveTokens = true;
});
在管道中使用Authentication
app.UseAuthentication();
Login.cshtml 页面接收returnUrl进行跳转


<form method="post" asp-controller="Account" asp-action="Login">
    <h4>Use a local account to log in.</h4>
    <hr />
    @*用于登录后进行跳转*@
    <input type="hidden" name="returnUrl" value="@ViewData["returnUrl"]" />


    <div class="form-group">
        <label asp-for="UserName"></label>
        <input asp-for="UserName" class="form-control" />
        <span asp-validation-for="UserName" class="text-danger"></span>
    </div>

    <div class="form-group">
        <label asp-for="Password"></label>
        <input asp-for="Password" type="password" class="form-control" />
        <span asp-validation-for="Password" class="text-danger"></span>
    </div>
    <div class="form-group">
        <button type="submit" class="btn btn-block btn-danger">Log in</button>
    </div>

</form>
接下来我们在HomeController上打上 [Authorize] 标签,然后启动运行
我们这个时候访问首页http://localhost:5001会自动跳转到ocalhost:5000/account/login登录

登录之后会自动跳转回来

我们可以在Home/About页面将claim的信息显示出来
@{
    ViewData["Title"] = "About";
}
<h2>@ViewData["Title"]</h2>
<h3>@ViewData["Message"]</h3>

<dl>
    @foreach (var claim in User.Claims)
    {
        <dt>@claim.Type</dt>
        <dt>@claim.Value</dt>
    }
</dl>
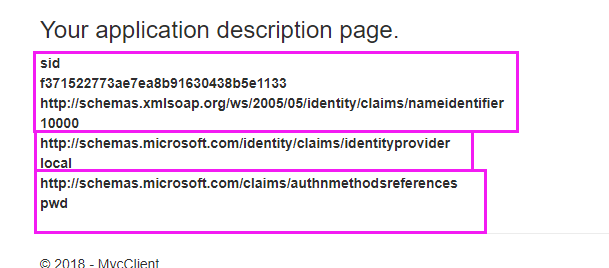
这边的内容是根据我们在IdentityServer服务中定义的返回资源决定的
