Unity中经常使用到精灵,尤其是2D游戏中制作动画等!今天我们就学习下精灵的切割和导出吧!
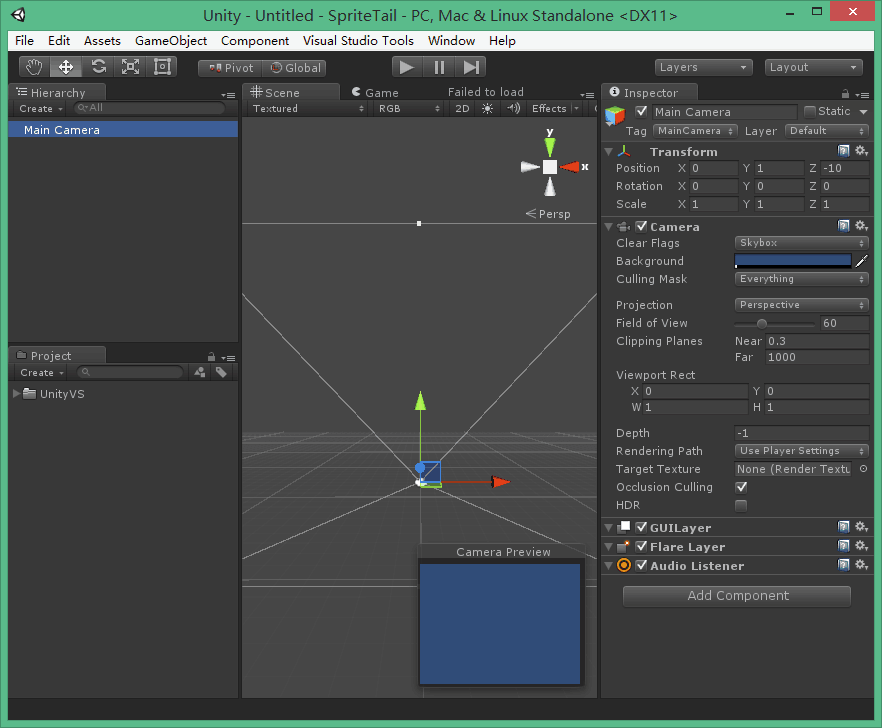
废话不多说,先建议空的工程。
1,打开Unity建工程。
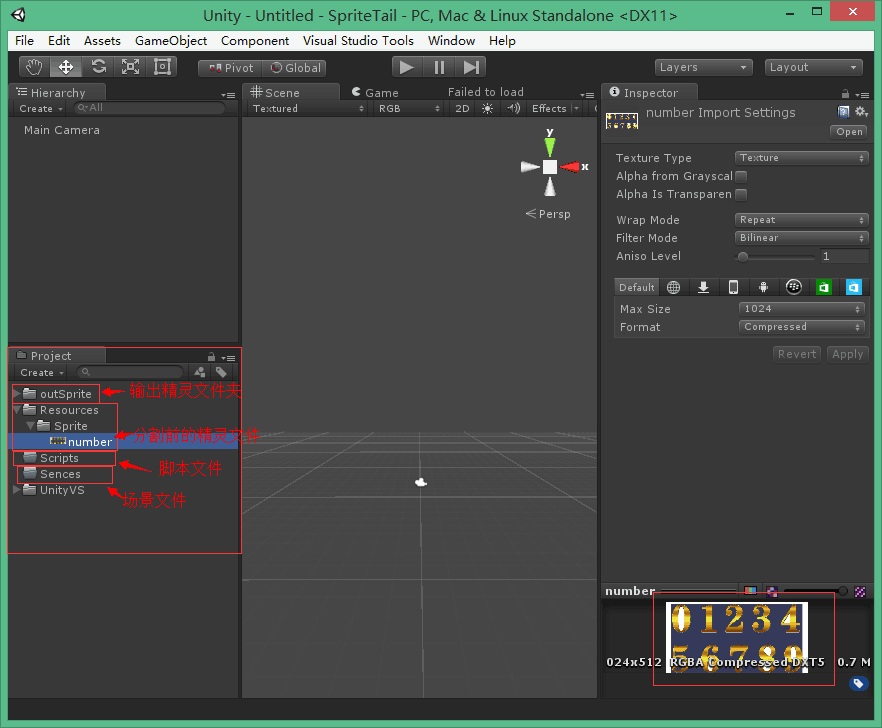
2 导入素材进行资源分类,工程不在于大小,这是我们对待它的态度!
3.开始分割精灵,三步走!
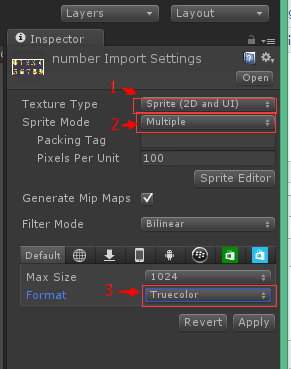
编辑精灵.

开始分割精灵
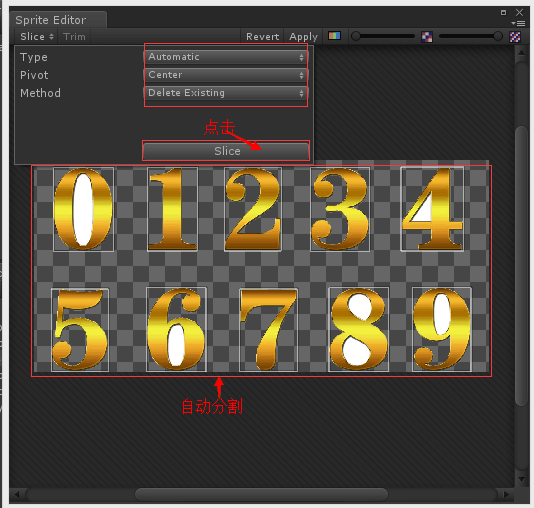
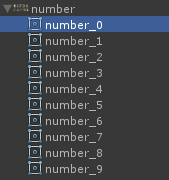
Apply一下,看下分割的精灵,0-9共9个。
贴精灵导出代码:
using UnityEngine;
using UnityEditor;


public class SpriteTailed:MonoBehaviour
{
    [MenuItem("Tools/导出精灵")]
    static void SaveSprite()
    {
        string resourcesPath = "Assets/Resources/";
        foreach (Object obj in Selection.objects)
        {
            string selectionPath = AssetDatabase.GetAssetPath(obj);

            // 必须最上级是"Assets/Resources/"
            if (selectionPath.StartsWith(resourcesPath))
            {
                string selectionExt = System.IO.Path.GetExtension(selectionPath);
                if (selectionExt.Length == 0)
                {
                    continue;
                }

                // 从路径"Assets/Resources/Sprite/number.png"得到路径"Sprite/number"
                string loadPath = selectionPath.Remove(selectionPath.Length - selectionExt.Length);
                loadPath = loadPath.Substring(resourcesPath.Length);

                // 加载此文件下的所有资源
                Sprite[] sprites = Resources.LoadAll<Sprite>(loadPath);
                if (sprites.Length > 0)
                {
                    Debug.Log(sprites.Length);
                    // 创建导出文件夹
                    string outPath = Application.dataPath + "/outSprite/" + loadPath;
                    System.IO.Directory.CreateDirectory(outPath);

                    foreach (Sprite sprite in sprites)
                    {
                        Debug.Log("Export Sprite:" + sprite.name);
                        // 创建单独的纹理
                        Texture2D tex = new Texture2D((int)sprite.rect.width, (int)sprite.rect.height, sprite.texture.format, false);
                        tex.SetPixels(sprite.texture.GetPixels((int)sprite.rect.xMin, (int)sprite.rect.yMin,
                                                               (int)sprite.rect.width, (int)sprite.rect.height));
                        tex.Apply();

                        // 写入成PNG文件
                        System.IO.File.WriteAllBytes(outPath + "/" + sprite.name + ".png", tex.EncodeToPNG());
                    }
                    Debug.Log("SaveSprite to " + outPath);
                }
            }
        }
        Debug.Log("SaveSprite Finished");
    }
}
将脚本挂到MainCamera上,点击Tools/导出精灵:
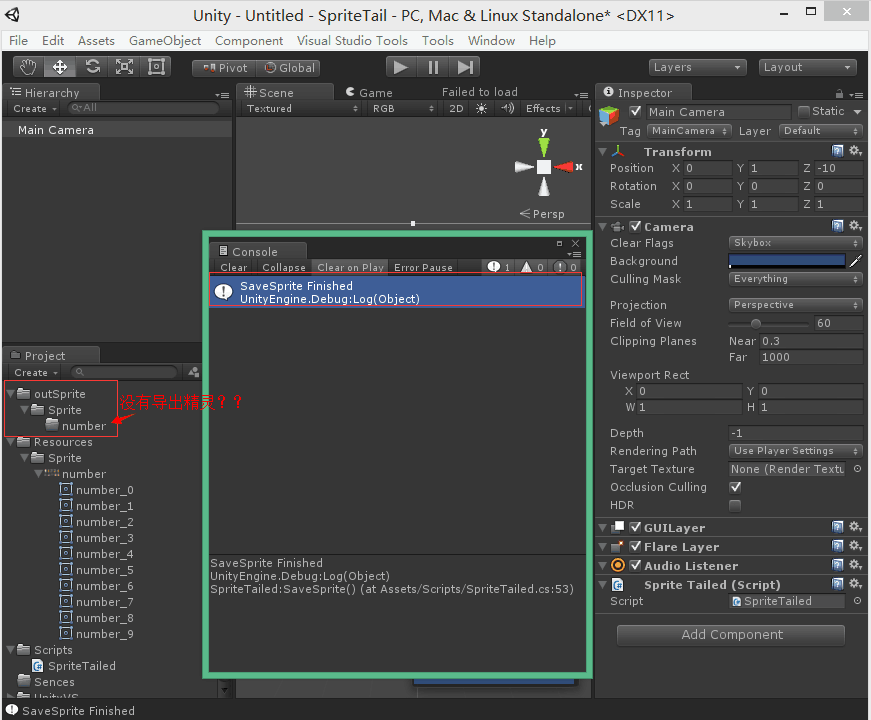
失败了,检查下原因!莫急,,,哦,现在的精灵是不可以读写的,我们要修改它的属性。
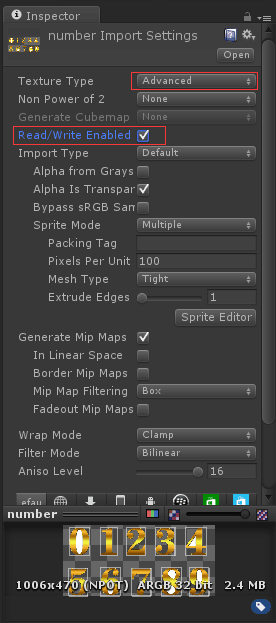
再次点击Tools/导出精灵,然后Refresh资源,就可以看到了!
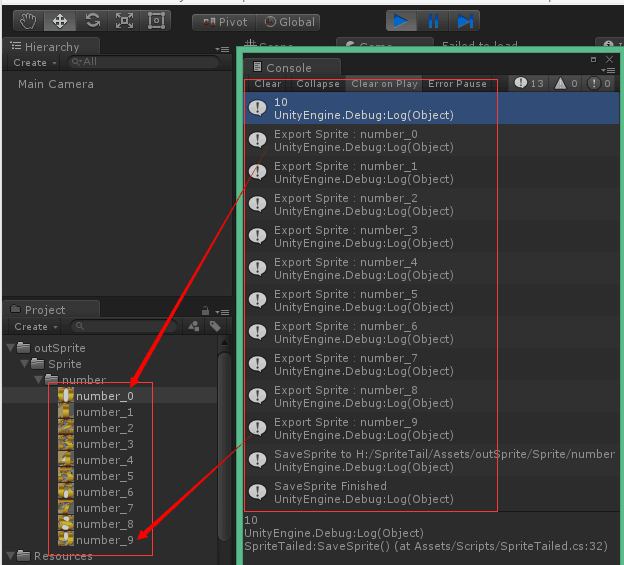
OK,精灵资源导出成功!