maven获取jar的xml地址:http://mvnrepository.com
步骤一安装jdk(略)
步骤二 安装eclipse(略)
步骤三 安装testNG
步骤四 maven安装
步骤三 安装testNG
在Eclipse - Help - Eclipse Market Place 里搜索testNG即可找到
eclipse在线下载testNG可能会失败,可以选择离线下载
可参考
https://www.cnblogs.com/xusweeter/p/6559196.html
步骤四 maven安装
安装好之后,一般要设置2个环境变量;
1)MVN_HOME:值为你安装maven的目录;如:D:apache-maven-3.5.4
2)path:向path里添加maven下的bin目录;
配置好后,打开命令行,使用mvn -v检查是否安装正确
Maven安装成功后,第一次命令行输入mvn help:system会在C:Users用户下生成.m2文件,默认放下载的jar包,叫maven仓库。
把生成的.m2复制到和maven同一级目录

大多数maven用户需要复制D:apache-maven-3.5.4conf下的settings.xml文件到.m2文件下。修改setting.xml。在<setting>中加入
<localRepository>D:.m2 epository</localRepository>
这样新下载的jar包就可以下载到D:.m2 epository这个路径下,不用每次都下载到C盘下了。
打开eclipse,选择window-preferences-maven-Installations。

点击add按钮,选择Directory,打开刚安装的maven路径,点击finish。
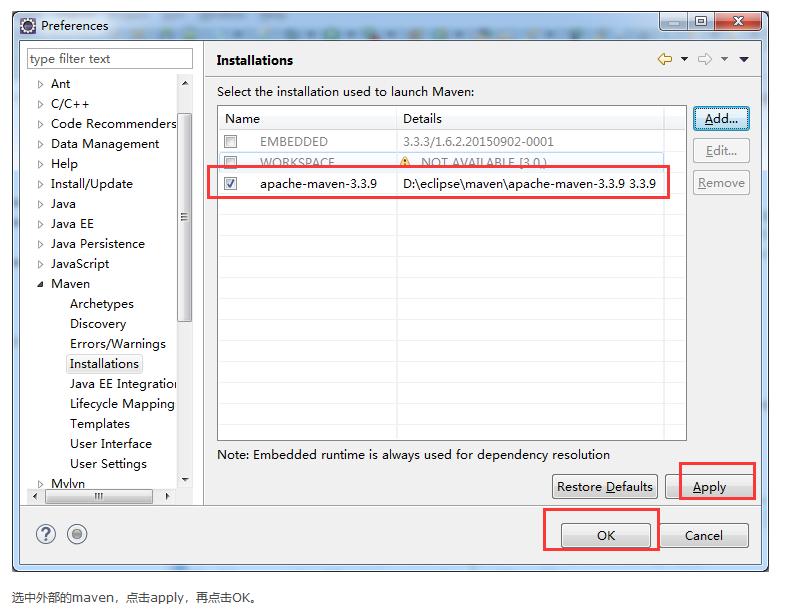
配置
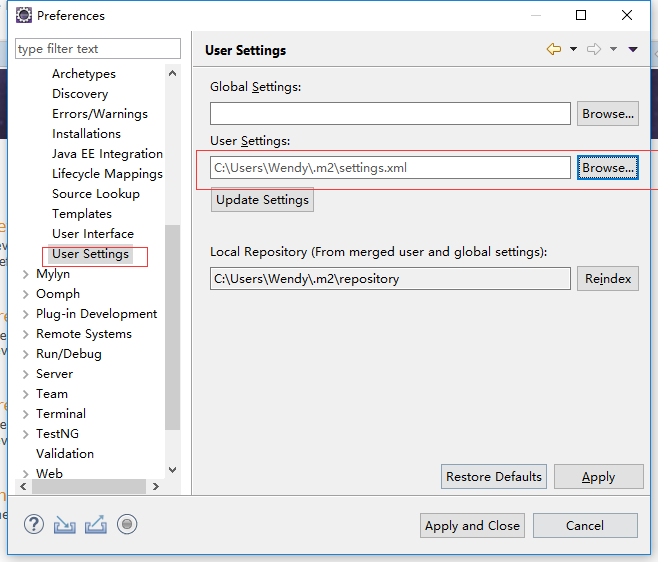
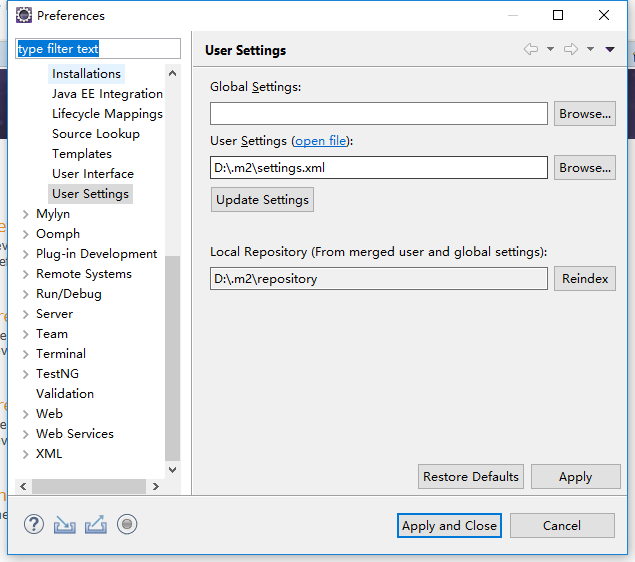
新建测试项目
打开eclipse-file-new-other,选中maven project点击next


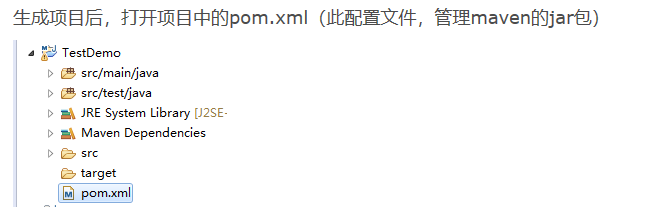

加入selenium的依赖
<dependency>
<groupId>org.seleniumhq.selenium</groupId>
<artifactId>selenium-java</artifactId>
<version>[2.53.0,)</version>
</dependency>
<dependency>
<groupId>org.seleniumhq.selenium</groupId>
<artifactId>selenium-server</artifactId>
<version>[2.53.0,)</version>
</dependency>
加入testNG
<dependency>
<groupId>org.testng</groupId>
<artifactId>testng</artifactId>
<version>6.9.10</version>
<scope>test</scope>
</dependency>
6.选择浏览器,我选择用chrome 版本70 和驱动2.42
下载chrome:下载地址 https://www.google.com/chrome/browser/desktop/index.html下载适合自己系统的chrome
下载chromeDriver:下载地址https://sites.google.com/a/chromium.org/chromedriver/
将chromeDriver放到chrome下安装目录下,并将chromeDriver目录加入到path中
例如:我的driver路径,将C:UsershustarAppDataLocalGoogleChromeApplication加入到path中。
第七步测试项目
以上基于selenium+testNG+maven的环境就搭建完成了,下面让我们写个小程序运行一下
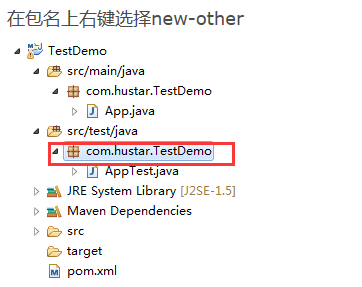
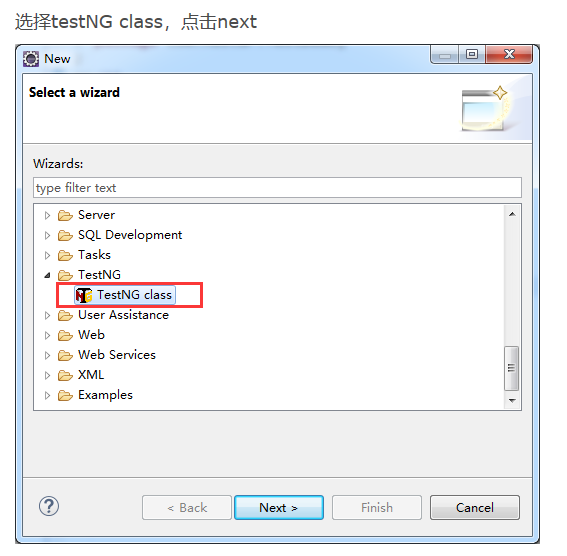
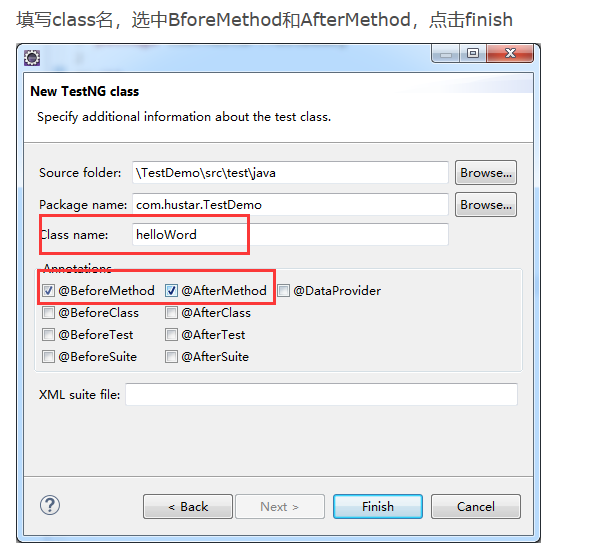
代码例子
package com.hustar.TestDemo;

import org.testng.annotations.Test;
import org.testng.annotations.BeforeMethod;
import org.openqa.selenium.WebDriver;
import org.openqa.selenium.chrome.ChromeDriver;
import org.testng.annotations.AfterMethod;

public class NewTest {

	WebDriver driver;
  @Test
  public void f() {
	  System.setProperty("webdriver.chrome.driver", "C:\Users\lenovo\AppData\Local\Google\Chrome\chromedriver.exe");
	  driver = new ChromeDriver();
	  driver.get("https://www.baidu.com/");
  }
  @BeforeMethod
  public void beforeMethod() {
  }

  @AfterMethod
  public void afterMethod() {
  }

}
