为了让大家少踩笔者踩过的坑,目前将工作中搭建rtmp推流服务器的步骤总结如下:
步骤1: 下载 nginx 1.7.11.3 Gryphon
下载链接: http://nginx-win.ecsds.eu/download/nginx 1.7.11.3 Gryphon.zip,下载完成后解压, 将解压后的目录命名为nginx_1.7.11.3_Gryphon
(此处注意千万不要命名为nginx-1.7.11.3-Gryphon,笔者初次搭建rtmp推流服务器时,将解压后的目录命名为nginx-1.7.11.3-Gryphon,出现局域网内的其他电脑都无法访问rtmp服务器的问题,也是花了一天的时间填坑,将主文件名改为nginx_1.7.11.3_Gryphon时,其他电脑才能正常访问。为神马会如此,笔者也是疑问,好歹问题无意间解决了)
步骤2:下载服务器状态检查程序 stat.xsl(注:直接clone到nginx-1.7.11.3-Gryphon目录下)
下载地址https://github.com/arut/nginx-rtmp-module/
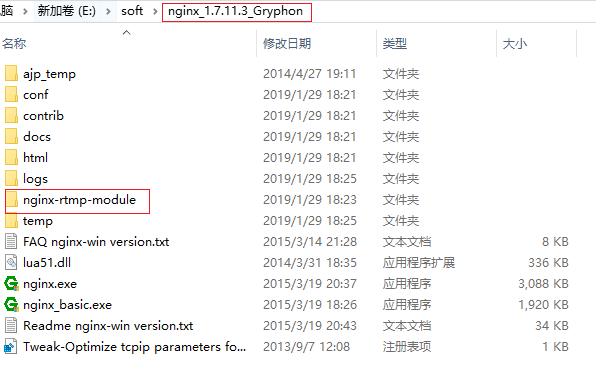
此时的目录结构如下图所示:
步骤3:配置文件 conf ginx-win-rtmp.conf 内容如下:


#user  nobody;
# multiple workers works !
worker_processes  2;

#error_log  logs/error.log;
#error_log  logs/error.log  notice;
#error_log  logs/error.log  info;

#pid        logs/nginx.pid;
#worker_rlimit_nofile 100000;   #更改worker进程的最大打开文件数限制
                                               #如果没设置的话, 这个值为操作系统的限制.
                                               #设置后你的操作系统和Nginx可以处理比“ulimit -a”更多的文件
                                               #所以把这个值设高, 这样nginx就不会有“too many open files”问题了


events {
    worker_connections  8192;#设置可由一个worker进程同时打开的最大连接数
                              #如果设置了上面提到的worker_rlimit_nofile, 我们可以将这个值设得很高
    # max value 32768, nginx recycling connections+registry optimization =
    #   this.value * 20 = max concurrent connections currently tested with one worker
    #   C1000K should be possible depending there is enough ram/cpu power
    # multi_accept on;
}

rtmp {
    server {
        listen 1935;#监听端口,若被占用,可以更改
        chunk_size 4000;#上传flv文件块儿的大小
        application live { #创建一个叫live的应用
             live on;#开启live的应用
             allow publish 127.0.0.1;#
             allow play all;
        }
    }
}

http {
    #include      /nginx/conf/naxsi_core.rules;
    include       mime.types;
    default_type  application/octet-stream;

    #log_format  main  '$remote_addr:$remote_port - $remote_user [$time_local] "$request" '
    #                  '$status $body_bytes_sent "$http_referer" '
    #                  '"$http_user_agent" "$http_x_forwarded_for"';

    #access_log  logs/access.log  main;

#     # loadbalancing PHP
#     upstream myLoadBalancer {
#         server 127.0.0.1:9001 weight=1 fail_timeout=5;
#         server 127.0.0.1:9002 weight=1 fail_timeout=5;
#         server 127.0.0.1:9003 weight=1 fail_timeout=5;
#         server 127.0.0.1:9004 weight=1 fail_timeout=5;
#         server 127.0.0.1:9005 weight=1 fail_timeout=5;
#         server 127.0.0.1:9006 weight=1 fail_timeout=5;
#         server 127.0.0.1:9007 weight=1 fail_timeout=5;
#         server 127.0.0.1:9008 weight=1 fail_timeout=5;
#         server 127.0.0.1:9009 weight=1 fail_timeout=5;
#         server 127.0.0.1:9010 weight=1 fail_timeout=5;
#         least_conn;
#     }

    sendfile        off;
    #tcp_nopush     on;

    server_names_hash_bucket_size 128;

## Start: Timeouts ##
    client_body_timeout   10;
    client_header_timeout 10;
    keepalive_timeout     30;
    send_timeout          10;
    keepalive_requests    10;
## End: Timeouts ##

    #gzip  on;

    server {
        listen       8088;
        server_name  localhost;

        #charset koi8-r;

        #access_log  logs/host.access.log  main;

        ## Caching Static Files, put before first location
        #location ~* .(jpg|jpeg|png|gif|ico|css|js)$ {
        #    expires 14d;
        #    add_header Vary Accept-Encoding;
        #}

# For Naxsi remove the single # line for learn mode, or the ## lines for full WAF mode
        location / {
            #include    /nginx/conf/mysite.rules; # see also http block naxsi include line
            ##SecRulesEnabled;
              ##DeniedUrl "/RequestDenied";
              ##CheckRule "$SQL >= 8" BLOCK;
              ##CheckRule "$RFI >= 8" BLOCK;
              ##CheckRule "$TRAVERSAL >= 4" BLOCK;
              ##CheckRule "$XSS >= 8" BLOCK;
            root   html;
            index  index.html index.htm;
        }

# For Naxsi remove the ## lines for full WAF mode, redirect location block used by naxsi
        ##location /RequestDenied {
        ##    return 412;
        ##}

## Lua examples !
#         location /robots.txt {
#           rewrite_by_lua '
#             if ngx.var.http_host ~= "localhost" then
#               return ngx.exec("/robots_disallow.txt");
#             end
#           ';
#         }

        #error_page  404              /404.html;

        # redirect server error pages to the static page /50x.html
        #
        error_page   500 502 503 504  /50x.html;
        location = /50x.html {
            root   html;
        }

        # proxy the PHP scripts to Apache listening on 127.0.0.1:80
        #
        #location ~ .php$ {
        #    proxy_pass   http://127.0.0.1;
        #}

        # pass the PHP scripts to FastCGI server listening on 127.0.0.1:9000
        #
        #location ~ .php$ {
        #    root           html;
        #    fastcgi_pass   127.0.0.1:9000; # single backend process
        #    fastcgi_pass   myLoadBalancer; # or multiple, see example above
        #    fastcgi_index  index.php;
        #    fastcgi_param  SCRIPT_FILENAME  $document_root$fastcgi_script_name;
        #    include        fastcgi_params;
        #}

        # deny access to .htaccess files, if Apache's document root
        # concurs with nginx's one
        #
        #location ~ /.ht {
        #    deny  all;
        #}
    }


    # another virtual host using mix of IP-, name-, and port-based configuration
    #
    #server {
    #    listen       8000;
    #    listen       somename:8080;
    #    server_name  somename  alias  another.alias;

    #    location / {
    #        root   html;
    #        index  index.html index.htm;
    #    }
    #}


    # HTTPS server
    #
    #server {
    #    listen       443 ssl spdy;
    #    server_name  localhost;

    #    ssl                  on;
    #    ssl_certificate      cert.pem;
    #    ssl_certificate_key  cert.key;

    #    ssl_session_timeout  5m;

    #    ssl_prefer_server_ciphers On;
    #    ssl_protocols TLSv1 TLSv1.1 TLSv1.2;
    #    ssl_ciphers ECDH+AESGCM:ECDH+AES256:ECDH+AES128:ECDH+3DES:RSA+AESGCM:RSA+AES:RSA+3DES:!aNULL:!eNULL:!MD5:!DSS:!EXP:!ADH:!LOW:!MEDIUM;

    #    location / {
    #        root   html;
    #        index  index.html index.htm;
    #    }
    #}

}
步骤4:启动服务器
nginx.exe -c conf
ginx-win-rtmp.conf
步骤5:使用推流地址
推流地址:rtmp://lP:监听端口/应用名/home,步骤3配置文件配置出的推流地址为rtmp://192.168.xxxx.xxxx:1935/live/home
通过此推流地址,便可以成功推流
步骤6:其他ngnix常用命令:
(1)终止服务器
nginx.exe -s stop
stop是快速停止nginx,可能并不保存相关信息;
nginx.exe -s quit
quit是完整有序的停止nginx,并保存相关信息。
(2)重新载入Nginx
nginx.exe -s reload
当配置信息修改,需要重新载入这些配置时使用此命令。
(3)重新打开日志文件
nginx.exe -s reopen
>>>>>>>>待续