记录一下安装和配置过程中的一些坑
步骤一
分别下载vagrant和VirtualBox,我这里下载的是vagrant_1.9.1.msi 和 VirtualBox-5.1.14-112924-Win.exe
步骤二
这两个东东安装好之后,我在e盘创建了一个myvagrant目录,作为工程目录,进入该目录,进行添加box

其中centos7.0是自定义的box的名字,后面是本地box的路径
添加完后 vagrant init cento7.0然后就会在myvagrant目录下生成一个vagrantfile文件


然后打开这个文件,修改一下这里


=================================================
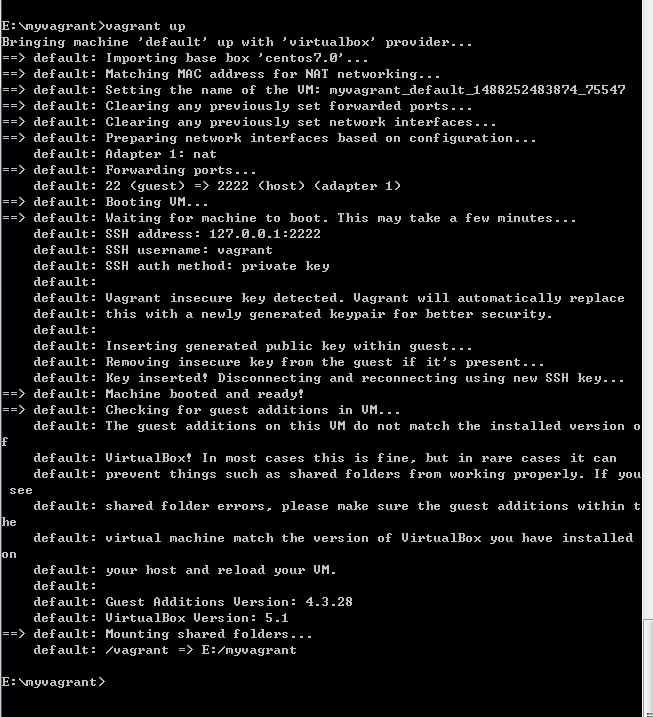
配置好后,输入vagrant up

这样就启动成功了。
坑一:
就是在vagrant up的时候出现如下错误
If the provider you're using has a GUI that comes with it,
it is often helpful to open that and watch the machine, since the
GUI often has more helpful error messages than Vagrant can retrieve.
For example, if you're using VirtualBox, run `vagrant up` while the
VirtualBox GUI is open.
The primary issue for this error is that the provider you're using
is not properly configured. This is very rarely a Vagrant issue.
然后在stackoverflow看了答案,跟着改了还是无果,最后我卸载掉原来安装好的virtualbox,然后去官网下载最新的virtualbox,版本是VirtualBox-5.1.14-112924-Win.exe
然后在vagrant up的时候这个错误就消失了,virtualbox版本的原因
坑二:
If you're using a custom box, make sure that networking is properly
working and you're able to connect to the machine. It is a common
problem that networking isn't setup properly in these boxes.
Verify that authentication configurations are also setup properly,
as well.

If the box appears to be booting properly, you may want to increase
the timeout ("config.vm.boot_timeout") value.

因为配置的时候开启了调用virtualbox可视化界面,所以出现这个提示的时候,virtualbox那也会弹出一个警告
VT-x/AMD-V硬件加速在您的系统中不可用。您的64-位虚拟机将无法检测到 64-位处理器,从而无法启动。

在网上找到解决办法是重启按f2进入bios设置,然后开启虚拟化支持,然后保存,重新启动,这个时候再用vagrant up就成功了。