更多内容参见个人技术博客,无广告欢迎关注
关于RN的相关资料,教你一步步开发react-native企业级应用
ReactNative开发企业级电商APP应用,环境搭建->开发工具->重点知识库->基础框架构建->iOS/Android上线
应用完成开发后,讲讲自动化构建fastlane,react-native fastlane自动化构建分发应用管理工具for iOS and Android

简单来说fastlane能为我们做些什么?
1、通过命令行 fastlane ios appstore / fastlane android google 即可将应用打包上传至App Store或Google应用市场
2、如果还处于内测阶段,fastlane ios debug / fastlane android debug 可以将应用打包上传至蒲公英pgyer上测试
----- -------------------- -------------------- -------------------- ---------------
先来看看我们的RN应用目录

一切开始的第一步:
brew cask install fastlane进入RN项目根目录,执行 fastlane init (fastlane for react-native官方文档)
然后会生成fastlane目录和Gemfile文件,cd fastlane 编辑对于Fastlane文件来自定义打包命令

文件说明:
Appfile:设置开发者账号信息,如 Developer Portal Team ID 或 ITunes Connent Team ID等
app_identifier("com.wood.appname") # The bundle identifier of your app
apple_id("youremail@gmail.com") # Your Apple email address

#itc_team_id("133456152") # iTunes Connect Team ID
team_id("UD5YXYYV23") # Developer Portal Team ID
# Google Play Console APP管理权限生成的私钥,这样可以直接将 apk 传送到PlayStore中
json_key_file "./android/keystores/key.json"
-------------------iOS前置工作--------------------------------------------------------------------------------------
iOS上架应用需要注册成为苹果开发者账号(https://developer.apple.com/),个人:$99 内测adhoc会有100台设备限制 企业:$299
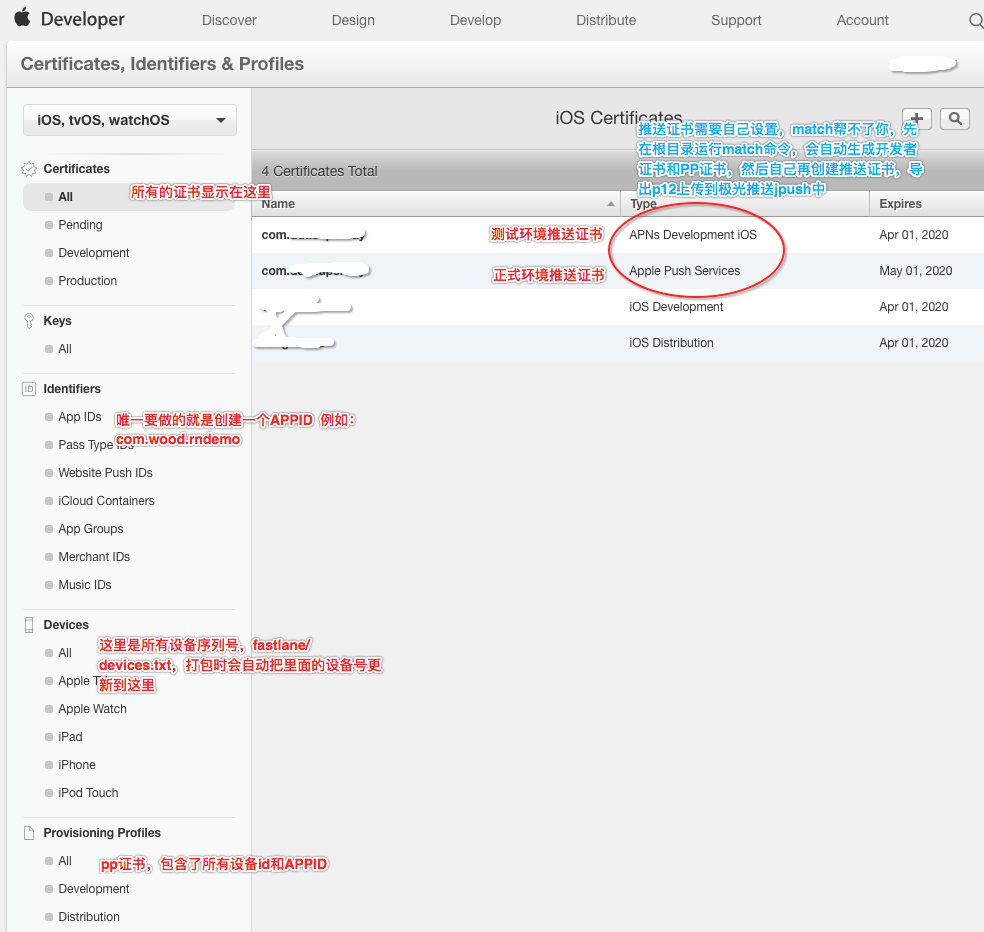
先要设置一个APPID(Bundle identifier)com.company.rndemo -和一个git私有仓库剩下的证书、签名都由 match 搞定
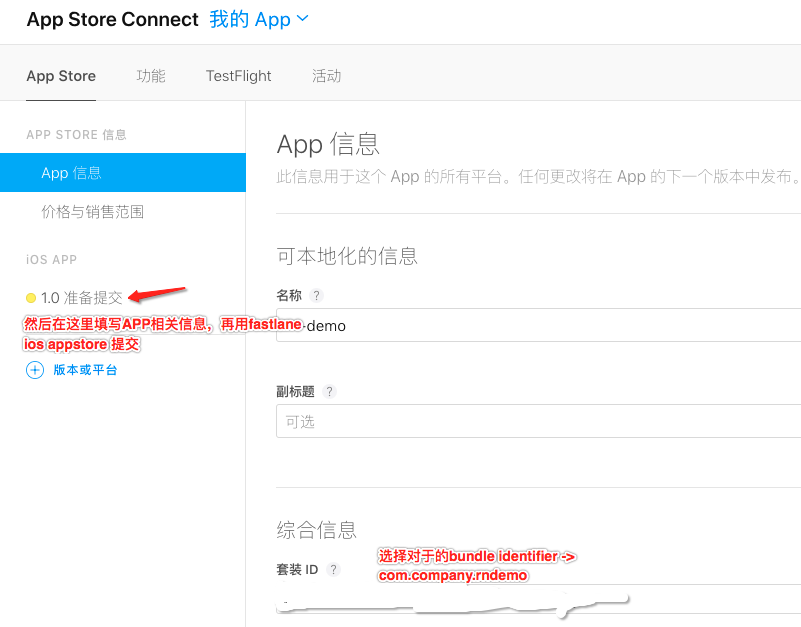
在iTunes connect 中填写APP相关信息,默认会创建一个1.0版本和本地的版本号对应
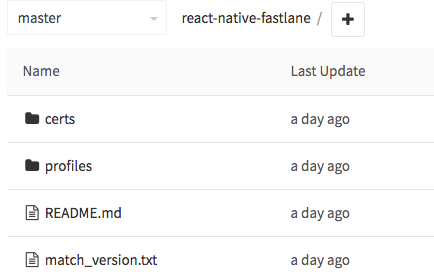
Git私有仓库
fastlane match
这个仓库包含你所有的 certificates(开发者证书) and provisioning profiles (PP证书),仓库是通过OpenSSL来访问的http协议不行
Important: 敲黑板划重点私有仓库
Installation
Make sure you have the latest version of the Xcode command line tools installed:
xcode-select --installInstall fastlane using
[sudo] gem install fastlane -NVor alternatively using brew cask install fastlane
Usage
Navigate to your project folder and run
fastlane match appstorefastlane match adhocfastlane match developmentfastlane match enterpriseFor more information open fastlane match git repo
强行植入广告(以前不知道打包上线怎么搞自己做APP当demo使用,fastlane和源码都在GitHub)

-------------------Android前置工作----------------------------------------------------------------------------------
1、打开 Google Play Console
2、设置 - API权限(弹出服务条款-选择全部接受)

3、点击 创建新项目-创建服务账号-join

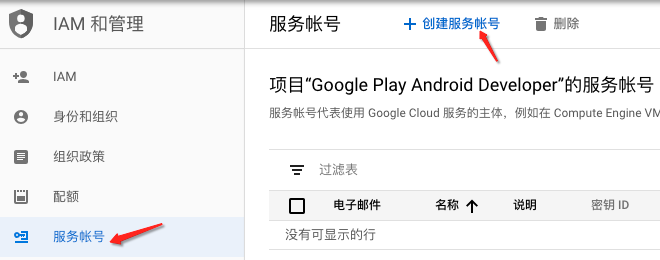

4、点击完成,记得保存json文件待会要用到,返回到上一页面Google Play Console继续

设置应用权限,添加用户并关闭对话框,Google Play Console设置完毕。

Configure supply
编辑 fastlane/Appfile 并设置 json_key_file 指定到你刚才下载的json私钥文件(我把私钥放到了项目中android/keysotres目录中):
json_key_file "./android/keystores/key.json" Fetch your app metadata
fastlane supply init //运行命令从Google play console中获取App metadata下载下来的目录结构 fastlane/metadata/android.
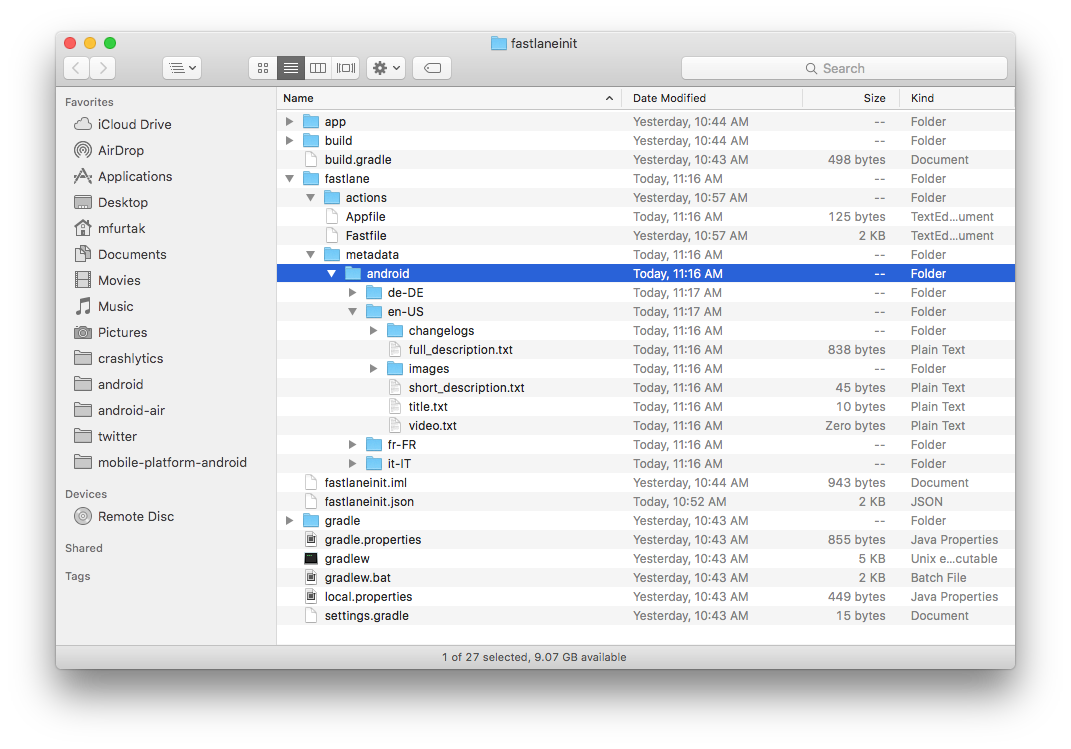
由于受限 Google Play API, supply 不能下载APP详情中的截图和视频。(如果下载失败记得**上网、VPN)
----------------------------------------------------------------------------------------------------------------------
Fastlane:定义打包动作,例如 lane appstore ,就可以在命令行执行fastlane appstore来做某些事情
# fastlane配置文件,定义fastlane可执行的动作

default_platform(:ios)

def build_sign_app(mode="release")
  # register_devices应用内测阶段,注册苹果设备ID,可以扫码下载
register_devices(
      devices_file: "./fastlane/devices.txt",
team_id: "UD5YXYYV23",
username: "youremail@gmail.com",
platform: "ios"
)
  configuration = "Release"
dirPrefix = "Release_"
if mode == "debug"
configuration = "Debug"
dirPrefix = "Beta_"
end
# match应用签名,自动生成证书并上传至私有git仓库,保证安全
match(type: "adhoc", force_for_new_devices: true)
    build_app(
    export_method: "ad-hoc",
project: "./ios/yourapp.xcodeproj",
configuration: configuration,
scheme: "yourapp",
clean: true,
output_directory: "./build/output/#{dirPrefix}#{Time.now.strftime('%Y%m%d%H%M%S')}",
output_name: "rn-yourapp.ipa"
)
end

def upload_to_pgyer(desc="", mode="release")
  description = "正式环境"
if mode == "debug"
description = "测试环境"
end
# pgyer上传至pgyer进行内测
pgyer(
    api_key: "xxxxxxxxxxxxxxxxxxxxxxxxxxx",
user_key: "xxxxxxxxxxxxxxxxxxxxxxxxxxx",
update_description: "#{desc}
#{description}"
)
end

def sign_appstore
increment_build_number(xcodeproj: './ios/yourapp.xcodeproj')
  match(type: "appstore", readonly: true)
end

# 所有lane动作开始前都会执行这里的命令,例如指定打master上的包或执行project clean
before_all do |options|
#ensure_git_branch
  #ensure_git_status_clean
  #git_pull
end

############################################### iOS #############################################
platform :ios do
desc "构建一个测试环境版本上传至pgyer"
lane :debug do|option|
build_sign_app(mode: "debug")
    upload_to_pgyer(desc: option[:desc], mode: "debug")
  end

desc "构建一个正式环境版本上传至pgyer"
lane :release do|option|
build_sign_app
    upload_to_pgyer(desc: option[:desc])
  end

desc "构建一个正式环境版本上传至AppStore"
lane :appstore do|option|
sign_appstore
    build_app(
      export_method: "app-store",
project: "./ios/yourapp.xcodeproj",
scheme: "yourapp",
clean: true,
output_directory: "./build/output/AppStore_#{Time.now.strftime('%Y%m%d%H%M%S')}",
output_name: "rn-yourapp.ipa"
)
    upload_to_app_store(app_identifier: "com.ddt.yourapp")
    commit_version_bump(message: 'Bump build', xcodeproj: './ios/name.xcodeproj')
    push_to_git_remote
  end

end


############################################### Android ##########################################
platform :android do

desc "构建一个测试环境版本上传至pgyer"
lane :debug do|option|
gradle(task: 'clean', project_dir: 'android/')
    gradle(task: 'assemble', build_type: 'Debug', project_dir: 'android/')
    upload_to_pgyer(mode: "debug")
  end

desc "构建一个正式环境版本上传至pgyer"
lane :release do|option|
gradle(task: 'clean', project_dir: 'android/')
    gradle(task: 'assemble', build_type: 'Release', project_dir: 'android/')
    upload_to_pgyer(desc: option[:desc])
  end

desc "构建一个正式环境版本上传至AppStore"
lane :playstore do|option|
    # clean清理工程
    gradle(task: 'clean', project_dir: 'android/')
    # 从Google Play中获取应用versioncode
    google_play_track_version_codes(package_name: 'com.ddt.superbuy')
    # 编译打包
    gradle(task: 'assemble', build_type: 'Release', project_dir: 'android/')
    # 上传Android APP Bundle到Google Play
    upload_to_play_store(package_name: 'com.wood.rndemo')
    # 因为修改了versioncode,自动提交代码并push
    git_commit(path: ['./android/gradle.properties'], message: 'Bump versionCode')
    push_to_git_remote
end

end
Deliverfile:它属于fastlane工具集中的一个模块,用于配置上传App Store功能(本教程暂未用到)
Matchfile:证书管理,配置应用信息和git仓库地址,会自动生成签名证书来给应用签名,随后将证书上传至git私有仓库中保证安全。私有仓库这个要特别注意,保证你在命令行git clone your.git 可以download你的证书仓库,需要配置你的git.email/username --global,因为这个命令不会提示你输入密码、要设置username什么的,这些前置工作不到位直接就挂了,如果你有多仓库的话,参考:
git_url("git@github.com:xxx/react-native-fastlane.git")

type("development") # The default type, can be: appstore, adhoc, enterprise or development
type("adhoc")
type("appstore")

app_identifier(["com.ddt.yourapp"])
username("youremail@gmail.com") # Your Apple Developer Portal username
Pluginfile:fastlane插件,社区提供了数不清的插件供我们使用
依次添加安装这些插件后会自动生成此文件
fastlane add_plugin versioning
# Autogenerated by fastlane
#
# Ensure this file is checked in to source control!

gem 'fastlane-plugin-versioning'
gem 'fastlane-plugin-appicon'
gem 'fastlane-plugin-changelog'
gem 'fastlane-plugin-pgyer'
devices.txt:iOS应用内侧时扫码下载,在内的设备id才可以下载最多设置100台设备,苹果企业级账号没有这个限制,如何获取设备ID和相关信息
Device ID   Device Name
a5e2118eebdad4c85011ade6919c22bbcxxxxxxx   我的iPhone X 按照这个格式添加设备
执行命令
fastlane ios debug/release/appstore
fastlane android debug/release/playstore

------------------------------------
注意事项:
1、iOS上传APP失败,多次重试后upload_to_appstore上传失败?
这是网络问题,不要中断脚本,保证没有开启代理
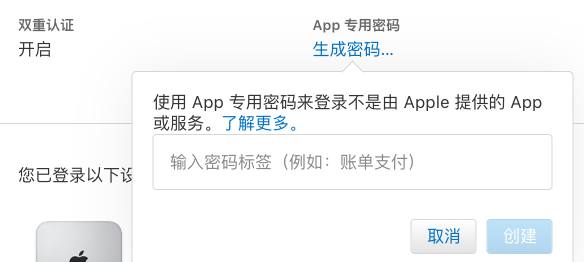
2、iOS开发者账号开启两部验证?
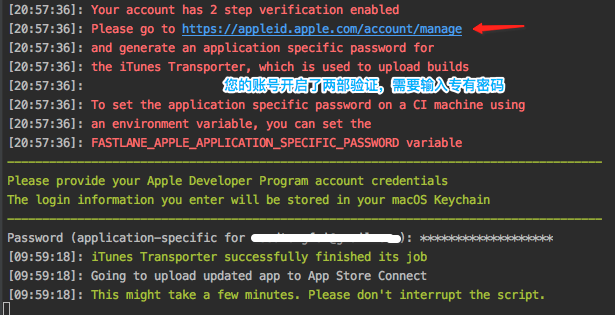
请打开控制台中指定链接,设置专用密码
3、Android上传playstore失败,错误日志中有connection error?
网络原因,国内需要**上网,你懂得