1、Linux配置Java环境
CentOS系统默认是带有yum(软件包依赖管理工具)的,Ubuntu是apt,macOS是homebrew
yum -y update 升级所有包同时也升级软件和系统内核
yum -y upgrade 只升级所有包,不升级软件和系统内核
安装之前先检查一下系统有没有自带open-jdk
rpm -qa |grep java
rpm -qa |grep jdk
rpm -qa |grep gcj
如果没有输入信息表示没有安装。
如果安装可以使用 rpm -qa | grep java | xargs rpm -e --nodeps 批量卸载所有带有Java的文件 这句命令的关键字是java
yum list java* 检索包含java的列表
yum install java-1.8.0-openjdk* -y 安装1.8.0的所有文件
java -version 检查是否安装成功(yum安装都不用配置环境变量)
2、Linux配置MySQL
yum安装MySQL,主要是3个包
mysql-devel 开发用到的库以及包含文件
mysql mysql 客户端
mysql-server 数据库服务器
安装之前,先说收如何彻底卸载MySQL
用命令rpm -qa|grep -i mysql查看已经安装的MySQL安装包,在列表中逐个卸载
yum remove mysql mysql-server mysql-libs compat-mysql51
rm -rf /var/lib/mysql
rm /etc/my.cnf
查看以前是否安装过
yum list installed mysql*
rpm -qa | grep mysql*
安装MySQL
yum install mysql
yum install mysql-server
yum install mysql-devel
配置MySQL
[root@wood /]# cat /etc/my.cnf
[client]
default-character-set=utf8
[mysql]
default-character-set = utf8
[mysqld]
character_set_server=utf8
character_set_client=utf8
collation-server=utf8_general_ci
max_connections=100
datadir=/var/lib/mysql
socket=/var/lib/mysql/mysql.sock
user=mysql
# Disabling symbolic-links is recommended to prevent assorted security risks
symbolic-links=0
[mysqld_safe]
log-error=/var/log/mysqld.log
pid-file=/var/run/mysqld/mysqld.pid
开机启动 MySQL
chkconfig -add mysqld
启动、停止 MySQL
service mysqld start
service mysqld stop
service mysqld restart
第一次启动会弹出
[root@wood ~]# service mysqld start
Initializing MySQL database: Installing MySQL system tables...
OK
Filling help tables...
OK
To start mysqld at boot time you have to copy
support-files/mysql.server to the right place for your system
PLEASE REMEMBER TO SET A PASSWORD FOR THE MySQL root USER !
To do so, start the server, then issue the following commands:
/usr/bin/mysqladmin -u root password 'new-password'
/usr/bin/mysqladmin -u root -h wood password 'new-password'
Alternatively you can run:
/usr/bin/mysql_secure_installation
which will also give you the option of removing the test
databases and anonymous user created by default. This is
strongly recommended for production servers.
See the manual for more instructions.
You can start the MySQL daemon with:
cd /usr ; /usr/bin/mysqld_safe &
You can test the MySQL daemon with mysql-test-run.pl
cd /usr/mysql-test ; perl mysql-test-run.pl
Please report any problems with the /usr/bin/mysqlbug script!
设置管理员密码
设置mysql管理员密码
/usr/bin/mysqladmin -u root password 'new-password'
/usr/bin/mysqladmin -u root -h localhost password 'new-password'
配置mysql安装向导
/usr/bin/mysql_secure_installation
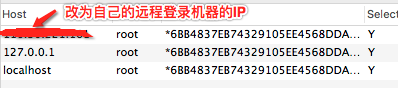
修改localhost,任何IP都可以远程访问mysql服务器
更改 "mysql" 数据库里的 "user" 表里的 "host" 项,从"localhost"改成"%"
mysql>use mysql;
mysql>update user set host = '%' where user = 'root';
mysql>select host, user from user;
mysql>FLUSH PRIVILEGES;
为了安全,我是这样设置的
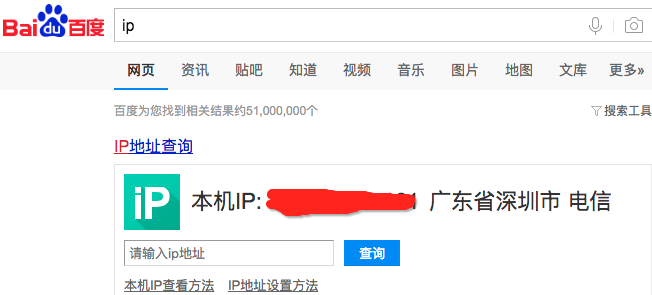
话说IP怎么查?