1,最近看了一篇文章关于GreenDao的文章 ,感觉使用这个操作数据库还是很好用的,帮我们省了不少的查询代码,今天就和大家一起来简单的使用一下吧。首先这是官网地址:https://github.com/greenrobot/greendao,我们来按照文档一点点的来写一下
2,首先要认识一下GreenDao是使用ORM(Object RelationShop Mapping)对象关系映射,就是通过GreenDao将数据库和Bean关联起来有以下优点:
-
存取速度快
-
支持数据库加密
-
轻量级
-
激活实体
-
支持缓存
-
代码自动生成
3,接入,首先要在Project中的build中添加如下代码
buildscript {
    repositories {
        jcenter()
    }
    dependencies {
        classpath 'com.android.tools.build:gradle:2.2.3'

        // NOTE: Do not place your application dependencies here; they belong
        // in the individual module build.gradle files
        classpath 'org.greenrobot:greendao-gradle-plugin:3.2.1'
    }
}

allprojects {
    repositories {
        jcenter()
    }
}

task clean(type: Delete) {
    delete rootProject.buildDir
}
再在Module中的build添加引用
apply plugin: 'com.android.application'
//使用greendao
apply plugin: 'org.greenrobot.greendao'
android {
    compileSdkVersion 25
    buildToolsVersion "25.0.2"

    defaultConfig {
        applicationId "com.qianmo.greendaotest"
        minSdkVersion 15
        targetSdkVersion 25
        versionCode 1
        versionName "1.0"

        testInstrumentationRunner "android.support.test.runner.AndroidJUnitRunner"

    }
    //greendao配置
    greendao {
        //版本号,升级时可配置
        schemaVersion 1
//        daoPackage 'com.qianmo.greendaotest.gen'
//        targetGenDir 'src/main/java'
    }

    buildTypes {
        release {
            minifyEnabled false
            proguardFiles getDefaultProguardFile('proguard-android.txt'), 'proguard-rules.pro'
        }
    }
}

dependencies {
    compile fileTree(dir: 'libs', include: ['*.jar'])
    androidTestCompile('com.android.support.test.espresso:espresso-core:2.2.2', {
        exclude group: 'com.android.support', module: 'support-annotations'
    })
    compile 'com.android.support:appcompat-v7:25.1.1'
    compile 'com.android.support:design:25.1.1'
    compile 'org.greenrobot:greendao:3.2.0' //greendao依赖

    testCompile 'junit:junit:4.12'
}
这样就配置成功了,接着是简单的使用。
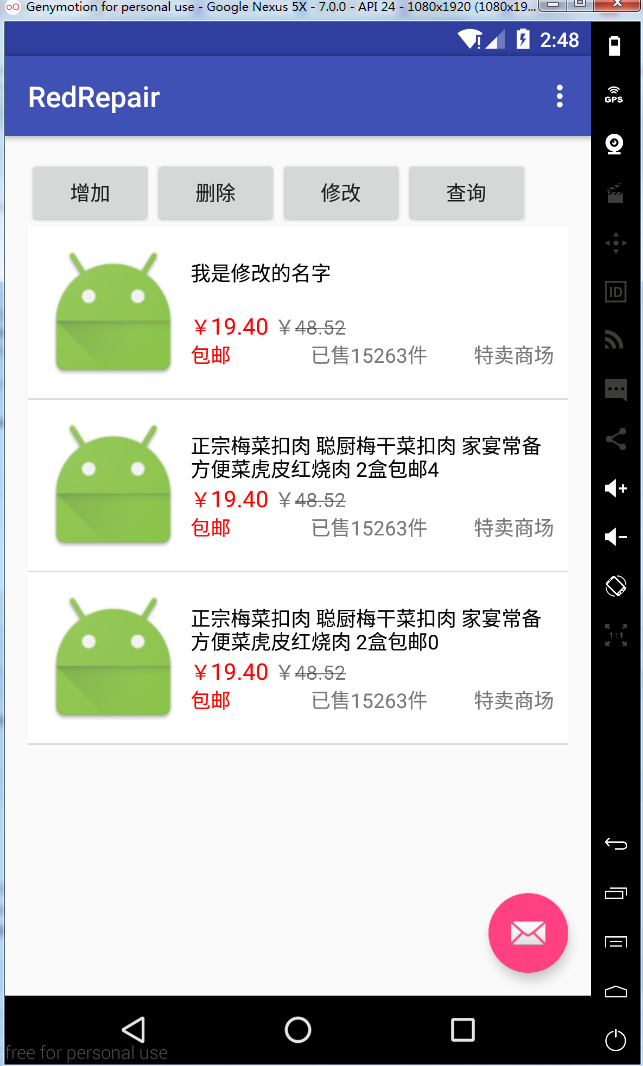
4,使用,先来看一下我们的效果图
①创建ShopBean
package com.qianmo.greendaotest.bean;

import org.greenrobot.greendao.annotation.Entity;
import org.greenrobot.greendao.annotation.Id;
import org.greenrobot.greendao.annotation.Property;
import org.greenrobot.greendao.annotation.Unique;
import org.greenrobot.greendao.annotation.Generated;

/**
 * Created by wangjitao on 2017/2/13 0013.
 * E-Mail:543441727@qq.com
 *
 * Bean 对象注释的解释
 *
 * @Entity:告诉GreenDao该对象为实体,只有被@Entity注释的Bean类才能被dao类操作
    @Id:对象的Id,使用Long类型作为EntityId,否则会报错。(autoincrement = true)表示主键会自增,如果false就会使用旧值
    @Property:可以自定义字段名,注意外键不能使用该属性
    @NotNull:属性不能为空
    @Transient:使用该注释的属性不会被存入数据库的字段中
    @Unique:该属性值必须在数据库中是唯一值
    @Generated:编译后自动生成的构造函数、方法等的注释,提示构造函数、方法等不能被修改
 */

@Entity
public class Shop {
    //表示是购物车列表
    public static final int TYPE_CART = 0x01;
    //表示为收藏列表
    public static final int TYPE_LOVE = 0x02;

    //不能用int (ID 表示标识主键 且主键不能用int autoincrement = true 表示主键会自增)
    @Id(autoincrement = true)
    private Long id;

    //商品名称 (unique 表示该属性必须在数据库中是唯一的值)
    @Unique
    private String name;

    //商品价格(可以自定义字段名,注意外键不能使用该属性)
    @Property(nameInDb = "price")
    private String price;

    //已售数量
    private int sell_num;

    //图标url
    private String image_url;

    //商家地址
    private String address;

    //商品列表分类
    private int type;

    @Generated(hash = 1304458862)
    public Shop(Long id, String name, String price, int sell_num, String image_url,
            String address, int type) {
        this.id = id;
        this.name = name;
        this.price = price;
        this.sell_num = sell_num;
        this.image_url = image_url;
        this.address = address;
        this.type = type;
    }

    @Generated(hash = 633476670)
    public Shop() {
    }

    public Long getId() {
        return this.id;
    }

    public void setId(Long id) {
        this.id = id;
    }

    public String getName() {
        return this.name;
    }

    public void setName(String name) {
        this.name = name;
    }

    public String getPrice() {
        return this.price;
    }

    public void setPrice(String price) {
        this.price = price;
    }

    public int getSell_num() {
        return this.sell_num;
    }

    public void setSell_num(int sell_num) {
        this.sell_num = sell_num;
    }

    public String getImage_url() {
        return this.image_url;
    }

    public void setImage_url(String image_url) {
        this.image_url = image_url;
    }

    public String getAddress() {
        return this.address;
    }

    public void setAddress(String address) {
        this.address = address;
    }

    public int getType() {
        return this.type;
    }

    public void setType(int type) {
        this.type = type;
    }

}
对Bean中的对象进行解释
- @Entity:告诉GreenDao该对象为实体,只有被@Entity注释的Bean类才能被dao类操作
- @Id:对象的Id,使用Long类型作为EntityId,否则会报错。(autoincrement = true)表示主键会自增,如果false就会使用旧值
- @Property:可以自定义字段名,注意外键不能使用该属性
- @NotNull:属性不能为空
- @Transient:使用该注释的属性不会被存入数据库的字段中
- @Unique:该属性值必须在数据库中是唯一值
- @Generated:编译后自动生成的构造函数、方法等的注释,提示构造函数、方法等不能被修改
②创建数据库名称
package com.qianmo.greendaotest;

import android.app.Application;
import android.database.sqlite.SQLiteDatabase;

import com.qianmo.greendaotest.bean.DaoMaster;
import com.qianmo.greendaotest.bean.DaoSession;


/**
 * Created by wangjitao on 2017/2/13 0013.
 * E-Mail:543441727@qq.com
 */

public class BaseApplication extends Application {
    private static DaoSession daoSession;

    @Override
    public void onCreate() {
        super.onCreate();

        //配置数据库
        setupDatabase();
    }

    /**
     * 配置数据库
     */
    private void setupDatabase() {
        //创建数据库shop.db
        DaoMaster.DevOpenHelper helper = new DaoMaster.DevOpenHelper(this, "shop.db", null);
        //获取可写数据库
        SQLiteDatabase db = helper.getWritableDatabase();
        //获取数据库对象
        DaoMaster daoMaster = new DaoMaster(db);
        //获取dao对象管理者
        daoSession = daoMaster.newSession();
    }

    public static DaoSession getDaoInstant() {
        return daoSession;
    }

}
这里我们需要创建一个Application,在代码中初始化数据库的基本数据,这里要讲解这下面这三个类
-
DevOpenHelper:创建SQLite数据库的SQLiteOpenHelper的具体实现
-
DaoMaster:GreenDao的顶级对象,作为数据库对象、用于创建表和删除表
-
DaoSession:管理所有的Dao对象,Dao对象中存在着增删改查等API
这里注意一下我们要编译一下我们的工程(ctrl+F9),因为上面三个类是运行时创建的,还有相应的Shop中的set和get方法及构造函数
③添加一个Dao,提供简单的Shop对象的增删该查的简单方法
package com.qianmo.greendaotest.dao;

import com.qianmo.greendaotest.BaseApplication;
import com.qianmo.greendaotest.bean.Shop;
import com.qianmo.greendaotest.bean.ShopDao;

import java.util.List;

/**
 * Created by wangjitao on 2017/2/13 0013.
 * E-Mail:543441727@qq.com
 * 使用GreenDao 实现简单的增删改查,下面是基本方法
 * 增加单个数据
 * getShopDao().insert(shop);
 * getShopDao().insertOrReplace(shop);
 * 增加多个数据
 * getShopDao().insertInTx(shopList);
 * getShopDao().insertOrReplaceInTx(shopList);
 * 查询全部
 * List< Shop> list = getShopDao().loadAll();
 * List< Shop> list = getShopDao().queryBuilder().list();
 * 查询附加单个条件
 * .where()
 * .whereOr()
 * 查询附加多个条件
 * .where(, , ,)
 * .whereOr(, , ,)
 * 查询附加排序
 * .orderDesc()
 * .orderAsc()
 * 查询限制当页个数
 * .limit()
 * 查询总个数
 * .count()
 * 修改单个数据
 * getShopDao().update(shop);
 * 修改多个数据
 * getShopDao().updateInTx(shopList);
 * 删除单个数据
 * getTABUserDao().delete(user);
 * 删除多个数据
 * getUserDao().deleteInTx(userList);
 * 删除数据ByKey
 * getTABUserDao().deleteByKey();
 */

public class ShopDao {

    /**
     * 添加数据,如果有重复则覆盖
     *
     * @param shop
     */
    public static void insertShop(Shop shop) {
        BaseApplication.getDaoInstant().getShopDao().insertOrReplace(shop);
    }

    /**
     * 删除数据
     *
     * @param id
     */
    public static void deleteShop(long id) {
        BaseApplication.getDaoInstant().getShopDao().deleteByKey(id);
    }

    /**
     * 更新数据
     */
    public static void updateShop(Shop shop) {
        BaseApplication.getDaoInstant().getShopDao().update(shop);
    }

    /**
     * 查询Type为1的所有数据
     *
     * @return
     */
    public static List<Shop> queryShop() {
        return BaseApplication.getDaoInstant().getShopDao().queryBuilder().where(ShopDao.Properties.Type.eq(Shop.TYPE_CART)).list();

    }

    /**
     * 查询所有数据
     *
     * @return
     */
    public static List<Shop> queryAll() {
        return BaseApplication.getDaoInstant().getShopDao().loadAll();
    }

}
Dao中其它的一些方法
-
增加单个数据
-
getShopDao().insert(shop);
-
getShopDao().insertOrReplace(shop);
-
增加多个数据
-
getShopDao().insertInTx(shopList);
-
getShopDao().insertOrReplaceInTx(shopList);
-
查询全部
-
List< Shop> list = getShopDao().loadAll();
-
List< Shop> list = getShopDao().queryBuilder().list();
-
查询附加单个条件
-
.where()
-
.whereOr()
-
查询附加多个条件
-
.where(, , ,)
-
.whereOr(, , ,)
-
查询附加排序
-
.orderDesc()
-
.orderAsc()
-
查询限制当页个数
-
.limit()
-
查询总个数
-
.count()
-
修改单个数据
-
getShopDao().update(shop);
-
修改多个数据
-
getShopDao().updateInTx(shopList);
-
删除单个数据
-
getTABUserDao().delete(user);
-
删除多个数据
-
getUserDao().deleteInTx(userList);
-
删除数据ByKey
-
getTABUserDao().deleteByKey();
④这样我们就基本上完成了,这里我们写一个界面来展示一下吧
activity_main.xml
<?xml version="1.0" encoding="utf-8"?>
<RelativeLayout
    xmlns:android="http://schemas.android.com/apk/res/android"
    xmlns:app="http://schemas.android.com/apk/res-auto"
    xmlns:tools="http://schemas.android.com/tools"
    android:id="@+id/content_main"
    android:layout_width="match_parent"
    android:layout_height="match_parent"
    android:orientation="horizontal"
    android:paddingBottom="@dimen/activity_vertical_margin"
    android:paddingLeft="@dimen/activity_horizontal_margin"
    android:paddingRight="@dimen/activity_horizontal_margin"
    android:paddingTop="@dimen/activity_vertical_margin"
    app:layout_behavior="@string/appbar_scrolling_view_behavior"
    tools:context="com.qianmo.greendaotest.MainActivity"
    tools:showIn="@layout/activity_main">

    <LinearLayout
        android:id="@+id/ll_btn"
        android:layout_width="wrap_content"
        android:layout_height="wrap_content"
        android:orientation="horizontal"
        >

        <Button
            android:id="@+id/btn_add"
            android:layout_width="wrap_content"
            android:layout_height="wrap_content"
            android:layout_alignParentLeft="true"
            android:layout_alignParentStart="true"
            android:layout_alignParentTop="true"
            android:text="增加"/>

        <Button
            android:id="@+id/btn_delete"
            android:layout_width="wrap_content"
            android:layout_height="wrap_content"
            android:layout_alignParentLeft="true"
            android:layout_alignParentStart="true"
            android:layout_alignParentTop="true"
            android:text="删除"/>

        <Button
            android:id="@+id/btn_edit"
            android:layout_width="wrap_content"
            android:layout_height="wrap_content"
            android:layout_alignParentLeft="true"
            android:layout_alignParentStart="true"
            android:layout_alignParentTop="true"
            android:text="修改"/>

        <Button
            android:id="@+id/btn_query"
            android:layout_width="wrap_content"
            android:layout_height="wrap_content"
            android:layout_alignParentLeft="true"
            android:layout_alignParentStart="true"
            android:layout_alignParentTop="true"
            android:text="查询"/>

    </LinearLayout>

    <ListView
        android:id="@+id/listView"
        android:layout_width="match_parent"
        android:layout_height="match_parent"
        android:layout_below="@+id/ll_btn">

    </ListView>

</RelativeLayout>
MainActivity.java
package com.qianmo.greendaotest;

import android.os.Bundle;
import android.support.design.widget.FloatingActionButton;
import android.support.design.widget.Snackbar;
import android.support.v7.app.AppCompatActivity;
import android.support.v7.widget.Toolbar;
import android.view.View;
import android.view.Menu;
import android.view.MenuItem;
import android.widget.Button;
import android.widget.ListView;

import com.qianmo.greendaotest.adapter.ShopListAdapter;
import com.qianmo.greendaotest.bean.Shop;
import com.qianmo.greendaotest.dao.LoveDao;

import java.util.ArrayList;
import java.util.List;

public class MainActivity extends AppCompatActivity implements View.OnClickListener {

    private Button btn_add;
    private Button btn_edit;
    private Button btn_delete;
    private Button btn_query;

    private ListView listView;

    private List<Shop> shops;
    private ShopListAdapter adapter;

    private int i;

    @Override
    protected void onCreate(Bundle savedInstanceState) {
        super.onCreate(savedInstanceState);
        setContentView(R.layout.activity_main);
        Toolbar toolbar = (Toolbar) findViewById(R.id.toolbar);
        setSupportActionBar(toolbar);

        FloatingActionButton fab = (FloatingActionButton) findViewById(R.id.fab);
        fab.setOnClickListener(new View.OnClickListener() {
            @Override
            public void onClick(View view) {
                Snackbar.make(view, "Replace with your own action", Snackbar.LENGTH_LONG)
                        .setAction("Action", null).show();
            }
        });

        initView();
        initData();
    }

    private void initData() {
        shops = new ArrayList<>();
        shops = LoveDao.queryShop();
        adapter = new ShopListAdapter(this, shops);
        listView.setAdapter(adapter);
    }

    private void initView() {

        btn_add = (Button) findViewById(R.id.btn_add);
        btn_edit = (Button) findViewById(R.id.btn_edit);
        btn_delete = (Button) findViewById(R.id.btn_delete);
        btn_query = (Button) findViewById(R.id.btn_query);
        listView = (ListView) findViewById(R.id.listView);

        btn_add.setOnClickListener(this);
        btn_edit.setOnClickListener(this);
        btn_delete.setOnClickListener(this);
        btn_query.setOnClickListener(this);

    }

    @Override
    public boolean onCreateOptionsMenu(Menu menu) {
        // Inflate the menu; this adds items to the action bar if it is present.
        getMenuInflater().inflate(R.menu.menu_main, menu);
        return true;
    }

    @Override
    public boolean onOptionsItemSelected(MenuItem item) {
        // Handle action bar item clicks here. The action bar will
        // automatically handle clicks on the Home/Up button, so long
        // as you specify a parent activity in AndroidManifest.xml.
        int id = item.getItemId();

        //noinspection SimplifiableIfStatement
        if (id == R.id.action_settings) {
            return true;
        }

        return super.onOptionsItemSelected(item);
    }

    private void addDate() {
        Shop shop = new Shop();
        shop.setType(Shop.TYPE_CART);
        shop.setAddress("广东深圳");
        shop.setImage_url("https://img.alicdn.com/bao/uploaded/i2/TB1N4V2PXXXXXa.XFXXXXXXXXXX_!!0-item_pic.jpg_640x640q50.jpg");
        shop.setPrice("19.40");
        shop.setSell_num(15263);
        shop.setName("正宗梅菜扣肉 聪厨梅干菜扣肉 家宴常备方便菜虎皮红烧肉 2盒包邮" + i++);
        LoveDao.insertShop(shop);
        initData();
    }

    private void updateDate() {
        if (!shops.isEmpty()) {
            Shop shop = shops.get(0);
            shop.setName("我是修改的名字");
            LoveDao.updateShop(shop);
            initData();
        }
    }

    private void deleteDate() {
        if (!shops.isEmpty()) {
            LoveDao.deleteShop(shops.get(0).getId());
            initData();
        }
    }

    @Override
    public void onClick(View v) {
        switch (v.getId()) {
            case R.id.btn_add:
                addDate();
                break;
            case R.id.btn_edit:
                updateDate();
                break;
            case R.id.btn_delete:
                deleteDate();
                break;
            case R.id.listView:
                initData();
                break;
        }
    }
}
Adapter
package com.qianmo.greendaotest.adapter;

import android.content.Context;
import android.graphics.Paint;
import android.view.LayoutInflater;
import android.view.View;
import android.view.ViewGroup;
import android.widget.BaseAdapter;
import android.widget.ImageView;
import android.widget.TextView;

import com.qianmo.greendaotest.R;
import com.qianmo.greendaotest.bean.Shop;

import java.util.List;

import static android.R.id.list;

/**
 * Created by Administrator on 2017/2/13 0013.
 * E-Mail:543441727@qq.com
 */

public class ShopListAdapter extends BaseAdapter {
    private Context context;
    private List<Shop> datas;
    private LayoutInflater mInflater;

    public ShopListAdapter(Context context, List<Shop> datas) {
        this.context = context;
        this.datas = datas;
        mInflater = LayoutInflater.from(context);
    }

    @Override
    public int getCount() {
        return datas.size();
    }

    @Override
    public Object getItem(int position) {
        return datas.get(position);
    }

    @Override
    public long getItemId(int position) {
        return position;
    }

    @Override
    public View getView(int position, View convertView, ViewGroup parent) {
        if (convertView == null) {
            convertView = mInflater.inflate(R.layout.adapter_shop_list, null);
        }
        ViewHolder holder = getViewHolder(convertView);
        Shop shop = datas.get(position);

        holder.iv_shop.setImageResource(R.mipmap.ic_launcher);
        holder.tv_name.setText(shop.getName());
        holder.tv_price.setText(shop.getPrice() + "");
        holder.tv_price_discount.setPaintFlags(Paint.STRIKE_THRU_TEXT_FLAG);
        holder.tv_sell_num.setText("已售" + shop.getSell_num() + "件");
        return convertView;
    }

    /**
     * 获得控件管理对象
     *
     * @param view
     * @return
     */
    private ViewHolder getViewHolder(View view) {
        ViewHolder holder = (ViewHolder) view.getTag();
        if (holder == null) {
            holder = new ViewHolder(view);
            view.setTag(holder);
        }
        return holder;
    }

    /**
     * 控件管理类
     */
    private class ViewHolder {
        private TextView tv_name, tv_price, tv_price_discount, tv_sell_num;
        private ImageView iv_shop;

        ViewHolder(View view) {
            tv_name = (TextView) view.findViewById(R.id.tv_name);
            tv_price = (TextView) view.findViewById(R.id.tv_price);
            tv_price_discount = (TextView) view.findViewById(R.id.tv_price_discount);
            tv_sell_num = (TextView) view.findViewById(R.id.tv_sell_num);
            iv_shop = (ImageView) view.findViewById(R.id.iv_shop);
        }
    }
}
ok,这样我们就完成了,看一下效果
See you next time!