TabBar.vue
<template>
<div id="tab-bar">
<slot></slot>
</div>
</template>
<script>
export default {};
</script>
<style>
#tab-bar {
display: flex;
text-align: center;
height: 49px;
background-color: #f2f2f2;
box-shadow: 0 -1px 1px rgba(100, 100, 100, 0.2);
position: fixed;
left: 0;
right: 0;
bottom: 0;
padding-top: 5px;
box-sizing: border-box;
}
</style>
TabBarItem.vue
<template>
<div class="tab-bar-item" @click="itemClick">
<!-- 插槽设置属性,都要在插槽外面包装一层div然后给div设置属性,不能直接给插槽设置属性,会被插入时直接替换掉属性 -->
<div v-if="!isActive">
<slot name="item-icon"></slot>
</div>
<div v-else>
<slot name="item-icon-active"></slot>
</div>
<div :style="activeStyle">
<slot name="item-text"></slot>
</div>
</div>
</template>
<script>
export default {
props: {
link: String,
activeColor: {
type: String,
default: "red"
}
},
computed: {
isActive() {
// 如果当前活跃的路由的path和传来的path一致就返回true
return this.$route.path.indexOf(this.link) !== -1;
},
// 可以动态绑定样式的计算属性
activeStyle() {
return this.isActive ? { color: this.activeColor } : {};
}
},
methods: {
itemClick() {
this.$router.push(this.link);
}
}
};
</script>
<style>
.tab-bar-item {
flex: 1;
font-size: 14px;
}
.tab-bar-item img {
24px;
height: 24px;
vertical-align: middle;
margin-bottom: 2px;
}
</style>
App.vue
<template>
<div id="app">
<router-view />
<tab-bar>
<tab-bar-item link="/home" activeColor="red">
<img src="./assets/img/tabbar/home.svg" slot="item-icon" alt />
<img src="./assets/img/tabbar/home_active.svg" slot="item-icon-active" alt />
<div slot="item-text">首页</div>
</tab-bar-item>
<tab-bar-item link="/category" activeColor="red">
<img src="./assets/img/tabbar/category.svg" slot="item-icon" alt />
<img src="./assets/img/tabbar/category_active.svg" slot="item-icon-active" alt />
<div slot="item-text">分类</div>
</tab-bar-item>
<tab-bar-item link="/shopcart" activeColor="red">
<img src="./assets/img/tabbar/shopcart.svg" slot="item-icon" alt />
<img src="./assets/img/tabbar/shopcart_active.svg" slot="item-icon-active" alt />
<div slot="item-text">购物车</div>
</tab-bar-item>
<tab-bar-item link="/profile" activeColor="red">
<img src="./assets/img/tabbar/profile.svg" slot="item-icon" alt />
<img src="./assets/img/tabbar/profile_active.svg" slot="item-icon-active" alt />
<div slot="item-text">我的</div>
</tab-bar-item>
</tab-bar>
</div>
</template>
<script>
import TabBar from "./components/tabbar/TabBar";
import TabBarItem from "./components/tabbar/TabBarItem";
export default {
name: "App",
components: {
TabBar,
TabBarItem
}
};
</script>
<style>
@import url("./assets/css/base.css");
</style>
路由的index.js
import Vue from 'vue'
//1、 引入路由
import Router from 'vue-router'
//2、 使用路由
Vue.use(Router)
// 解决路由两次点击报错
const VueRouterPush = Router.prototype.push
Router.prototype.push = function push(to) {
  return VueRouterPush.call(this, to).catch(err => err)
}
// 懒加载路由
const Home = () => import("../views/home/Home.vue")
const Category = () => import("../views/category/Category.vue")
const Shopcart = () => import("../views/shopcart/Shopcart.vue")
const Profile = () => import("../views/profile/Profile.vue")
//5、 一般把路由定义相关的抽离出来
const routes = [
  { path: "/", redirect: "/home" },
  { path: "/home", component: Home },
  { path: "/category", component: Category },
  { path: "/shopcart", component: Shopcart },
  { path: "/profile", component: Profile }
]
//3、 创建路由对象
const router = new Router({
  routes,
  mode: "history"
})
//4、 导出路由
export default router
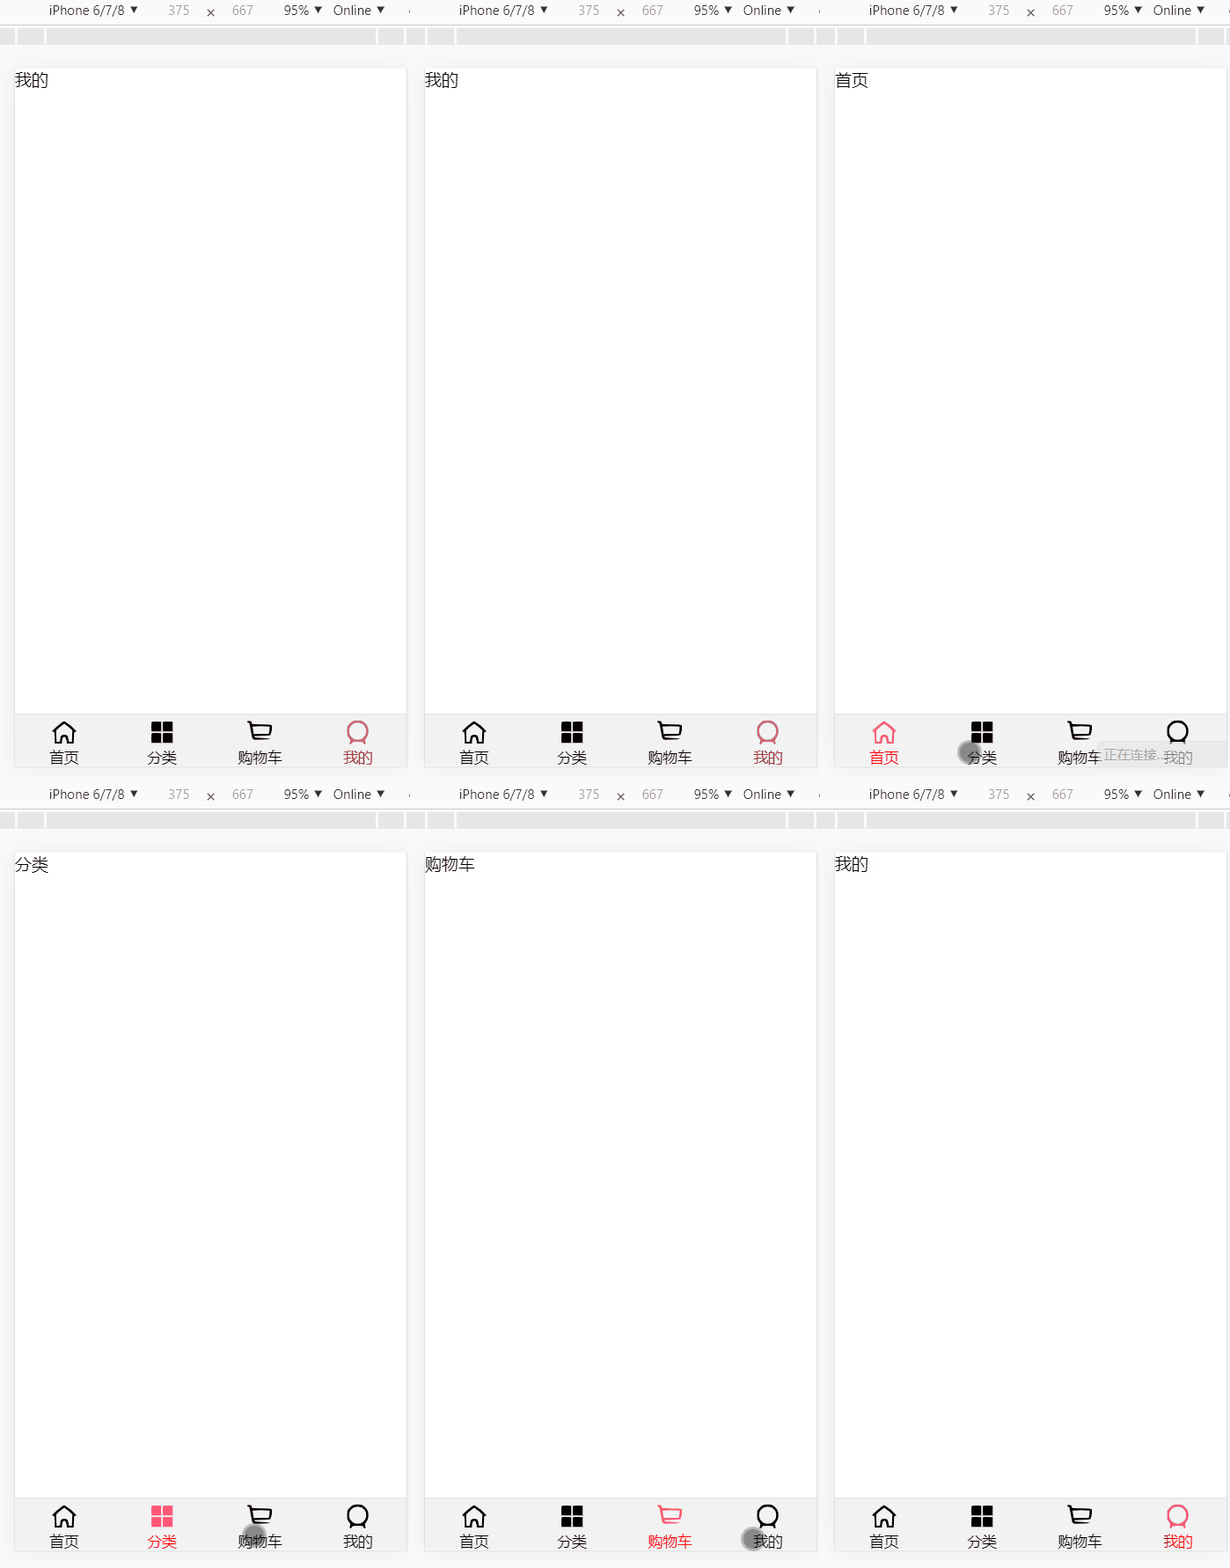
效果图
