一、安装Linux环境
1. 安装VM虚拟机和操作系统
VM虚拟工具安装的过程详见:http://blog.csdn.net/stpeace/article/details/78598333。直接按照文中安装布骤进行即可。
上面链接中,在描述完VM安装之后,也介绍了如果安装linux操作系统。我们并不是安装这个版本。
Linux操作系统,我们选择server版本,Ubuntu 16.04 Server。这个版本是没有界面可操作的。安装过程详见:https://www.linuxidc.com/Linux/2017-11/148341.htm
特别注意:到了
23.选择要安装的软件,多加一个OpenSSH Server,然后下一步-Continue;

一定要按图中显示选上openssh server和 standard system utitities,如果不选择这个,后面需要这个服务再去安装的话,会比较麻烦。
2. 安装 Xshell Portable
安装完操作系统之后,我们可以在虚拟机上输命令操作。但在虚拟机环境与本机环境的焦点切换时,显得非常的不方便,那么我们可以安装Xshell,更便捷地去使用虚拟机上的操作系统。
安装过程非常简单,https://jingyan.baidu.com/article/295430f13fb4db0c7f005065.html
安装完成后,连上我们的linux服务器即可。

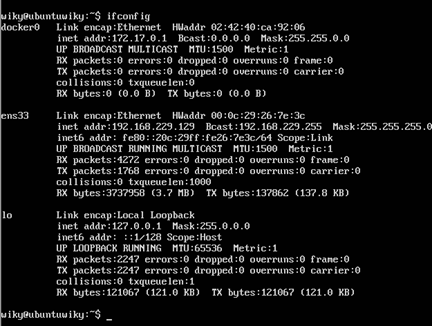
如果不知道linux服务器的IP地址,请在虚拟机上输入:ifconfig

通过xshell连接之后的界面:

3. 安装 WinSCP
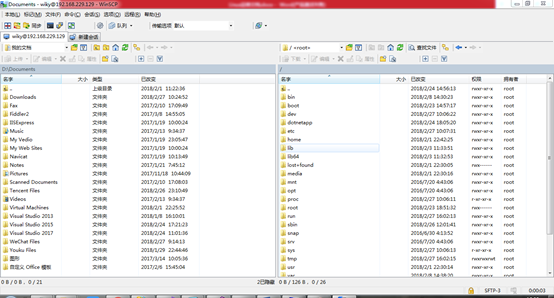
这个工具是用于远程上传文件到linux服务器,也可以通过界面方式直接查看linux目录,可以对文件进行增删改,对文件做权限控制。
默认情况下,我们在安装linux中所配置的用户权限,是只读的。所以我们很多的操作命令都要加上sudo。那么我们用WinSCP连接linux服务器用就个用户登录,也是只读权限。
那么我们需要用root用户来登录,具体如下:
1、设置root密码
sudo passwd root
2、修改etc/ssh/sshd_config文件
su - root
vi /etc/ssh/sshd_config
#Authentication:
LoginGraceTime 120
#PermitRootLogin without-password
PermitRootLogin yes
StrictModes yes
3、重启ssh
service ssh restart
这样修改过后就可以使用root登录winSCP了


二、Linux 基本命令
1. 打开目录
cd /dotnetapp/console
2. 文件操作
sudo vim /dotnetapp/console
如果路径不存在,将是新建操作
要对文件进行编辑,输入 i
使用键盘上下左右,编辑文件
按esc 退出编辑状态
输入 :eq! 保存退出文件
三、Web发布
1. Asp.net Core 程序发布
这个大家都会发布吧,就不要我多说了。
2. 安装.net core
curl https://packages.microsoft.com/keys/microsoft.asc | gpg --dearmor > microsoft.gpg
sudo mv microsoft.gpg /etc/apt/trusted.gpg.d/microsoft.gpg
sudo sh -c 'echo "deb [arch = amd64] https://packages.microsoft.com/repos/microsoft-ubuntu-xenial-prod xenial main" > /etc/apt/sources.list.d/dotnetdev.list'
sudo apt-get install apt-transport-https
sudo apt-get update
sudo apt-get install dotnet-sdk-2.1.4
详见 https://www.microsoft.com/net/learn/get-started/linux/ubuntu16-04
2. FTP上传
Winscp如果装好,配置好,使用root帐号登录之后,只是复制粘贴就完事了。
3. Nginx反向代理
我们知道.net core程序是可以在多个操作系统下运行的。
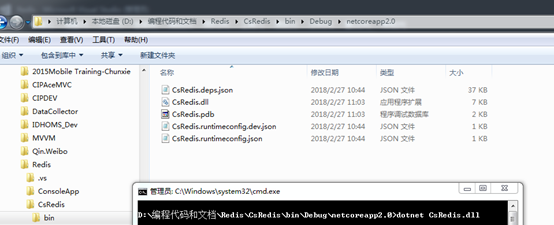
在windows下需要安装 .net core, 然后在程序目录下运行 dotnet xxxx.dll,程序就跑起来了

同样在linux环境下也是一样的

如果这是一个web程序,直接执行 dotnet xxxx.dll也可以让网站跑起来

此时网站已经跑起来了,我们在本机的浏览器输入 http://服务器IP:5000, 不能访问。
我们接下来,需要安装反向代理
sudo apt-get install nginx
sudo service ngnix start
安装完之后修改配置
sudo vim /etc/nginx/sites-available/default
server {
listen 81;
location / {
proxy_pass http://localhost:5000;
proxy_http_version 1.1;
proxy_set_header Upgrade $http_upgrade;
proxy_set_header Connection keep-alive;
proxy_set_header Host $http_host;
proxy_cache_bypass $http_upgrade;
}
}
修改完之后,
sudo nginx -t
sudo nginx -s reload.
浏览器输入 http://服务器IP:81,即可访问网站。
4. Supervisor 守护进程
到目前位置,应用程序还是我们自己手动运行起来的,而且还不能Ctrl+C关闭并退出,否则你的网站将无法访问!所以我们需要有一个类似监视器的角色来保证ASP.NET Core进程的正常运行,那么Supervisor会是我们的首选。
安装supervisor
sudo apt-get install supervisor
安装完之后,添加一个监视文件
/etc/supervisor/conf.d
[program:backend]
command=dotnet /dotnetapp/backend/OneCode.Api.dll
directory=/dotnetapp/backend/
autostart=true
autorestart=true
stderr_logfile=/var/log/hellomvc.err.log
stdout_logfile=/var/log/hellomvc.out.log
environment=ASPNETCORE__ENVIRONMENT=Production
user=www-data
stopsignal=INT
重新启动配置中的所有程序
supervisorctl reload
重启某一进程 (program_name=你配置中写的程序名称)
supervisorctl restart program_name
这时站点部署完毕
注: 这个节点写得比较乱,详见
https://www.cnblogs.com/wangjieguang/p/aspnetcore-ubuntuserver.html
四、控制台程序发布
让一个.net core console在linux环境下跑起来,只需要简单配置一下守护进程即可
cd /etc/supervisor/conf.d
sudo vim console.conf
[program:console]
command=dotnet /dotnetapp/console/CommonConsole.dll
directory=/dotnetapp/console
autostart=true
autorestart=true
stderr_logfile=/var/log/console.err.log
stdout_logfile=/var/log/console.out.log
environment=ASPNETCORE__ENVIRONMENT=Production
user=root
stopsignal=INT
sudo supervisorctl start console
如果要关掉这个进程
sudo supervisorctl stop console
重启
sudo supervisorctl restart console
这样我们.net写的控制台程序就这样,在linux上面跑开,我们的signalr消息推送程序是基于控制台的,也就可以运行了。
如果想看一下,跑得怎么样:
sudo supervisorctl tail -f console
可以看到控制台的输出日志
五、安装mysql
首先执行下面三条命令:
sudo apt-get install mysql-server
sudo apt isntall mysql-client
安装成功后可以通过下面的命令测试是否安装成功:
sudo netstat -tap | grep mysql
出现如下信息证明安装成功:

可以通过如下命令进入MySQL服务:
mysql -uroot -p你的密码
现在设置mysql允许远程访问,首先编辑文件/etc/mysql/mysql.conf.d/mysqld.cnf:
sudo vi /etc/mysql/mysql.conf.d/mysqld.cnf
注释掉bind-address = 127.0.0.1:

保存退出,然后
mysql -u root –p 进入mysql服务,
执行授权命令:
grant all on *.* to root@'%' identified by '你的密码' with grant option;
flush privileges;
然后执行quit命令退出mysql服务,执行如下命令重启mysql:
service mysql restart
现在在Windows下可以使用navicat远程连接Ubuntu下的MySQL服务:

六、部署VUE
1.打包好 vue 项目,通过ftp上传到linux相应位置
比如:/dotnetapp/nodejs/secondpro
2.在nginx上添加如下:
server {
listen 84;
server_name localhost;
root /dotnetapp/nodejs/secondpro;
index index.html;
location / {
try_files $uri $uri/ @router;
index index.html;
}
location @router {
rewrite ^.*$ /index.html last;
}
}
3.重启nginx sudo nginx -s reload.
七、Redis
1. 安装Redis
安装Redis服务器端
~ sudo apt-get install redis-server
安装完成后,Redis服务器会自动启动,我们检查Redis服务器程序
检查Redis服务器系统进程
~ ps -aux|grep redis
redis 4162 0.1 0.0 10676 1420 ? Ss 23:24 0:00 /usr/bin/redis-server /etc/redis/redis.conf
conan 4172 0.0 0.0 11064 924 pts/0 S+ 23:26 0:00 grep --color=auto redis
通过启动命令检查Redis服务器状态
~ netstat -nlt|grep 6379
tcp 0 0 127.0.0.1:6379 0.0.0.0:* LISTEN
通过启动命令检查Redis服务器状态
~ sudo /etc/init.d/redis-server status
redis-server is running
2. C#代码使用Redis
.net core 代码使用redis 服务
新建控制台程序
安装nuget 包

添加appsetting.json
{
"ConnectionStrings": {
"redis": {
"port": "6379",
"poolsize": "50",
"database": "0",
"ip": "192.168.229.129",
"pass": "wk",
"name": "RedisCon"
}
}
}
封装
public class RedisHelper : CSRedis.QuickHelperBase
{
public static IConfigurationRoot Configuration { get; internal set; }
public static void InitializeConfiguration(IConfigurationRoot cfg)
{
Configuration = cfg;
int port, poolsize, database;
string ip, pass;
if (!int.TryParse(cfg["ConnectionStrings:redis:port"], out port)) port = 6379;
if (!int.TryParse(cfg["ConnectionStrings:redis:poolsize"], out poolsize)) poolsize = 50;
if (!int.TryParse(cfg["ConnectionStrings:redis:database"], out database)) database = 0;
ip = cfg["ConnectionStrings:redis:ip"];
pass = cfg["ConnectionStrings:redis:pass"];
Name = cfg["ConnectionStrings:redis:name"];
Instance = new CSRedis.ConnectionPool(ip, port, poolsize);
Instance.Connected += (s, o) => {
CSRedis.RedisClient rc = s as CSRedis.RedisClient;
if (!string.IsNullOrEmpty(pass)) rc.Auth(pass);
if (database > 0) rc.Select(database);
};
}
}
使用:
static void Main(string[] args)
{
IConfigurationBuilder builder = new ConfigurationBuilder().SetBasePath(Directory.GetCurrentDirectory()).AddJsonFile("appsettings.json");
IConfigurationRoot configuration = builder.Build();
RedisHelper.InitializeConfiguration(configuration);
bool setResult = RedisHelper.Set("test1", "123123");
var getResult = RedisHelper.Get("test1");
}
以上是对csredis做了进一步的封装,如果不作封装也可以直接使用,而且可操作性更为丰富,具体详见