上一篇 负载均衡之Ocelot+Consul(文件配置注册服务),介绍了如何通过json文件注册服务,本篇将学习如何通过web api 注册服务。
在展开学习过程之前,且先总结一下 consul服务发现的知识:
上篇的服务发现介绍,是基于单机单节点的,并没有跟其它机子进行联盟。Consul 是建议至少要有3台机子来做一个集群,并且从中先出一个leader,作为其他两个随从者的老大,由它来负责处理所有的查询和事务。如果leader挂掉了,集群会自动重新选举一个leader,这样也就保证了集群高可用性。
具体可看:张善友 https://www.cnblogs.com/shanyou/p/6286207.html
尽管如此,本学习过程依然是单机来做试验,原因还是没有准备好虚拟机,另外也还没进一步地学习docker,最优的做法应该是创建几个docker容器来做这个试验。
前话说完,下面开始试验如何在节点API上面注册服务:
主要一步 就是在webapi 请求管道中 加入 一个 consul 中间件,关于.net core web api 中间件的知识,我认为所有学习.net core编程的码友都要去了解。具体可以看一下这里: https://www.cnblogs.com/whuanle/p/10095209.html
consul 中间件:
 public static class ConsulBuilderExtensions

    {

        // 服务注册

        public static IApplicationBuilder RegisterConsul(this IApplicationBuilder app, IApplicationLifetime lifetime, HealthService healthService, ConsulService consulService)

        {

            var consulClient = new ConsulClient(x => x.Address = new Uri($"http://{consulService.IP}:{consulService.Port}"));//请求注册的 Consul 地址

            var httpCheck = new AgentServiceCheck()

            {

                DeregisterCriticalServiceAfter = TimeSpan.FromSeconds(5),//服务启动多久后注册

                Interval = TimeSpan.FromSeconds(10),//健康检查时间间隔,或者称为心跳间隔

                HTTP = $"http://{healthService.IP}:{healthService.Port}/master/health",//健康检查地址

                Timeout = TimeSpan.FromSeconds(5)

            };

            // Register service with consul

            var registration = new AgentServiceRegistration()

            {

                Checks = new[] { httpCheck },

                ID = healthService.Name + "_" + healthService.Port,

                Name = healthService.Name,

                Address = healthService.IP,

                Port = healthService.Port,

                Tags = new[] { $"urlprefix-/{healthService.Name}" }//添加 urlprefix-/servicename 格式的 tag 标签,以便 Fabio 识别

            };

            consulClient.Agent.ServiceRegister(registration).Wait();//服务启动时注册,内部实现其实就是使用 Consul API 进行注册(HttpClient发起)

            lifetime.ApplicationStopping.Register(() =>

            {

                consulClient.Agent.ServiceDeregister(registration.ID).Wait();//服务停止时取消注册

            });

            return app;

        }

    }


public class ConsulService

    {

        public string IP { get; set; }

        public int Port { get; set; }

    }

    public class HealthService

    {

        public string Name { get; set; }

        public string IP { get; set; }

        public int Port { get; set; }
    }
相应的配置:
  "Service": {
    "Name": "MasterService",
    "IP": "192.168.1.232",
    "Port": "5011"
  },

  "Consul": {
    "IP": "192.168.1.23",
    "Port": "8500"
  }
这个就非常像上篇,文件方式注册服务的注册:
services": [
    {
      "id": "api1",
      "name": "MasterService",
      "tags": [ "ApiService" ],
      "address": "192.168.1.232",
      "port": 5011,
      "checks": [
        {
          "id": "ApiServiceA_Check",
          "name": "ApiServiceA_Check",
          "http": "http://192.168.1.232:5011/health",
          "interval": "10s",
          "tls_skip_verify": false,
          "method": "GET",
          "timeout": "1s"
        }
      ]
    }
主要提供了服务名,标签,地址,端口,健康检查入口,等等
中间件准备好之后,在startup中使用中间件:
 public void Configure(IApplicationBuilder app, IHostingEnvironment env, IApplicationLifetime lifetime)
        {
            if (env.IsDevelopment())
            {
                app.UseDeveloperExceptionPage();
            }

            app.UseSwagger();

            app.UseSwagger(c =>
            {
                c.RouteTemplate = "{documentName}/swagger.json";
            });
            // Enable middleware to serve swagger-ui (HTML, JS, CSS etc.), specifying the Swagger JSON endpoint.
            app.UseSwaggerUI(c =>
            {
                c.SwaggerEndpoint("/master/swagger.json", "api1 doc");
                c.ShowExtensions();
            });

            app.UseMvc();

            ConsulService consulService = new ConsulService()

            {

                IP = Configuration["Consul:IP"],

                Port = Convert.ToInt32(Configuration["Consul:Port"])

            };

            HealthService healthService = new HealthService()

            {

                IP = Configuration["Service:IP"],

                Port = Convert.ToInt32(Configuration["Service:Port"]),

                Name = Configuration["Service:Name"],

            };

           app.RegisterConsul(lifetime, healthService, consulService);
        }
以此,将当前webapi 注册到了 consul。
另外一个子节点webapi要做一样的处理;下面进行检验结果
1. 开启 consul 服务
consul agent -server -ui -bootstrap-expect=3 -data-dir=/tmp/consul -node=consul-1 -client=0.0.0.0 -bind=0.0.0.0 -datacenter=dc1 &
报错, No cluster leader
服务没有选举出新的leader,这里正常情况下,是会选举出新leader consul-1, 因为单机,所以只能选惟一那个(空头司令)
查到原因说是, consul 服务没有被优雅的关闭掉,导致的。
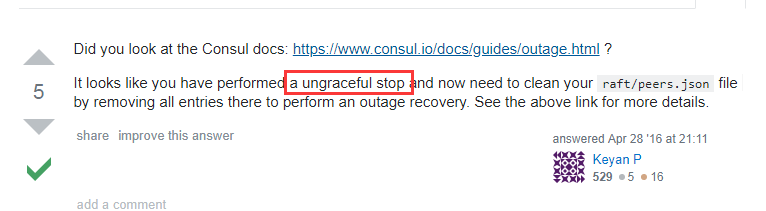
进到 https://learn.hashicorp.com/consul/day-2-operations/advanced-operations/outage
To recover from this, go to the -data-dir of the failing Consul server. Inside the data directory there will be a raft/ sub-directory. Create a raft/peers.json file in the raft/ directory.
For Raft protocol version 3 and later, this should be formatted as a JSON array containing the node ID, address:port, and suffrage information of the Consul server, like this:
[{ "id": "<node-id>", "address": "<node-ip>:8300", "non_voter": false }]node-id,和node-ip也换了,照做了,没用。
于是我暴力地把 -data-dir 下面的文件全干掉了。
再次启动 consul 服务,是可以正常开启了
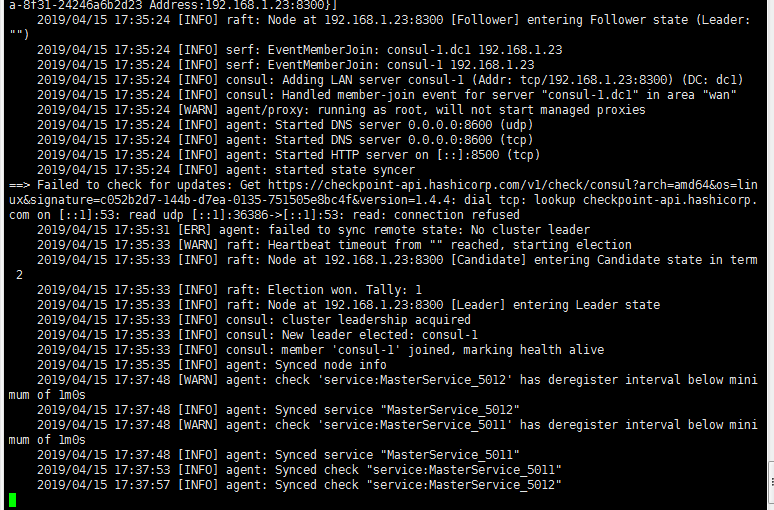
成功选举了当前节点为leader
将API全部开启,可以看到两个服务都能成功注册进去。从上面的实验得出一个结论,单机模式是真的很有风险的,因为些不可知的原因导致consul服务停掉了。
下面跟上一篇一样,最关键的一步,让其中一个节点挂掉,看看服务还能不能继续,我把 api2,关掉,后面再访问,一直都是

试验完毕。
至此,单机环境下,以 ocelot为网关做负载均衡,并使用consul来做服务发现的学习到此分享完。