版权声明:本文为HaiyuKing原创文章,转载请注明出处!
前言
状态栏着色,也就是我们经常听到的沉浸式状态栏,关于沉浸式的称呼网上也有很多吐槽的,这里就不做过多讨论了,以下我们统称状态栏着色,这样我觉得更加容易理解。
从Android4.4开始,才可以实现状态栏着色,并且从5.0开始系统更加完善了这一功能,可直接在主题中设置<item name="colorPrimaryDark">@color/colorPrimaryDark</item>或者getWindow().setStatusBarColor(color)来实现,但毕竟4.4+的机器还有很大的占比,所以就有必要寻求其它的解决方案。
一般通过Android Studio新建项目时就实现了状态栏着色功能,不过只能在API>19的机型上正常显示。下面是通过Android studio新建项目时的默认样式代码:
styles.xml

colors.xml
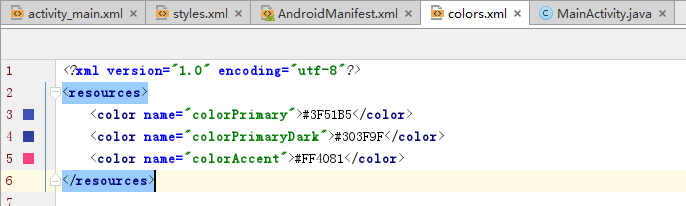
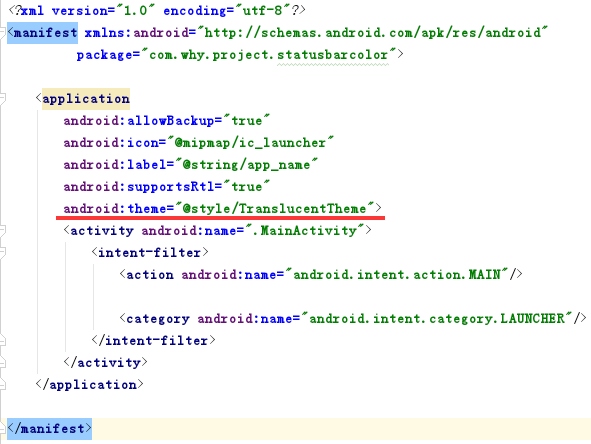
AndroidManifest.xml
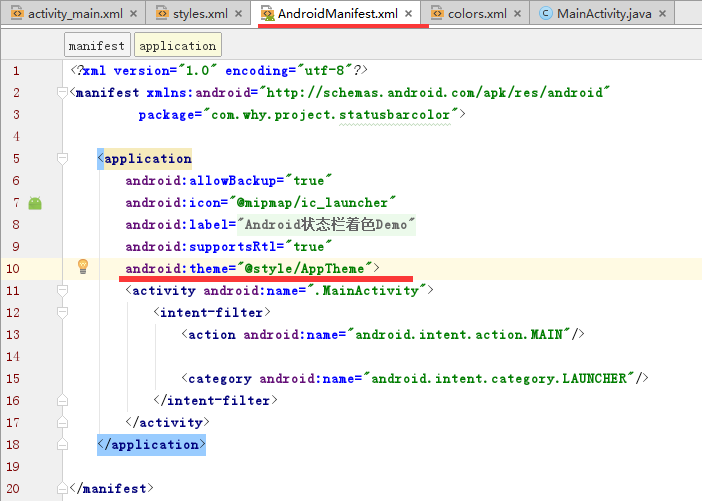
而本文想要实现的效果是在API>19和API<19的机型上都兼容状态栏着色效果。
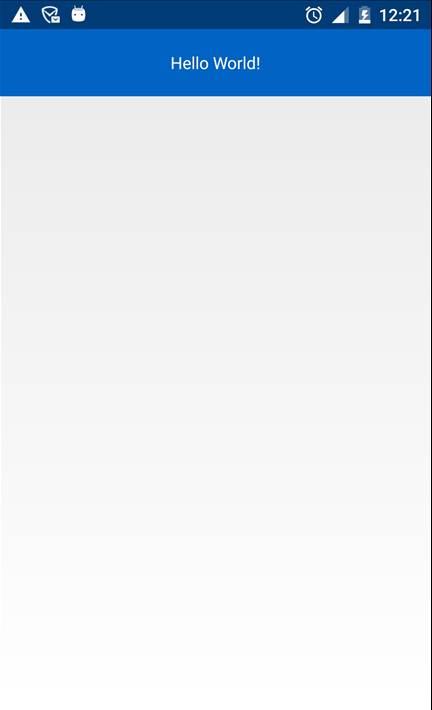
效果图
| API>19 | API =19 | API <19 |
|

|

|
代码分析
- 首先将手机手机状态栏透明化
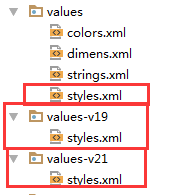
在values、values-v19、values-v21目录下分别创建相应的主题,然后在AndroidManifest.xml中给Application设置该主题。
- 在布局文件中添加
android:fitsSystemWindows="true"属性
我们使用android:fitsSystemWindows="true"属性,不让布局延伸到状态栏,这时状态栏就是透明的,然后添加一个和状态栏高、宽相同的指定颜色View来覆盖被透明化的状态栏。
- 创建View并添加到状态栏
使用步骤
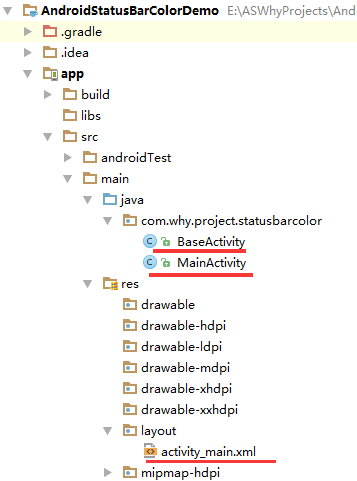
一、项目组织结构图

注意事项:
- 导入类文件后需要change包名以及重新import R文件路径
- values目录下的文件(strings.xml、dimens.xml、colors.xml等),如果项目中存在,则复制里面的内容,不要整个覆盖
二、使用方法
修改valus目录下的styles.xml文件【在eclipse开发环境和Android studio开发环境中建议使用不同的样式】
<resources>

    <!--
        Base application theme, dependent on API level. This theme is replaced
        by AppBaseTheme from res/values-vXX/styles.xml on newer devices.
    -->
    <!--
        Theme customizations available in newer API levels can go in
        res/values-vXX/styles.xml, while customizations related to
        backward-compatibility can go here.
    -->
    <!-- Eclipse开发环境 -->
    <!--<style name="AppBaseTheme" parent="android:Theme.Light.NoTitleBar">
    </style>-->
    <!-- Android Studio开发环境 -->
    <style name="AppBaseTheme" parent="Theme.AppCompat.Light.NoActionBar">
    </style>

    <!-- Application theme. -->
    <style name="AppTheme" parent="AppBaseTheme">
        <!-- All customizations that are NOT specific to a particular API-level can go here. -->
    </style>

    <!-- Android 状态栏着色 -->
    <style name="TranslucentTheme" parent="AppTheme">
    </style>

</resources>
添加修改values-v19目录下的styles.xml文件【在eclipse开发环境和Android studio开发环境中建议使用不同的样式】
<resources>

    <!--
        Base application theme for API 19+. This theme completely replaces
        AppBaseTheme from BOTH res/values/styles.xml and
        res/values-v11/styles.xml on API 19+ devices.
    -->
    <!-- API 19 theme customizations can go here. -->

    <!-- Eclipse开发环境 -->
    <!--<style name="AppBaseTheme" parent="android:Theme.Light.NoTitleBar">
    </style>-->
    <!-- Android Studio开发环境 -->
    <style name="AppBaseTheme" parent="Theme.AppCompat.Light.NoActionBar">
    </style>

    <!-- Android 状态栏着色 -->
    <style name="TranslucentTheme" parent="AppTheme">
        <item name="android:windowTranslucentStatus">true</item>
        <item name="android:windowTranslucentNavigation">false</item>
    </style>

</resources>
添加修改values-v21目录下的styles.xml文件【在eclipse开发环境和Android studio开发环境中建议使用不同的样式】
<resources>

    <!--
        Base application theme for API 21+. This theme completely replaces
        AppBaseTheme from BOTH res/values/styles.xml and
        res/values-v11/styles.xml on API 21+ devices.
    -->
    <!-- API 21 theme customizations can go here. -->
    <!-- Eclipse开发环境 -->
    <!--<style name="AppBaseTheme" parent="android:Theme.Light.NoTitleBar">
    </style>-->
    <!-- Android Studio开发环境 -->
    <style name="AppBaseTheme" parent="Theme.AppCompat.Light.NoActionBar">
    </style>

    <!-- Android 状态栏着色 -->
    <style name="TranslucentTheme" parent="AppTheme">
        <item name="android:windowTranslucentStatus">true</item>
        <item name="android:windowTranslucentNavigation">false</item>
        <item name="android:statusBarColor">@android:color/transparent</item>
    </style>

</resources>
在values目录下的colors.xml文件中添加状态栏着色的颜色值代码
<?xml version="1.0" encoding="utf-8"?>
<resources>
    <!-- Android 状态栏着色 -->
    <color name="colorPrimary">#0164C5</color>
</resources>
在AndroidManifest.xml中给Application设置TranslucentTheme主题
<?xml version="1.0" encoding="utf-8"?>
<manifest xmlns:android="http://schemas.android.com/apk/res/android"
          package="com.why.project.statusbarcolor">

    <application
        android:allowBackup="true"
        android:icon="@mipmap/ic_launcher"
        android:label="@string/app_name"
        android:supportsRtl="true"
        android:theme="@style/TranslucentTheme">
        <activity android:name=".MainActivity">
            <intent-filter>
                <action android:name="android.intent.action.MAIN"/>

                <category android:name="android.intent.category.LAUNCHER"/>
            </intent-filter>
        </activity>
    </application>

</manifest>
在activity布局文件中的根节点元素中添加android:fitsSystemWindows="true"
<?xml version="1.0" encoding="utf-8"?>
<!-- Android 状态栏着色:android:fitsSystemWindows="true" -->
<RelativeLayout
    xmlns:android="http://schemas.android.com/apk/res/android"
    xmlns:tools="http://schemas.android.com/tools"
    android:id="@+id/activity_main"
    android:layout_width="match_parent"
    android:layout_height="match_parent"
    tools:context="com.why.project.statusbarcolor.MainActivity"
    android:fitsSystemWindows="true">

    <TextView
        android:layout_width="match_parent"
        android:layout_height="56dp"
        android:text="Hello World!"
        android:textColor="#ffffff"
        android:background="@color/colorPrimary"
        android:gravity="center"/>
</RelativeLayout>
在Activity基类以及子类中添加以下标记的代码
package com.why.project.statusbarcolor;

import android.content.Context;
import android.os.Build;
import android.os.Bundle;
import android.support.annotation.Nullable;
import android.support.v4.content.ContextCompat;
import android.support.v7.app.AppCompatActivity;
import android.view.View;
import android.view.ViewGroup;
import android.widget.LinearLayout;

/**
 * Created by HaiyuKing
 * Used activity基类
 */

public class BaseActivity extends AppCompatActivity{

    @Override
    protected void onCreate(@Nullable Bundle savedInstanceState) {
        super.onCreate(savedInstanceState);
    }

    /*==========Android 状态栏着色=============*/
    public void addStatusBarView() {
        int height;
        height = getStatusBarHeight(this);
        if (height <= 0) {
            return;
        }
        View view = new View(this);
        view.setBackgroundColor(ContextCompat.getColor(this,R.color.colorPrimary));
        LinearLayout.LayoutParams params = new LinearLayout.LayoutParams(ViewGroup.LayoutParams.MATCH_PARENT, height);
        ViewGroup decorView = (ViewGroup) findViewById(android.R.id.content);
        decorView.addView(view, params);
    }

    /**
     * 获取状态栏的高度
     * 19API以上 读取到状态栏高度才有意义
     */
    public int getStatusBarHeight(Context context) {
        if (Build.VERSION.SDK_INT >= Build.VERSION_CODES.KITKAT) {
            int resourceId = context.getResources().getIdentifier("status_bar_height", "dimen", "android");
            return resourceId > 0 ? context.getResources().getDimensionPixelSize(resourceId) : 0;
        } else {
            return 0;
        }
    }
}
package com.why.project.statusbarcolor;

import android.os.Bundle;

public class MainActivity extends BaseActivity {

    @Override
    protected void onCreate(Bundle savedInstanceState) {
        super.onCreate(savedInstanceState);
        setContentView(R.layout.activity_main);

        /*==========Android 状态栏着色=============*/
        addStatusBarView();
    }

}
注意:
- Android studio新建的项目默认extends AppCompatActivity !如果是Eclipse开发环境则需要修改为extends Activity或者FragemntActivity或者自定义的activity基类。
- 如果activity布局中含有fragment布局,那么在Activity含有以上代码的基础上只需要在fragment布局文件中添加上android:fitsSystemWindows="true"即可
混淆配置
无