1.创建一个线程
创建线程比较简单,使用std的thread实例化一个线程对象就创建完成了,示例:
 1 #include <iostream>
 2 #include <thread>
 3 using namespace std;
 4
 5 void t1()  //普通的函数,用来执行线程
 6 {
 7     for (int i = 0; i < 20; ++i)
 8     {
 9         cout << "t1111
";
10     }
11 }
12 void t2()
13 {
14     for (int i = 0; i < 20; ++i)
15     {
16         cout << "t22222
";
17     }
18 }
19 int main()
20 {
21     thread th1(t1);  //实例化一个线程对象th1,使用函数t1构造,然后该线程就开始执行了(t1())
22     thread th2(t2);
23
24     cout << "here is main

";
25
26     return 0;
27 }
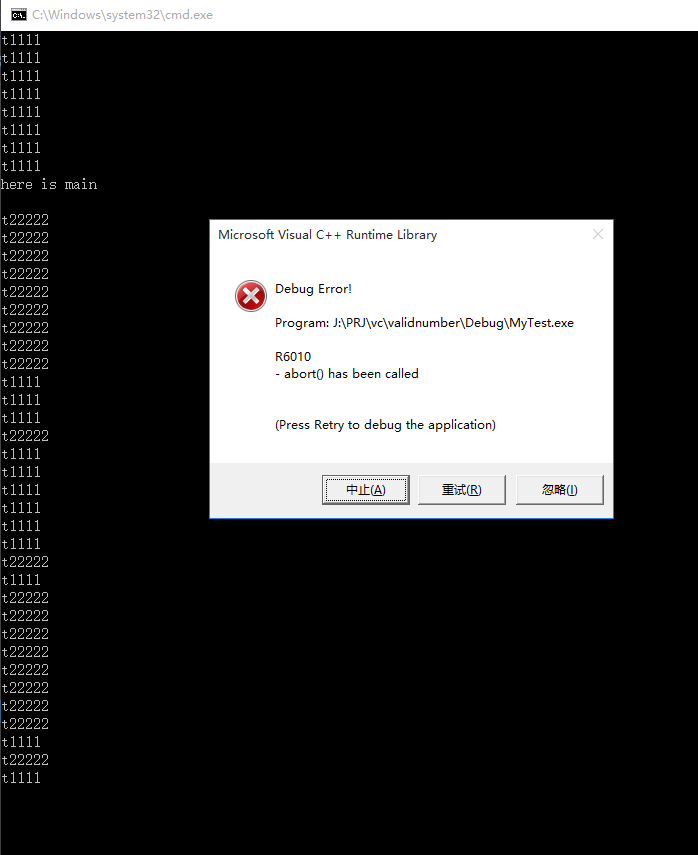
不过这个示例是有问题的,因为在创建了线程后线程开始执行,但是主线程main()并没有停止脚步,仍然继续执行然后退出,此时线程对象还是joinable的,线程仍然存在但指向它的线程对象已经销毁,所以会抛出异常。

那么该如何保证子线程执行完了退出后再退出主线程呢?
2.thread::join()
使用join接口可以解决上述问题,join的作用是让主线程等待直到该子线程执行结束,示例:
#include <iostream>
#include <thread>
using namespace std;

void t1()
{
    for (int i = 0; i < 20; ++i)
    {
        cout << "t1111
";
    }
}
void t2()
{
    for (int i = 0; i < 20; ++i)
    {
        cout << "t22222
";
    }
}
int main()
{
    thread th1(t1);
    thread th2(t2);

    th1.join(); //等待th1执行完
    th2.join(); //等待th2执行完

    cout << "here is main

";

    return 0;
}
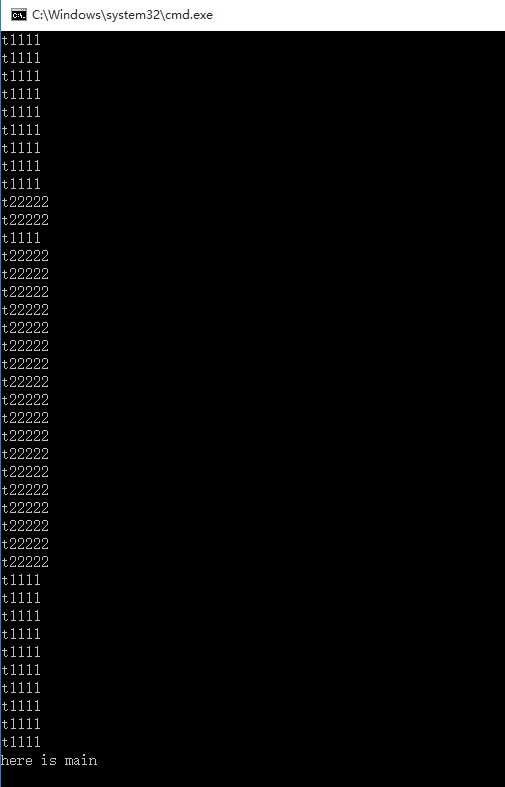
此时就可以正常地执行子线程了,同时注意最后一个输出,说明了main是等待子线程结束才继续执行的

需要注意的是线程对象执行了join后就不再joinable了,所以只能调用join一次。
3.thread::detach()
(1.)中提到的问题,还可以使用detach来解决,detach是用来和线程对象分离的,这样线程可以独立地执行,不过这样由于没有thread对象指向该线程而失去了对它的控制,当对象析构时线程会继续在后台执行,但是当主程序退出时并不能保证线程能执行完。如果没有良好的控制机制或者这种后台线程比较重要,最好不用detach而应该使用join。
int main()
{
    thread th1(t1);
    thread th2(t2);

    th1.detach();
    th2.detach();

    cout << "here is main

";

    return 0;
}
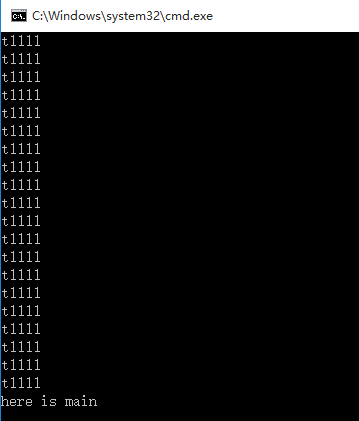
由结果可见线程并没有执行完而退出:

4.mutex
头文件是<mutex>,mutex是用来保证线程同步的,防止不同的线程同时操作同一个共享数据。
int cnt = 20;
mutex m;
void t1()
{
    while (cnt > 0)
    {
        m.lock();

        if (cnt > 0)
        {
            --cnt;
            cout << cnt << endl;
        }

        m.unlock();
    }
}
void t2()
{
    while (cnt > 0)
    {
        m.lock();

        if (cnt > 0)
        {
            --cnt;
            cout << cnt << endl;
        }

        m.unlock();
    }
}
int main()
{

    thread th1(t1);
    thread th2(t2);

    th1.join();
    th2.join();

    return 0;
}
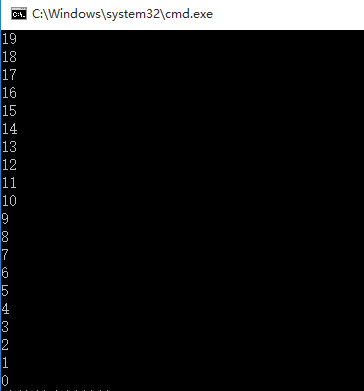
运行结果,cnt是依次递减的,没有因为多线程而打乱次序:

但是使用mutex是不安全的,当一个线程在解锁之前异常退出了,那么其它被阻塞的线程就无法继续下去。
5.std::lock_guard
使用lock_guard则相对安全,它是基于作用域的,能够自解锁,当该对象创建时,它会像m.lock()一样获得互斥锁,当生命周期结束时,它会自动析构(unlock),不会因为某个线程异常退出而影响其他线程。示例:
int cnt = 20;
mutex m;
void t1()
{
    while (cnt > 0)
    {
        lock_guard<mutex> lockGuard(m);
        if (cnt > 0)
        {
            --cnt;
            cout << cnt << endl;
        }

    }
}
void t2()
{
    while (cnt > 0)
    {
        lock_guard<mutex> lockGuard(m);
        if (cnt > 0)
        {
            --cnt;
            cout << cnt << endl;
        }

    }
}