第一,scrapy框架的安装
通过命令提示符进行安装(如果没有安装的话)
pip install Scrapy
如果需要卸载的话使用命令为:
pip uninstall Scrapy
第二,scrapy框架的使用
先通过命令提示符创建项目,运行命令:
scrapy startproject crawlquote#crawlquote这是我起的项目名
其次,通过我们的神器PyCharm打开我们的项目--crawlquote(也可以将PyCharm打开我们使用虚拟环境创建的项目)
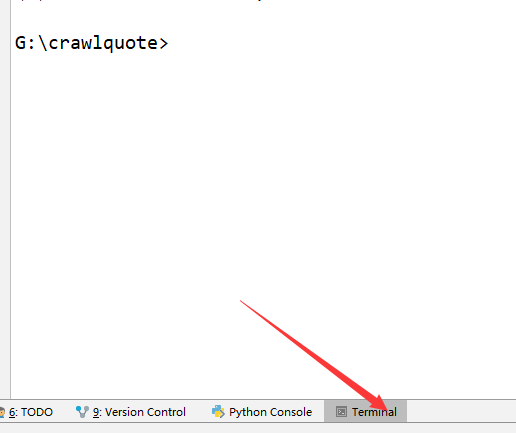
然后,打开PyCharm的Terminal,如图
然后在命令框中输入
scrapy genspider quotes quotes.toscrape.com
此时的代码目录为:
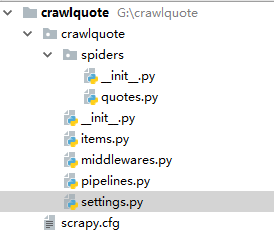
文件说明:
-
scrapy.cfg 项目的配置信息,主要为Scrapy命令行工具提供一个基础的配置信息。(真正爬虫相关的配置信息在settings.py文件中)
-
items.py 设置数据存储模板,用于结构化数据,如:Django的Model
-
pipelines 数据处理行为,如:一般结构化的数据持久化
-
settings.py 配置文件,如:递归的层数、并发数,延迟下载等
-
spiders 爬虫目录,如:创建文件,编写爬虫规则
quotes.py使我们书写的爬虫---里面是发起请求-->拿到数据---->临时存储到item.py中
运行爬虫命令为:
scrapy crawl quotes
第三,使用scrapy的基本流程
(1)明确需要爬取的数据有哪些
(2)分析页面结构知道需要爬取的内容在页面中的存在形式
(3)在item.py中定义需要爬取的数据的存储字段
(4)书写爬虫 -spider中定义(spiders中的quotes.py) --数据重新格式化化后在item.py中存储
(5)管道中--pipeline.py ----对item里面的内容在加工 , 以及定义链接数据库的管道
(6)配置文件中----settings.py中开启管道作用:ITEM_PIPELINES ,定义数据库的名称,以及链接地址
(7)中间件中----middlewares.py
根据上述的一个简单的代码演示:
1)item.py中
import scrapy


class CrawlquoteItem(scrapy.Item):
    # define the fields for your item here like:
    # name = scrapy.Field()
    text = scrapy.Field()
    author = scrapy.Field()
    tags = scrapy.Field()
2)spiders--quotes(爬虫)
# -*- coding: utf-8 -*-
import scrapy
from  crawlquote.items import CrawlquoteItem


class QuotesSpider(scrapy.Spider):
    name = 'quotes'
    allowed_domains = ['quotes.toscrape.com']
    start_urls = ['http://quotes.toscrape.com/']

    def parse(self, response):
        quotes = response.css('.quote')
        for quote in quotes:
            item = CrawlquoteItem()
            text = quote.css('.text::text').extract_first()  # 获取一个
            author = quote.css('.author::text').extract_first()
            tags = quote.css('.tags .tag::text').extract()
            item['text'] = text
            item['author'] = author
            item['tags'] = tags
            yield item  # 将网页中的内容重新生成一个item以便于后面的认识

        next = response.css('.pager .next a::attr(href)').extract_first()
        url = response.urljoin(next)  # urljoin翻页
        yield scrapy.Request(url=url, callback=self.parse)  # 递归调用
3)pipeline.py中
# -*- coding: utf-8 -*-

# Define your item pipelines here
#
# Don't forget to add your pipeline to the ITEM_PIPELINES setting
# See: http://doc.scrapy.org/en/latest/topics/item-pipeline.html
import pymongo
from scrapy.exceptions import DropItem


class TextPipeline(object):
    def __init__(self):
        self.limit = 50

    def process_item(self, item, spider):  # 对重新生成的item进行再制作
        if item['text']:
            if len(item['text']) > self.limit:
                item['text'] = item['text'][0:self.limit].rstrip() + '...'
            return item
        else:
            return DropItem('Missing Text')


class MongoPipeline(object):  # 与数据库有关的操作
    def __init__(self, mongo_uri, mongo_db):  # (2) MongoPipeline构造函数
        self.mongo_uri = mongo_uri
        self.mongo_db = mongo_db

    @classmethod
    def from_crawler(cls, crawler):  # (1)读取settings里面的值,类方法
        return cls(
            mongo_uri=crawler.settings.get('MONGO_URI'),
            mongo_db=crawler.settings.get('MONGO_DB')
        )

    def open_spider(self, spider):  # (3)爬虫启动时需要的操作
        self.client = pymongo.MongoClient(self.mongo_uri)
        self.db = self.client[self.mongo_db]

    def process_item(self, item, spider):  # 保存到mongodb数据库
        name = item.__class__.__name__
        self.db[name].insert(dict(item))
        return item

    def close_spider(self, spider):  # 关闭mongodb
        self.client.close()
4)settings.py中
BOT_NAME = 'crawlquote'

SPIDER_MODULES = ['crawlquote.spiders']
NEWSPIDER_MODULE = 'crawlquote.spiders'

#数据库链接
MONGO_URI = 'localhost'
MONGO_DB = 'crawlquote'

#项目管道开启
ITEM_PIPELINES = {
    'crawlquote.pipelines.TextPipeline': 300,
    'crawlquote.pipelines.MongoPipeline': 400,
}
5)此处还没有用的middelwares.py
总结一下:
针对某部分数据的爬取,先要在item中定义字段,然后在爬虫程序中通过选择器拿到数据并存储到item中,再然后通过pipeline的在加工+setting文件修改--存储到数据库中。此时简单爬取就实现了。