本文是 后段程序向测试号发消息
1,微信扫码登录下面网址
https://mp.weixin.qq.com/debug/cgi-bin/sandbox?t=sandbox/login
扫码登录成功后,就会给我们生成微信公号的appid和appsecret

2,当前页往下翻,微信扫码关注 测试号二维码,微信给我们返回我们的openid,这个openid在推送时特别重要。代码会用到它。
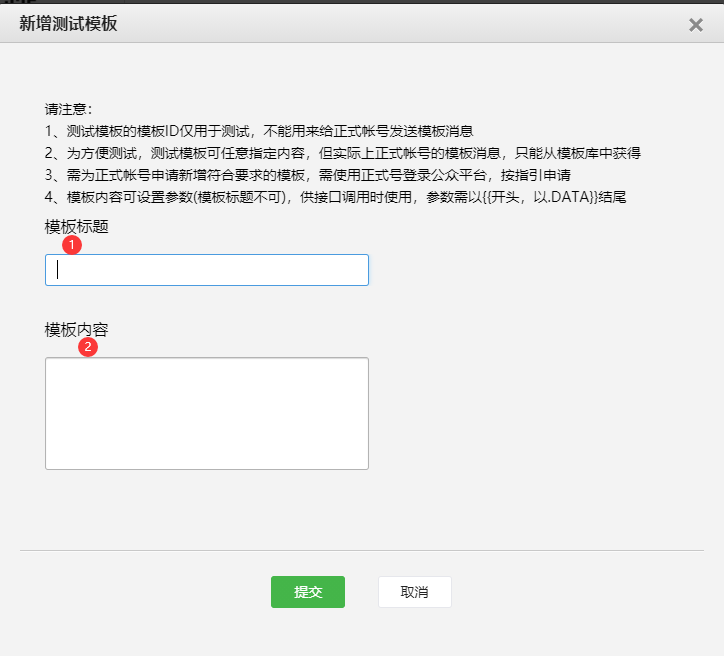
3,再往下翻 ,如图点击新增测试模板填写模板标题 模板内容 点击确定后会返回模板ID


随便写个模板标题
模板内容 可以自定义
{{first.DATA}} 领品:{{keyword1.DATA}}
领奖  时间: {{keyword2.DATA}} 领奖地址:{{keyword3.DATA}}
过期时间:  {{keyword4.DATA}} {{remark.DATA}}
4,创建springboot工程 pom引入一下
        <!--微信模版消息推送三方sdk-->
        <dependency>
            <groupId>com.github.binarywang</groupId>
            <artifactId>weixin-java-mp</artifactId>
            <version>3.3.0</version>
        </dependency>
5,编写controller
@RestController
public class PushController {


    /*
     * 微信测试账号推送
     * */
    @GetMapping("/push")
    public void push() {
        //1,配置
        WxMpInMemoryConfigStorage wxStorage = new WxMpInMemoryConfigStorage();
        wxStorage.setAppId("wx1cc543a07a6511e8");//appID
        wxStorage.setSecret("d69ce22cc5c07d871ea159da526fa179");//appsecret
        WxMpService wxMpService = new WxMpServiceImpl();
        wxMpService.setWxMpConfigStorage(wxStorage);

        //2,推送消息
        WxMpTemplateMessage templateMessage = WxMpTemplateMessage.builder()
                .toUser("o7put6qeqg3a1SqImNrgqP_TKIWw")//要推送的用户openid
                .templateId("eTBW2GvzfMP-mTEjAECE9Owt1I72XX59PfLbydkxNq8")//模版ID
                .url("https://home.cnblogs.com/u/wf-zhang/")//点击模板消息 下方详情访问的网址
                .build();
        try {
        //这里的first到remark的值 和 模板消息的配置的一 一 对应
            List<WxMpTemplateData> data = Arrays.asList(
                    new WxMpTemplateData("first", "亲,请记得奖品哈。"),
                    new WxMpTemplateData("keyword1", "茅台500箱"),
                    new WxMpTemplateData("keyword2", DateUtil.now()),
                    new WxMpTemplateData("keyword3", "聚源大酒店"),
                    new WxMpTemplateData("keyword4", "永不过期"),
                    new WxMpTemplateData("remark", "欢迎再次光临!")
            );
            templateMessage.setData(data);
            wxMpService.getTemplateMsgService().sendTemplateMsg(templateMessage);
        } catch (Exception e) {
            System.out.println("推送失败:" + e.getMessage());
            e.printStackTrace();
        }
    }
}
6,启动项目 浏览器或者postman调用地址 http://localhost:8080/push
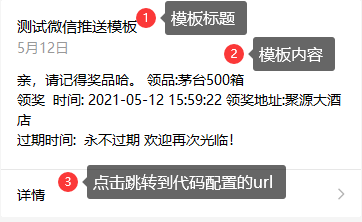
7,推送结果

点击详情就是代码中的网址("https://home.cnblogs.com/u/wf-zhang/") 这里是博客园网址