*atten:文章里嵌有代码段,若使用博客自带的“复制到剪贴板”功能,再粘贴到代码编辑器,可能会在某些部分插入 导致编译失败。
想用as3写一个3D渲染引擎,可惜又没什么基础。因此先熟悉一款别人写的3D引擎,然后模仿它做一个。我暂时拿到的理论书是《3D游戏编程大师技巧》和《3D Game Engine Design, Second Edition A Practical Approach to Real-Time Computer Graphics》。偶然看到了 《the essential guide to 3D in flash》(我后面就简称作Essential Guide),虽然讲解的是3.5版本的away3d,但文字很浅显,既是写软引擎,版本也就不需要在4.0(重新用stage3D架构)以后。其实我学过几天的away3D-4.07,苦于没有书籍,只能在论坛上一偏偏的挖帖子,很累,也很慢。对比两个版本,觉得3.5版本更平易近人(性能差距自不必说了),诸如类的架构也符合我的思维习惯,这可能由于我和它都处于“初级阶段”缘故吧。
这份笔记不会去摘要书上的重点,主要记录我遇到的问题。
1,什么是view?
用书上的话说:“The view holds the 2D representation of the 3D scene being rendered and links the virtual 3D world of your project to the 2D world that is necessary for representation on a computer screen”。“link”这个词很准确,away3d引擎内建的容器层级列表模仿了flash原生的显示列表,Scene3D类对应Stage,是3D根舞台,并通过ObjectContainer3D对象的层层嵌套来组织3D世界中所有的Object3D实例。但scene中所有Object3D实例都是以数据形式存在的,必须经过裁剪、消除、Z-sorting、透视映射等等获得2D的渲染数据,借助view(继承自Sprite)在flash舞台上渲染出来。
(上文中的scene,view指代Scene3D,View3D的实例)
2,不要给view.background赋值
view的background属性是Sprite类型,用来充当view的背景,它很容易招惹出这样的代码:
TestBack.as(Set Document Class)
package
{
	import away3d.containers.View3D;
	import flash.display.Sprite;
	import flash.events.Event;
	/**
	 * ...
	 * @author wws
	 */
	[SWF(width='550',height='400',backgroundColor='0x00ff00')]
	public class TestBack extends Sprite
	{
		private var _view:View3D;
		public function TestBack()
		{
			_view = new View3D( { x:stage.stageWidth / 2, y:stage.stageHeight / 2 } );
			addChild(_view);
			_view.background = new DarkSprite();//试图让_view的background属性指向DarkSprite实例。
		}

		private function render(e:Event = null):void {
			_view.render();
		}

	}

}
//一个私有类,实例化后是个2000X2000的黑色矩形。
import flash.display.Sprite;
class DarkSprite extends Sprite{
	public function DarkSprite() {
		this.graphics.lineStyle(1, 0);
		this.graphics.beginFill(0x0);
		this.graphics.drawRect( -1000, -1000, 2000, 2000);
		this.graphics.endFill();
	}
}
代码运行的效果是:空的绿色背景的舞台。而非黑色。(这里就不贴出截图了) 看下View.as源码就知道原因: ...
...
/**
* A background sprite positioned under the rendered scene.
*/
public var background:Sprite = new Sprite();
...
...
addChild(background);//首先添加background,这样其深度index为0
addChild(background);
addChild(_session.getContainer(this));
addChild(_interactiveLayer);
addChild(overlay);
addChild(foreground); ...
...原来background在View类内部是Sprite类的instance,并且被第一个addChild,因此处于view的最底部,这便是background的由来了。由此也看出,之前使用的“_view.background.addChild(new DarkSprite())”属于无效的赋值形式,应该写成“_view.background.addChild(new DarkSprite())”。 虽然问题解决了,但感觉away3d应当支持“_view.background=XXX”这种赋值形式,因为不少人会想当然的这样用。我试着改了下View.as的源码:
		//把background改为backgroundd,并设为私有变量
                private var backgroundd:Sprite = new Sprite();
		//通过getter、setter伪造出background属性
		public function get background():Sprite {
		        return this.backgroundd;
		}

		public function set background(sp:Sprite):void {
			this.removeChildAt(0);
			this.addChildAt(sp, 0);
		}
这下就可以堂而皇之的写“_view.background = new DarkSprite()”了,重新编译、运行TestBack.as,舞台背景颜色是预料中的黑色。(这里只局部性的局部性的测试通过,不知道是否会影响View类与其它类的协作)
3,view.clipping
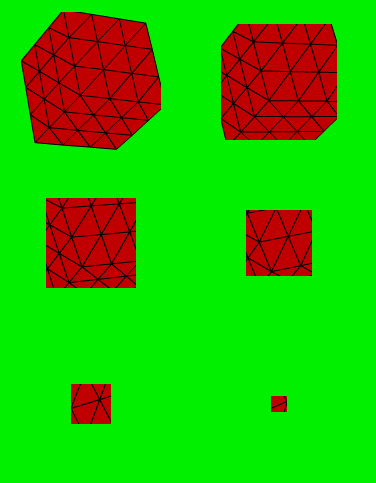
与其说clipping对象定义了视窗的裁剪范围,倒不如直接说它定义了视窗的大小。反正裁剪的机理即:摄像机(camera)与视窗(view)确定视锥体,只有视锥体内部的Object3D对象进入后续流水线。view.clipping是RectangleClipping实例,它定义的minX,minY,maxX,maxY都是无穷远,但并不意味视窗无穷大。视窗的极限是flash根容器stage的大小(这个不难理解)。
下面的代码演示了view(视窗)逐渐缩小的效果:
TestClip.as[Set Document Class]
package
{
	import away3d.containers.View3D;
	import away3d.core.clip.RectangleClipping;
	import away3d.materials.WireColorMaterial;
	import away3d.primitives.Cube;
	import flash.display.Sprite;
	import flash.events.Event;

	/**
	 * ...
	 * @author wws
	 */
	public class TestClip extends Sprite
	{
		private var _view:View3D;
		private var _cube:Cube;
		public function TestClip()
		{
			_cube = new Cube( { x:0, y:0, z:1000, segmentsW:3, segmentsH:3, segmentsD:3, 200, height:200, depth:200, material:new WireColorMaterial(0xcc0000) } );
			_view = new View3D( { x:stage.stageWidth / 2, y:stage.stageHeight / 2,clipping:new RectangleClipping({minX:-300,minY:-300,maxX:300,maxY:300})} );
			_view.scene.addChild(_cube);
			stage.addChild(_view);
			stage.addEventListener(Event.ENTER_FRAME, render);
		}

		private function render(e:Event = null):void {
			_view.render();
                       //使立方体旋转
                        with (_cube) {
				rotationX += 0.2;
				rotationY += 0.2;
				rotationZ += 0.2;
			}
                        //逐渐缩小视窗
                        with (_view.clipping) {
				minX += 1;
				minY += 1;
				maxX -= 1;
				maxY -= 1;
			}
		}
	}

}

4,view.x,view.y
书上解释vanish-point说:“The x and y positions of the view on the stage define a center point for all perspective projection calculations. In 3D graphics, this center point is commonly called the vanishing point and represents the position toward which objects converge the further away they are. The center point also represents the default screen vector for the projected origin of the scene”。
我没有看懂。
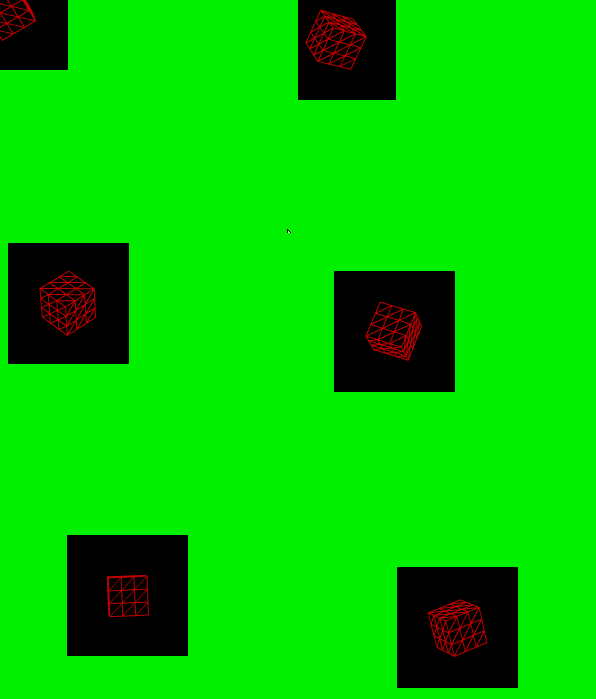
按我的理解,view既是一个普通的Sprite子类实例,那就把它当做flash舞台上的一块儿显示屏,里面播放着scene世界里的一举一动,那么,通过x,y属性来移动这块儿屏幕是再寻常不过的操作了。需要注意的是:view的注册点在中心而非左上角。下面的例子,让“这块儿显示屏”从flash舞台上飘过。
TestViewXY.as[Set Document Class]
package
{
	import away3d.containers.View3D;
	import away3d.core.clip.Clipping;
	import away3d.materials.WireframeMaterial;
	import away3d.primitives.Cube;
	import flash.display.Sprite;
	import flash.events.Event;
	/**
	 * ...
	 * @author wws
	 */
	[swf(width='550',height='400',backgroundColor='0x00ff00')]
	public class TestViewXY extends Sprite
	{
		private var _view:View3D;
		private var _cube:Cube;
		public function TestViewXY()
		{
                        //视窗大小:120X120
                       _view = new View3D( { x:-150, y:-150, clipping:new Clipping( { minX: -60, minY: -60, manX:60, maxY:60 } ) } );
                        //为了将视窗与flash舞台区别开来,设置其背景填充黑色,填充范围即视窗大小。
                        _view.background.addChild(new DarkSprite());
			_cube = new Cube( { 80, height:80, depth:80, x:0, y:0, z:1000, material:new WireframeMaterial(0xcc00000), segmentsH:3,segmentsW:3,segmentsD:3 } );

			this.addChild(_view);
			_view.scene.addChild(_cube);

			stage.addEventListener(Event.ENTER_FRAME, render);
		}

		private function render(e:Event = null):void {
			_view.render();
			_cube.rotationX += 0.5;
			_cube.rotationY += 0.5;
			_cube.rotationZ += 0.5;
			_view.x += 0.8;
			_view.y += 0.8;
		}

	}

}

import flash.display.Sprite;
class DarkSprite extends Sprite{
	public function DarkSprite() {
		this.graphics.lineStyle(1, 0);
		this.graphics.beginFill(0x0);
		this.graphics.drawRect( -60, -60, 120, 120);//填色范围与视窗大小相同
		this.graphics.endFill();
	}
}
效果图:
